2000 Black FRC Progress Thread
 02-08-2016, 12:26 PM
#1

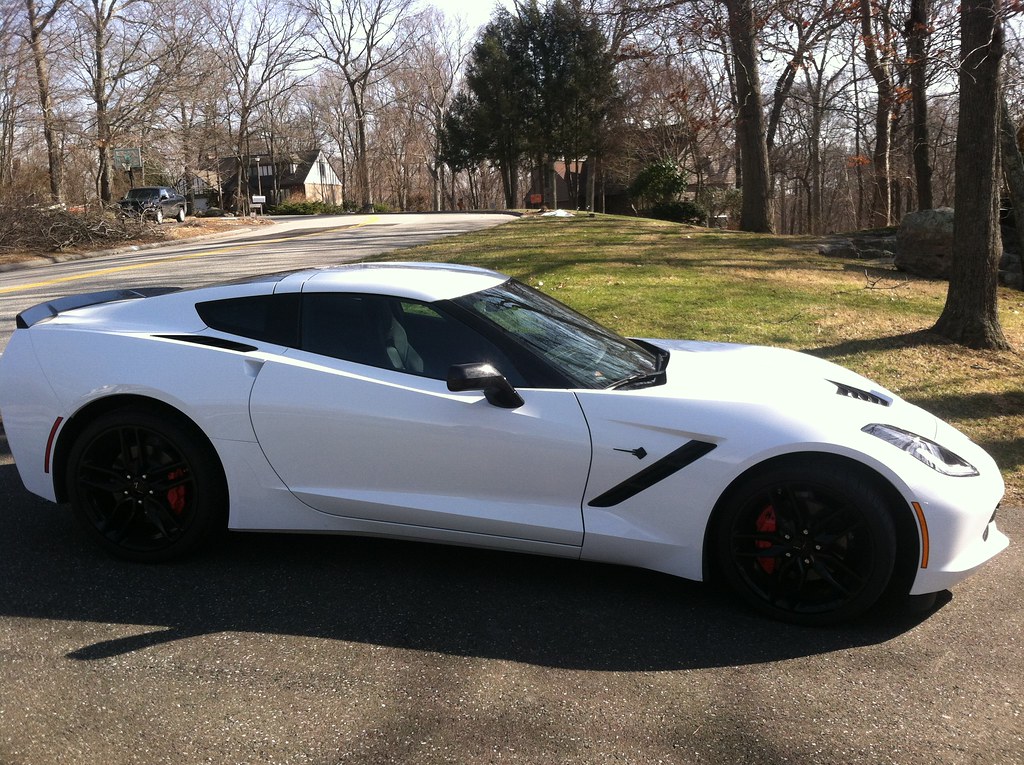
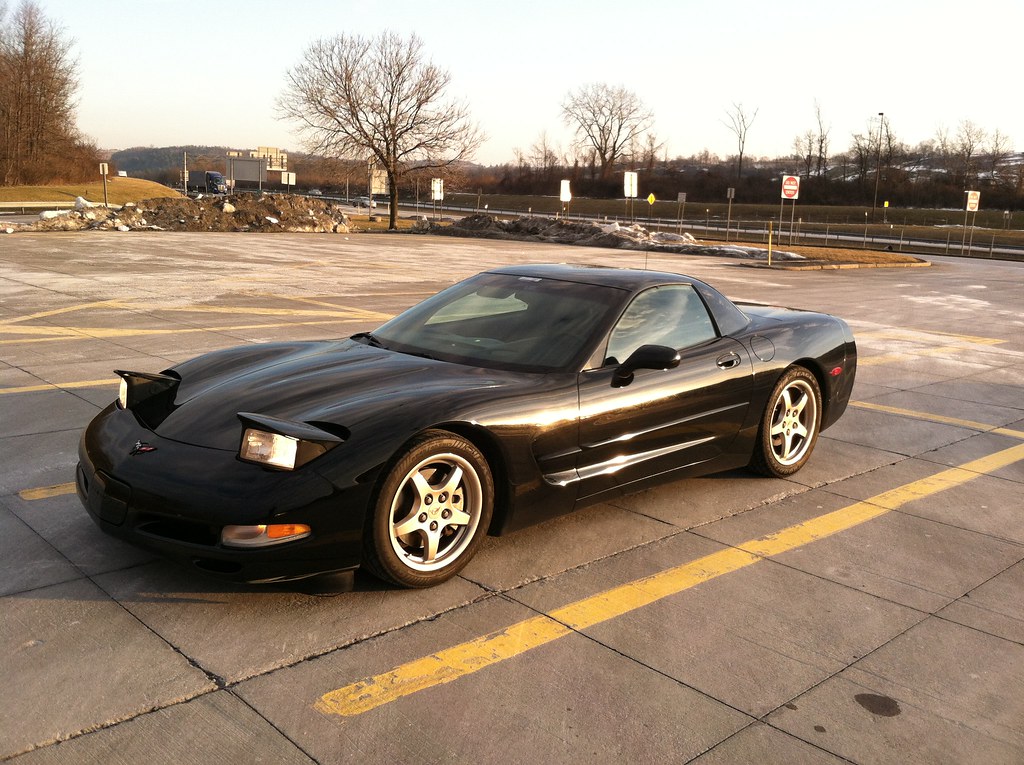
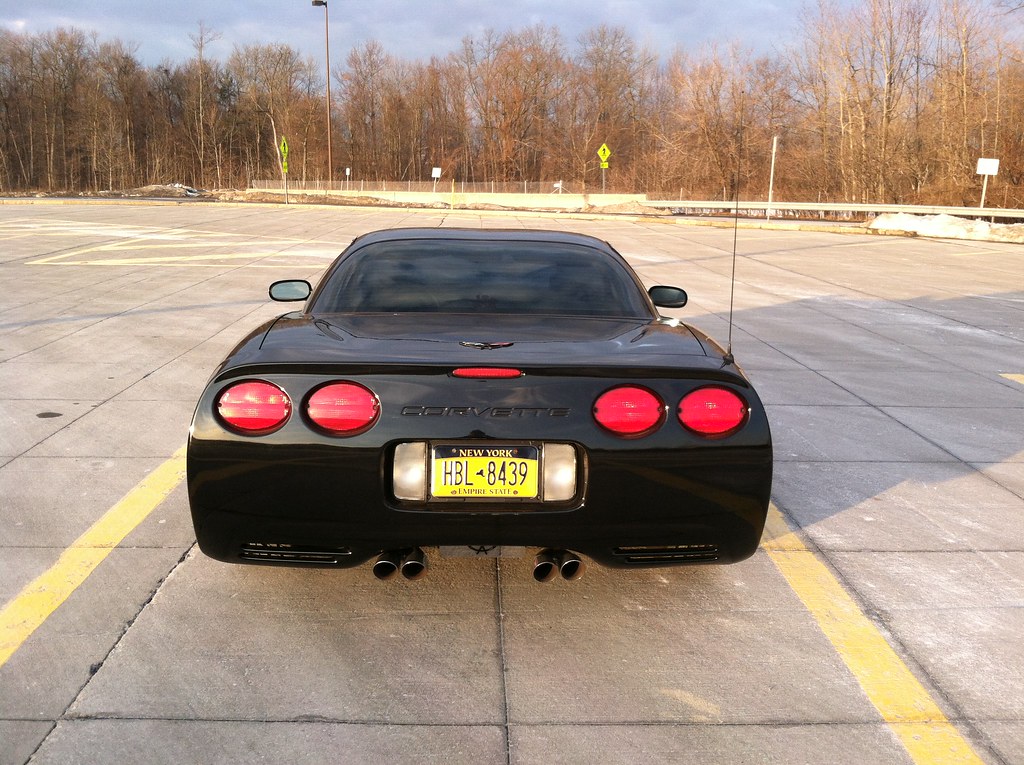
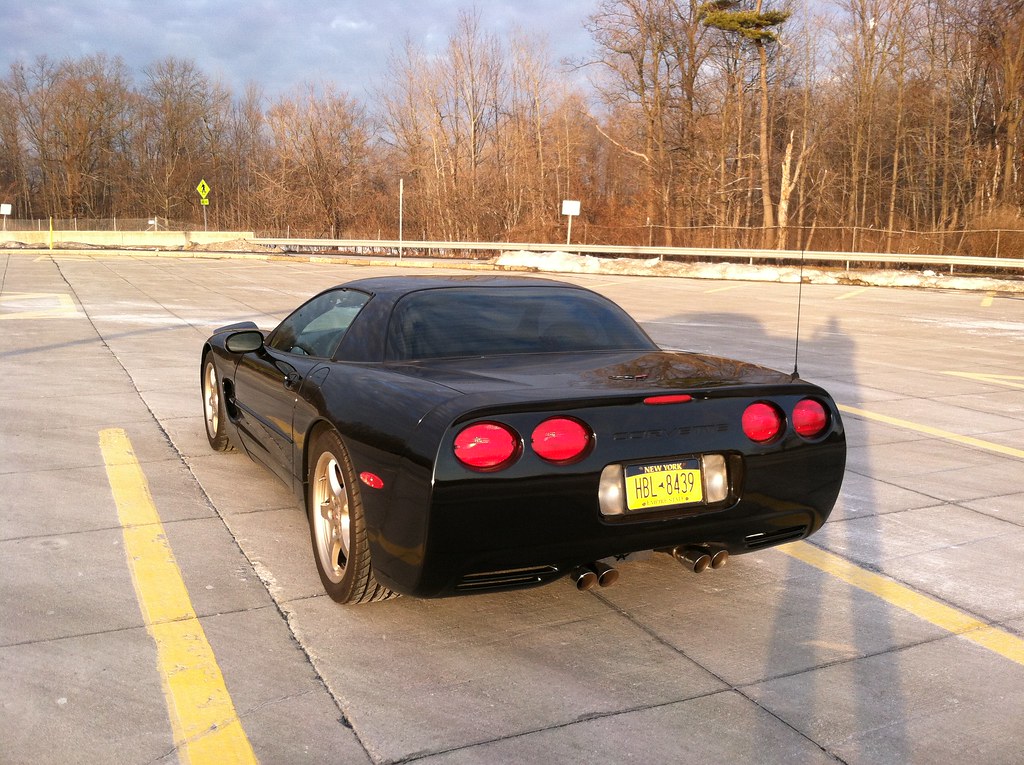
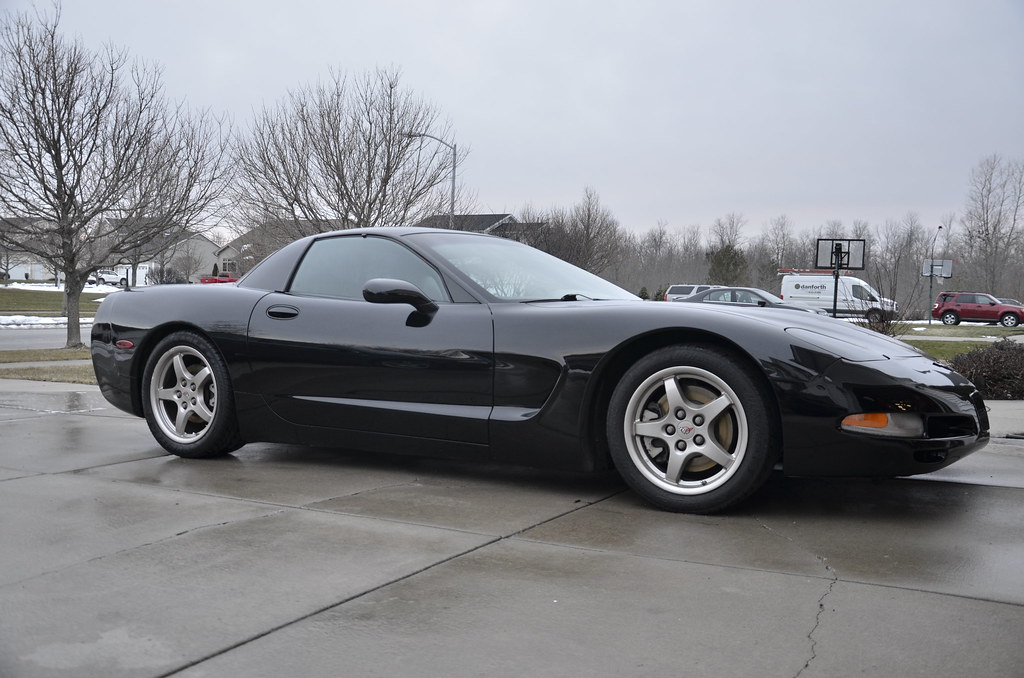
With my 6.0 LS powered E39 saying goodbye in late December '15, I was in the market for something smaller, more fun, more agile, and better on gas. I was willing to give up some horsepower and engine size to gain that, but found a nice compromise  After about 8 months of deliberation I settled on this nice 2000 Corvette FRC Hardtop (fixed roof coupe).
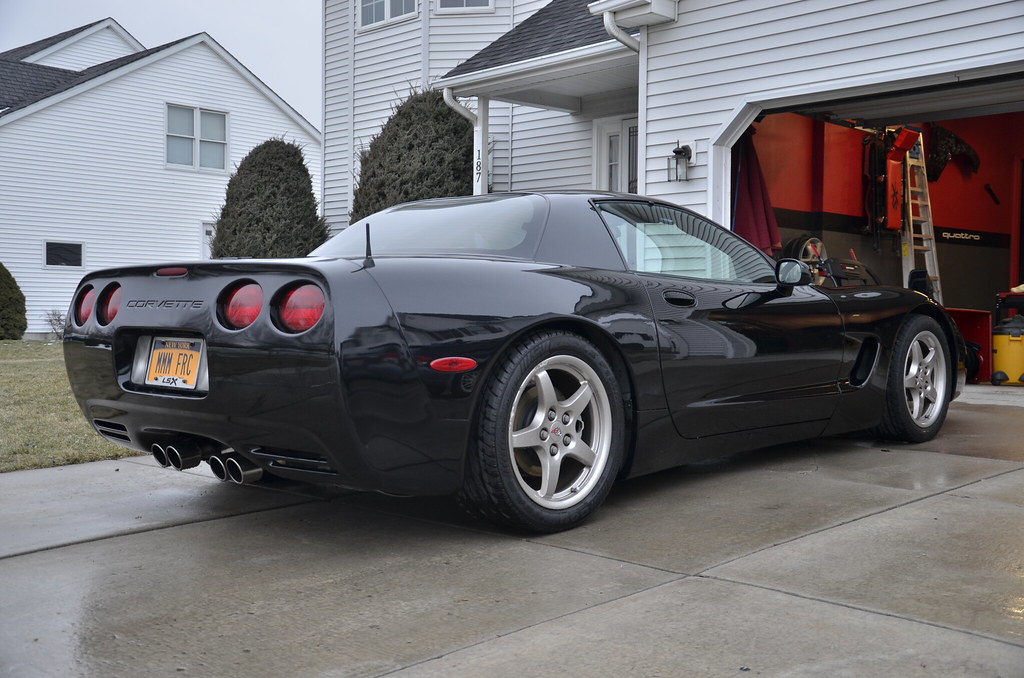
After the usual slew of homework and background checks on the car, I booked a flight out to Providence to go pick her up. Nothing quite like getting on a one way flight with a pair of license plates and crossed fingers. This was my first time buying a car out of state and everything went off without a hitch.
Apologize in advance for the poor quality pics. Here is the traditional long winded, pic heavy story.
Early flight out of Buffalo to Philadelphia was uneventful if a bit early.
Somewhere over PA:
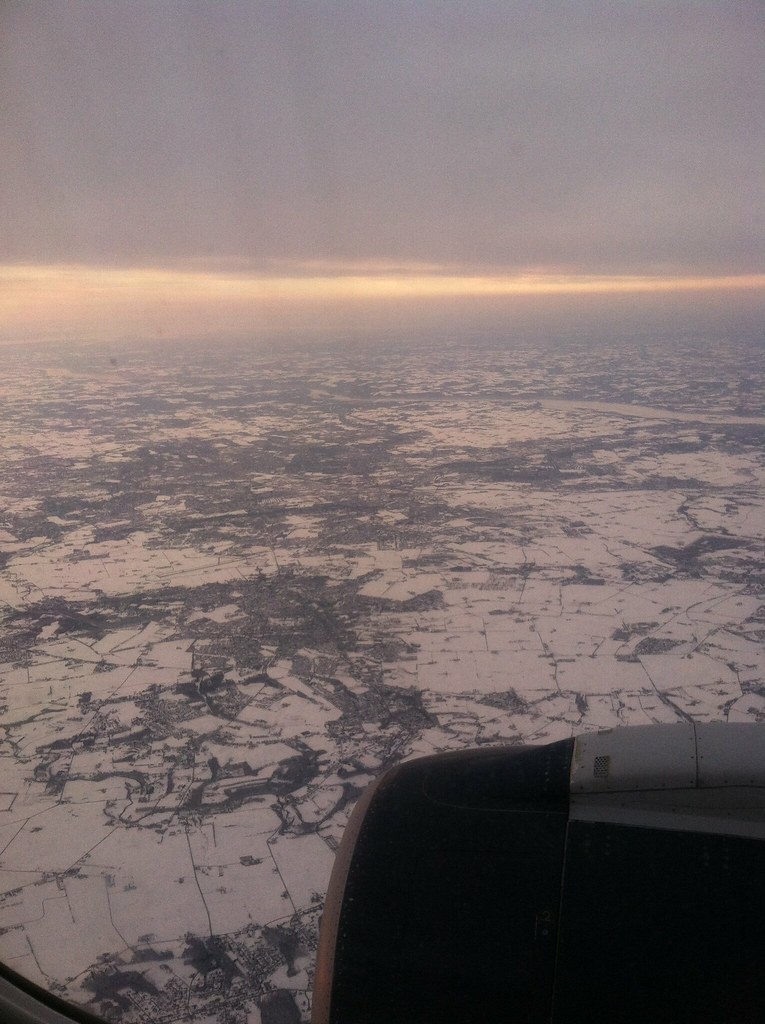 IMG_1177 by Norbert Ogiba, on Flickr
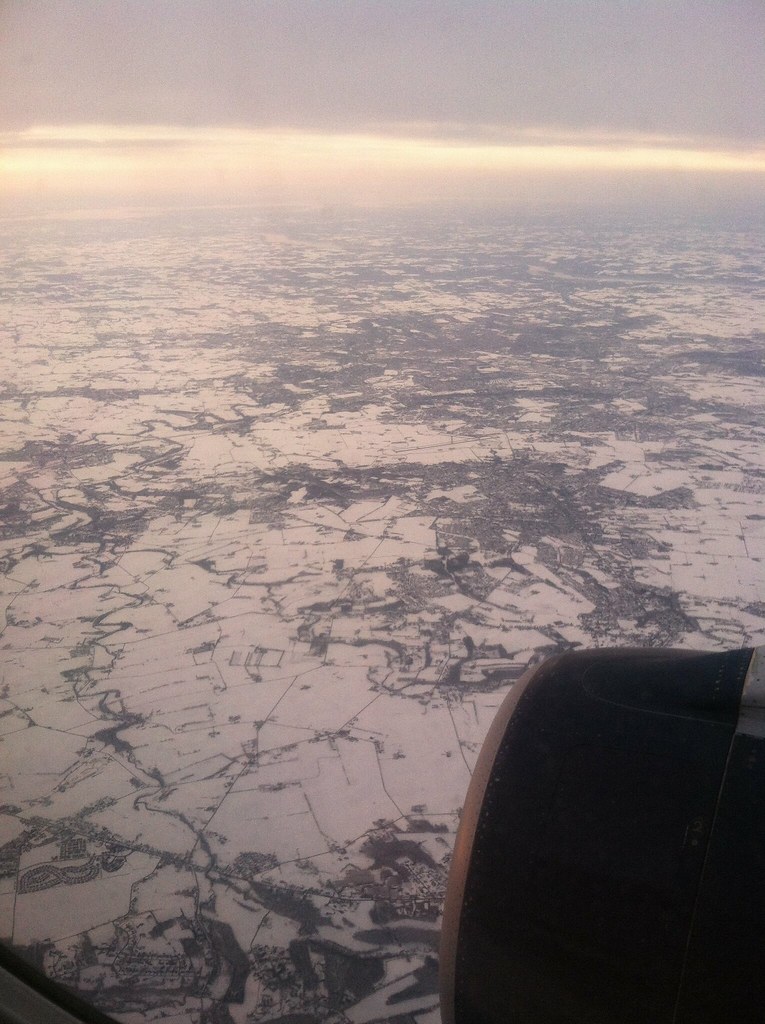 IMG_1178 by Norbert Ogiba, on Flickr
Flying into Philly on a nice Sunday morning. Need to visit in person some day.
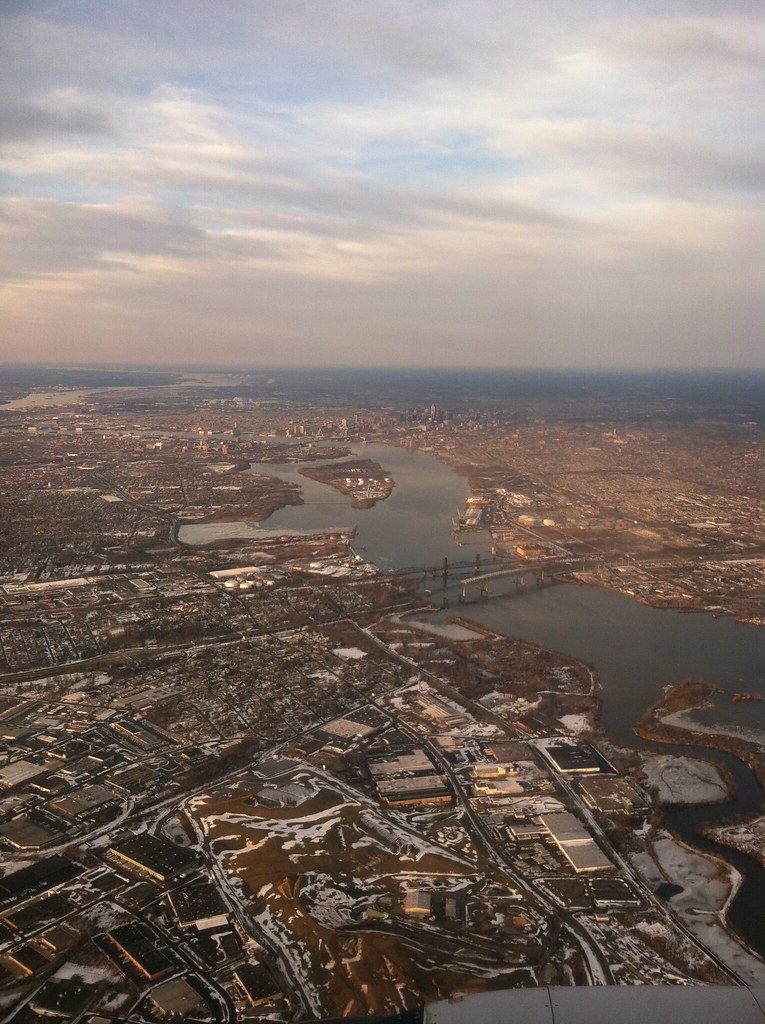 IMG_1180 by Norbert Ogiba, on Flickr
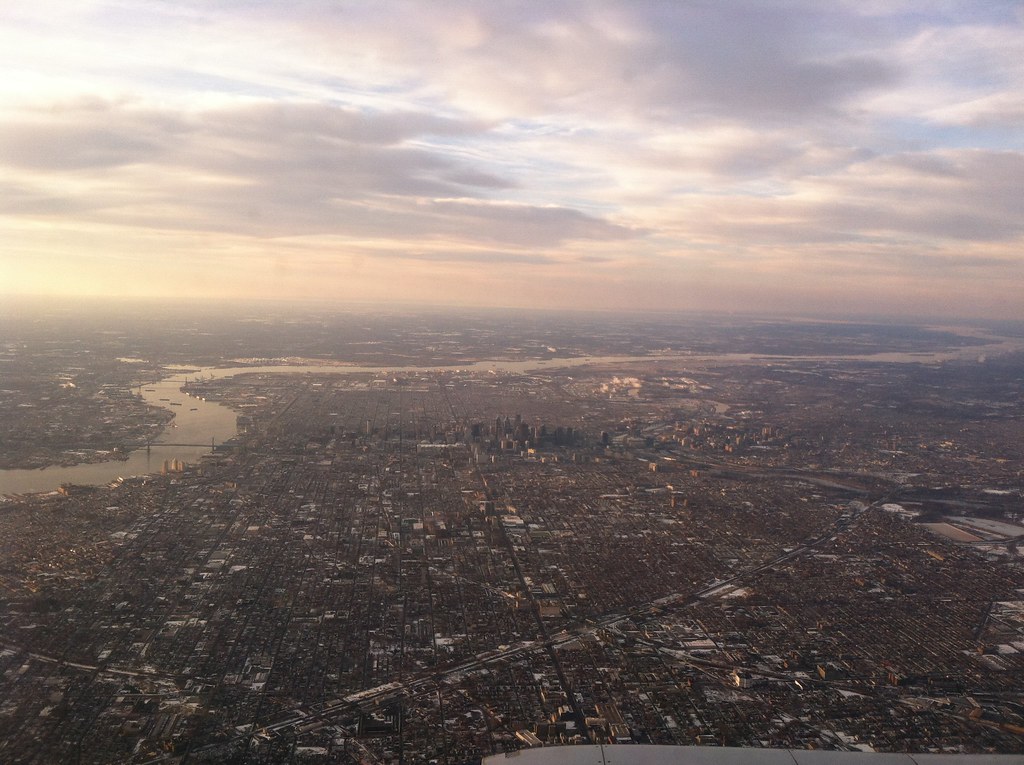 IMG_1179 by Norbert Ogiba, on Flickr
Quick layover and a bite to eat, back on the plane to continue on to Providence. 40 minutes later, the sellers Joe and Kathy picked me up at T.F. Green Airport and we made the 45 min drive to their place to inspect the car. I can't thank them enough for their generosity in making the drive there and back on a Sunday morning!
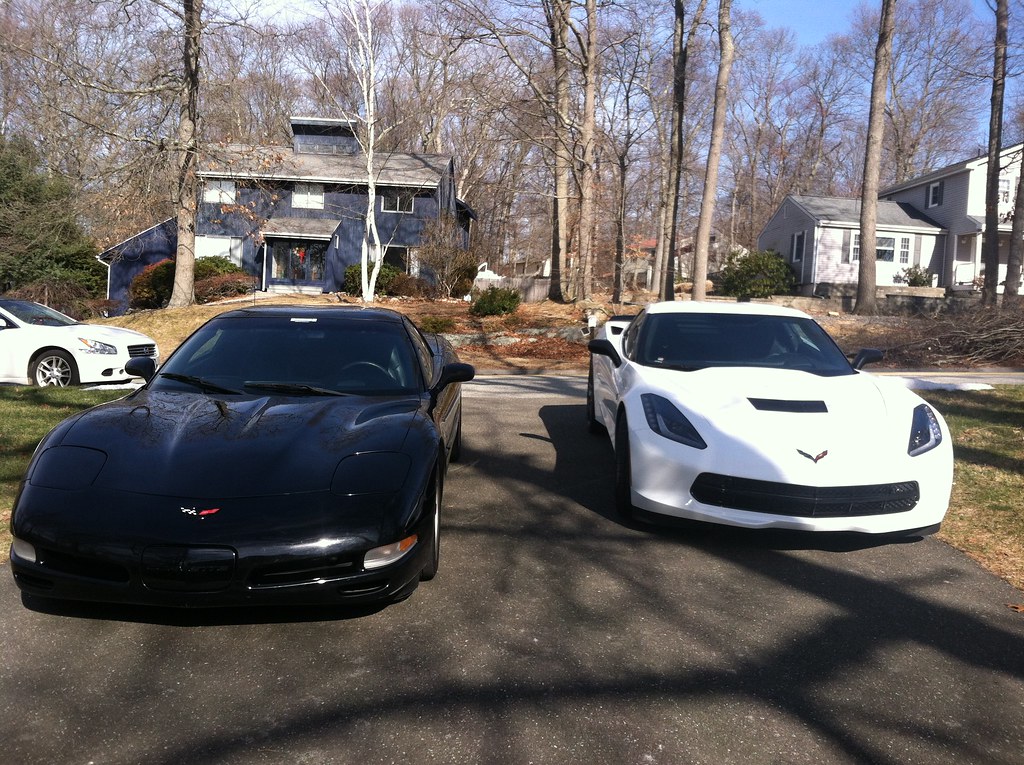
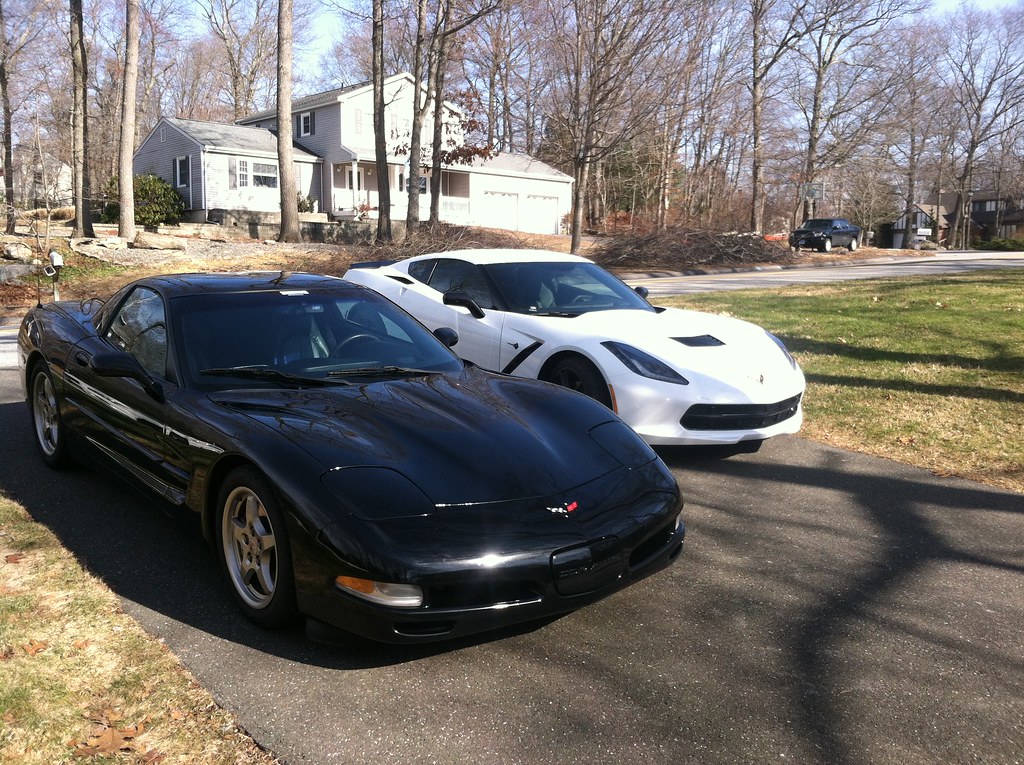
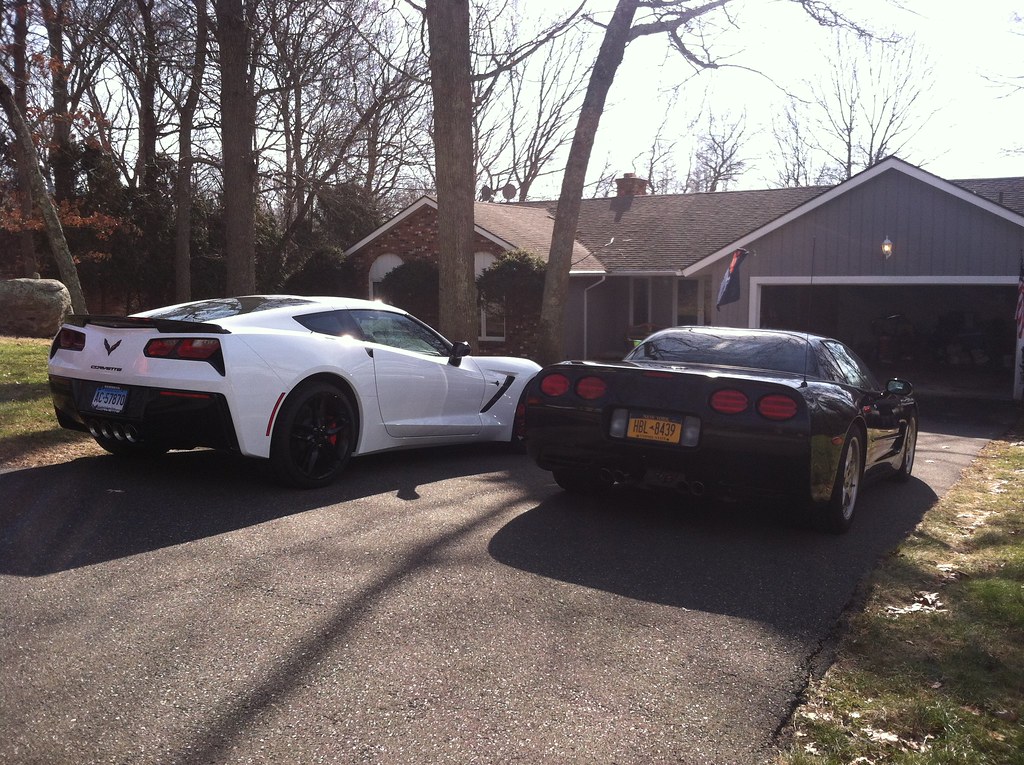
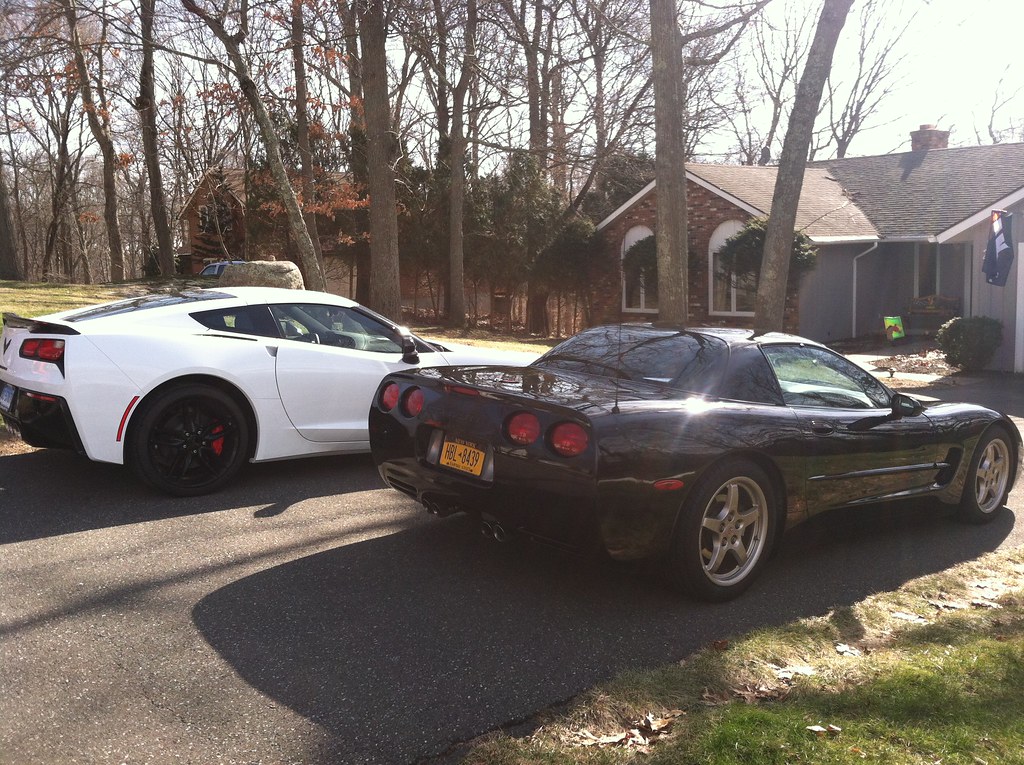
Pulled up to their place and pulled out Kathy's new C7 and my new C5 for inspection, comparison, and general drooling.
Kathy's new C7 Stingray. What a sound out of the exhaust on this car...no, it's not stock either
 IMG_1185 by Norbert Ogiba, on Flickr
15 year generation gap
 IMG_1186 by Norbert Ogiba, on Flickr
 IMG_1187 by Norbert Ogiba, on Flickr
 IMG_1188 by Norbert Ogiba, on Flickr
 IMG_1189 by Norbert Ogiba, on Flickr
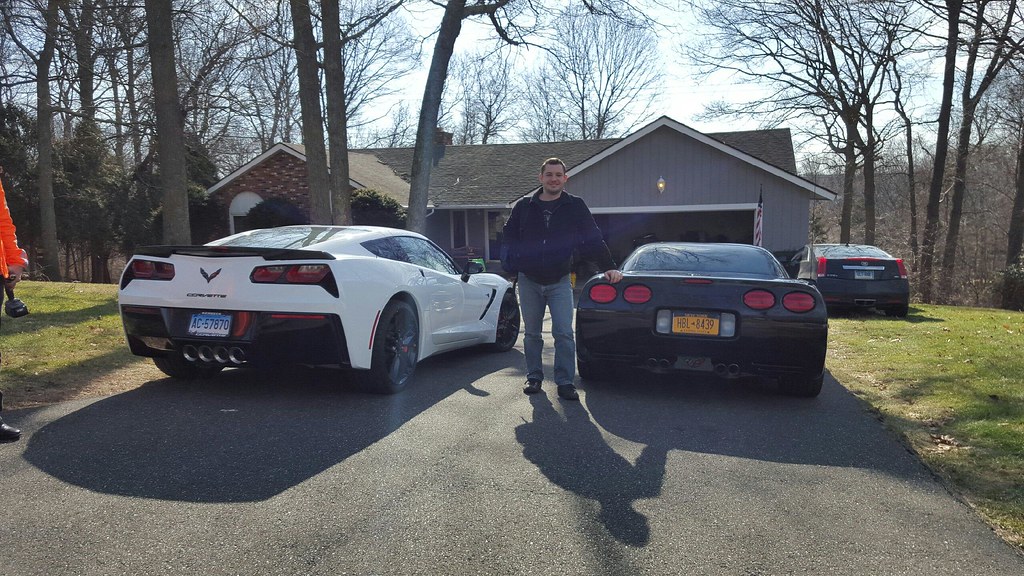
Myself and the new car.
 IMG_1217 by Norbert Ogiba, on Flickr
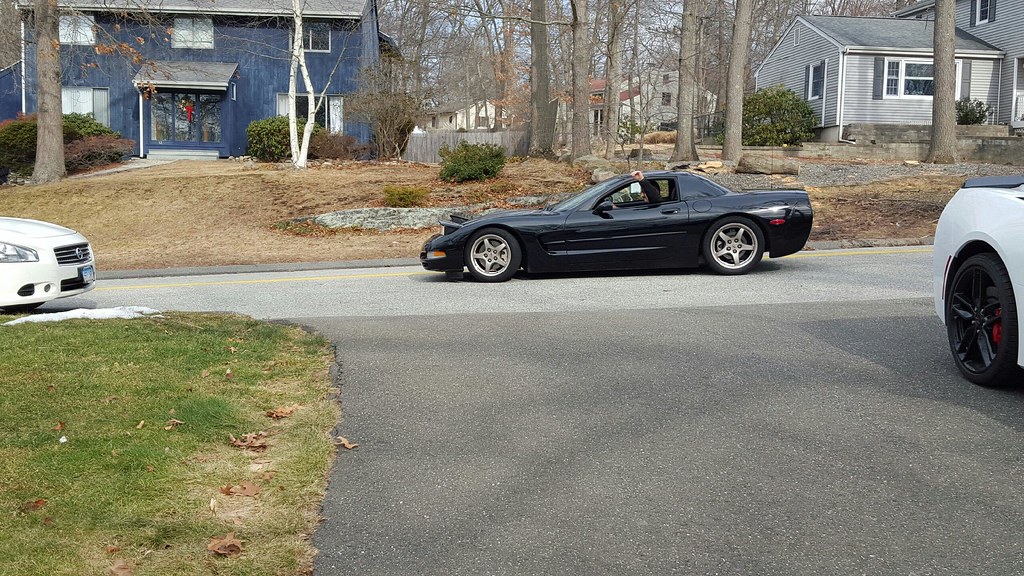
After tying up the last few loose ends I tossed my bag in the car, said my goodbyes, thanked Kathy and her husband for everything, and hit the road:
 IMG_1216 by Norbert Ogiba, on Flickr
I was lucky enough to get a 50F day at the end of January with no snow on the ground to make this journey.
Some ominous clouds gathering around Hartford CT
 IMG_1194 by Norbert Ogiba, on Flickr
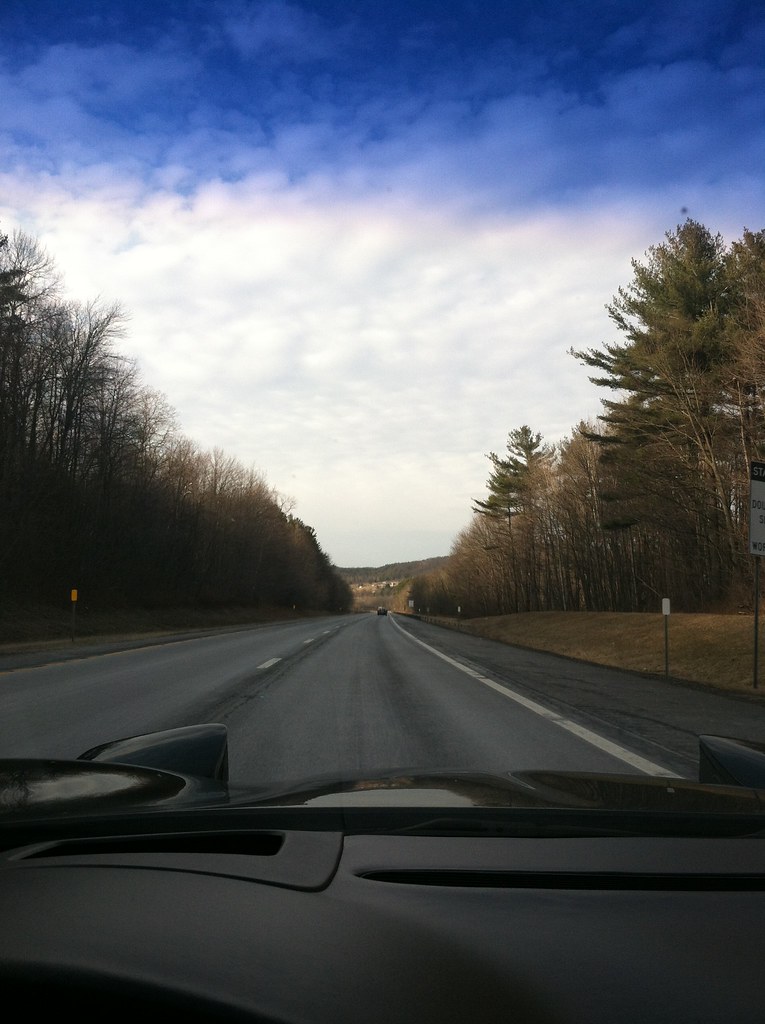
Open road and remnants of fall scenery in Connecticut
 IMG_1198 by Norbert Ogiba, on Flickr
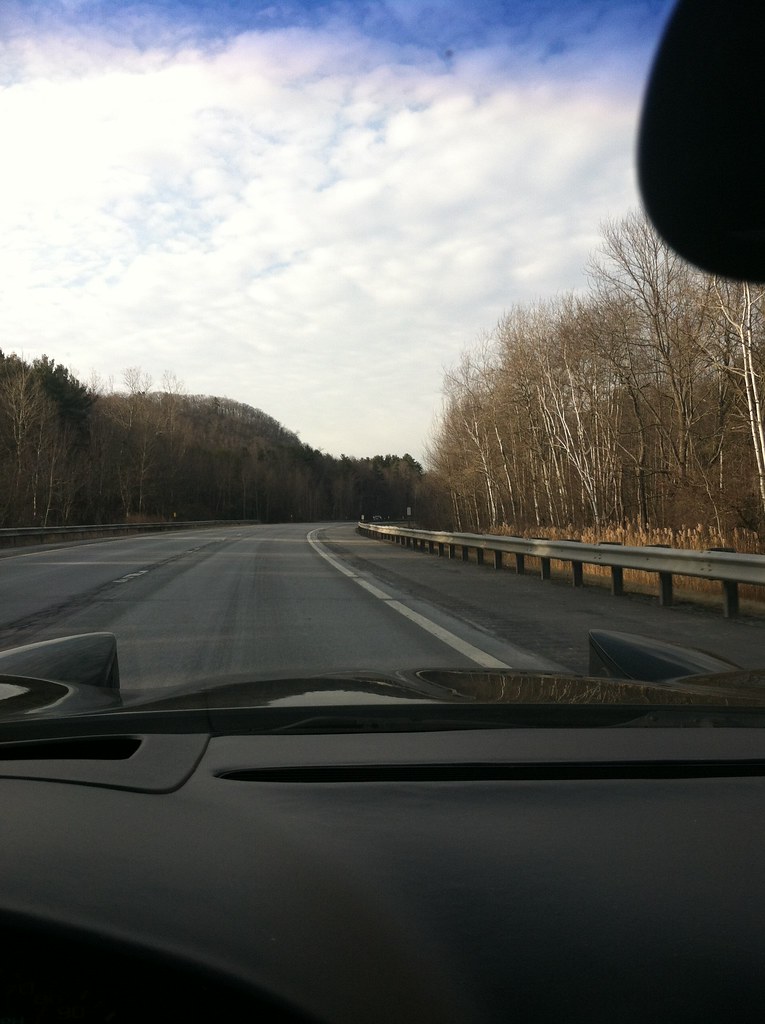 IMG_1196 by Norbert Ogiba, on Flickr
I passed over this bridge north of Hartford many times as a kid in the family van on the way to visit family. A nice memory.
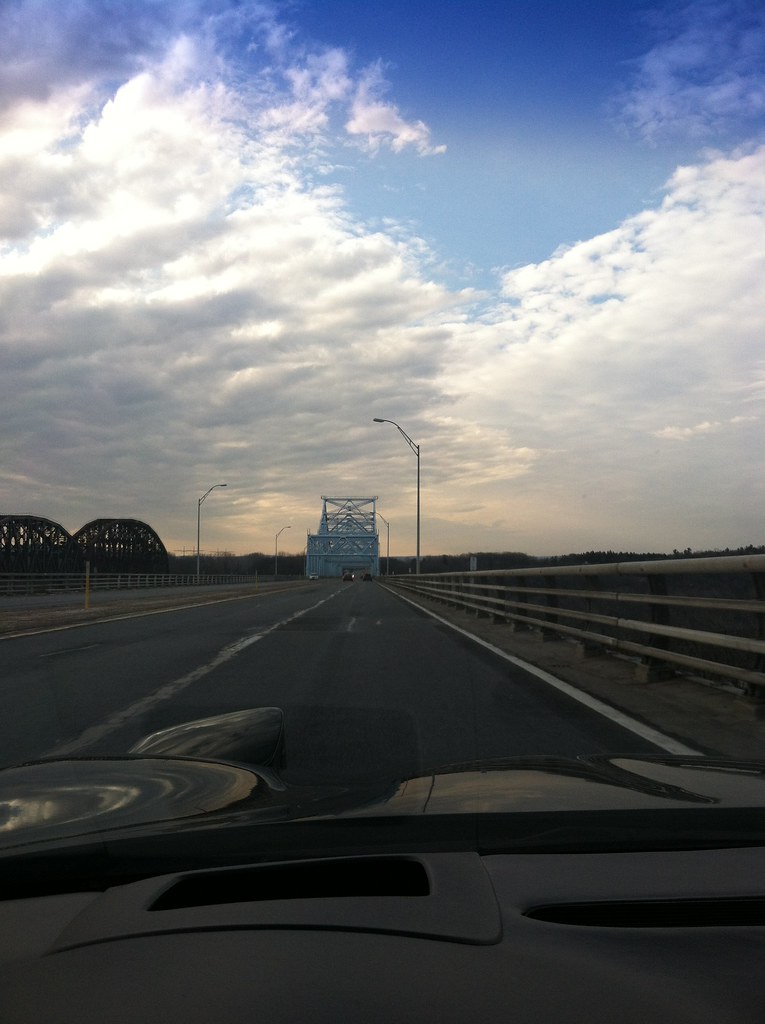 IMG_1199 by Norbert Ogiba, on Flickr
 IMG_1200 by Norbert Ogiba, on Flickr
 IMG_1201 by Norbert Ogiba, on Flickr
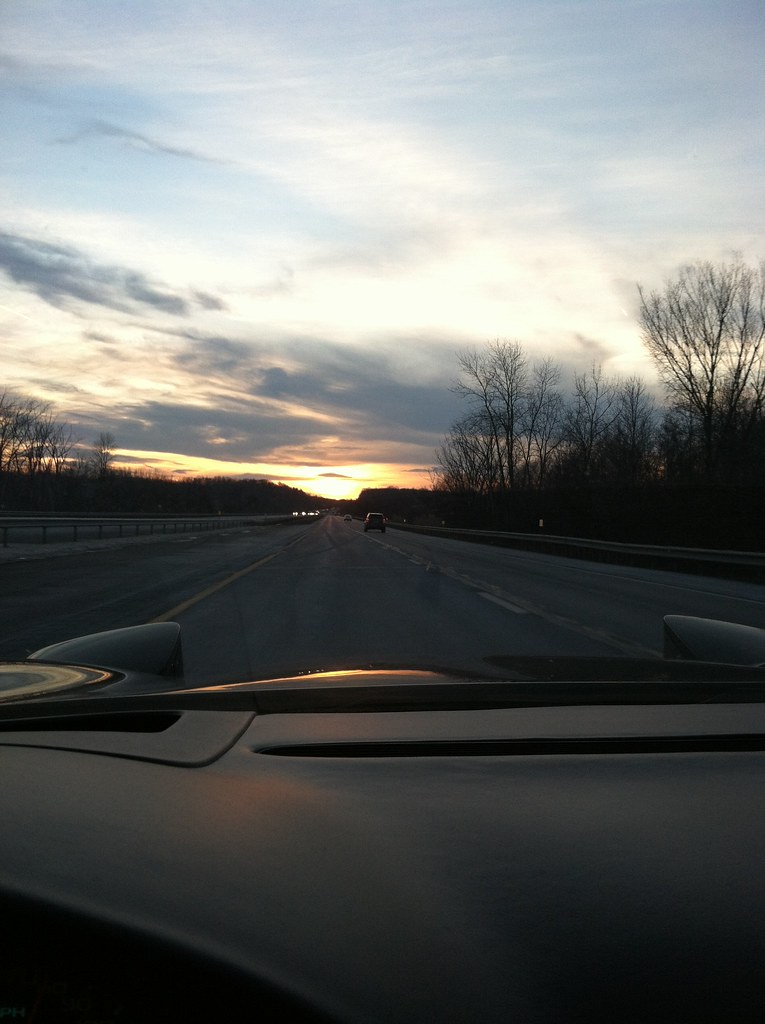
Beautiful skies coming out of Massachusetts, pictures don't do it justice.
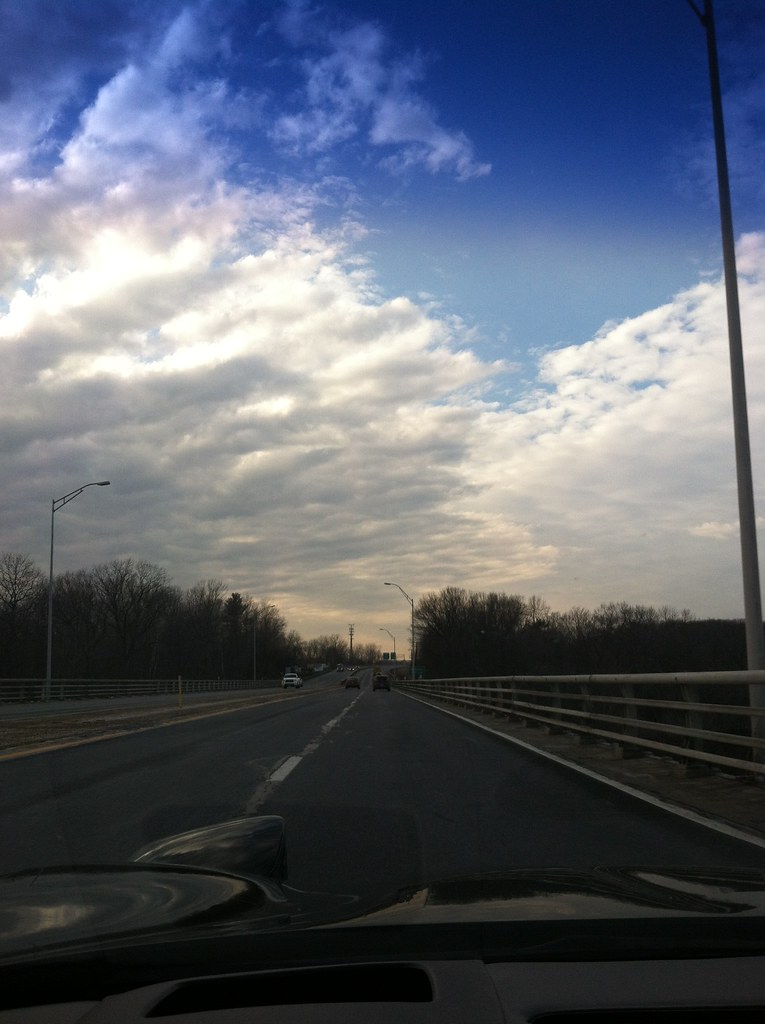 IMG_1202 by Norbert Ogiba, on Flickr
hmmmm...decisions, decisions.
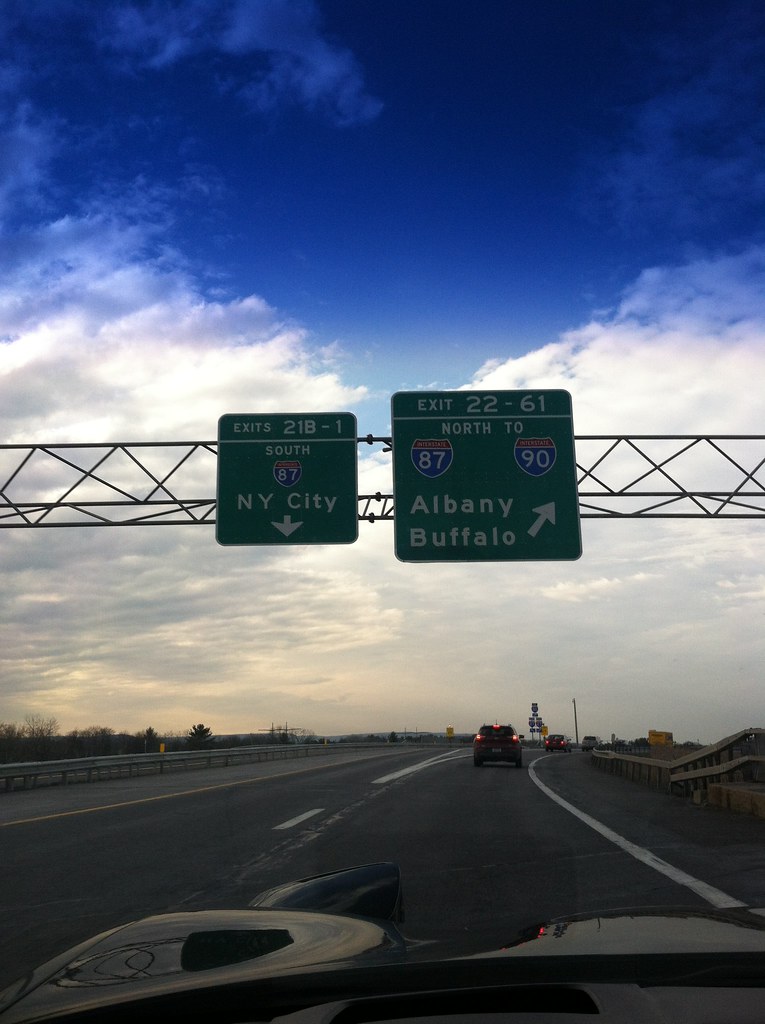 IMG_1203 by Norbert Ogiba, on Flickr
Cruising at an easy 82mph, the car returned stellar gas mileage.
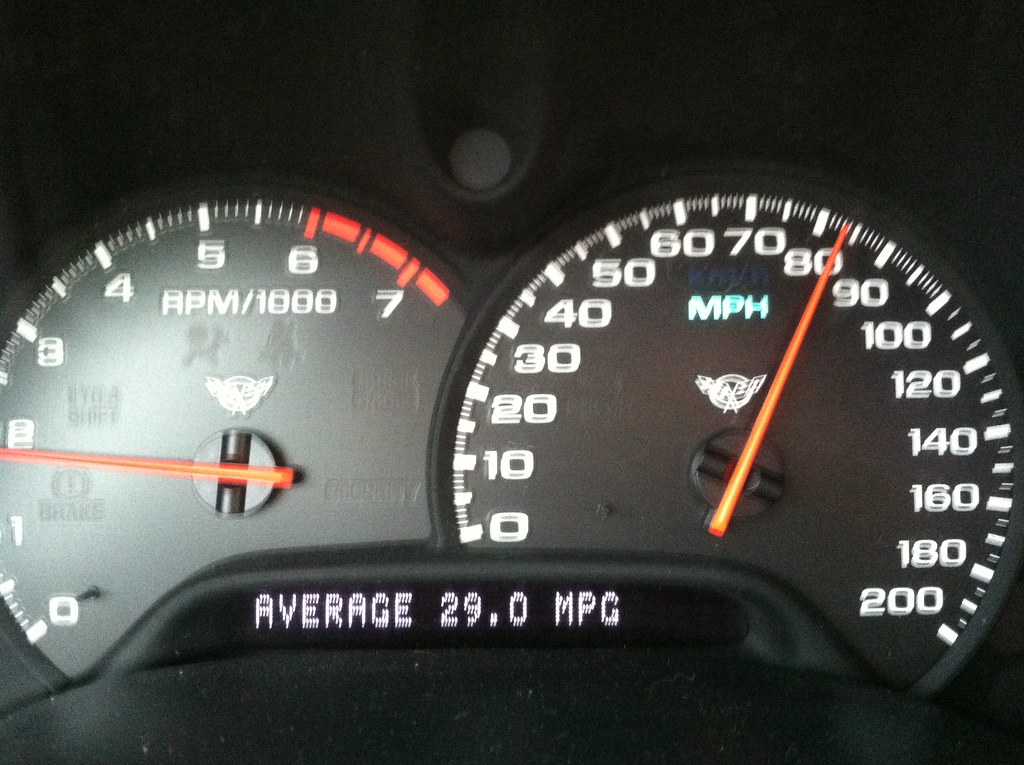 IMG_1205 by Norbert Ogiba, on Flickr
Being the realist that I am, I decided to pull over to fill up the half empty tank and see how she really did. Exactly 250.1 miles, it used 9.345 gals, for an average of 26.7 mpg, with me ripping on it every chance I got. I'm sure it would come close to 30mpg if I were cruising at 70.
Some pictures and admiring the lines as the sun set in Central New York State
 IMG_1207 by Norbert Ogiba, on Flickr
 IMG_1208 by Norbert Ogiba, on Flickr
 IMG_1209 by Norbert Ogiba, on Flickr
 IMG_1210 by Norbert Ogiba, on Flickr
 IMG_1211 by Norbert Ogiba, on Flickr
 IMG_1212 by Norbert Ogiba, on Flickr
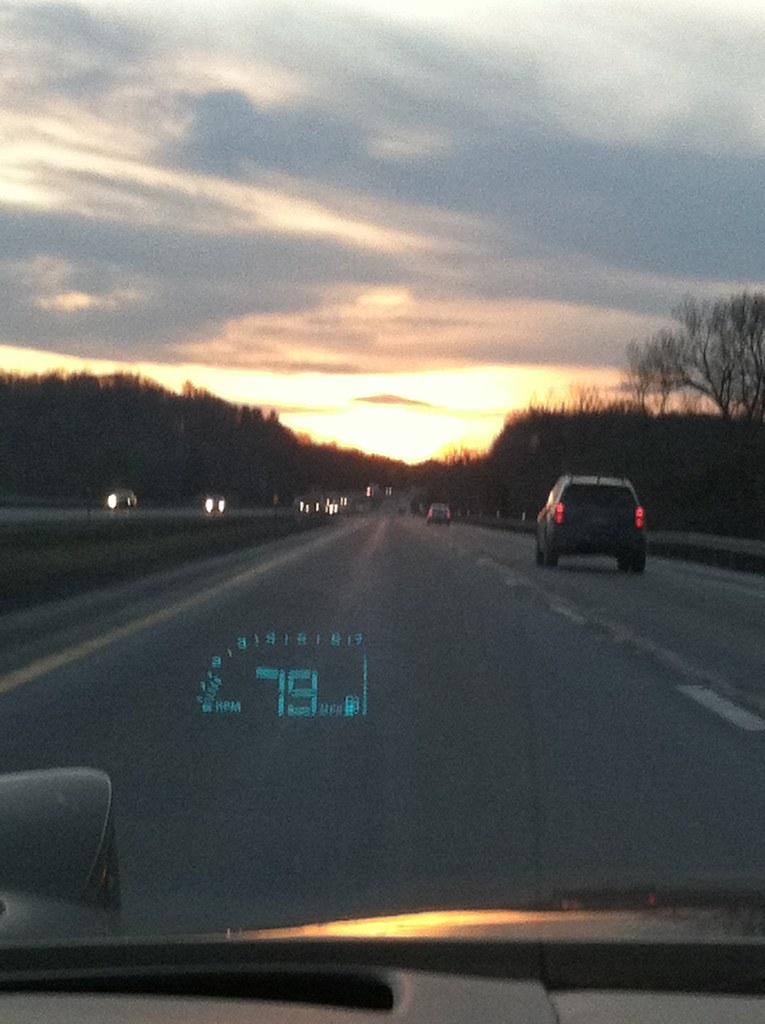
Last couple hours were uneventful.
 IMG_1213 by Norbert Ogiba, on Flickr
The HUD is awesome.
 IMG_1214 by Norbert Ogiba, on Flickr
Finally back to the Bat Cave:
 IMG_1215 by Norbert Ogiba, on Flickr
Will be back in a BMW some day, but for now it's time to enjoy this one. :woohoo:

 :thumbs:
After about 8 months of deliberation I settled on this nice 2000 Corvette FRC Hardtop (fixed roof coupe). After the usual slew of homework and background checks on the car, I booked a flight out to Providence to go pick her up. Nothing quite like getting on a one way flight with a pair of license plates and crossed fingers. This was my first time buying a car out of state and everything went off without a hitch.
Apologize in advance for the poor quality pics. Here is the traditional long winded, pic heavy story.
Early flight out of Buffalo to Philadelphia was uneventful if a bit early.
Somewhere over PA:
IMG_1177 by Norbert Ogiba, on FlickrIMG_1178 by Norbert Ogiba, on FlickrFlying into Philly on a nice Sunday morning. Need to visit in person some day.
IMG_1180 by Norbert Ogiba, on FlickrIMG_1179 by Norbert Ogiba, on FlickrQuick layover and a bite to eat, back on the plane to continue on to Providence. 40 minutes later, the sellers Joe and Kathy picked me up at T.F. Green Airport and we made the 45 min drive to their place to inspect the car. I can't thank them enough for their generosity in making the drive there and back on a Sunday morning!
Pulled up to their place and pulled out Kathy's new C7 and my new C5 for inspection, comparison, and general drooling.
Kathy's new C7 Stingray. What a sound out of the exhaust on this car...no, it's not stock either
IMG_1185 by Norbert Ogiba, on Flickr15 year generation gap
IMG_1186 by Norbert Ogiba, on FlickrIMG_1187 by Norbert Ogiba, on FlickrIMG_1188 by Norbert Ogiba, on FlickrIMG_1189 by Norbert Ogiba, on FlickrMyself and the new car.
IMG_1217 by Norbert Ogiba, on FlickrAfter tying up the last few loose ends I tossed my bag in the car, said my goodbyes, thanked Kathy and her husband for everything, and hit the road:
IMG_1216 by Norbert Ogiba, on FlickrI was lucky enough to get a 50F day at the end of January with no snow on the ground to make this journey.
Some ominous clouds gathering around Hartford CT
IMG_1194 by Norbert Ogiba, on FlickrOpen road and remnants of fall scenery in Connecticut
IMG_1198 by Norbert Ogiba, on FlickrIMG_1196 by Norbert Ogiba, on FlickrI passed over this bridge north of Hartford many times as a kid in the family van on the way to visit family. A nice memory.
IMG_1199 by Norbert Ogiba, on FlickrIMG_1200 by Norbert Ogiba, on FlickrIMG_1201 by Norbert Ogiba, on FlickrBeautiful skies coming out of Massachusetts, pictures don't do it justice.
IMG_1202 by Norbert Ogiba, on Flickrhmmmm...decisions, decisions.
IMG_1203 by Norbert Ogiba, on FlickrCruising at an easy 82mph, the car returned stellar gas mileage.
IMG_1205 by Norbert Ogiba, on FlickrBeing the realist that I am, I decided to pull over to fill up the half empty tank and see how she really did. Exactly 250.1 miles, it used 9.345 gals, for an average of 26.7 mpg, with me ripping on it every chance I got. I'm sure it would come close to 30mpg if I were cruising at 70.
Some pictures and admiring the lines as the sun set in Central New York State
IMG_1207 by Norbert Ogiba, on FlickrIMG_1208 by Norbert Ogiba, on FlickrIMG_1209 by Norbert Ogiba, on FlickrIMG_1210 by Norbert Ogiba, on FlickrIMG_1211 by Norbert Ogiba, on FlickrIMG_1212 by Norbert Ogiba, on FlickrLast couple hours were uneventful.
IMG_1213 by Norbert Ogiba, on FlickrThe HUD is awesome.
IMG_1214 by Norbert Ogiba, on FlickrFinally back to the Bat Cave:
IMG_1215 by Norbert Ogiba, on FlickrWill be back in a BMW some day, but for now it's time to enjoy this one. :woohoo:
:thumbs:  02-08-2016, 12:26 PM
#2
I took it out fer a rip last night and drove it to work this morning. Seriously daily-able.
Placed some orders last night:
TR55 plugs
GMPP Red plug wires
a shitload of oil filters (at $3 a pop for OEM AC Delco parts you can't go wrong)
wiper blades
air filter and fuel filter
hood lip seal (weatherstripping)
4x leave-in jacking pucks so i can get this pig up on the lift
some interior trim pieces that the PO broke
stubby antenna
once the jacking pucks come in I plan on doing plugs, wires, engine oil + filter, trans fluid, diff fluid, fuel filter. The motor has an ever so slight miss while sitting at a light, and based on looking at most of the stuff under the hood I'm guessing the plugs and wires are original. I also need to order the LCM5 column lock bypass - even though the column lock was replaced/serviced multiple times over the past couple years.
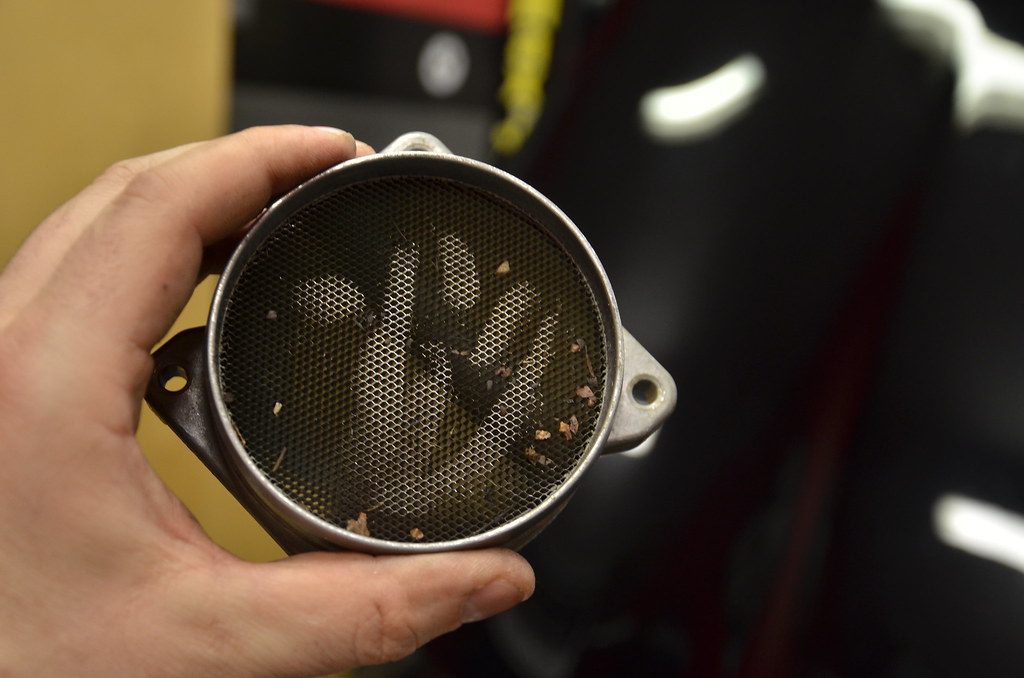
I did the zip tie mod to the intake last night and it definitely is a big improvement on the butt dyno. I took apart the whole snorkel/"power duct" to inspect it and am glad I did. bunch of leaves, dust, and general grime came out of the pre-filter area, and the MAF screen had last seen daylight circa 2000.
 _DSC4652 by Norbert Ogiba, on Flickr
The marks are just from me gently rubbing my finger on the screen face. Luckily the screened portion is removeable from the heated wire element so I gave it a hot soapy bath with a toothbrush, rinsed out the lower airbox, and put the whole thing back together.
Finally I pulled the codes - looks like the majority are history codes - I need to check the listing and see what they're all for.
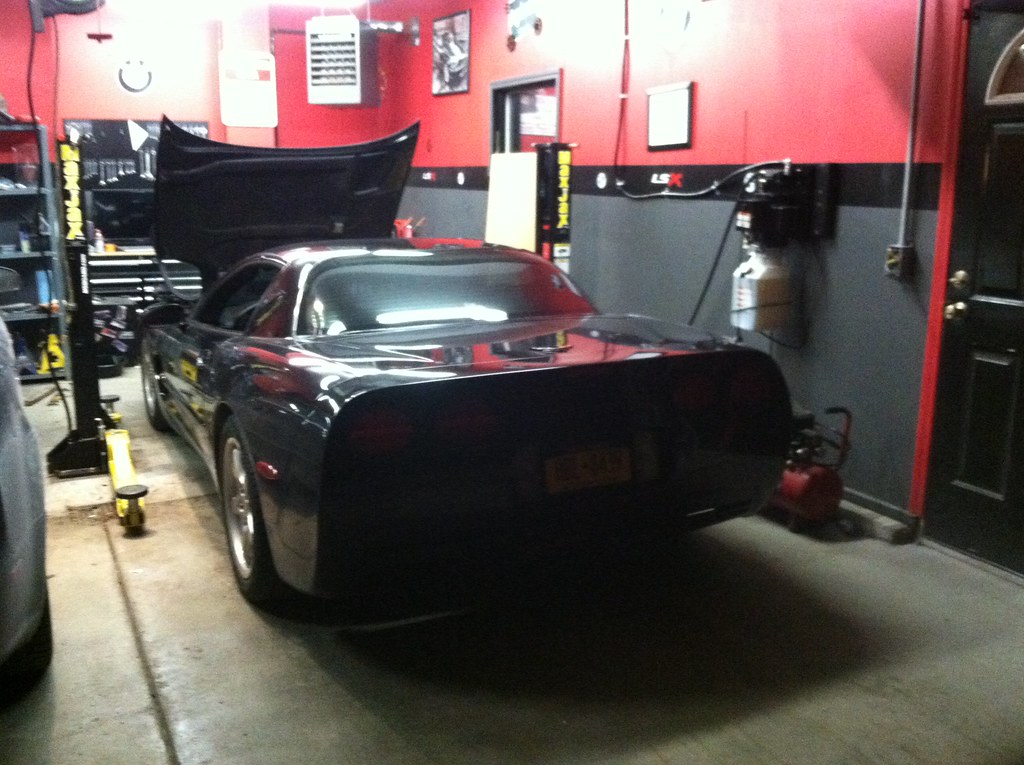
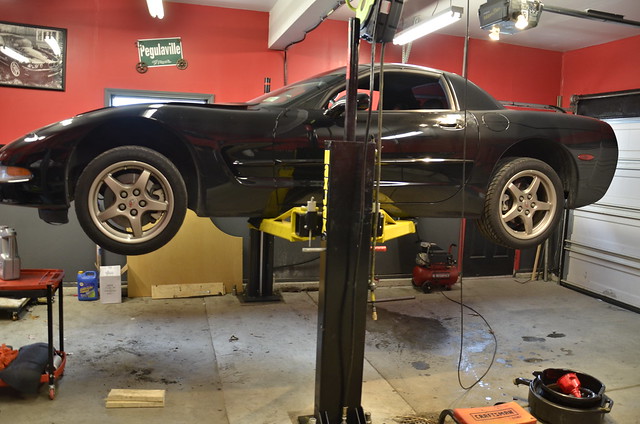
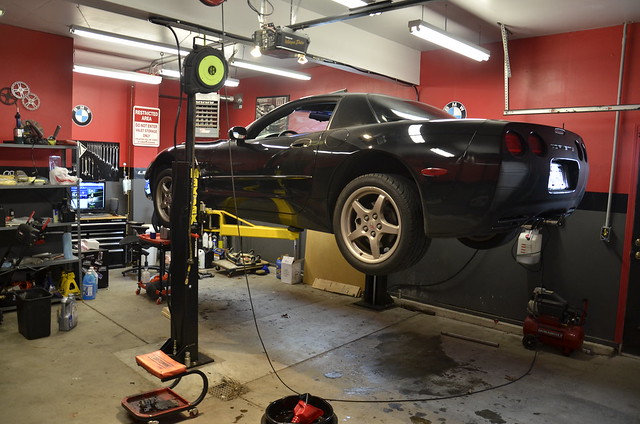
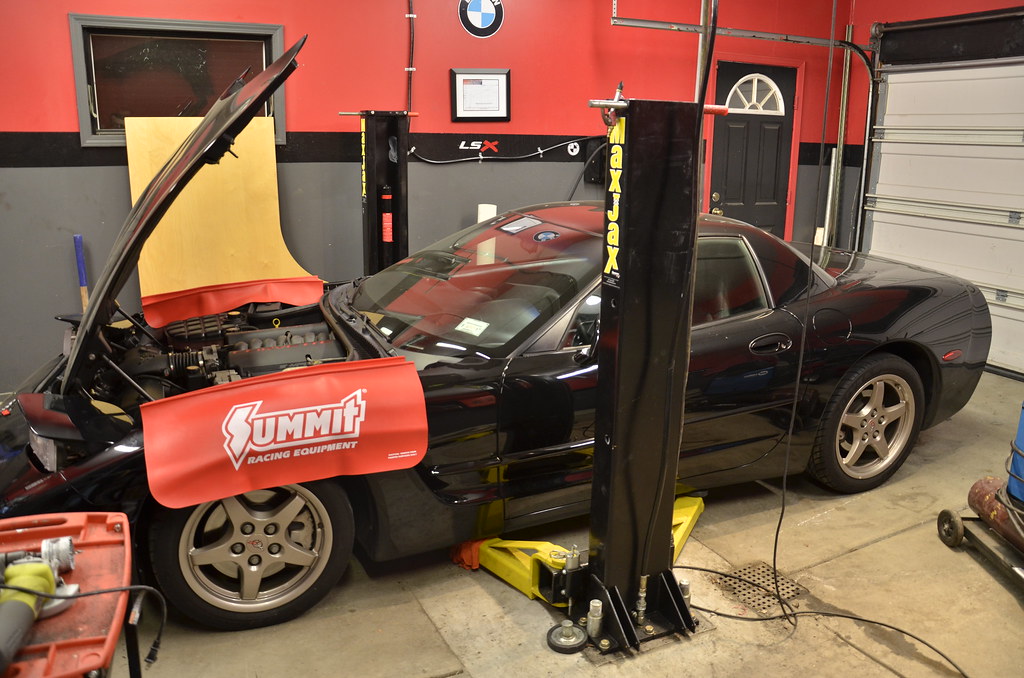
the MaxJax lift makes things a bit easier
 _DSC4679 by Norbert Ogiba, on Flickr
 _DSC4680 by Norbert Ogiba, on Flickr
Oil and Filter
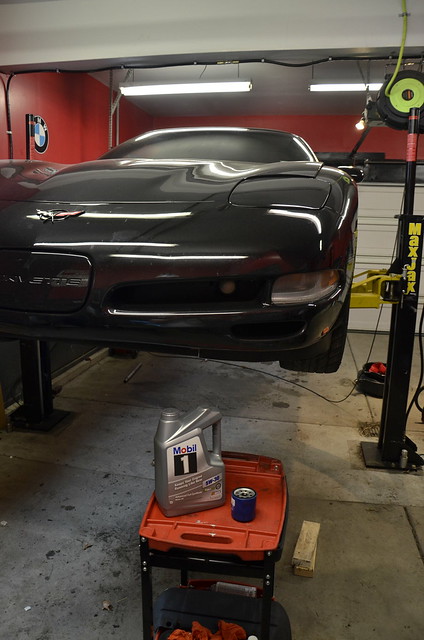 _DSC4681 by Norbert Ogiba, on Flickr
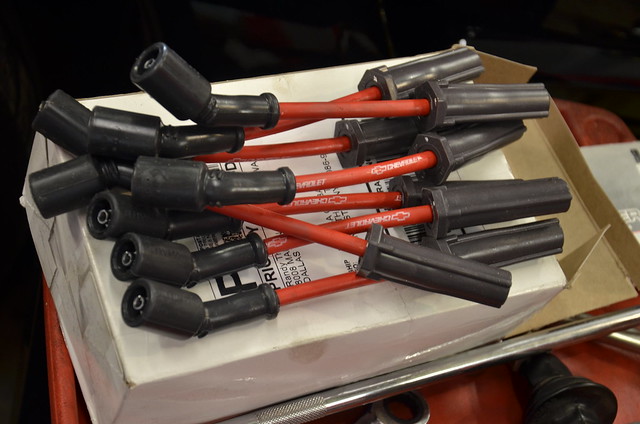
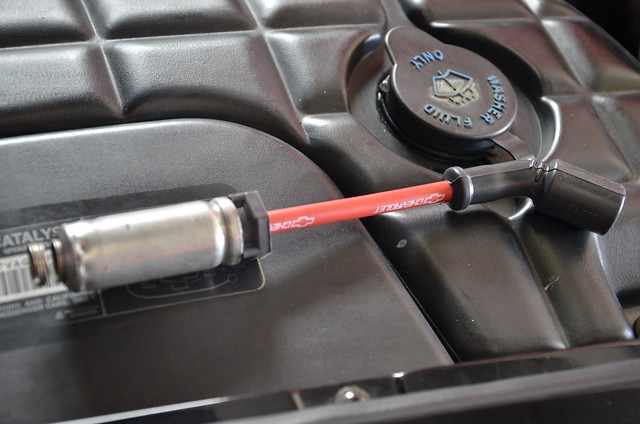
Rounded out the maintenance with new TR55 spark plugs and Red Chevrolet Performance Plug Wires
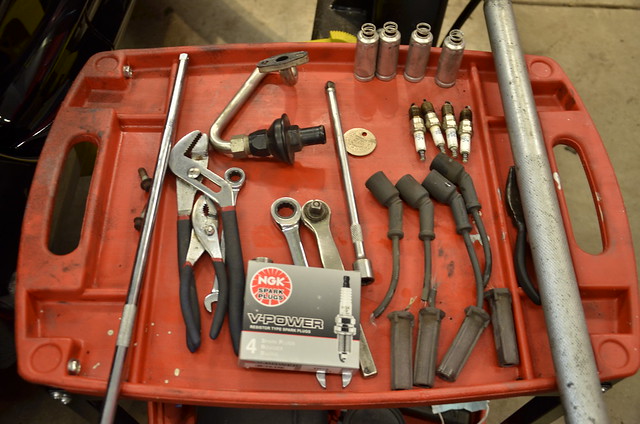 _DSC4682 by Norbert Ogiba, on Flickr
The old plugs looked so - so, but the gap on them was abysmal - up to .075" on the worst ones
 _DSC4683 by Norbert Ogiba, on Flickr
Driver's side 1 3 5 7
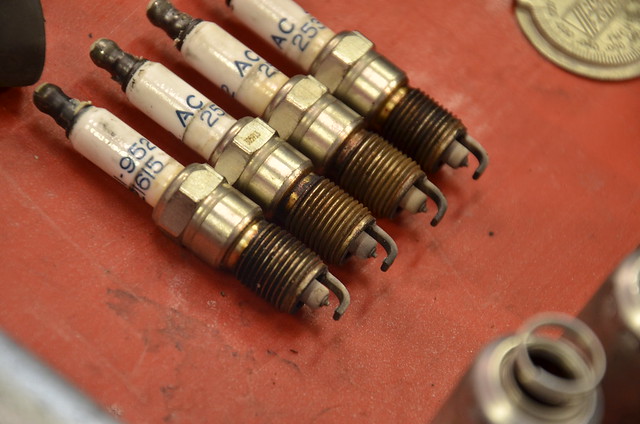 _DSC4686 by Norbert Ogiba, on Flickr
Workspace
 _DSC4684 by Norbert Ogiba, on Flickr
105K worth of use
_DSC4686 by Norbert Ogiba, on Flickr
new red GM Performance Wires
 _DSC4687 by Norbert Ogiba, on Flickr
Luckily, I was able to reuse all the stamped metal heat shields for all the new wires.
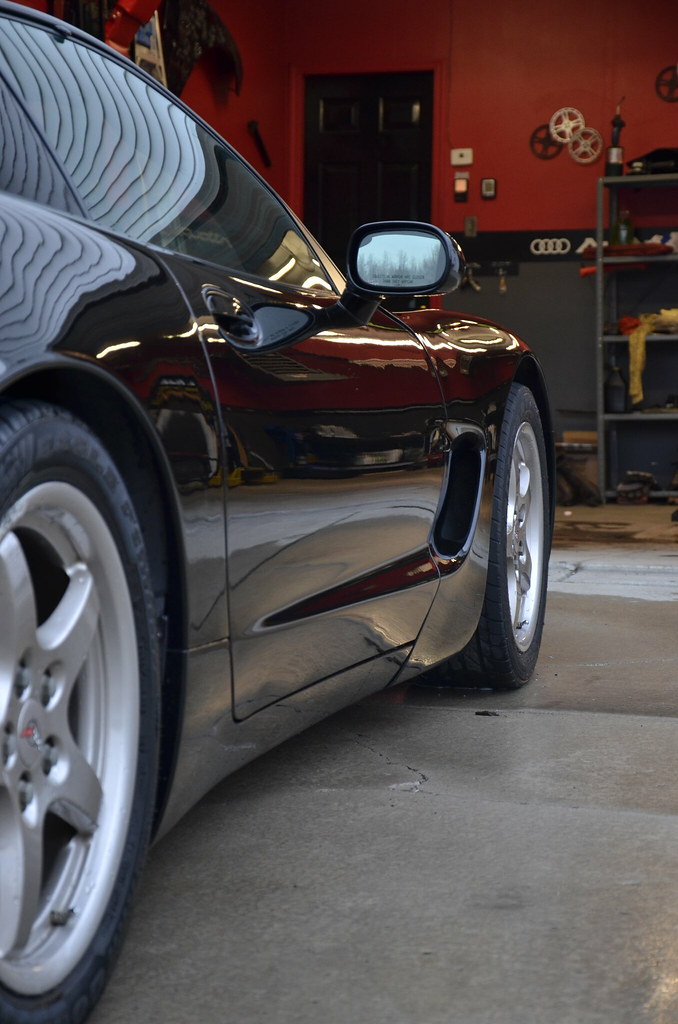
Took the wife to the driving range and hit a couple buckets of *****. Car ran flawlessly. Tomorrow is Super Bowl Sunday - before I head to the father - in - laws, plan on washing the exterior, vacuuming inside, and cleaning the "udders" inside the engine compartment. Saw quite a bit of buildup while inspecting everything on the lift!
Placed some orders last night:
TR55 plugs
GMPP Red plug wires
a shitload of oil filters (at $3 a pop for OEM AC Delco parts you can't go wrong)
wiper blades
air filter and fuel filter
hood lip seal (weatherstripping)
4x leave-in jacking pucks so i can get this pig up on the lift
some interior trim pieces that the PO broke
stubby antenna
once the jacking pucks come in I plan on doing plugs, wires, engine oil + filter, trans fluid, diff fluid, fuel filter. The motor has an ever so slight miss while sitting at a light, and based on looking at most of the stuff under the hood I'm guessing the plugs and wires are original. I also need to order the LCM5 column lock bypass - even though the column lock was replaced/serviced multiple times over the past couple years.
I did the zip tie mod to the intake last night and it definitely is a big improvement on the butt dyno. I took apart the whole snorkel/"power duct" to inspect it and am glad I did. bunch of leaves, dust, and general grime came out of the pre-filter area, and the MAF screen had last seen daylight circa 2000.
_DSC4652 by Norbert Ogiba, on FlickrThe marks are just from me gently rubbing my finger on the screen face. Luckily the screened portion is removeable from the heated wire element so I gave it a hot soapy bath with a toothbrush, rinsed out the lower airbox, and put the whole thing back together.
Finally I pulled the codes - looks like the majority are history codes - I need to check the listing and see what they're all for.
the MaxJax lift makes things a bit easier
_DSC4679 by Norbert Ogiba, on Flickr_DSC4680 by Norbert Ogiba, on FlickrOil and Filter
_DSC4681 by Norbert Ogiba, on FlickrRounded out the maintenance with new TR55 spark plugs and Red Chevrolet Performance Plug Wires
_DSC4682 by Norbert Ogiba, on FlickrThe old plugs looked so - so, but the gap on them was abysmal - up to .075" on the worst ones
_DSC4683 by Norbert Ogiba, on FlickrDriver's side 1 3 5 7
_DSC4686 by Norbert Ogiba, on FlickrWorkspace
_DSC4684 by Norbert Ogiba, on Flickr105K worth of use
_DSC4686 by Norbert Ogiba, on Flickrnew red GM Performance Wires
_DSC4687 by Norbert Ogiba, on FlickrLuckily, I was able to reuse all the stamped metal heat shields for all the new wires.
Took the wife to the driving range and hit a couple buckets of *****. Car ran flawlessly. Tomorrow is Super Bowl Sunday - before I head to the father - in - laws, plan on washing the exterior, vacuuming inside, and cleaning the "udders" inside the engine compartment. Saw quite a bit of buildup while inspecting everything on the lift!
02-08-2016, 07:57 PM
#4
12 Second Club
iTrader: (13)
Join Date: Nov 2004
Location: 707
Posts: 453
Likes: 0
Received 0 Likes
on
0 Posts

Nice car, a little off topic but I've been looking at that same lift for a couple of weeks now. Do you like it? If you needed to pull the passenger side fender off would you have room?
Where did you get the wires?
Keep us updated, I read your other thread and enjoyed it.
Where did you get the wires?
Keep us updated, I read your other thread and enjoyed it.
02-09-2016, 09:16 AM
#6
Thank you.
I love the lift. It works fine for what I need. I knew that it would be tight going into the installation, but that's just the compromise you take when trying to make a shop out of a small 2.5 car attached garage. You could pull off the fender no problem.
I have a detailed thread on my garage "build" showing the lift install starting on page 5, i think. The install was made complicated by the fact that my floor was sloped for a drain, so I needed to break up a portion of the slab and pour a new level segment to hold the columns.
http://garagejournal.com/forum/showthread.php?t=221146
Bought the wires for $62 on Amazon.
No, looked like a regular run of the mill CTS, but the owners were definitely car nuts.
Nice car, a little off topic but I've been looking at that same lift for a couple of weeks now. Do you like it? If you needed to pull the passenger side fender off would you have room?
Where did you get the wires?
Keep us updated, I read your other thread and enjoyed it.
Where did you get the wires?
Keep us updated, I read your other thread and enjoyed it.
I have a detailed thread on my garage "build" showing the lift install starting on page 5, i think. The install was made complicated by the fact that my floor was sloped for a drain, so I needed to break up a portion of the slab and pour a new level segment to hold the columns.
http://garagejournal.com/forum/showthread.php?t=221146
Bought the wires for $62 on Amazon.
No, looked like a regular run of the mill CTS, but the owners were definitely car nuts.
02-09-2016, 07:31 PM
#7
forgot to add the pic of the stock heat shields on the new wires
 _DSC4689 by Norbert Ogiba, on Flickr
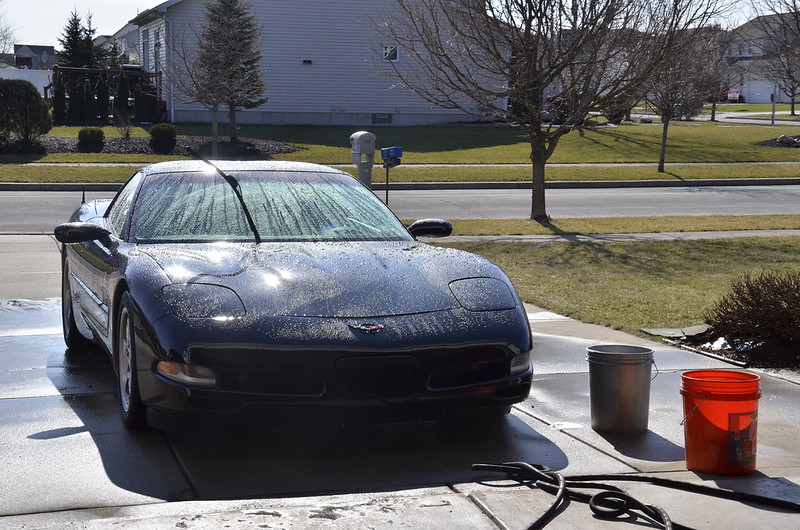
Super Bowl Sunday: spent a couple hours cleaning the old person smell out of the interior. vacuumed, cleaned glass, cleaned seats, cleaned dashboard/door panels, everything got a coat of armorall/leather conditioner and a quart of febreze spray. now it's inhabitable.
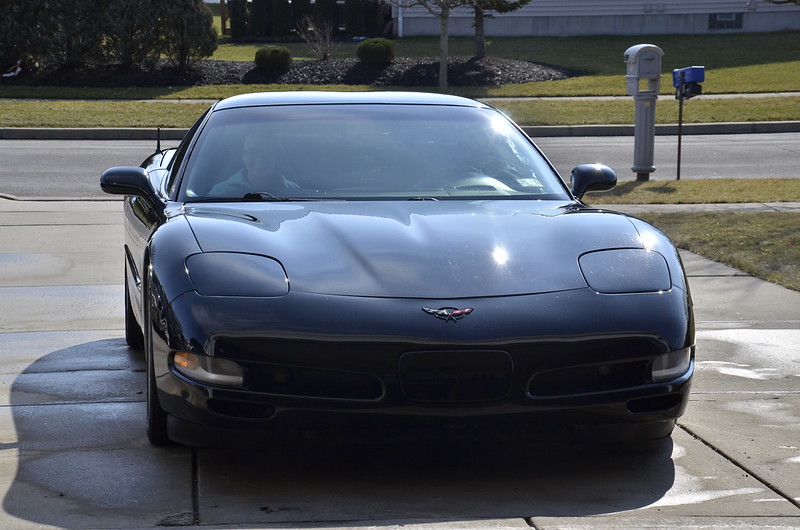
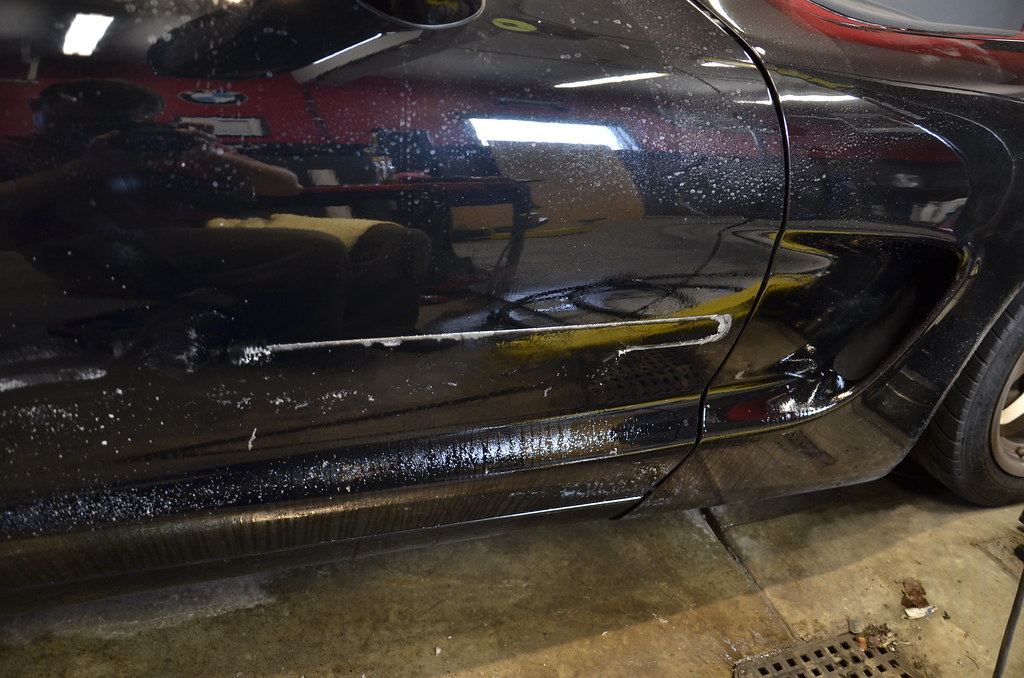
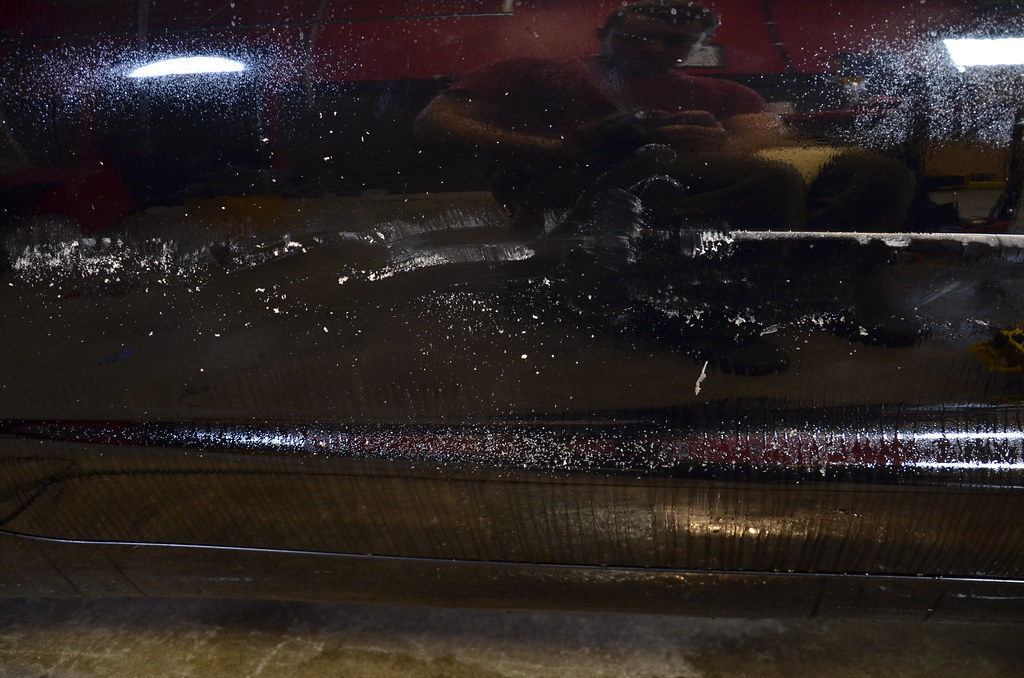
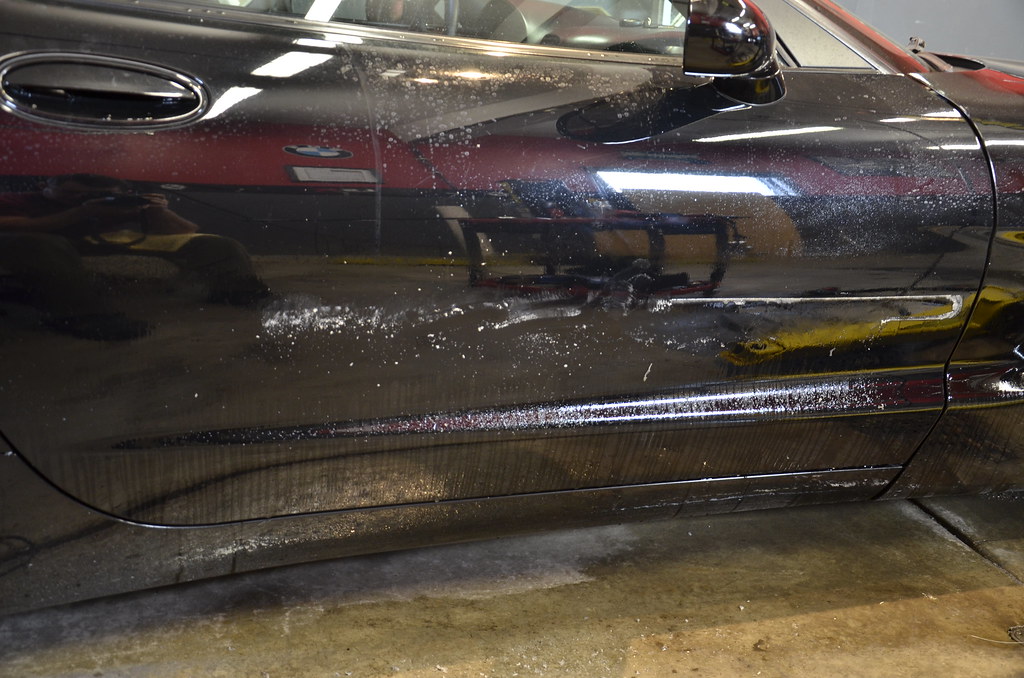
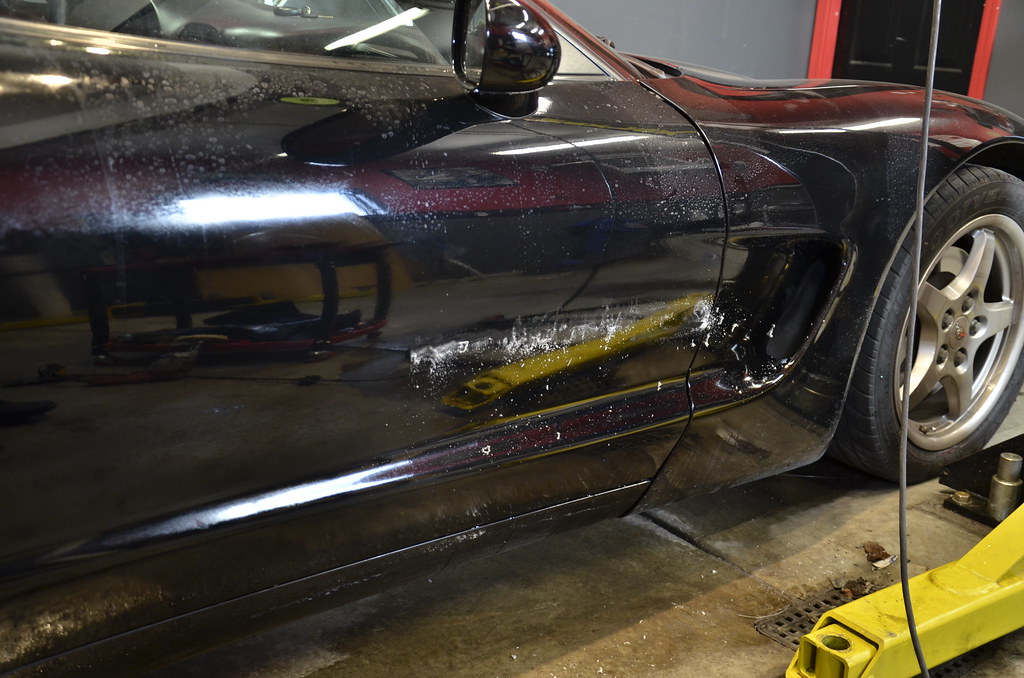
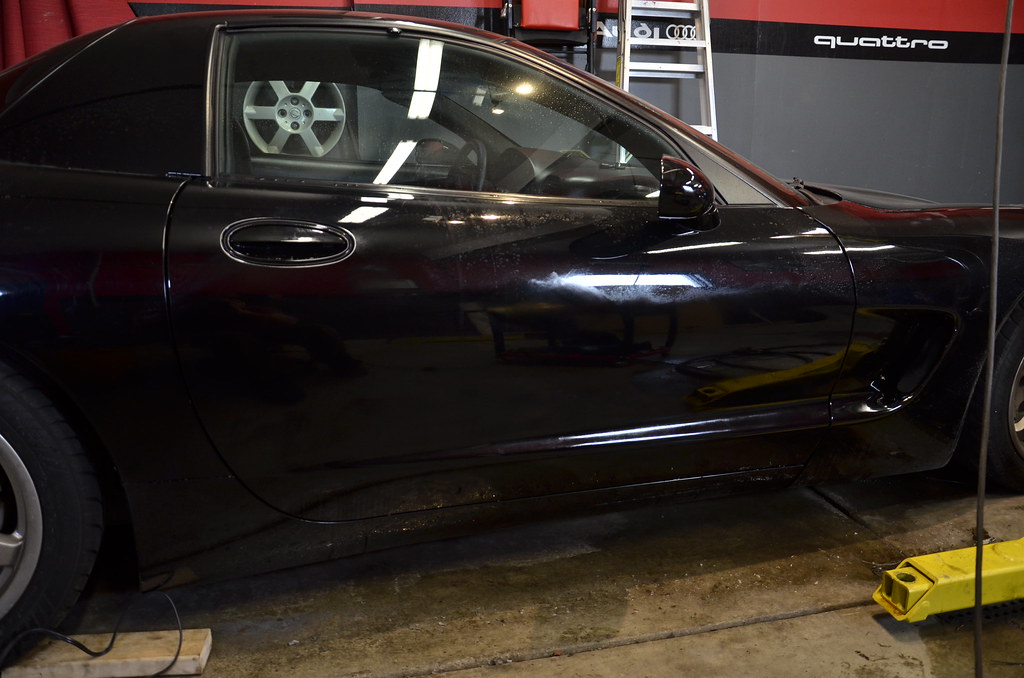
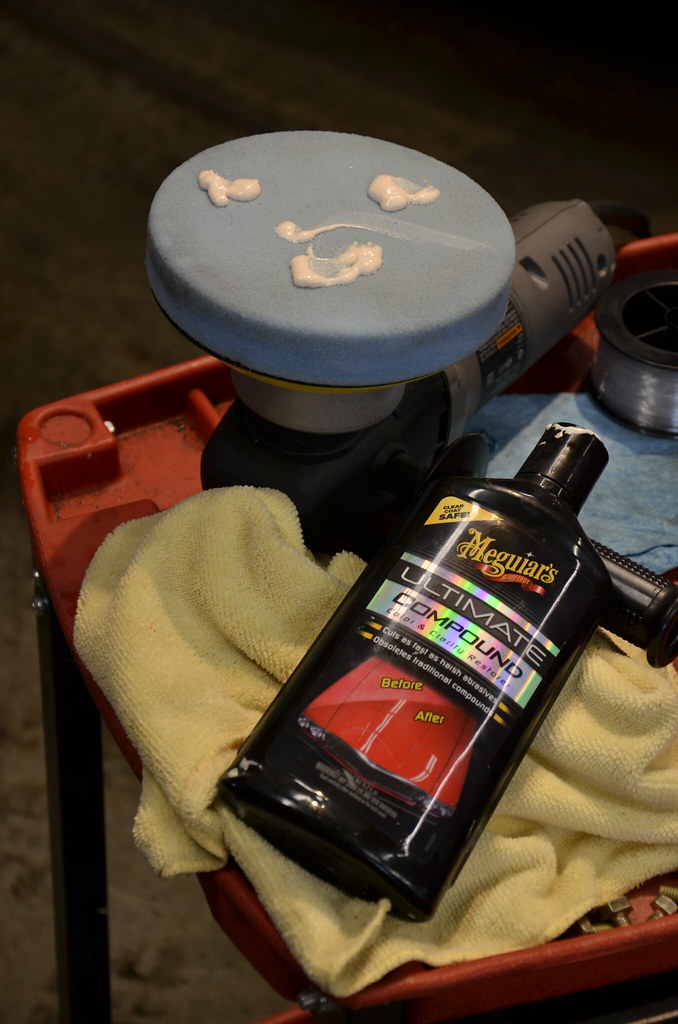
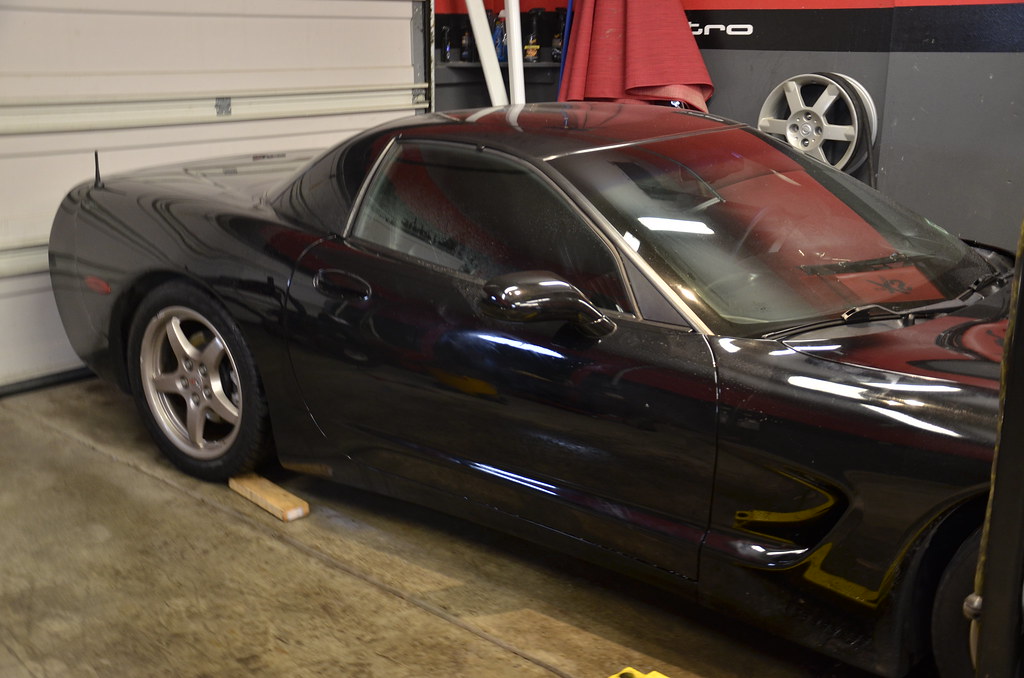
quick wash on the exterior. paint correction to come in a month or so
 _DSC4690 by Norbert Ogiba, on Flickr
 _DSC4691 by Norbert Ogiba, on Flickr
took a ride out to Rochester to grab Z06 Ti's
 _DSC4692 by Norbert Ogiba, on Flickr
 _DSC4695 by Norbert Ogiba, on Flickr
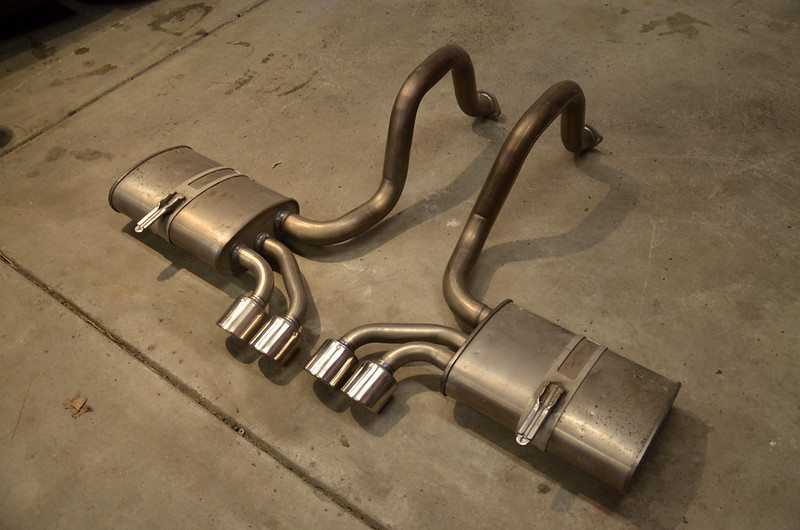
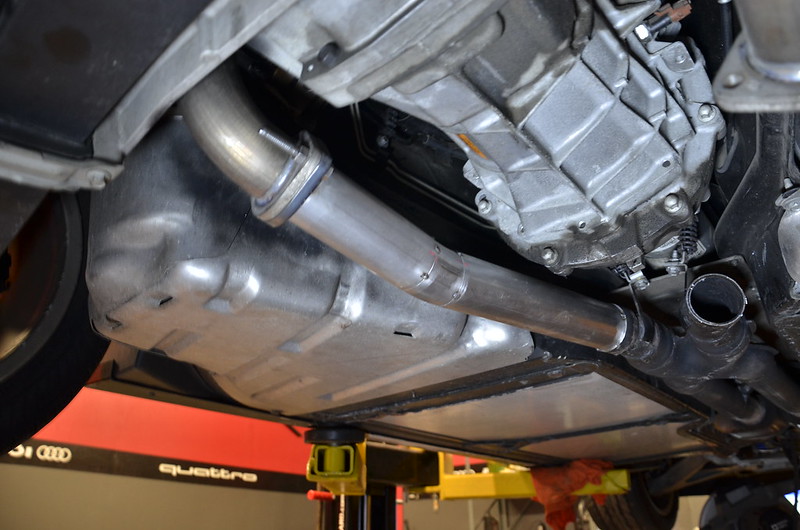
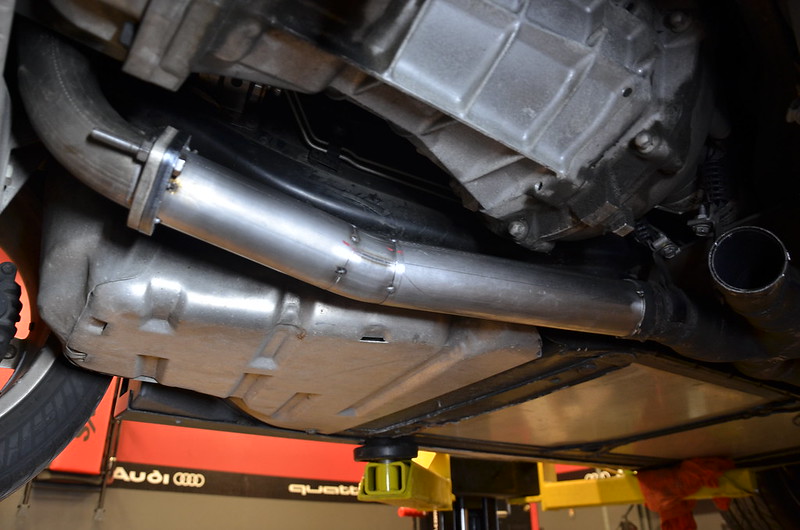
the "custom" exhaust needed to go. the shop that did the work was nice enough to weld in the bullets where the old flanges used to be, making the system one piece from the header flange to the tips. wouldn't be a problem if the exhaust didn't loop up over the axle. the bullets sounded okay when you romped on it but otherwise droned around town pretty badly.
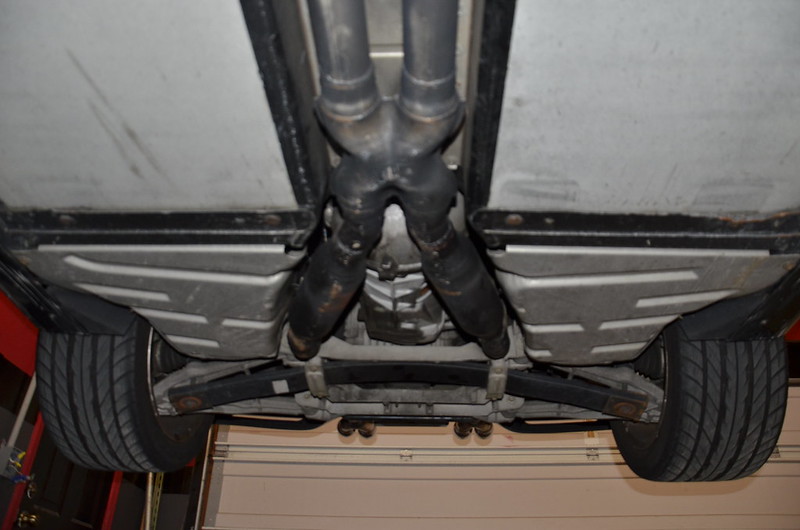
The h-pipe was long gone, replaced by this x-pipe, which will stay
 _DSC4698 by Norbert Ogiba, on Flickr
generic bullets in all their exhaust shop crap glory
 _DSC4699 by Norbert Ogiba, on Flickr
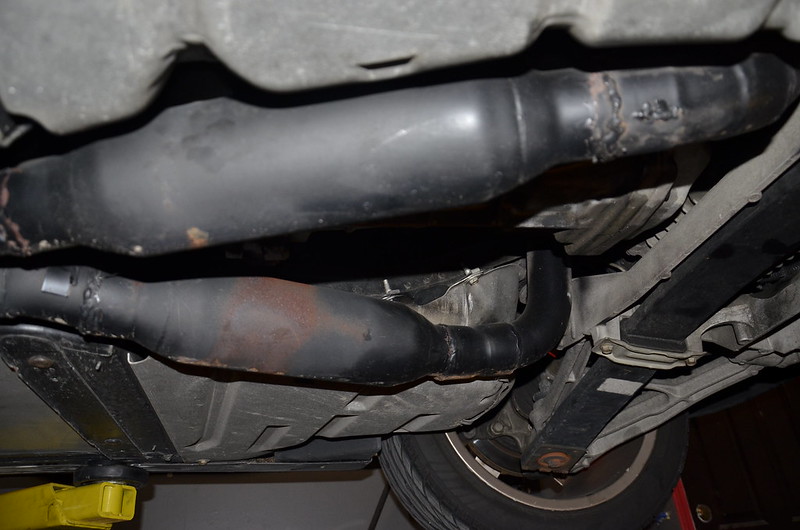
snaking over to the tips
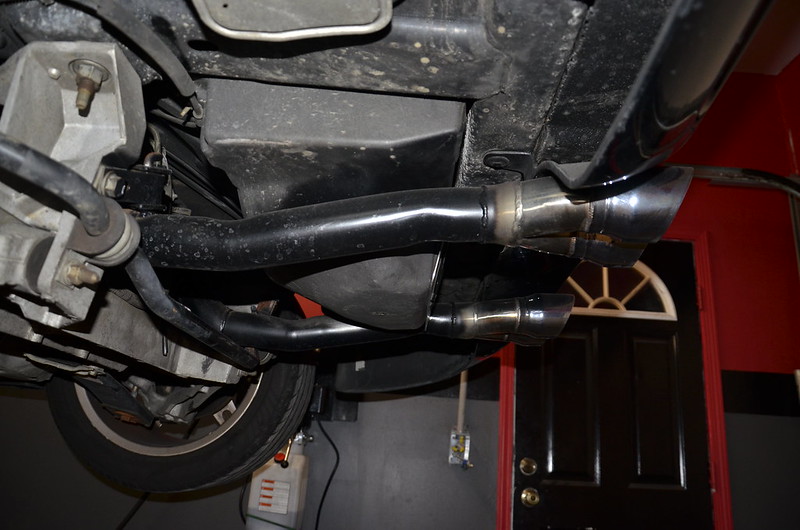 _DSC4700 by Norbert Ogiba, on Flickr
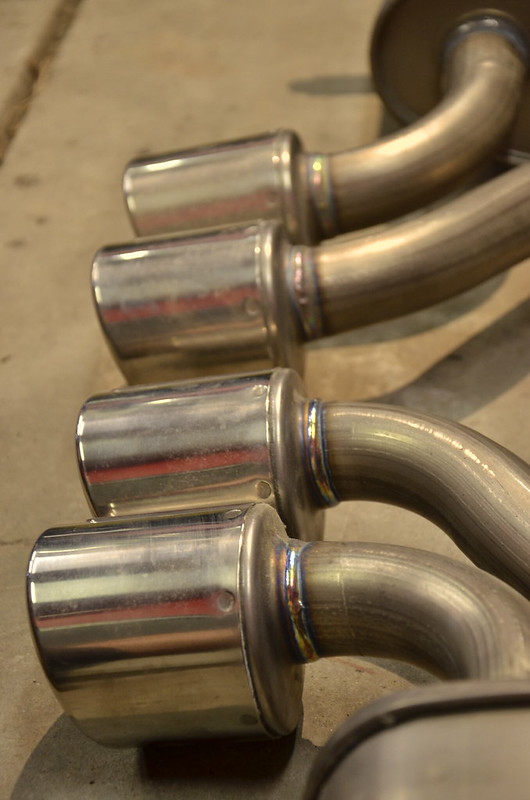
Tip alignment wasn't amazing, and the tip diameter seemed out of place and too far apart between sides
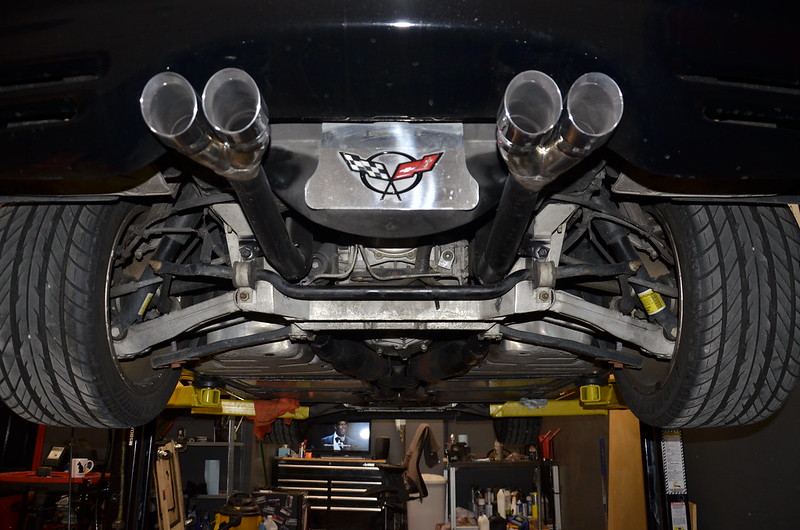 _DSC4703 by Norbert Ogiba, on Flickr
 _DSC4704 by Norbert Ogiba, on Flickr
chop chop. out they come
 _DSC4705 by Norbert Ogiba, on Flickr
 _DSC4706 by Norbert Ogiba, on Flickr
Blank slate
 _DSC4708 by Norbert Ogiba, on Flickr
pipes and flanges get in tomorrow, I need to mock up the mufflers and align the tips - then connect them to the existing x-pipe
_DSC4689 by Norbert Ogiba, on FlickrSuper Bowl Sunday: spent a couple hours cleaning the old person smell out of the interior. vacuumed, cleaned glass, cleaned seats, cleaned dashboard/door panels, everything got a coat of armorall/leather conditioner and a quart of febreze spray. now it's inhabitable.
quick wash on the exterior. paint correction to come in a month or so
_DSC4690 by Norbert Ogiba, on Flickr_DSC4691 by Norbert Ogiba, on Flickrtook a ride out to Rochester to grab Z06 Ti's
_DSC4692 by Norbert Ogiba, on Flickr_DSC4695 by Norbert Ogiba, on Flickrthe "custom" exhaust needed to go. the shop that did the work was nice enough to weld in the bullets where the old flanges used to be, making the system one piece from the header flange to the tips. wouldn't be a problem if the exhaust didn't loop up over the axle. the bullets sounded okay when you romped on it but otherwise droned around town pretty badly.
The h-pipe was long gone, replaced by this x-pipe, which will stay
_DSC4698 by Norbert Ogiba, on Flickrgeneric bullets in all their exhaust shop crap glory
_DSC4699 by Norbert Ogiba, on Flickrsnaking over to the tips
_DSC4700 by Norbert Ogiba, on FlickrTip alignment wasn't amazing, and the tip diameter seemed out of place and too far apart between sides
_DSC4703 by Norbert Ogiba, on Flickr_DSC4704 by Norbert Ogiba, on Flickrchop chop. out they come
_DSC4705 by Norbert Ogiba, on Flickr_DSC4706 by Norbert Ogiba, on FlickrBlank slate
_DSC4708 by Norbert Ogiba, on Flickrpipes and flanges get in tomorrow, I need to mock up the mufflers and align the tips - then connect them to the existing x-pipe
Trending Topics
02-10-2016, 12:03 PM
#9
I saw your thread over on the other board. With your budget, if you're not too picky on showroom condition, you can get a decent "driver" Z06 for around there, and not need to put too much into it. Of course you could spend half that for the FRC and mod away, or spent the rest of the cash on other toys like I did! I was able to put a couple grand in the bank too, which is always great.
[img] image by Norbert Ogiba, on Flickr[/img]
[img]
image by Norbert Ogiba, on Flickr[/img]
02-10-2016, 08:24 PM
#10
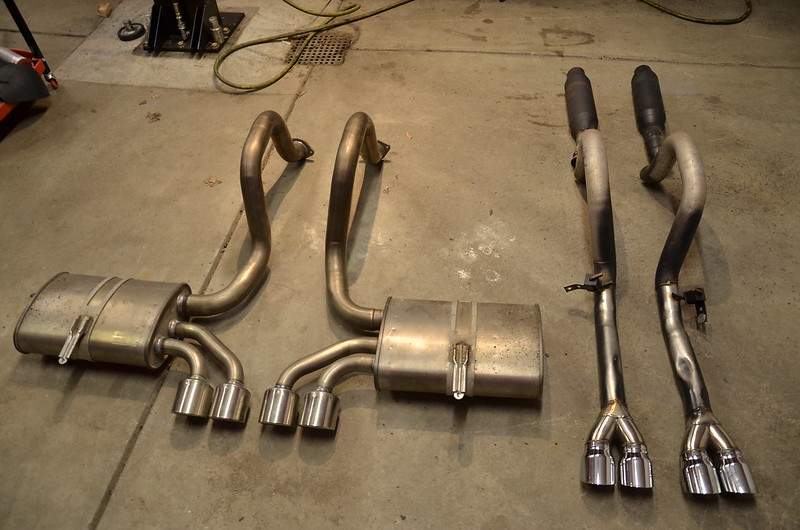
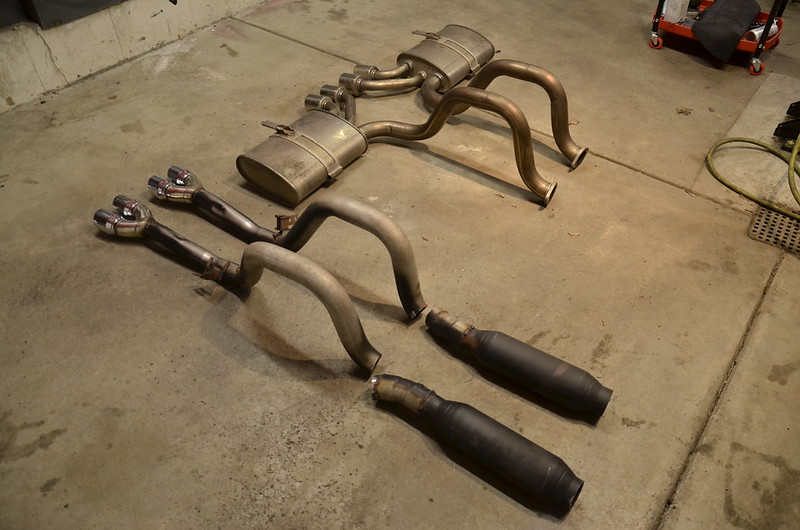
slow but steady progress. I dusted off the welder, chop saw, and unpackaged the mandrel bend and flanges that came in.
First I installed the Ti muffler on the driver's side, getting the tip level, and then held the front flange in place with a jack and a 2x4.
Now that point A and point B were fixtured I connected the dots. The blank flange bolted to the muffler flange gave me a lot of leeway and made it fairly easy.
All tacked up:
 _DSC4710 by Norbert Ogiba, on Flickr
 _DSC4712 by Norbert Ogiba, on Flickr
Now I need to repeat the process for the passenger side.
First I installed the Ti muffler on the driver's side, getting the tip level, and then held the front flange in place with a jack and a 2x4.
Now that point A and point B were fixtured I connected the dots. The blank flange bolted to the muffler flange gave me a lot of leeway and made it fairly easy.
All tacked up:
_DSC4710 by Norbert Ogiba, on Flickr_DSC4712 by Norbert Ogiba, on FlickrNow I need to repeat the process for the passenger side.
 02-15-2016, 08:55 AM
#12
So I finished cutting the bends for the passenger side of the factory midpipes, and got it all tacked into place. For some reason it went much more slowly than the driver's side. The compound bend (lateral and vertical move) was being a real PITA, but I finally got it to fit while keeping the tailpipes level. That was strike 1, got me kinda pissed off. Now that the system was tacked, I was ready to drop it and finish weld everything. Removed the 6 header nuts - 2 came out clean, the rest snapped the studs - that was strike 2. Disconnected oxygen sensors, removed midpipe hangers, and dropped it down. Set it on my shop cart and got all set up to finish weld it, and had a bunch of issues with the wire birdnesting inside the gun tip - so I had to stop and clear the jam every couple of minutes. Now I'm pretty ticked. Finally get a rhythm going and the wire runs out. Strike 3. At this point I decided to quit for the night before I lit the whole thing on fire.
Go inside to wash up and have a beer, and I see that Huron Speed is having a sale for their longtubes and x-pipe, $50 off and free shipping. I thought about how much fun it would be to remove 4 broken studs in the existing manifolds and 30 seconds later placed my order. I still plan on welding up the existing system I fabbed, but will keep it in the basement in case the catless x-pipe is too loud.
.jpg)
Cliffnotes: Welded stuff. Broke studs. Got pissed off. Longtubes on sale. Cha-ching.
Go inside to wash up and have a beer, and I see that Huron Speed is having a sale for their longtubes and x-pipe, $50 off and free shipping. I thought about how much fun it would be to remove 4 broken studs in the existing manifolds and 30 seconds later placed my order. I still plan on welding up the existing system I fabbed, but will keep it in the basement in case the catless x-pipe is too loud.
Cliffnotes: Welded stuff. Broke studs. Got pissed off. Longtubes on sale. Cha-ching.


 02-19-2016, 08:08 AM
#14
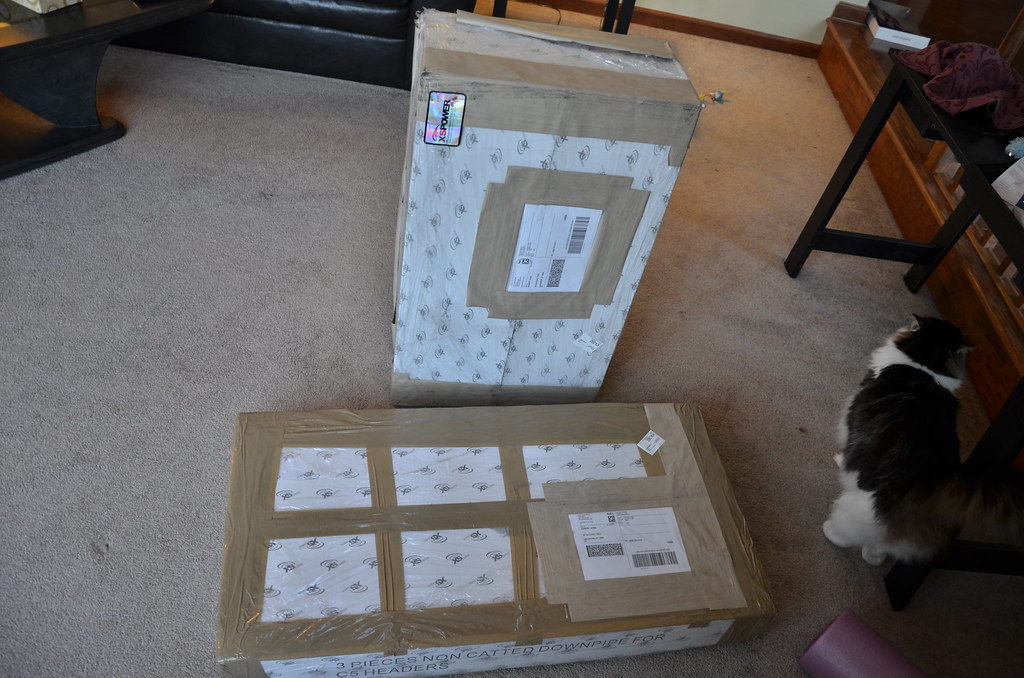
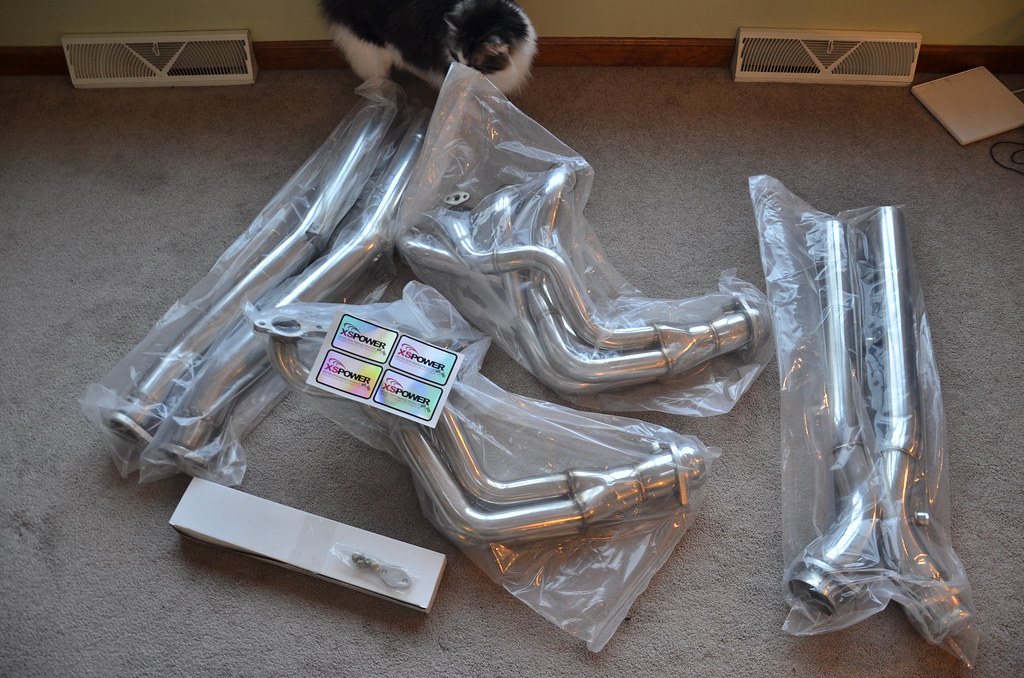
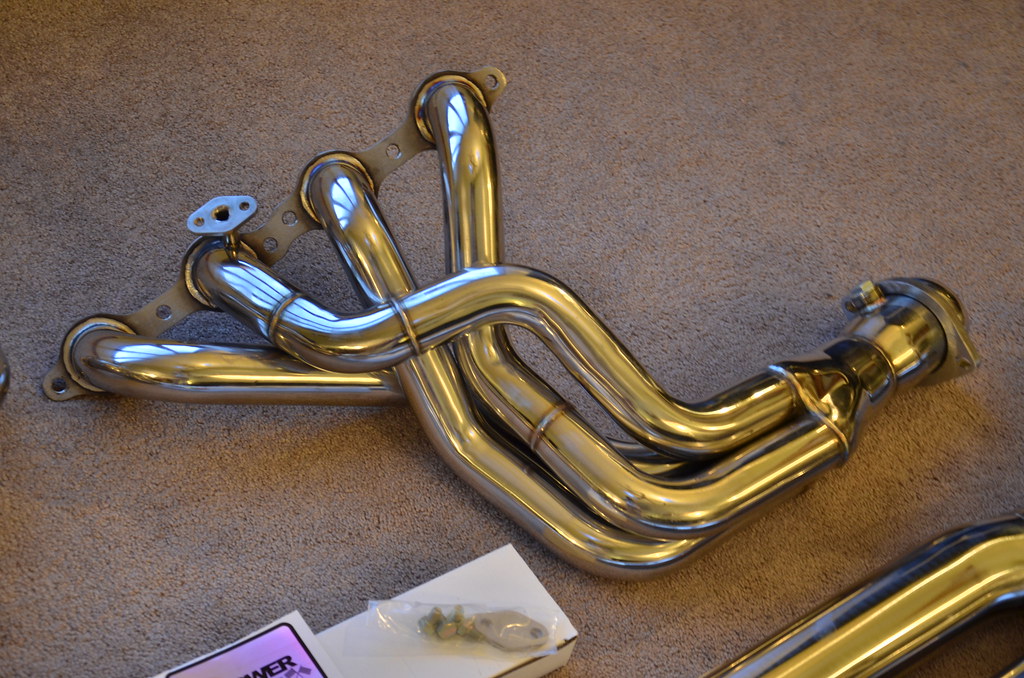
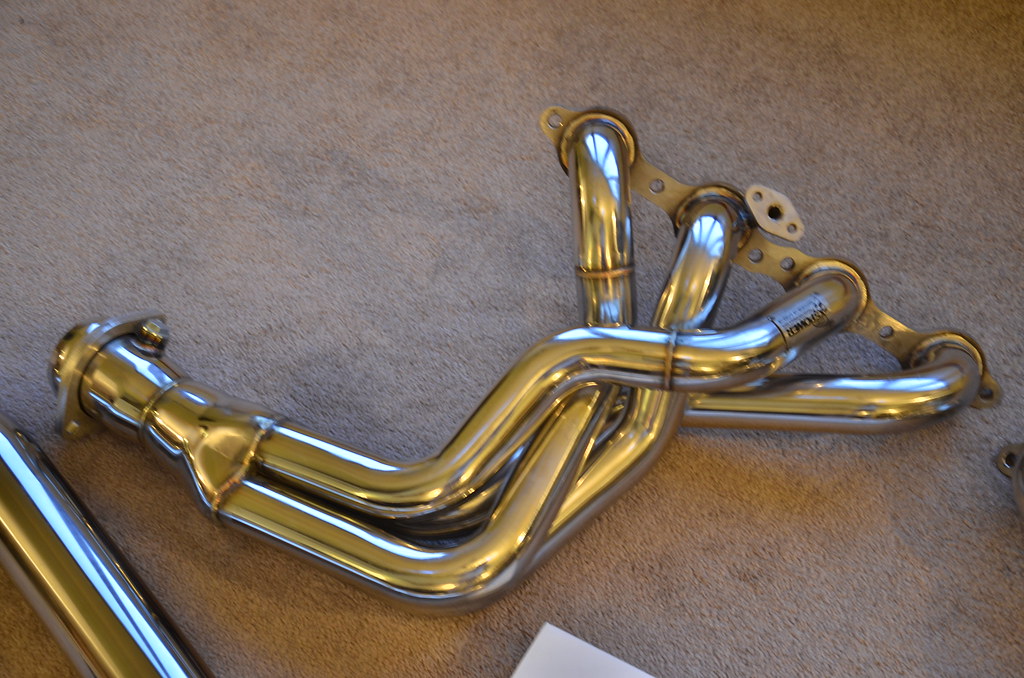
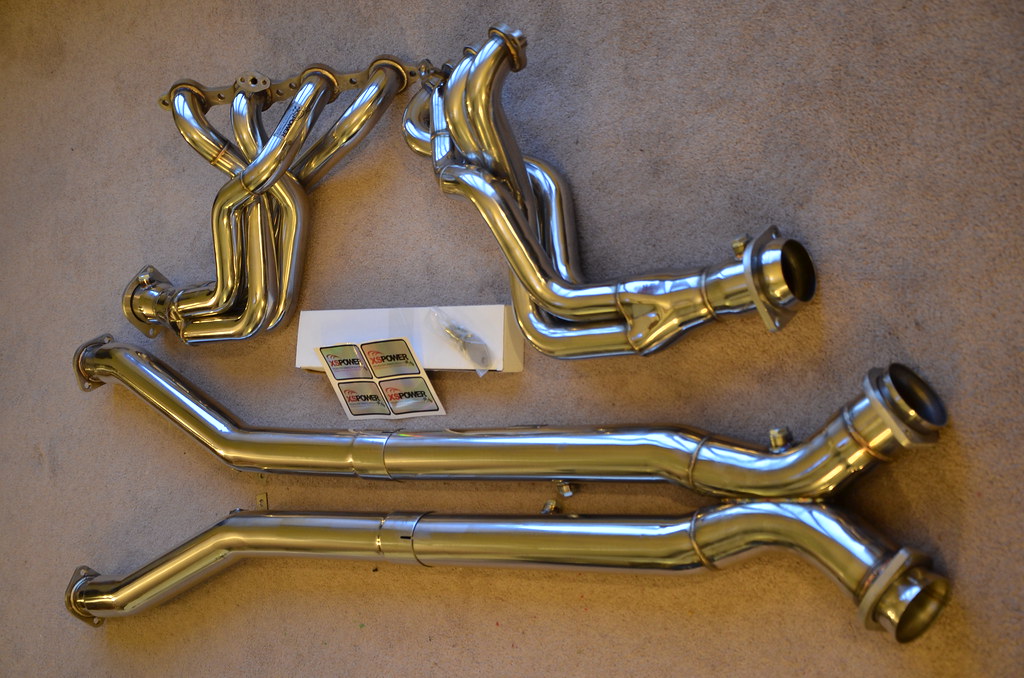
Longtubes came in much earlier than expected! I ordered them Sunday night and they were waiting for me Thursday afternoon. Not bad for a company that is closed this week and didn't expect to ship til next.
Boxes were wrapped up nicely. Cat was looking over the boxes, unfortunately I got the catless model, sorry lil guy
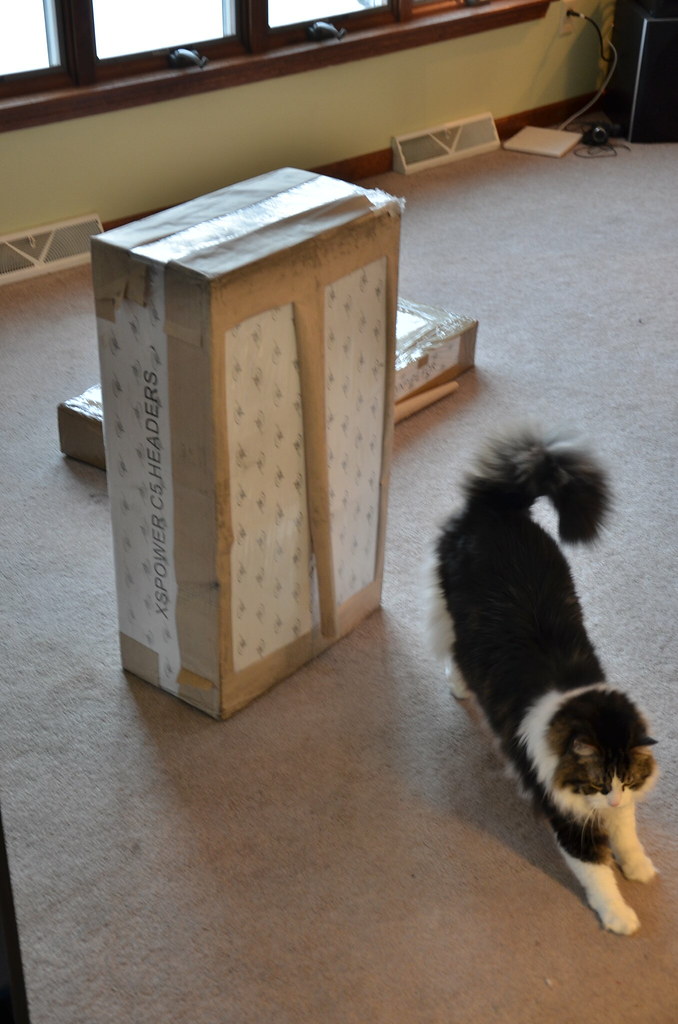 _DSC4721 by Norbert Ogiba, on Flickr
 _DSC4723 by Norbert Ogiba, on Flickr
 _DSC4725 by Norbert Ogiba, on Flickr
 _DSC4726 by Norbert Ogiba, on Flickr
 _DSC4727 by Norbert Ogiba, on Flickr
 _DSC4728 by Norbert Ogiba, on Flickr
 _DSC4729 by Norbert Ogiba, on Flickr
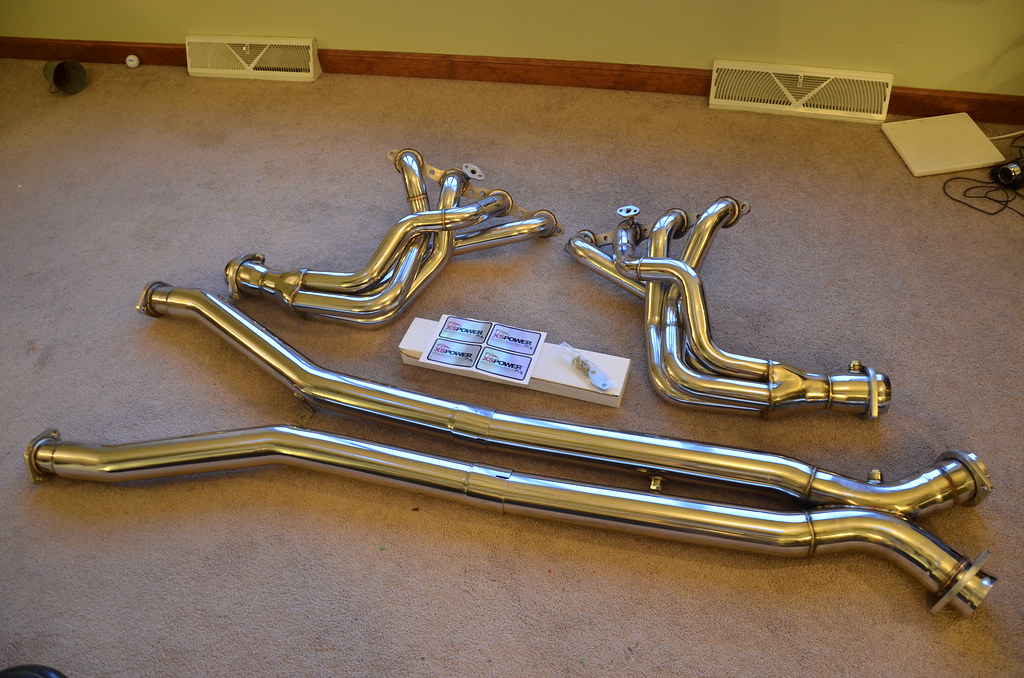
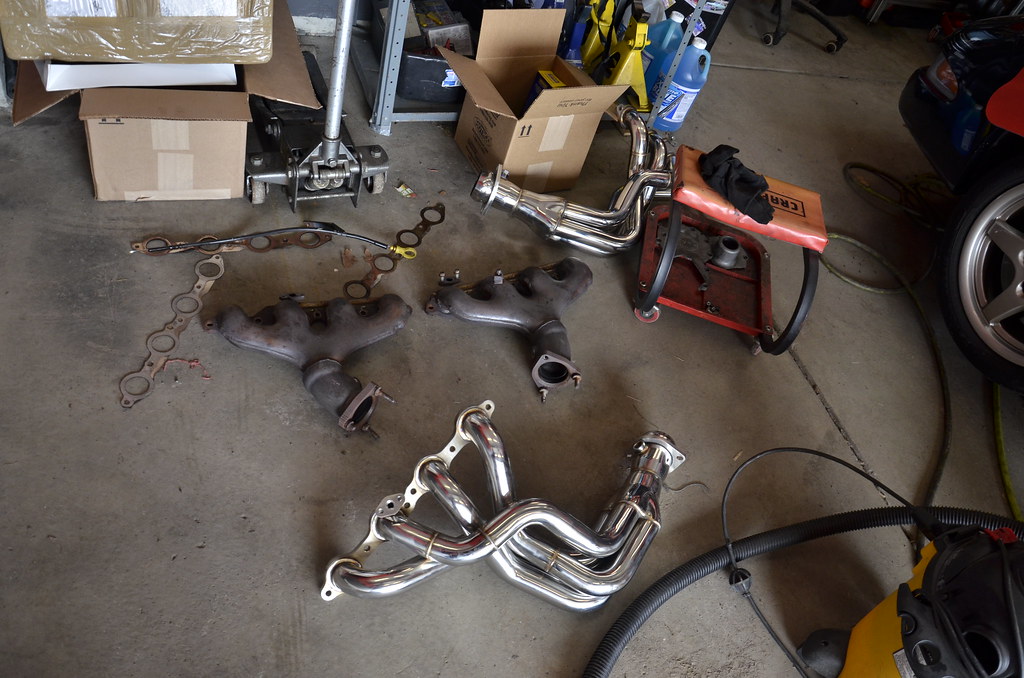
I didn't look too closely at the fabrication quality yet but initial impressions are good. We will see how the fitment is, I have heard good things.
Starting the install. The midpipes were already removed since I had been repairing the stock ones
 _DSC4730 by Norbert Ogiba, on Flickr
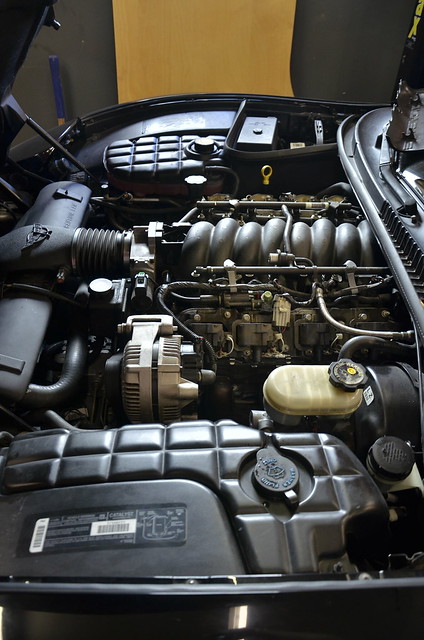
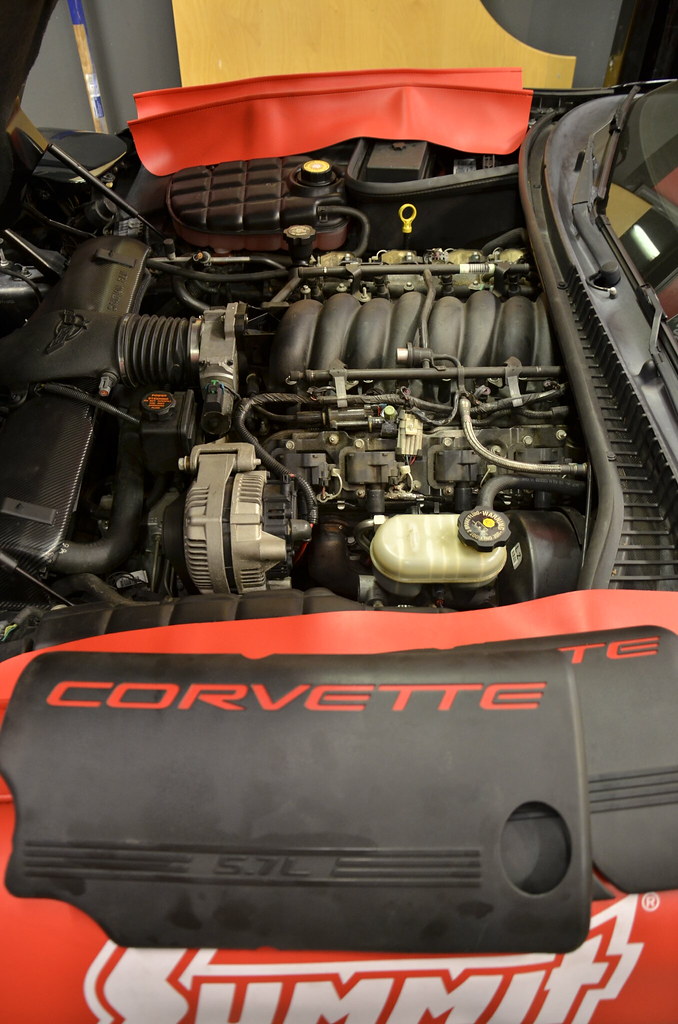
Fuel Rail Covers off. I need to scrub these things in some hot soapy water.
 _DSC4731 by Norbert Ogiba, on Flickr
Battery disconnected and removed.
 _DSC4734 by Norbert Ogiba, on Flickr
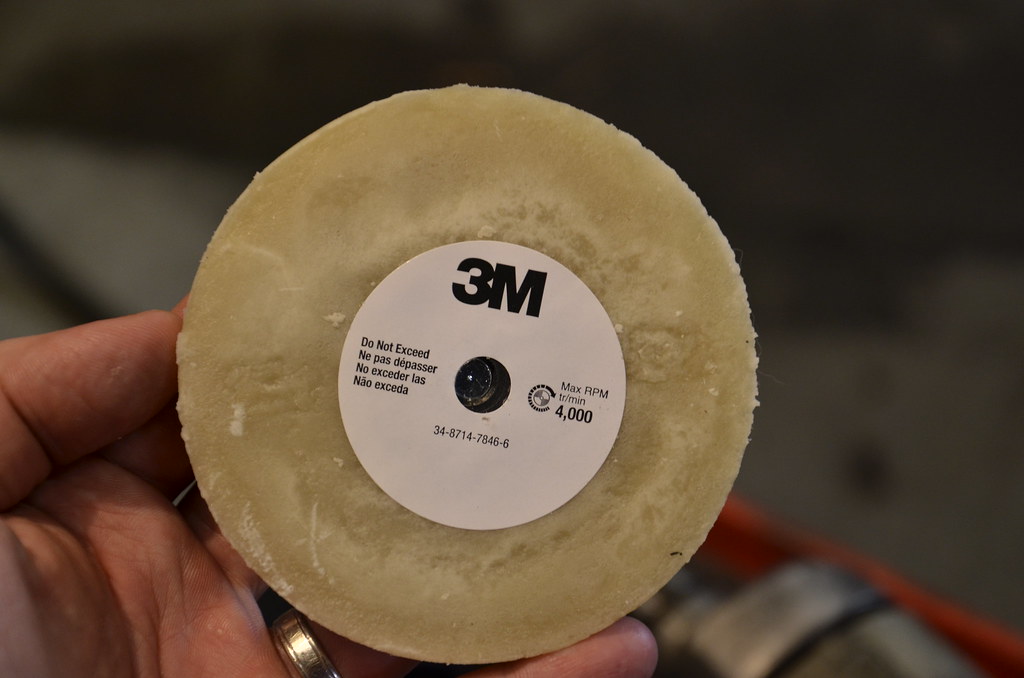
Belt de-tensioned. Also note that I wrapped the radiator cover in 3M CF vinyl. Started wrapping the headlight bezels as well.
 _DSC4735 by Norbert Ogiba, on Flickr
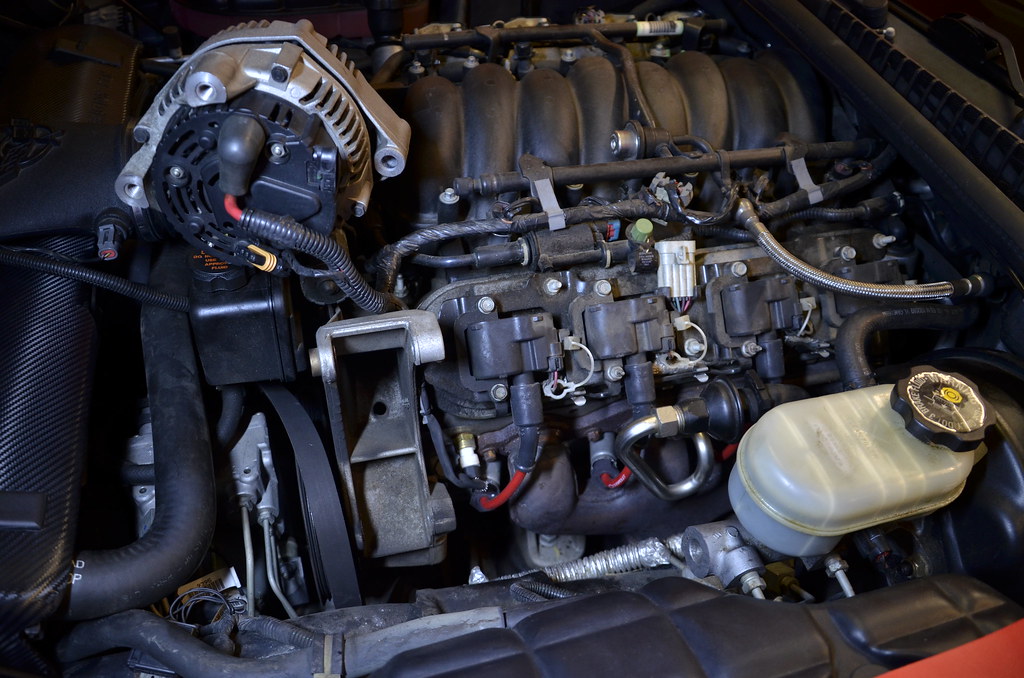
Alternator removed and placed aside (I didn't remove the big battery positive terminal)
 _DSC4737 by Norbert Ogiba, on Flickr
There's not a lot of room by the accessories so rather than remove the belt completely I just tucked it in the alt bracket so that it'll be easy to slip on later.
 _DSC4738 by Norbert Ogiba, on Flickr
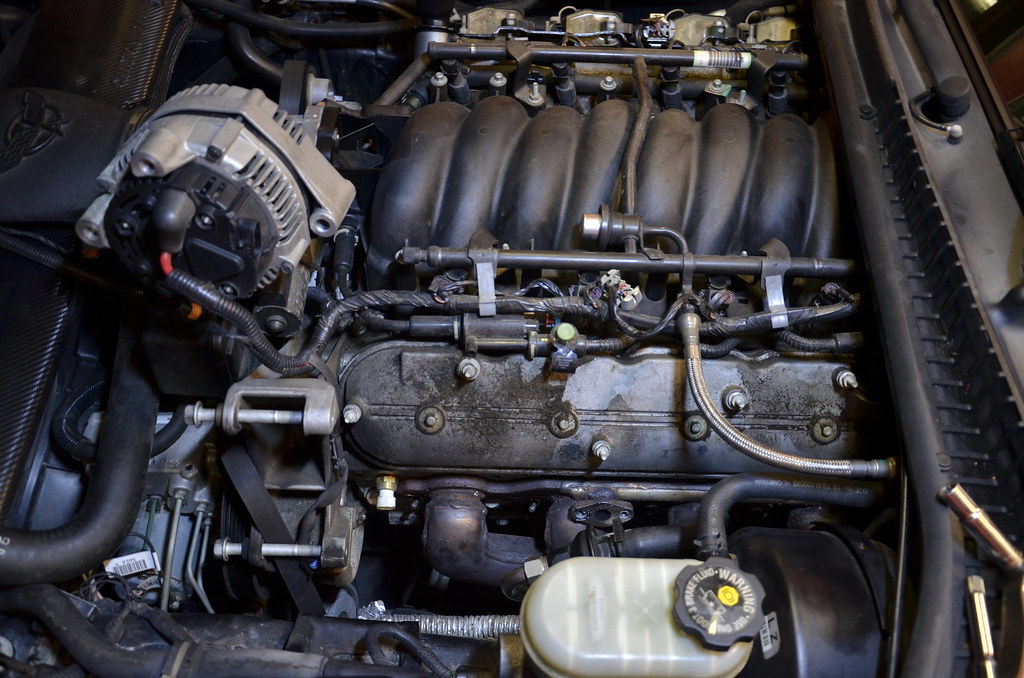
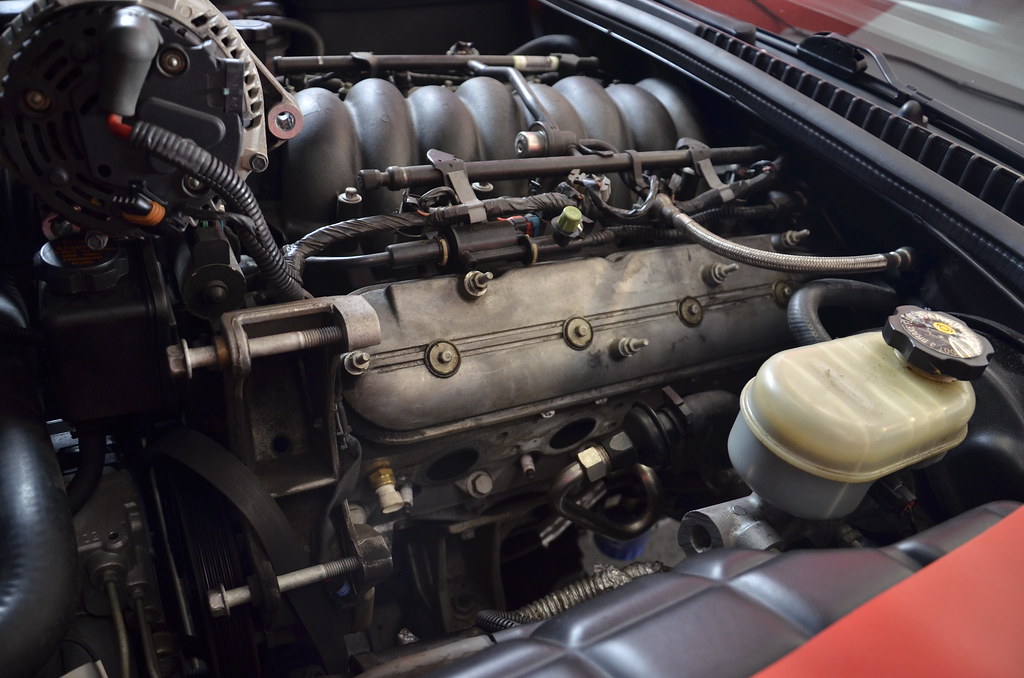
Driver's coils and AIR stuff removed. I'll probably end up pulling both valve covers and scrubbing them clean
 _DSC4740 by Norbert Ogiba, on Flickr
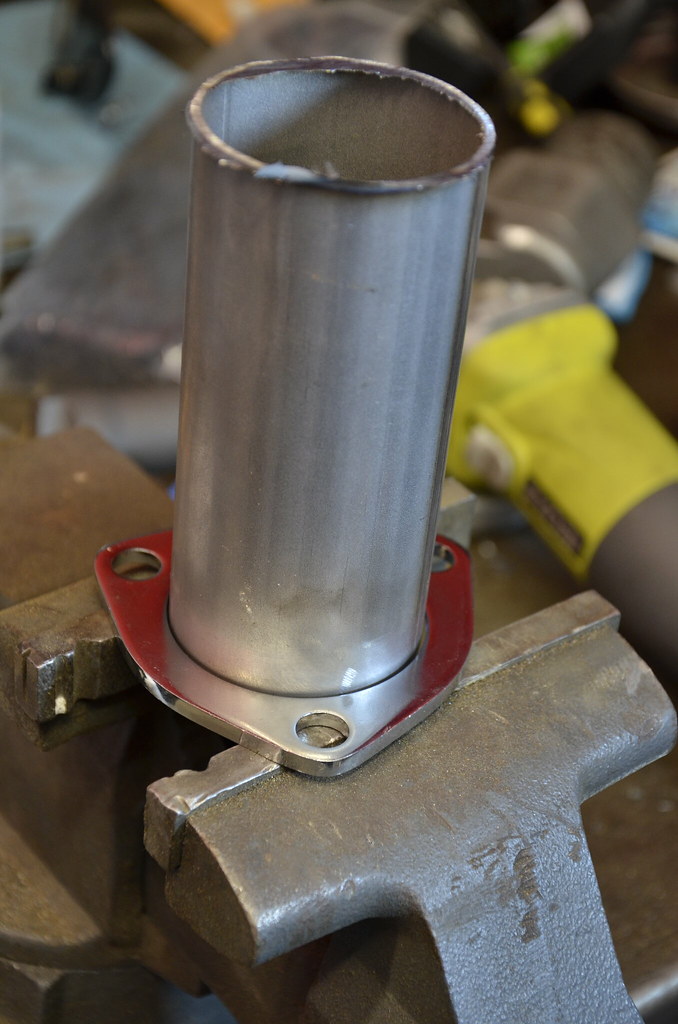
Also started fabbing the cutout pipes that will be welded to the x-pipe. Need to deburr and tack this flange (the cutout valve and turndown will bolt to the flange)
 _DSC4714 by Norbert Ogiba, on Flickr
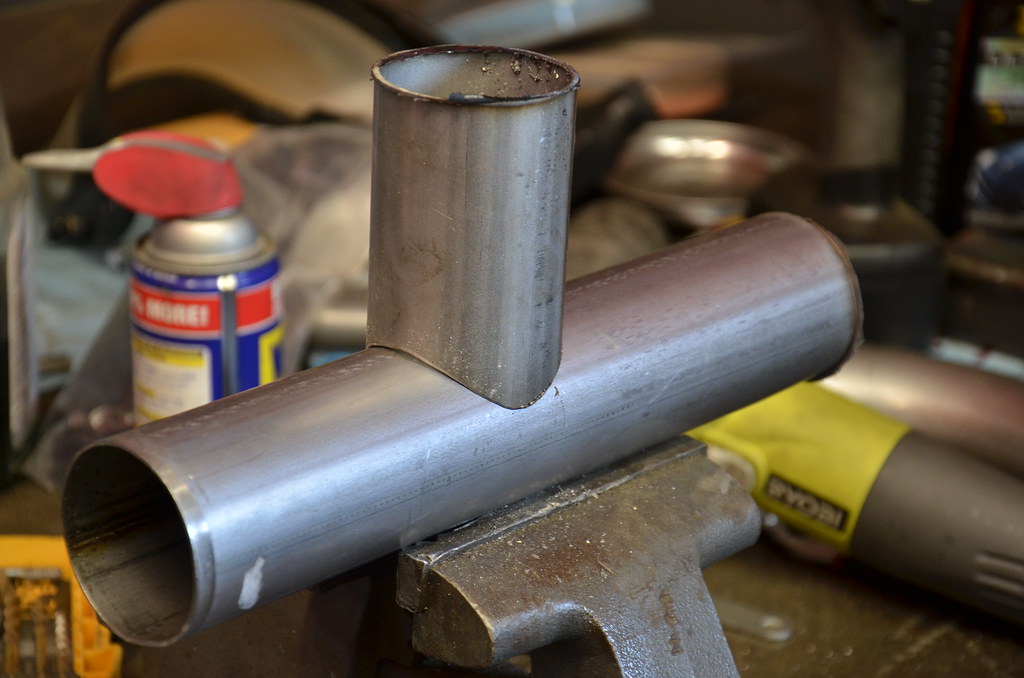
saddle cut with a hole saw. I may need to cut it with a 3" hole saw to saddle to the new x-pipe properly
 _DSC4720 by Norbert Ogiba, on Flickr
Boxes were wrapped up nicely. Cat was looking over the boxes, unfortunately I got the catless model, sorry lil guy
_DSC4721 by Norbert Ogiba, on Flickr_DSC4723 by Norbert Ogiba, on Flickr_DSC4725 by Norbert Ogiba, on Flickr_DSC4726 by Norbert Ogiba, on Flickr_DSC4727 by Norbert Ogiba, on Flickr_DSC4728 by Norbert Ogiba, on Flickr_DSC4729 by Norbert Ogiba, on FlickrI didn't look too closely at the fabrication quality yet but initial impressions are good. We will see how the fitment is, I have heard good things.
Starting the install. The midpipes were already removed since I had been repairing the stock ones
_DSC4730 by Norbert Ogiba, on FlickrFuel Rail Covers off. I need to scrub these things in some hot soapy water.
_DSC4731 by Norbert Ogiba, on FlickrBattery disconnected and removed.
_DSC4734 by Norbert Ogiba, on FlickrBelt de-tensioned. Also note that I wrapped the radiator cover in 3M CF vinyl. Started wrapping the headlight bezels as well.
_DSC4735 by Norbert Ogiba, on FlickrAlternator removed and placed aside (I didn't remove the big battery positive terminal)
_DSC4737 by Norbert Ogiba, on FlickrThere's not a lot of room by the accessories so rather than remove the belt completely I just tucked it in the alt bracket so that it'll be easy to slip on later.
_DSC4738 by Norbert Ogiba, on FlickrDriver's coils and AIR stuff removed. I'll probably end up pulling both valve covers and scrubbing them clean
_DSC4740 by Norbert Ogiba, on FlickrAlso started fabbing the cutout pipes that will be welded to the x-pipe. Need to deburr and tack this flange (the cutout valve and turndown will bolt to the flange)
_DSC4714 by Norbert Ogiba, on Flickrsaddle cut with a hole saw. I may need to cut it with a 3" hole saw to saddle to the new x-pipe properly
_DSC4720 by Norbert Ogiba, on Flickr
02-19-2016, 09:03 AM
#15
Cool story and thread. My Dad bought a 2000 C5 M6 with 10k miles on it last summer. He let me drive it back and they are really a joy to drive. He also has a 98 SS M6 that we drove to get the C5, and the difference between the two is amazing. If I didn't have my Camaro I would seriously consider a C5 as they are a ton of fun to drive.
02-23-2016, 07:53 PM
#17
been busy. installed the headers over the weekend
got the old stuff out, came out pretty easy
 _DSC4741 by Norbert Ogiba, on Flickr
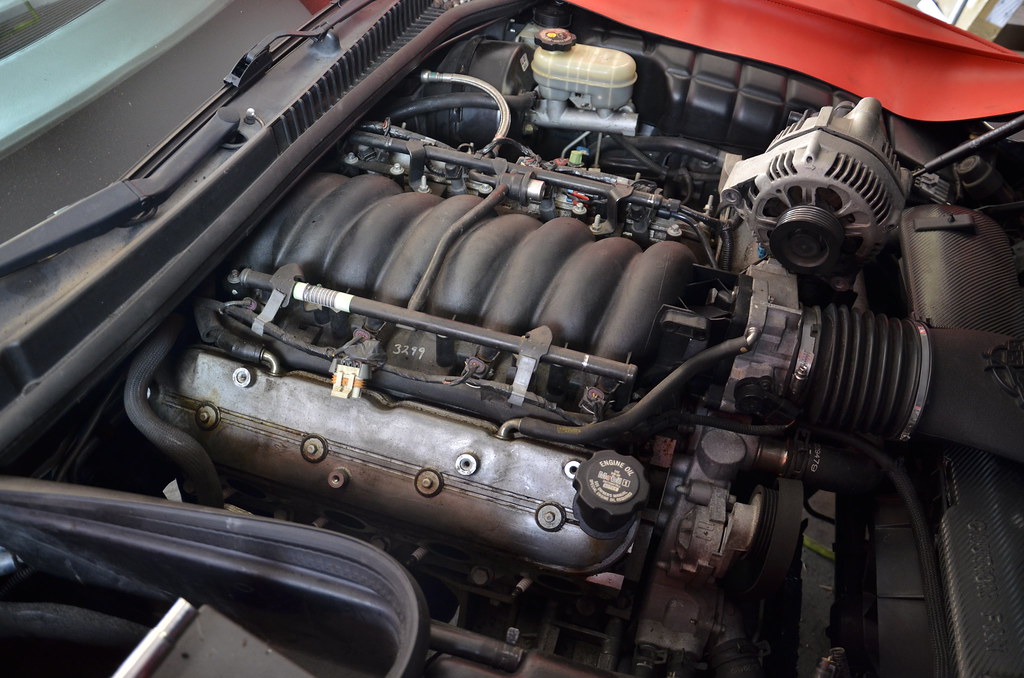
shop vac'd and cleaned the valve covers, 16 years of grime
 _DSC4742 by Norbert Ogiba, on Flickr
 _DSC4743 by Norbert Ogiba, on Flickr
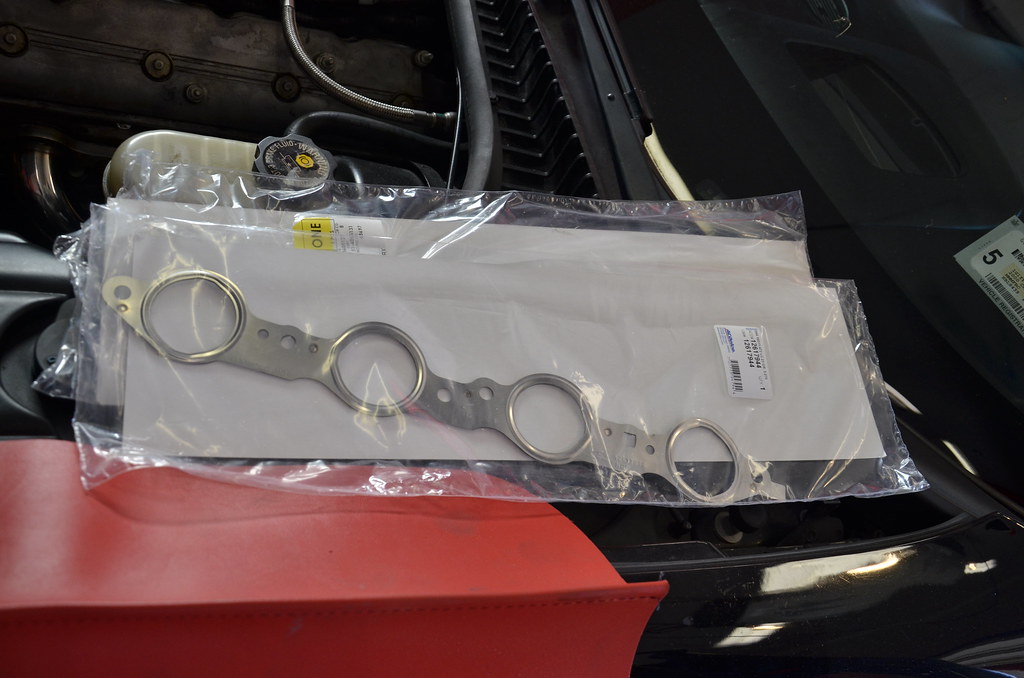
dropped by the dealer around the corner for some new MLS gaskets. I thought the ones that came with the headers would be the crappy imported perforated metal/paper type by they also seemed to be of the MLS construction. Never had a bad experience with the OEM GM gaskets though so they went in.
 _DSC4744 by Norbert Ogiba, on Flickr
at this point I dropped the hammer and got the longtubes in. they fought me at first but I finally wrestled them in. It's a tight fit on both sides for sure. Had to grind a portion of bellhousing on the driver's side and slid those in from the bottom. On the passenger side they went in from the top after removing the starter and dipstick.
 _DSC4745 by Norbert Ogiba, on Flickr
on the passenger side the valve cover had to come off to make some room. good time to inspect the valvetrain, very clean for 105K.
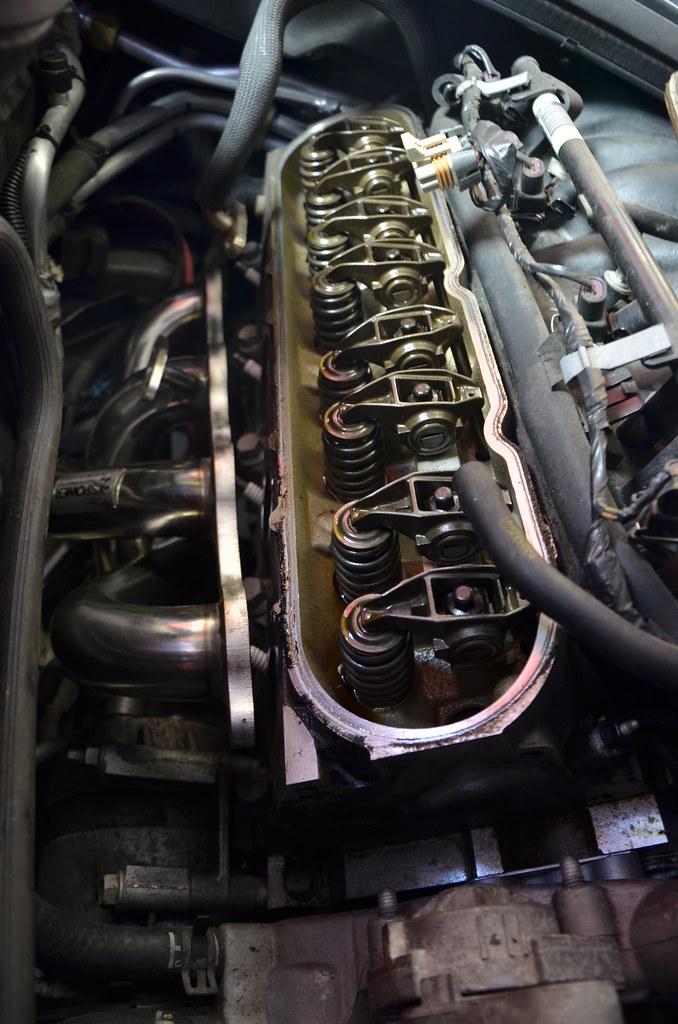 _DSC4746 by Norbert Ogiba, on Flickr
while removing the rear sway bar end links to make room for installing the Z06 Ti's the looked to be trashed, so I picked up metal construction, beefy Moog replacements with nice grease fittings for serviceability.
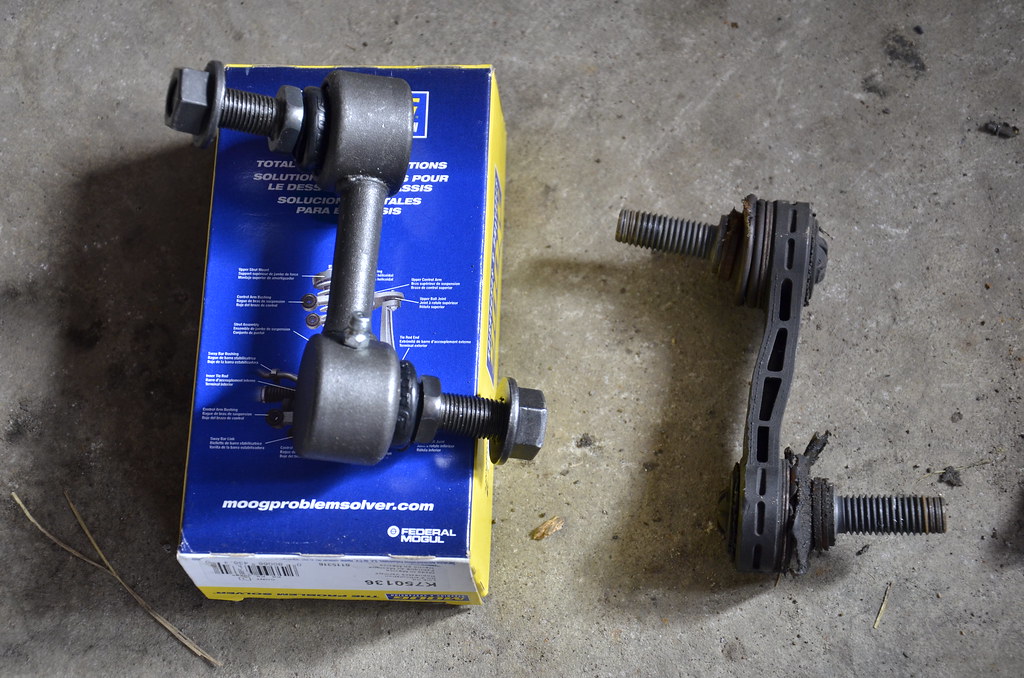 _DSC4747 by Norbert Ogiba, on Flickr
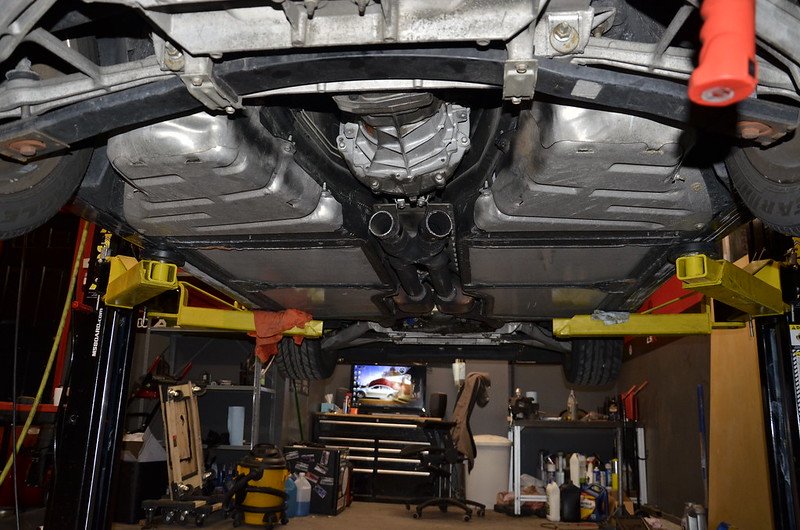
with the headers loosely bolted in I installed the x pipe and intermediate pipes underneath and connected everything. Everything tucked up nicely, no problems. Finally I tightened down the headers, x pipe, intermediates, and axleback. Before wrapping up the install I cleaned everything with IPA so that any fingerprints/grease wouldn't get burned onto the pipes and look bad.
 _DSC4748 by Norbert Ogiba, on Flickr
Coil packs, wires, AIR crap all back in.
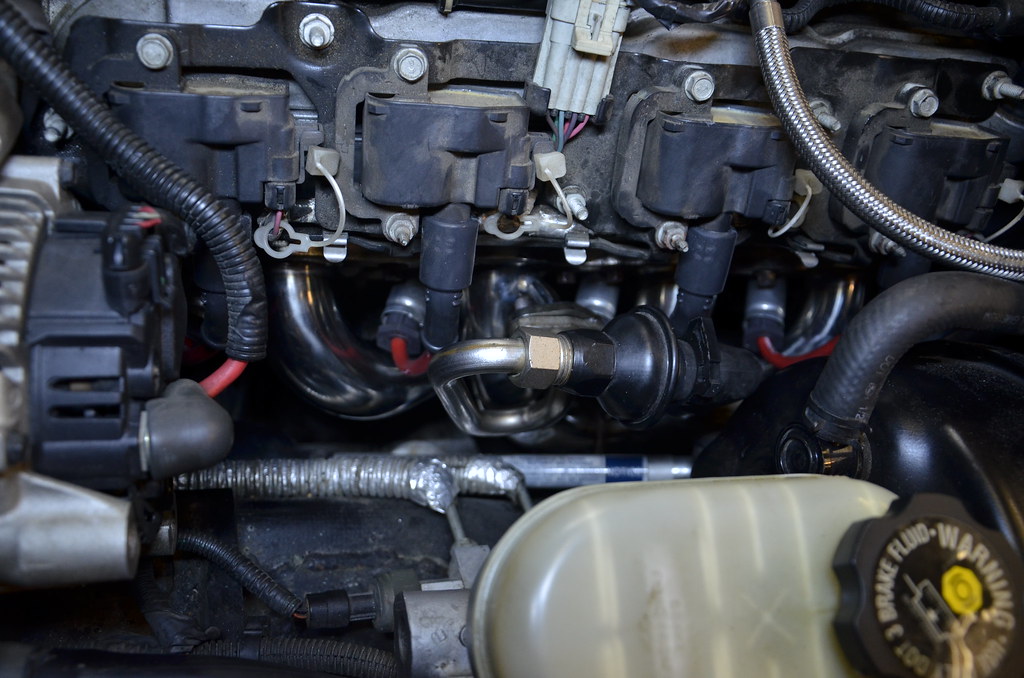 _DSC4749 by Norbert Ogiba, on Flickr
 _DSC4750 by Norbert Ogiba, on Flickr
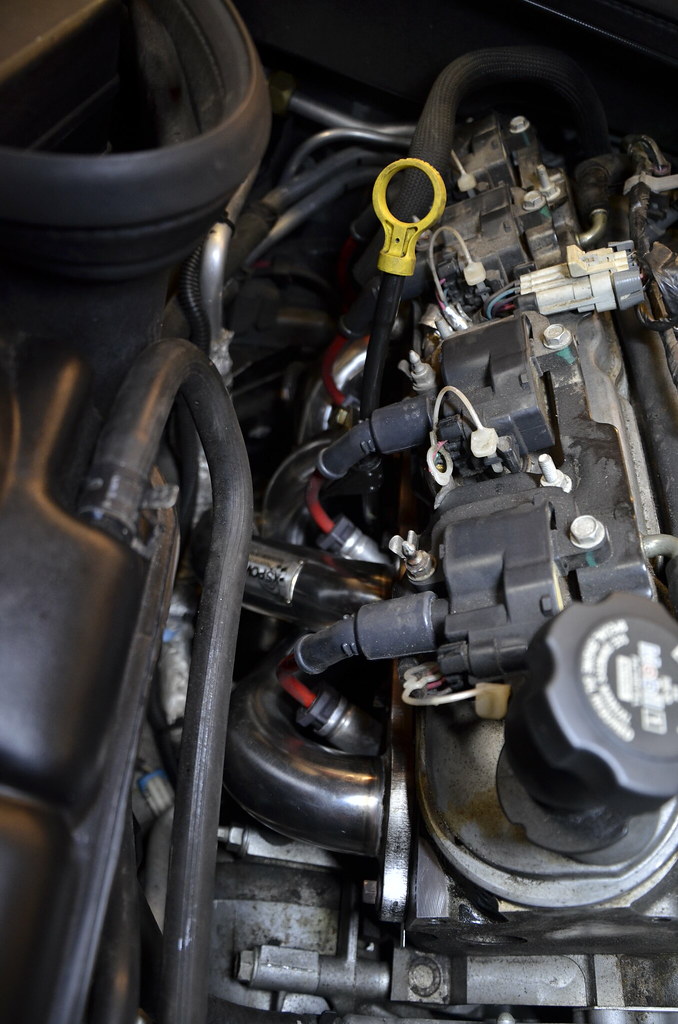
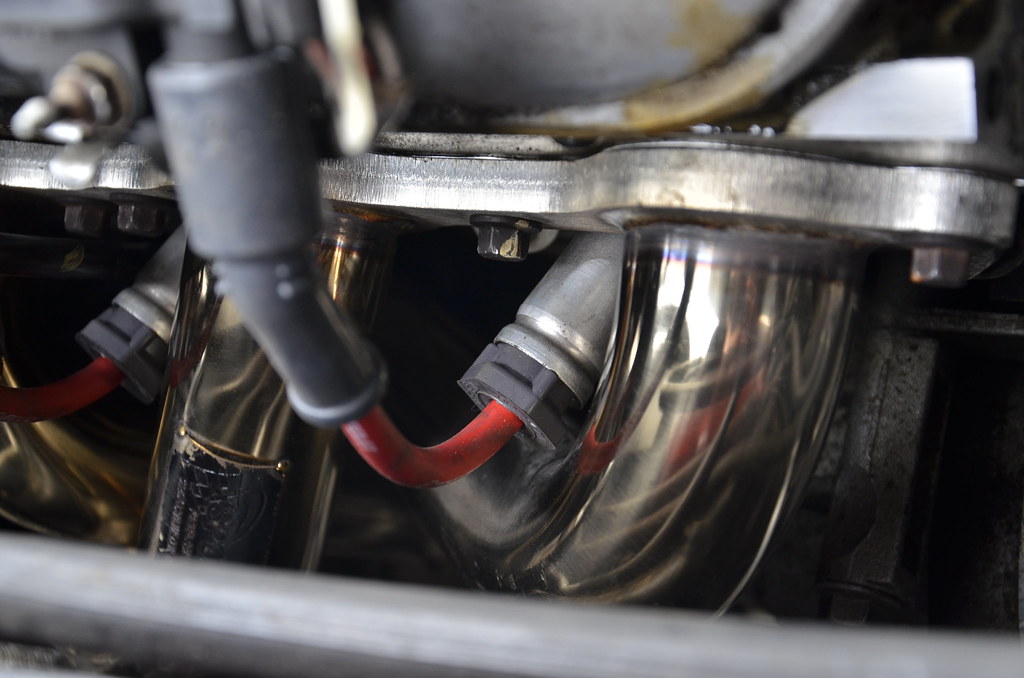
Wire clearance on one of the passenger side primaries was closer than I'd like, but I've put a couple hundred miles on so far with no issue. I'm really glad I kept the factory metal heat shields
 _DSC4751 by Norbert Ogiba, on Flickr
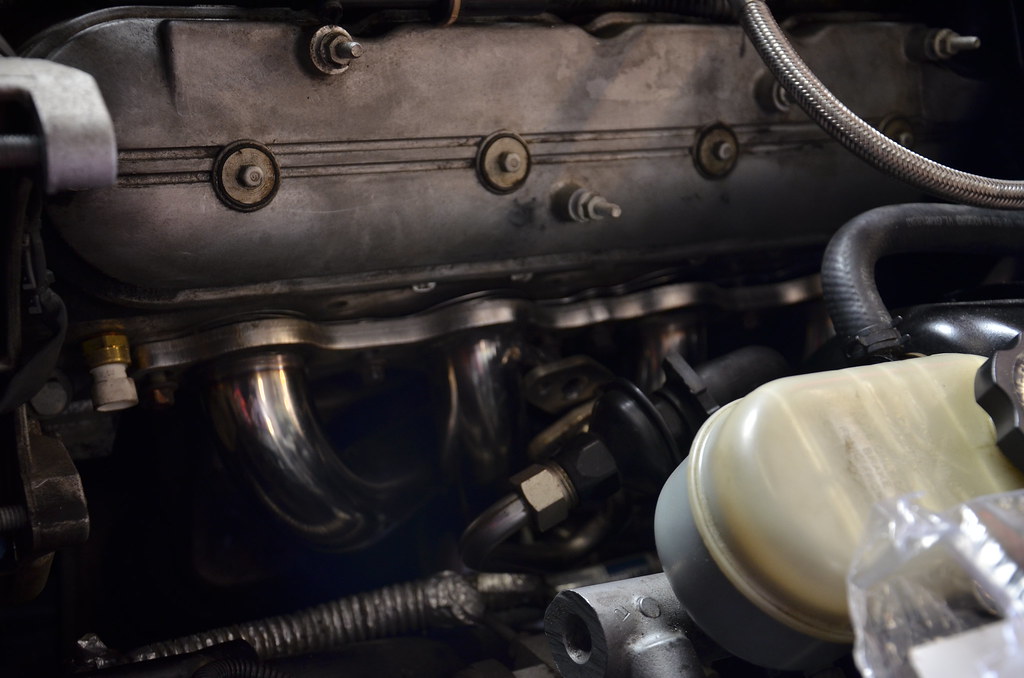
rather than upgrade to the newer 01-04 dipstick I made the older version work by bolting to the AIR fitting. the AIR won't be around for long, will wait until I install the LS6 intake before tuning
 _DSC4752 by Norbert Ogiba, on Flickr
Fired her up, checked for leaks, the band clamps on the intermediate pipes suck, so I'll replace those with proper quality ones
pipes getting nice and golden with heat, paid off to wipe them down
 _DSC4755 by Norbert Ogiba, on Flickr
 _DSC4756 by Norbert Ogiba, on Flickr
Looks stock otherwise, fuel rail covers are off to get scrubbed
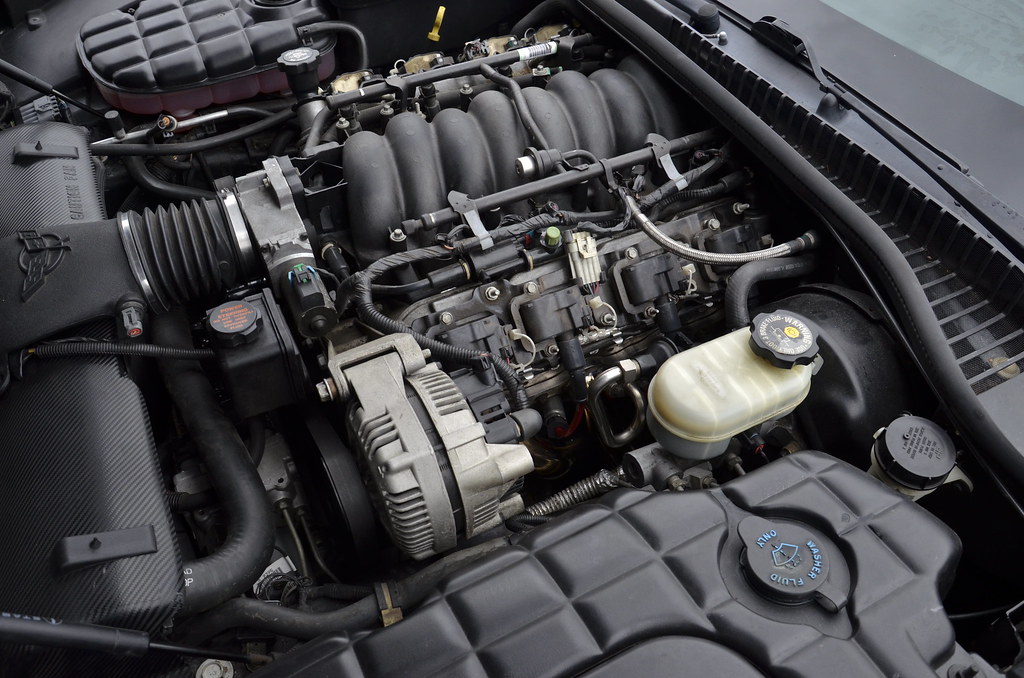 _DSC4757 by Norbert Ogiba, on Flickr
removed the headlight bezels and wrapped with Carbon Fiber Vinyl, ended that night with a treat
 _DSC4759 by Norbert Ogiba, on Flickr
 _DSC4760 by Norbert Ogiba, on Flickr
Finished up by doing the Ranger method for clutch fluid. Put 100 miles on it Sunday in the countryside, clutch went to the floor after a couple gear changes at very high RPM. Hopefully this helps.
Fluid definitely original
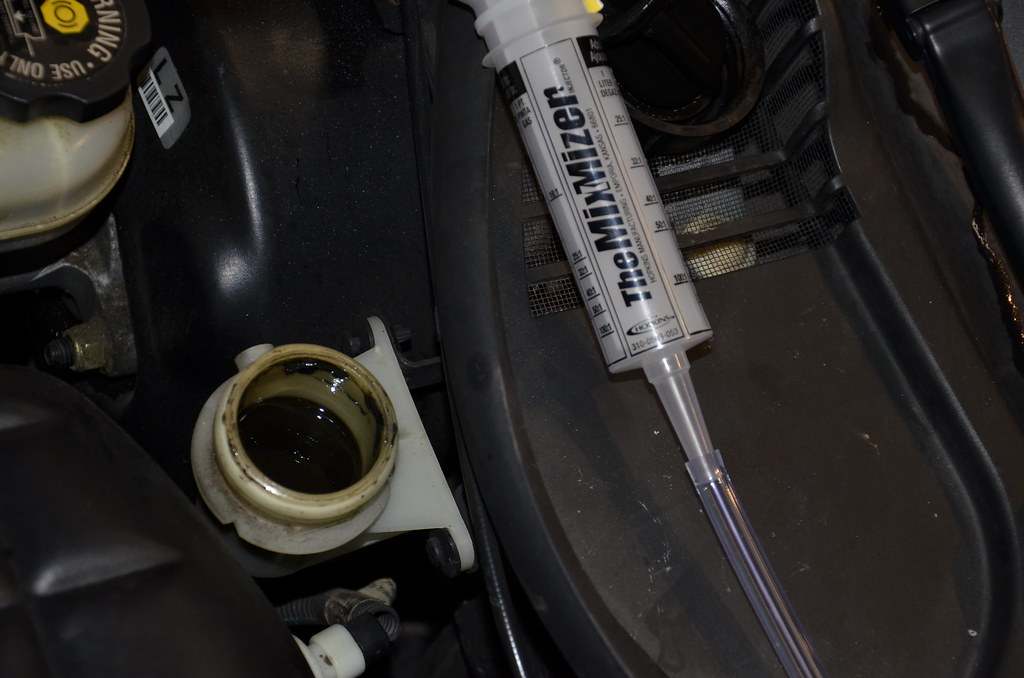 _DSC4763 by Norbert Ogiba, on Flickr
totally opaque
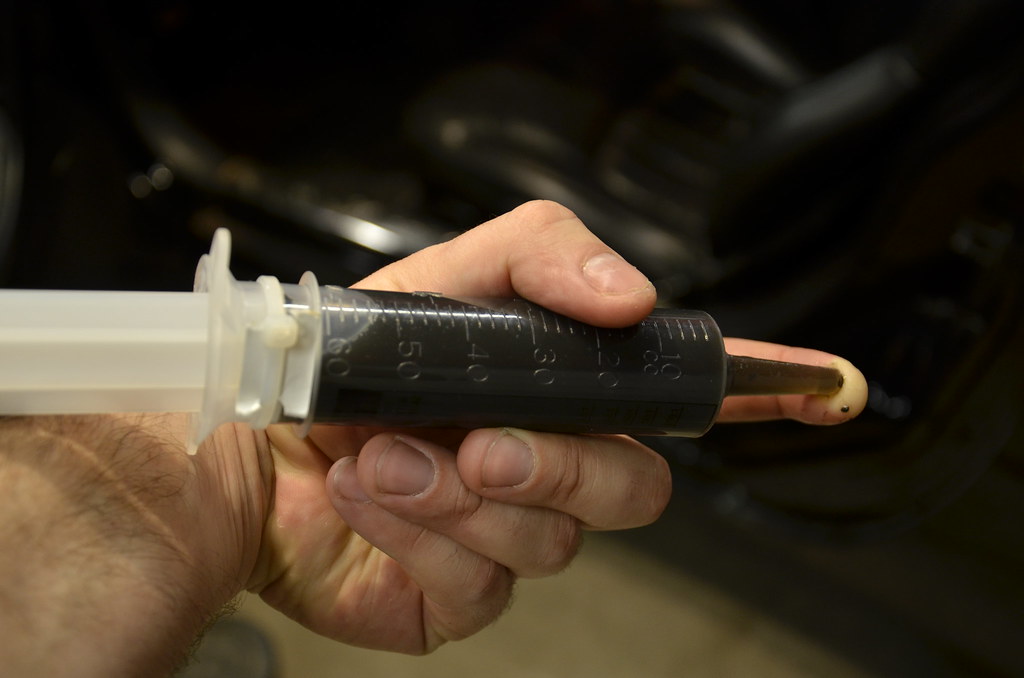 _DSC4764 by Norbert Ogiba, on Flickr
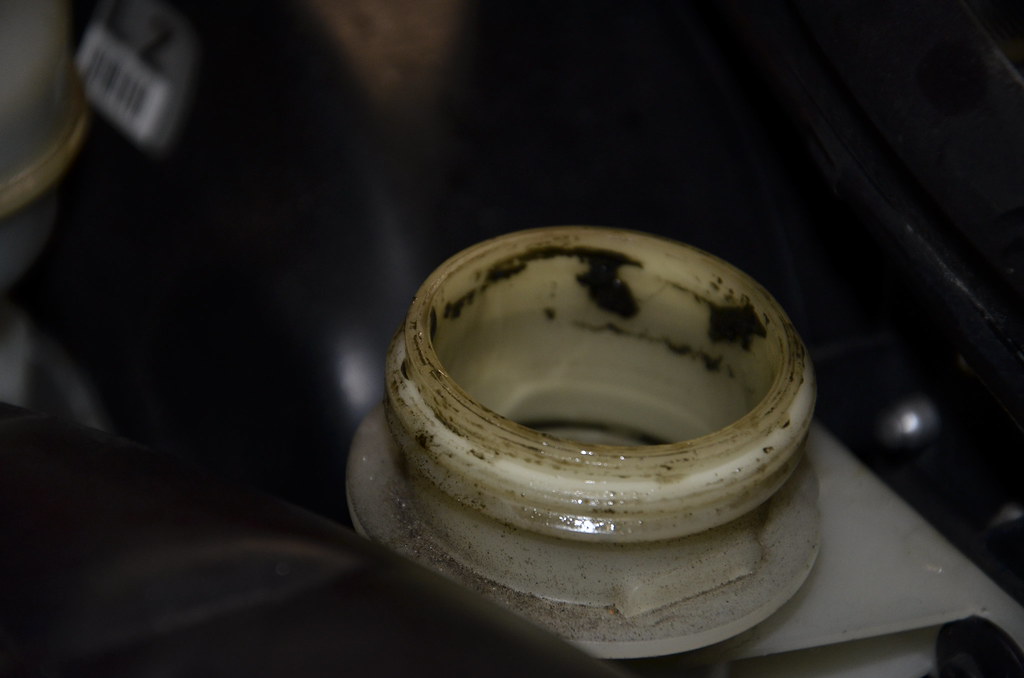 _DSC4767 by Norbert Ogiba, on Flickr
getting there
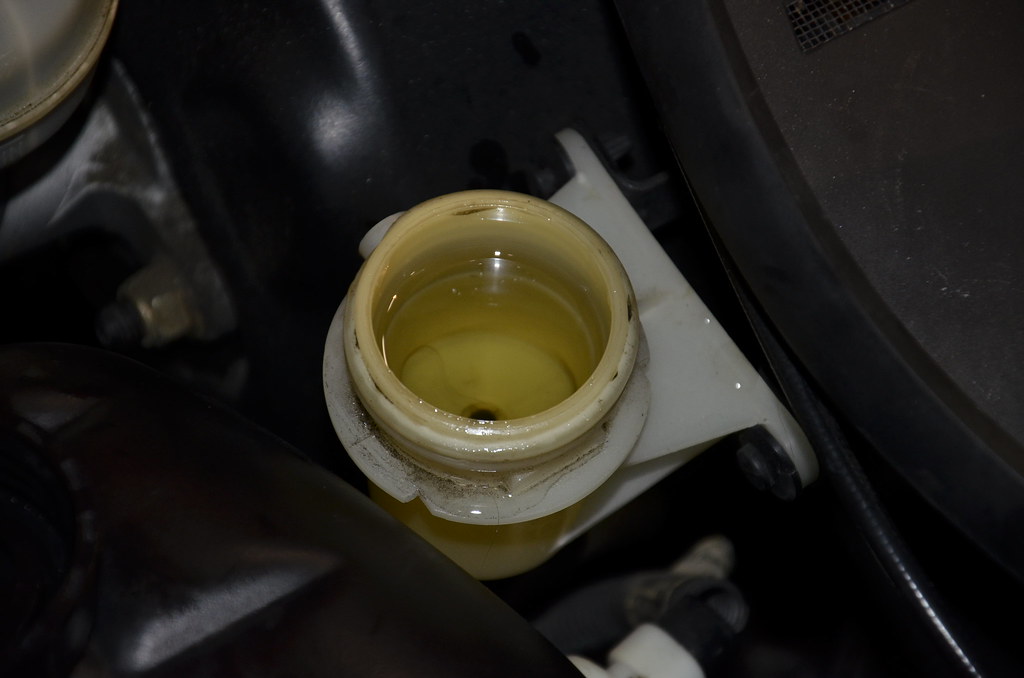 _DSC4769 by Norbert Ogiba, on Flickr
Final product of what was removed
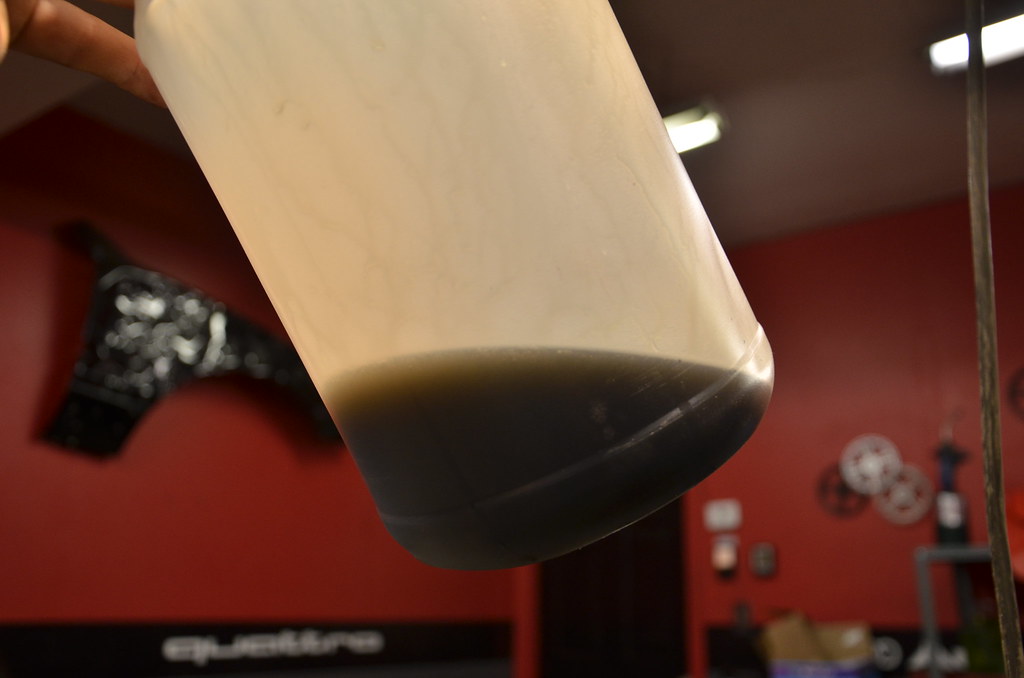 _DSC4770 by Norbert Ogiba, on Flickr
More to come this week, I'm working on installing an AUX connection for my phone with Bluetooth capability
got the old stuff out, came out pretty easy
_DSC4741 by Norbert Ogiba, on Flickrshop vac'd and cleaned the valve covers, 16 years of grime
_DSC4742 by Norbert Ogiba, on Flickr_DSC4743 by Norbert Ogiba, on Flickrdropped by the dealer around the corner for some new MLS gaskets. I thought the ones that came with the headers would be the crappy imported perforated metal/paper type by they also seemed to be of the MLS construction. Never had a bad experience with the OEM GM gaskets though so they went in.
_DSC4744 by Norbert Ogiba, on Flickrat this point I dropped the hammer and got the longtubes in. they fought me at first but I finally wrestled them in. It's a tight fit on both sides for sure. Had to grind a portion of bellhousing on the driver's side and slid those in from the bottom. On the passenger side they went in from the top after removing the starter and dipstick.
_DSC4745 by Norbert Ogiba, on Flickron the passenger side the valve cover had to come off to make some room. good time to inspect the valvetrain, very clean for 105K.
_DSC4746 by Norbert Ogiba, on Flickrwhile removing the rear sway bar end links to make room for installing the Z06 Ti's the looked to be trashed, so I picked up metal construction, beefy Moog replacements with nice grease fittings for serviceability.
_DSC4747 by Norbert Ogiba, on Flickrwith the headers loosely bolted in I installed the x pipe and intermediate pipes underneath and connected everything. Everything tucked up nicely, no problems. Finally I tightened down the headers, x pipe, intermediates, and axleback. Before wrapping up the install I cleaned everything with IPA so that any fingerprints/grease wouldn't get burned onto the pipes and look bad.
_DSC4748 by Norbert Ogiba, on FlickrCoil packs, wires, AIR crap all back in.
_DSC4749 by Norbert Ogiba, on Flickr_DSC4750 by Norbert Ogiba, on FlickrWire clearance on one of the passenger side primaries was closer than I'd like, but I've put a couple hundred miles on so far with no issue. I'm really glad I kept the factory metal heat shields
_DSC4751 by Norbert Ogiba, on Flickrrather than upgrade to the newer 01-04 dipstick I made the older version work by bolting to the AIR fitting. the AIR won't be around for long, will wait until I install the LS6 intake before tuning
_DSC4752 by Norbert Ogiba, on FlickrFired her up, checked for leaks, the band clamps on the intermediate pipes suck, so I'll replace those with proper quality ones
pipes getting nice and golden with heat, paid off to wipe them down
_DSC4755 by Norbert Ogiba, on Flickr_DSC4756 by Norbert Ogiba, on FlickrLooks stock otherwise, fuel rail covers are off to get scrubbed
_DSC4757 by Norbert Ogiba, on Flickrremoved the headlight bezels and wrapped with Carbon Fiber Vinyl, ended that night with a treat
_DSC4759 by Norbert Ogiba, on Flickr_DSC4760 by Norbert Ogiba, on FlickrFinished up by doing the Ranger method for clutch fluid. Put 100 miles on it Sunday in the countryside, clutch went to the floor after a couple gear changes at very high RPM. Hopefully this helps.
Fluid definitely original
_DSC4763 by Norbert Ogiba, on Flickrtotally opaque
_DSC4764 by Norbert Ogiba, on Flickr_DSC4767 by Norbert Ogiba, on Flickrgetting there
_DSC4769 by Norbert Ogiba, on FlickrFinal product of what was removed
_DSC4770 by Norbert Ogiba, on FlickrMore to come this week, I'm working on installing an AUX connection for my phone with Bluetooth capability
Last edited by LQ4-E39; 02-23-2016 at 08:01 PM.
02-26-2016, 08:19 AM
#18
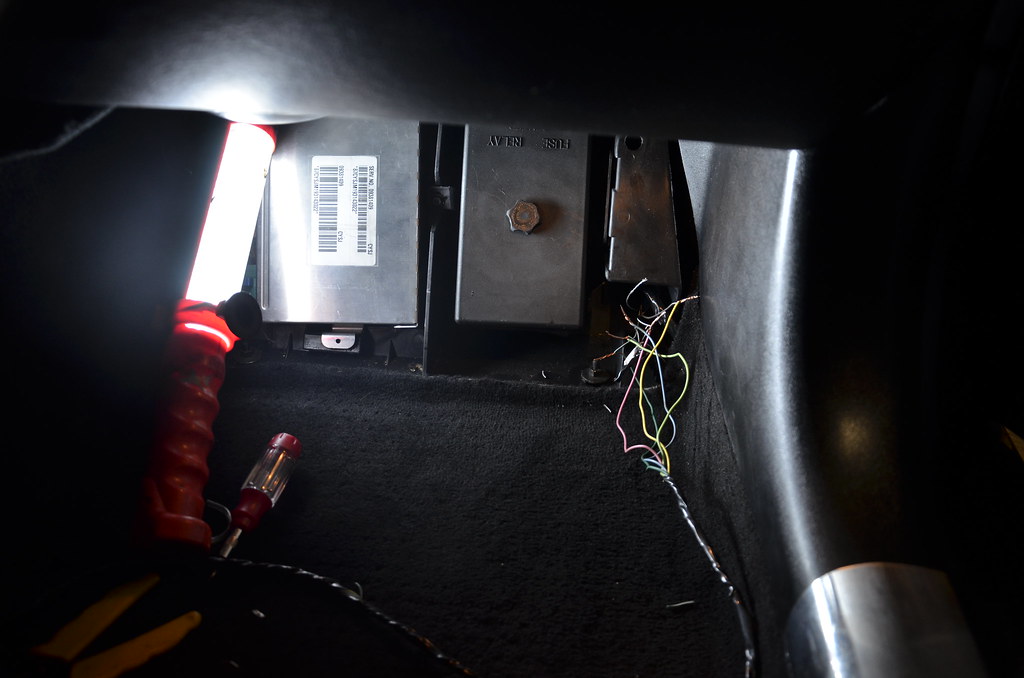
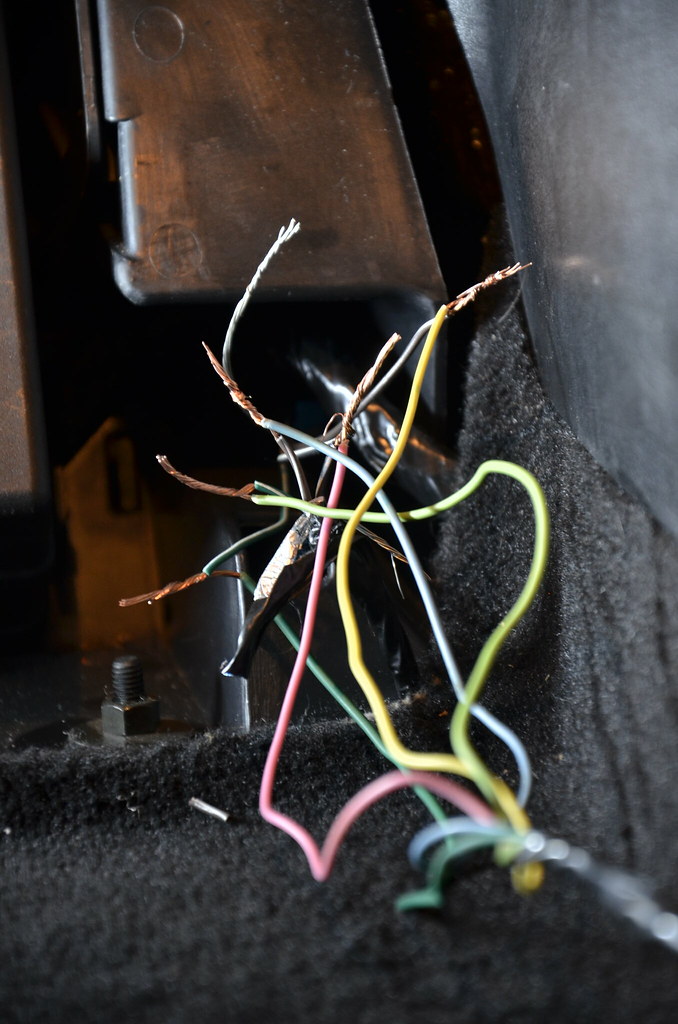
Time for some tunes
So i pulled the passenger foot kick panel and cut the CD changer connector, and after thinking about how I wanted to route the radio shack connector, I sat down at the kitchen table and soldered wires to the 5 pins using bits of my old GM truck harness from my swap. small scale soldering is not my strong point but I got it done.
I made temporary connections to everything (left the bare shield wires disconnected from anything), stuck a CD in the changer, crossed my fingers, reconnected the battery, and let her rip
by https://www.flickr.com/photos/nogiba/, on Flickr
SUCCESS! Using a 3.5mm to 3.5mm I was able to get my phone to play music and it sounded great. Figured I'd take it one step further, and plugged in my Miccus Mini Bluetooth adapter, which is a tiny portable unit that takes a bluetooth audio signal (like from your smartphone) and converts it to audio output through a 3.5mm jack. After making sure it was paired properly, that worked perfectly as well! So now I have wireless bluetooth AUX audio through my smartphone, which will be great this summer on those long road trips. Sure beats those expensive AUX converter units
Now I need to clean up this mess, solder and heatshrink everything, and run the aux port into the center cubby where the bluetooth module will be housed.
by https://www.flickr.com/photos/nogiba/, on Flickr
So i pulled the passenger foot kick panel and cut the CD changer connector, and after thinking about how I wanted to route the radio shack connector, I sat down at the kitchen table and soldered wires to the 5 pins using bits of my old GM truck harness from my swap. small scale soldering is not my strong point but I got it done.
I made temporary connections to everything (left the bare shield wires disconnected from anything), stuck a CD in the changer, crossed my fingers, reconnected the battery, and let her rip
SUCCESS! Using a 3.5mm to 3.5mm I was able to get my phone to play music and it sounded great. Figured I'd take it one step further, and plugged in my Miccus Mini Bluetooth adapter, which is a tiny portable unit that takes a bluetooth audio signal (like from your smartphone) and converts it to audio output through a 3.5mm jack. After making sure it was paired properly, that worked perfectly as well! So now I have wireless bluetooth AUX audio through my smartphone, which will be great this summer on those long road trips. Sure beats those expensive AUX converter units
Now I need to clean up this mess, solder and heatshrink everything, and run the aux port into the center cubby where the bluetooth module will be housed.
 02-28-2016, 05:08 PM
#19
Few buddies sent me this, got a chuckle out of it
 photo 1 by Norbert Ogiba, on Flickr
I found this guy on ebay, used to love building these as a kid, kinda cool that now I own a car that I can have a model of
 photo 3 by Norbert Ogiba, on Flickr
So I was on the fence about the body side moldings but decided to pull them off and I'm really glad I did. It cleaned up the body lines a ton. Spent a couple hours Saturday doing it
Off to Wallyworld to get supplies. I am driving this thing every chance I get!
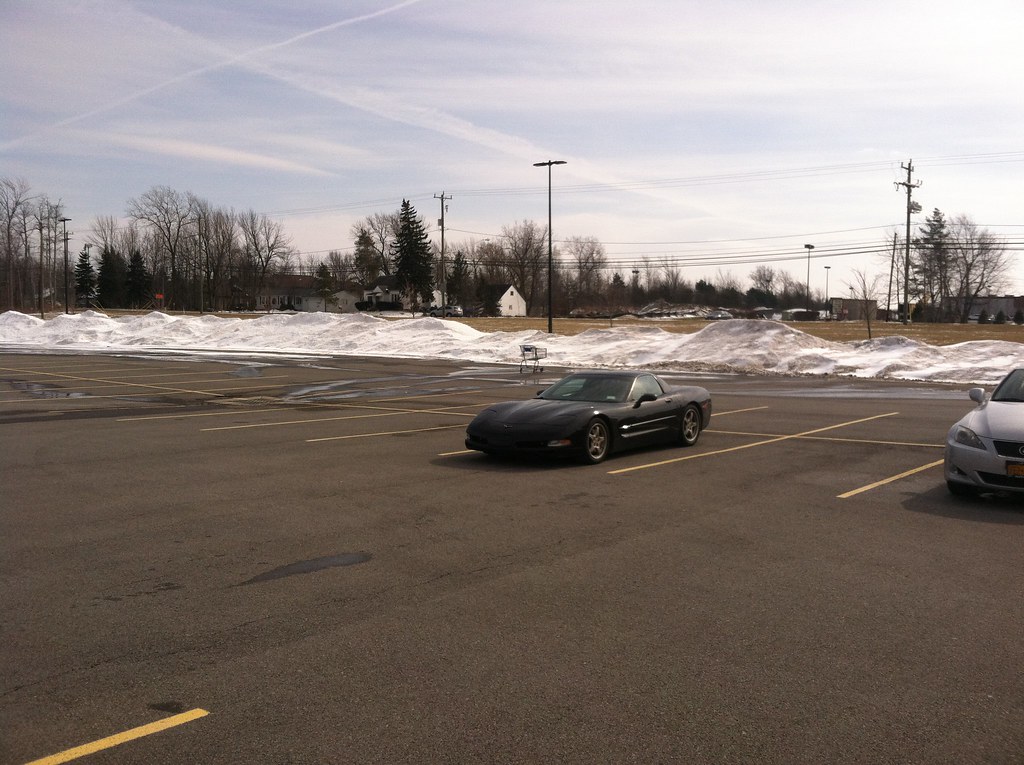 photo 2 by Norbert Ogiba, on Flickr
 _DSC4774 by Norbert Ogiba, on Flickr
Rinse her down with hot water to soften the tape a bit and clean any dirt and grime off
 _DSC4776 by Norbert Ogiba, on Flickr
This piece came off with very minimal effort, surprisingly
 _DSC4777 by Norbert Ogiba, on Flickr
Glue came off easily too. Not the case for the rest of the doors
 _DSC4778 by Norbert Ogiba, on Flickr
Time to start flossin' baby
 _DSC4780 by Norbert Ogiba, on Flickr
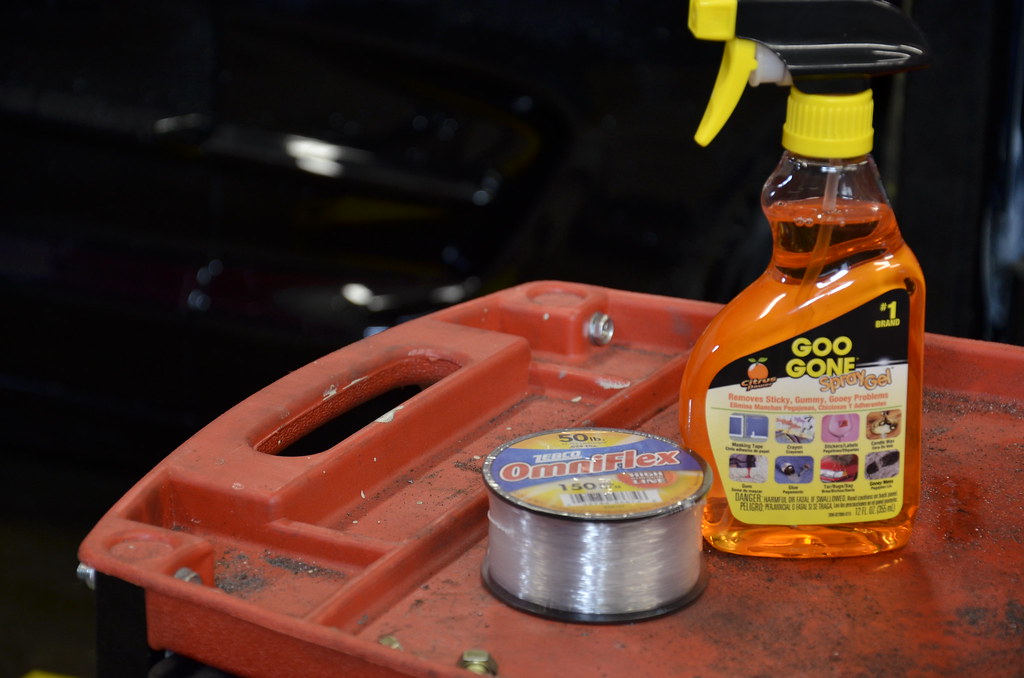
So the glue on the door is miserable soft foamy stuff, I spent about half an hour peeling chunks off with my fingernails before I had enough. off to the store to buy this bad boy which was the best thing since sliced bread and craft beer.
 _DSC4782 by Norbert Ogiba, on Flickr
Very effective but leaves a pretty nasty mess of wax, foam, and dust behind. Worth every single penny
 _DSC4783 by Norbert Ogiba, on Flickr
 _DSC4784 by Norbert Ogiba, on Flickr
 _DSC4785 by Norbert Ogiba, on Flickr
 _DSC4786 by Norbert Ogiba, on Flickr
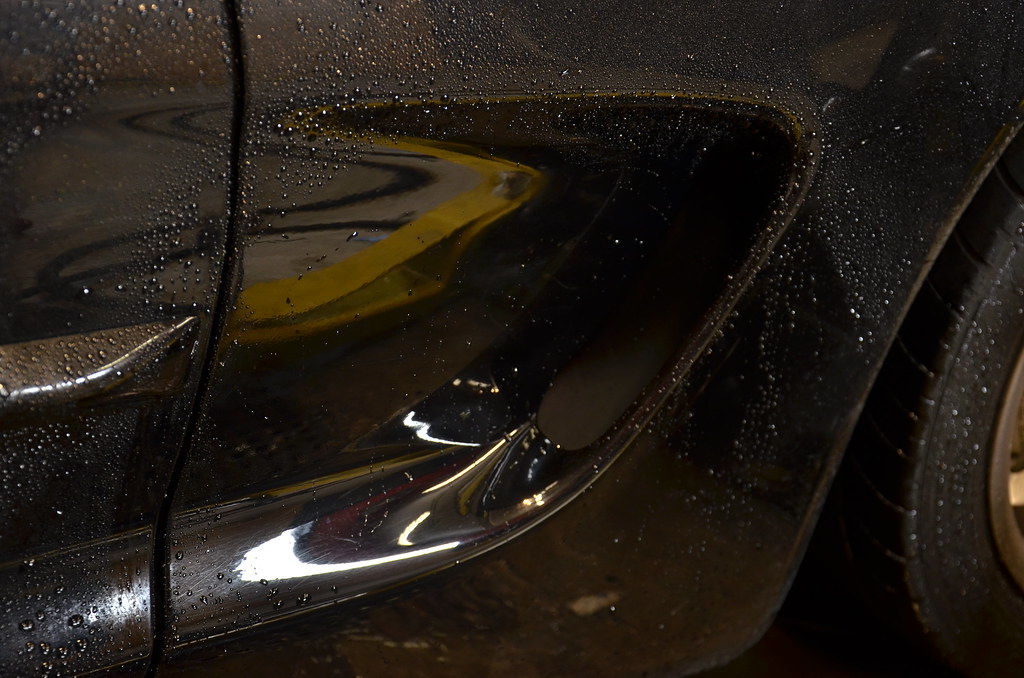
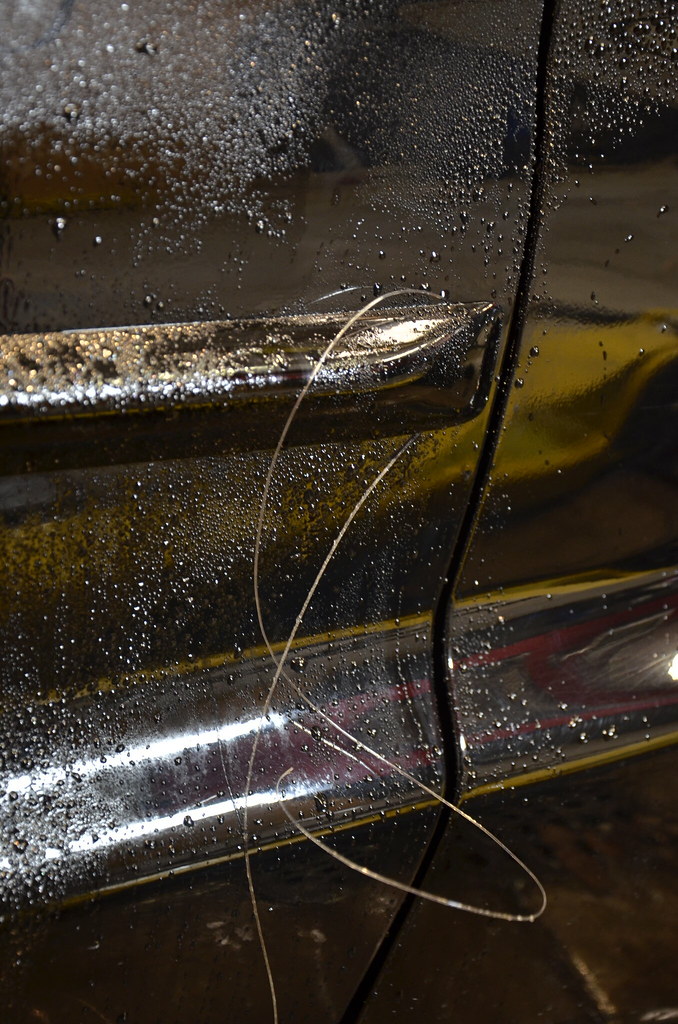
Quick wipe down with a microfiber looked great but there was still an imprint of adhesive around the perimeter
 _DSC4787 by Norbert Ogiba, on Flickr
I read about horror stories where guys with brightly colored cars down south (read: sun-baked) had a big shade difference when removing theirs. Mine was a NE car stored in a a garage so it was barely visible, especially on a black car. Anyhow out came the DA
_DSC4787 by Norbert Ogiba, on Flickr
 _DSC4788 by Norbert Ogiba, on Flickr
 _DSC4789 by Norbert Ogiba, on Flickr
Pulled it out for a quick wash, looks a ton better
 _DSC4790 by Norbert Ogiba, on Flickr
 _DSC4791 by Norbert Ogiba, on Flickr
 _DSC4792 by Norbert Ogiba, on Flickr
So I finished out the evening by visiting a friend in Rochester an hour away, chasing my buddy in his M5 the whole way. We did a couple of rips and the car was a blast but the clutch hydraulics will definitely need attention. I had the typical C5 problem of a soft clutch pedal after a couple hard shifts. Already did the Ranger method to clean the clutch fluid and honestly it didn't do squat, so I'll have to do some homework to see what's next.
 photo 4 by Norbert Ogiba, on Flickr
Depending on the weather this week I might start on the cutouts, stay tuned
photo 1 by Norbert Ogiba, on FlickrI found this guy on ebay, used to love building these as a kid, kinda cool that now I own a car that I can have a model of
photo 3 by Norbert Ogiba, on FlickrSo I was on the fence about the body side moldings but decided to pull them off and I'm really glad I did. It cleaned up the body lines a ton. Spent a couple hours Saturday doing it
Off to Wallyworld to get supplies. I am driving this thing every chance I get!
photo 2 by Norbert Ogiba, on Flickr_DSC4774 by Norbert Ogiba, on FlickrRinse her down with hot water to soften the tape a bit and clean any dirt and grime off
_DSC4776 by Norbert Ogiba, on FlickrThis piece came off with very minimal effort, surprisingly
_DSC4777 by Norbert Ogiba, on FlickrGlue came off easily too. Not the case for the rest of the doors
_DSC4778 by Norbert Ogiba, on FlickrTime to start flossin' baby
_DSC4780 by Norbert Ogiba, on FlickrSo the glue on the door is miserable soft foamy stuff, I spent about half an hour peeling chunks off with my fingernails before I had enough. off to the store to buy this bad boy which was the best thing since sliced bread and craft beer.
_DSC4782 by Norbert Ogiba, on FlickrVery effective but leaves a pretty nasty mess of wax, foam, and dust behind. Worth every single penny
_DSC4783 by Norbert Ogiba, on Flickr_DSC4784 by Norbert Ogiba, on Flickr_DSC4785 by Norbert Ogiba, on Flickr_DSC4786 by Norbert Ogiba, on FlickrQuick wipe down with a microfiber looked great but there was still an imprint of adhesive around the perimeter
_DSC4787 by Norbert Ogiba, on FlickrI read about horror stories where guys with brightly colored cars down south (read: sun-baked) had a big shade difference when removing theirs. Mine was a NE car stored in a a garage so it was barely visible, especially on a black car. Anyhow out came the DA
_DSC4787 by Norbert Ogiba, on Flickr_DSC4788 by Norbert Ogiba, on Flickr_DSC4789 by Norbert Ogiba, on FlickrPulled it out for a quick wash, looks a ton better
_DSC4790 by Norbert Ogiba, on Flickr_DSC4791 by Norbert Ogiba, on Flickr_DSC4792 by Norbert Ogiba, on FlickrSo I finished out the evening by visiting a friend in Rochester an hour away, chasing my buddy in his M5 the whole way. We did a couple of rips and the car was a blast but the clutch hydraulics will definitely need attention. I had the typical C5 problem of a soft clutch pedal after a couple hard shifts. Already did the Ranger method to clean the clutch fluid and honestly it didn't do squat, so I'll have to do some homework to see what's next.
photo 4 by Norbert Ogiba, on FlickrDepending on the weather this week I might start on the cutouts, stay tuned
03-07-2016, 07:28 AM
#20
Did some tuning over the weekend with HPTuners, emissions codes deleted and AIR shut off. I also made a bunch of small changes like lowering the temps at which fans come on, shutting off AIR system, turning off CAGS (skip shift), and repurposing the 1-4 shift light to act as an actual shift light. I set it at 3000rpm for testing and it worked like a charm, so I'll have to change it to 6000 for the real deal. I also got in my LCM5 module to proactively fix the column lock but didn't get a chance to install it. While I had the laptop hooked up I also set the Column Lock Fail parameter to shut off fuel above 284mph in case of CL fail - so good to go there. I'll toss in the LCM5 this week and that should take care of that potential problem permanently. Finally I shut off AIR and rear O2 codes, flashed the tune, and took a ride to get it inspected. Unfortunately flashing the PCM erases it (along with readiness monitors for emissions), so I wasn't able to get a sticker today, but I put a bunch of miles on it Sunday with the wife, so should be good to go in a day or two.
Had a few minutes before dinner Sunday and the weather was nice so I removed the Clutch Over Center spring (partial assist and return) to see if it helped with the sticking pedal - it seemed to have helped a bit but haven't beat on it hard enough to tell for sure. I am also working on a DIY solution for an actual return tension spring but need to think about how I want to attach it...
Had a few minutes before dinner Sunday and the weather was nice so I removed the Clutch Over Center spring (partial assist and return) to see if it helped with the sticking pedal - it seemed to have helped a bit but haven't beat on it hard enough to tell for sure. I am also working on a DIY solution for an actual return tension spring but need to think about how I want to attach it...

