Drag Racing Tech
Sponsored by:
Sponsored by:

98 Camaro Build

Thread Tools
 
Search this Thread
 
Old 10-08-2015, 06:23 PM
  #21  
TECH Fanatic
Thread Starter
iTrader: (9)
 
brandonppr's Avatar
 
Join Date: Nov 2004
Location: Tennessee
Posts: 1,687
Likes: 0
Received 2 Likes on 2 Posts

Default


rest of fenderwell spot welds cut out


Brace under dash


New k member came in.


Upper A arm mounting plate each so over 10lbs together


Trying to get an idea of how the bars will come through.
Old 10-08-2015, 06:39 PM
  #22  
TECH Fanatic
Thread Starter
iTrader: (9)
 
brandonppr's Avatar
 
Join Date: Nov 2004
Location: Tennessee
Posts: 1,687
Likes: 0
Received 2 Likes on 2 Posts

Default

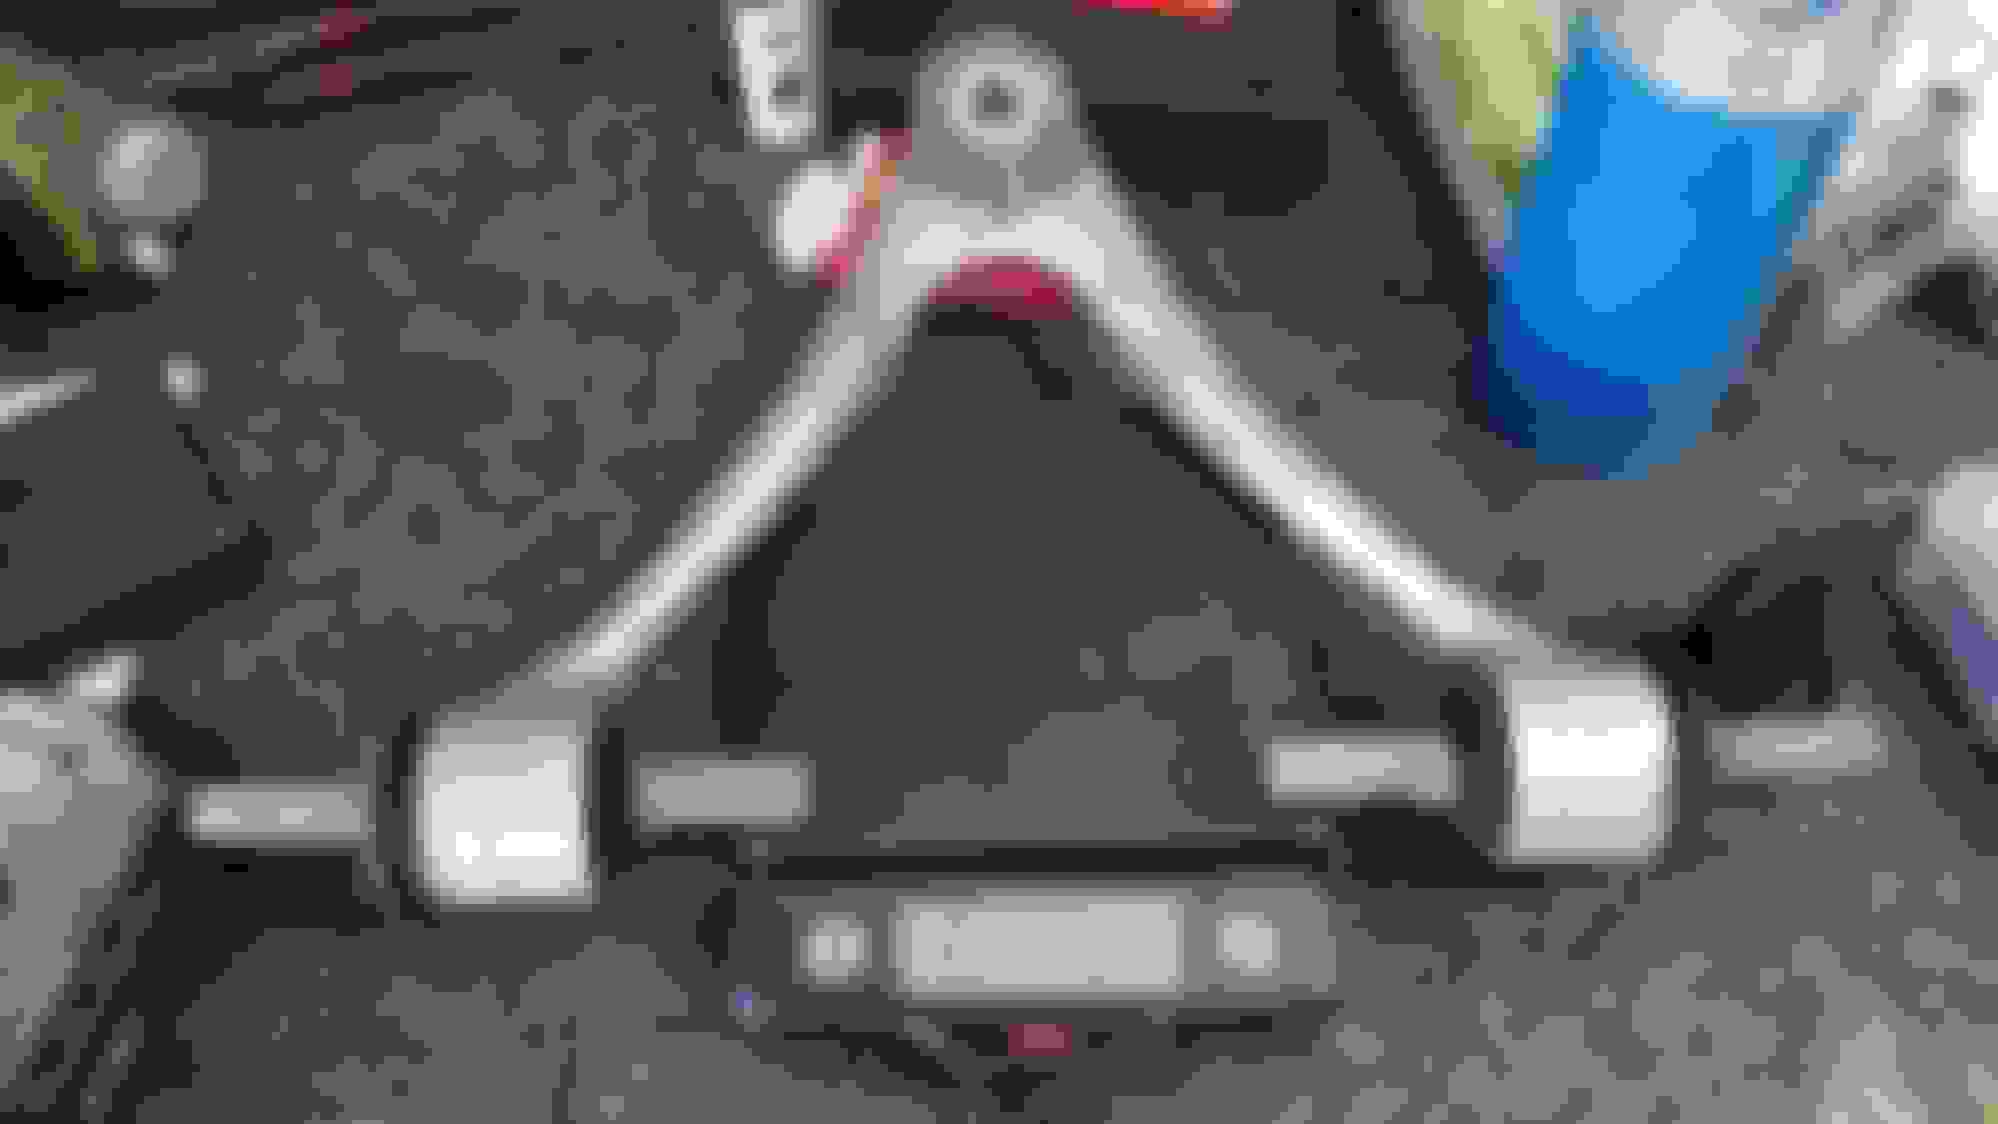
Ok I guess I am deviating from my original plan. I have decided to move the upper a arm down and convert to a C5 spindle and upper aarm. I took the spindle and a arm off my C6 Z51 to test fit and it seems like its going to work and I will loose some weight. I would love to convert to struts, but I don't want to spend all the money on all that goes along with it. I got the C5 parts off ebay for $300 and if I ever convert to a strut, it won't take much and I will be able to sell the C5 parts to recover my money. Also I will have parts from my car left to sell from this so it should come out pretty good.
I will get the weights for the C5 parts when they get here, but it should be pretty close as they are almost the same. I'm hoping the brake bracket from my LS1 brakes will work so I can use my same rotor or not have to make brackets for it.


C6 Aarms are 1lb each lighter than stock uppers


C6 one is 7.5lbs each lighter
Old 10-09-2015, 12:56 AM
  #23  
TECH Fanatic
Thread Starter
iTrader: (9)
 
brandonppr's Avatar
 
Join Date: Nov 2004
Location: Tennessee
Posts: 1,687
Likes: 0
Received 2 Likes on 2 Posts

Default


I think when the a arm gets mounted on top of the frame. It will be about right.


This is the angle on the stock upper a arm.


Weight of upper mounting plate for a arm. Not reusing this.


This is the shock angle with the lower a arm level.


This is another angle that the upper control arm is mounted at. So it slants out.


Found this rubber under the door to get rid of as well as the rubber on the cowl. Lost over a pound.


Old 10-09-2015, 01:04 AM
  #24  
TECH Fanatic
Thread Starter
iTrader: (9)
 
brandonppr's Avatar
 
Join Date: Nov 2004
Location: Tennessee
Posts: 1,687
Likes: 0
Received 2 Likes on 2 Posts

Default

I decided to just order some 2x3 tube and redo the frame rails too.


This weighed 30lbs


This would be a little heavier if I had not used a hole saw.


Old 10-09-2015, 11:23 PM
  #25  
TECH Fanatic
Thread Starter
iTrader: (9)
 
brandonppr's Avatar
 
Join Date: Nov 2004
Location: Tennessee
Posts: 1,687
Likes: 0
Received 2 Likes on 2 Posts

Default

Some parts came in today and I got the front end mocked up to see what it looks like.


Old 05-01-2016, 04:21 PM
  #26  
TECH Fanatic
iTrader: (1)
 
sbcgenII's Avatar
 
Join Date: Dec 2004
Location: Fort hood
Posts: 1,245
Likes: 0
Received 1 Like on 1 Post

Default

Updates???
Old 07-20-2016, 11:35 PM
  #27  
TECH Fanatic
Thread Starter
iTrader: (9)
 
brandonppr's Avatar
 
Join Date: Nov 2004
Location: Tennessee
Posts: 1,687
Likes: 0
Received 2 Likes on 2 Posts

Default

Well I ended up getting super busy and haven't had much time to dedicate to the car. I ended up taking it to the local chassis shop and just going with stock suspension. I did eliminate the upper plate, but still retained the upper a arm. I am very happy with the way it turned out. I should have it back by the end of the month.


Old 07-21-2016, 07:46 AM
  #28  
11 Second Club
iTrader: (4)
 
waltsfastz's Avatar
 
Join Date: Jan 2005
Location: Rowletts,KY
Posts: 1,004
Likes: 0
Received 0 Likes on 0 Posts

Default

Looks good
Old 07-21-2016, 09:00 AM
  #29  
"The Drag Racing Director"
iTrader: (10)
 
Coach 02 A3 Z/28's Avatar
 
Join Date: Jan 2002
Location: Tomball, TX.
Posts: 7,538
Received 4 Likes on 4 Posts

Default

Very cool. Looking forward to track times.
Old 07-27-2016, 02:37 PM
  #30  
Teching In
 
Budget Deficit's Avatar
 
Join Date: Nov 2015
Posts: 19
Likes: 0
Received 0 Likes on 0 Posts
Default

Nice build and looking forward to more progress.
Old 07-28-2016, 02:15 PM
  #31  
TECH Fanatic
Thread Starter
iTrader: (9)
 
brandonppr's Avatar
 
Join Date: Nov 2004
Location: Tennessee
Posts: 1,687
Likes: 0
Received 2 Likes on 2 Posts

Default

Thanks!
Old 07-28-2016, 08:01 PM
  #32  
TECH Fanatic
iTrader: (19)
 
Majestic9C1's Avatar
 
Join Date: Jun 2013
Location: Cincinnati, OH
Posts: 1,655
Received 22 Likes on 22 Posts

Default

dumb question but would you ever sell or trade those taillights?
Old 11-22-2016, 02:32 PM
  #33  
TECH Fanatic
Thread Starter
iTrader: (9)
 
brandonppr's Avatar
 
Join Date: Nov 2004
Location: Tennessee
Posts: 1,687
Likes: 0
Received 2 Likes on 2 Posts

Default

Originally Posted by Majestic9C1
dumb question but would you ever sell or trade those taillights?
Sorry no
Old 11-22-2016, 02:37 PM
  #34  
TECH Fanatic
Thread Starter
iTrader: (9)
 
brandonppr's Avatar
 
Join Date: Nov 2004
Location: Tennessee
Posts: 1,687
Likes: 0
Received 2 Likes on 2 Posts

Default

Finally getting some work done on this thing again. I have my engine in and I am working on wiring it up temporary until I figure out where I want all the wires at. I just need to get it started right now first.

Also I am working on designing my own gauges from scratch. I plan on using a bunch of OLED screens driven by a micro-controller that I am programming. I was able to build a micro-controller on a breadboard and drive the single OLED display. Next plan is to learn how to drive multiple screens with the one chip.


Got the engine in


Working on designing my own gauges from scratch


This is the concept I drew up. It will probably change before its done


Learned how to build a micro-controller on a breadboard to control the OLED
Old 11-23-2016, 07:14 AM
  #35  
TECH Resident
iTrader: (21)
 
sillysspeed's Avatar
 
Join Date: Sep 2009
Location: MD
Posts: 766
Likes: 0
Received 0 Likes on 0 Posts
Default

Very cool!
Old 11-23-2016, 11:24 AM
  #36  
TECH Fanatic
Thread Starter
iTrader: (9)
 
brandonppr's Avatar
 
Join Date: Nov 2004
Location: Tennessee
Posts: 1,687
Likes: 0
Received 2 Likes on 2 Posts

Default

Thanks


Getting started on the gauge build


Old 11-24-2016, 10:13 PM
  #37  
Race your car!
iTrader: (50)
 
JL ws-6's Avatar
 
Join Date: Mar 2004
Posts: 15,420
Likes: 0
Received 18 Likes on 18 Posts

Default

A lot for trouble to go thru for gauges but you'll have something unique when you're done.

Nice wrk on the front end, there's gonna be some serious room up there now. If I thought the stock front suspension rules would t flip out for doing something g like that, I think I would have done it for the room.
Old 11-25-2016, 03:24 AM
  #38  
TECH Fanatic
Thread Starter
iTrader: (9)
 
brandonppr's Avatar
 
Join Date: Nov 2004
Location: Tennessee
Posts: 1,687
Likes: 0
Received 2 Likes on 2 Posts

Default

Originally Posted by JL ws-6
A lot for trouble to go thru for gauges but you'll have something unique when you're done.

Nice wrk on the front end, there's gonna be some serious room up there now. If I thought the stock front suspension rules would t flip out for doing something g like that, I think I would have done it for the room.
Thanks
The following users liked this post:
Ed Burns (02-07-2021)
Old 11-25-2016, 08:21 AM
  #39  
9 Second Club
iTrader: (2)
 
80/TA/LT1's Avatar
 
Join Date: May 2011
Posts: 479
Received 8 Likes on 6 Posts

Default

Wow, I'm really liking what you're doing here! I want to do a once piece removable front on my 93 in the worst way. Is there any way you could post detailed pics of how you connected all of it together? Most importantly the headlight assemblies and how the nose attaches to the car, and the radiator mount? Pretty much all of it I guess hsha, not much info out there on how it's done. Thank you and good luck with your build man
Old 11-25-2016, 10:35 AM
  #40  
Race your car!
iTrader: (50)
 
JL ws-6's Avatar
 
Join Date: Mar 2004
Posts: 15,420
Likes: 0
Received 18 Likes on 18 Posts

Default

Want to really make some people scratch their heads? Cut the trunk floor out and flat plate that and mount the radiator back there. Makes LOTS of room up front ;-). Moves weight back as well. Which for a lower power combo won't hurt it.


Quick Reply: 98 Camaro Build


All times are GMT -5. The time now is 03:16 AM.