KYTP GT-88 Truck Manifold 408ci Build w/Pics
 06-14-2010, 10:34 PM
#1
12 Second Club
Thread Starter
iTrader: (9)
Join Date: Jun 2006
Location: Grand Forks, North Dakota
Posts: 1,051
Likes: 0
Received 0 Likes
on
0 Posts

Old Setup
2000 TransAM with a H/C/I 346, 4L80E, Ford 9" w/ 3.70's.
New Motor
408ci LQ4 Build
-9.3:1 Weisco Forged Pistons
-Arp rod bolts & main studs
-Callies Compstar Rods & Crank
-Ls2 Timing Chain
-Melling Oil Pump (P/N:MEL-10295)
-Reused Truck lifters/rockers
-PRC .650" dual springs
-Chromoly Pushrods
-Reused my Torquer V2 (232/234 114lsa) cam
-LS6 Intake
-Hand ported 317 Heads
-2.02" Stainless Intake Valves
-1.60" Inconnel Exhaust Valves
-Ported TB
Turbo Kit
-Kentucky Turbo Truck Manifold GT-88 Kit
-4" Mild Steel Down pipe
-Mild hot pipes
I will post up more pics as I have time.
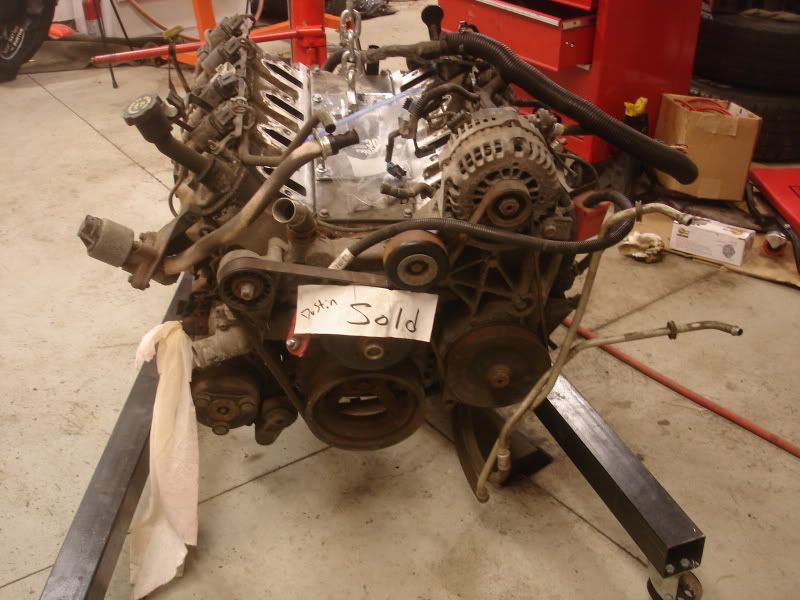
346 Removed
Junkyard LQ4
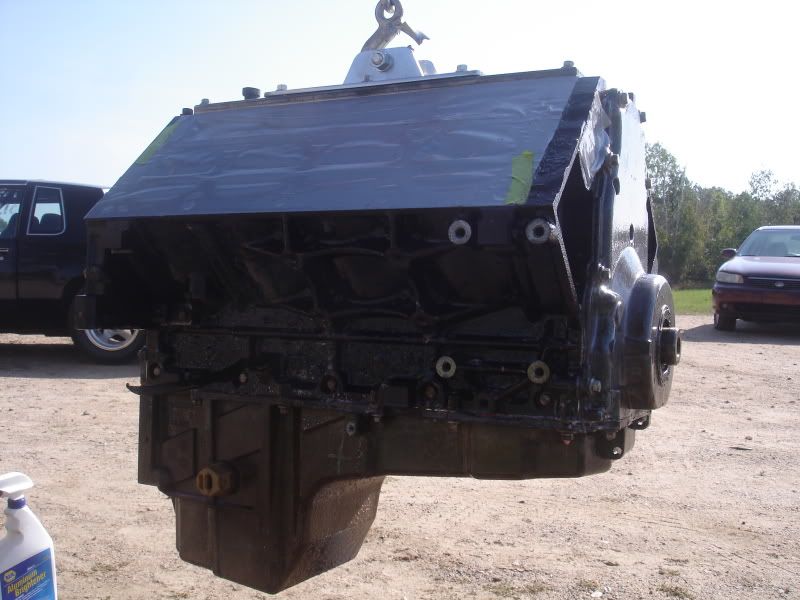
Stripped the block for painting
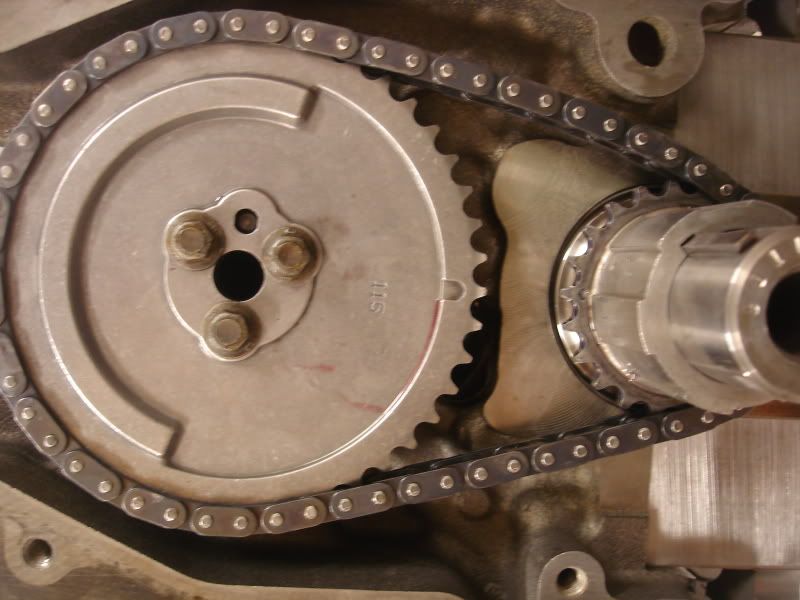
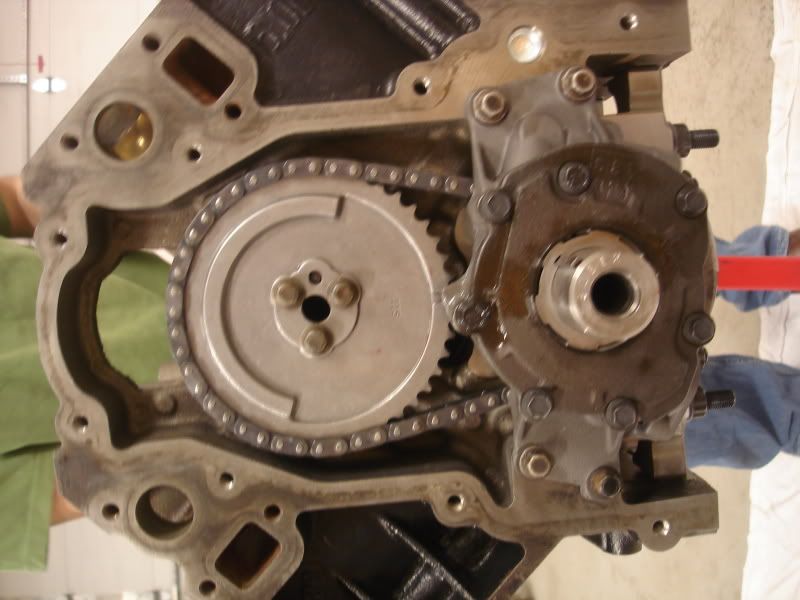
Installed the LS2 Timing Chain (careful to line up the dots)
Installed the oil pump (Melling MEL-10295)
JB Weld on front plug (as recommended by LS1 install book)
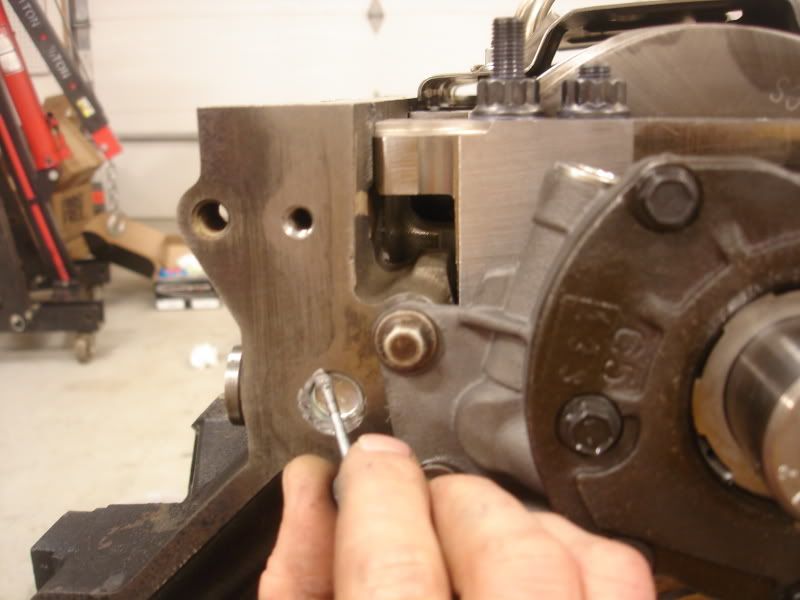
Installed windage tray. We had to clearance it with a long screw driver so the crank wouldnt hit. As said above, the short block has arp main studs and arp rod bolts.
Soaked the lifters from the used LQ4 in oil and installed them in the truck lifter cups. I drilled drainage holes in the lifter cups.
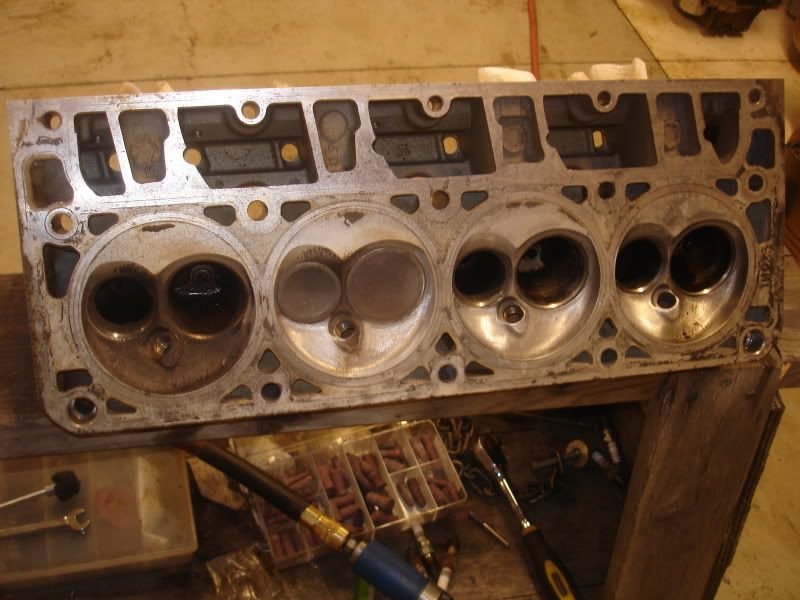
317 Heads off of the LQ4. My bro started cleaning up the bowls as you can see.
Took the heads to a local machinist to deck surface. Had him machine for the larger valves.
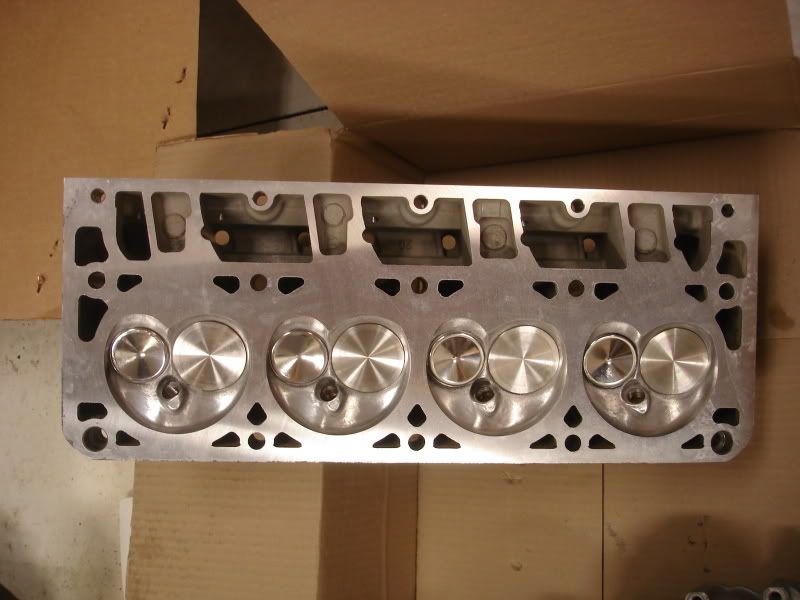
Installed the Stainless Manley 2.02" intake valves ( P/N: 11362-8) and Ferrea 1.60"inconnel exhaust valves (P/N:F1892P).
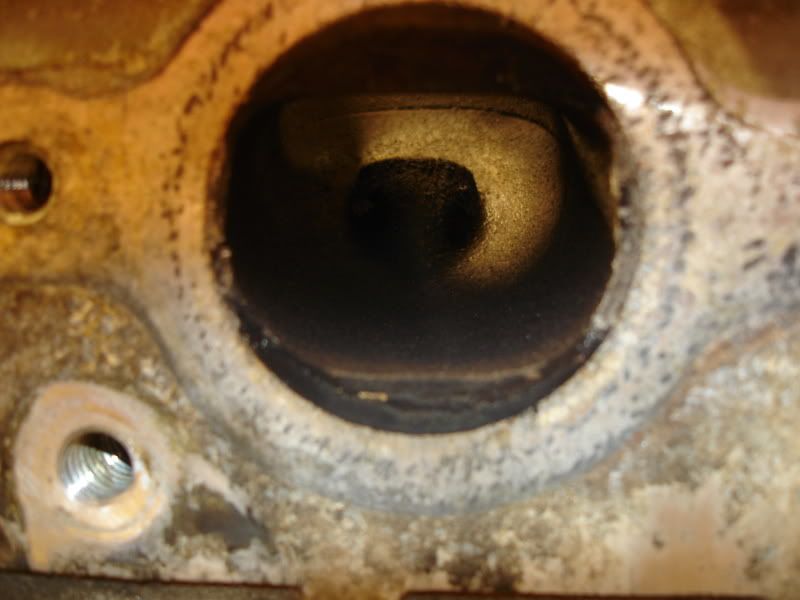
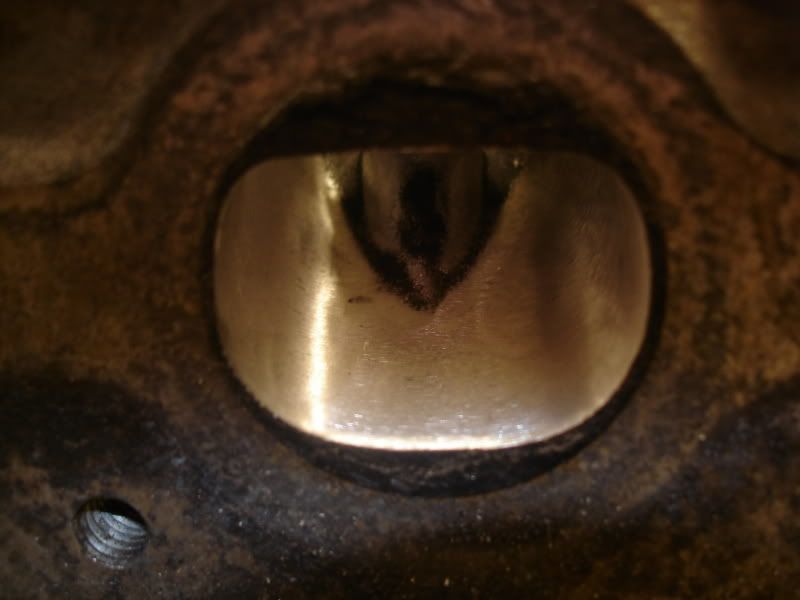
Stock Exhaust Port on the heads
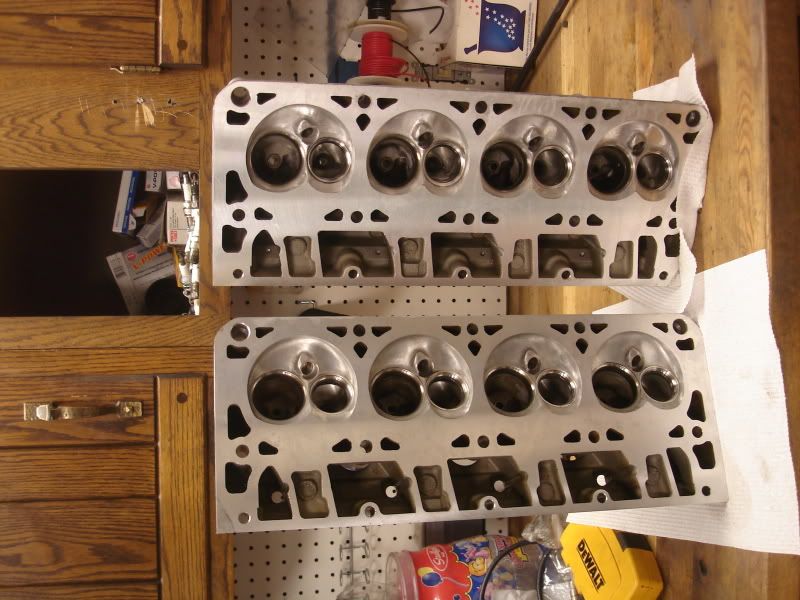
Hand ported and smoothed exhaust port (my bro hand ported these heads). The stock port is pretty rough, he mainly just smoothed them out and took out the casting bump shown at the bottom of the picture in the exhaust port.
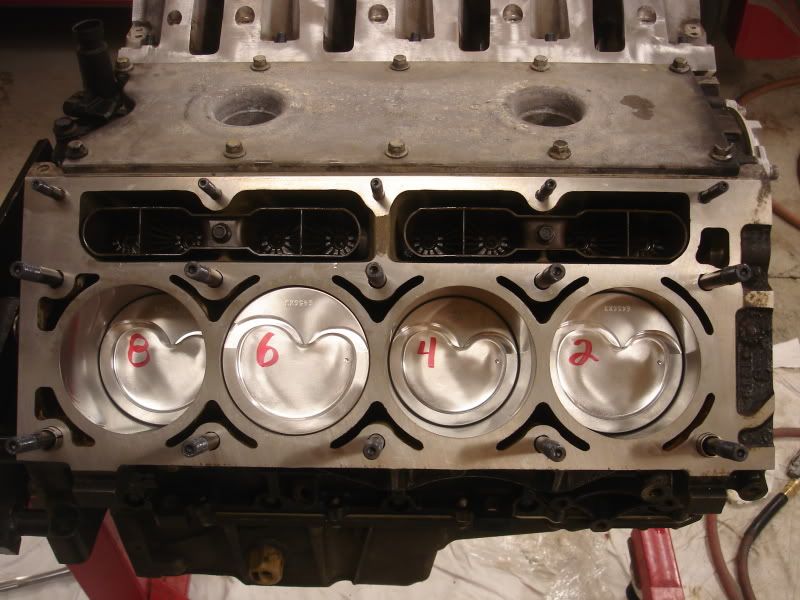
Installed of the ARP head studs (Headstud P/N:ARP-234-4316). You can see the purty Weisco pistons..
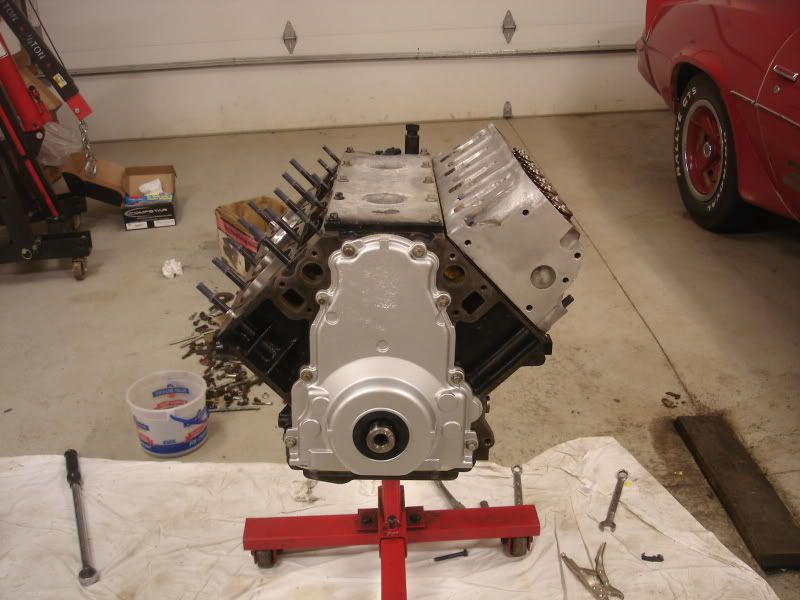
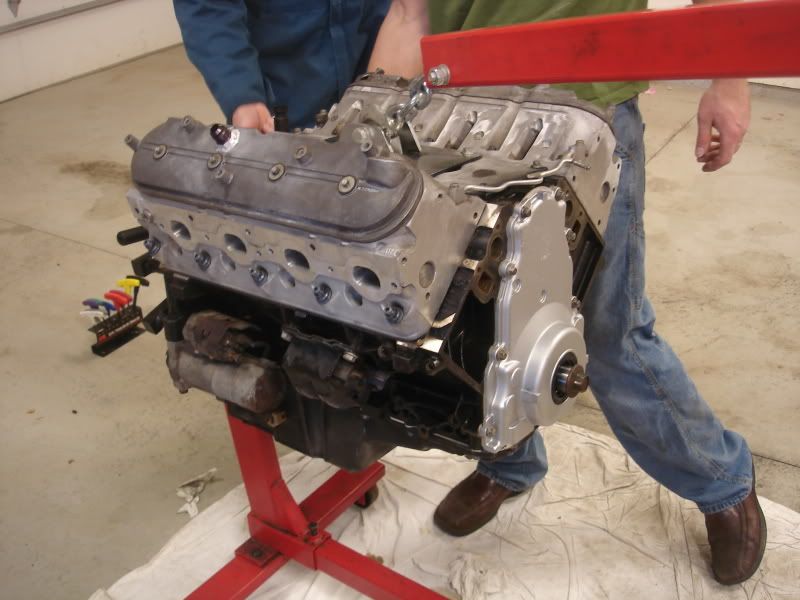
We torqued both heads down, installed my PRC .650" springs, truck rockers, and pushrods.
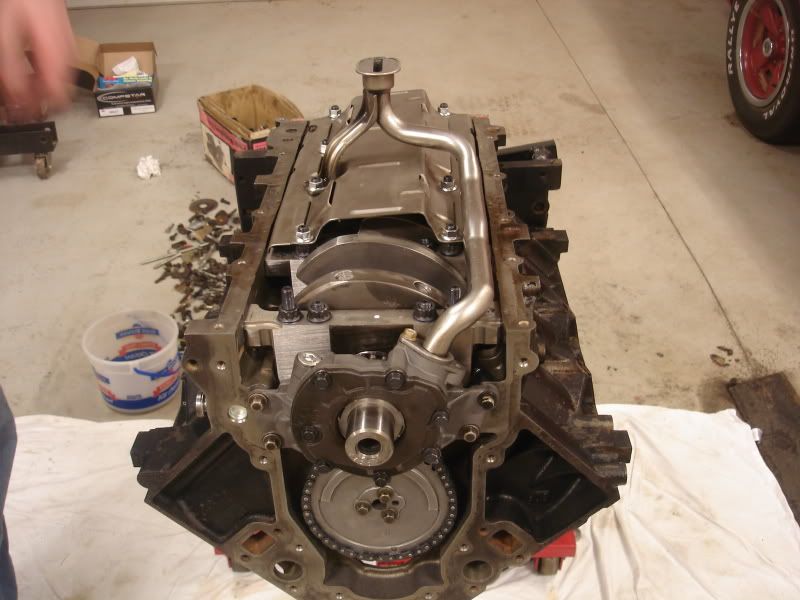
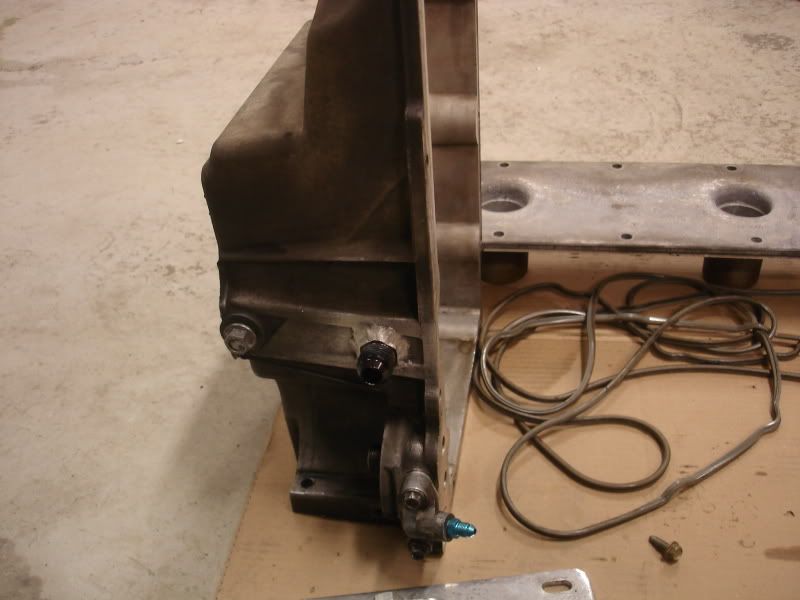
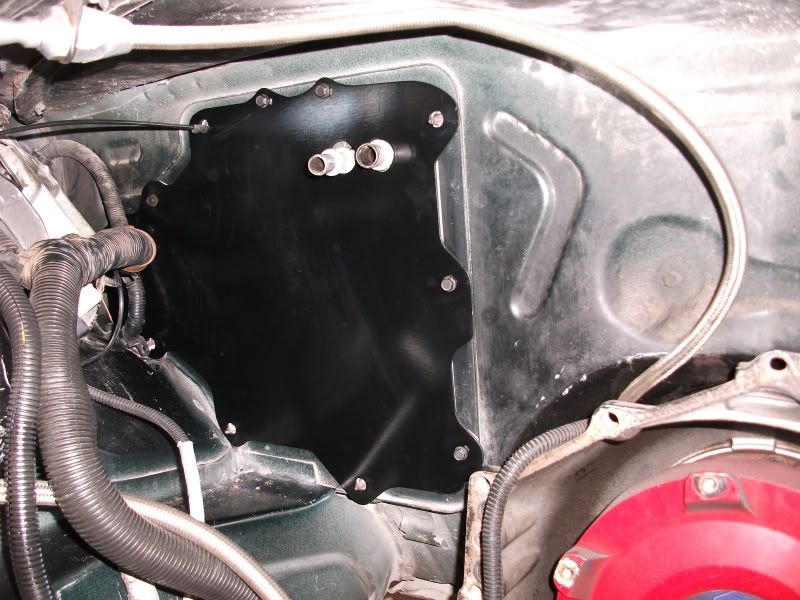
To back up a bit...Here is the oil pan with the oil drain and high pressure oil feed line for the turbo. I sent my pan to Josh with Kentucky Turbo and he did the work. (-3an male pressure fitting and -8an return IIRC)
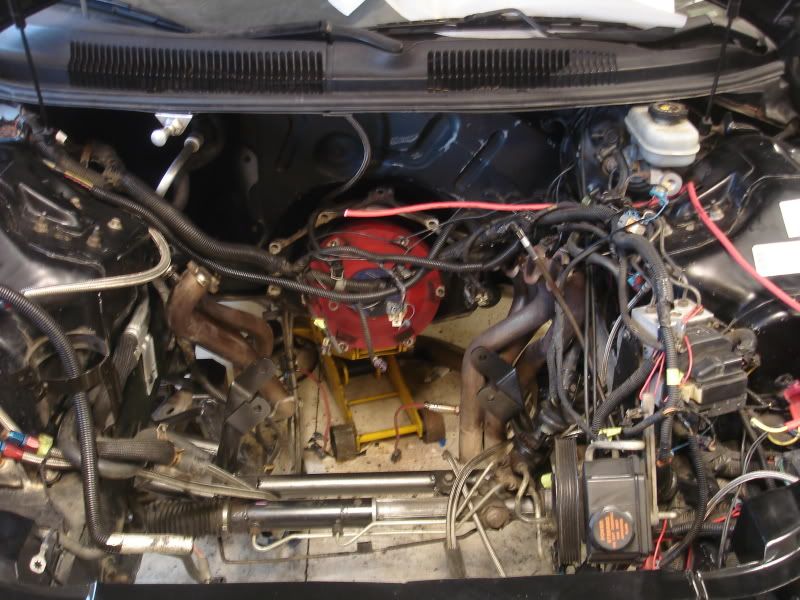
We installed a BMR turbo K-Member. Some of the stock bolts sucked, but with some work we got the old K-Member out and this installed. I reused the stock power steering setup.
Next the A/C had to go with this setup.....
I have a cage installed so no way was i going to remove it from the inside. Taking that dash out was a job i dont want to repeat...
I used a cutting wheel and basically cut it flush with the firewall. I used tape they use to repair HVAC duct as you can see to cover the holes and to direct the air from the fan into the rest of the heater core system. Using a grinding wheel made an awful dust and smell. After about 20 seconds of that i resorted to using a saw blade with my hand.
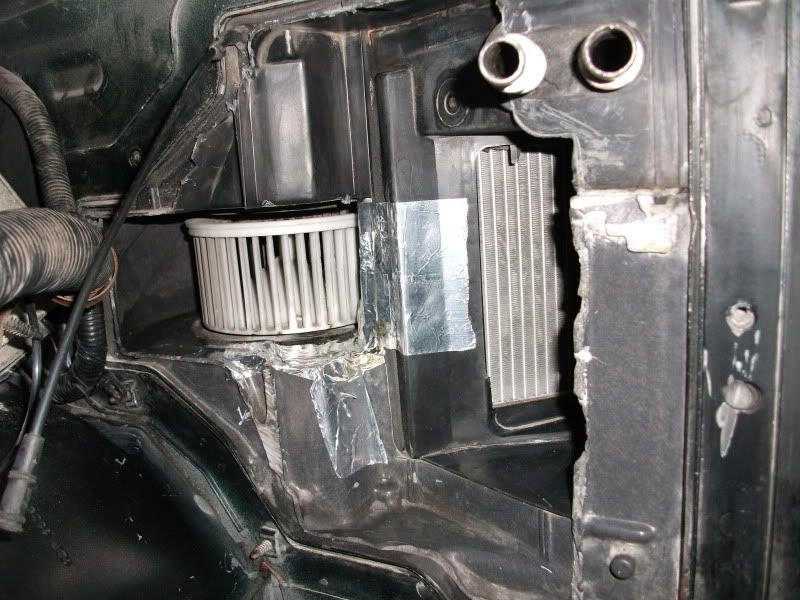
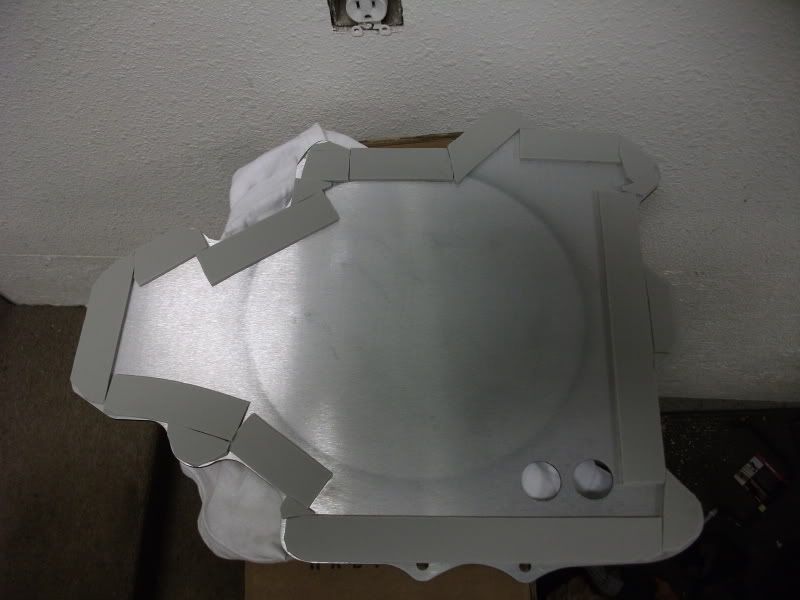
I bought an AC Delete Plate from BMR. I installed adhesive foam to seal it up. We drilled the two holes for the heater hoses and the one hole for the vacuum line.
We spray canned it black and bolted it in. I used a putty to seal around the two heater lines and the vacuum line. Be careful not to cut that vacuum line, it controls the HVAC (for me now just the heating system) if i have my facts straight.
More to come.....
2000 TransAM with a H/C/I 346, 4L80E, Ford 9" w/ 3.70's.
New Motor
408ci LQ4 Build
-9.3:1 Weisco Forged Pistons
-Arp rod bolts & main studs
-Callies Compstar Rods & Crank
-Ls2 Timing Chain
-Melling Oil Pump (P/N:MEL-10295)
-Reused Truck lifters/rockers
-PRC .650" dual springs
-Chromoly Pushrods
-Reused my Torquer V2 (232/234 114lsa) cam
-LS6 Intake
-Hand ported 317 Heads
-2.02" Stainless Intake Valves
-1.60" Inconnel Exhaust Valves
-Ported TB
Turbo Kit
-Kentucky Turbo Truck Manifold GT-88 Kit
-4" Mild Steel Down pipe
-Mild hot pipes
I will post up more pics as I have time.
346 Removed
Junkyard LQ4
Stripped the block for painting
Installed the LS2 Timing Chain (careful to line up the dots)
Installed the oil pump (Melling MEL-10295)
JB Weld on front plug (as recommended by LS1 install book)
Installed windage tray. We had to clearance it with a long screw driver so the crank wouldnt hit. As said above, the short block has arp main studs and arp rod bolts.
Soaked the lifters from the used LQ4 in oil and installed them in the truck lifter cups. I drilled drainage holes in the lifter cups.
317 Heads off of the LQ4. My bro started cleaning up the bowls as you can see.
Took the heads to a local machinist to deck surface. Had him machine for the larger valves.
Installed the Stainless Manley 2.02" intake valves ( P/N: 11362-8) and Ferrea 1.60"inconnel exhaust valves (P/N:F1892P).
Stock Exhaust Port on the heads
Hand ported and smoothed exhaust port (my bro hand ported these heads). The stock port is pretty rough, he mainly just smoothed them out and took out the casting bump shown at the bottom of the picture in the exhaust port.
Installed of the ARP head studs (Headstud P/N:ARP-234-4316). You can see the purty Weisco pistons..
We torqued both heads down, installed my PRC .650" springs, truck rockers, and pushrods.
To back up a bit...Here is the oil pan with the oil drain and high pressure oil feed line for the turbo. I sent my pan to Josh with Kentucky Turbo and he did the work. (-3an male pressure fitting and -8an return IIRC)
We installed a BMR turbo K-Member. Some of the stock bolts sucked, but with some work we got the old K-Member out and this installed. I reused the stock power steering setup.
Next the A/C had to go with this setup.....
I have a cage installed so no way was i going to remove it from the inside. Taking that dash out was a job i dont want to repeat...
I used a cutting wheel and basically cut it flush with the firewall. I used tape they use to repair HVAC duct as you can see to cover the holes and to direct the air from the fan into the rest of the heater core system. Using a grinding wheel made an awful dust and smell. After about 20 seconds of that i resorted to using a saw blade with my hand.
I bought an AC Delete Plate from BMR. I installed adhesive foam to seal it up. We drilled the two holes for the heater hoses and the one hole for the vacuum line.
We spray canned it black and bolted it in. I used a putty to seal around the two heater lines and the vacuum line. Be careful not to cut that vacuum line, it controls the HVAC (for me now just the heating system) if i have my facts straight.
More to come.....
Last edited by nahasapeemapetalon; 10-20-2010 at 07:50 AM.

 06-15-2010, 09:14 PM
#5
12 Second Club
Thread Starter
iTrader: (9)
Join Date: Jun 2006
Location: Grand Forks, North Dakota
Posts: 1,051
Likes: 0
Received 0 Likes
on
0 Posts
Here is some more work....
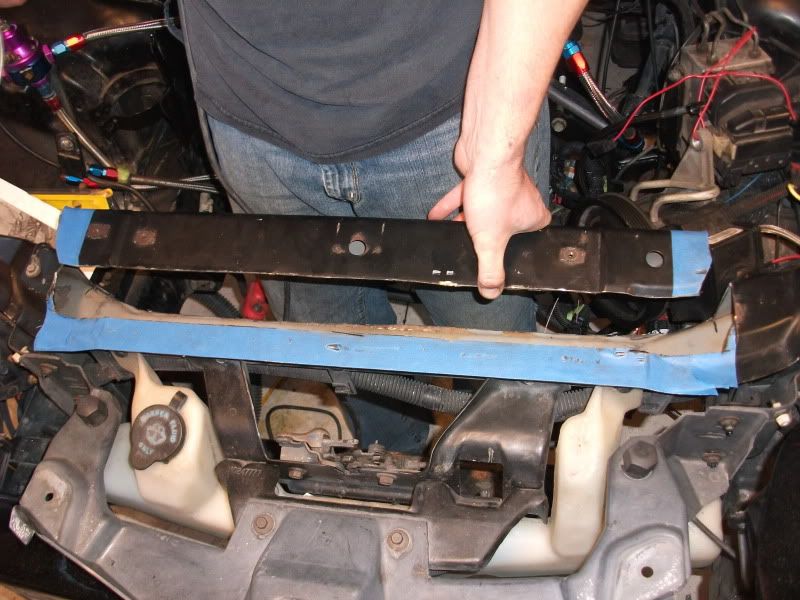
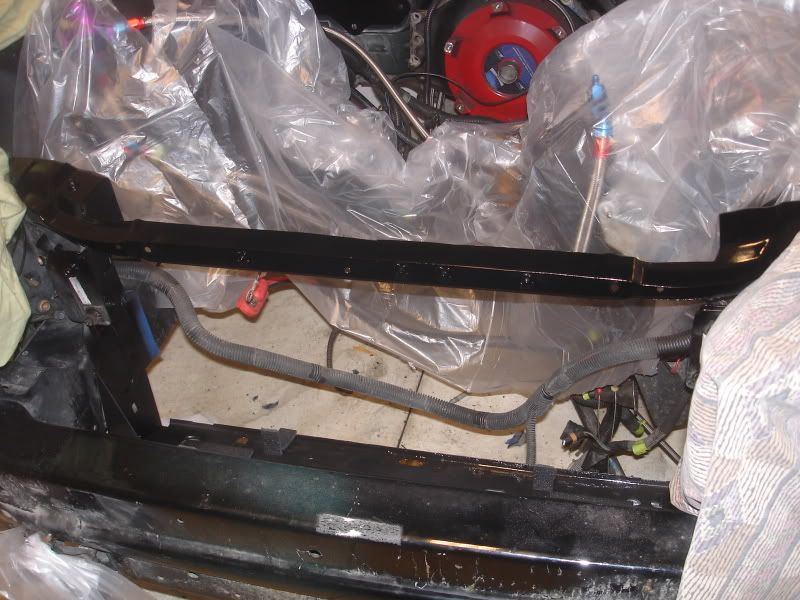
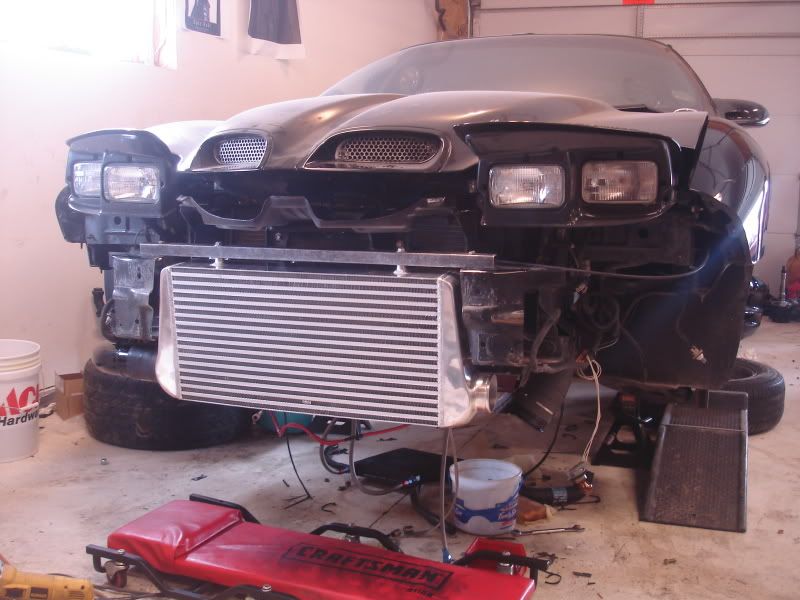
Cutting out the radiator support to fit a Griffin radiator (P/N:GRI-1-25241-X) (27"x15.5"x3").

Here is the piece that was cut out...
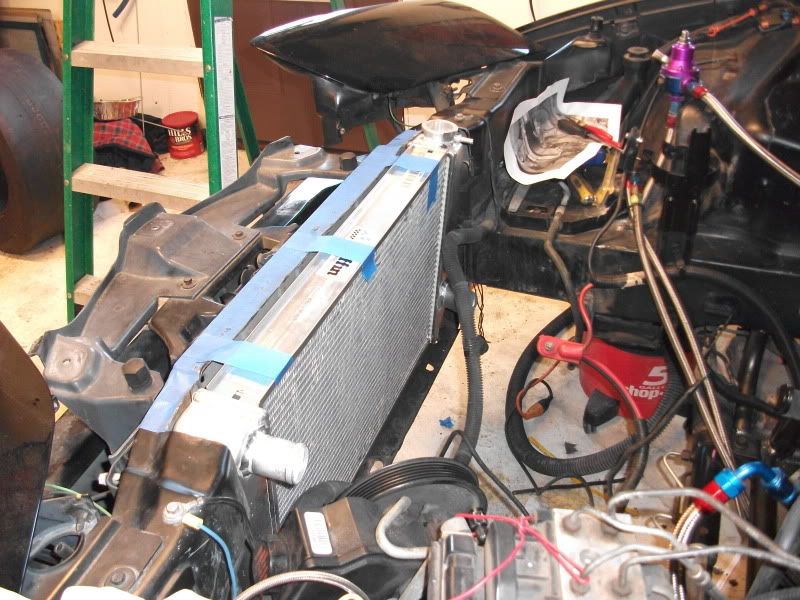
Had a few pieces of steel welded on the sides then ground them down somewhat smooth.
Added two Proform 10" pusher fans (P/N: PRO-67010) 1000cfm each.
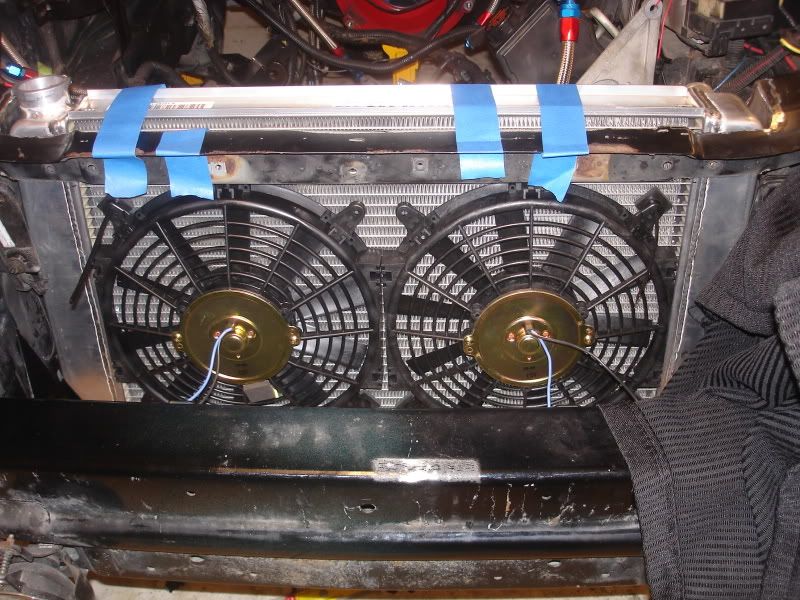
Painted it up...Spray can for the top stuff, POR-15 for the bottom tray
Cutting out the radiator support to fit a Griffin radiator (P/N:GRI-1-25241-X) (27"x15.5"x3").
Here is the piece that was cut out...
Had a few pieces of steel welded on the sides then ground them down somewhat smooth.
Added two Proform 10" pusher fans (P/N: PRO-67010) 1000cfm each.
Painted it up...Spray can for the top stuff, POR-15 for the bottom tray
Last edited by nahasapeemapetalon; 06-16-2010 at 01:41 PM.
06-17-2010, 06:22 PM
#6
12 Second Club
Thread Starter
iTrader: (9)
Join Date: Jun 2006
Location: Grand Forks, North Dakota
Posts: 1,051
Likes: 0
Received 0 Likes
on
0 Posts
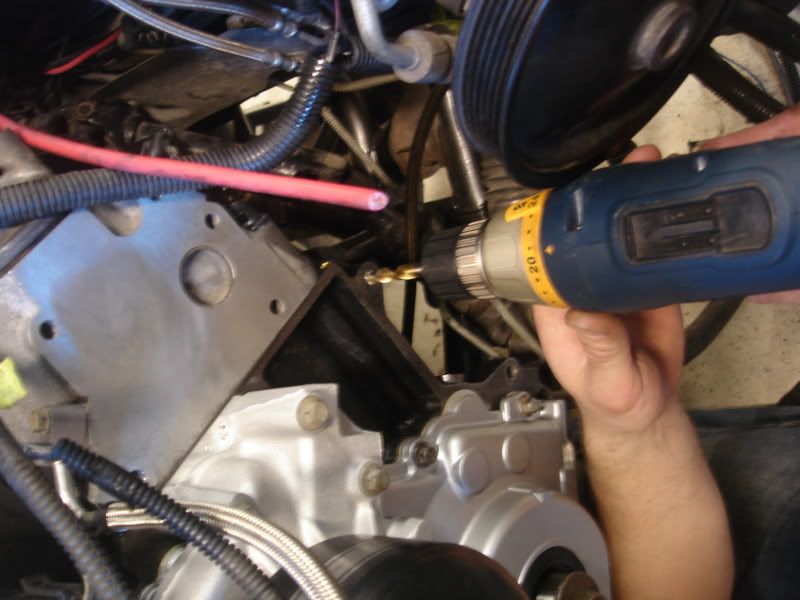
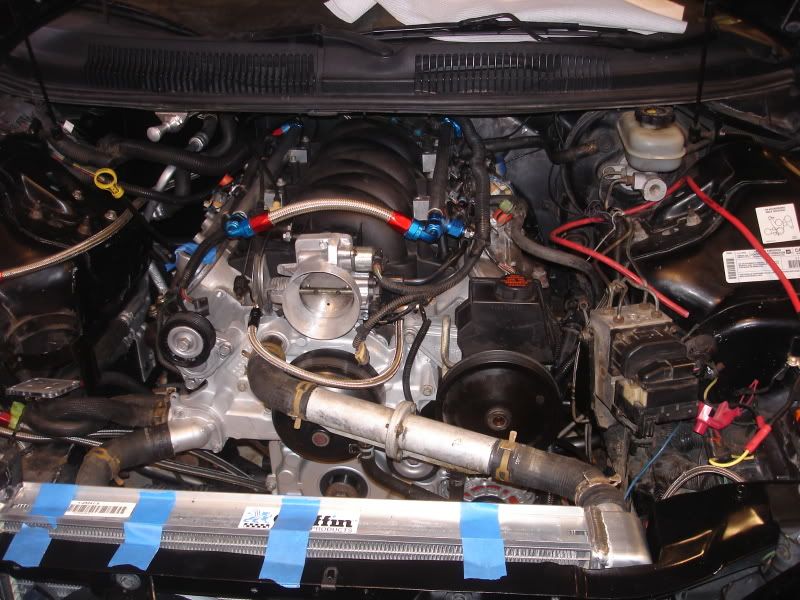
Motor bolted in. It took a while to get it lined up with the tranny and over the kmember mounts.
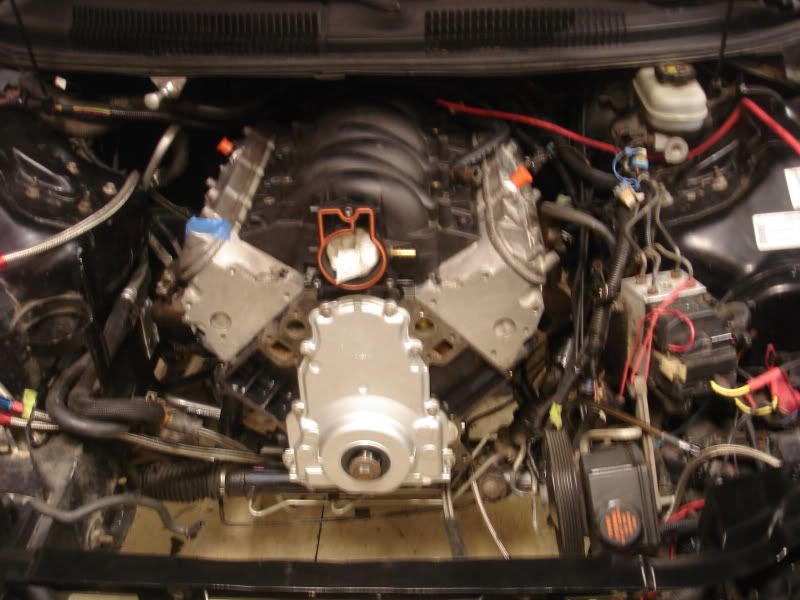
We realized after it was in that we needed another hole drilled and tapped for the stock alternator bracket bolt.
Accessories bolted on, reused the stock coolant lines with some cutting.
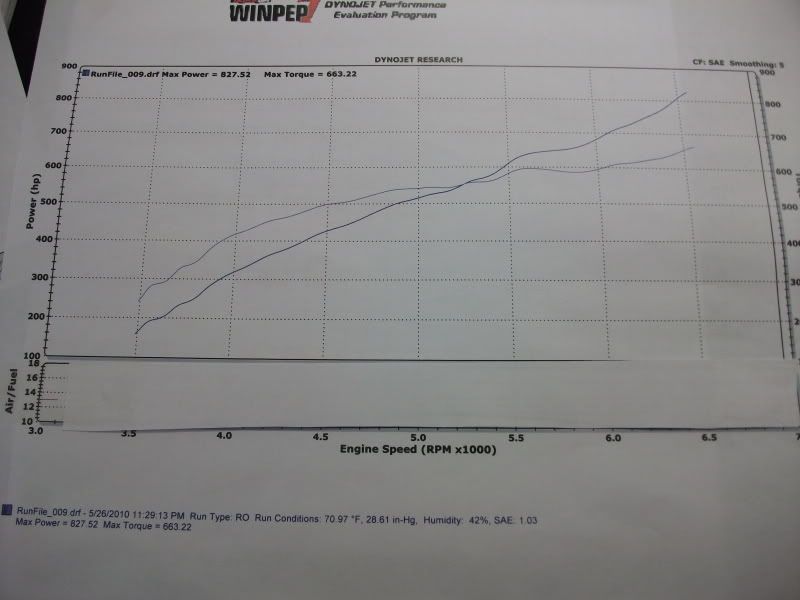
Got the car dyno'd on motor to break it in. Here is the dyno. The red lines are the current 408 setup, the blue was my 346. Picked up quite a bit of torque!

We realized after it was in that we needed another hole drilled and tapped for the stock alternator bracket bolt.
Accessories bolted on, reused the stock coolant lines with some cutting.
Got the car dyno'd on motor to break it in. Here is the dyno. The red lines are the current 408 setup, the blue was my 346. Picked up quite a bit of torque!
Last edited by nahasapeemapetalon; 06-17-2010 at 06:29 PM.
08-24-2010, 12:24 PM
#7
12 Second Club
Thread Starter
iTrader: (9)
Join Date: Jun 2006
Location: Grand Forks, North Dakota
Posts: 1,051
Likes: 0
Received 0 Likes
on
0 Posts
It has been a while since an update, got my laptop wet and lost a lot of my pictures. Ill fill in the details later on...
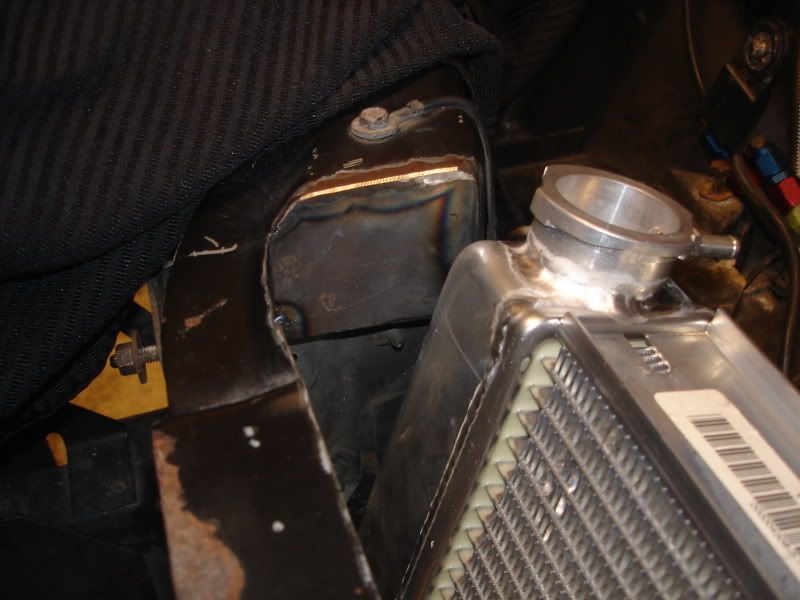
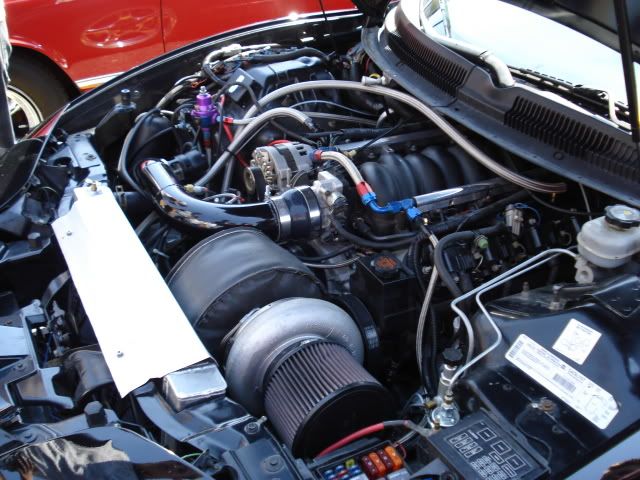
Intercooler Mounted
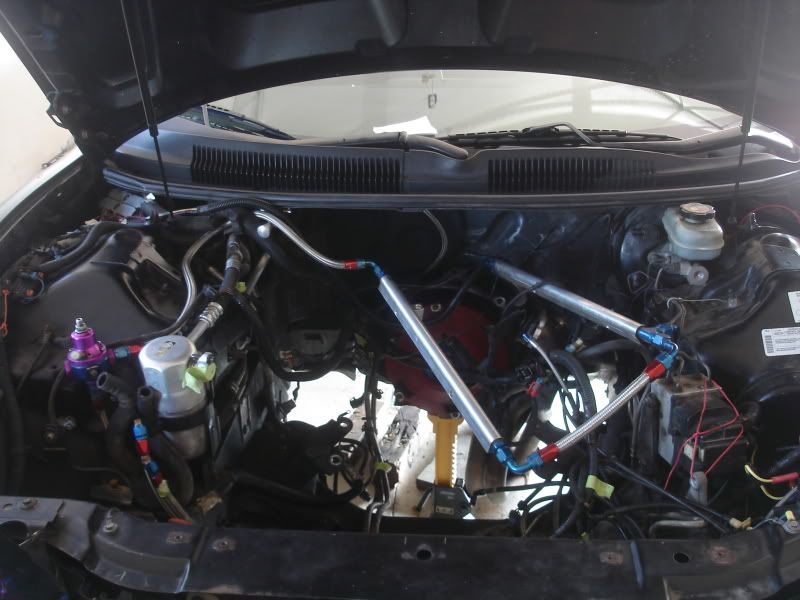
Car pretty much how it sits now....
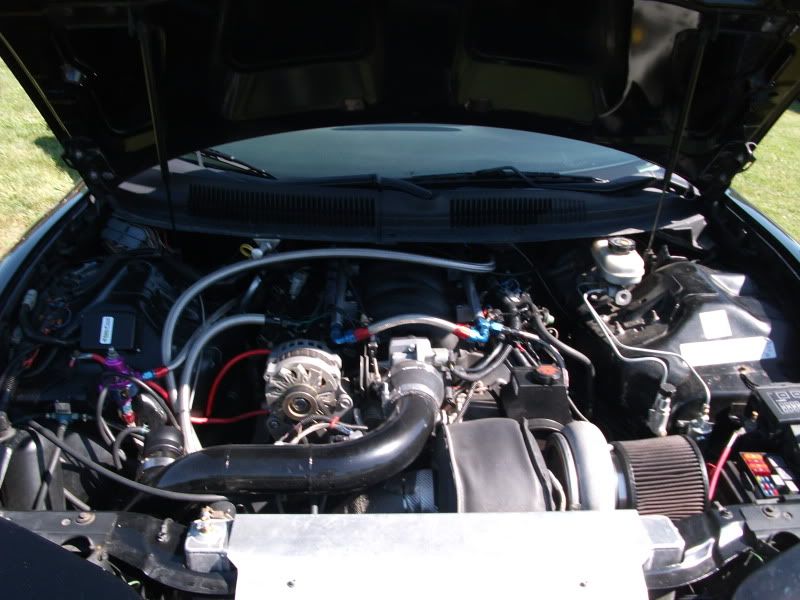
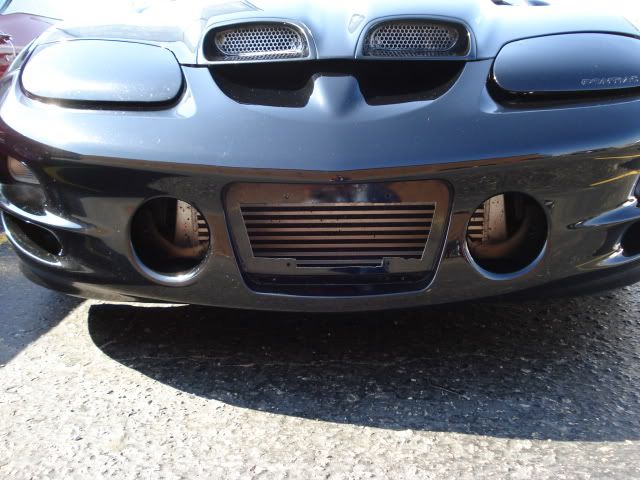
Car dyno'd with open dump and boost creep issues...(16-18psi if i had to guess)
I tied into the 3" exhaust in a restrictive way and the boost holds now. We will be installing a 60mm JGS wastegate over the winter and slightly redoing the hot pipes.
I made 785rwhp and 710rwtq through the exhaust at 18lbs...See vids below
http://www.youtube.com/watch?v=HlYlu...layer_embedded
http://www.youtube.com/watch?v=tEaRm...eature=channel
Intercooler Mounted
Car pretty much how it sits now....
Car dyno'd with open dump and boost creep issues...(16-18psi if i had to guess)
I tied into the 3" exhaust in a restrictive way and the boost holds now. We will be installing a 60mm JGS wastegate over the winter and slightly redoing the hot pipes.
I made 785rwhp and 710rwtq through the exhaust at 18lbs...See vids below
http://www.youtube.com/watch?v=HlYlu...layer_embedded
http://www.youtube.com/watch?v=tEaRm...eature=channel
Trending Topics

 08-24-2010, 12:54 PM
#11
12 Second Club
Thread Starter
iTrader: (9)
Join Date: Jun 2006
Location: Grand Forks, North Dakota
Posts: 1,051
Likes: 0
Received 0 Likes
on
0 Posts
Im sure i have some, ill look tonight. I lost a bunch with my computer crapping out.
08-24-2010, 01:16 PM
#12
I take the airfilter off at the track and all the dyno pulls, its pretty restrictive. That is one of the items I need to upgrade. 1.08 A/R. Far as spooling im not exactly sure 3500-4k i'd guess. Its a little doggy out of the hole but the N20 takes care of that. Tranny is going out so i havent been able to bang on it.
Yeah it looks aweful small lol. Was the dyno pulls with nitrous?! I was hoping that was boost only...was that on pump gas? Sorry for all the questions, just very interested in your build!
08-24-2010, 02:43 PM
#13
12 Second Club
Thread Starter
iTrader: (9)
Join Date: Jun 2006
Location: Grand Forks, North Dakota
Posts: 1,051
Likes: 0
Received 0 Likes
on
0 Posts
All the dyno pulls are with no nitrous, i only use that for the track. I plan on putting a bigger filter on, but it will require moving part or all of the fuseblock.
I run E-85 with 120lb lucas injectors and versafueler, ill up date all that info as i get time as well with some pics.
09-01-2010, 01:27 PM
#14
I'm finishing a very similar build, what size line are you running for the oil feed? Are you using a restrictor? It looks like there is more left in the turbo from the dyno graph, did you limit boost because of the e85?
 09-01-2010, 08:44 PM
#16
12 Second Club
Thread Starter
iTrader: (9)
Join Date: Jun 2006
Location: Grand Forks, North Dakota
Posts: 1,051
Likes: 0
Received 0 Likes
on
0 Posts
PM me if you need more info, i can check tommorow. My info is on my work computer.
And probably try better pusher fans.
09-01-2010, 08:58 PM
#17
Launching!
iTrader: (7)

Join Date: Jan 2006
Location: Lexington, Kentucky
Posts: 292
Likes: 0
Received 0 Likes
on
0 Posts
I had overheating issues same as you with my 2 pusher fans, Believe it or not the stock fans move close to 4000 cfm, and since they are pullers the expose more surface area of the radiator than pushers. I ended up cutting them in half trimming one of them up and making it a pusher for the driver side and puttung the othe back as a puller on the passenger side. This solved all my overheating issues.
09-01-2010, 09:00 PM
#18
The pressurized feed to the turbo should be -3an hose and fittings. The return to the pan is -8 or -10 i can look back into it man. No restrictor... not sure what you mean. I am sure there is a lot left in the turbo, i limited boost because of 4 bolt heads and a safety factor. If i had a good 6 bolt setup or thicker deck heads id let it rip more. E85 isnt a limiting factor.
PM me if you need more info, i can check tommorow. My info is on my work computer.
PM me if you need more info, i can check tommorow. My info is on my work computer.

 09-01-2010, 09:26 PM
#20
12 Second Club
Thread Starter
iTrader: (9)
Join Date: Jun 2006
Location: Grand Forks, North Dakota
Posts: 1,051
Likes: 0
Received 0 Likes
on
0 Posts
I had overheating issues same as you with my 2 pusher fans, Believe it or not the stock fans move close to 4000 cfm, and since they are pullers the expose more surface area of the radiator than pushers. I ended up cutting them in half trimming one of them up and making it a pusher for the driver side and puttung the othe back as a puller on the passenger side. This solved all my overheating issues.
Have to measure things and try it out maybe.