How to DIY build a truck manifold turbo kit!
 07-09-2010, 11:14 PM
#1

So I know there are a lot of threads on here about truck manifold set ups, but when it comes to a step-by-step guide, it seems like we could use more info. Heres a quick guide to help the average guy/girl build a front-mount kit in their garage! 
NEW:
OLD:
PREREQUISITES
in order to fab this kit, you need to mount the radiator vertically. I called Griffin Radiators and told them what I was doing and what engine it was for and they built me a custom one. The "universal" griffin that everyone seems to use really isnt the correct unit to use. The engineers at Griffin said that would be too small, and it does not come with a steam port for the heads, or a bung to mount the fluid level sensor. Id just call them and get their recommendation Here are some photos on mounting it...
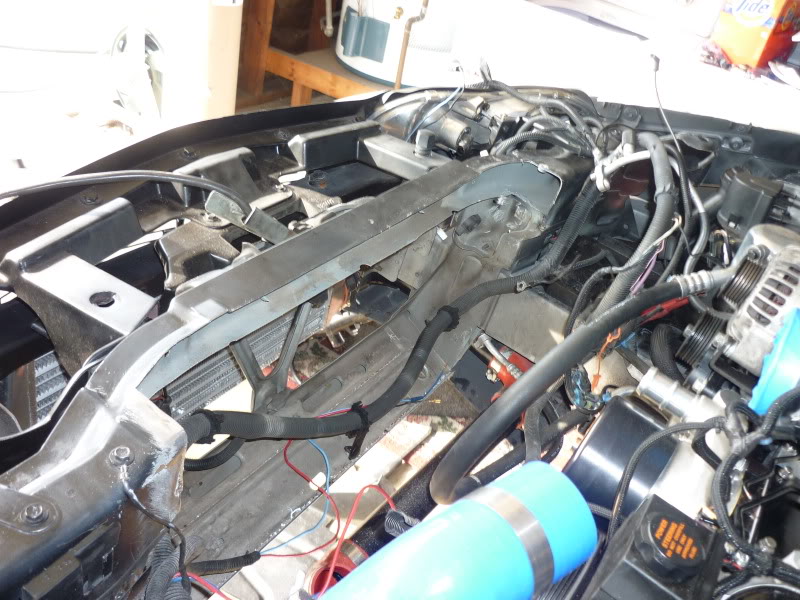
I used a sawzall and just notched my rad support. If you want more room, you can cut it out completely and weld in a square bar to tie the two ends together
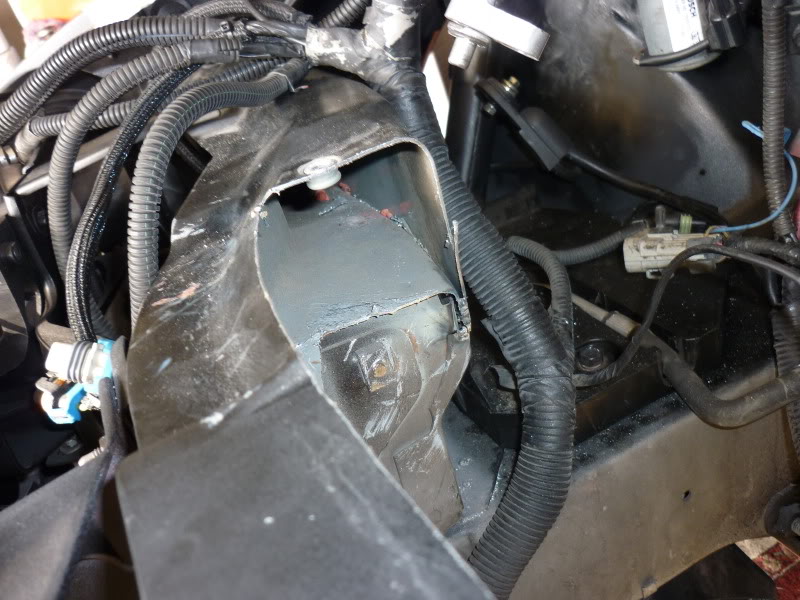
You will be left with some ugly looking holes. I cut a piece of metal to the same shape and welded it on, filed, and bondo'd it to make it look OEM.
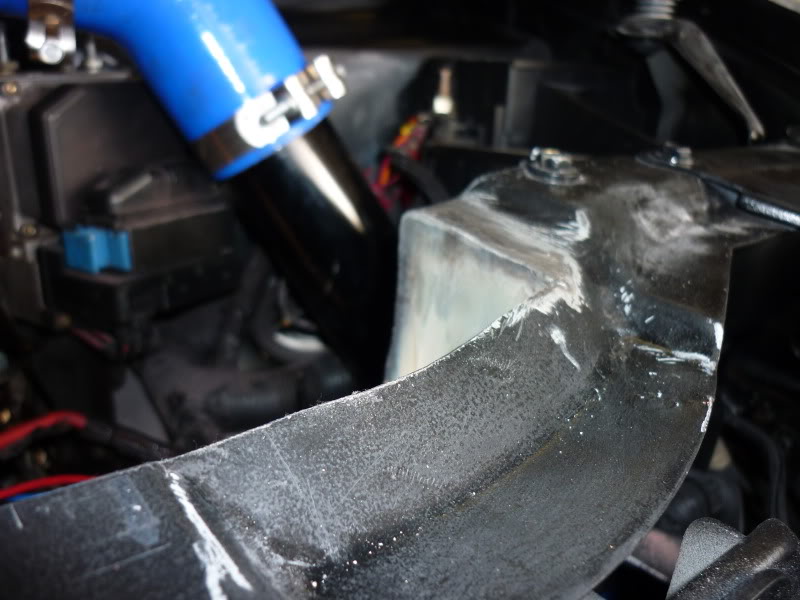
Now just paint!
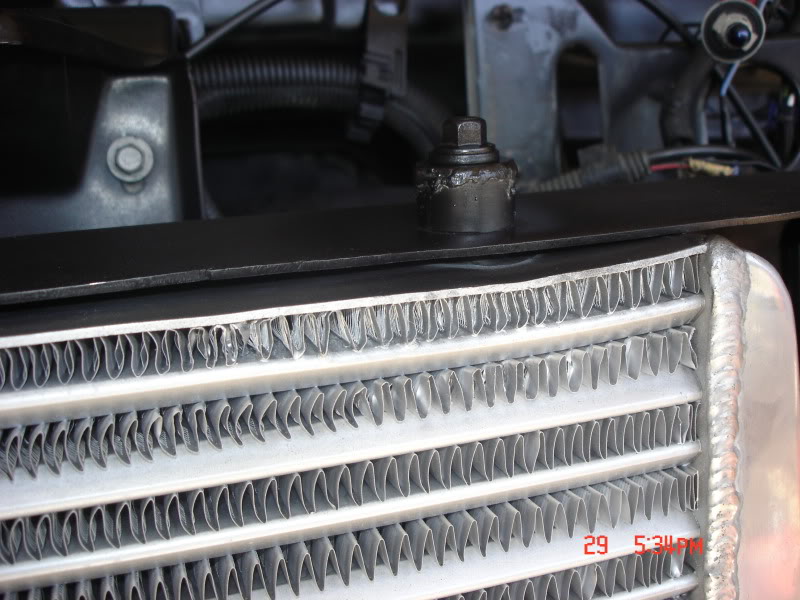
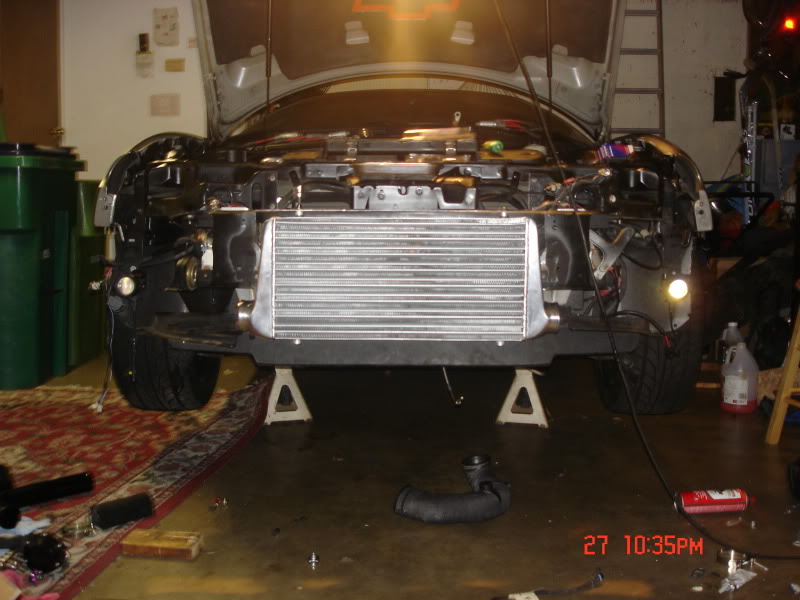
You will also need to mount your intercooler:

I just notched out the bumper support, leaving the top of it in tact. then i bolted the intercooler straight up to that.
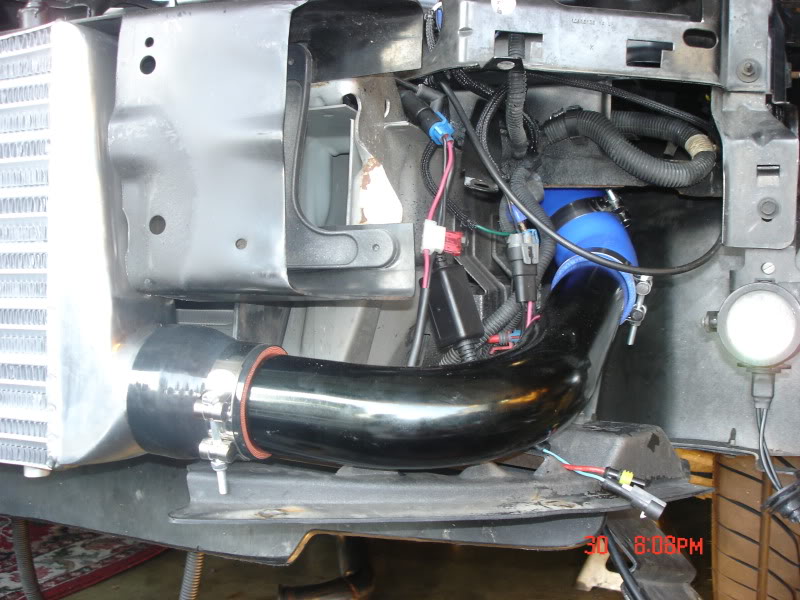
This is the tubing going to the motor. You dont need to move the fuse block, just loosen it from the bracket to make room for the tube to come through.
TOOLS NEEDED
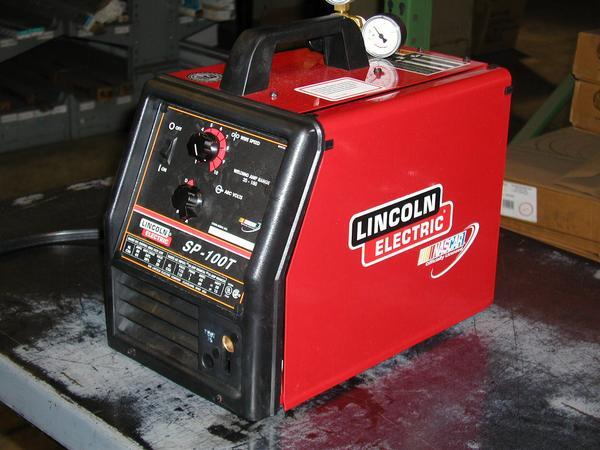
I used very simple tools, and a basic lincoln MIG welder. Even if you dont have a welder, you can make everything, and then have someone weld it up.
The basics were:
Shielded Gas MIG Welder
Saw (I used a Sawzall for all my cuts haha)
grinder (I used a bench grinder and also had a dremel tool)
Angle gauge ( didnt use one but it might be helpful)
MATERIALS NEEDED
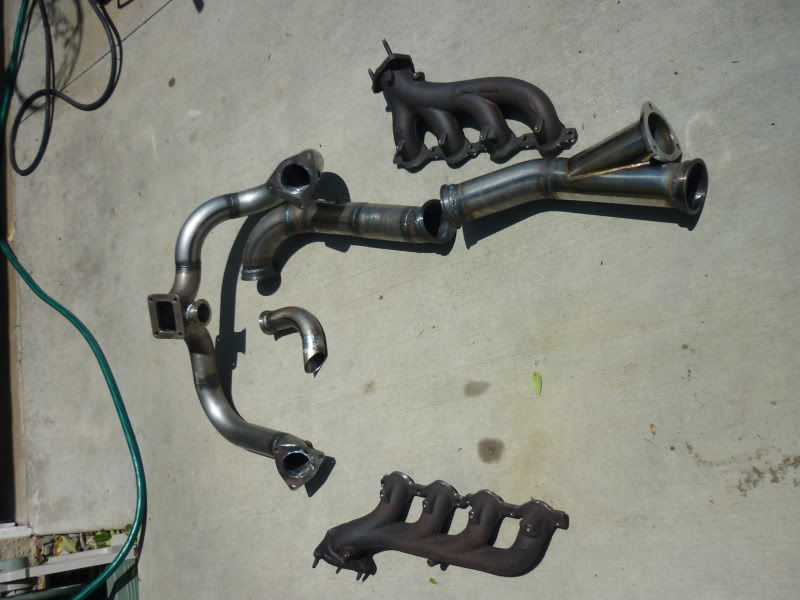
Truck Manifolds- no need to modify them. Just put the drivers side manifold on the passenger side the other manifold on the drivers side.
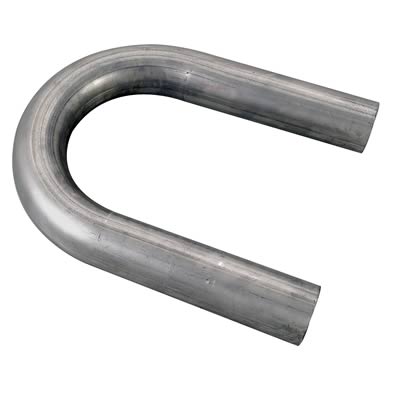
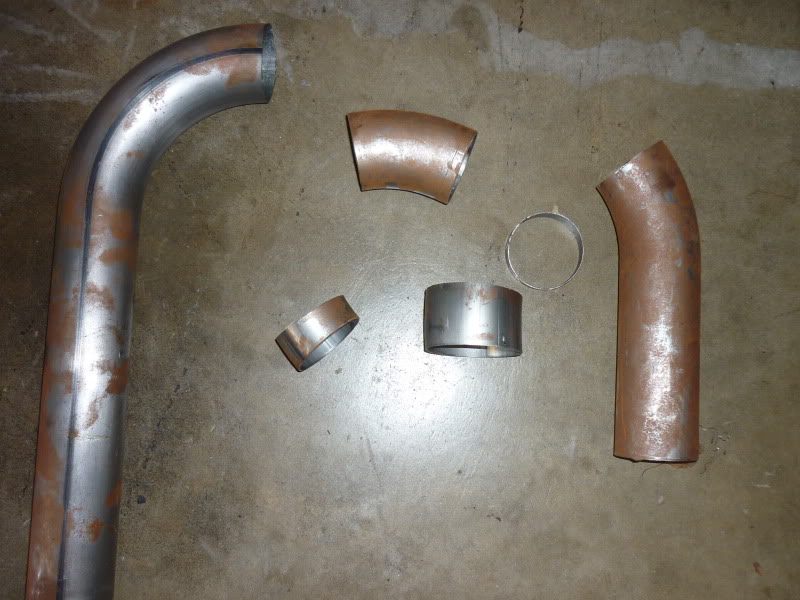
Mandrel bent tubing. I bought (1) 2" U bend for my wastegate, (3) 2.5" Mandrel U-bends for the merge pipes, and (3) 3" U bends for the downpipe. This gave me plenty of extra room for error
Manifold flange - I bought two laser cut flanges off ebay, but im sure some of our sponsors would have them. These are welded to the merge pipe and bolt on to the truck manifolds.
Turbo Flange - Bought my T4 flange from Turbonetics
Wastegate Flange - Should come with your wastegate
V-Band flanges w/ clamps - these come in handy while making the downpipe!
02 Sensor Bung(s)- for wideband/oem sensors
Turbo K-member- will make your life MUCH EASIER!!
MAKING THE MERGE PIPE

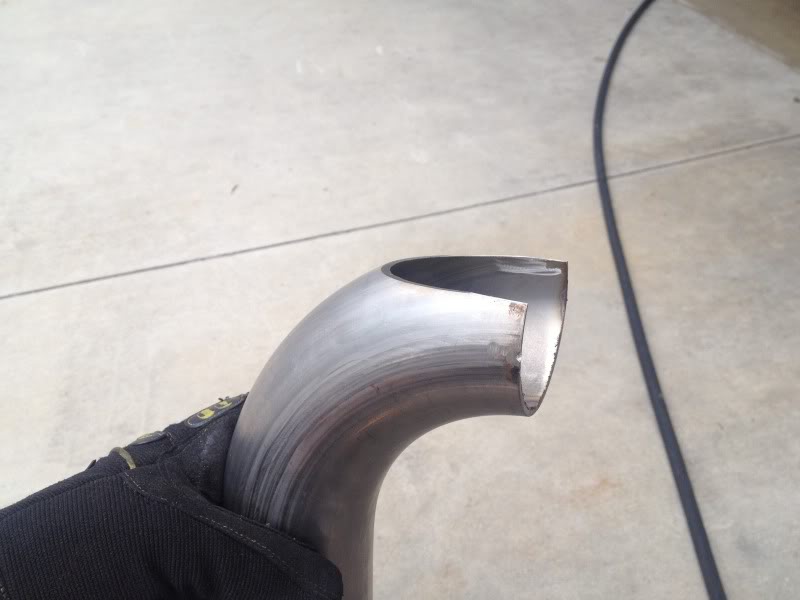
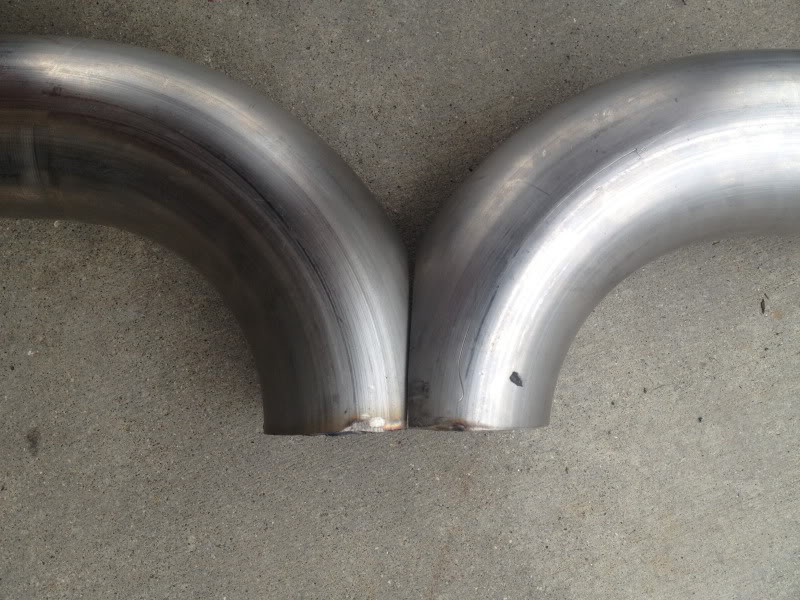
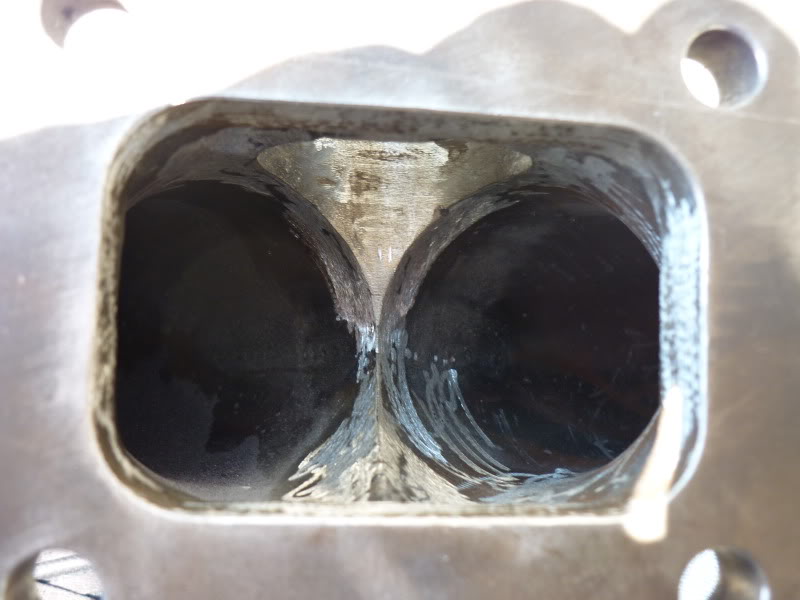
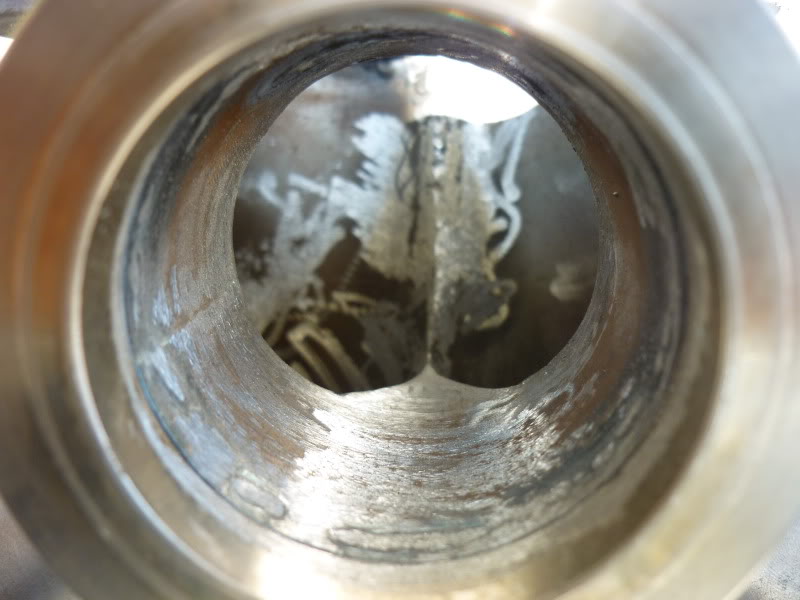
First thing i did was make the actual merge into the T4 Flange. I cut a U bend in half for the 2 pieces. then I measured the opening of the hole on the T4 flange and cut a little off the insides of each pipe until it looked like it would flow smoothly into the turbo flange. Its hard to explain in words, just look at all these pictures
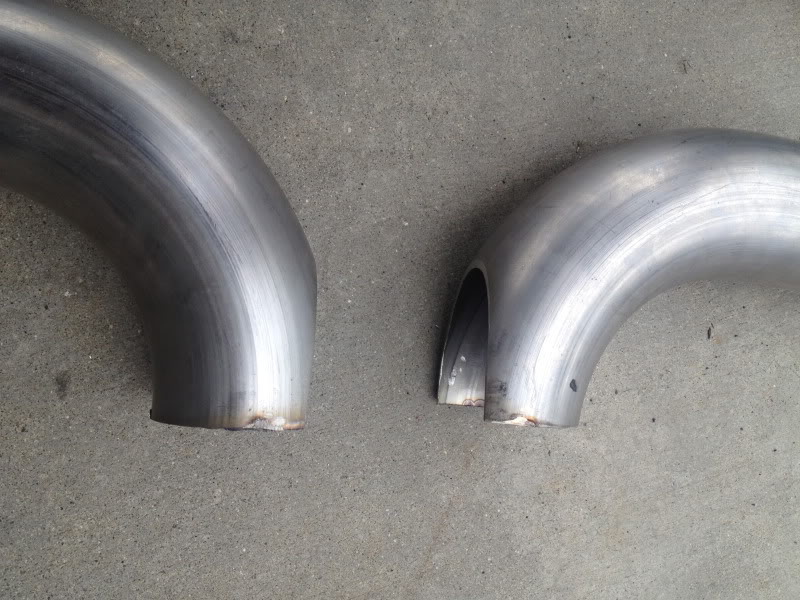
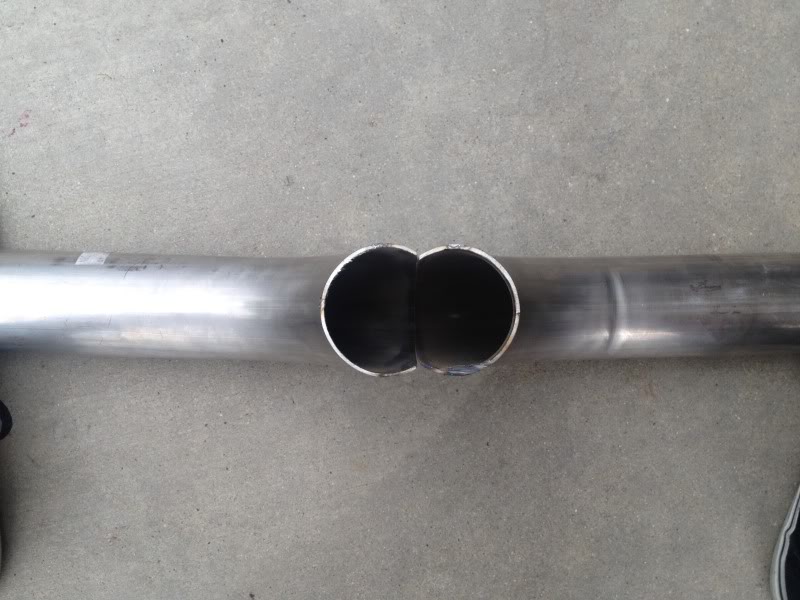
 After a little dremel work to smooth out the weld.
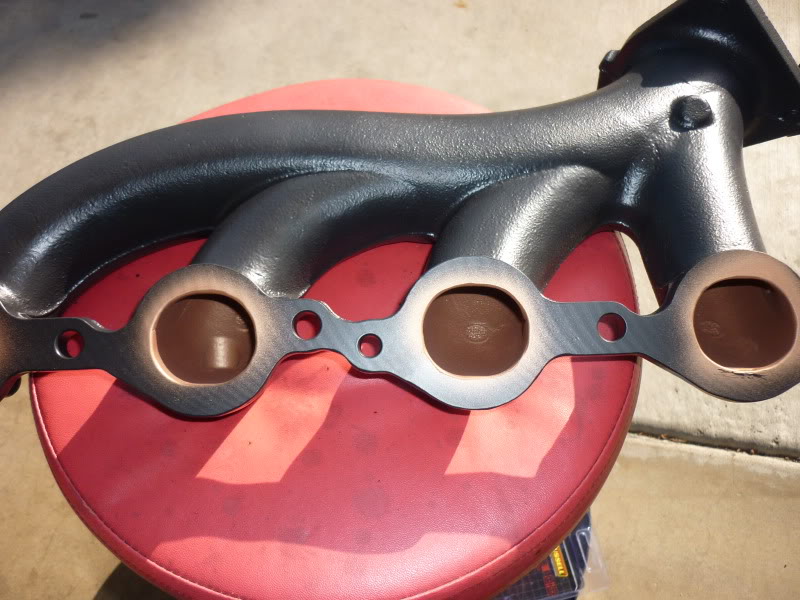
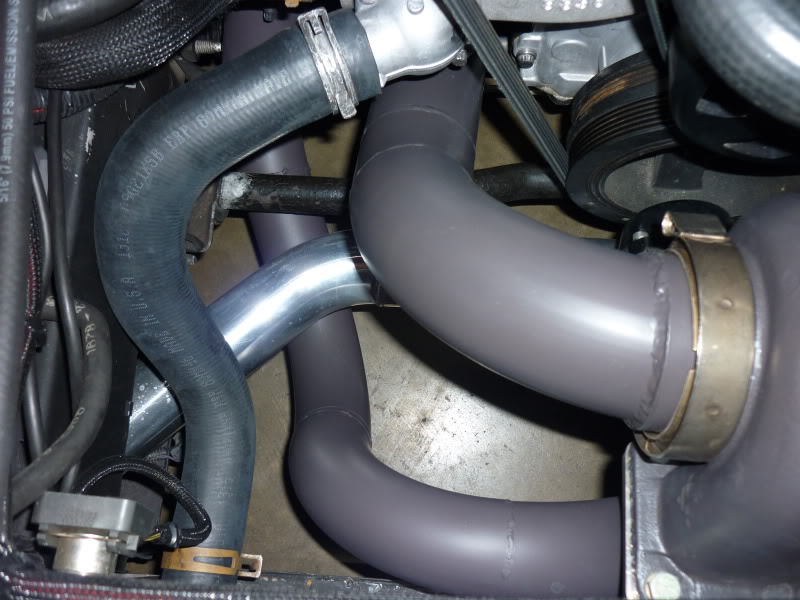
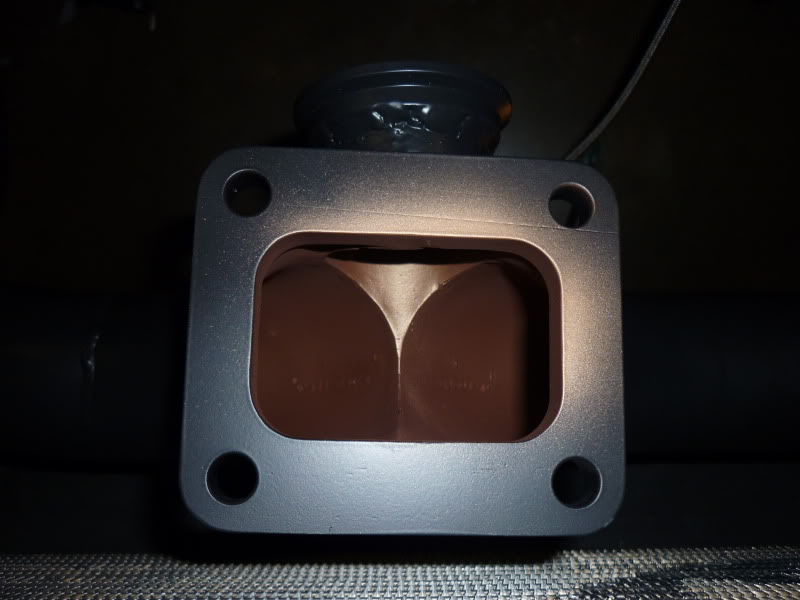 After the ceramic coating- you can see how smooth the transition is!!
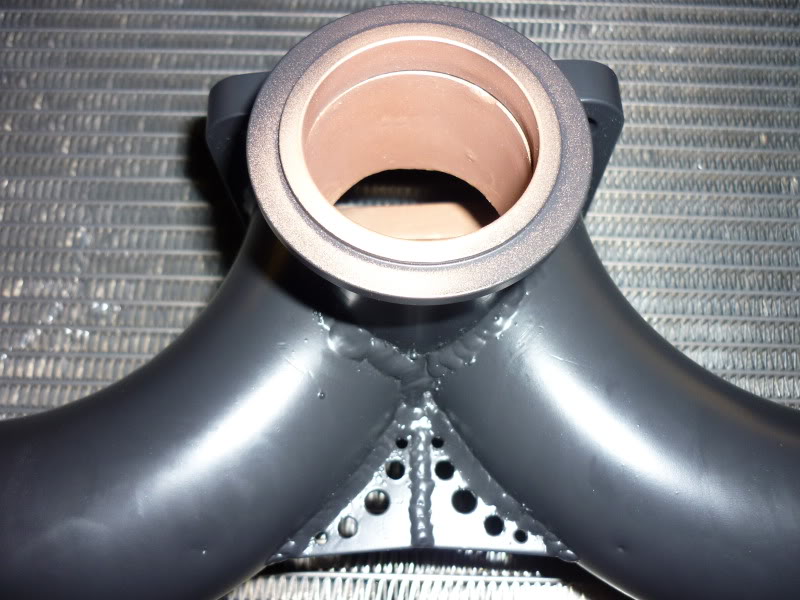 Added metal Gussets to strengthen the merge
After the merge was done, I fully bolted up both manifolds with gaskets and started to put it all together... I started on the passenger side and worked my way over. You can go whatever way you want. Just start with the laser cut flange and figure out where you need to go next. THE LESS PIECES YOU HAVE THE BETTER This takes some creativity and a lot of trial and error, but cut an angle out of your U bend and hold it up to the manifold flange and look at the placement. if its where you want it, tack it on in a few spots.
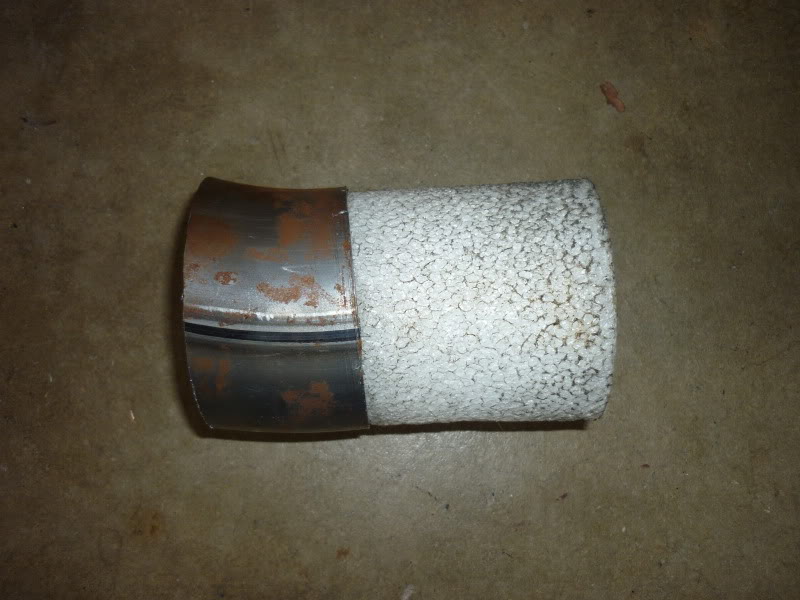
Heres a trick i learned: Get a piece of foam tube (like a pool noodle or rollbar padding- etc) then cut it into a few pieces. this way you can jam it into the tube and it will temporarily hold 2 pieces together. THIS IS VERY HELPFUL WHEN MAKING COMPLICATED TURNS!!!
After a lot of time and hard work, you'll be half way there
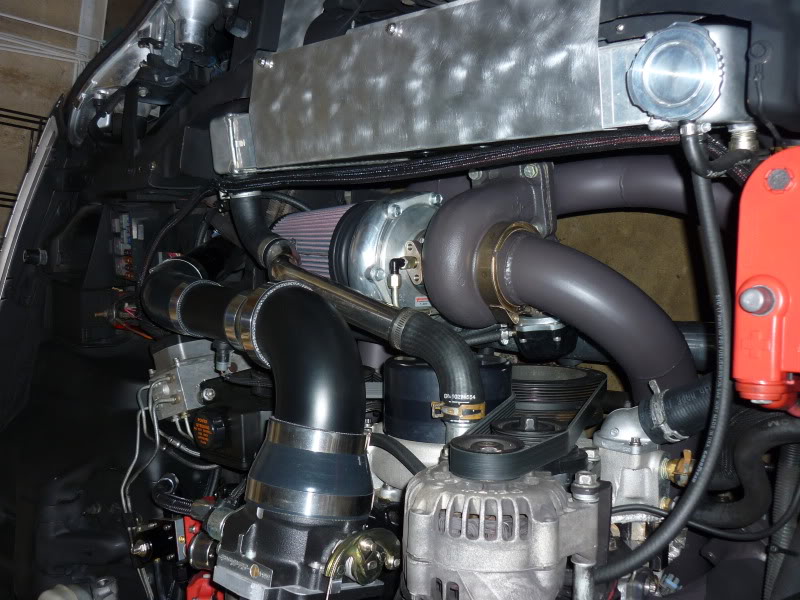
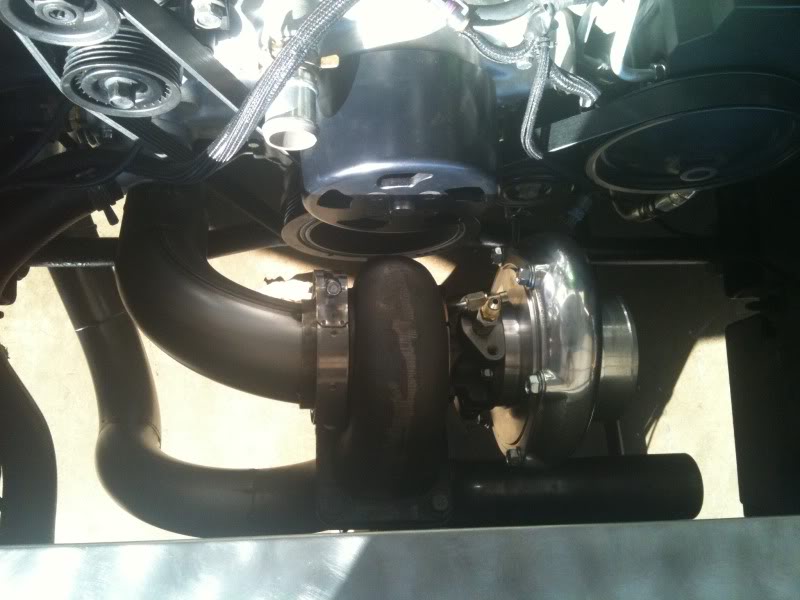 THIS IS TEST FITTING THE PLACEMENT OF THE TURBO, I PUT A JACKSTAND UNDER THE MERGE SO I WOULDNT BREAK THE LITTLE WELDS I HAD
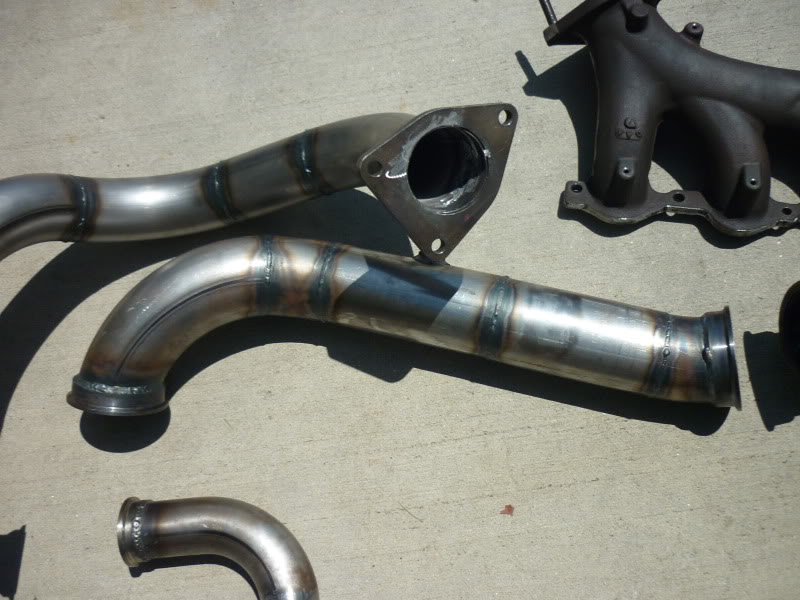
To make the wastegate merge: My turbosmart 50mm required a 2" pipe, so i used a hole saw and cut a 2' hole in the middle of my merge pipe. I then slid in the pipe, and traced around the pipe with a sharpie to figure out how to cut the pipe. A grinder comes in handy because this wont be a straight cut... slide it back in, weld it up, and smooth out all the welding slag!
Now just continue everything over to the other side, and BAM! you just finished the hard part if youre happy how it turned out, remove the whole thing and fully weld it up!
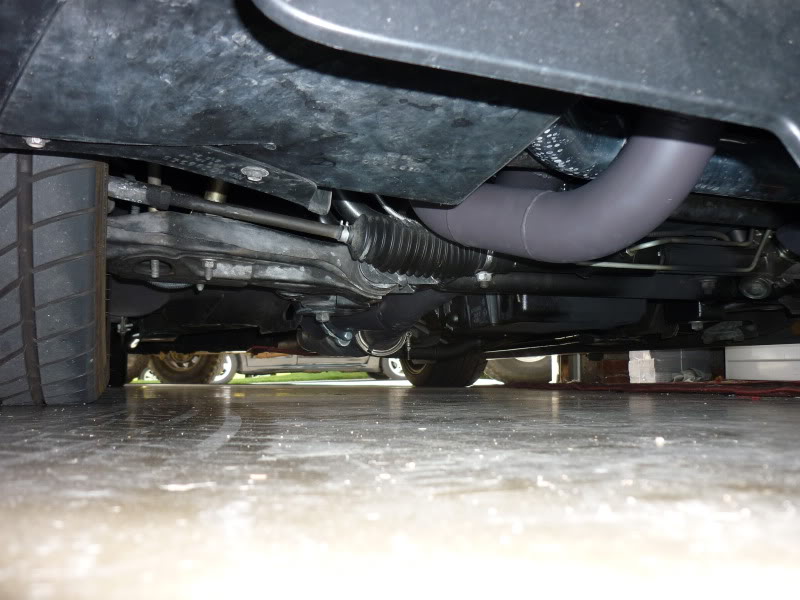
Now follow the same process for the downpipe. I have a V-band clamp attaching the downpipe to the turbo, and more right before and after it goes through the k-member. This makes everything a lot easier to remove if you need to work on the engine. Keep following the same process all the way to your cat-back and youre done!! now plumb the turbo, and route the cold side (there are many write-ups for that) and all the other turbo goodies!
MORE TIPS
Patience!!!!! Making a nice straight cut will make lining up and welding everything much easier.
Dont over-complicate Simple is better, dont go all crazy routing piping everywhere
Ceramic coat your tubing - youll thank me later, i used to have another turbo kit with header wrap and let me tell you, this is MUCH BETTER AND MUCH CLEANER LOOKING.
Use the proper tools!! Dont make cuts with a dull blade. Youre chances of hurting yourself or messing up are greater if your tools arent in good condition.
BE SAFE!!!! wear eye protection! ive been to the hospital twice and have had them DRILL out metal from my eye while i was awake. trust me, its not fun.
And last but not least......
HAVE FUN! this was a super fun project for me and it should be for you too!
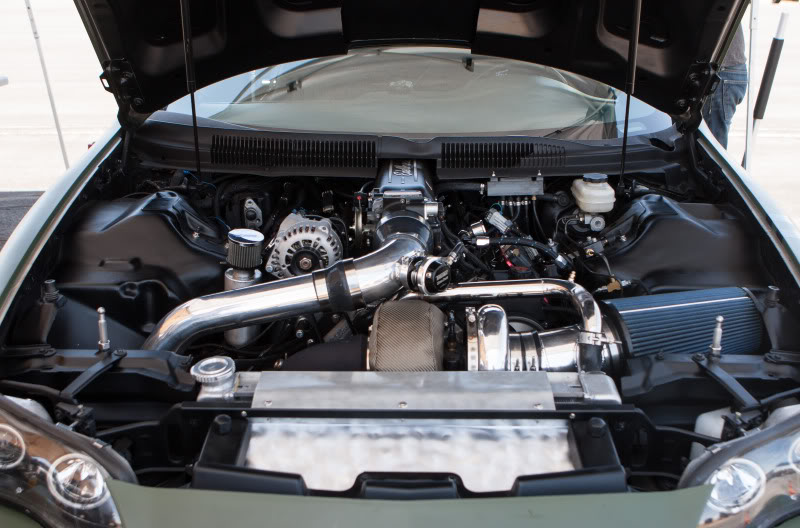
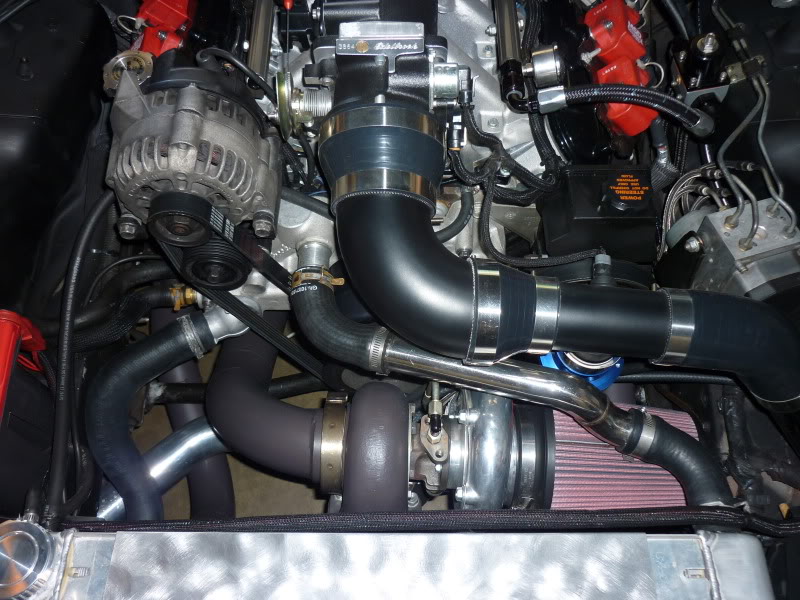
More pics:
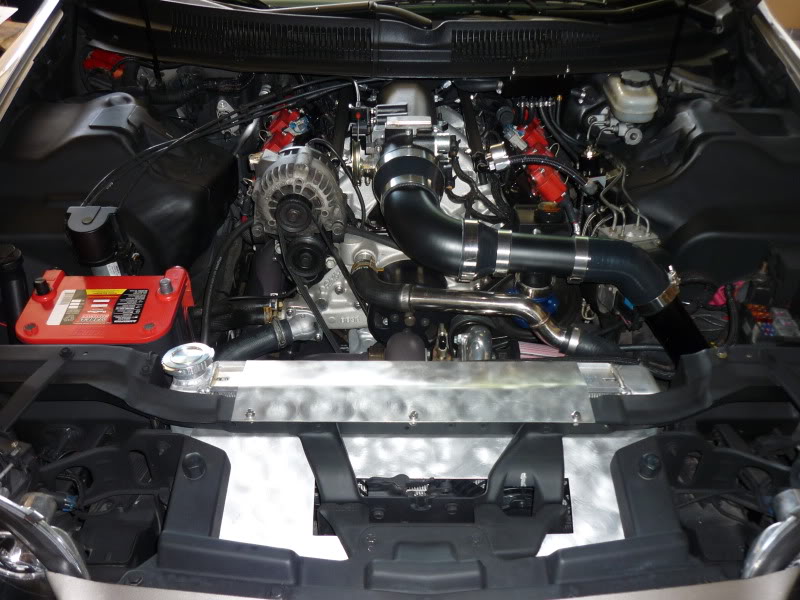

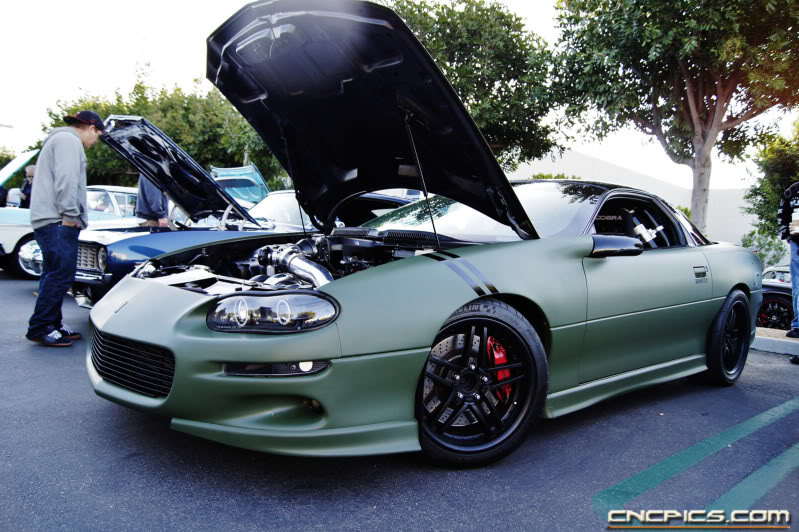
NEW COLOR SCHEME:

http://youtu.be/Ra0kGcRJ48A
Thanks for checkin out my thread! -Josh Forster
NEW:
OLD:
PREREQUISITES
in order to fab this kit, you need to mount the radiator vertically. I called Griffin Radiators and told them what I was doing and what engine it was for and they built me a custom one. The "universal" griffin that everyone seems to use really isnt the correct unit to use. The engineers at Griffin said that would be too small, and it does not come with a steam port for the heads, or a bung to mount the fluid level sensor. Id just call them and get their recommendation Here are some photos on mounting it...
I used a sawzall and just notched my rad support. If you want more room, you can cut it out completely and weld in a square bar to tie the two ends together
You will be left with some ugly looking holes. I cut a piece of metal to the same shape and welded it on, filed, and bondo'd it to make it look OEM.
Now just paint!
You will also need to mount your intercooler:
I just notched out the bumper support, leaving the top of it in tact. then i bolted the intercooler straight up to that.
This is the tubing going to the motor. You dont need to move the fuse block, just loosen it from the bracket to make room for the tube to come through.
TOOLS NEEDED
I used very simple tools, and a basic lincoln MIG welder. Even if you dont have a welder, you can make everything, and then have someone weld it up.
The basics were:
Shielded Gas MIG Welder
Saw (I used a Sawzall for all my cuts haha)
grinder (I used a bench grinder and also had a dremel tool)
Angle gauge ( didnt use one but it might be helpful)
MATERIALS NEEDED
Truck Manifolds- no need to modify them. Just put the drivers side manifold on the passenger side the other manifold on the drivers side.
Mandrel bent tubing. I bought (1) 2" U bend for my wastegate, (3) 2.5" Mandrel U-bends for the merge pipes, and (3) 3" U bends for the downpipe. This gave me plenty of extra room for error
Manifold flange - I bought two laser cut flanges off ebay, but im sure some of our sponsors would have them. These are welded to the merge pipe and bolt on to the truck manifolds.
Turbo Flange - Bought my T4 flange from Turbonetics
Wastegate Flange - Should come with your wastegate
V-Band flanges w/ clamps - these come in handy while making the downpipe!
02 Sensor Bung(s)- for wideband/oem sensors
Turbo K-member- will make your life MUCH EASIER!!
MAKING THE MERGE PIPE
First thing i did was make the actual merge into the T4 Flange. I cut a U bend in half for the 2 pieces. then I measured the opening of the hole on the T4 flange and cut a little off the insides of each pipe until it looked like it would flow smoothly into the turbo flange. Its hard to explain in words, just look at all these pictures
After a little dremel work to smooth out the weld. After the ceramic coating- you can see how smooth the transition is!! Added metal Gussets to strengthen the mergeAfter the merge was done, I fully bolted up both manifolds with gaskets and started to put it all together... I started on the passenger side and worked my way over. You can go whatever way you want. Just start with the laser cut flange and figure out where you need to go next. THE LESS PIECES YOU HAVE THE BETTER This takes some creativity and a lot of trial and error, but cut an angle out of your U bend and hold it up to the manifold flange and look at the placement. if its where you want it, tack it on in a few spots.
Heres a trick i learned: Get a piece of foam tube (like a pool noodle or rollbar padding- etc) then cut it into a few pieces. this way you can jam it into the tube and it will temporarily hold 2 pieces together. THIS IS VERY HELPFUL WHEN MAKING COMPLICATED TURNS!!!
After a lot of time and hard work, you'll be half way there
THIS IS TEST FITTING THE PLACEMENT OF THE TURBO, I PUT A JACKSTAND UNDER THE MERGE SO I WOULDNT BREAK THE LITTLE WELDS I HADTo make the wastegate merge: My turbosmart 50mm required a 2" pipe, so i used a hole saw and cut a 2' hole in the middle of my merge pipe. I then slid in the pipe, and traced around the pipe with a sharpie to figure out how to cut the pipe. A grinder comes in handy because this wont be a straight cut... slide it back in, weld it up, and smooth out all the welding slag!
Now just continue everything over to the other side, and BAM! you just finished the hard part
if youre happy how it turned out, remove the whole thing and fully weld it up!Now follow the same process for the downpipe. I have a V-band clamp attaching the downpipe to the turbo, and more right before and after it goes through the k-member. This makes everything a lot easier to remove if you need to work on the engine. Keep following the same process all the way to your cat-back and youre done!! now plumb the turbo, and route the cold side (there are many write-ups for that) and all the other turbo goodies!
MORE TIPS
Patience!!!!! Making a nice straight cut will make lining up and welding everything much easier.
Dont over-complicate Simple is better, dont go all crazy routing piping everywhere
Ceramic coat your tubing - youll thank me later, i used to have another turbo kit with header wrap and let me tell you, this is MUCH BETTER AND MUCH CLEANER LOOKING.
Use the proper tools!! Dont make cuts with a dull blade. Youre chances of hurting yourself or messing up are greater if your tools arent in good condition.
BE SAFE!!!! wear eye protection! ive been to the hospital twice and have had them DRILL out metal from my eye while i was awake. trust me, its not fun.
And last but not least......
HAVE FUN! this was a super fun project for me and it should be for you too!
More pics:
NEW COLOR SCHEME:
http://youtu.be/Ra0kGcRJ48A
Thanks for checkin out my thread! -Josh Forster
Last edited by KILLER-LS1; 05-23-2012 at 05:22 PM.

The following 3 users liked this post by KILLER-LS1:
07-09-2010, 11:16 PM
#2
Heres the most current specs on the car:
Engine:
• 408ci LQ4 Block
• Eagle Forged 4” Stroke Crank
• Eagle Forged Connecting Rods – Teflon Coated
• Wiseco Forged Pistons – Ceramic & Teflon Coatings
• Clevite Bearings – Teflon Coated
• Improved Racing Baffled Oil Pan
• ARP Studs & Bolts on Every Component
• Comp Cams Custom Camshaft
• Edelbrock Pro-Port Cylinder Heads CNC’d by West Coast Cylinder Heads
• Comp Cams Hardened Pushrods
• Comp Cams Rocker Trunion Upgrade
• Comp Cams High Energy Lifters
• Patriot Extreme Dual Valvesprings
• Edelbrock Pro-Flo XT Intake Manifold
• Edelbrock 90mm Competition Throttle Body
• Edelbrock Water Pump
• Griffin Custom Radiator
• Canton Crankcase Oil Catch Can
• ATI Super Damper
• Dual Edelbrock In-Tank Fuel Pumps
• Edelbrock Fuel Rails
• Turbosmart Adjustable Fuel Pressure Regulator
• Russell Pro-Classic Fuel Lines & Fittings
• MSD 2 Step Launch Control & Plug Wires
Turbo System:
• Custom 91mm Turbocharger
• Garrett Housings & Center Section, Turbonetics Compressor & Turbine Wheels
• Turbosmart Pro Gate 50mm Wastegate
• Turbosmart 50mm Blow Off Valve
• Turbosmart Eboost 2 Boost Controller
• Custom Stainless Steel T6 Flanged Turbo Kit – Ceramic Coated
• Custom 4” Downpipe w/ QTP 4” Electric Exhaust Cutout – Ceramic Coated
• Custom 3” Aluminum “Cold Side” w/ Front Mount Intercooler
• Russell Oil Feed & Return Lines
• Painless “Striker” Methanol Injection
• HP Tuners 3 BAR Speed Density Tune on Factory PCM - Tuned by Cunningham Motorsports (CMS)
Driveline:
• Centerforce DYAD Twin Disc Clutch & Flywheel
• Viper-Spec T56 6-Speed Transmission w/ Hurst Shifter
• PST 3.5” Driveshaft w/ Dual Safety Loops
• Moser 9” Rear Axle w/ Wavetrak Diff, 35 spline Axles, Control Arm Relocation
Chassis:
• QA1 Front Coilover Shocks & Koni Rear Shocks
• BMR Front & Rear Swaybars
• Baer Tracker Adjustable Tie Rod Ends
• BMR Tubular Engine Cradle
• BMR Adjustable Torque Arm
• BMR Torque Arm Relocation Transmission Crossmember
• BMR Dual Rod-End Chromoly Rear Lower Control Arms & Panhard Bar
• Energy Suspension Front Control Arm Bushings, Transmission & Motor Mounts
• Tubular Welded Subframe Connectors
• Custom 7 Point Roll Cage
• Brembo 14” Big Brake Kit
• Hawk HPS Pads
• Russell Brake Lines
Data:
• Custom 220mph Gauge Cluster by 6Litereater Designs
• Autometer Boost Guage & Wideband O2 Sensor
• Stewart Warner Digital Tachometer & Shift Light
Last edited by KILLER-LS1; 05-23-2012 at 05:13 PM.
 07-09-2010, 11:24 PM
#4
Heres a little info ive learned along the way, now that I'm on my 3rd turbo system:
Get everything ceramic coated, it is much better than any wrap.
Get a turboblanket, again for heat
Use extra heatshields anywhere you think it might cause an issue ... I melted a rack & Pinion boot on the dyno, and another time melted through the power steering line
Use the LEAST amount of silicone connectors as possible, those will always be the weak point
make sure the turbo is adequately supported, you dont want to stress the tubing
run the biggest oil drain you can. -12 if you can fit it
run the biggest air filter you can fit, my old ones were always a restriction
put an extra 02 sensor bung where your tuner can easily reach it, he will thank you later
invest in a high quality boost controller like Turbosmart Eboost 2. Its amazing what you can do with a nice boost controller. I used to run the AEM and the Eboost 2 has so many more functions!
Last edited by KILLER-LS1; 05-23-2012 at 05:20 PM.
The following users liked this post:
TURBOPOWERED68 (01-03-2021)
Trending Topics
 07-09-2010, 11:57 PM
#12
btw I learned how to weld on a harbor freight flux core lol so I know it could be done
07-10-2010, 12:36 AM
#15
TECH Resident
iTrader: (17)
Join Date: Sep 2009
Location: Orlando Fl.
Posts: 791
Likes: 0
Received 0 Likes
on
0 Posts


