70 Chevelle Restomod 5.3 w/S475 and 4L80E, Videos start on page 10
 05-09-2012, 03:06 PM
#21
11 Second Club
Thread Starter
iTrader: (8)
Join Date: Jan 2010
Location: Southern Idaho
Posts: 502
Likes: 0
Received 0 Likes
on
0 Posts
Don't know why the video uploaded that way but oh well. Not the prettiest thing ever put on the dyno but it was an opportunity to test run the engine and prove what these little motors are capable of.

 05-09-2012, 06:43 PM
#23
Hey! Is that a turbo I see on the top shelf, you sneaky devil?! Lol. What do you think of this project? Your dyno pull motivated me to grab this from a buddy. If we can work out a trade it should be mine by the end of the month. 395hp? Was that with a truck or car intake?
05-10-2012, 09:42 AM
#24
11 Second Club
Thread Starter
iTrader: (8)
Join Date: Jan 2010
Location: Southern Idaho
Posts: 502
Likes: 0
Received 0 Likes
on
0 Posts
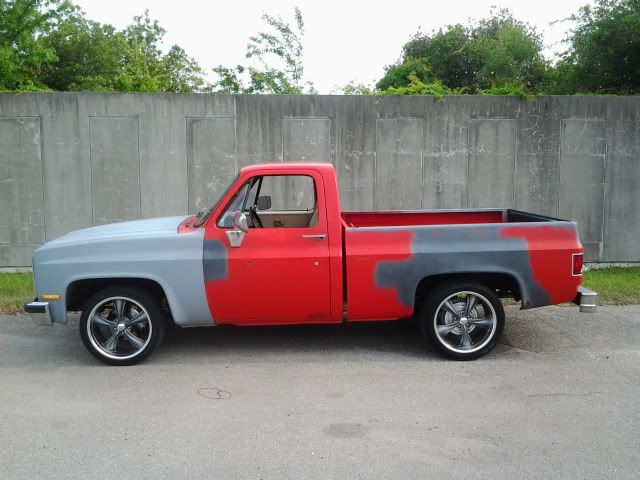
Yeah that's a blown up ebay turbo lol bearings went out of it and the compressor wheel ran into the housing, came off an old project, now just a garage decoration haha. That's not my favorite year of pickup but looks pretty good with those wheels on it. Good luck on the trade. I am running the truck intake on my 5.3
05-10-2012, 11:00 AM
#25
11 Second Club
Thread Starter
iTrader: (8)
Join Date: Jan 2010
Location: Southern Idaho
Posts: 502
Likes: 0
Received 0 Likes
on
0 Posts
Here is jewel of this thread haha should be making it's way into the car this fall or winter depending on funds and how satisfied I am with the NA 5.3

05-14-2012, 06:25 PM
#30
11 Second Club
Thread Starter
iTrader: (8)
Join Date: Jan 2010
Location: Southern Idaho
Posts: 502
Likes: 0
Received 0 Likes
on
0 Posts
I set the motor in with the F-body oil pan to discover that once it had ample crossmember clearance it was going to be too close to the firewall and require modifying the trans tunnel more than I had planned, forgot to take pics. But I switched back to the truck pan and set the motor back in with the frame stands in the stock location to see what I needed to do for a different oil pan.

The driverside mount slipped right into place

The passengers side wouldn't line up because the front of the oil pan was resting on the crossmember, common problem with stock style oil pans and the reason why most people shim the frame stands up.


Didn't get an exact pic but this one kinda shows it, the backside of the crossmember to the front of the sump had about an inch of clearance.

Like many others have stated the truck pan hangs way below the crossmember, about 3" in this pic.

And one from the bottom of firewall clearance.

Hope these pics can help someone else with their mount plate and pan choice.
The driverside mount slipped right into place
The passengers side wouldn't line up because the front of the oil pan was resting on the crossmember, common problem with stock style oil pans and the reason why most people shim the frame stands up.
Didn't get an exact pic but this one kinda shows it, the backside of the crossmember to the front of the sump had about an inch of clearance.
Like many others have stated the truck pan hangs way below the crossmember, about 3" in this pic.
And one from the bottom of firewall clearance.
Hope these pics can help someone else with their mount plate and pan choice.
05-15-2012, 09:06 AM
#33
11 Second Club
Thread Starter
iTrader: (8)
Join Date: Jan 2010
Location: Southern Idaho
Posts: 502
Likes: 0
Received 0 Likes
on
0 Posts
Then I should be sitting pretty in a couple days, just ordered the Autokraft pan! Wasn't sure about spending that much on an oil pan at first but I plan on making a corner carver out of this thing eventually so the baffling was very appealing.
 05-15-2012, 10:36 AM
#35
11 Second Club
Thread Starter
iTrader: (8)
Join Date: Jan 2010
Location: Southern Idaho
Posts: 502
Likes: 0
Received 0 Likes
on
0 Posts
Yeah the dyno numbers look good but I can't wait to get it to the track to see how it really performs. I really like EFILive it was just a little complicated to learn at first but with multiple trips back to their forum I got it figured out.
05-15-2012, 10:56 AM
#36
11 Second Club
Thread Starter
iTrader: (8)
Join Date: Jan 2010
Location: Southern Idaho
Posts: 502
Likes: 0
Received 0 Likes
on
0 Posts
Picked up a set of the Ford Windstar fans, tested them real quick then modified for the chevelle radiator water necks and drain.

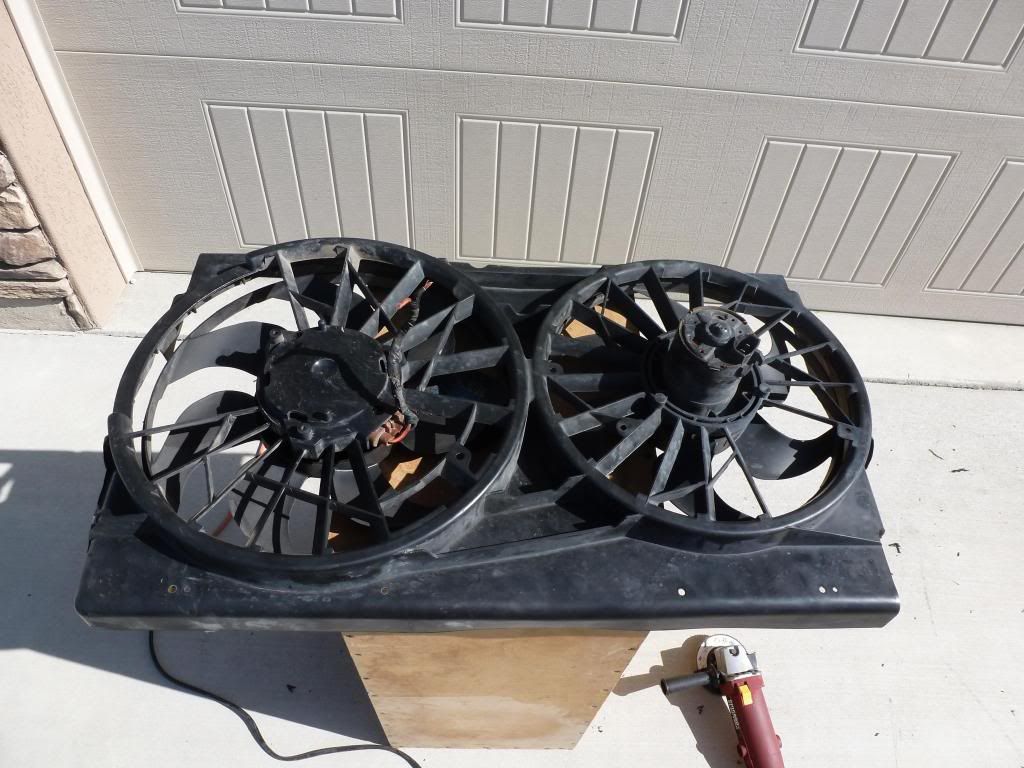
How they look sitting in place, I haven't made brackets for the bottom yet, that will be tonight.


How they look sitting in place, I haven't made brackets for the bottom yet, that will be tonight.
Last edited by Agent_Orange_Shuvel; 01-30-2014 at 03:51 PM. Reason: fix pic links
05-15-2012, 11:01 AM
#37
11 Second Club
Thread Starter
iTrader: (8)
Join Date: Jan 2010
Location: Southern Idaho
Posts: 502
Likes: 0
Received 0 Likes
on
0 Posts
Also test fit the exhaust manifolds, the driverside wouldn't fit at all because of the brake distribution block and the passenger side just barely cleared the frame so I cut both the flanges off and plan to have a buddy weld v-bands on for me. I decided to go with the v-bands for tighter packaging and will probably use these same manifolds when I go turbo.


05-15-2012, 11:15 AM
#38
11 Second Club
Thread Starter
iTrader: (8)
Join Date: Jan 2010
Location: Southern Idaho
Posts: 502
Likes: 0
Received 0 Likes
on
0 Posts
For my fuel system I am gonna run a sumped stock tank and a single inline walbro 255 plan on using the stock fuel rails and regulator setup so I will be running a feed and return from the tank to the engine. Couple pics of the tank.

cleaned up with new anti-sqweek strips applied

loosely hanging in place until I get the fuel pump and filter mounted and lines ran
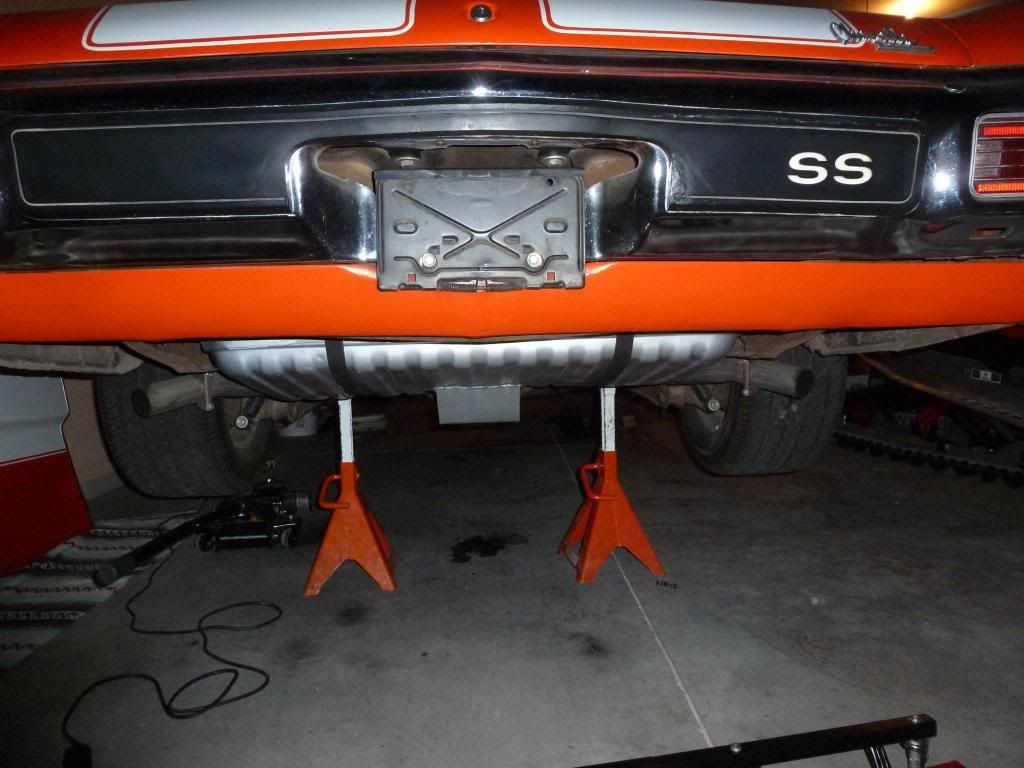
I decided to not go with the traditional rear facing sump for a cleaner look and the guy who made the sump baffled it so I shouldn't have any fuel starvation issues.
cleaned up with new anti-sqweek strips applied
loosely hanging in place until I get the fuel pump and filter mounted and lines ran

I decided to not go with the traditional rear facing sump for a cleaner look and the guy who made the sump baffled it so I shouldn't have any fuel starvation issues.
Last edited by Agent_Orange_Shuvel; 01-30-2014 at 03:52 PM. Reason: fix pics
05-15-2012, 12:05 PM
#39
TECH Fanatic
Even with the vband you will need to move the proportioning valve. I just unbolted and pushed it op untill I get the turbos on then I will pull it back down and bolt it right back in the same place.
05-21-2012, 04:04 PM
#40
11 Second Club
Thread Starter
iTrader: (8)
Join Date: Jan 2010
Location: Southern Idaho
Posts: 502
Likes: 0
Received 0 Likes
on
0 Posts
Got the engine and accessory bracket painted, looks a lot better!


This showed up at work as well

Tried setting the motor in with the autokraft pan and still had trouble getting the mounts to line up, flipped them upside down and it slid right into place. I will post pics when I get a chance to download my camera again.
This showed up at work as well
Tried setting the motor in with the autokraft pan and still had trouble getting the mounts to line up, flipped them upside down and it slid right into place. I will post pics when I get a chance to download my camera again.