'83 Monte Twin Turbo LQ4 Build


 01-02-2015, 12:43 PM
#82
Teching In

Join Date: Feb 2007
Posts: 31
Likes: 0
Received 0 Likes
on
0 Posts

Nice build, just read through it all. Like it had been said before...you are VERY talented. I am building a similar Monte, but mine will be for more than just a straight line. Not that there is anything wrong with that. It's just not me. Here is a link to my build that I started a LONG time ago (knew it had been awhile...thread was started Aug 2004, a few things have changed since then).
Can you give me some information on your hood strut setup? I have a glass hood also, and want to use gas struts also.
Thanks, and keep up the excellent work,
Joe
Can you give me some information on your hood strut setup? I have a glass hood also, and want to use gas struts also.
Thanks, and keep up the excellent work,
Joe


 09-20-2015, 07:59 PM
#86
Staging Lane
Thread Starter
Join Date: Nov 2007
Location: Connecticut
Posts: 86
Likes: 0
Received 0 Likes
on
0 Posts
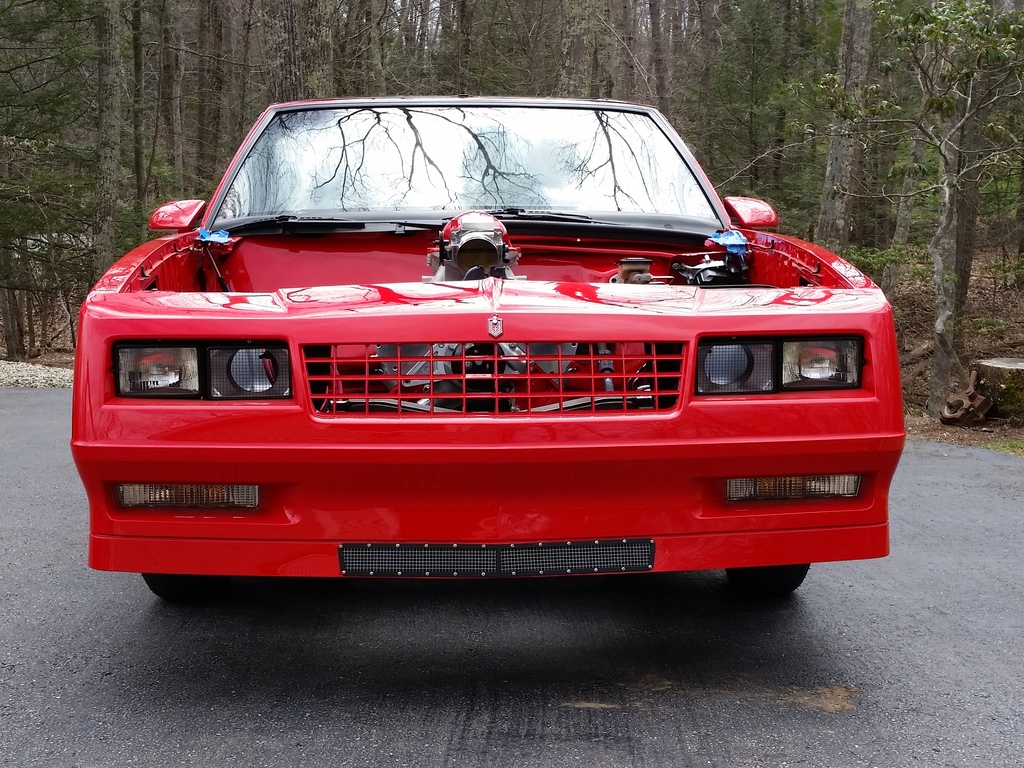
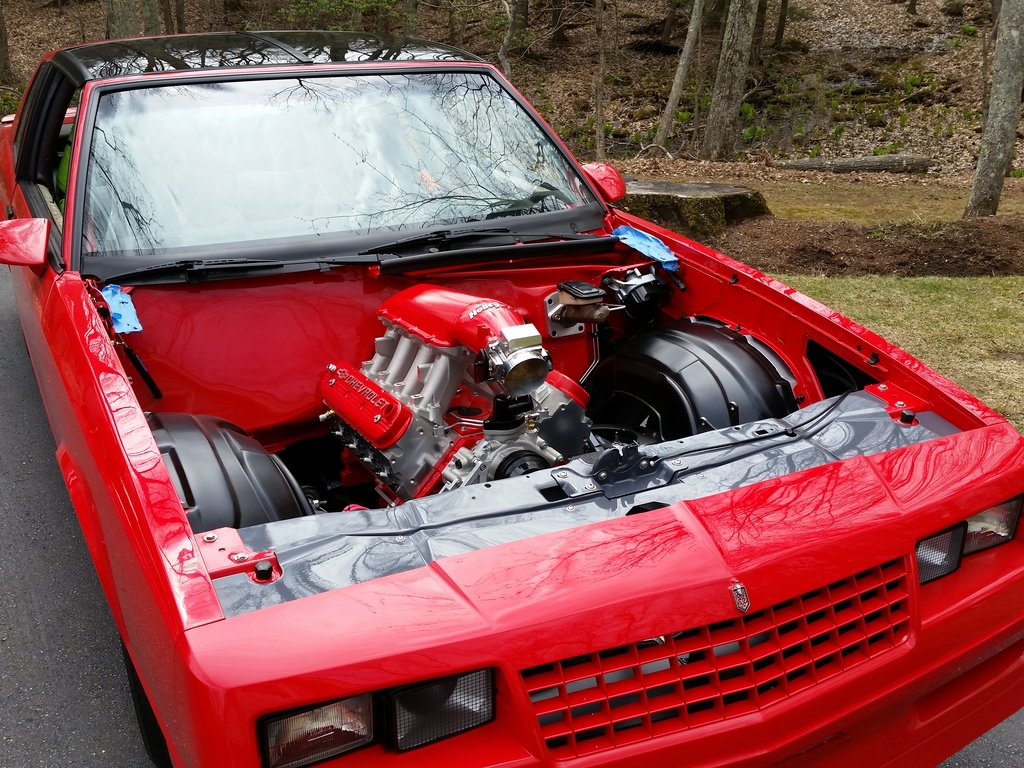
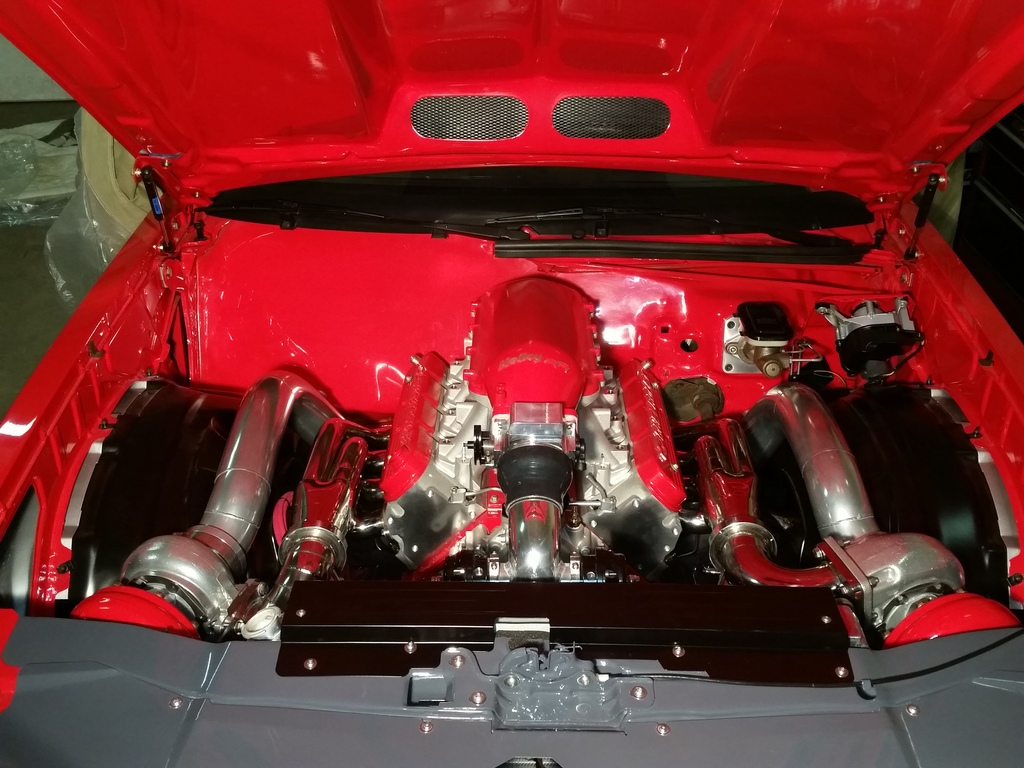
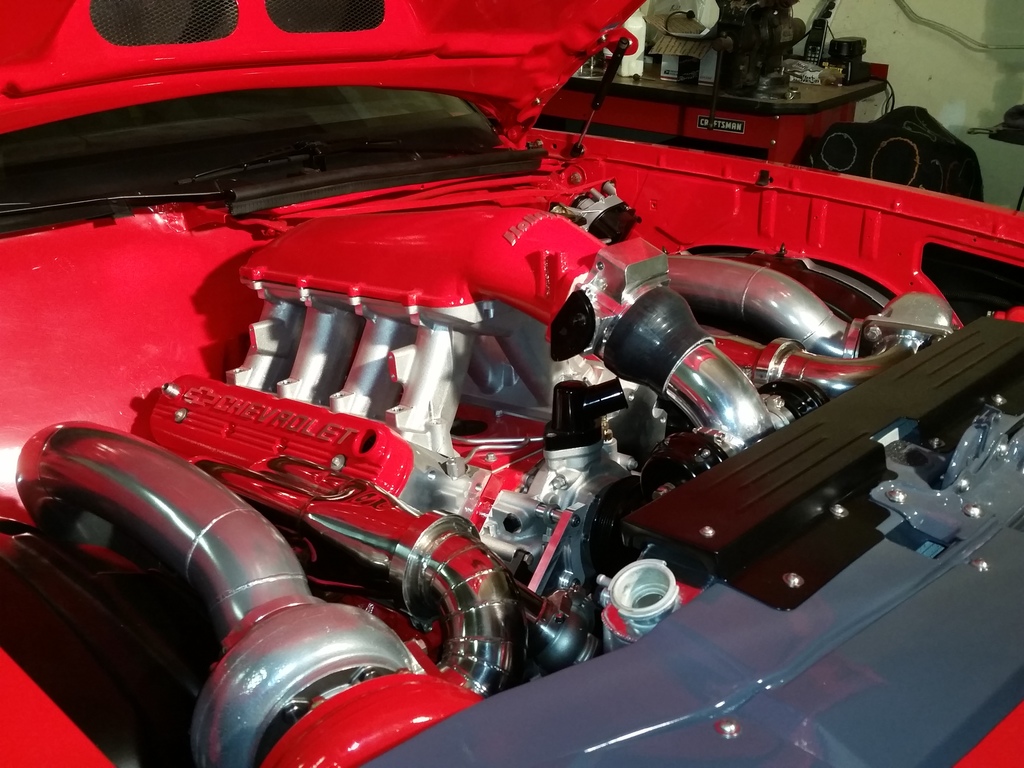
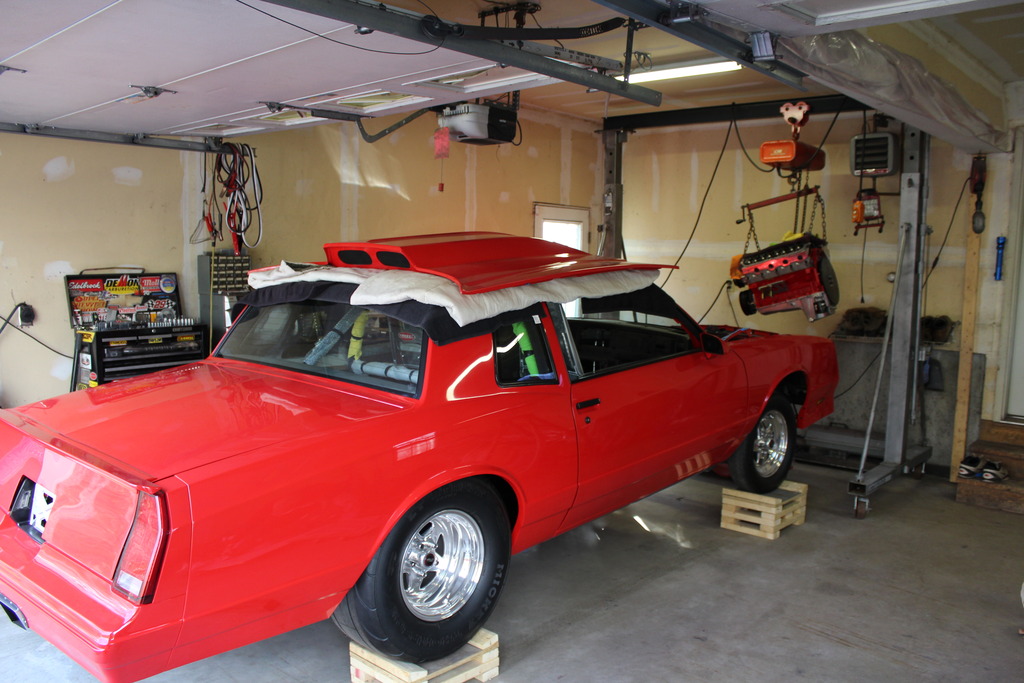
It's been a while! so here's the last year or so in pictures. We've done more than I can probably remember to type and things I don't have pictures of, but still not there yet. At this point, we have interior pieces getting upholstered, working on figuring out the MS3 Pro fuel management we just purchased, still need fuel system, and rear gears. Then all the other little odds and ends.
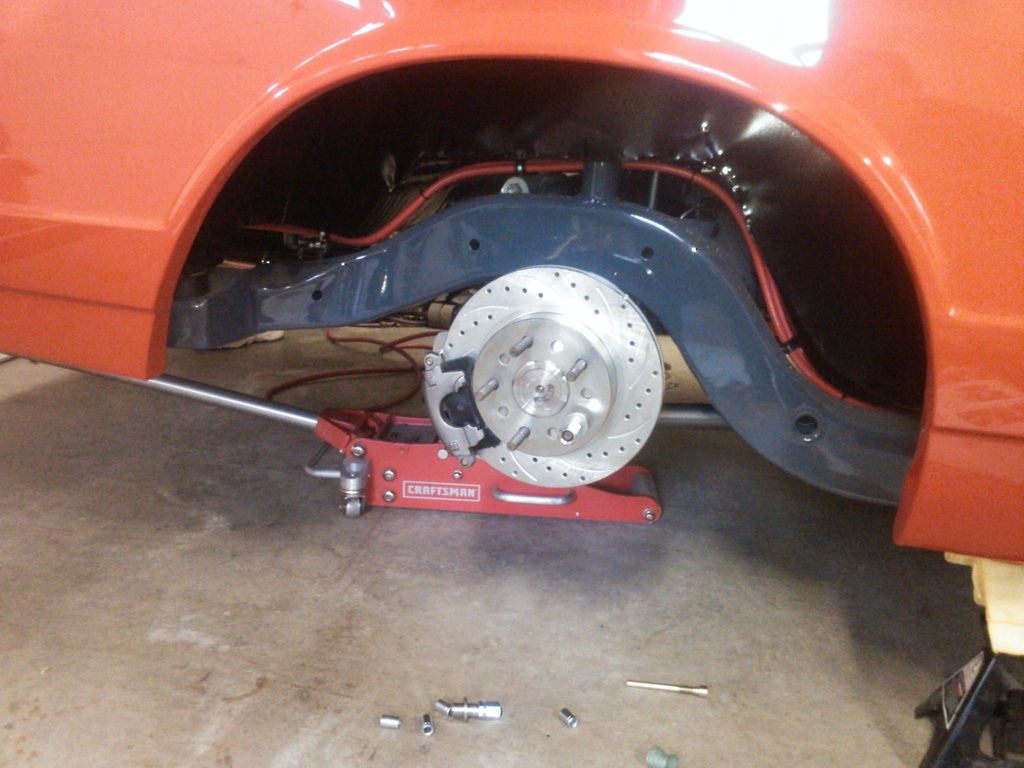
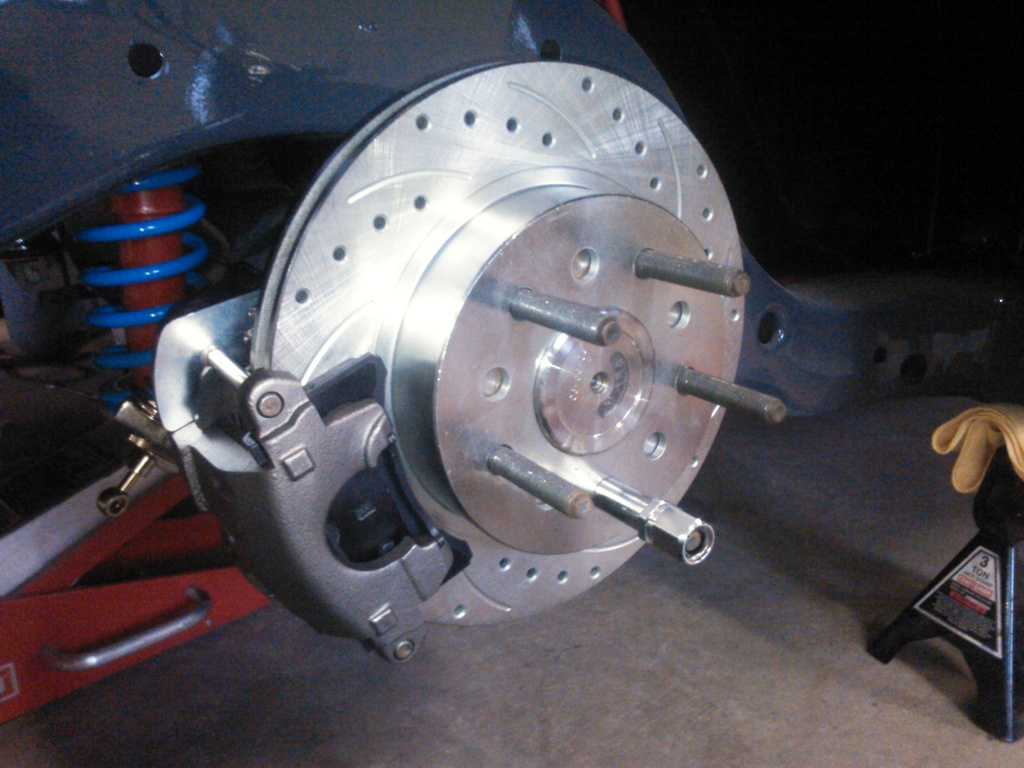
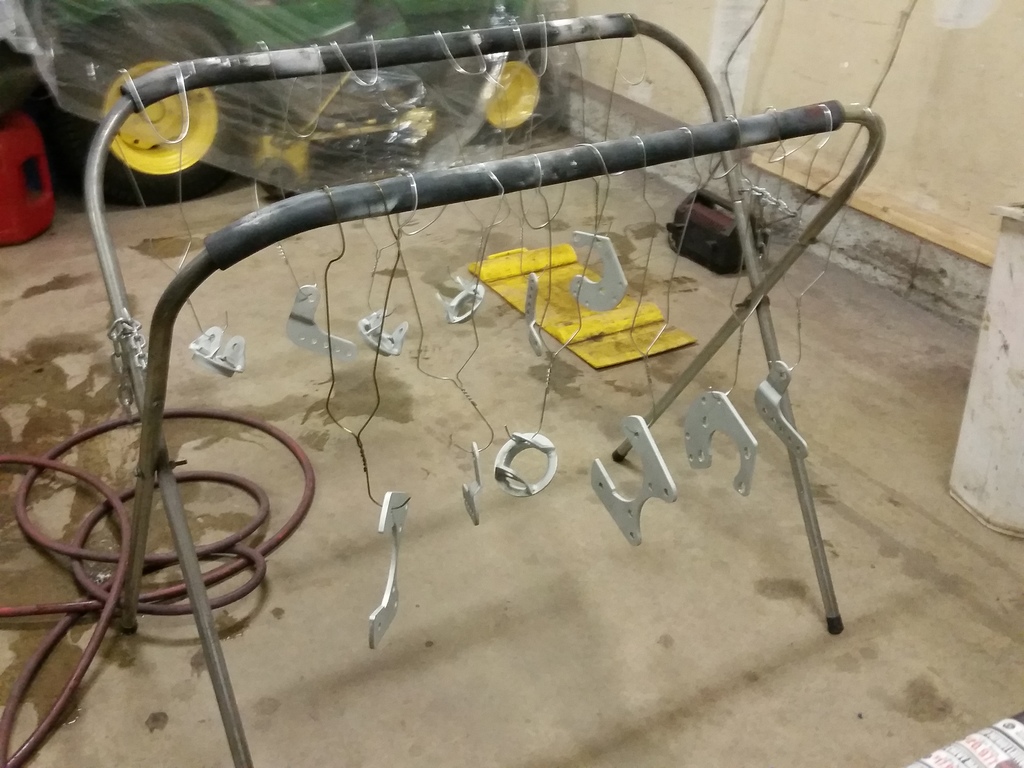
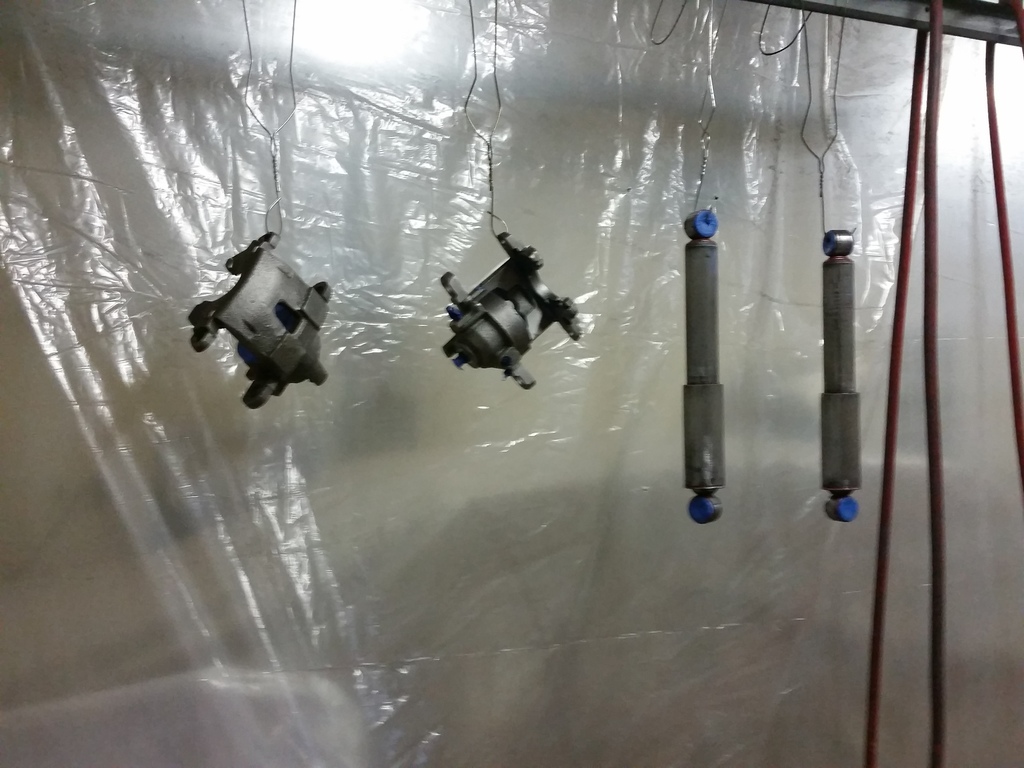
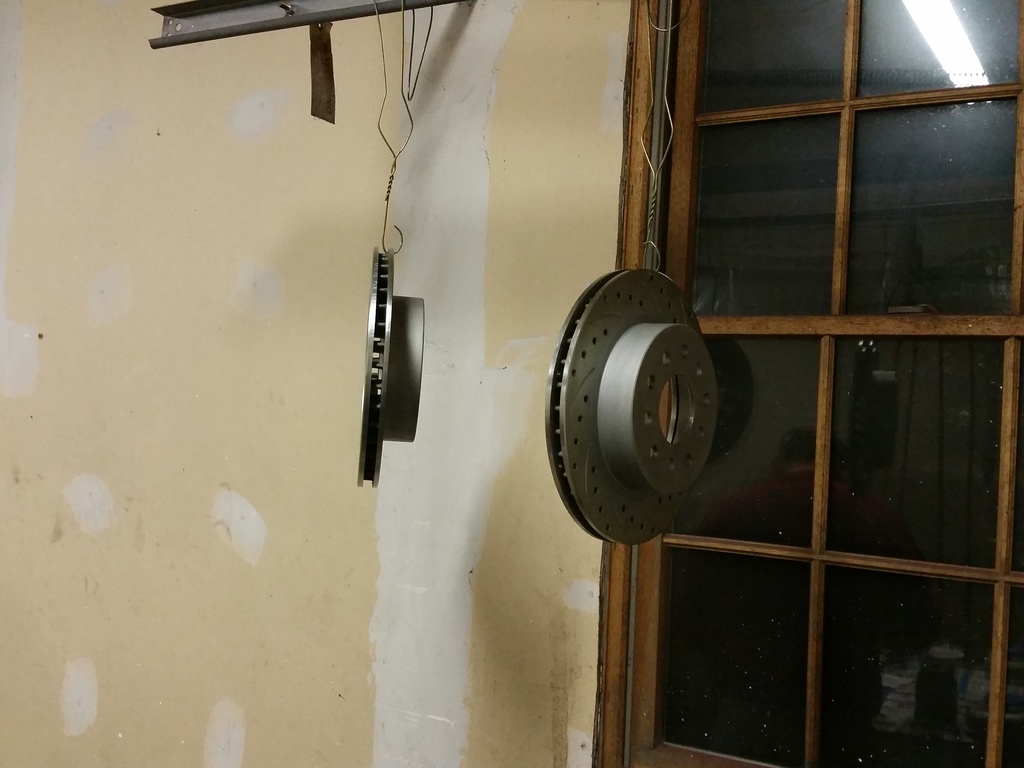
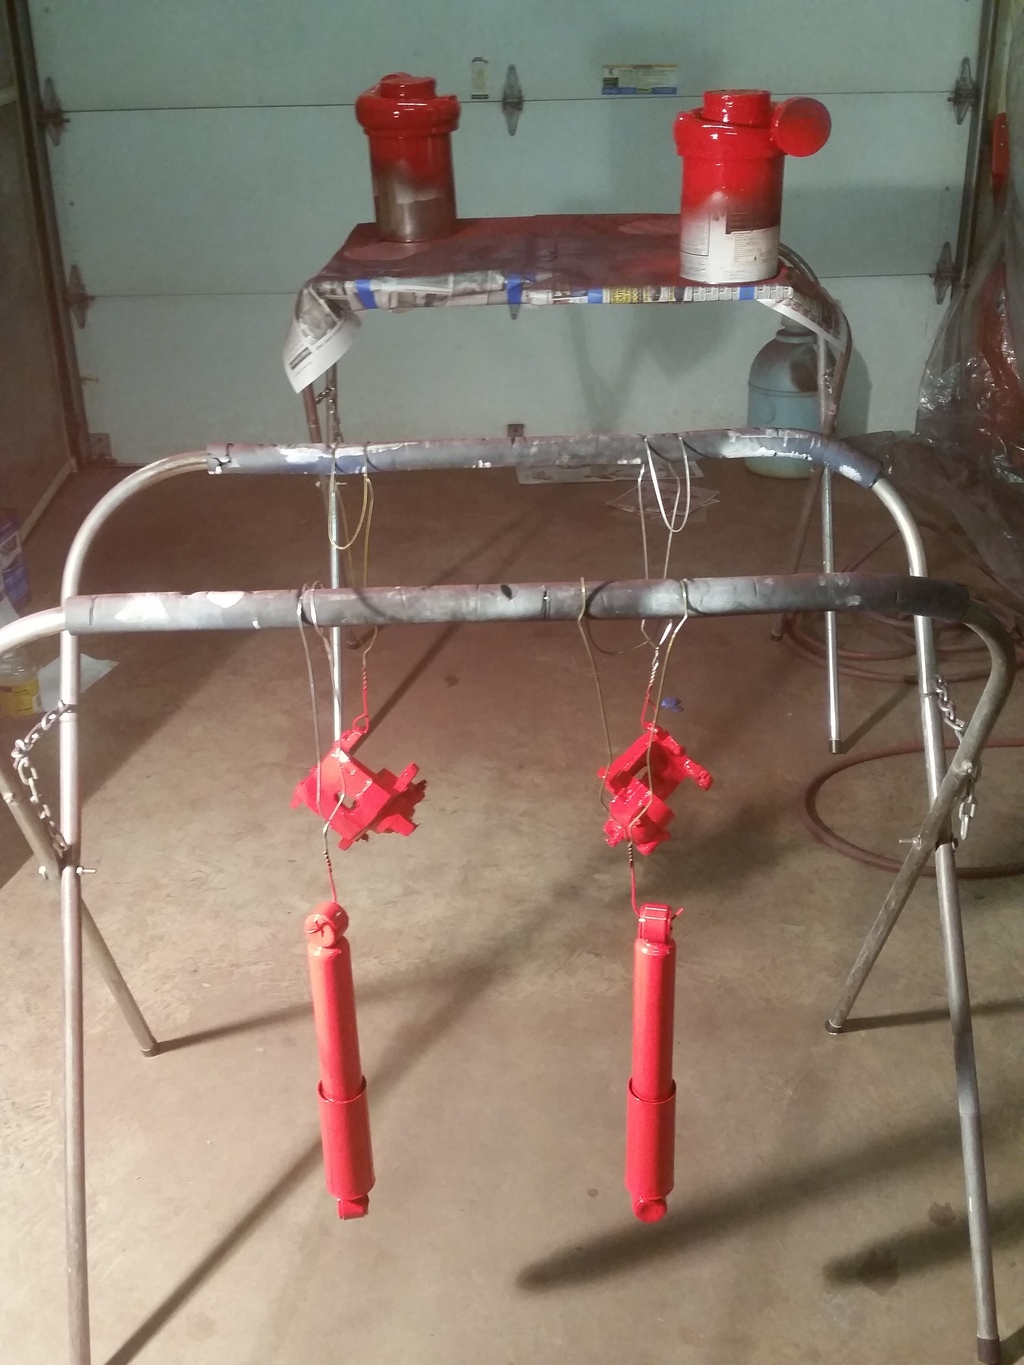
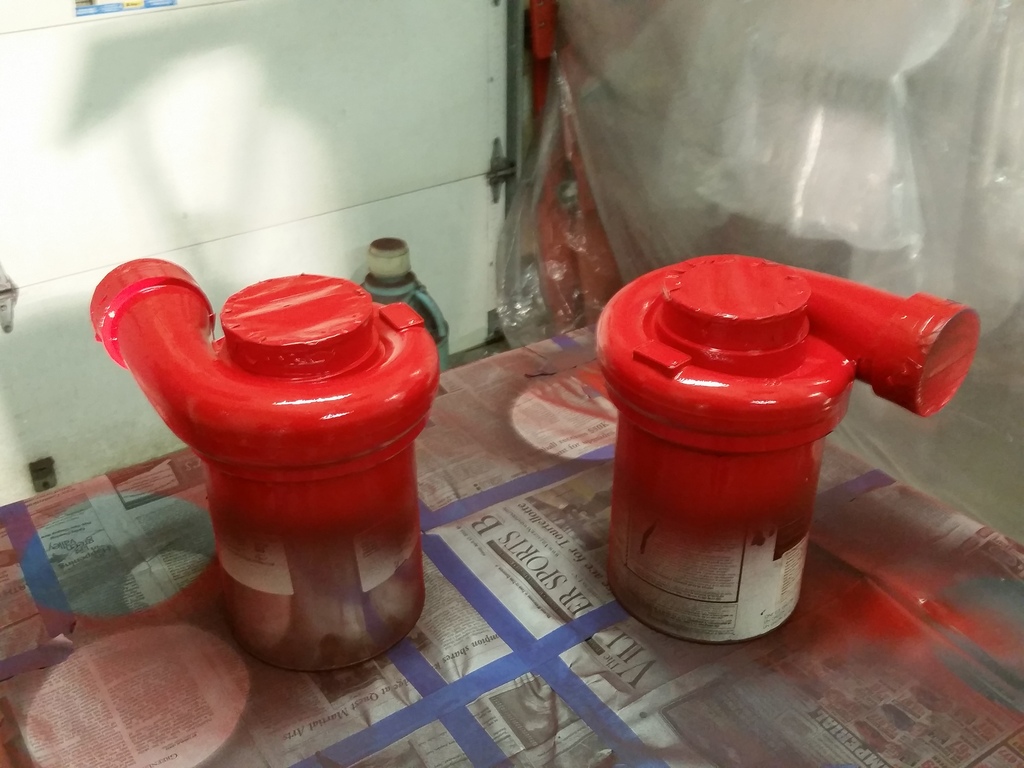
Installed/mocked up rear disc brake conversion. Everything is back off after painting everything. Waiting to put them in once the axles go in once and for all. Also painted other goodies at the same time.

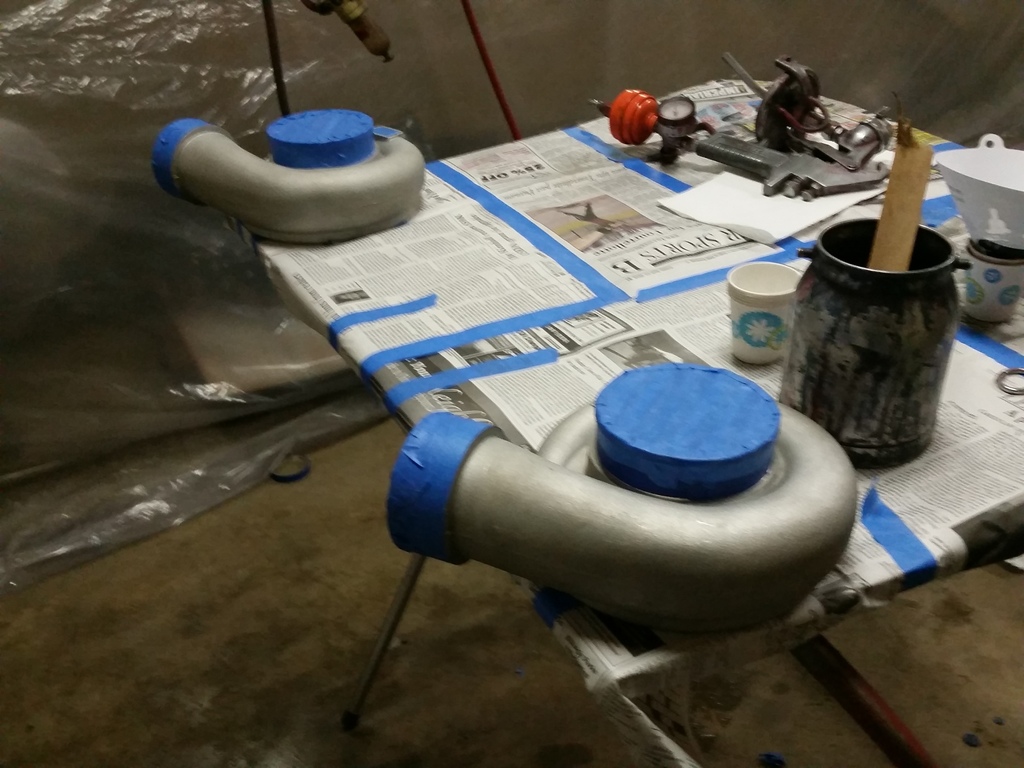


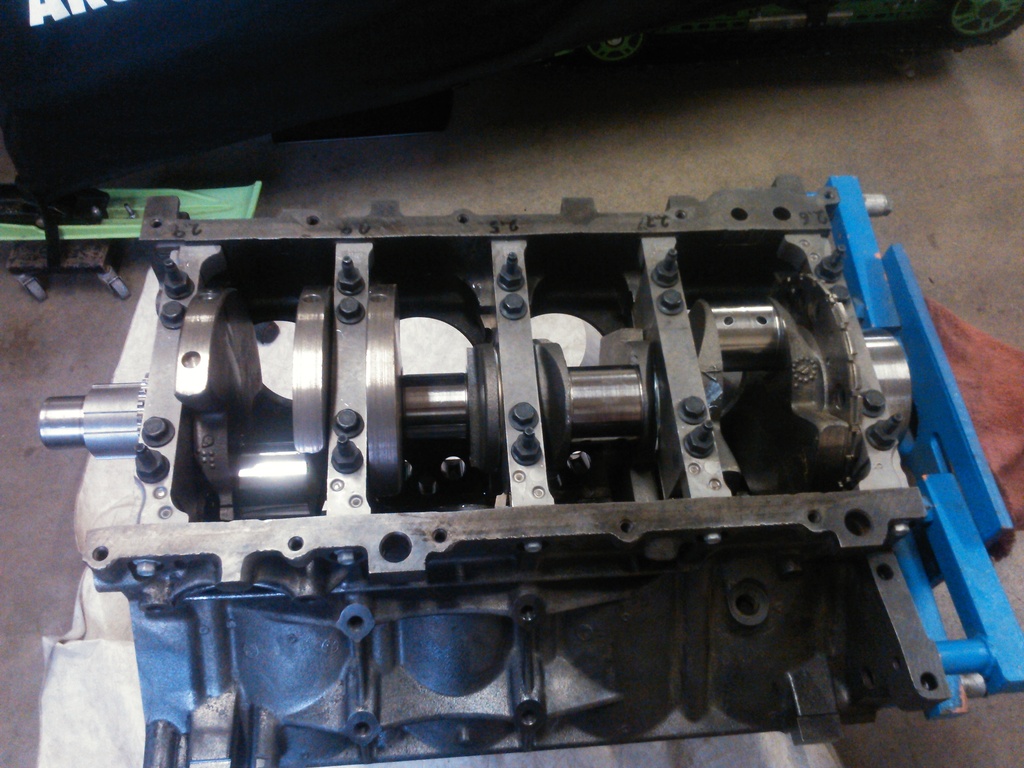
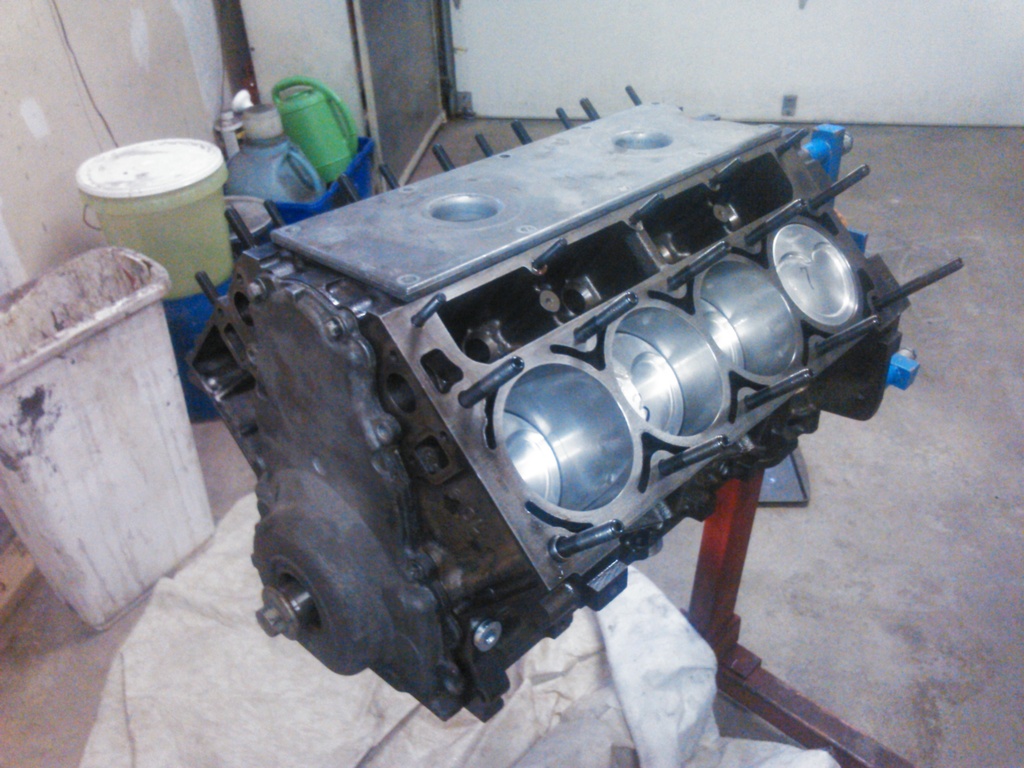
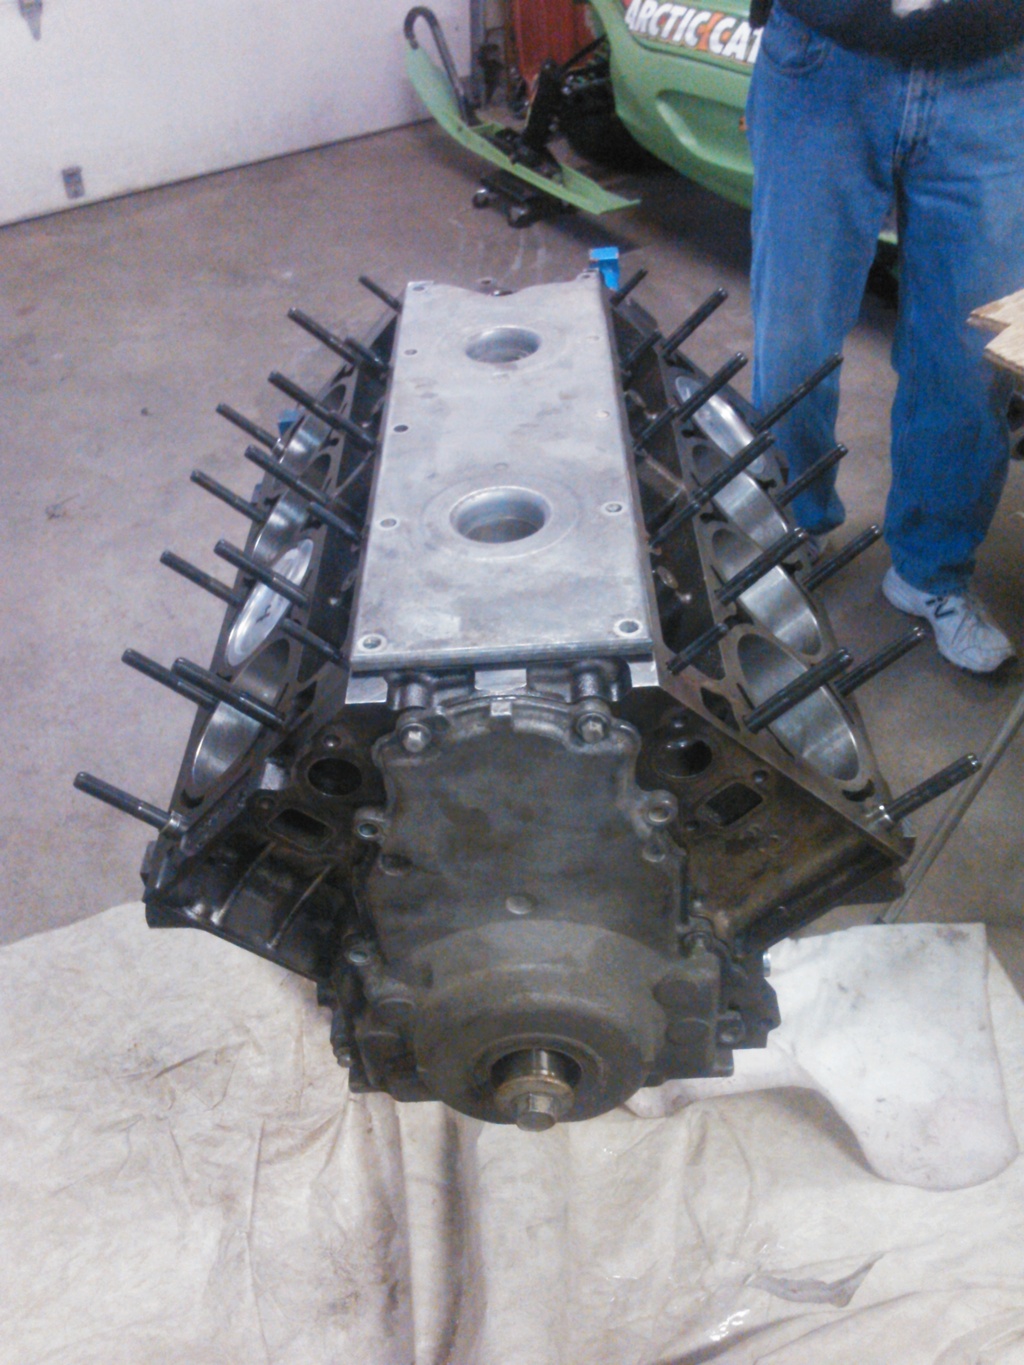
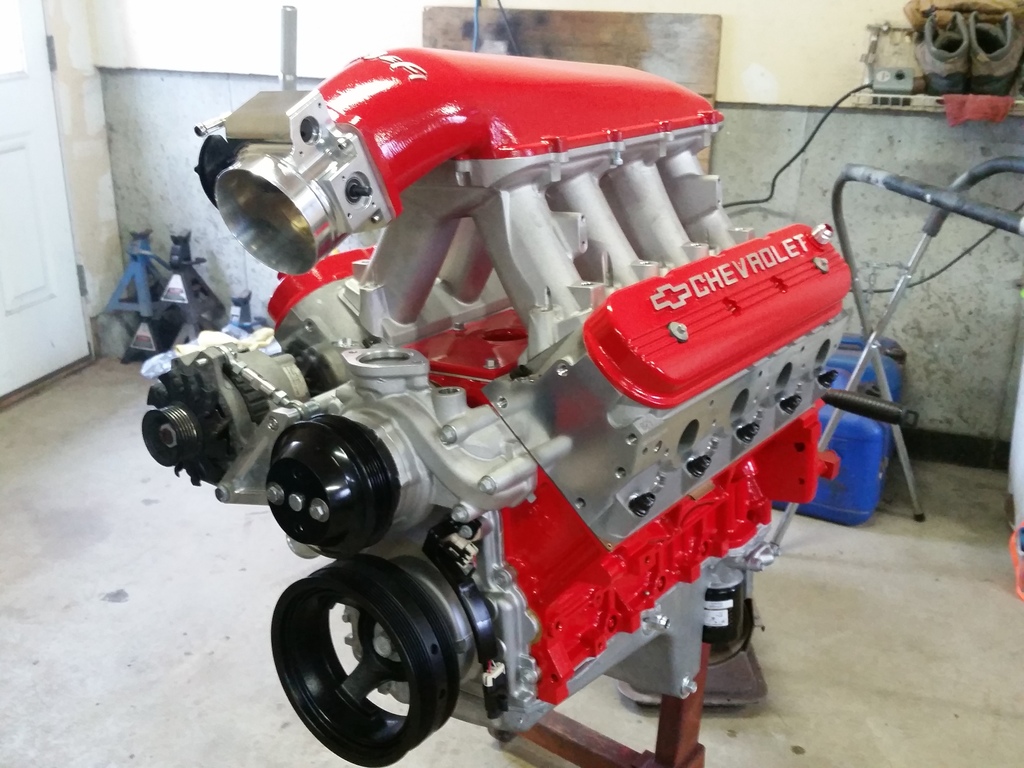
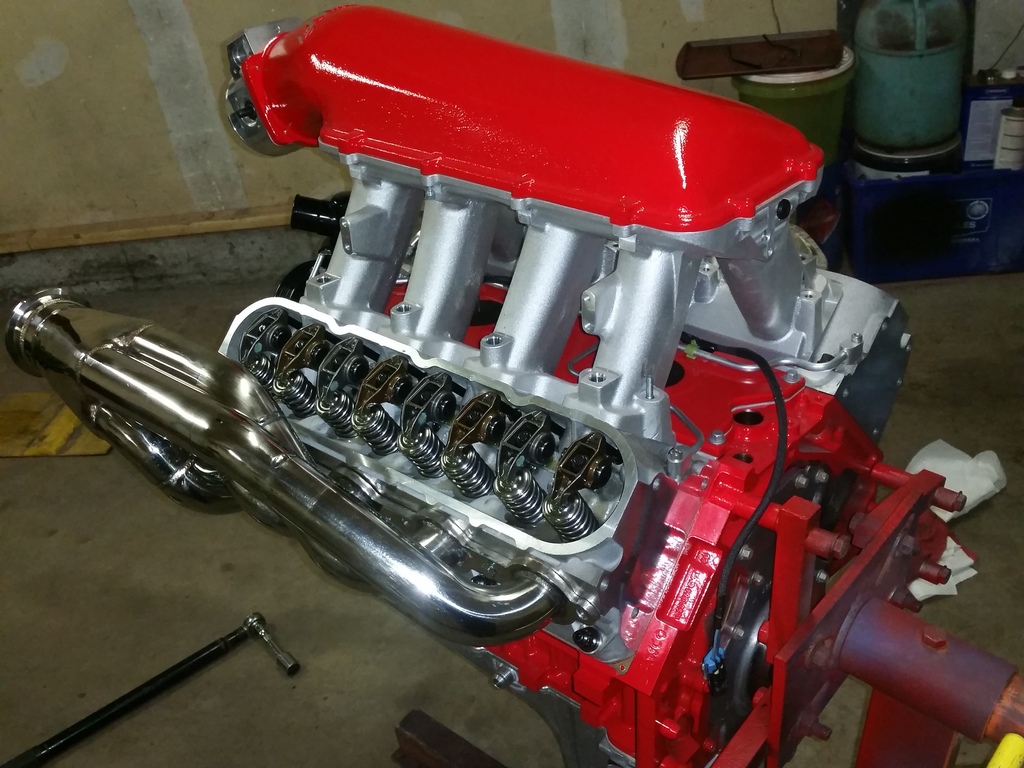
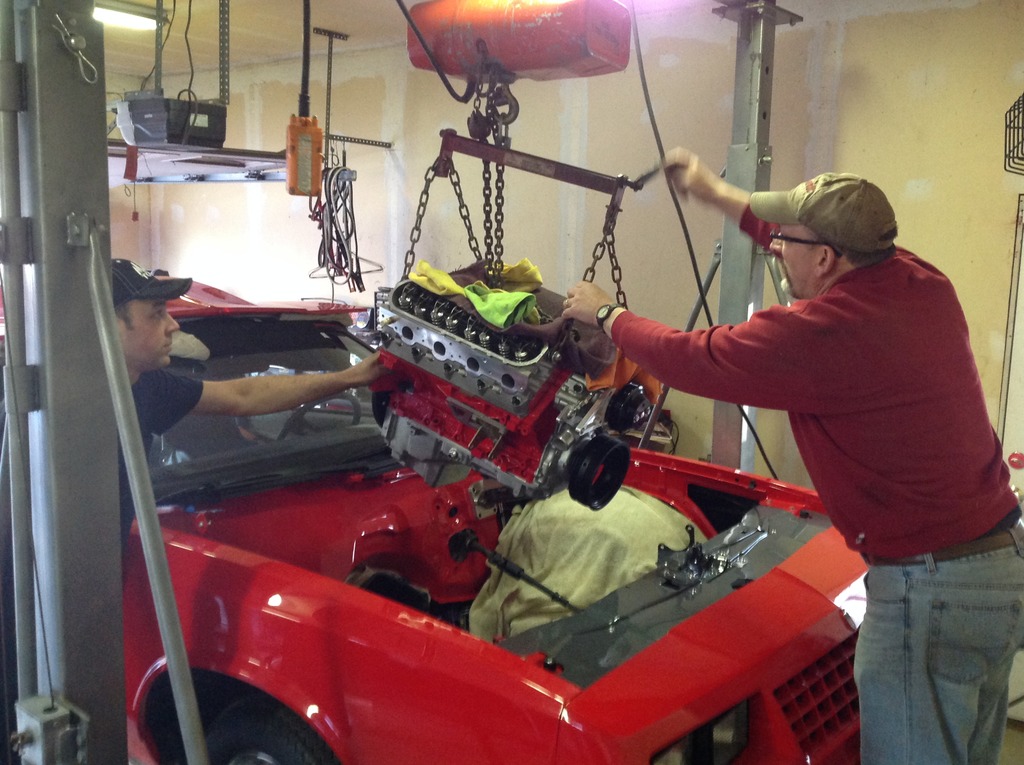
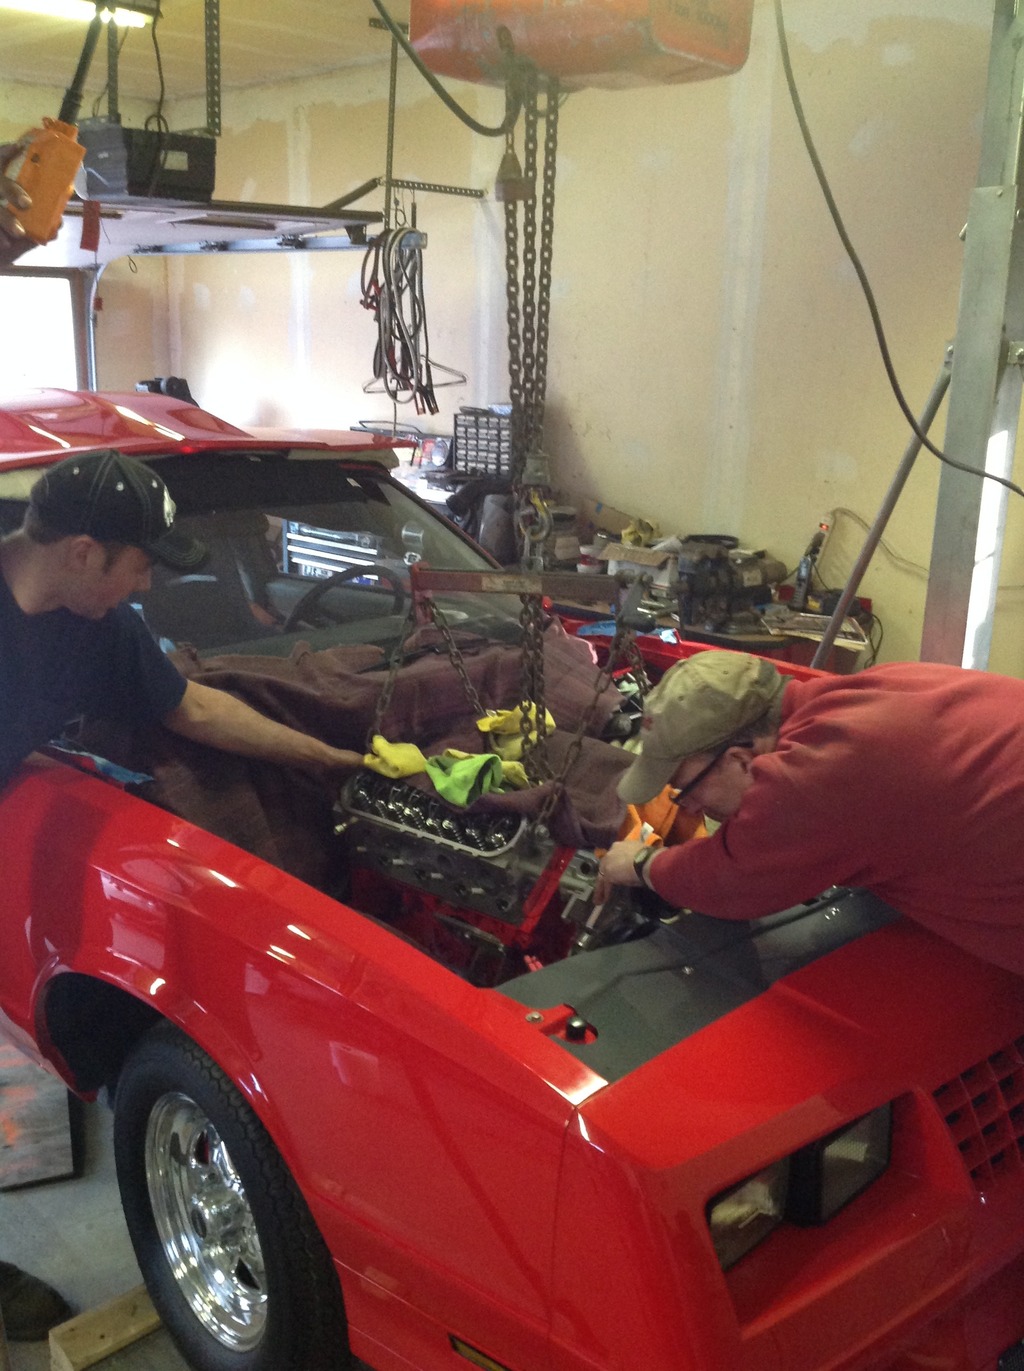
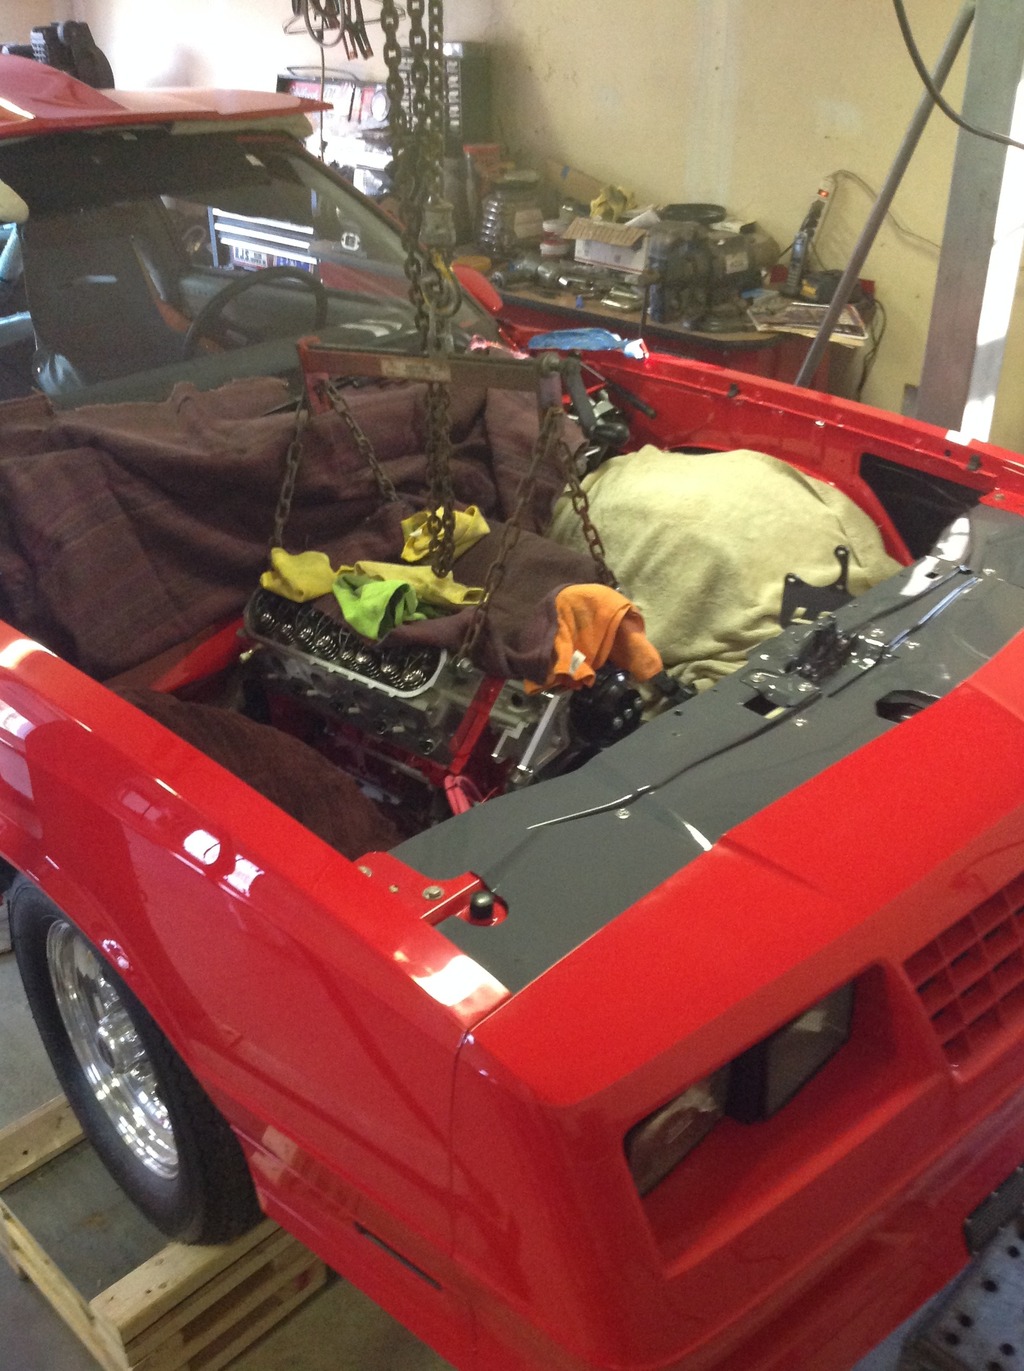
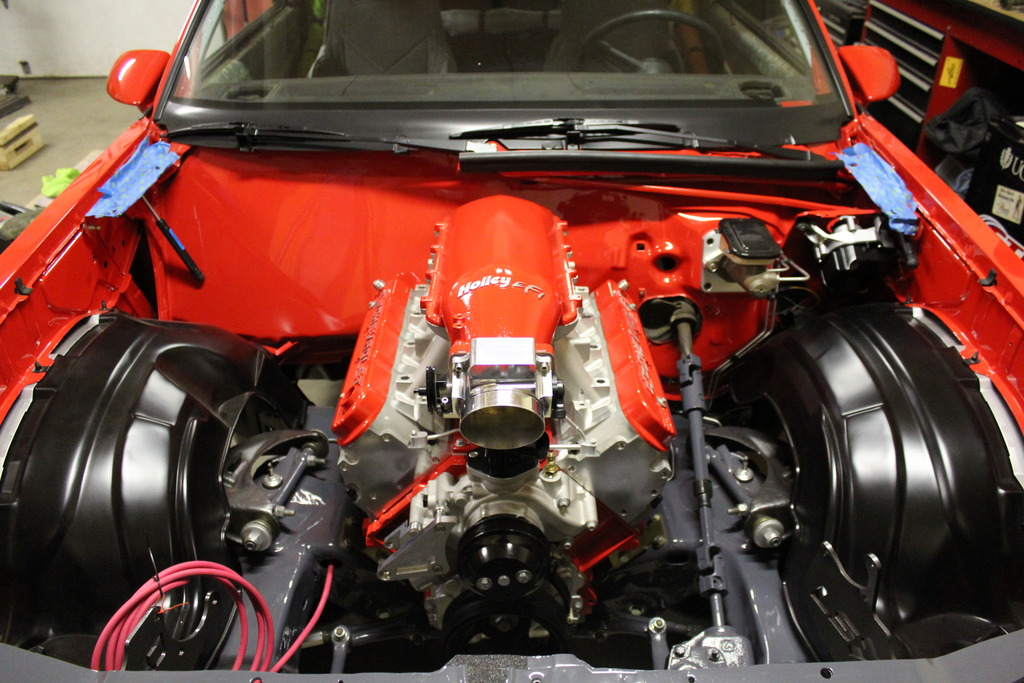
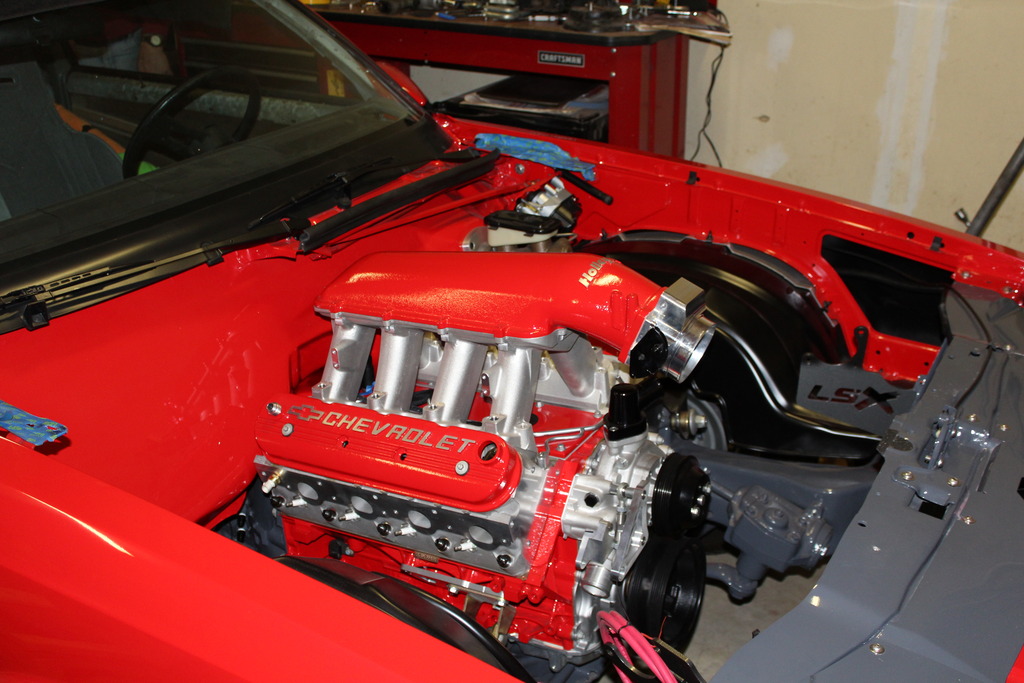
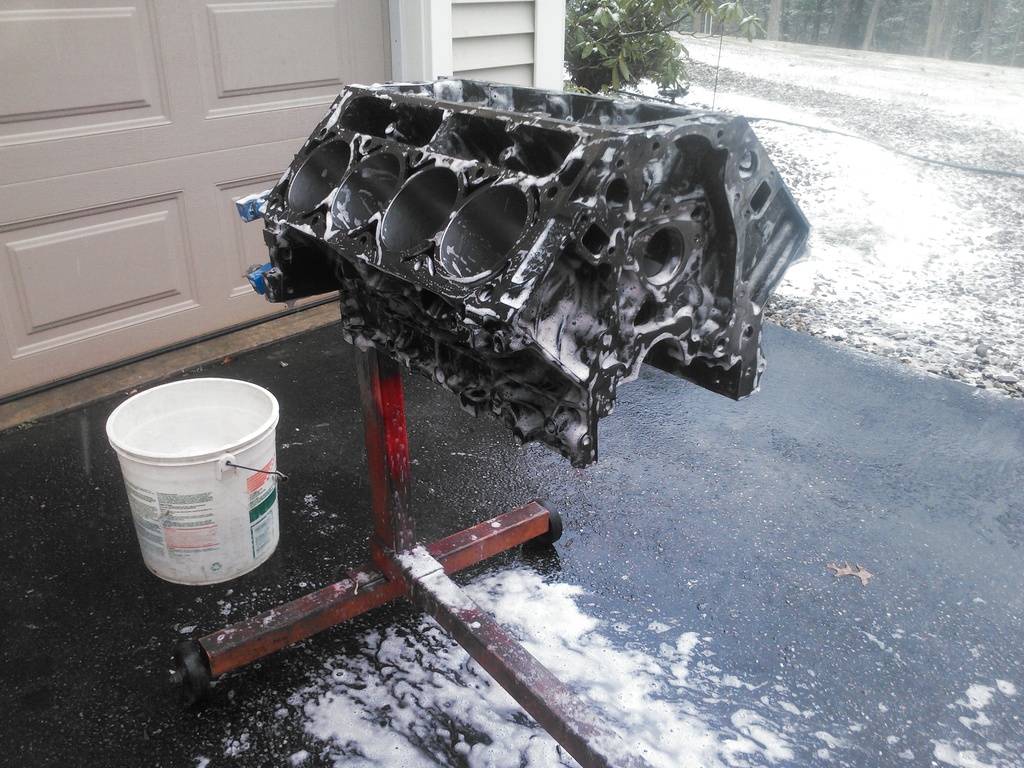
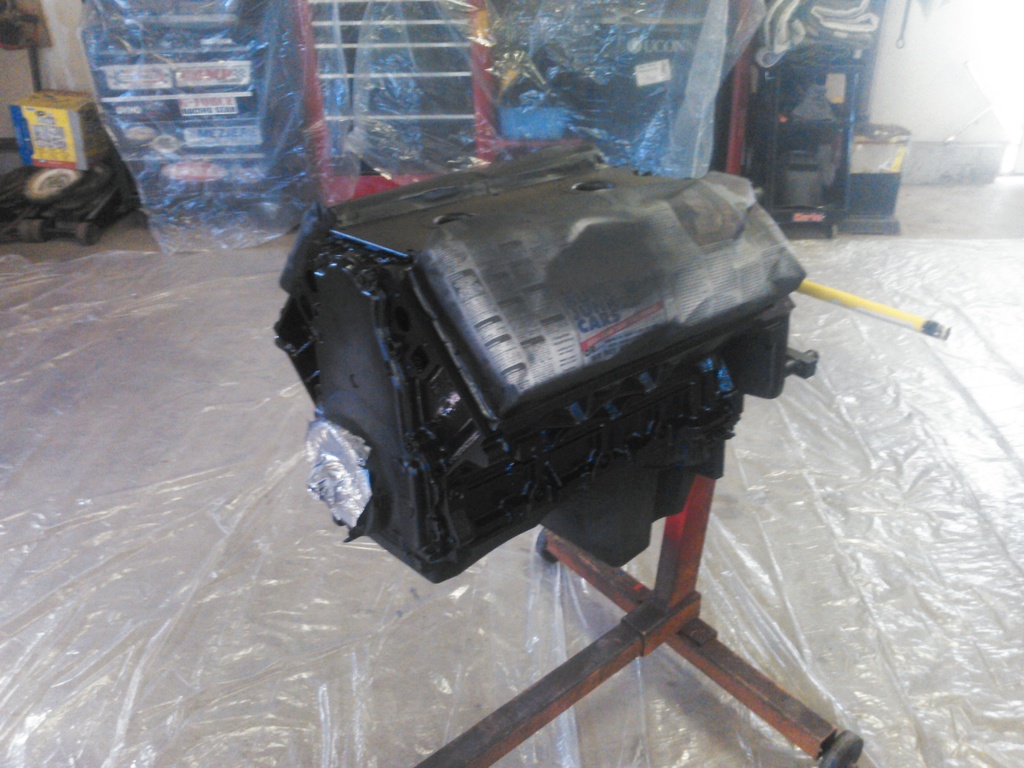
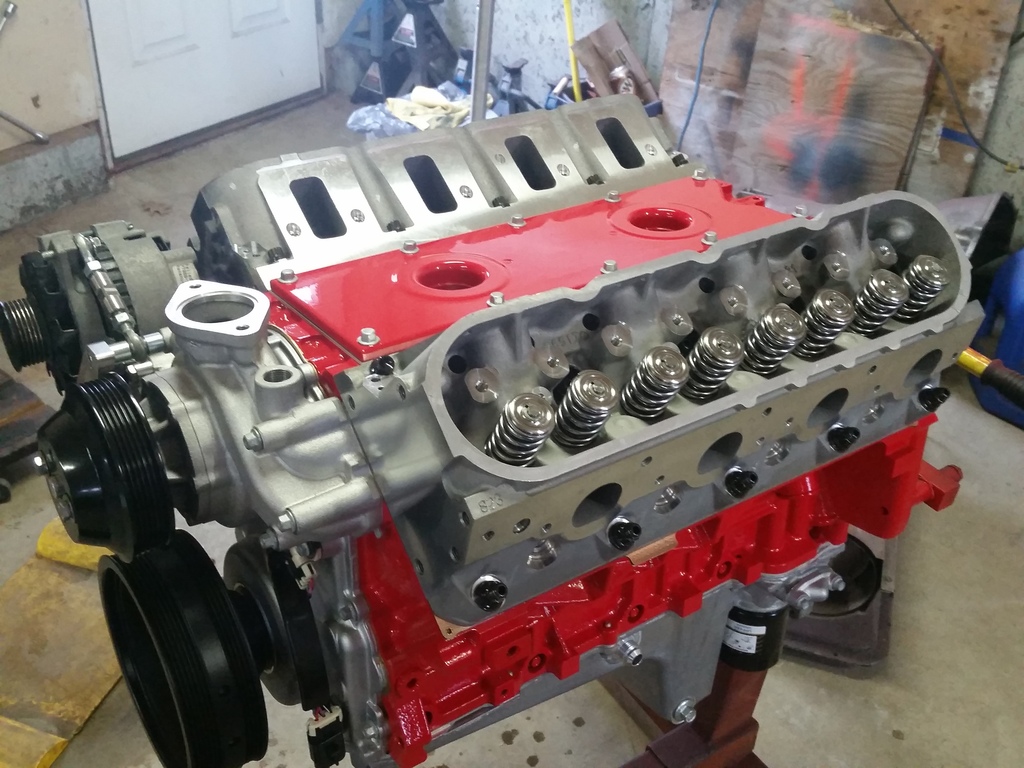
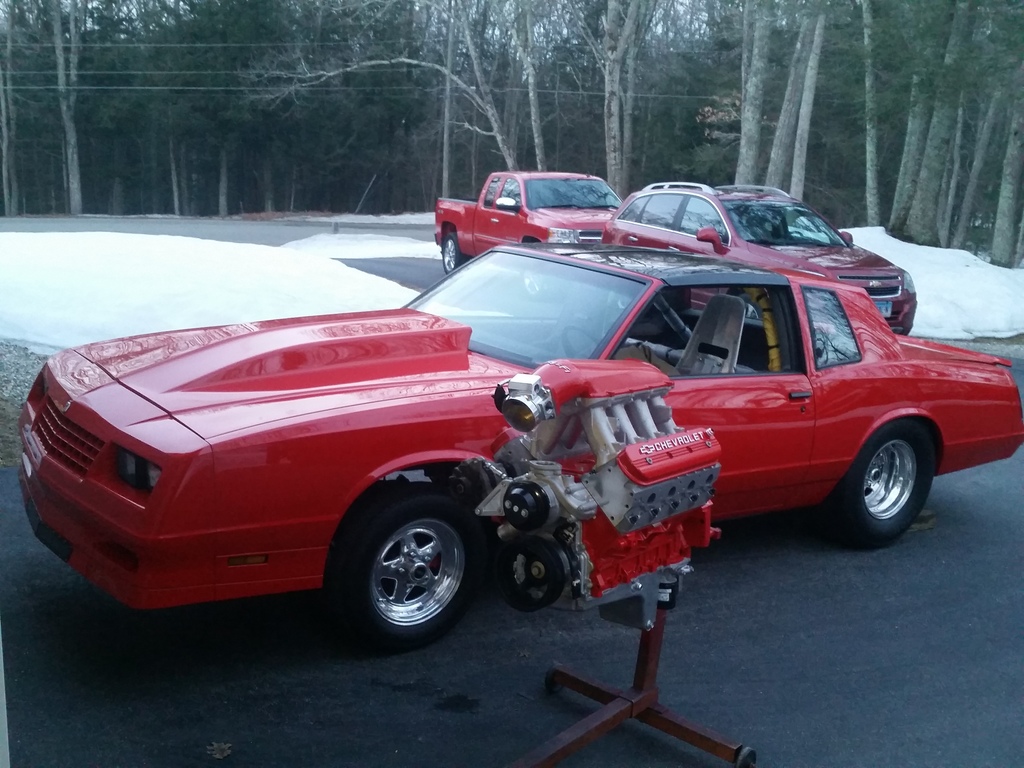
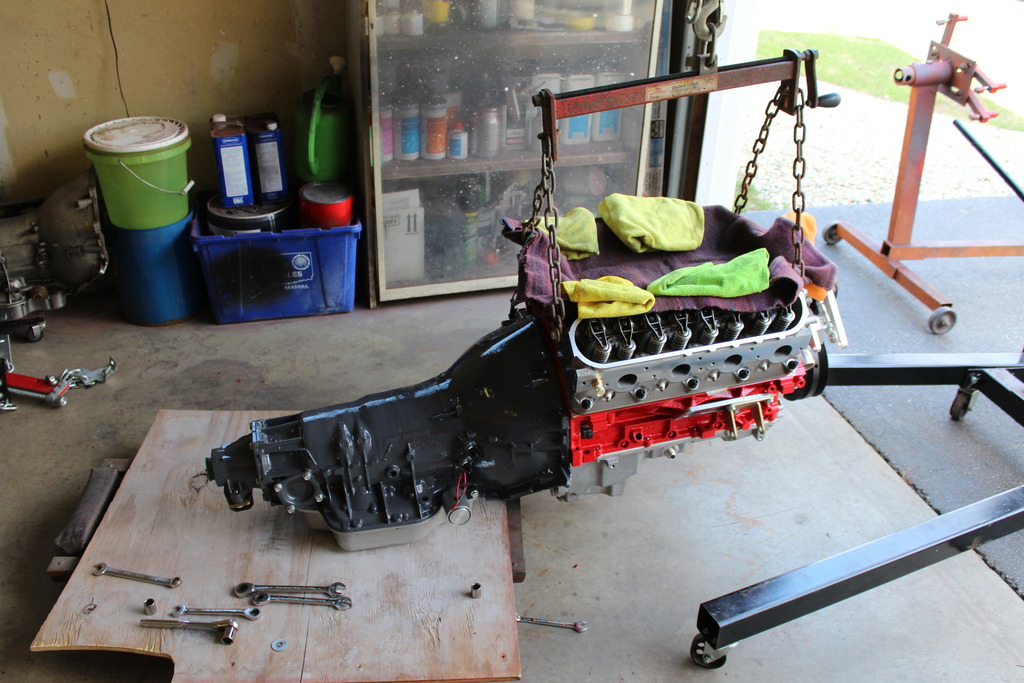
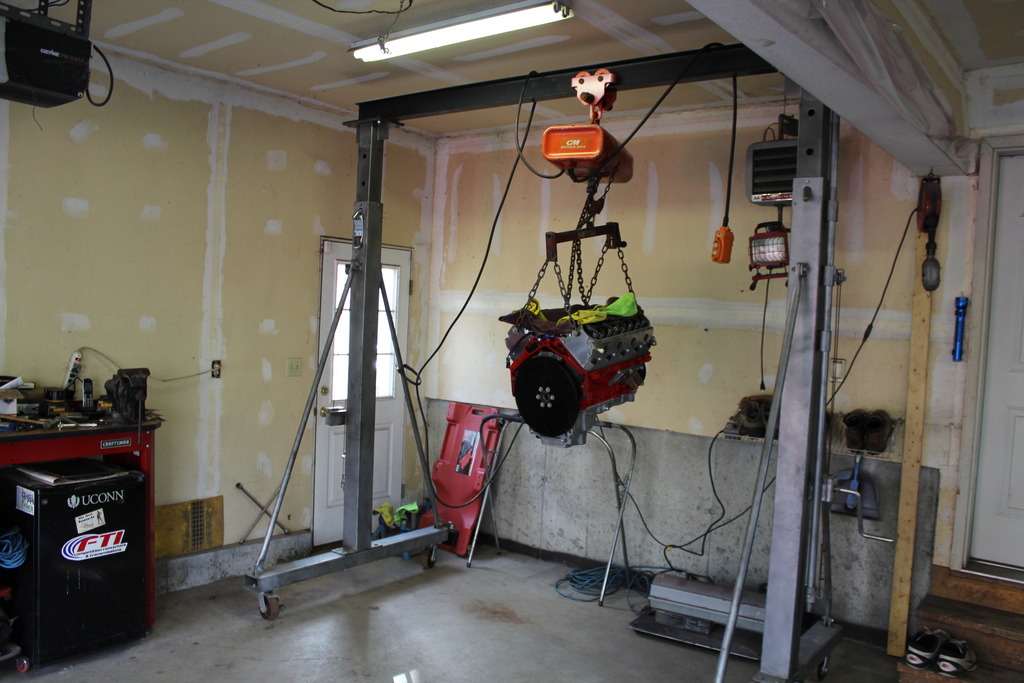
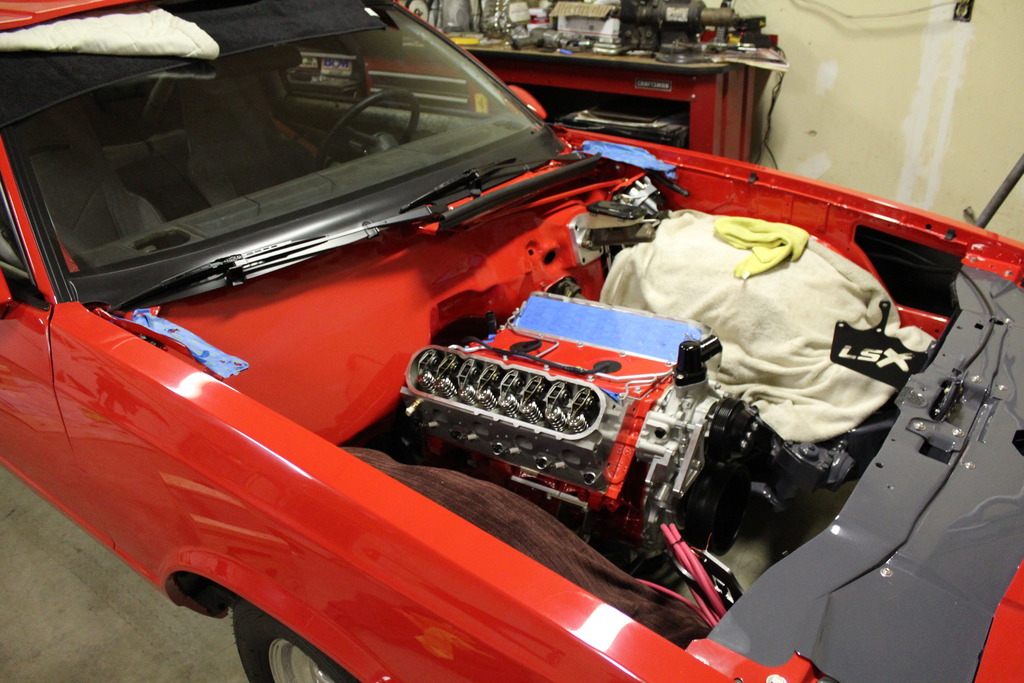
Engine build/installation


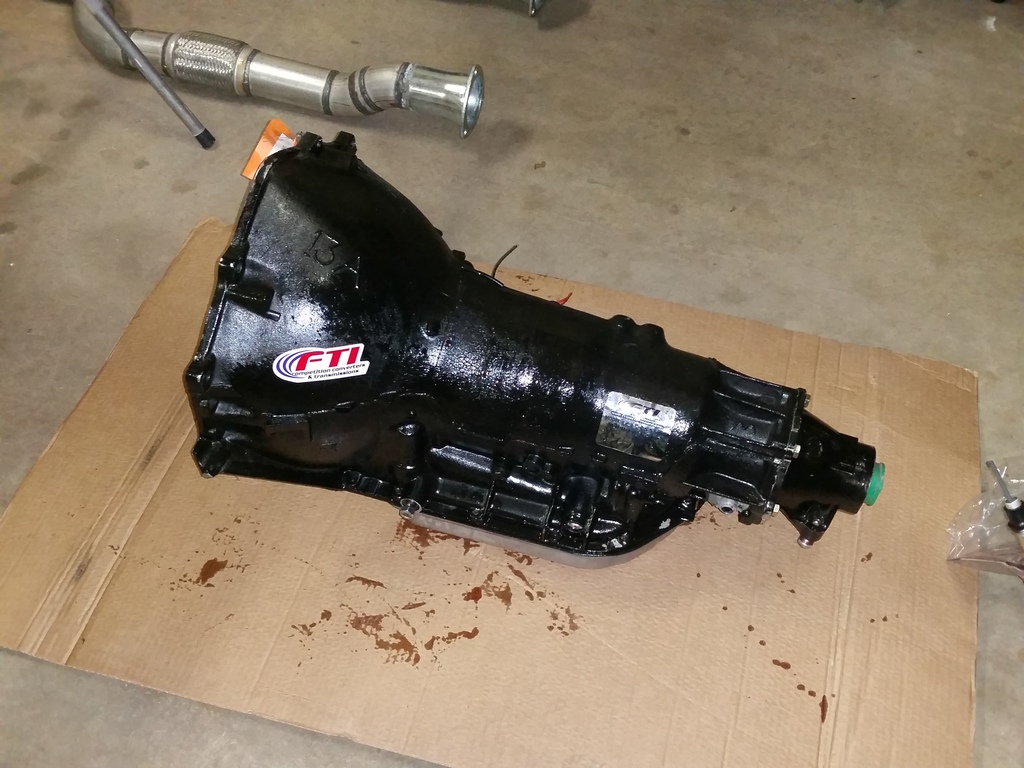
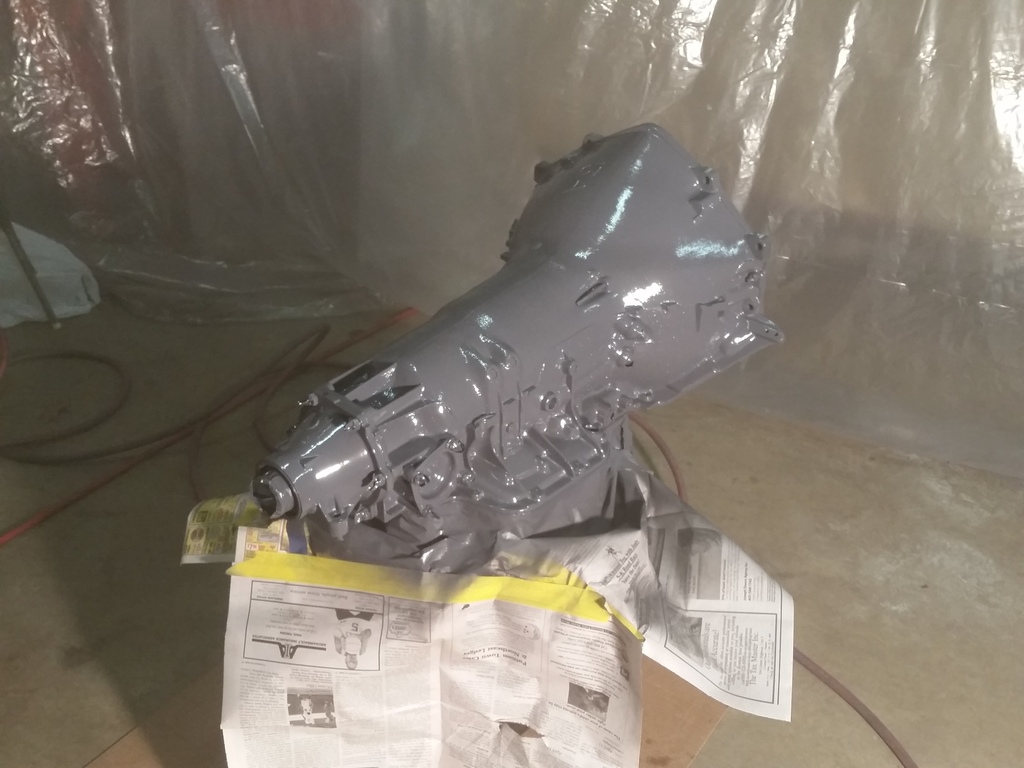
and out of order.. FTI TH400


Installed/mocked up rear disc brake conversion. Everything is back off after painting everything. Waiting to put them in once the axles go in once and for all. Also painted other goodies at the same time.


Engine build/installation


and out of order.. FTI TH400


 09-20-2015, 07:59 PM
#87
Staging Lane
Thread Starter
Join Date: Nov 2007
Location: Connecticut
Posts: 86
Likes: 0
Received 0 Likes
on
0 Posts
It's been a while! so here's the last year or so in pictures. We've done more than I can probably remember to type and things I don't have pictures of, but still not there yet. At this point, we have interior pieces getting upholstered, working on figuring out the MS3 Pro fuel management we just purchased, still need fuel system, and rear gears. Then all the other little odds and ends.
Installed/mocked up rear disc brake conversion. Everything is back off after painting everything. Waiting to put them in once the axles go in once and for all. Also painted other goodies at the same time.


Engine build/installation


and out of order.. FTI TH400


Installed/mocked up rear disc brake conversion. Everything is back off after painting everything. Waiting to put them in once the axles go in once and for all. Also painted other goodies at the same time.
Engine build/installation
and out of order.. FTI TH400


 09-28-2015, 11:52 AM
#96


this car is awesome. i've been following the thread on & off for a while & have gotten several ideas from your build.
could you post some closer/more detailed pics of your driver side downpipe? i'm going to try to snake mine between the steering shaft & the frame rail, which is what appears you did. thanks! and again....awesome ride!
could you post some closer/more detailed pics of your driver side downpipe? i'm going to try to snake mine between the steering shaft & the frame rail, which is what appears you did. thanks! and again....awesome ride!
 10-02-2015, 07:54 PM
#98
Staging Lane
Thread Starter
Join Date: Nov 2007
Location: Connecticut
Posts: 86
Likes: 0
Received 0 Likes
on
0 Posts
this car is awesome. i've been following the thread on & off for a while & have gotten several ideas from your build.
could you post some closer/more detailed pics of your driver side downpipe? i'm going to try to snake mine between the steering shaft & the frame rail, which is what appears you did. thanks! and again....awesome ride!
could you post some closer/more detailed pics of your driver side downpipe? i'm going to try to snake mine between the steering shaft & the frame rail, which is what appears you did. thanks! and again....awesome ride!


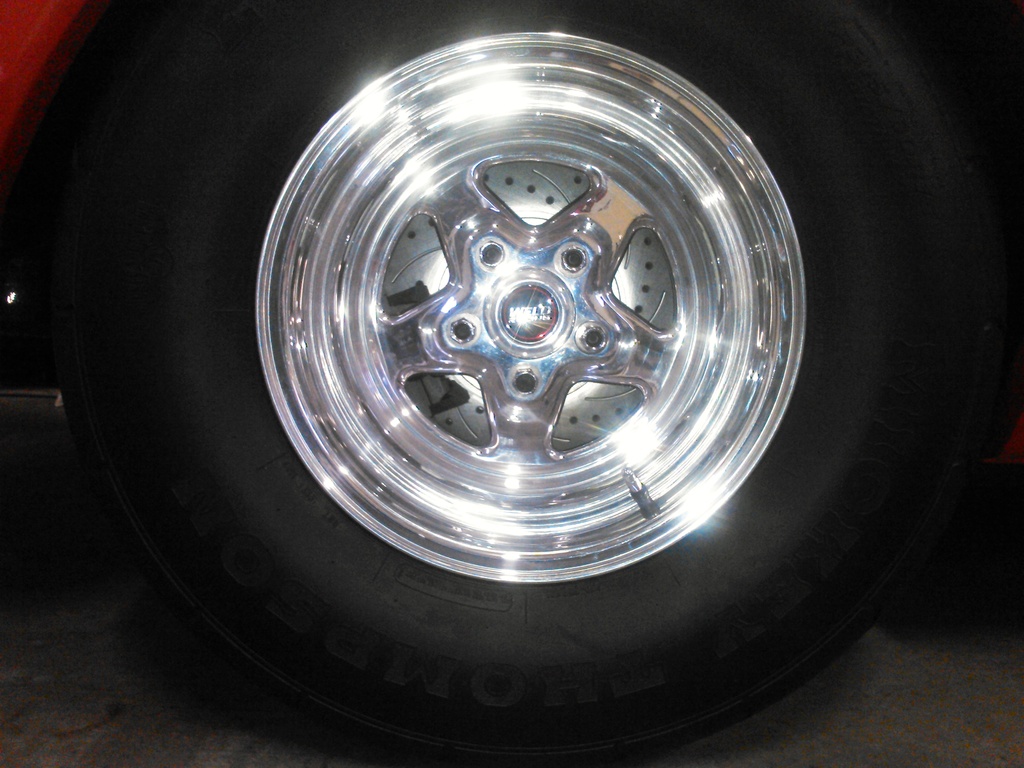
315/60r15. wheel is 15x10 4.5backspacing. Trimmed maybe a quarter inch off the lip..if that. But what made them fit was narrowing the frame and rear end 3.5" on each side and full tubs
10-03-2015, 06:44 PM
#99
Wow! You guys did a fantastic job! Looks like the end result worth all the hard work and fine details that you guys put into it. What happened to that passenger's side tight radius pipe section that connects the turbo to the headers? It looked like you had a CAD designed, CNC'd piece made?