ON3Performance No A/C Ls1 Camaro REVIEW PICS VIDEO GREAT KIT!
 03-14-2013, 10:44 AM
#1

Im going to try to do this as best I can but its my first time doing a write up so be easy... lol
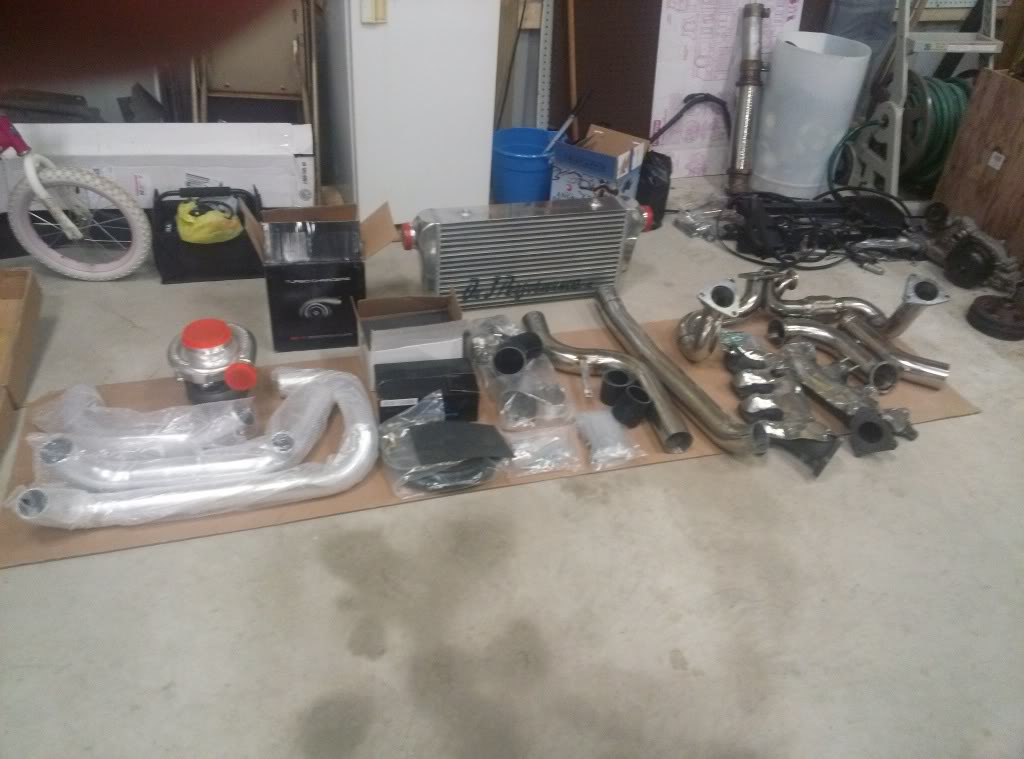
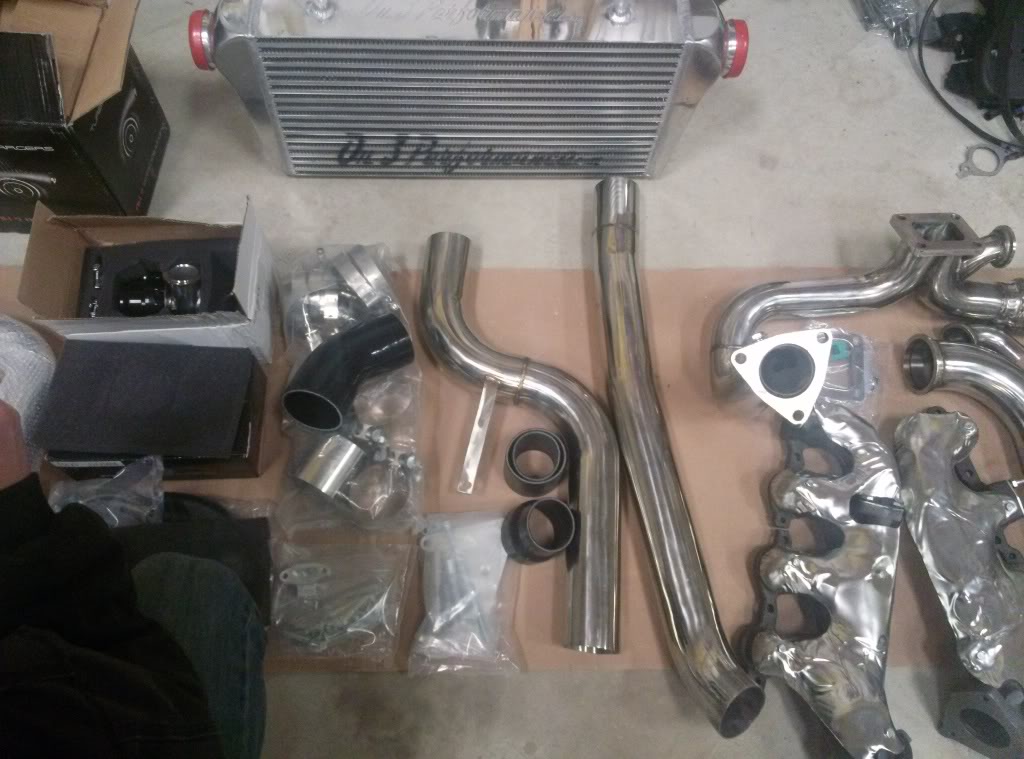
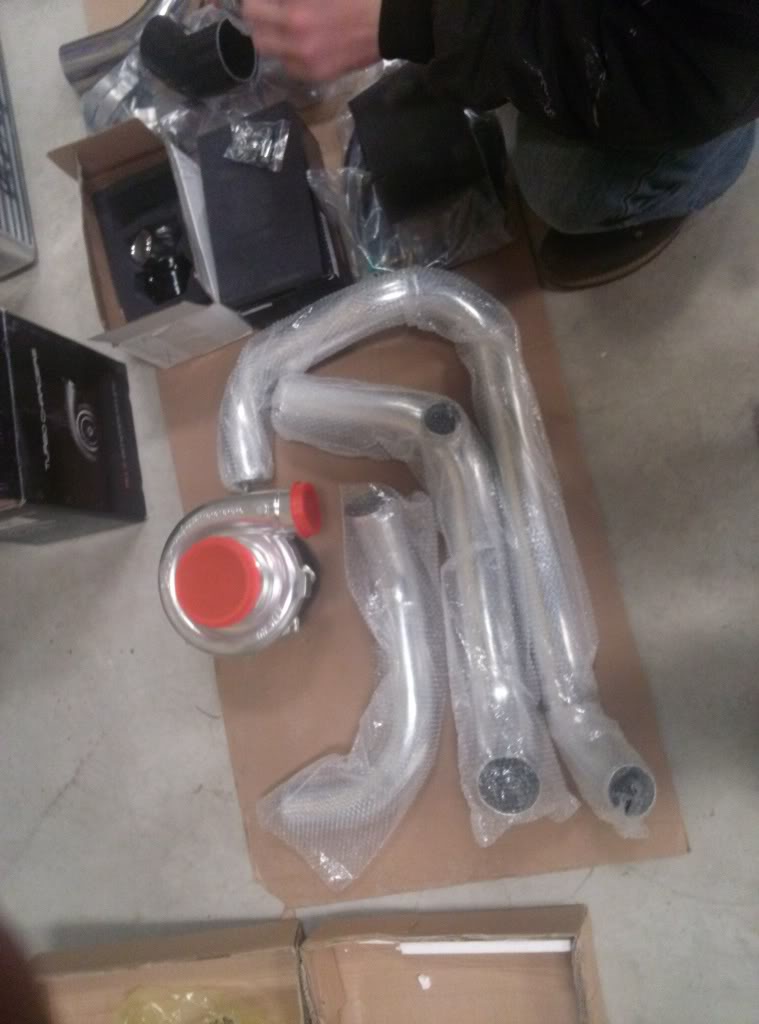
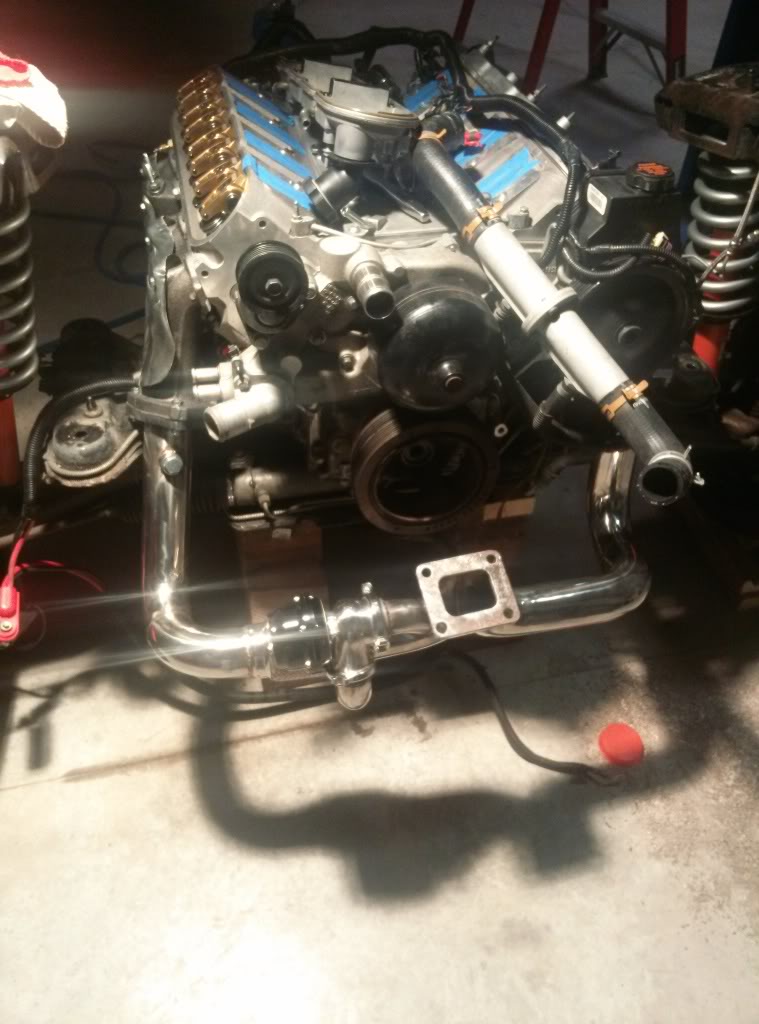
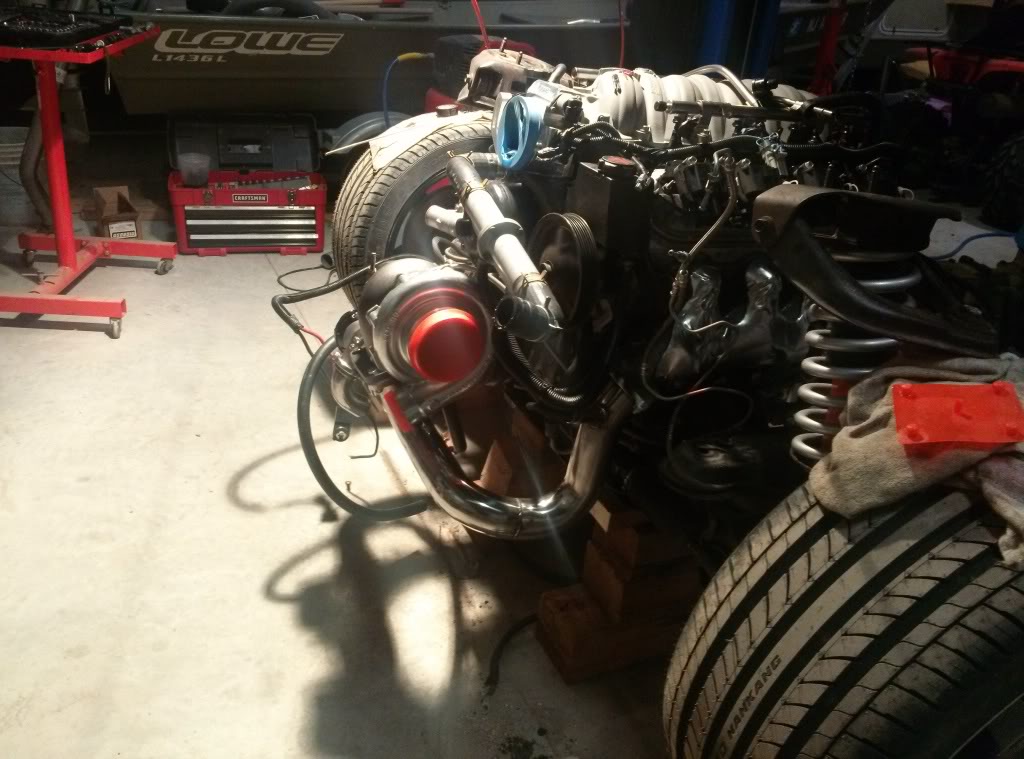
Ok, Ordered an On3 no a/c kit for an 02 camaro with and upgraded 76mm journal bearing turbo and a 4" intercooler upgrade as well.
When it came to the house (only took 2 or 3 days!) I opened the box and was amazed at the quality I got, especially for such a low price.
Stainless polished hot side pipes are a thick guage steel that are heavey enough to know they are not some cheap junk that would fall apart but, at the same time not so heavy that you are adding a thousand pounds to the car.
Cold pipes are a nice light polished aluminum that seem to line up great and seem to be of good quality.
As of this time right now my only complaint (if you would even call it that) is no instuctions. But it has been pretty simple to figure out.
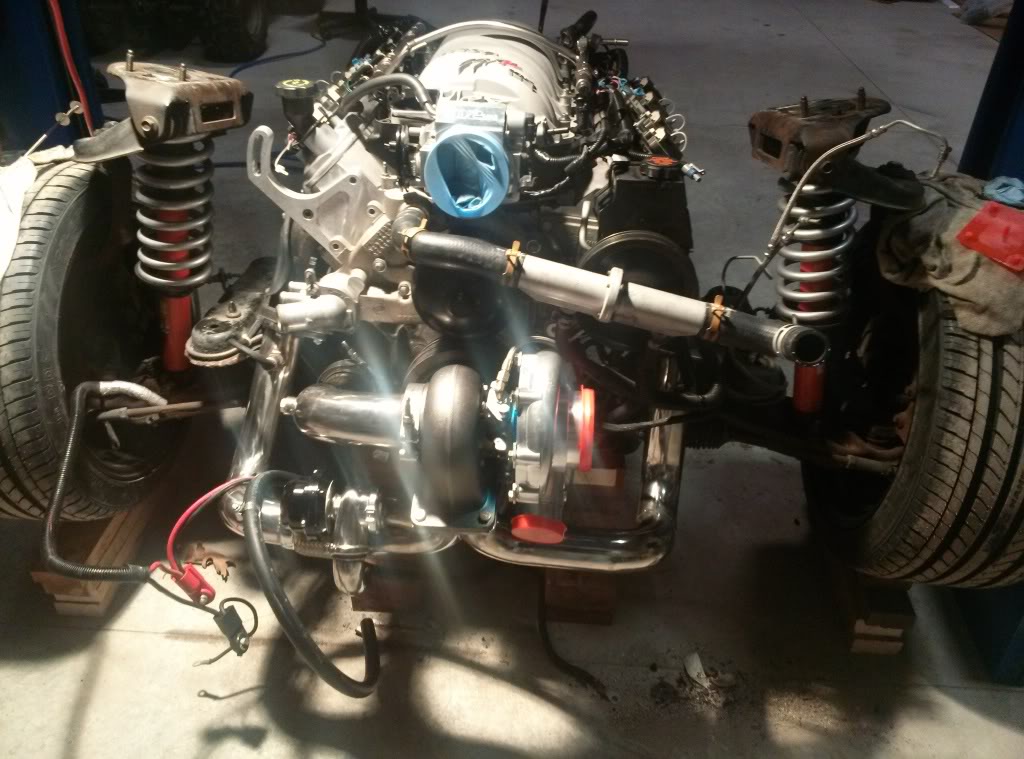
Also as of right now the kmember and drivetrain are out of the car because we also did heads and cam on this car as well as a monster stage 4 clutch package from Tick, a 9" from (cant say name because they are not a sponsor, For details pm me).
Here are the pics I have so far of the kit and more will come. As of right now there is nothing I feel I need to describe because the pics are self explanatory but if anyone has any questions by all means let me know...
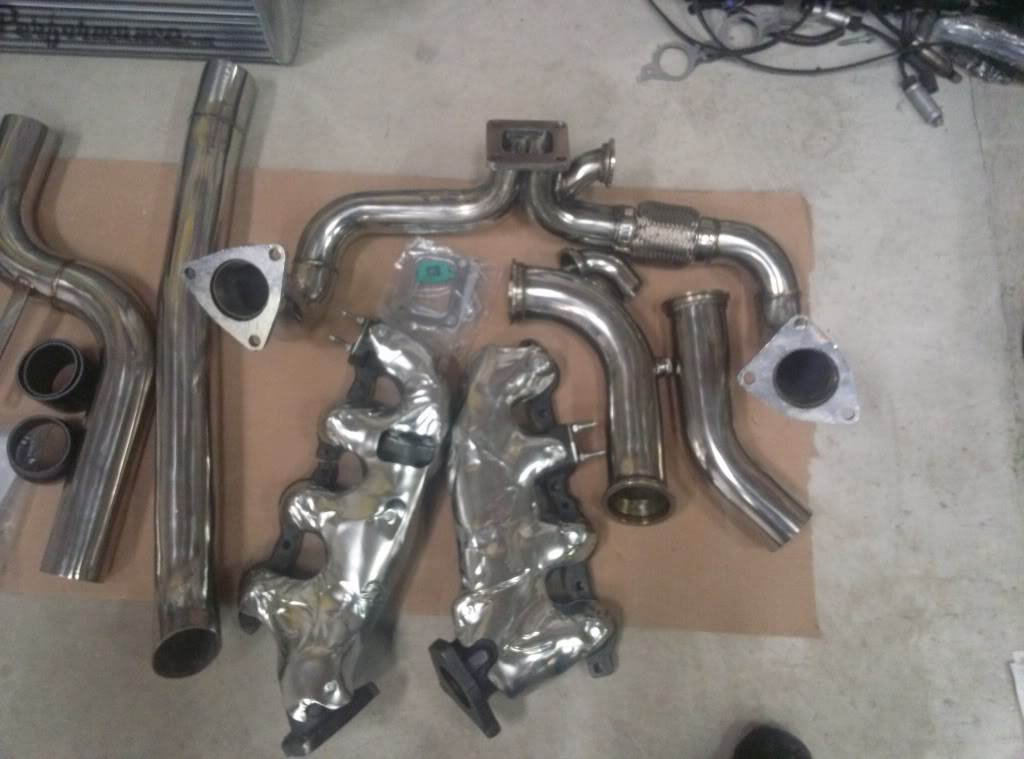
CLOSE BUT STILL FITS WITH NO NOTCHING OF THE K MEMBER!!!

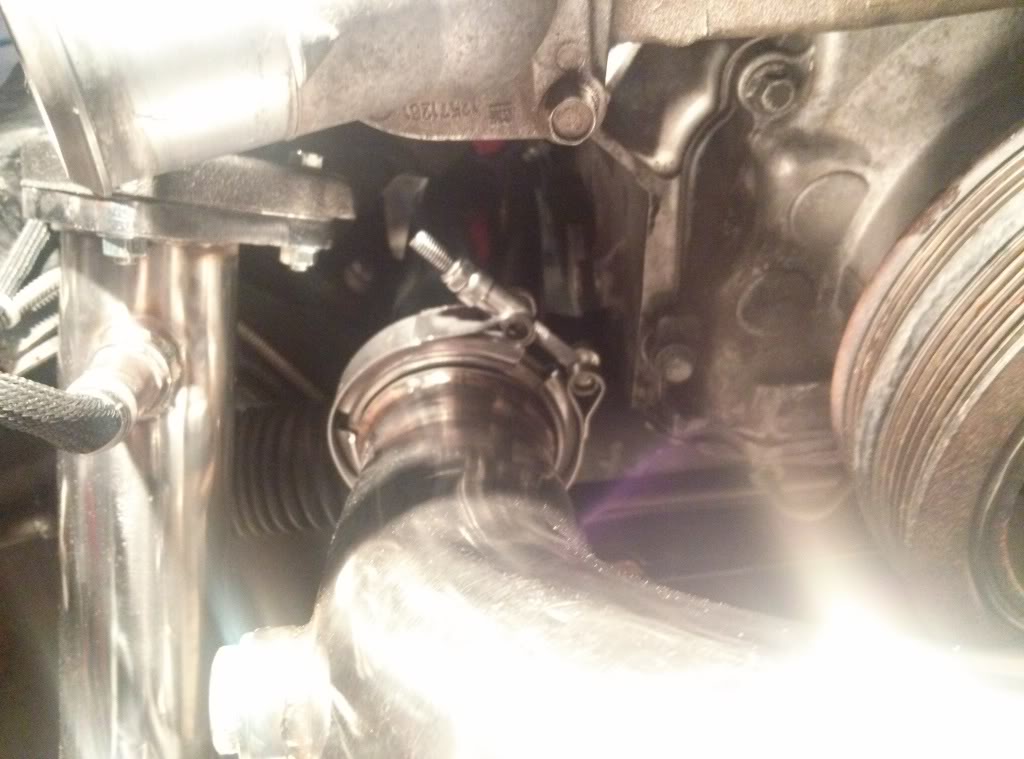
DOWNPIPE FITMENT IS GOOD
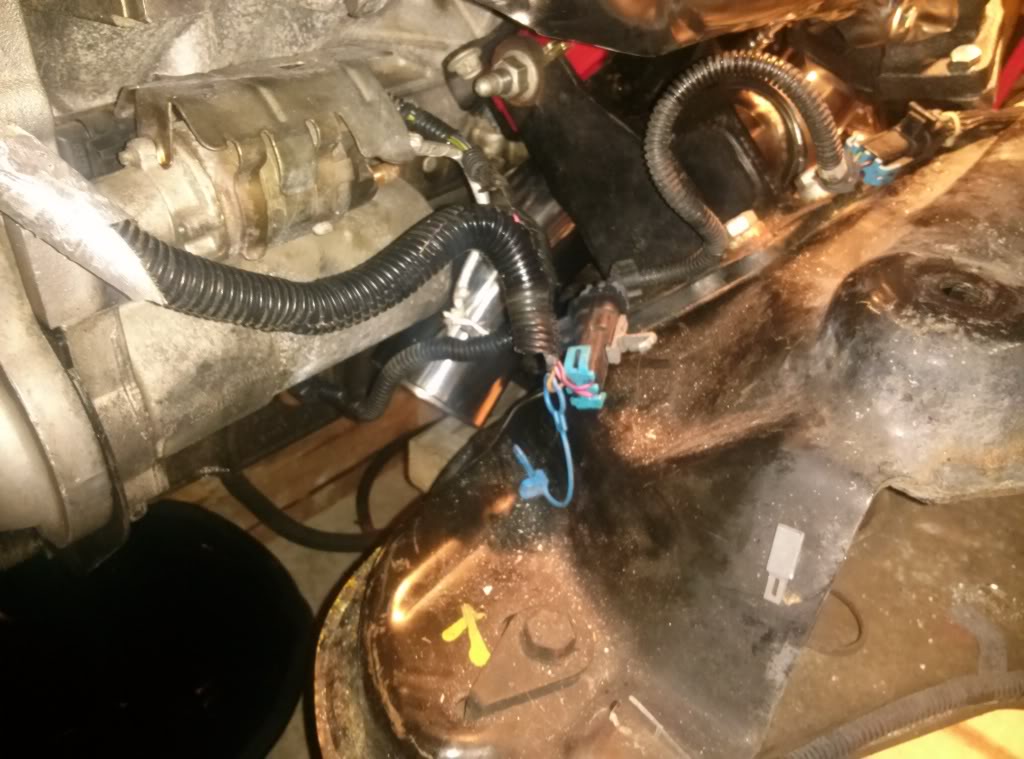
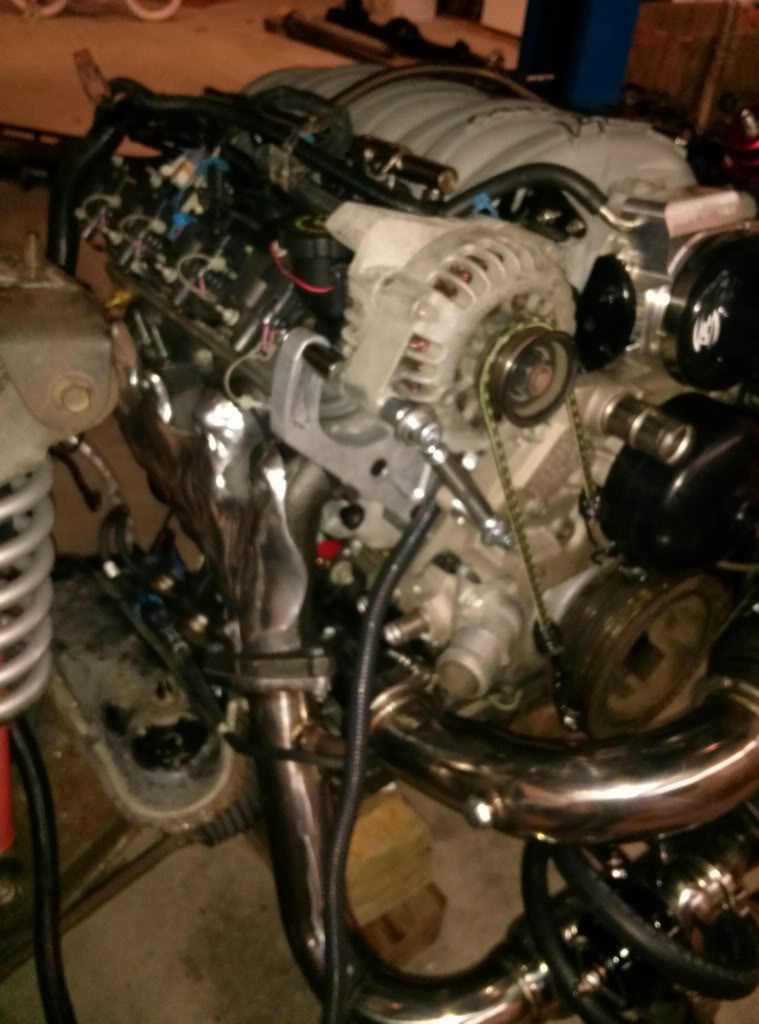
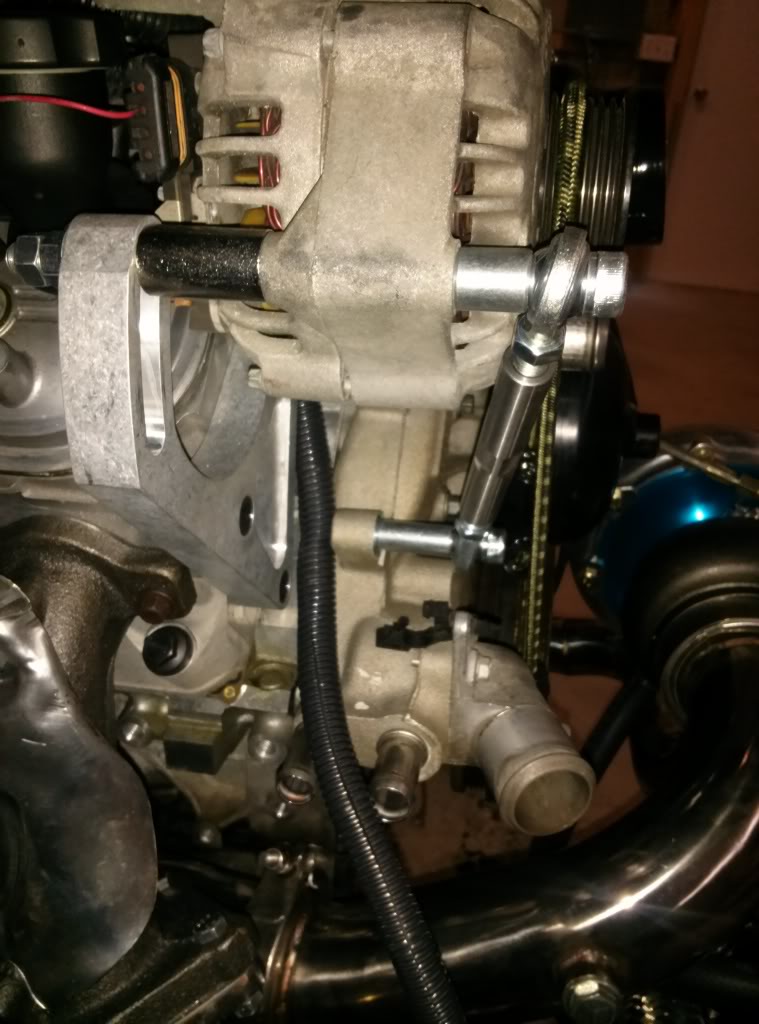
Alternator bracket was a little trick with no instructions but was fine as soon as you look at it for a few minutes. The part of the alternator that actually bolts to the head is a stock bolt reused but all other hardware and spacers and such are provided... Also the single 18g wire that clips into the alternator can be re routed through the harness to the passenger side. Some people will probably just cut it and run a new wire but I like stuff to look as clean as possible and have a stock look so I ran it all back through the harness and came out where the A/C lines used to come out at the end of the injector harness. I hate using anymore splices than I have too.

I am on a very tough time scedule for this build so this may take a little time to get on here and do the write up, but I know a lot of people have questions about this kit and someone has to step up and help out. I have gotten so much from this site and it is now my time to give back. So like I said bear with me I will try to get this done asap and as organized as I can but I just want people to have a source of info on this phenomenally priced kit.
Ok, Ordered an On3 no a/c kit for an 02 camaro with and upgraded 76mm journal bearing turbo and a 4" intercooler upgrade as well.
When it came to the house (only took 2 or 3 days!) I opened the box and was amazed at the quality I got, especially for such a low price.
Stainless polished hot side pipes are a thick guage steel that are heavey enough to know they are not some cheap junk that would fall apart but, at the same time not so heavy that you are adding a thousand pounds to the car.
Cold pipes are a nice light polished aluminum that seem to line up great and seem to be of good quality.
As of this time right now my only complaint (if you would even call it that) is no instuctions. But it has been pretty simple to figure out.
Also as of right now the kmember and drivetrain are out of the car because we also did heads and cam on this car as well as a monster stage 4 clutch package from Tick, a 9" from (cant say name because they are not a sponsor, For details pm me).
Here are the pics I have so far of the kit and more will come. As of right now there is nothing I feel I need to describe because the pics are self explanatory but if anyone has any questions by all means let me know...
CLOSE BUT STILL FITS WITH NO NOTCHING OF THE K MEMBER!!!
DOWNPIPE FITMENT IS GOOD
Alternator bracket was a little trick with no instructions but was fine as soon as you look at it for a few minutes. The part of the alternator that actually bolts to the head is a stock bolt reused but all other hardware and spacers and such are provided... Also the single 18g wire that clips into the alternator can be re routed through the harness to the passenger side. Some people will probably just cut it and run a new wire but I like stuff to look as clean as possible and have a stock look so I ran it all back through the harness and came out where the A/C lines used to come out at the end of the injector harness. I hate using anymore splices than I have too.
I am on a very tough time scedule for this build so this may take a little time to get on here and do the write up, but I know a lot of people have questions about this kit and someone has to step up and help out. I have gotten so much from this site and it is now my time to give back. So like I said bear with me I will try to get this done asap and as organized as I can but I just want people to have a source of info on this phenomenally priced kit.
Last edited by evilz99; 10-19-2013 at 10:21 AM.


Trending Topics
 03-15-2013, 12:07 PM
#10
just put the spark plugs in and everything was good except on the drivers side back plug I had get the dremel and take off about a milimeter at the most off of one tiny part of the manifold to fit the socket in but all is fine now. just thought I would share that in case someone is putting it all in while the motor is in the car, you may wanna do it before the manifold goes on. I will put a pic up when I get a chance to take one...
03-18-2013, 03:27 PM
#14
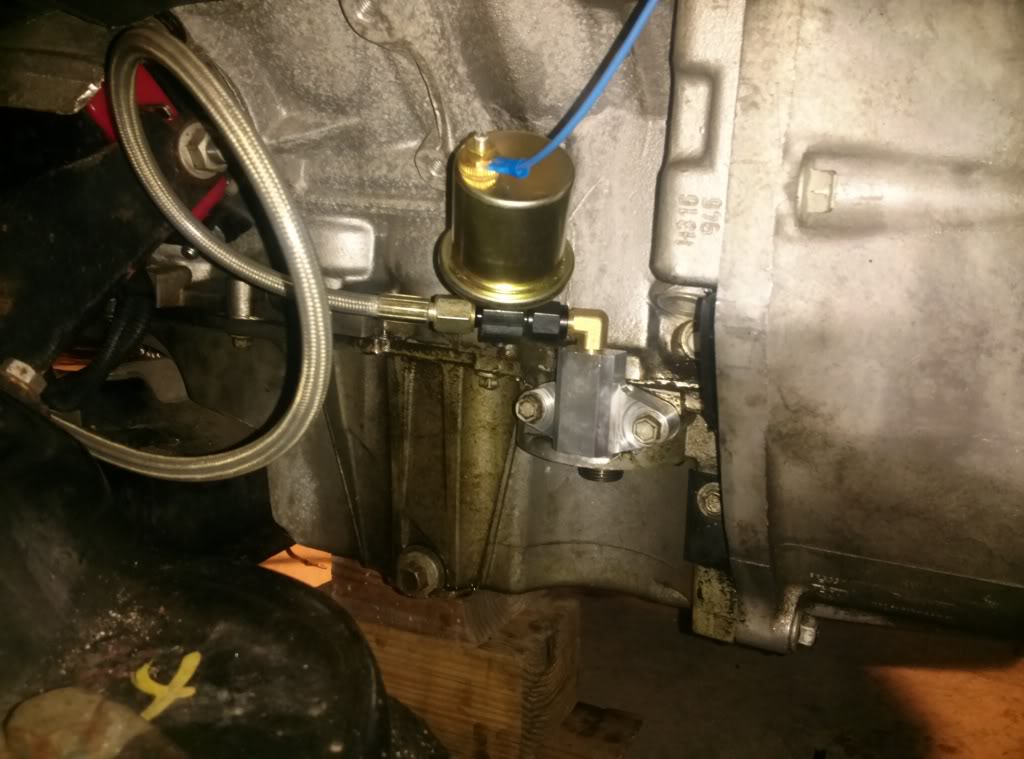
We arein a hurry so for now we are just draining it to the oil cap with a 10an oil billet oil cap from ebay but will eventually go to either the pan or timing cover. And yes we are using a scavenge pump. You may be able to get away with out one but the turbo looks like it sits a little low to really drain good so we went with one just to be safe.
03-19-2013, 01:14 PM
#16
FormerVendor

Join Date: Nov 2012
Posts: 472
Likes: 0
Received 0 Likes
on
0 Posts
Matt thanks for posting up your build and photos to support what you are doing step by step. Im finally back at the shop so if you have any other questions, just shoot me a message and Ill be back at it each day.
I had the manifolds cast and just drilled without using studs like the stock manifolds have. That way we can run bolts, not worry about notching into the frame or denting it. You just drop the bolts down through and go. It is tight but at least your not having to dent and pound on your car to make it fit
Scavenge pumps are essential on the kit. in order to make the turbo live, you really need to run it.
Although its really expensive, we can get you an oilless turbo if you wanted to completely get away from running the oil lines or pump.
We arein a hurry so for now we are just draining it to the oil cap with a 10an oil billet oil cap from ebay but will eventually go to either the pan or timing cover. And yes we are using a scavenge pump. You may be able to get away with out one but the turbo looks like it sits a little low to really drain good so we went with one just to be safe.
Although its really expensive, we can get you an oilless turbo if you wanted to completely get away from running the oil lines or pump.
 03-19-2013, 03:50 PM
#18

I have to agree with this. I bought a 76mm from them and got the wrong turbine housing. Called Adam and he said no problem he's going to email me a shipping label and I'll have the right one in no time. I believe him because I received the turbo within 48 hours. Thats excellent customer service. I'm going to call him back when I drop off the turbo to UPS and tell him I'll take a BOV and Wastegate as well.
03-19-2013, 04:01 PM
#20
I'm not Matt lol I'm Mike. No problem I am hoping this helps a lot of people with being on the fence of ordering the kit and also for there install while also helping your business as well. Thank you for making a kit the average guy can afford for once and at great quality as well...