SOM LAG Project: 394ci, 25.3, Twin PT7675 Gen 2's, PG, E85, 7-second Street Car


 10-14-2014, 10:05 PM
#126
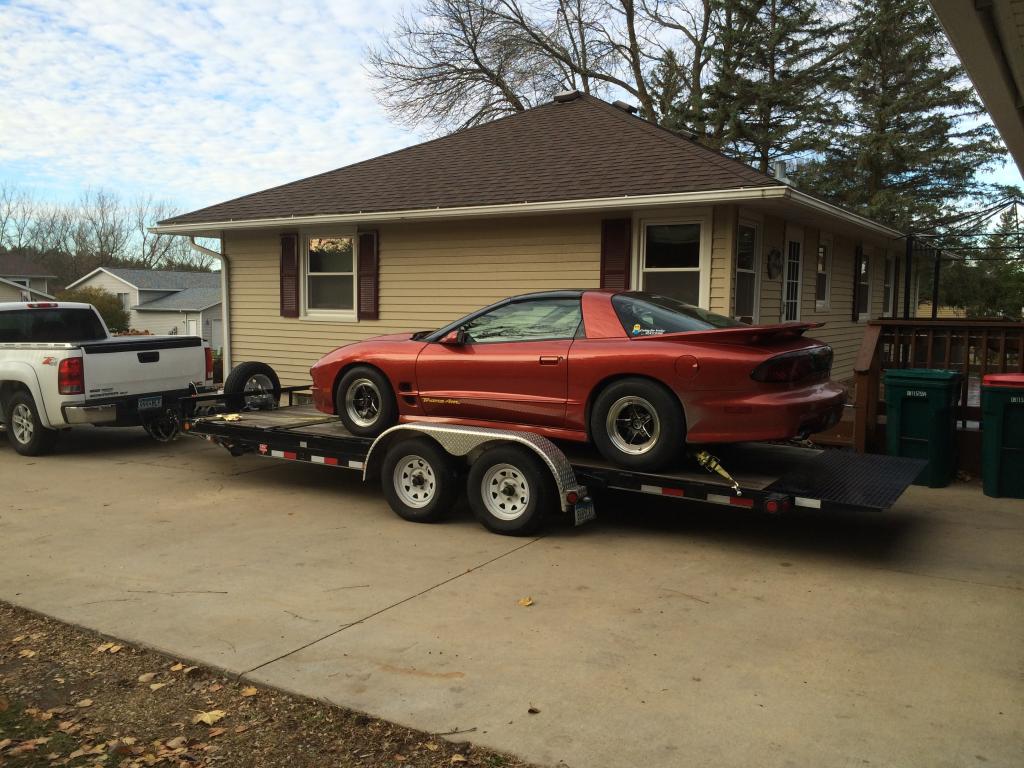
Have the car back together with the new pan and Improved Racing baffle. Was out playing around tonight to make sure there everything was good and to continue messing with the tune.
Decided to run to the gas station and then to run across the scales.
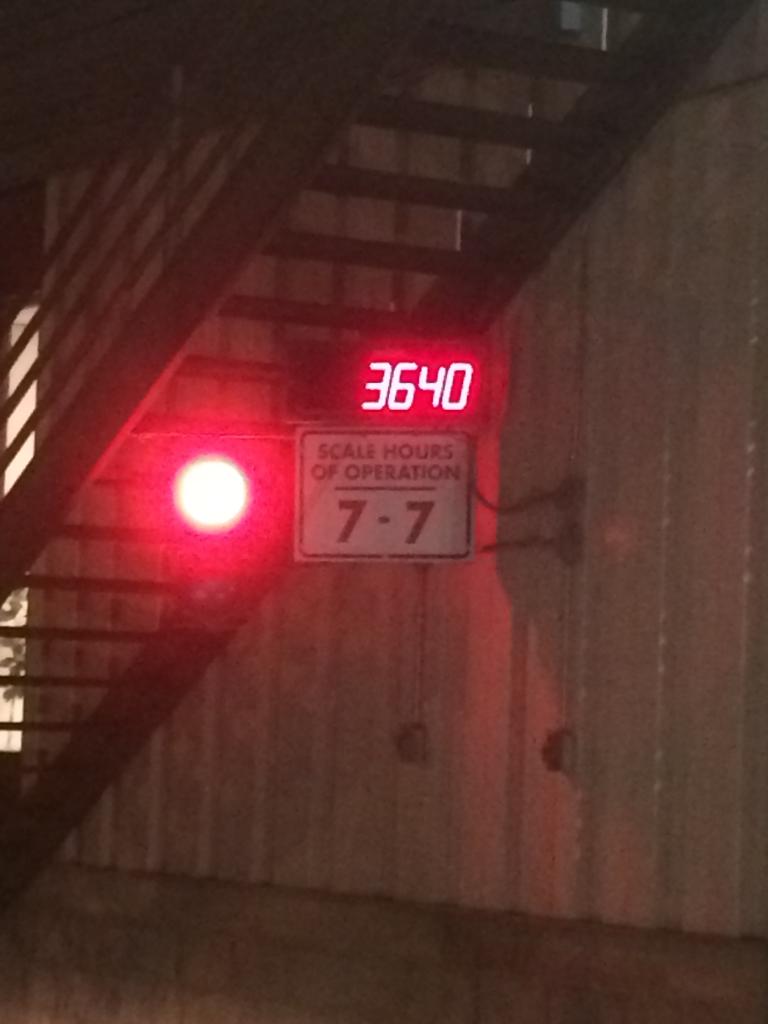
This was a full tank of E85, with full race trim minus the door bars, helmet, and safety clothing. No driver either. The number kept fluctuating between 3620 and 3640. I still have the MWC front bumper support to swap for the stock one.
The car had previously weighed 3700.
Added:
8 point MWC CM cage
Window Net
(1) 5 point harness
Safety Clothing
Removed:
AC Condenser
AC Motor
AC Compressor
Passenger Airbag and Bracket
Rear Seat
Sound Deadening from Carpet
Front Swaybar
Replaced:
T3 Flanges to T4's
Replaced Charge pipe
Custom Y-pipe, E-cutout, and Catback and replaced with true dual aluminum.
6 speed pedals for auto pedals
Existing upper panhard with Founder's Performance Panhard Relocation
10-24-2014, 12:33 PM
#127
Staging Lane
iTrader: (7)
Join Date: Oct 2008
Location: Right near the BEACH! BOOIIIEEE
Posts: 68
Likes: 0
Received 0 Likes
on
0 Posts

Wow! I normally hate people that use this word; but that was an "epic" wheelie and a badass ride! Thanks for sharing the build and whatnot. Just wish the video was in focus! But the pics turned out GREAT. My favorite part, NO WATERMARK!
10-24-2014, 02:02 PM
#128
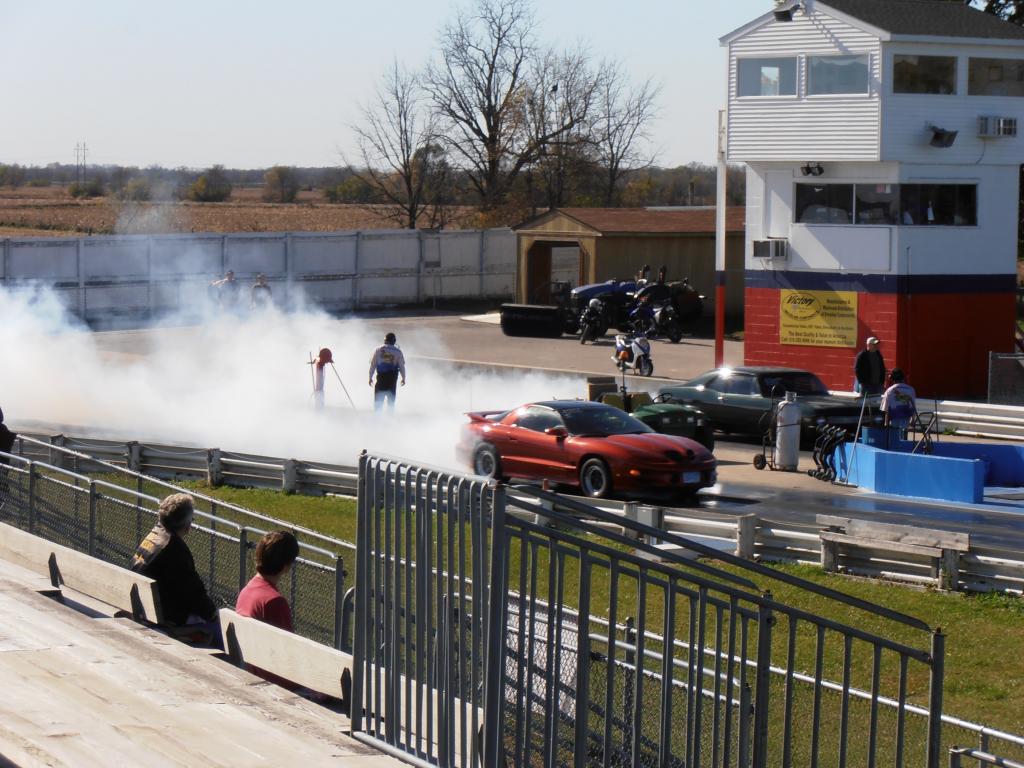
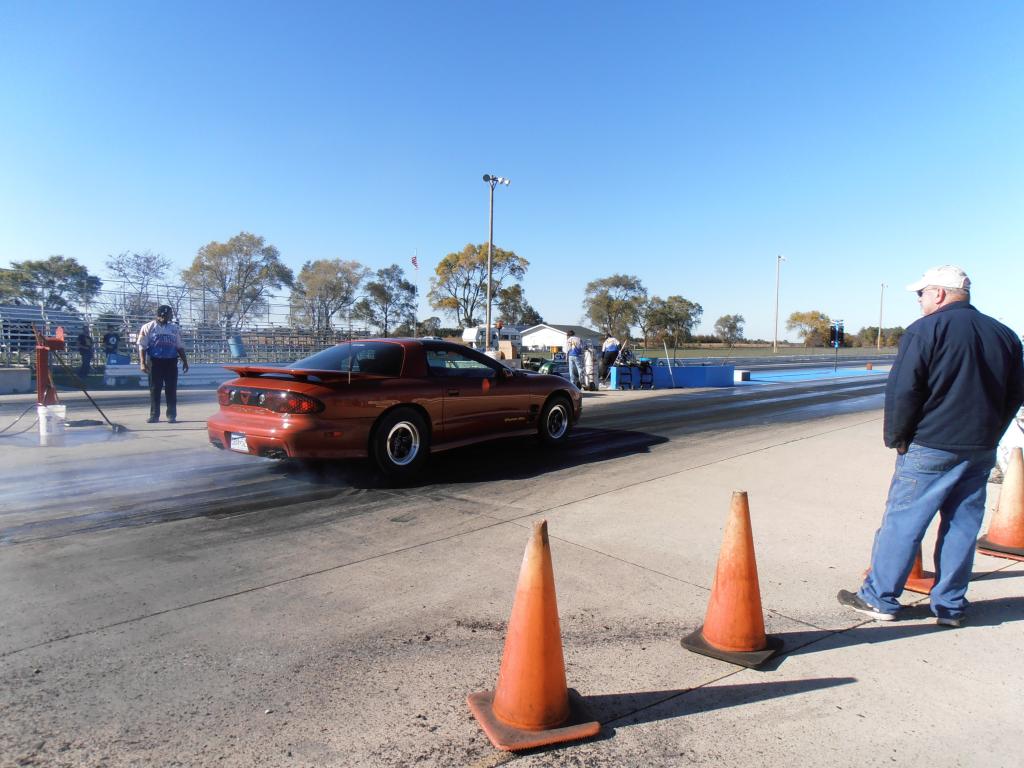
I went back to the racetrack on 10/18 after getting the new oil pan and Improved Racing baffle. I also had ordered travel limiters and crash bars but had not received those before going back to the track. The last thing I wanted to do was another wheelstand so I was pretty conservative on the shock settings. My plan was to slowly adjust and see how the car reacted. Needless to say, the first four passes, the front did not come up fast enough, and it would unload the tires before the 60’.
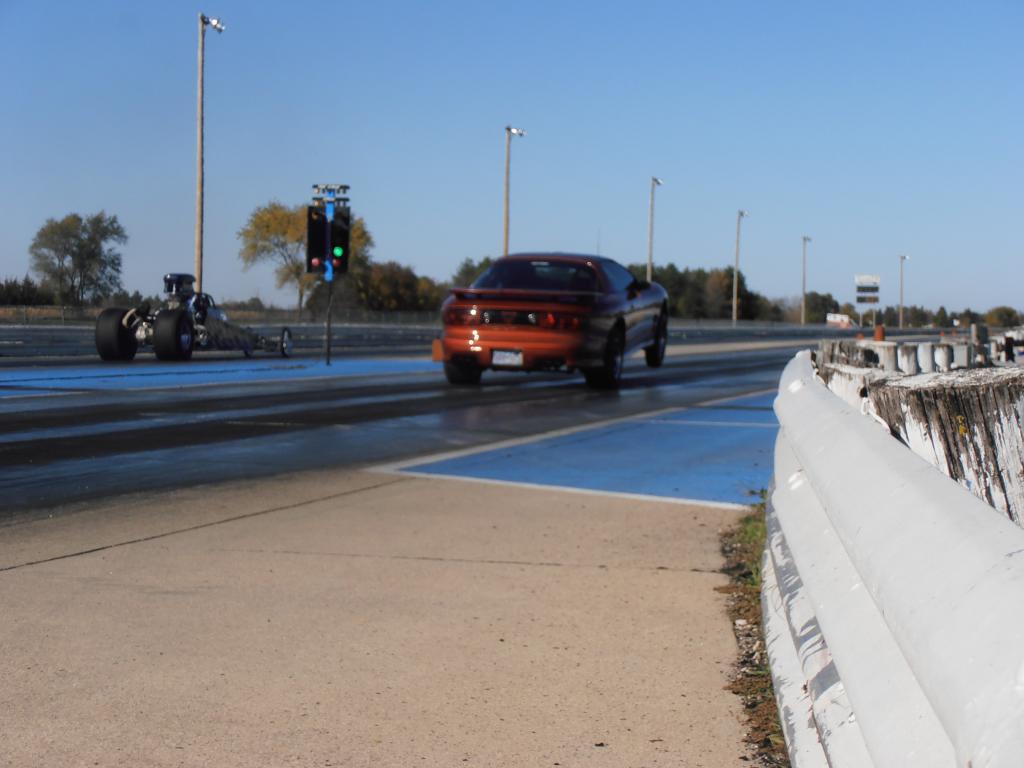
Slow94formula talked me into using the switch logic we had wired up with the Eboost2. The plan was to launch on wastegate and then switch to a higher boost level down track when I felt the car would not lose traction. It worked! The first launch off the wastegate spring gave me a 1.41 60’. I used the switch logic to go from wastegate, to 14lbs to about 20lbs downtrack. I was able to manage a 9.46.
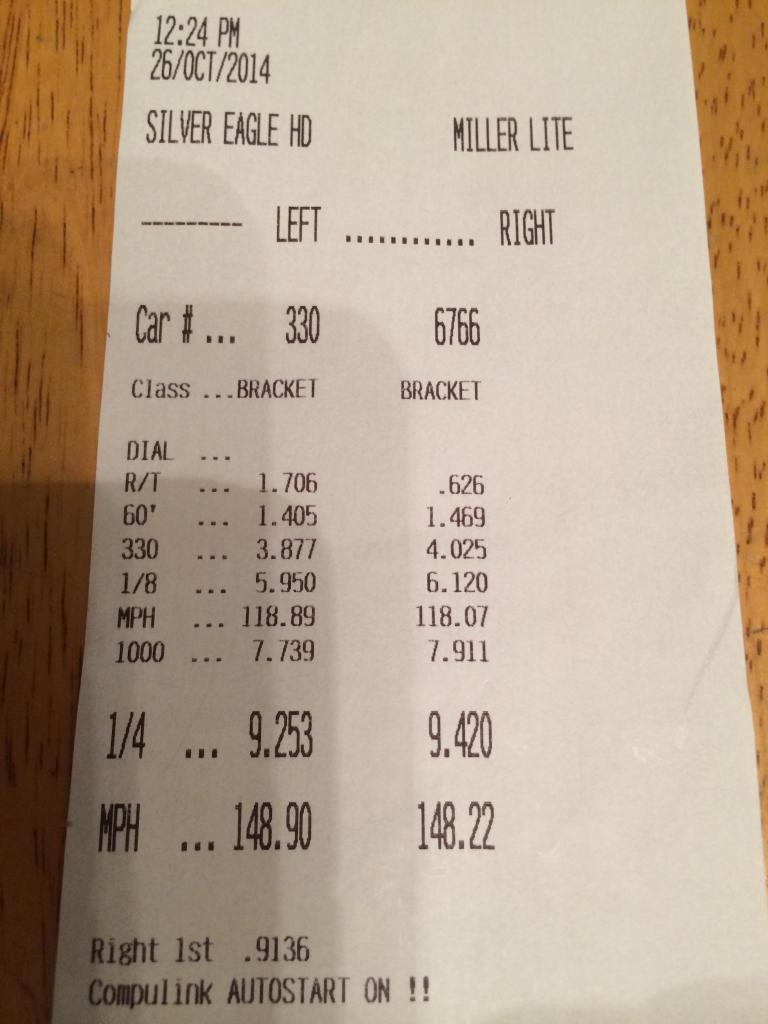
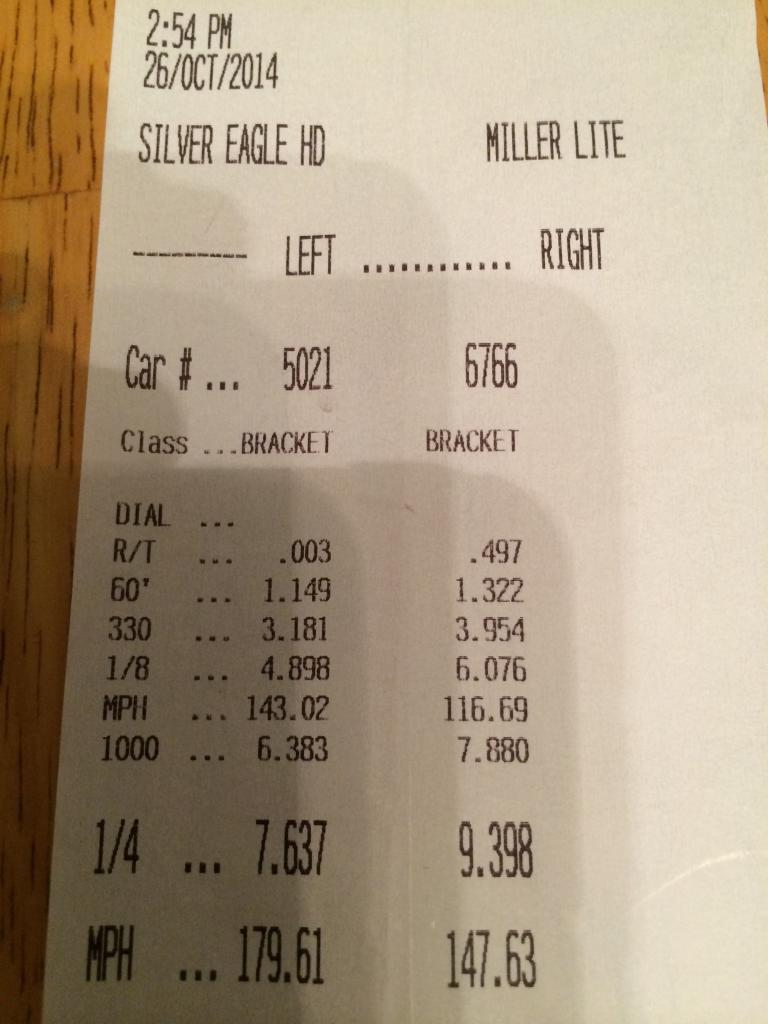
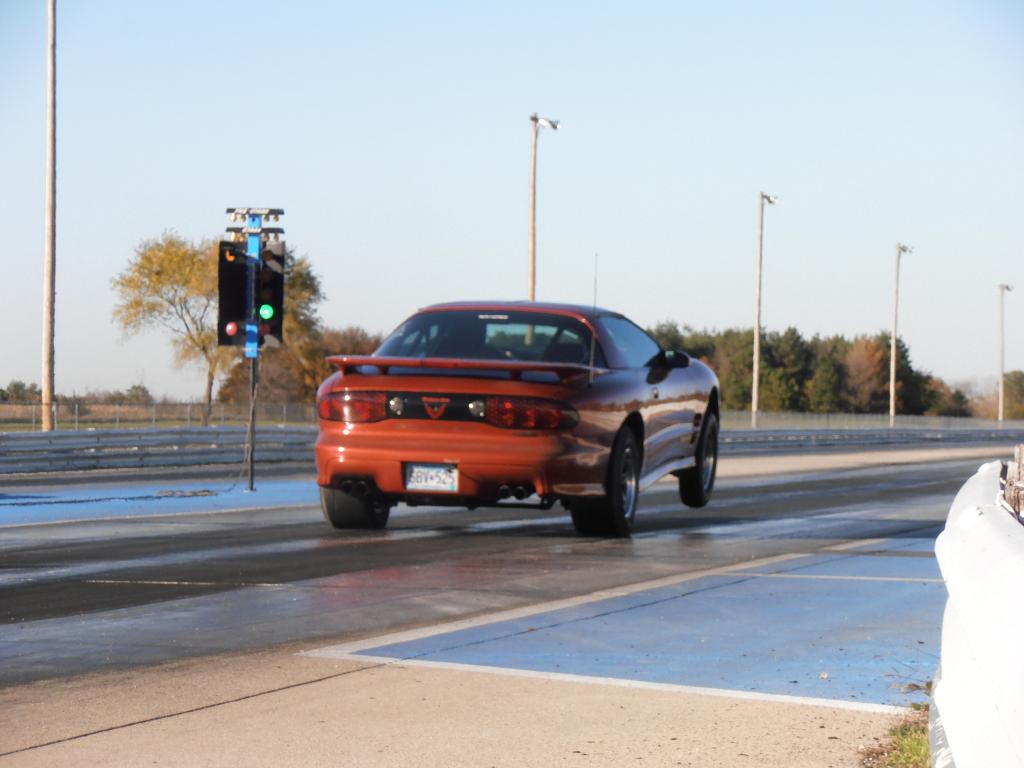
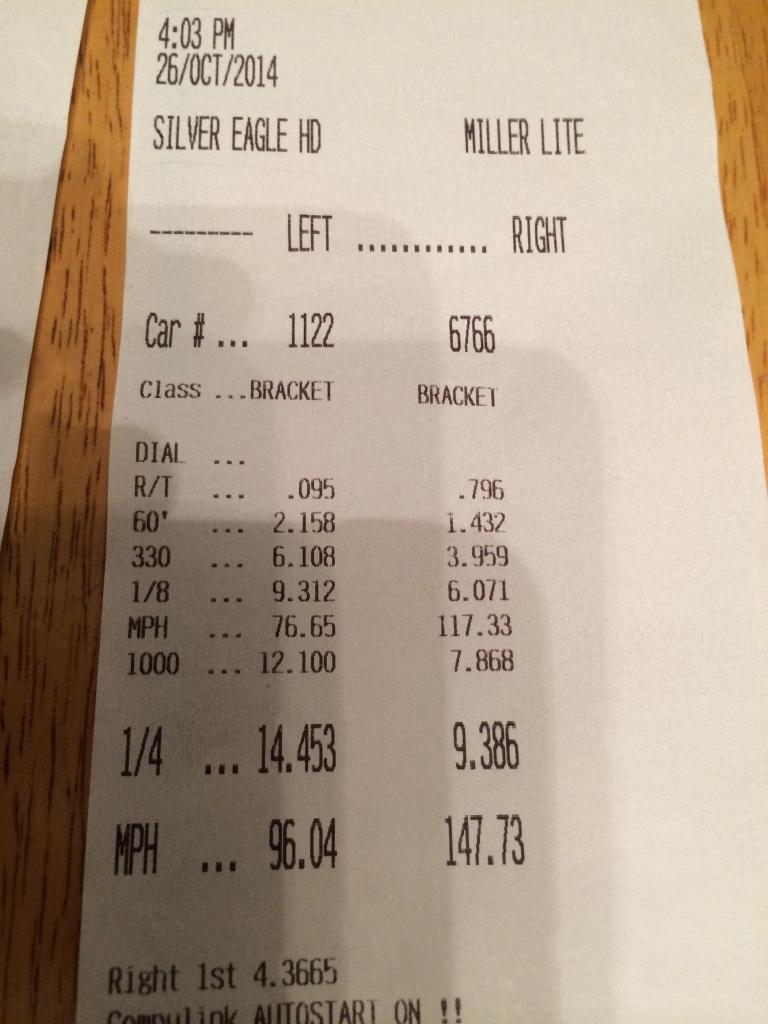
We decided to throw a little more duty cycle for the last pass on the holeshot and then switch directly to 20lbs. It netted me a new personal best 9.36 @ 147.

Here are the details from the pass:
Raceweight: 3920 lbs
Tires: 295/55/15 Mickey Thompson Drag Radial. 17psi cold.
Date/Time of Run: October 18th, 4:38PM
Air Temp: 55.4 degrees
Humidity: 51%
Pressure: 30.17
Density Altitude: 830 Feet
Launch Boost: 142kPA (5.89psi)
Peak Boost: 253kpa (21.99psi)
Average Boost through Run: 230.2kpa (18.68psi)
Timing: 9 degrees downtrack (IAT's pulled timing)
Front Shocks: __C/__R
Rear Shocks: __C/__R
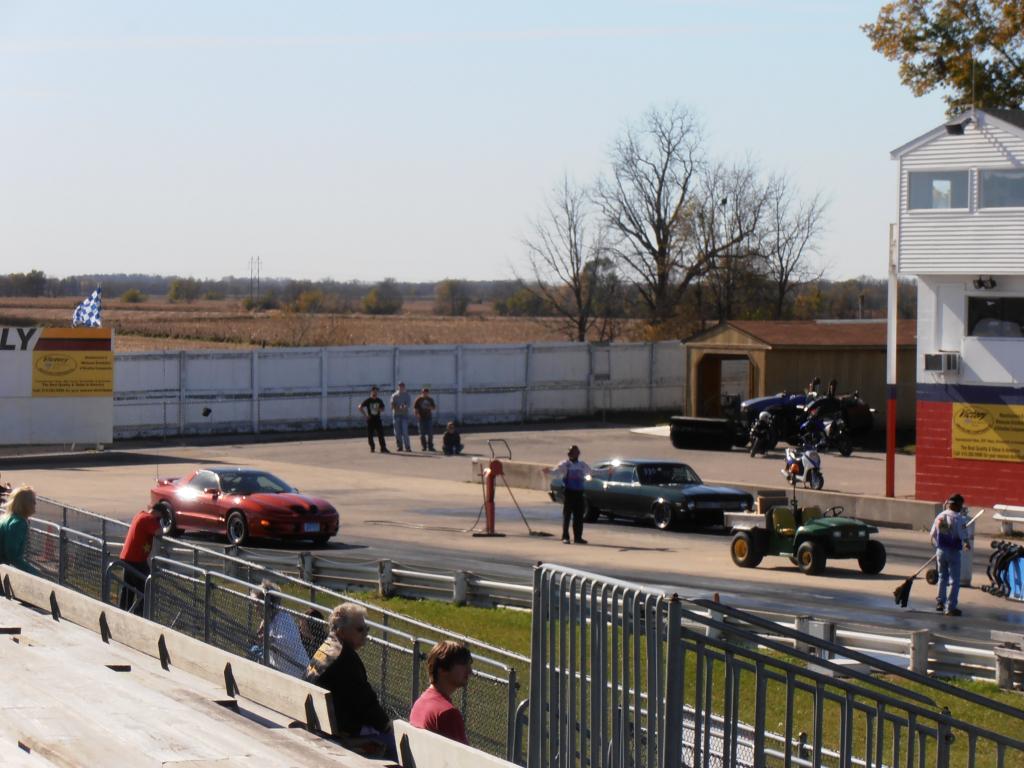
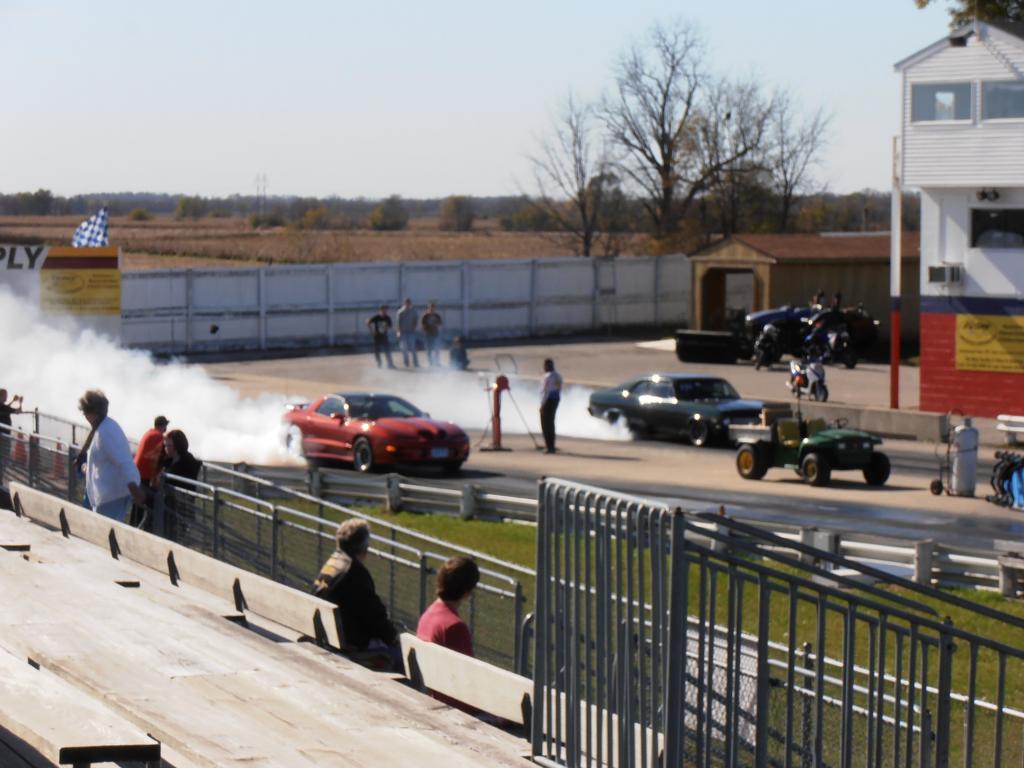
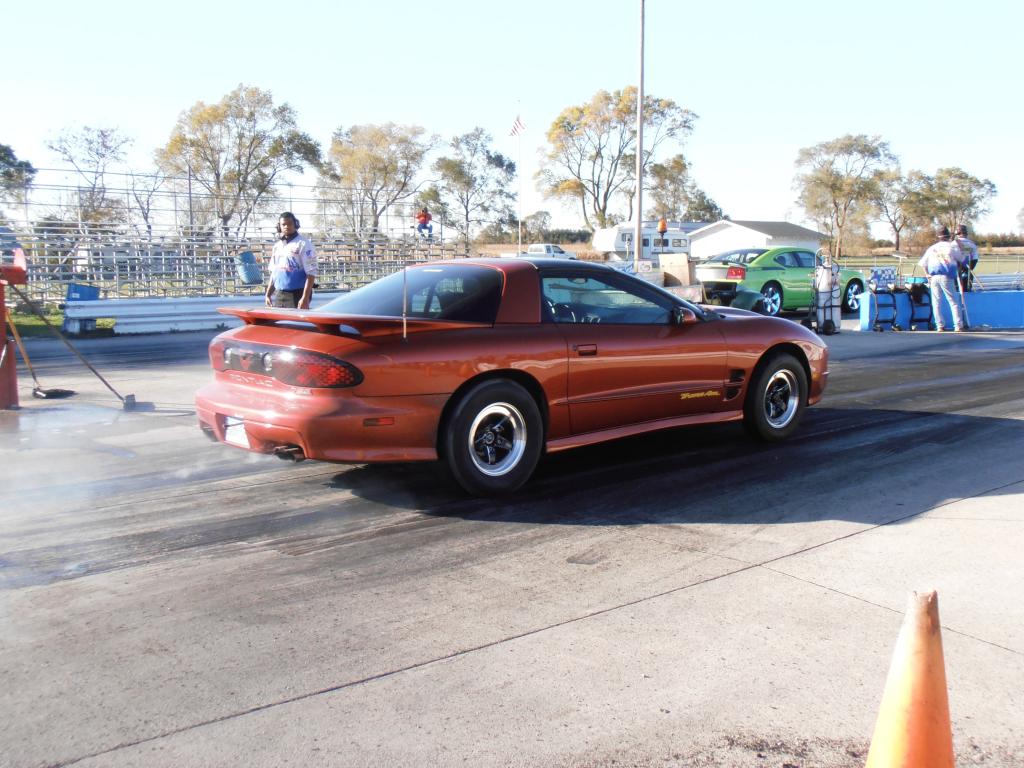
Here are a couple photos from last weekend at the track:


I was even able to drive the car to work on Monday. Changed nothing from the track.

I was going to call it a year, but then decided to go back the following weekend.
Last edited by Only ERO's; 10-28-2014 at 10:22 PM.
10-28-2014, 11:10 AM
#129
Cedar Falls was open for one more weekend (10/25/14) and I decided to go to the track. I had received the travel limiters and crash bars on Friday, but did not get them on in time for the track. I had a brand new set of MT Pro�s in the garage and put those on for the final outing of the year. I was curious to see if these would help the unloading of the tires through the 60�.
The car was launching and carrying the tires really nicely all day. They were up a little higher than I would have wanted (after seeing photos), but had no problems with the launch.
I only pass that was 100% clean was the first pass. It was also on the tamest setting.

The second pass, I had my best 60� to date (not counting the rear tires on the wheelstand). About 400�, a coupler blew off from the intercooler piping, aborting the run.
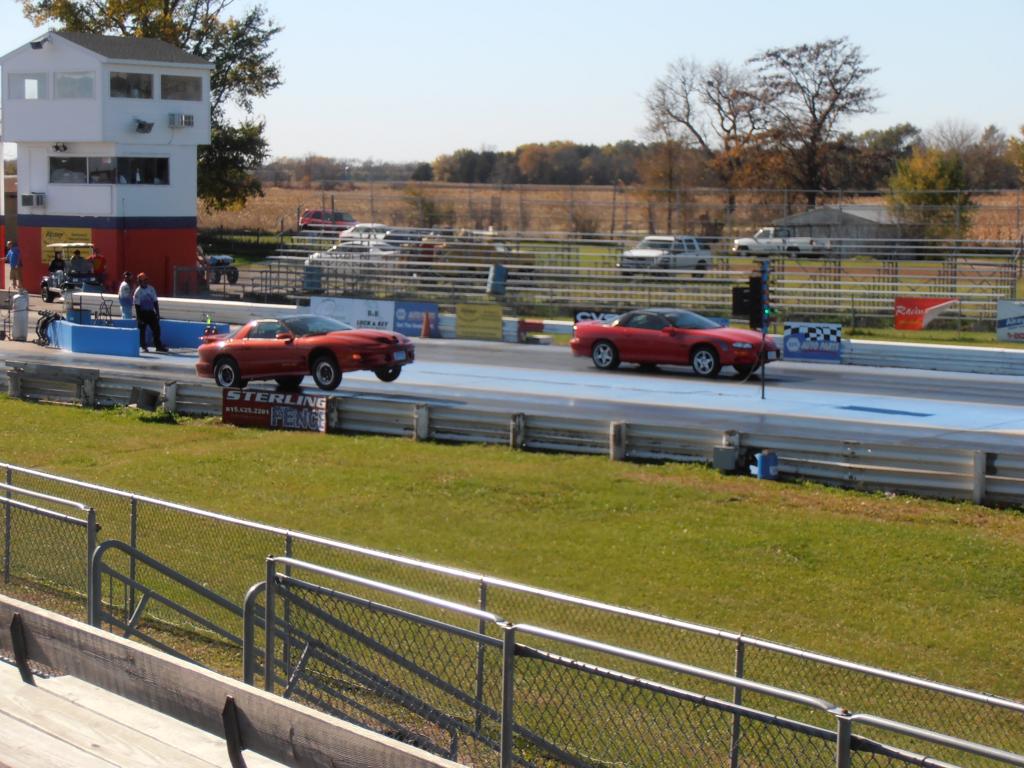
The third pass, I hit the rev limiter on the 1-2 shift and had a natural reaction to pedal the car. This pass also had a pretty decent 60�.
The final pass, I hit the rev limiter on the 1-2 shift (not as bad), and also pedaled the car. I also had significant water in the overflow. I will have to look into that. I was quite surprised based on the boost level, and timing.
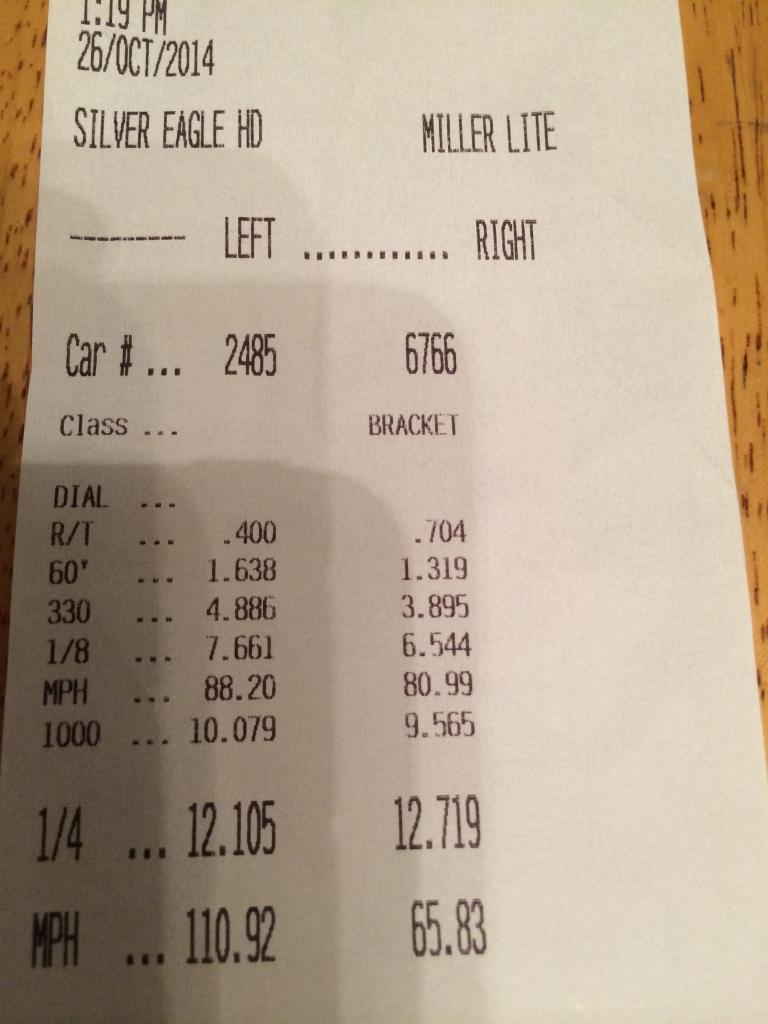
Here are the details from the passes:
Raceweight: 3920 lbs
Tires: 275/60/15 Mickey Thompson Pro Radial. 17psi cold.
Date/Time of Run: October 25th, __:__PM
Air Temp: __._ degrees
Humidity: __%
Pressure: __.__
Density Altitude: ___ Feet
Launch Boost: ___kPA (_.__psi)
Peak Boost: ___kpa (__.__psi)
Average Boost through Run: ___kpa (__.__psi)
Timing: __ degrees
Front Shocks: __C/__R
Rear Shocks: __C/__R

The car was launching and carrying the tires really nicely all day. They were up a little higher than I would have wanted (after seeing photos), but had no problems with the launch.
I only pass that was 100% clean was the first pass. It was also on the tamest setting.


The second pass, I had my best 60� to date (not counting the rear tires on the wheelstand). About 400�, a coupler blew off from the intercooler piping, aborting the run.


The third pass, I hit the rev limiter on the 1-2 shift and had a natural reaction to pedal the car. This pass also had a pretty decent 60�.


The final pass, I hit the rev limiter on the 1-2 shift (not as bad), and also pedaled the car. I also had significant water in the overflow. I will have to look into that. I was quite surprised based on the boost level, and timing.


Here are the details from the passes:
Raceweight: 3920 lbs
Tires: 275/60/15 Mickey Thompson Pro Radial. 17psi cold.
Date/Time of Run: October 25th, __:__PM
Air Temp: __._ degrees
Humidity: __%
Pressure: __.__
Density Altitude: ___ Feet
Launch Boost: ___kPA (_.__psi)
Peak Boost: ___kpa (__.__psi)
Average Boost through Run: ___kpa (__.__psi)
Timing: __ degrees
Front Shocks: __C/__R
Rear Shocks: __C/__R
03-15-2015, 01:00 AM
#130
Well, it's Spring time. So that means it is time for some Spring updates to my car. We have had some warm days here in MN the past week or two. I dug my car out of storage on Monday and drove it over to the shop to get going on the updates.
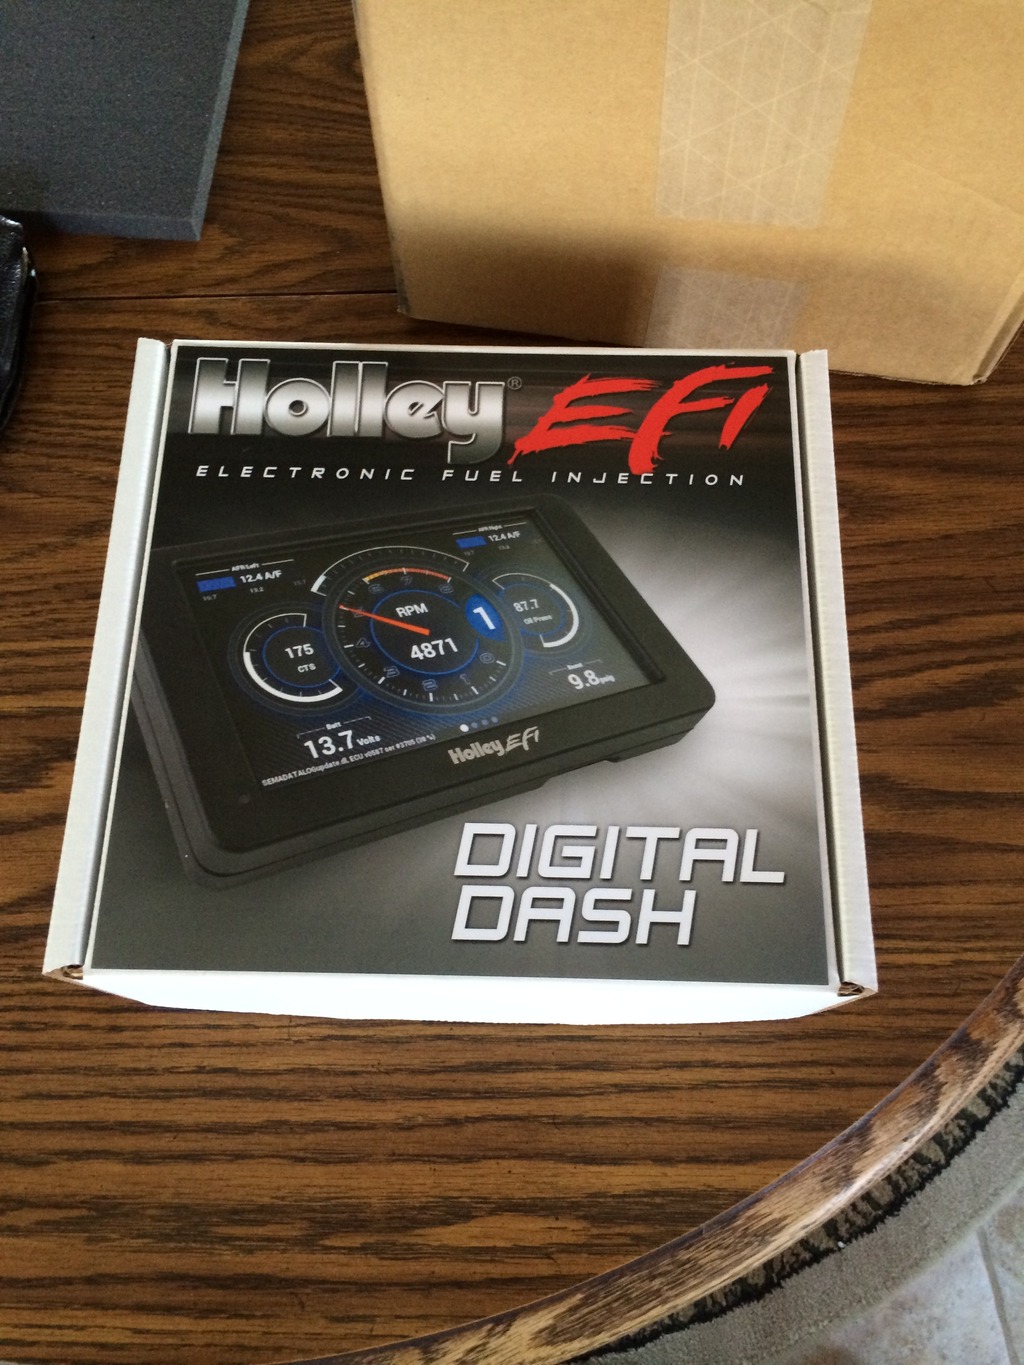
The main update was going to be converting over to Holley Dominator.
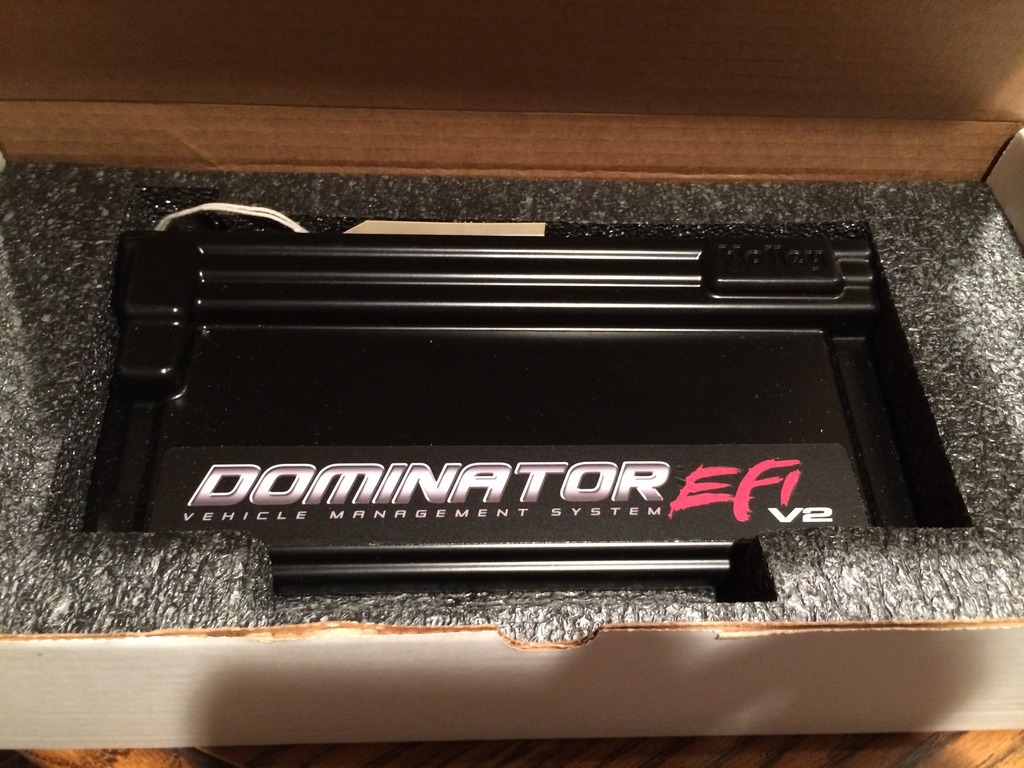
I couldn't pass up the good deal on Amazon and decided to pull the trigger and make the change.
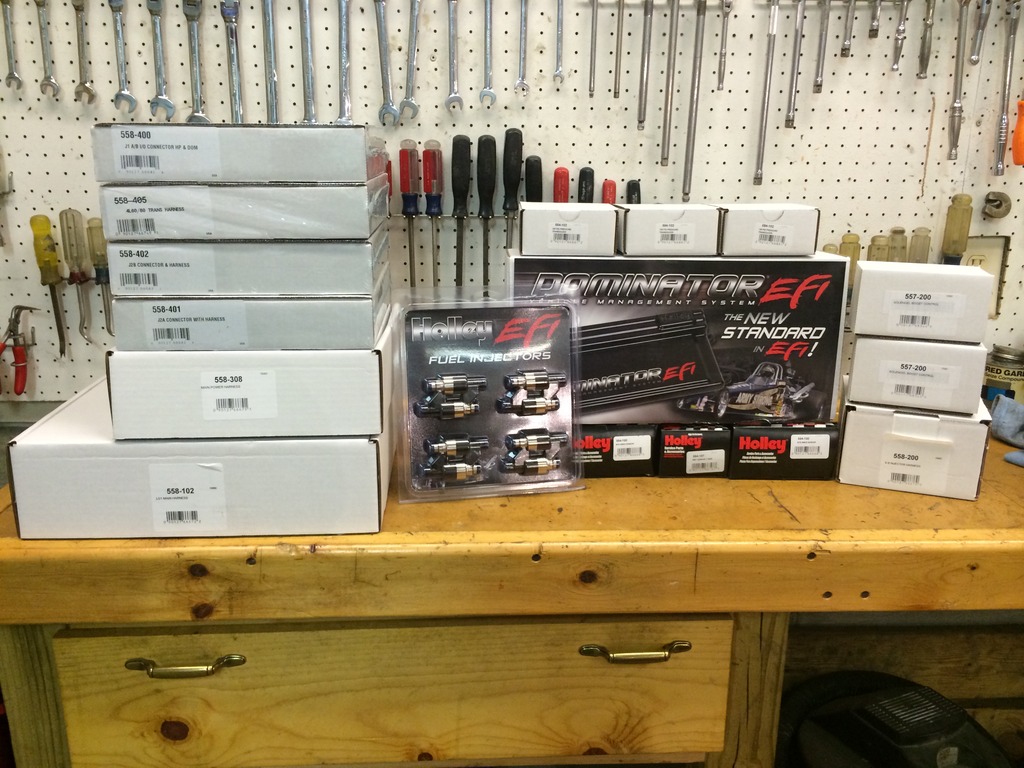
I have received most of the components, and will be working on the install over the next couple of weeks:
I have the Digital Dash on order, but it is currently backordered.
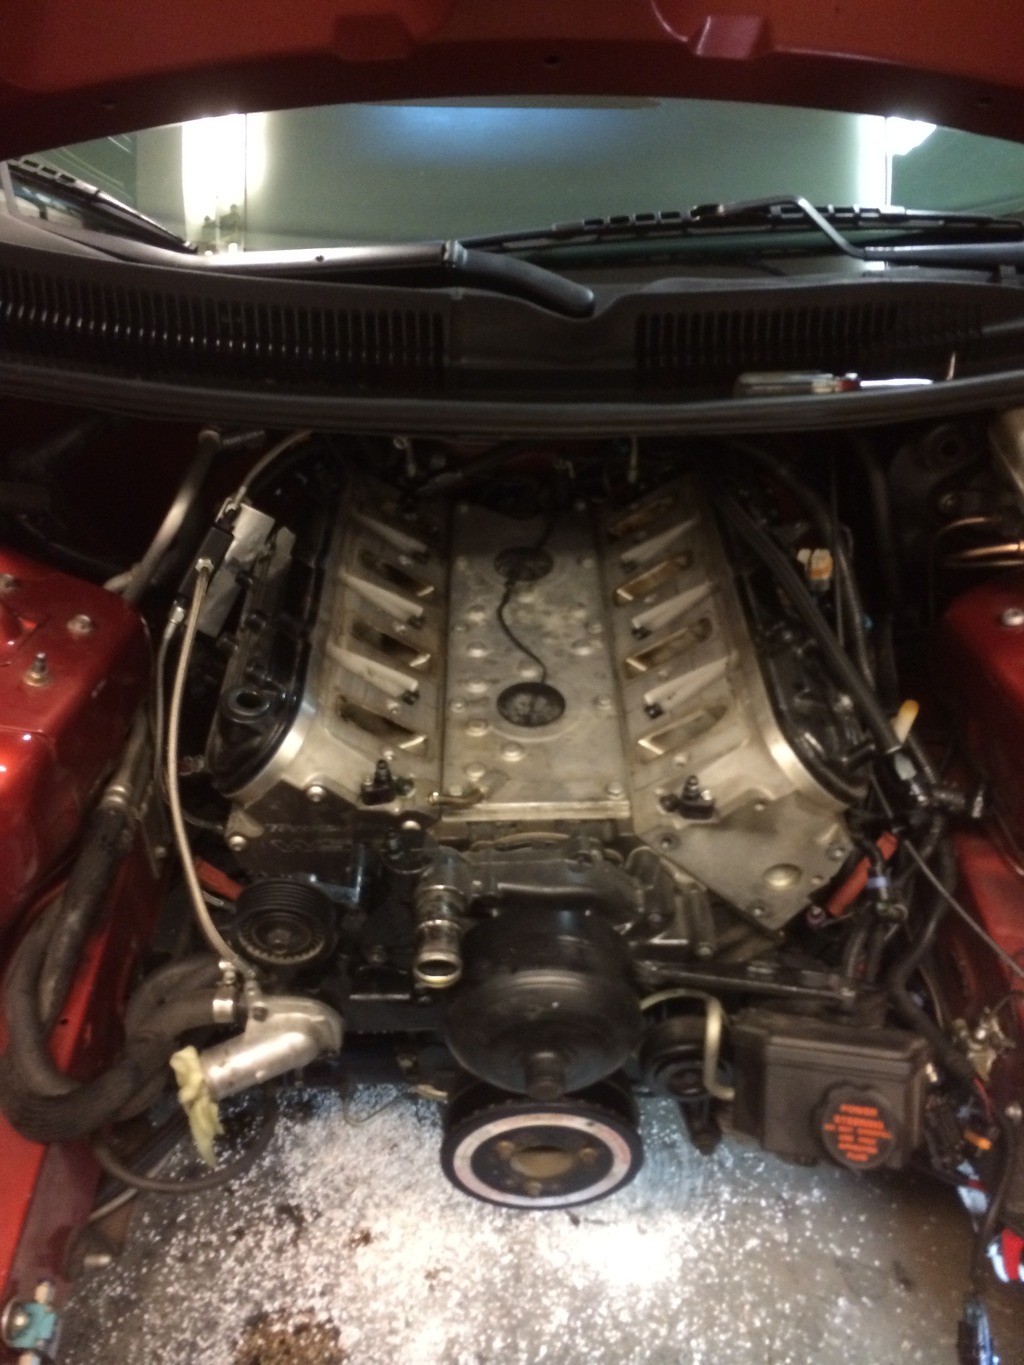
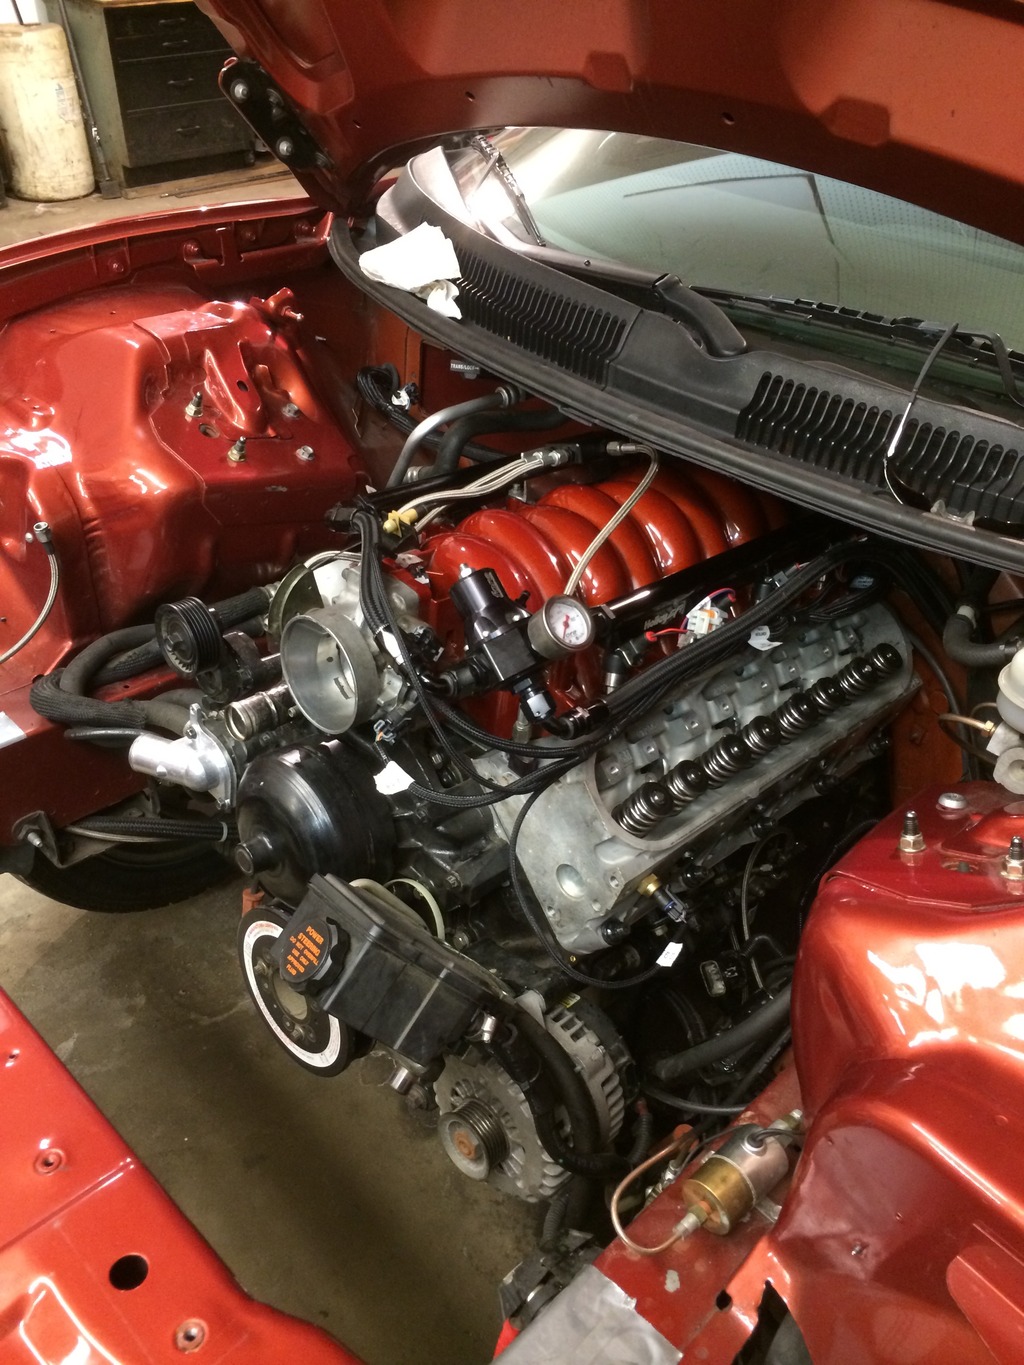
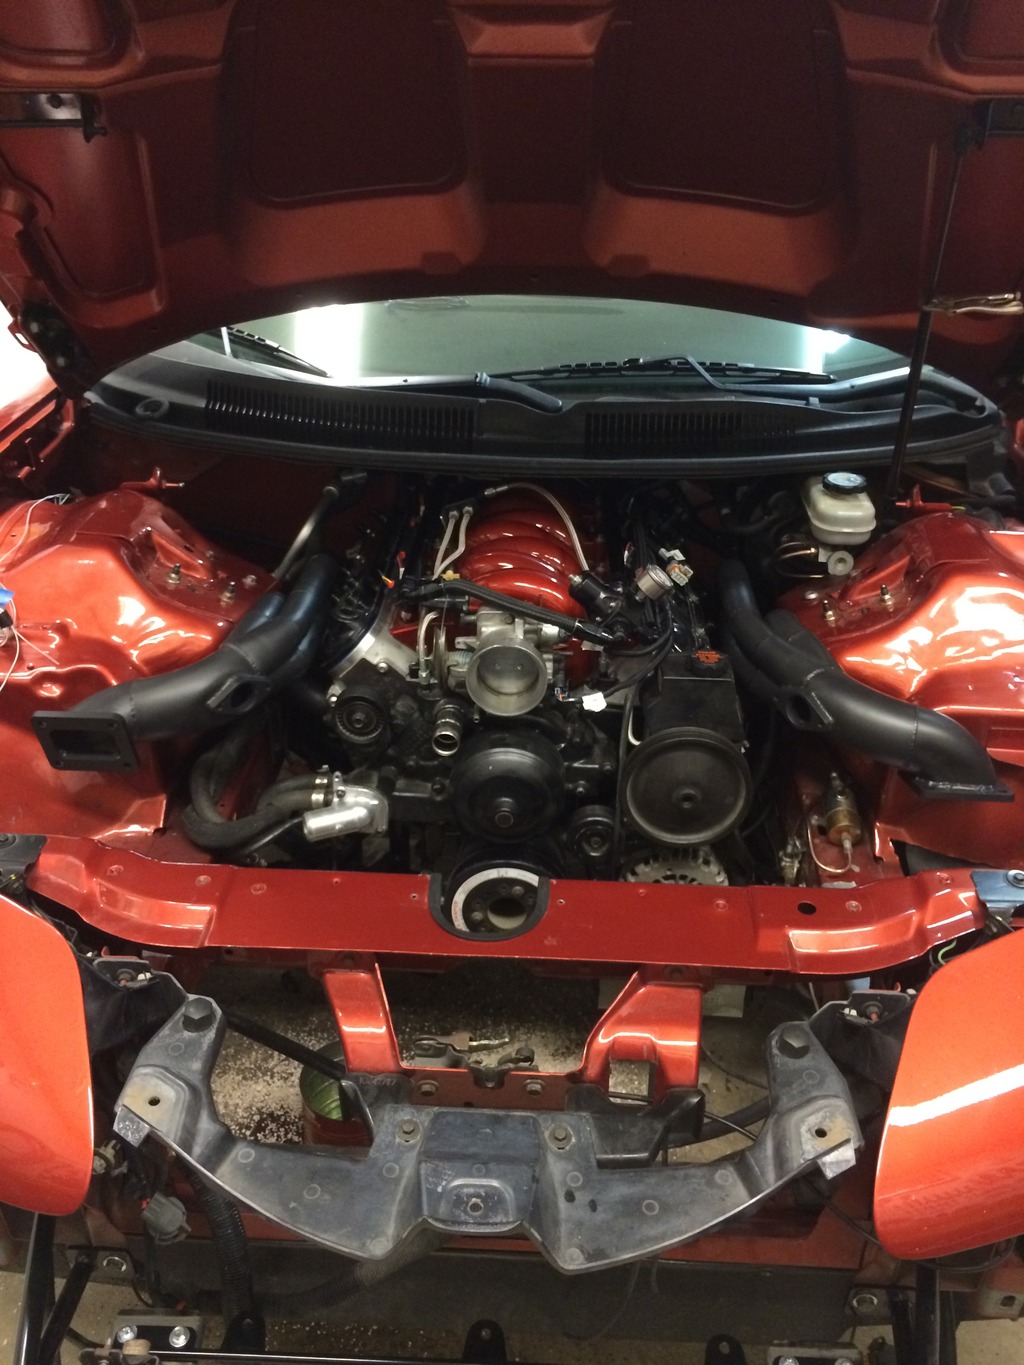
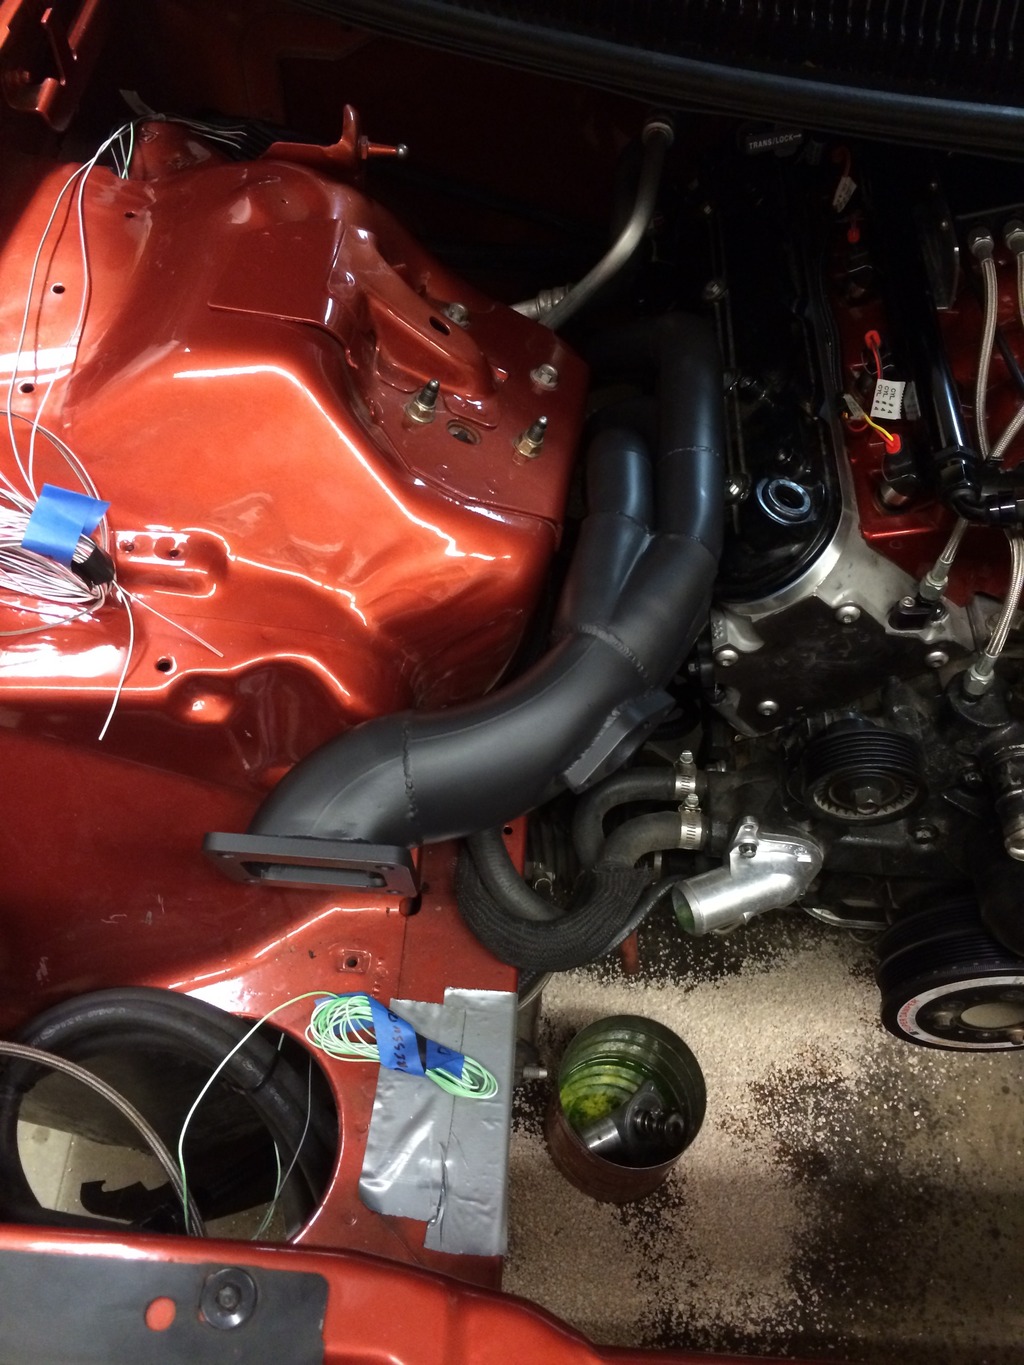
We started tearing things down today to prepare for the Holley. I also wanted to look into one issue from when I pushed some water last year. Mine was supposed to have LS9 head gaskets, but sure enough, AES did not put them in. I have 6.0 head gaskets. Needless to say, it will be getting tore down and changed over. AES - what a bunch of crooked bastards.
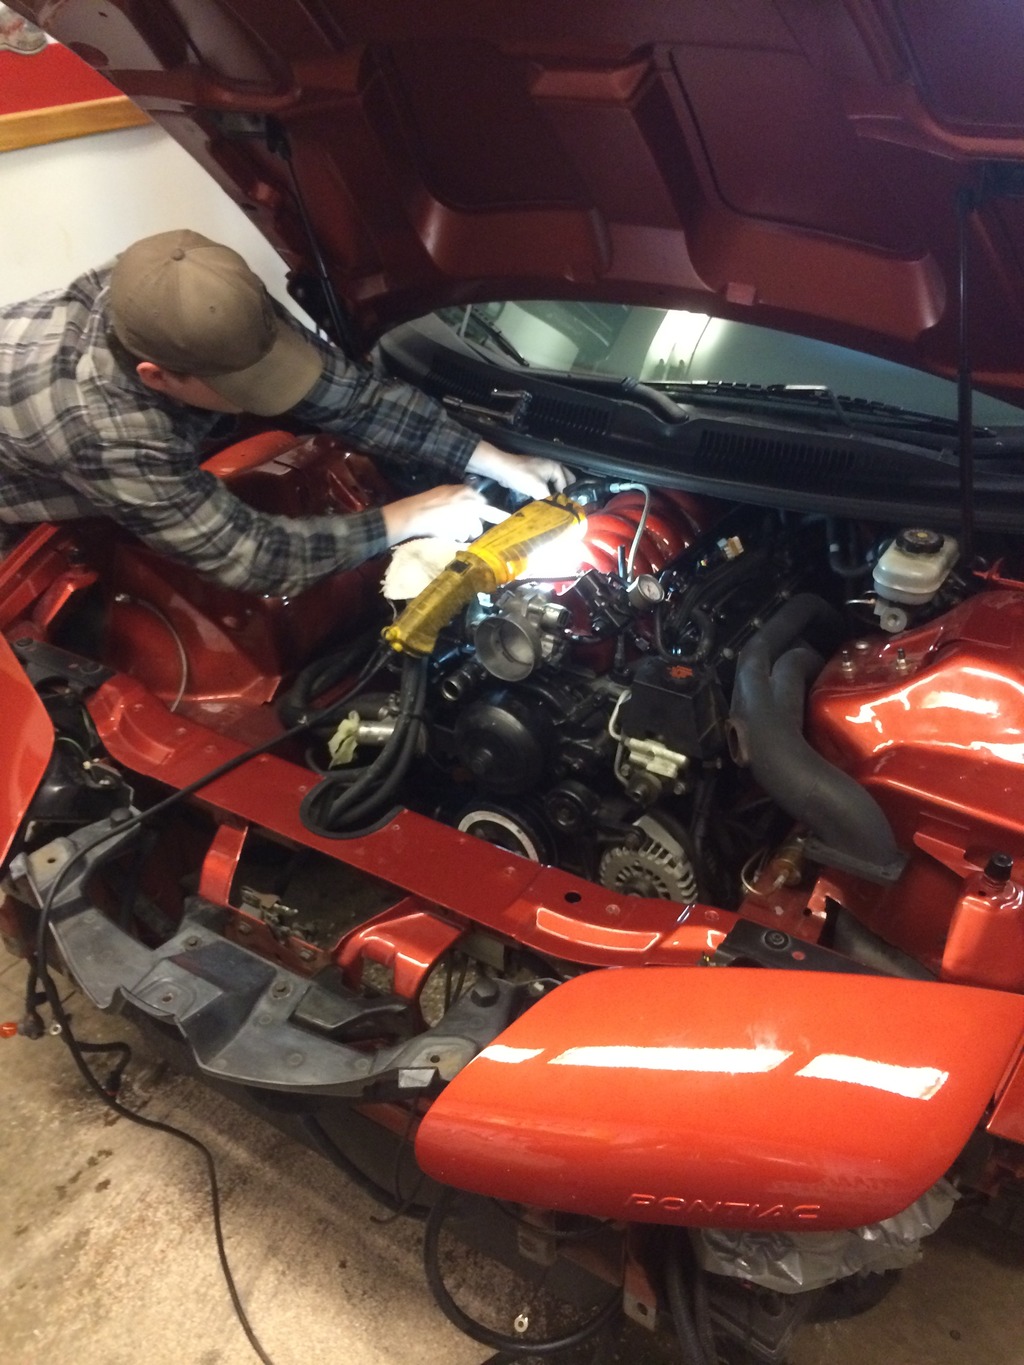
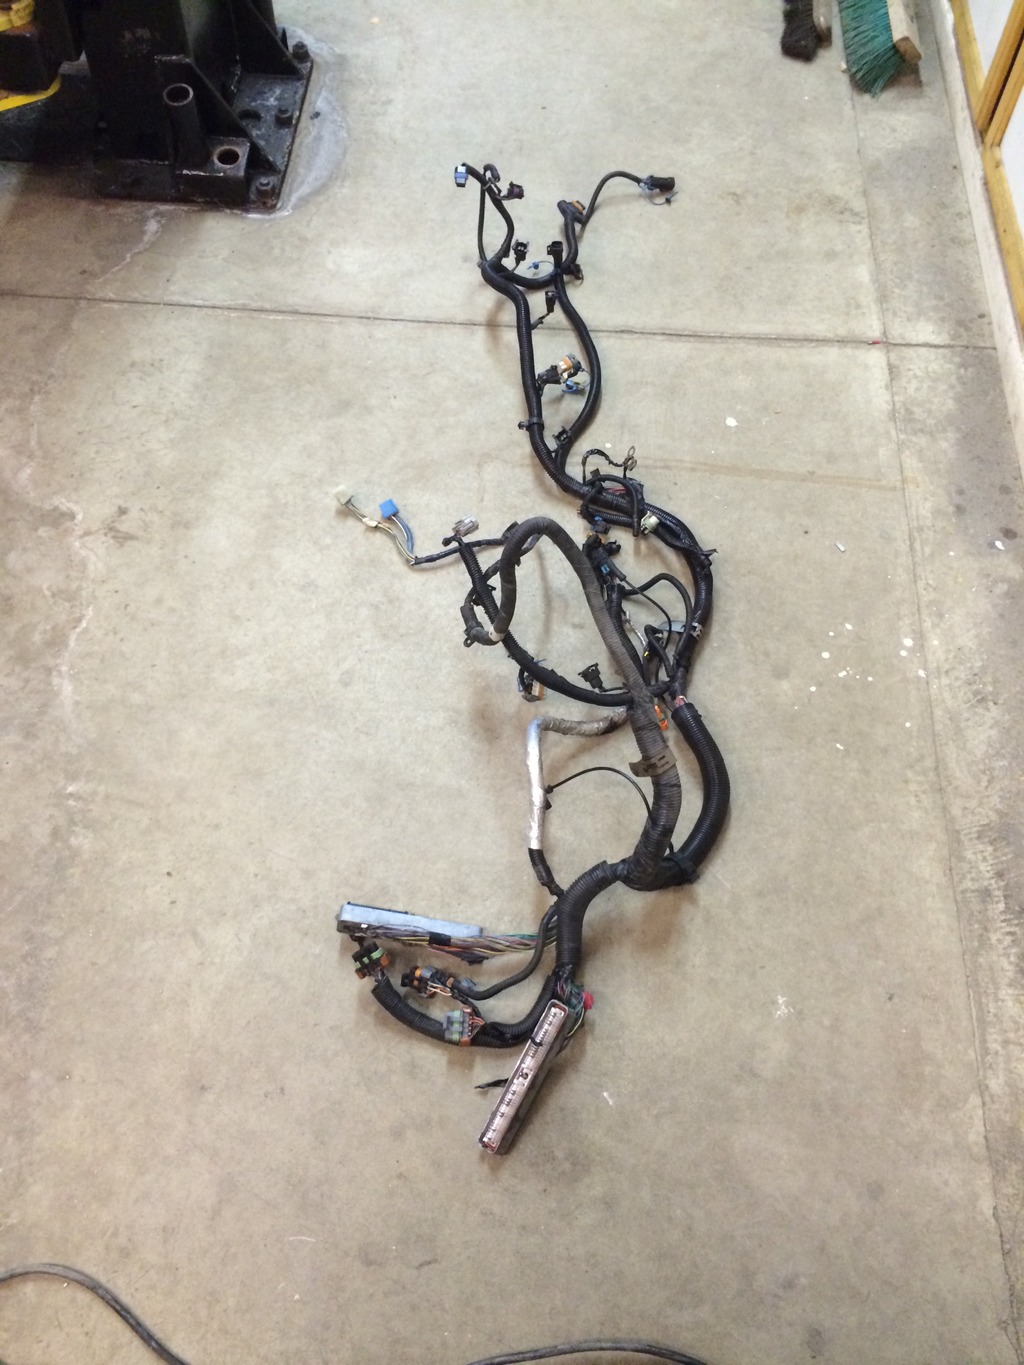
Most everything was tore down today, gaskets ordered, and even got the existing harness out:
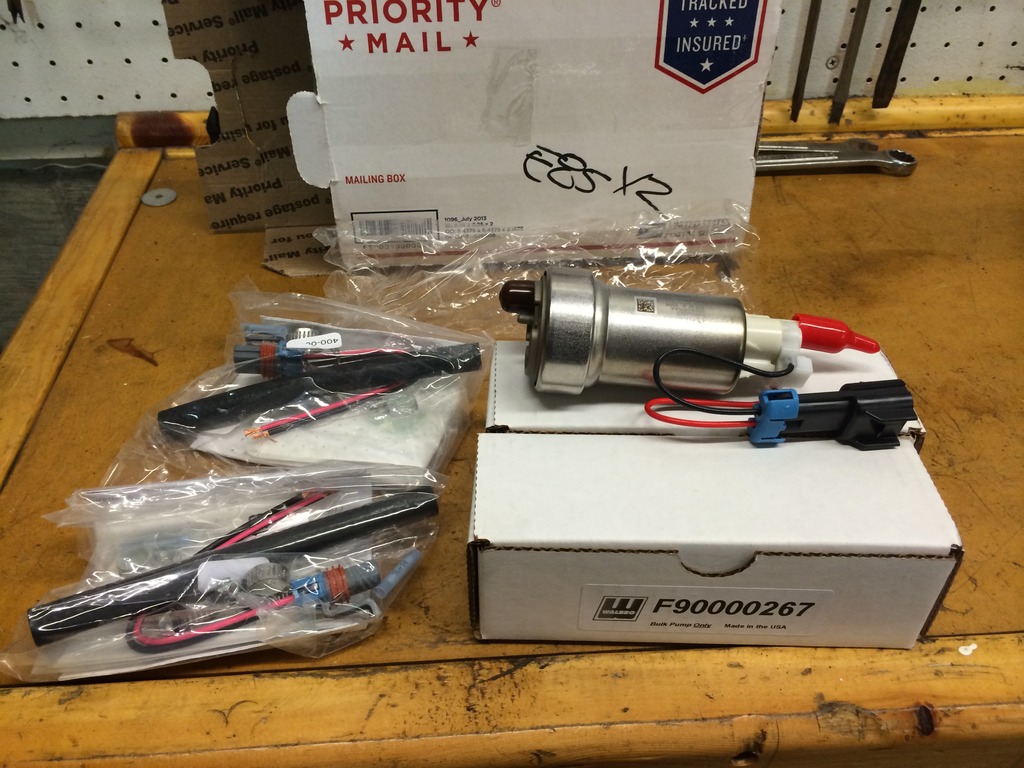
Also planning to upgrade some of the fuel pumps:
I have some stuff from MWC and will be getting on the car. I haven't put the front bumper support on yet. We tore that apart today and ready to fit-up with the MWC front bumper support. Also will be installing the MWC Crash Bars and Travel Limiters I bought last winter. I also have a MWC Chute Mount and Stroud parachute on the way.
One last upgrade for this Spring: Blackbird Lighting Solutions Premium Kit. I ran across a set in the for sale section for a great price and couldn't pass it up.
Will try to keep this updated. I am looking forward to racing season and chopping some more time off.
With the changeover to Holley, I will be pulling a fair amount of parts off and getting them up for sale here. Some of the items I can think of are the following: Eboost2, extra Eboost2 solenoids, Zeitronix Meters, EFI-Live, MSD 2-Step, MAP sensors, PCM, and some other miscellaneous components. I have a few local people interested in some components. Keep an eye out in the for sale section.
The main update was going to be converting over to Holley Dominator.

I couldn't pass up the good deal on Amazon and decided to pull the trigger and make the change.
I have received most of the components, and will be working on the install over the next couple of weeks:

I have the Digital Dash on order, but it is currently backordered.
We started tearing things down today to prepare for the Holley. I also wanted to look into one issue from when I pushed some water last year. Mine was supposed to have LS9 head gaskets, but sure enough, AES did not put them in. I have 6.0 head gaskets. Needless to say, it will be getting tore down and changed over. AES - what a bunch of crooked bastards.


Most everything was tore down today, gaskets ordered, and even got the existing harness out:

Also planning to upgrade some of the fuel pumps:

I have some stuff from MWC and will be getting on the car. I haven't put the front bumper support on yet. We tore that apart today and ready to fit-up with the MWC front bumper support. Also will be installing the MWC Crash Bars and Travel Limiters I bought last winter. I also have a MWC Chute Mount and Stroud parachute on the way.
One last upgrade for this Spring: Blackbird Lighting Solutions Premium Kit. I ran across a set in the for sale section for a great price and couldn't pass it up.
Will try to keep this updated. I am looking forward to racing season and chopping some more time off.
With the changeover to Holley, I will be pulling a fair amount of parts off and getting them up for sale here. Some of the items I can think of are the following: Eboost2, extra Eboost2 solenoids, Zeitronix Meters, EFI-Live, MSD 2-Step, MAP sensors, PCM, and some other miscellaneous components. I have a few local people interested in some components. Keep an eye out in the for sale section.
03-31-2015, 09:31 AM
#132
I thought I would give an update due to AES - Home of the World's Fastest Runaround and Record Setting Lies and Ripoffs.
As stated above, I decided to tear down the long block as it appeared AES had installed the wrong head gaskets. It was pretty clear on the invoice, and in discussions, to install LS9 head gaskets. When I got them off the car, they were a 3-layer 6.0 head gasket. I took the heads to a local company just to have them checked out. It appeared I had pushed water in 3 cylinders on the passenger side.
I asked the engine shop to take a look at the valves, due to this thread:
https://ls1tech.com/forums/forced-in...s-390-a-2.html
and more importantly, post #32. His engine was built at the same time.
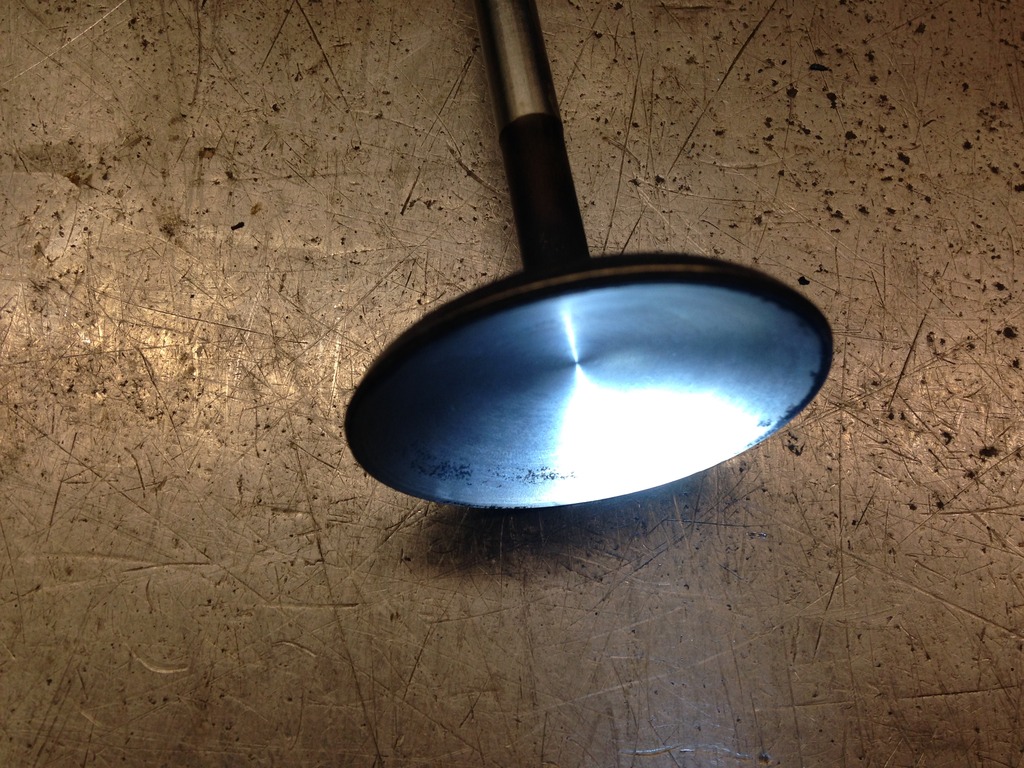
Sure enough, I received a text from the engine guy stating the news that I did not want to hear. The valves were the cheap Qualfast, which did not hold up in my application as they were severely tulipped.
I have talked to AES and of course, with their generalized invoices, they have their end covered. It is still pretty shitty that they would put such garbage in a turbo application, which it definitely won't hold up due to the heat. Just another customer that got bent over from them. You can definitely tell they have been through this with multiple customers because they know when not to answer questions on the phone. When discussing the head gaskets, they would not answer my question when I asked them, so with the 6.0 head gaskets in my engine, does this prove that my engine was not built to the contract, or invoice, because it called out for LS9 gaskets on the invoice and work order? They did not want to answer that, imagine that.
Their response to the the valves is they are running them in their own application. I sure as hell hope Karma catches up with those crooks. I would highly advise to run the opposite direction rather than to give them anything.
I will try to get some additional pictures showing the tulipped valves.
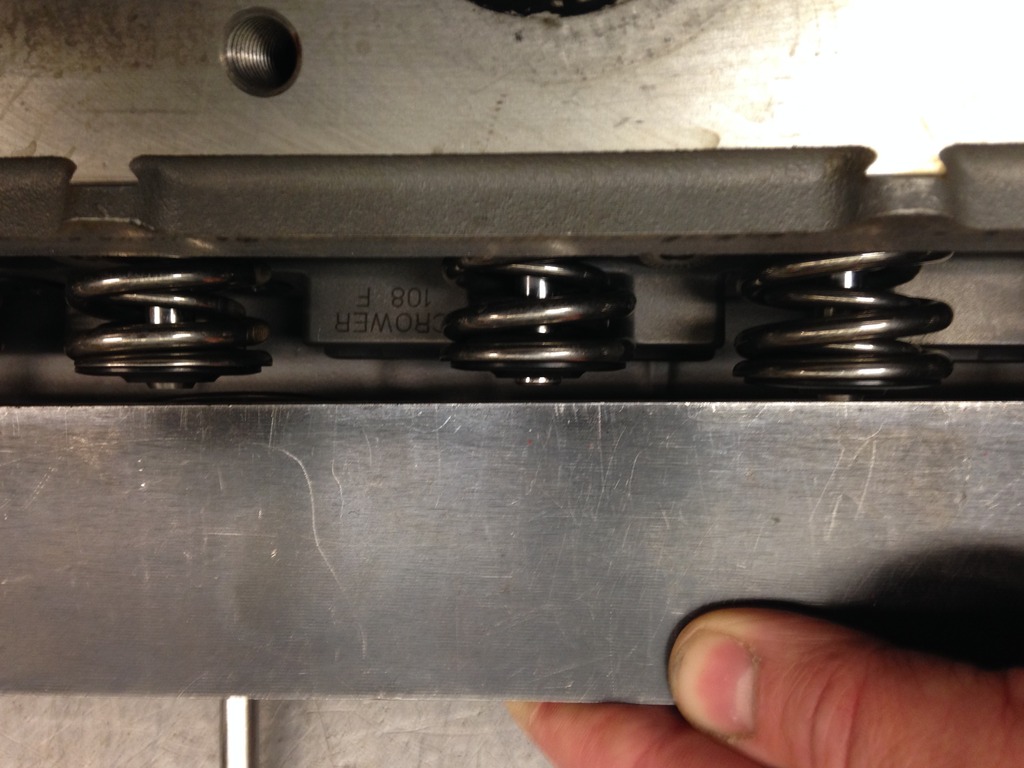
Part Number of the Head Gasket that was installed by AES:
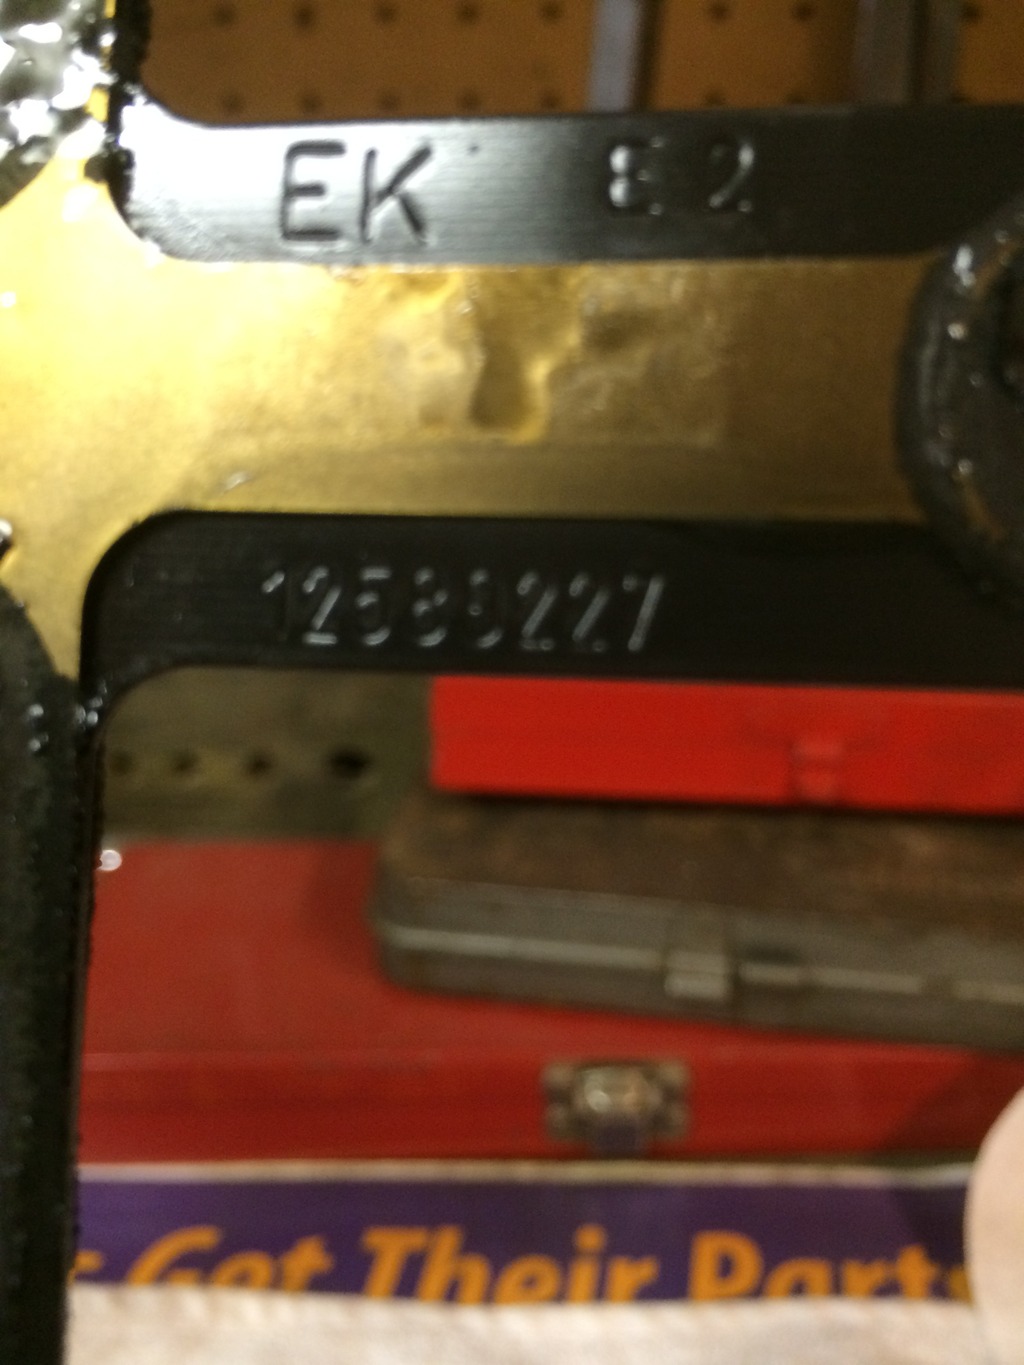
Tab on the Head Gasket:

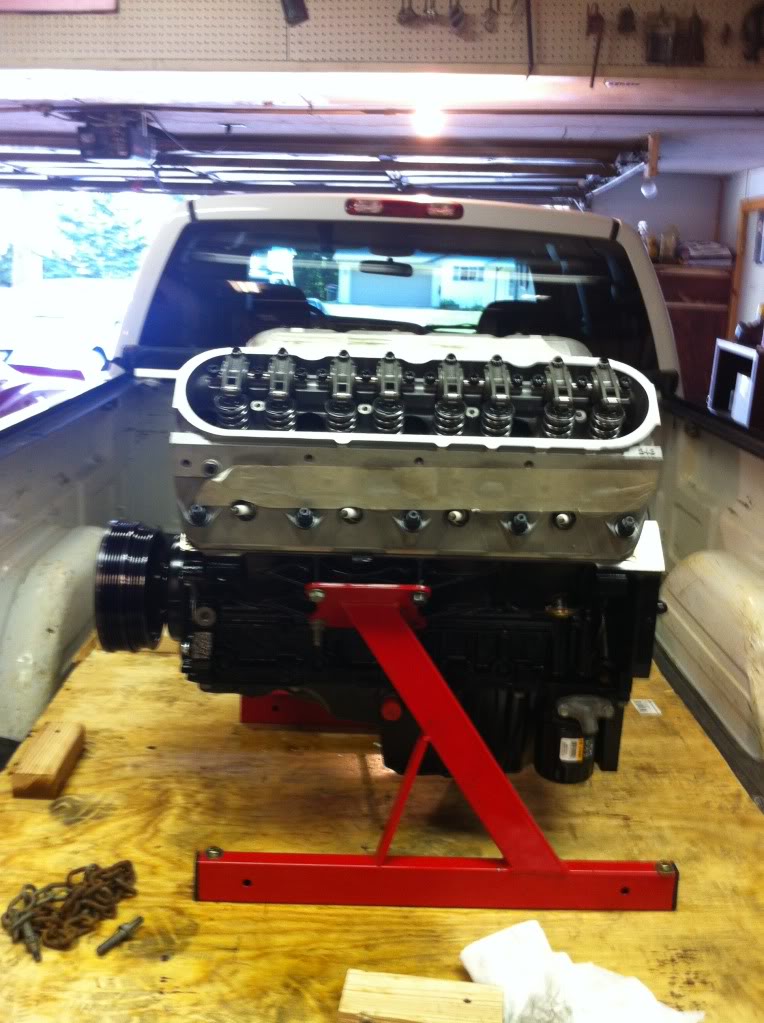
Going back to an original picture of the engine, I should have looked closer because it pretty clearly shows they are not LS9 head gaskets by the tab:


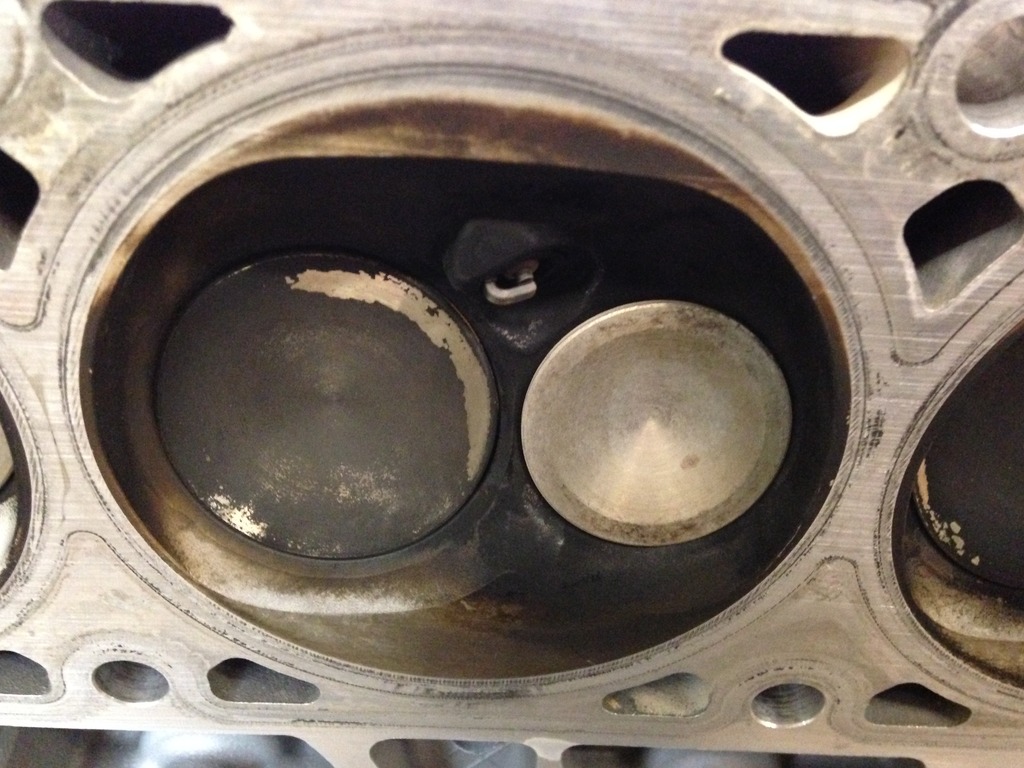
As stated above, I decided to tear down the long block as it appeared AES had installed the wrong head gaskets. It was pretty clear on the invoice, and in discussions, to install LS9 head gaskets. When I got them off the car, they were a 3-layer 6.0 head gasket. I took the heads to a local company just to have them checked out. It appeared I had pushed water in 3 cylinders on the passenger side.
I asked the engine shop to take a look at the valves, due to this thread:
https://ls1tech.com/forums/forced-in...s-390-a-2.html
and more importantly, post #32. His engine was built at the same time.
Sure enough, I received a text from the engine guy stating the news that I did not want to hear. The valves were the cheap Qualfast, which did not hold up in my application as they were severely tulipped.
I have talked to AES and of course, with their generalized invoices, they have their end covered. It is still pretty shitty that they would put such garbage in a turbo application, which it definitely won't hold up due to the heat. Just another customer that got bent over from them. You can definitely tell they have been through this with multiple customers because they know when not to answer questions on the phone. When discussing the head gaskets, they would not answer my question when I asked them, so with the 6.0 head gaskets in my engine, does this prove that my engine was not built to the contract, or invoice, because it called out for LS9 gaskets on the invoice and work order? They did not want to answer that, imagine that.
Their response to the the valves is they are running them in their own application. I sure as hell hope Karma catches up with those crooks. I would highly advise to run the opposite direction rather than to give them anything.
I will try to get some additional pictures showing the tulipped valves.
Part Number of the Head Gasket that was installed by AES:

Tab on the Head Gasket:

Going back to an original picture of the engine, I should have looked closer because it pretty clearly shows they are not LS9 head gaskets by the tab:


 03-31-2015, 09:38 AM
#134
Thank you, appreciate the good words.
I received my MWC rear bumper support / chute mount last week.
I got the LS9 head gaskets on, and the heads back together with different valves. The heads are back on the car. Still need to have the rockers and pushrods installed. The intake, fuel rails, etc are back on. The main engine harness is routed from the ECU to the engine bay and all sensors are hooked up and ready to go. Have the Holley transducers installed for the oil pressure and fuel pressure.
Also have the main power ran from the battery to the ECU.
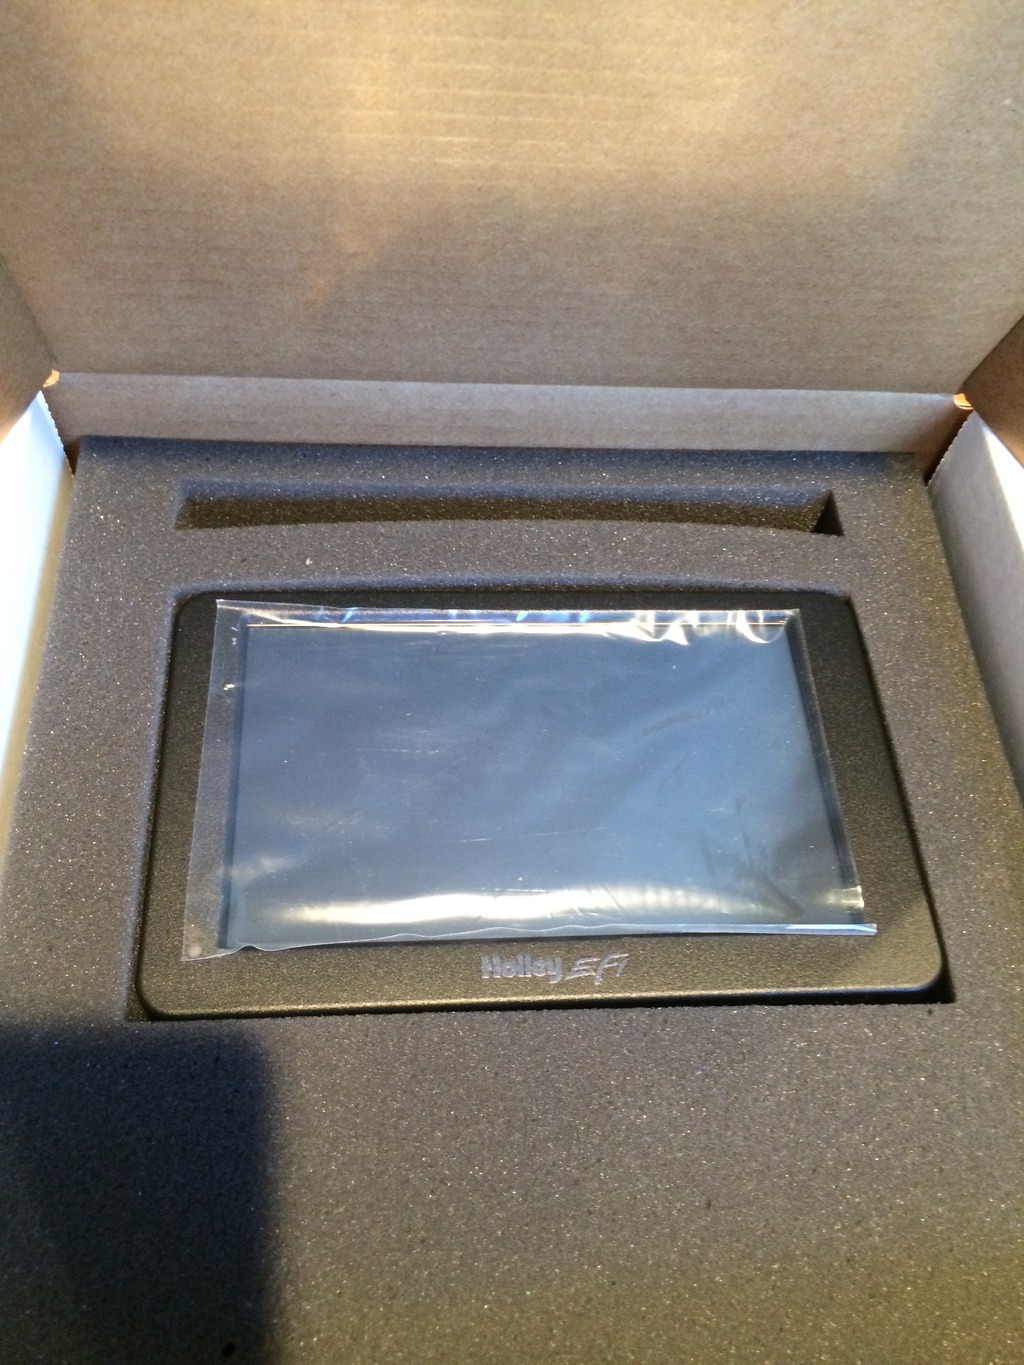
I received the Holley Digital Dash yesterday:
I took the turbo housings, headers, downpipes, and wastegate pipes to get powdercoated. Was told I should expect about a two week wait for that.
I am also planning to send one turbo out to get looked at and possibly rebuilt. Spring is showing up, yet, still quite a bit to get done before some fun.
More updates to come in the next couple of weeks.
I received my MWC rear bumper support / chute mount last week.

I got the LS9 head gaskets on, and the heads back together with different valves. The heads are back on the car. Still need to have the rockers and pushrods installed. The intake, fuel rails, etc are back on. The main engine harness is routed from the ECU to the engine bay and all sensors are hooked up and ready to go. Have the Holley transducers installed for the oil pressure and fuel pressure.

Also have the main power ran from the battery to the ECU.
I received the Holley Digital Dash yesterday:


I took the turbo housings, headers, downpipes, and wastegate pipes to get powdercoated. Was told I should expect about a two week wait for that.
I am also planning to send one turbo out to get looked at and possibly rebuilt. Spring is showing up, yet, still quite a bit to get done before some fun.
More updates to come in the next couple of weeks.
04-07-2015, 09:33 AM
#135
Quick update:
The turbo kit powdercoating was completed in just one week. I went and picked that up, but unfortunately, no pictures quite yet. I haven't opened it from the wrapping they did.
Sent the other turbo off to have it inspected. Hoping for an update on both of those this week.
Drained the transmission and pulled the pan off to fix a transmission leak. This could have been simplified with a drain in the pan. It wasn't too big of a pain, but was more of a hassle than it should have been. Will be welding a drain in before putting it back on. Have a new gasket and Electrical Connector O-ring coming. Hoping one of those cures the leak.
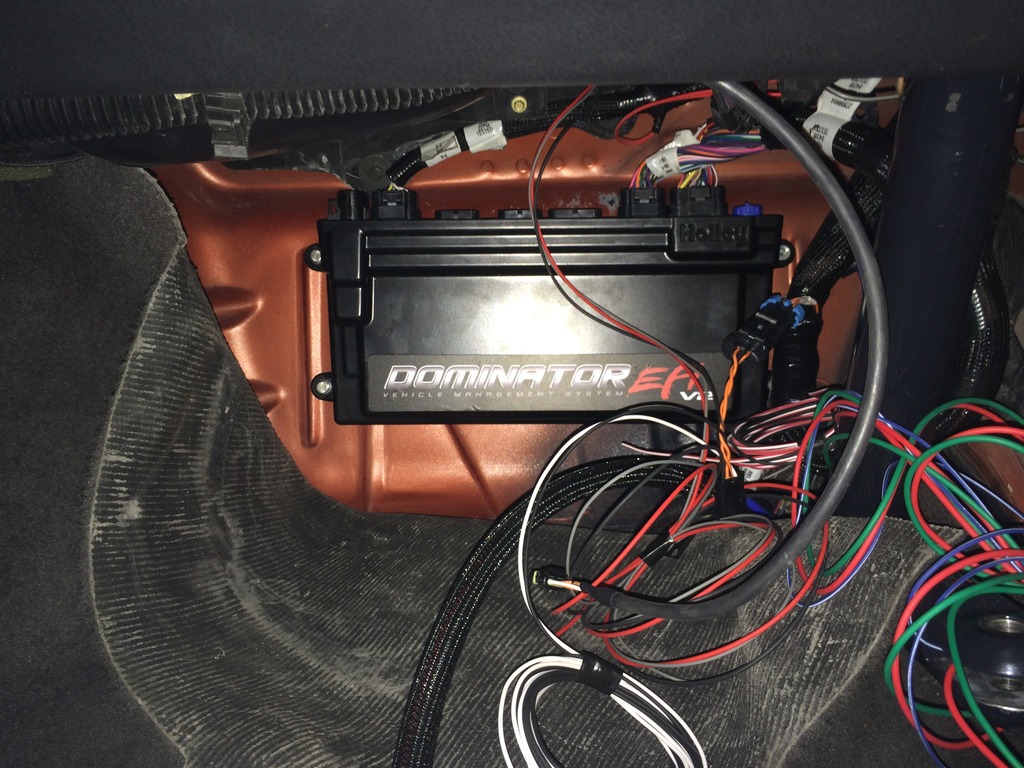
Was able to mount the Dominator ECU and also get a couple of input & outputs ran. Also routed the transmission harness and installed the transbrake pin to the harness:
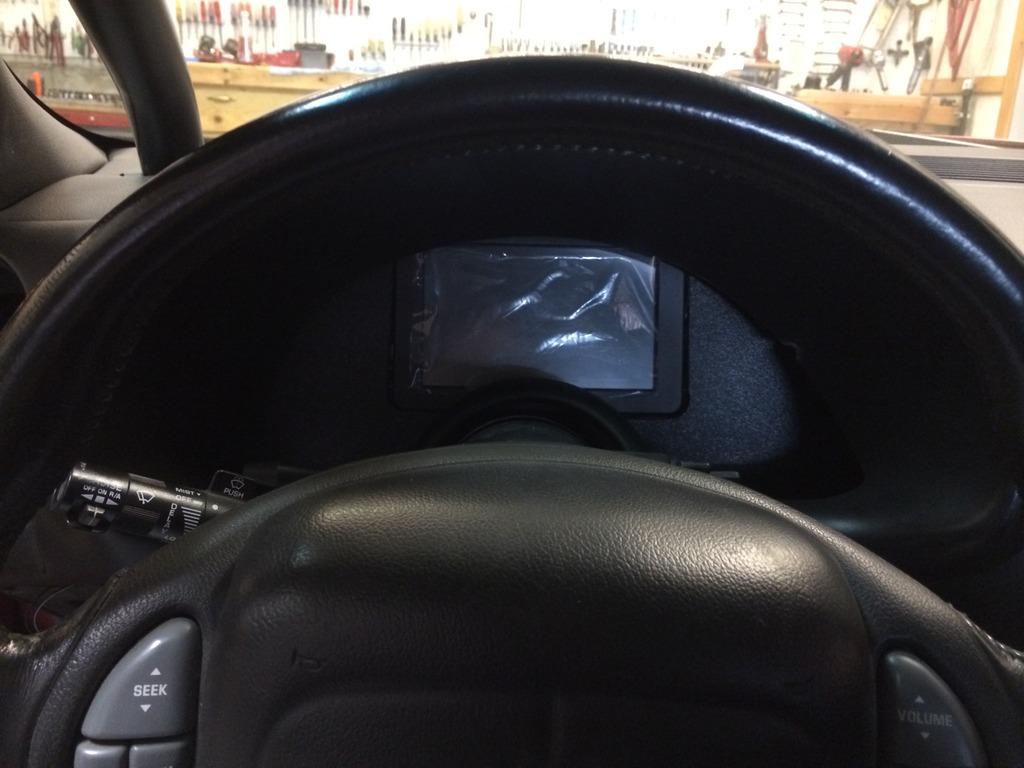
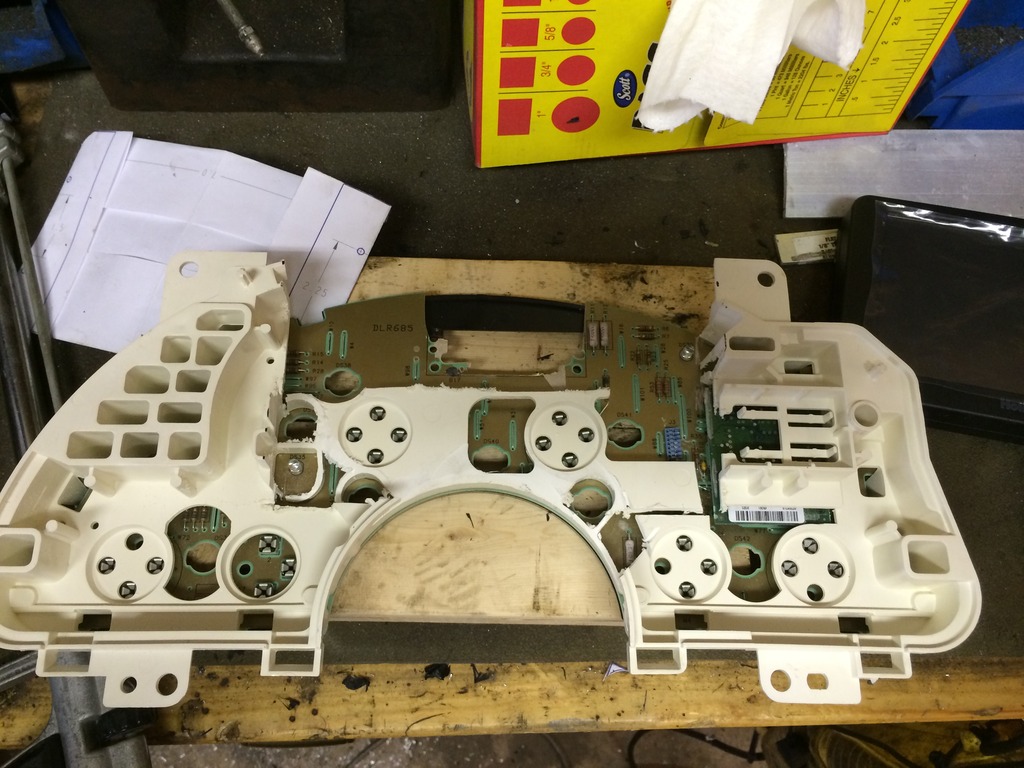
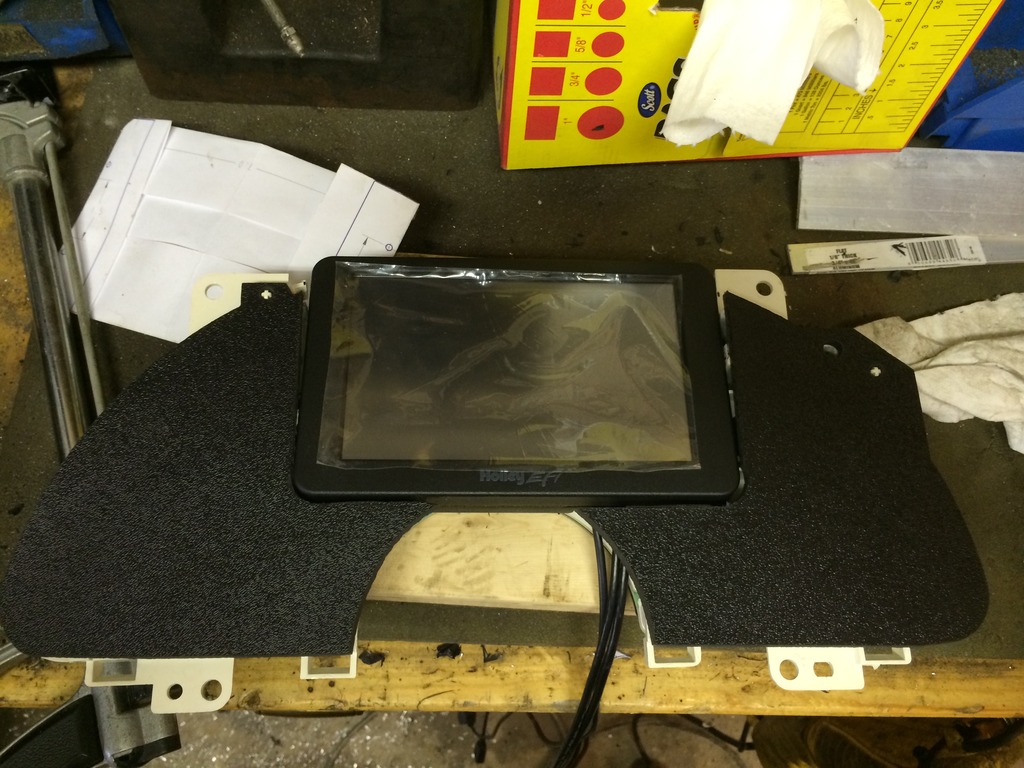
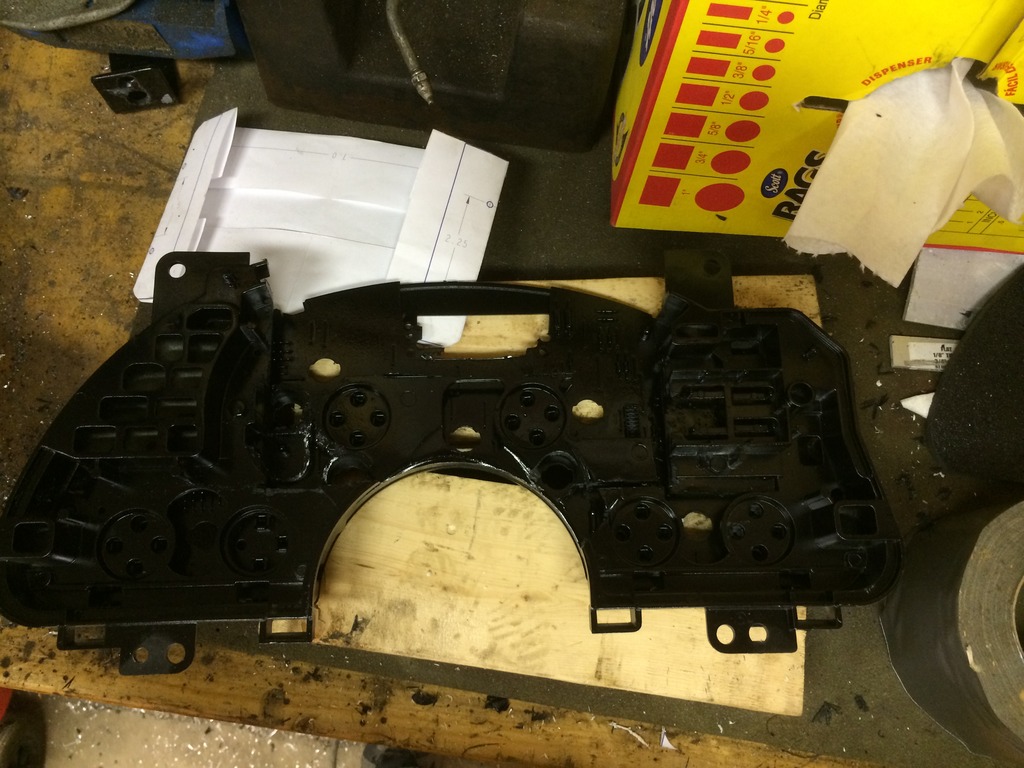
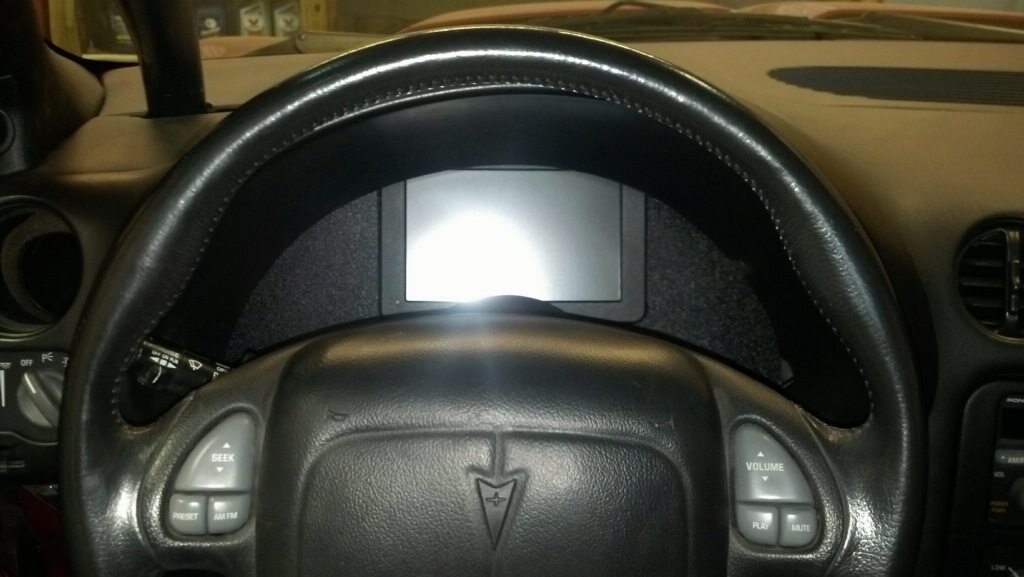
Spent a little bit of time installing the new Holley 7" Digital Dash. Utilized the old instrument cluster and did a fair amount of cutting to get the Dash to be recessed. Ran a few bolts through the instrument cluster to resupport it from the missing plastic. Built a couple of standoffs and ran screws to hold the Digital Dash in place. Also used a Blank Cluster from 6 Liter Eater to work around the Digital Dash. Took some cutting, filing, and patience to get this to look decent.
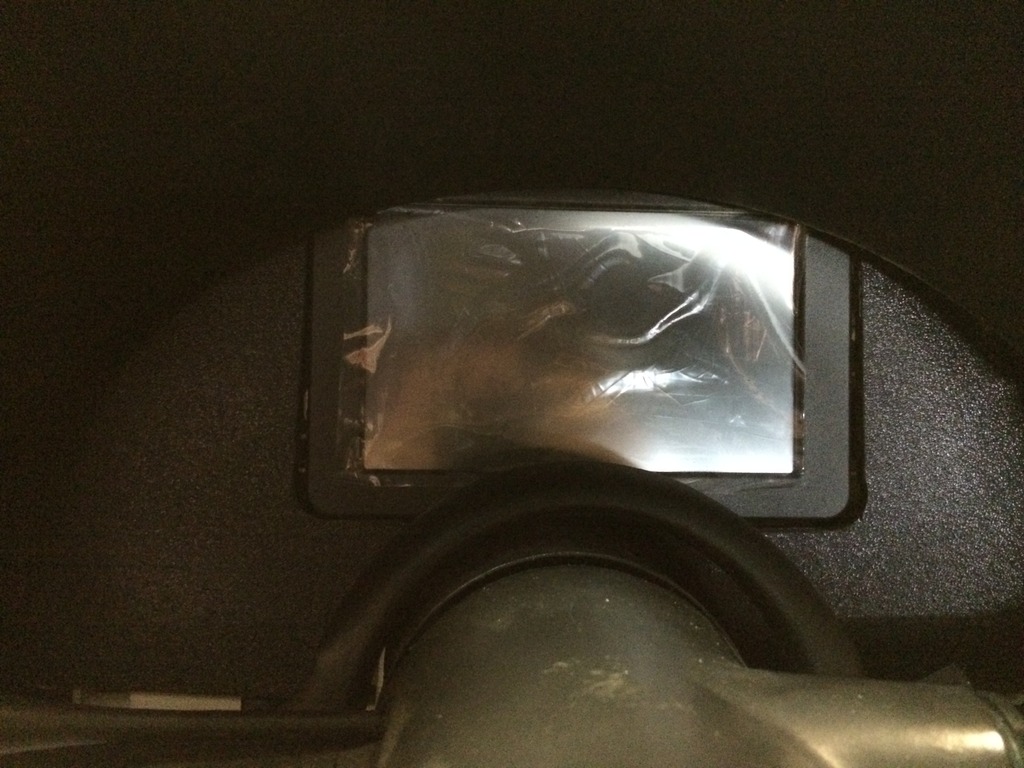
A quick mockup of the Digital Dash:
This shows how much of the cluster was cut to allow for the Dash to be recessed:
Painted the cluster black:
Final layout and fitting of the Digital Dash:
More updates to come.
The turbo kit powdercoating was completed in just one week. I went and picked that up, but unfortunately, no pictures quite yet. I haven't opened it from the wrapping they did.
Sent the other turbo off to have it inspected. Hoping for an update on both of those this week.
Drained the transmission and pulled the pan off to fix a transmission leak. This could have been simplified with a drain in the pan. It wasn't too big of a pain, but was more of a hassle than it should have been. Will be welding a drain in before putting it back on. Have a new gasket and Electrical Connector O-ring coming. Hoping one of those cures the leak.
Was able to mount the Dominator ECU and also get a couple of input & outputs ran. Also routed the transmission harness and installed the transbrake pin to the harness:

Spent a little bit of time installing the new Holley 7" Digital Dash. Utilized the old instrument cluster and did a fair amount of cutting to get the Dash to be recessed. Ran a few bolts through the instrument cluster to resupport it from the missing plastic. Built a couple of standoffs and ran screws to hold the Digital Dash in place. Also used a Blank Cluster from 6 Liter Eater to work around the Digital Dash. Took some cutting, filing, and patience to get this to look decent.
A quick mockup of the Digital Dash:


This shows how much of the cluster was cut to allow for the Dash to be recessed:


Painted the cluster black:

Final layout and fitting of the Digital Dash:

More updates to come.
06-05-2015, 09:28 AM
#136
It's time for an update.
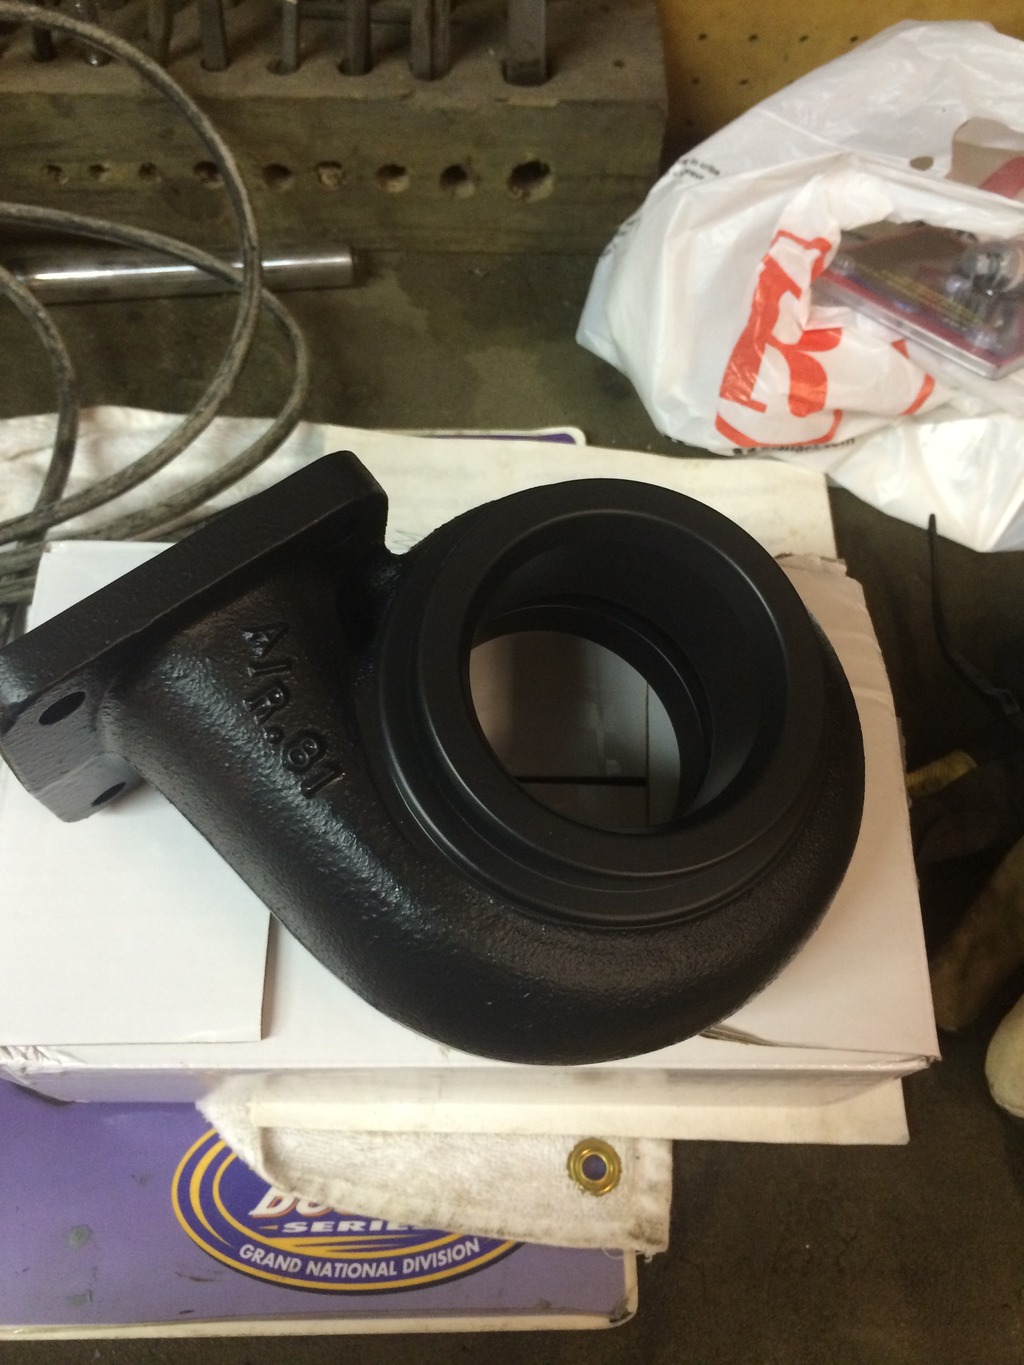
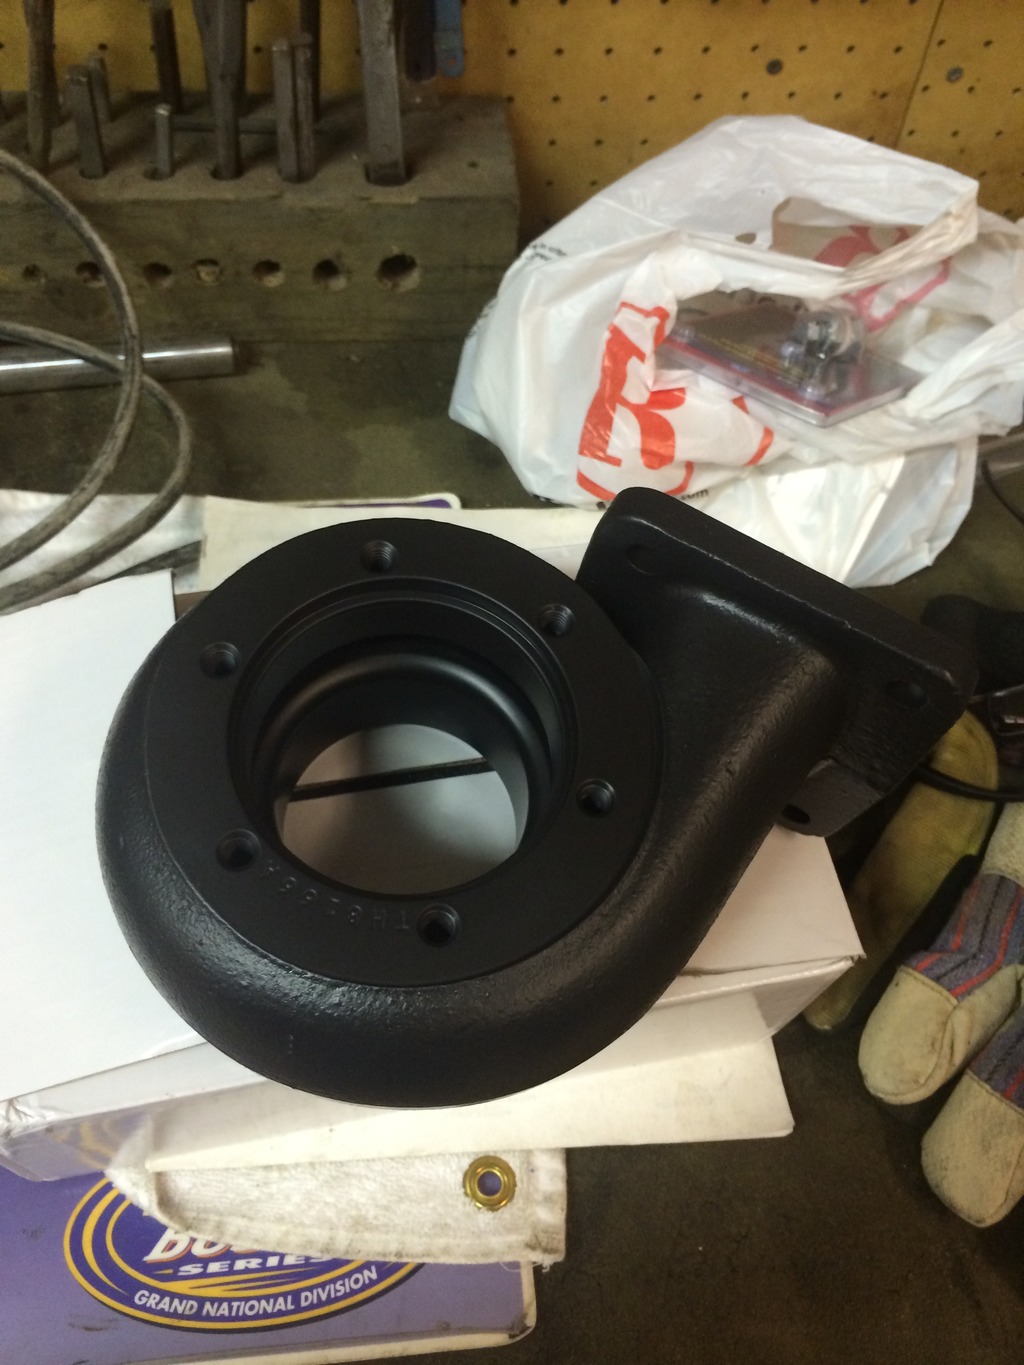
I had my turbo kit powdercoated this year while it was off the car.

http://s221.photobucket.com/user/Onl...l?sort=2&o=502
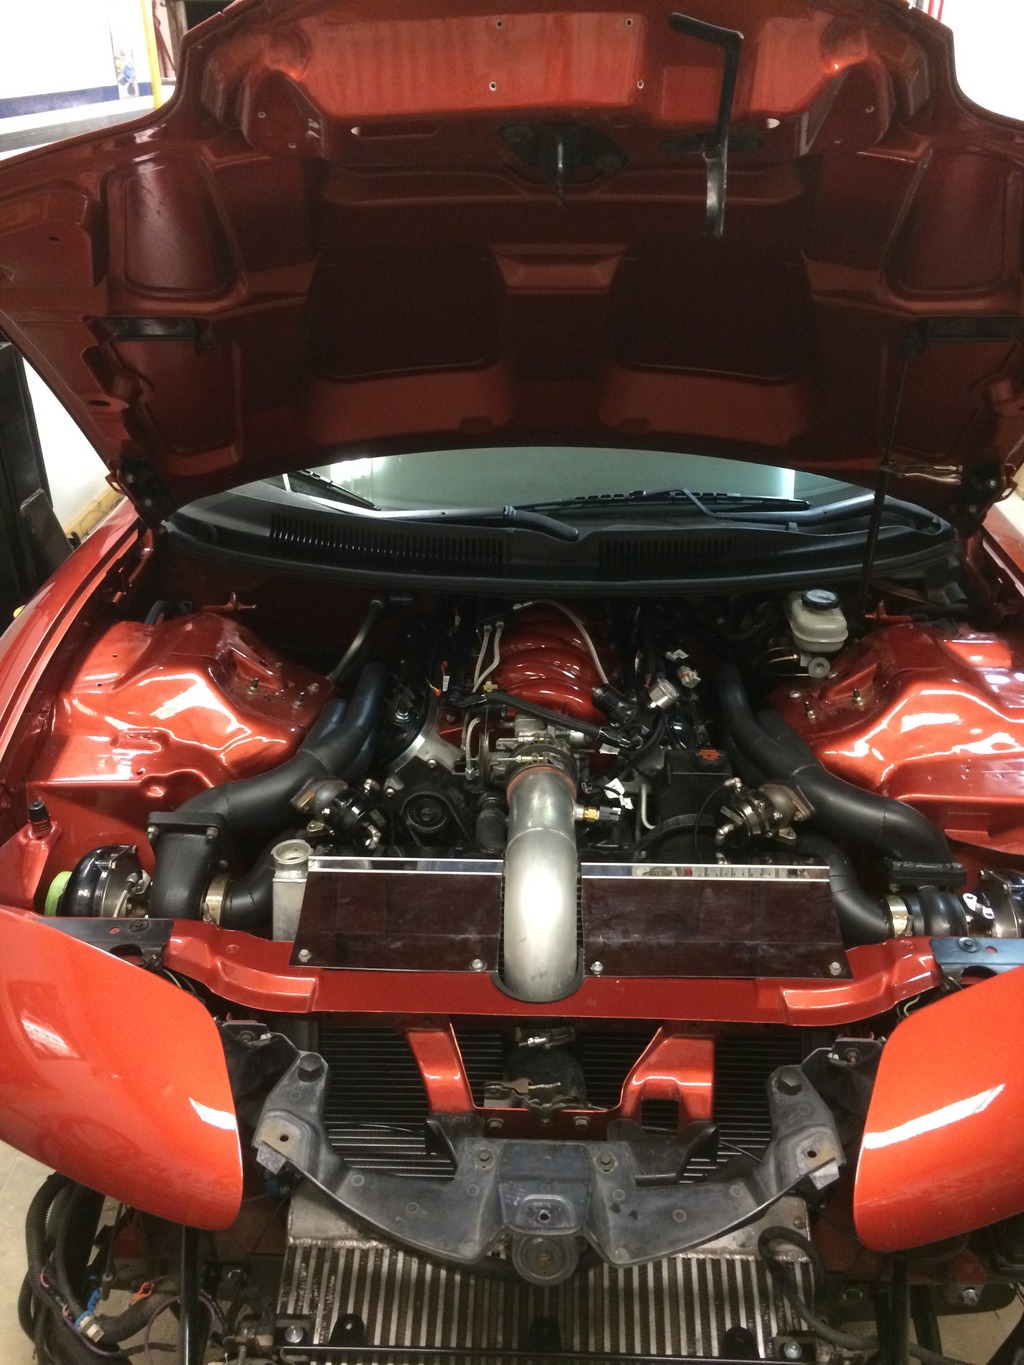
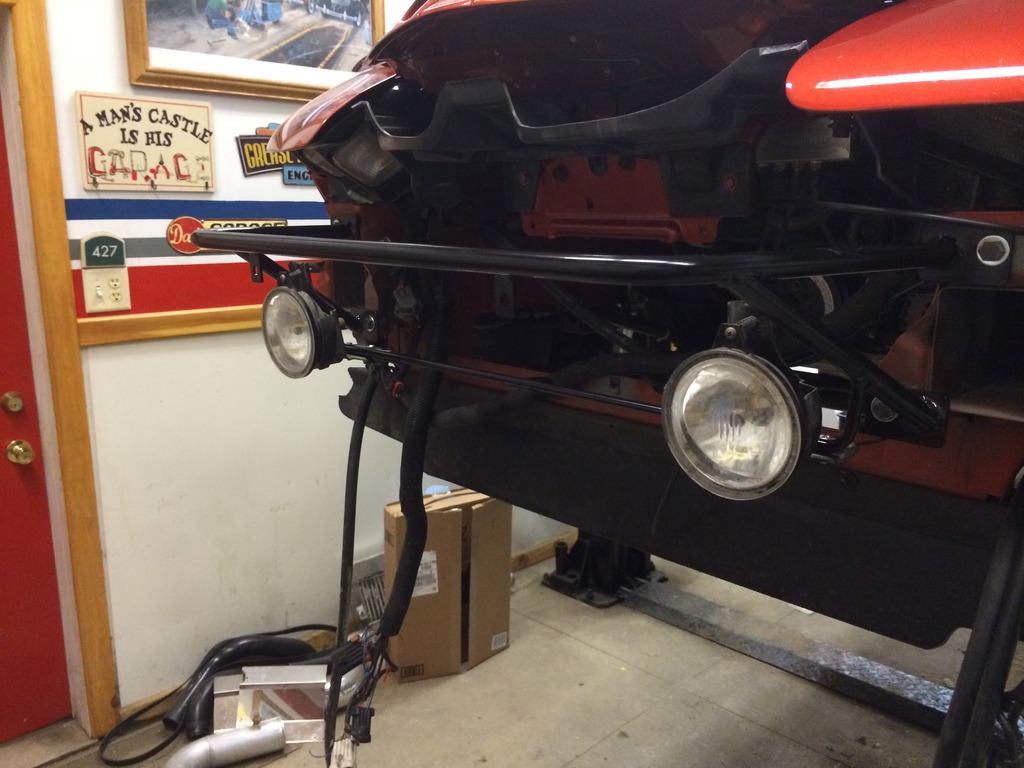
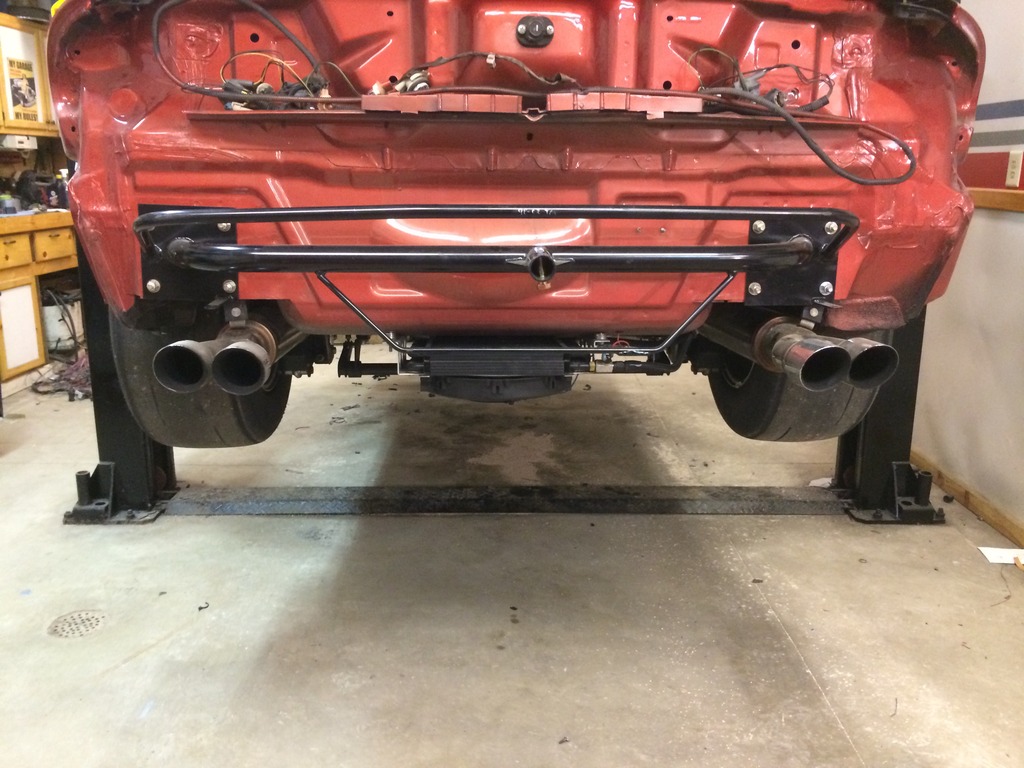
I also finally got the front bumper support put on that I bought from MWC last year:
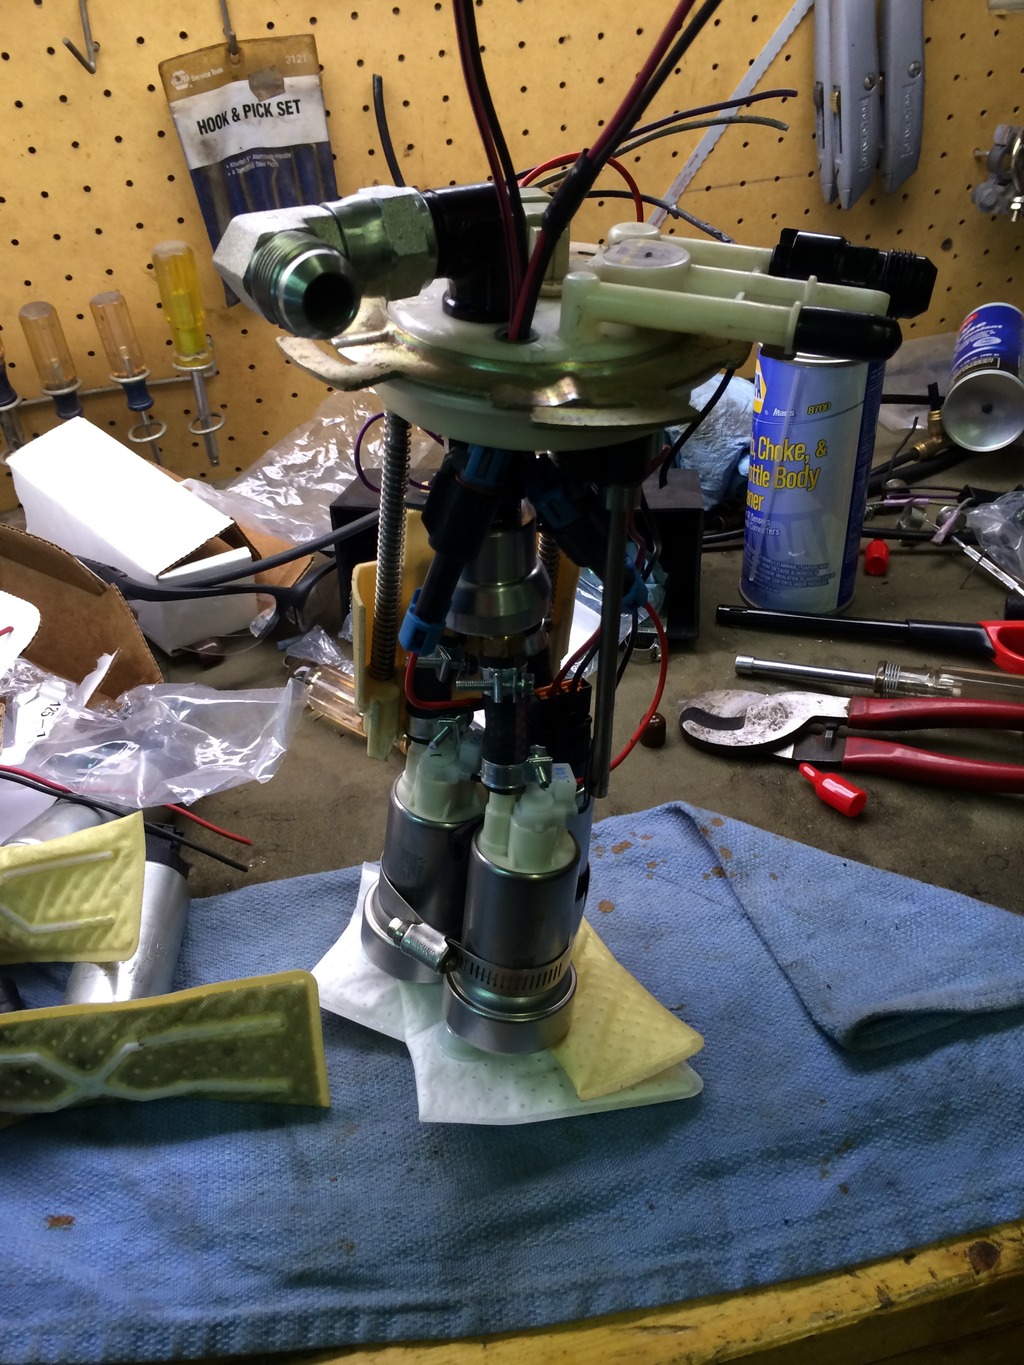
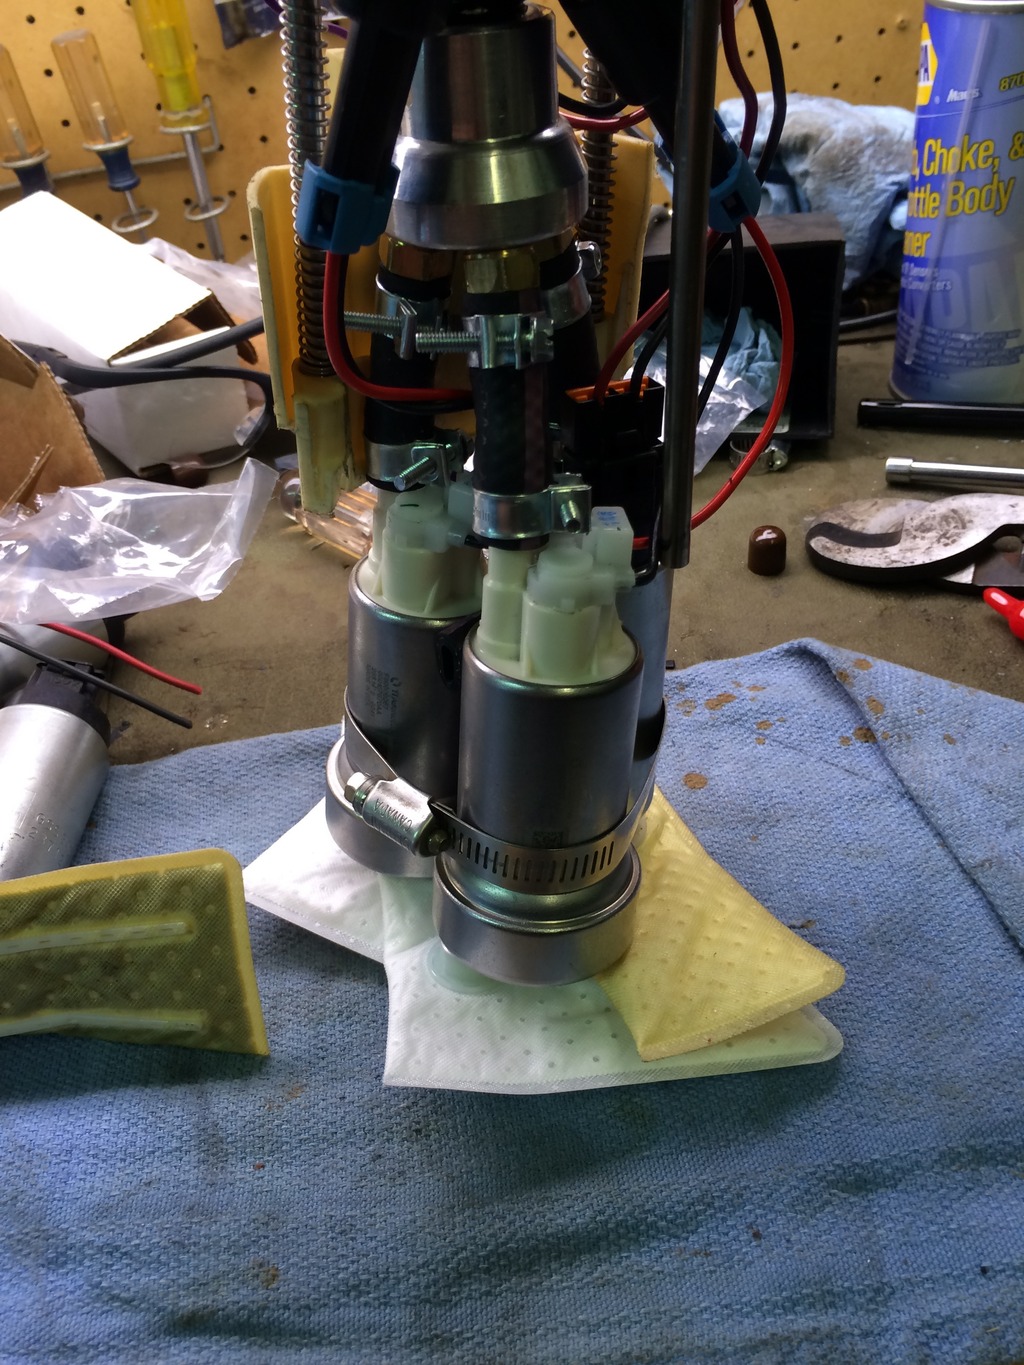
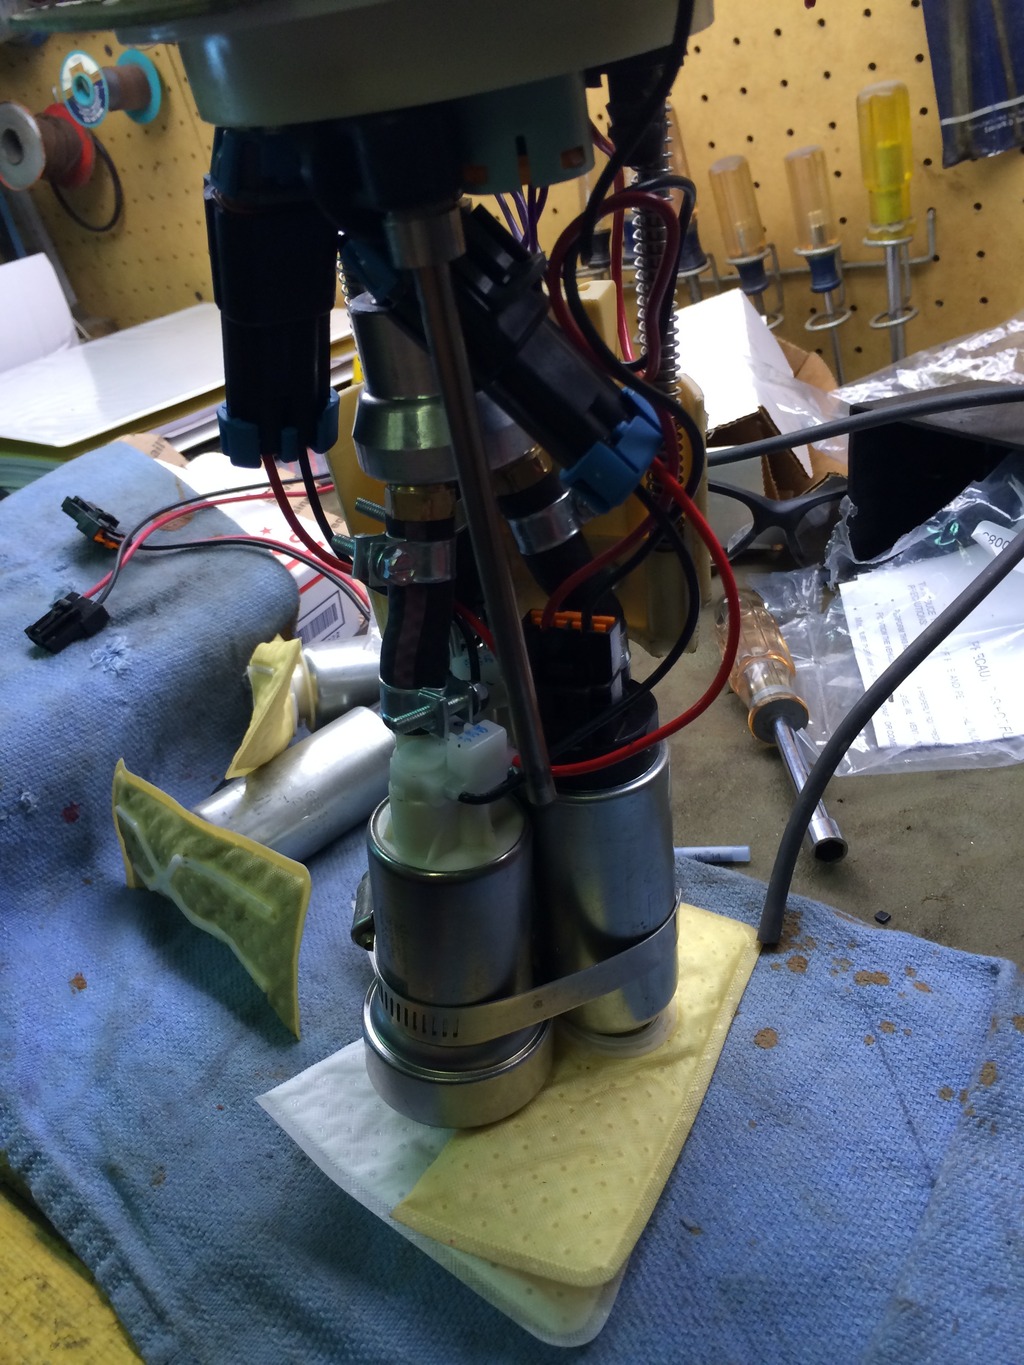
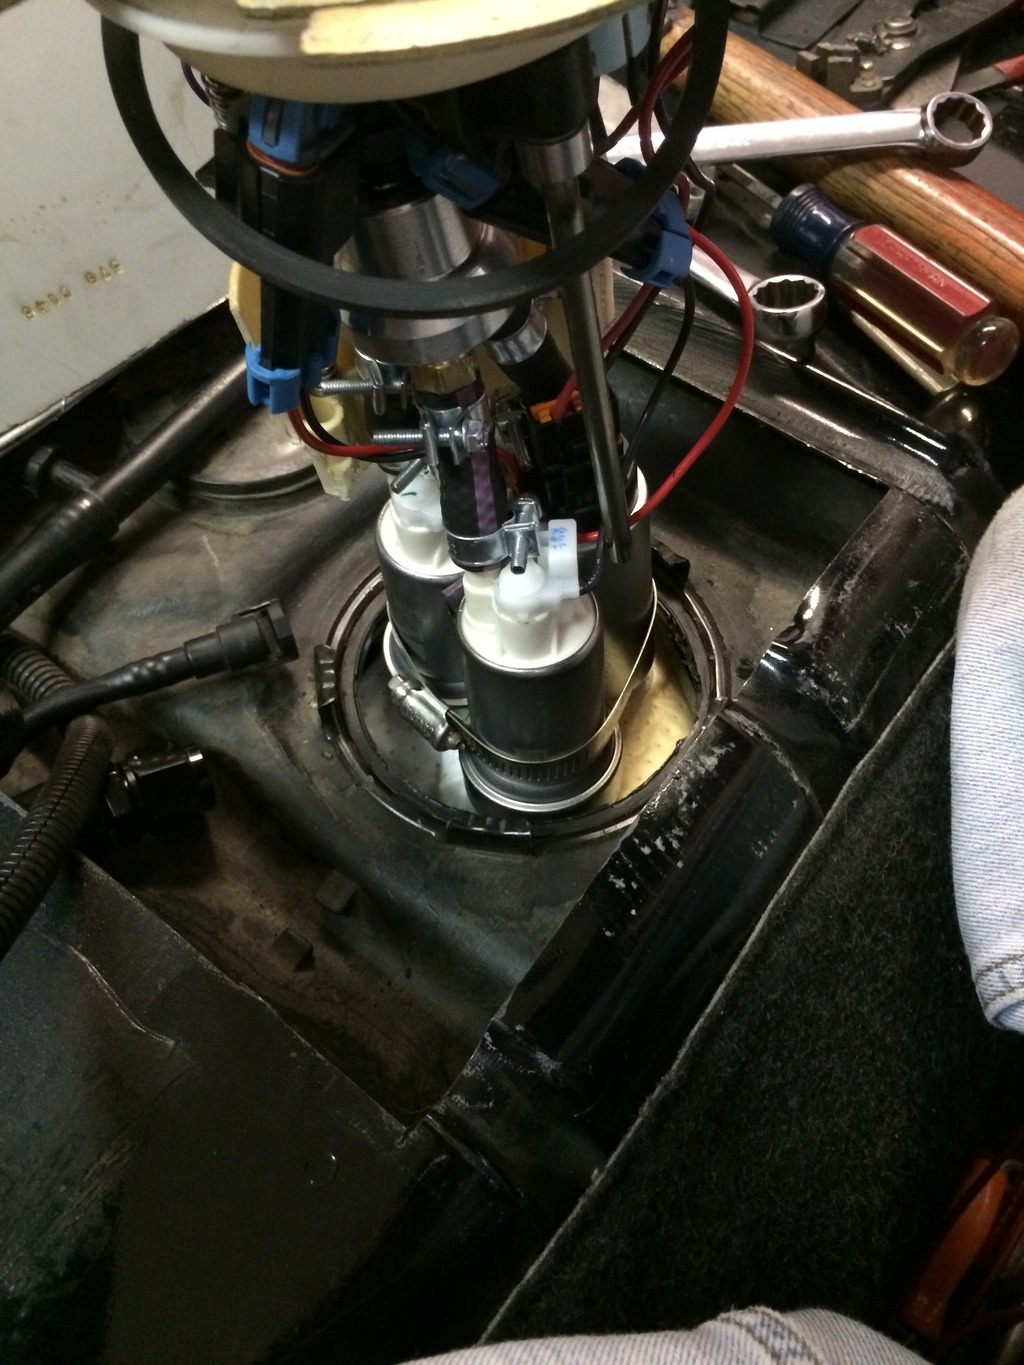
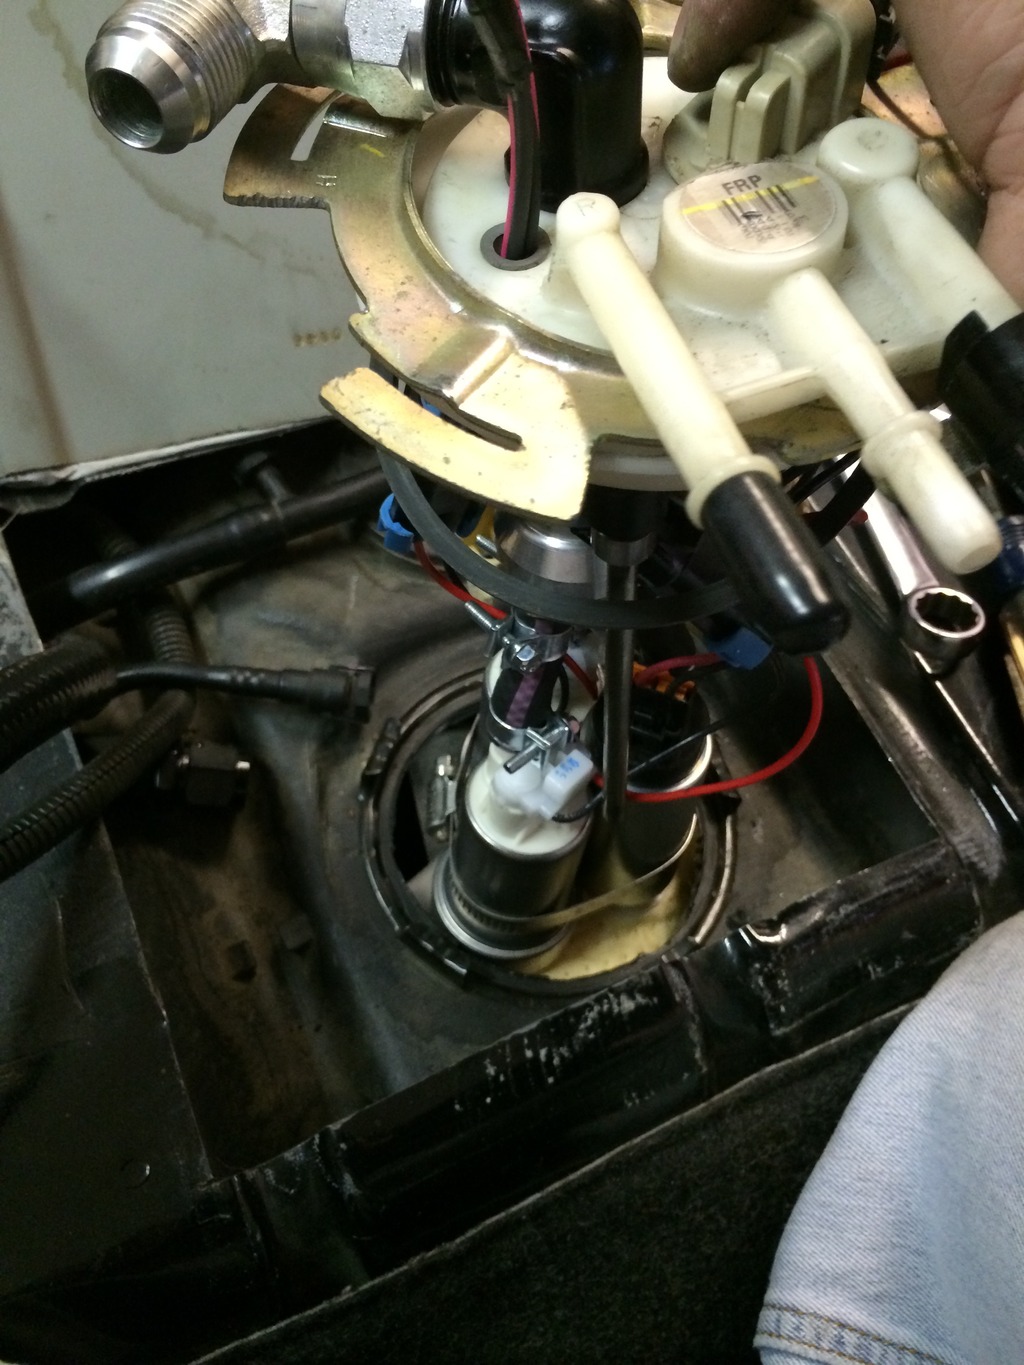
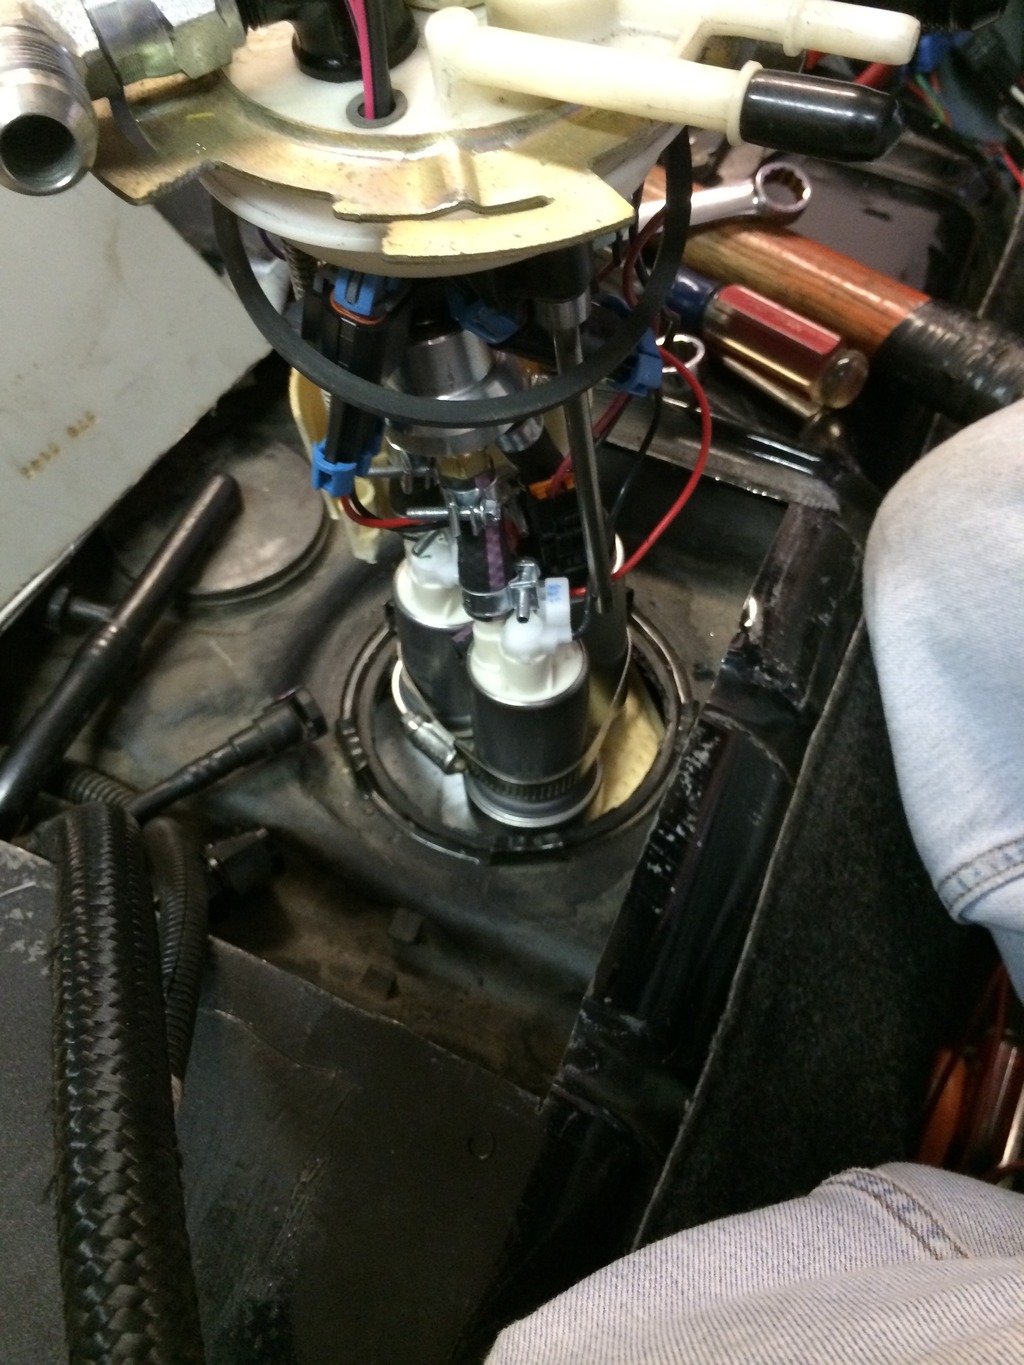
Figured it wouldn't be a bad time to upgrade the fuel system. I am running (1) 255 pump on at all times and (2) 450 pumps triggered from Holley. All intank.
I had my turbo kit powdercoated this year while it was off the car.


http://s221.photobucket.com/user/Onl...l?sort=2&o=502
I also finally got the front bumper support put on that I bought from MWC last year:


Figured it wouldn't be a bad time to upgrade the fuel system. I am running (1) 255 pump on at all times and (2) 450 pumps triggered from Holley. All intank.


 06-05-2015, 09:44 AM
#137
From there, the problems continued. We had completed the Holley installation, but the transmission never worked properly with the ECU. We spent 5-6 weeks troubleshooting to figure out what the hell the problem was. Lots of rewiring, checking, testing, yada yada yada. Had the transmission pan off the car about 10 times verifying different things. I went through 5+ gallons of E85 of idling and "driving" on a hoist.
In the end, I had a bad pressure switch. It was a secondary pressure switch for the D3 brake. It ohmed out slightly different than a new one. Swapped the pressure switch and it shifts and communicates with the ECU properly. I am guessing the tolerances from a stock ECU was a little more lenient than Holley and that is why it worked with the factory ECU. What a nightmare it was.
With all the rewiring, testing, etc, I had sent the ECU/transmission harness to Holley for testing, got another ECU for testing, and basically jumped through all hoops. No fun, but it was a cool photo for the symmetry:

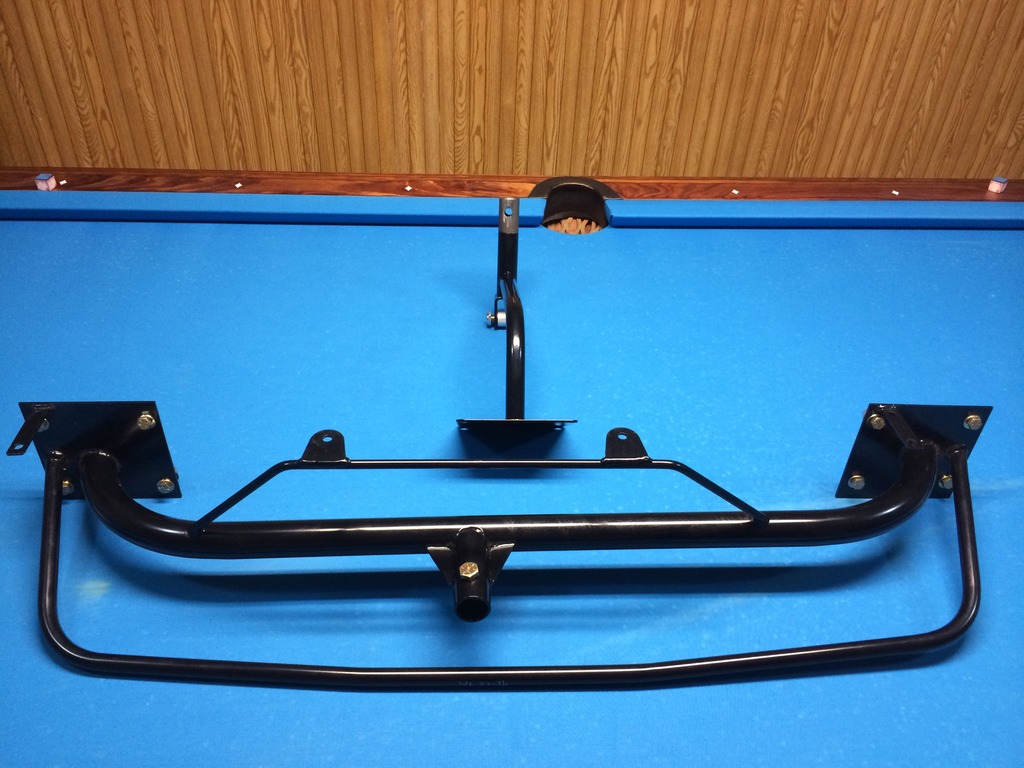
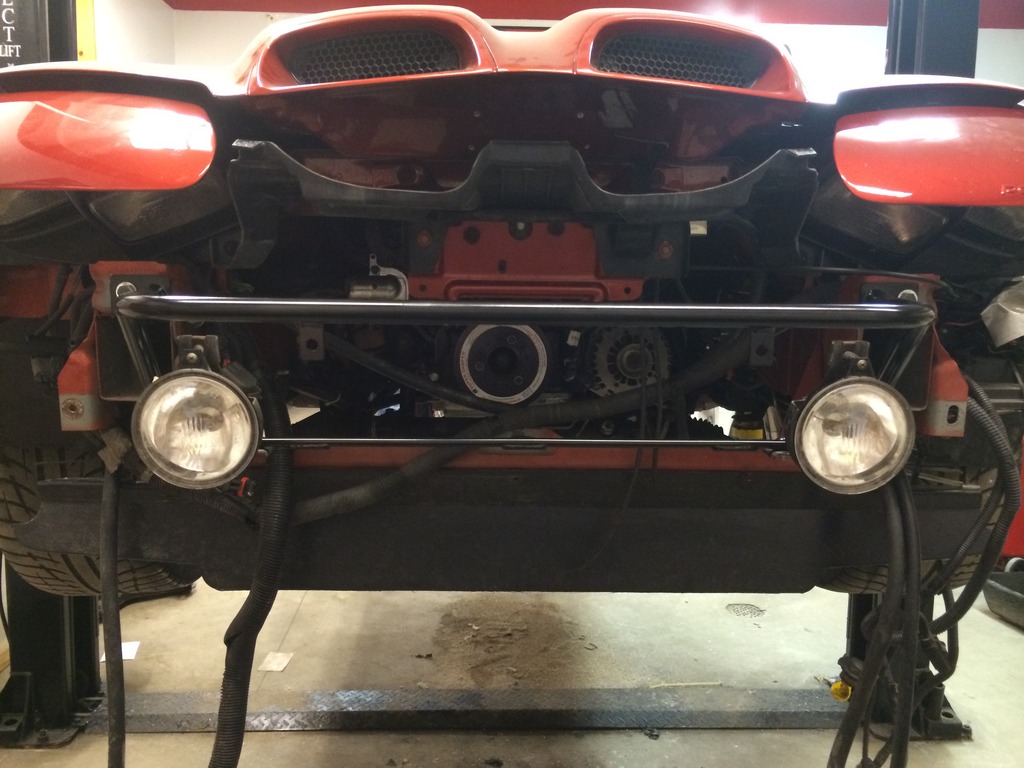
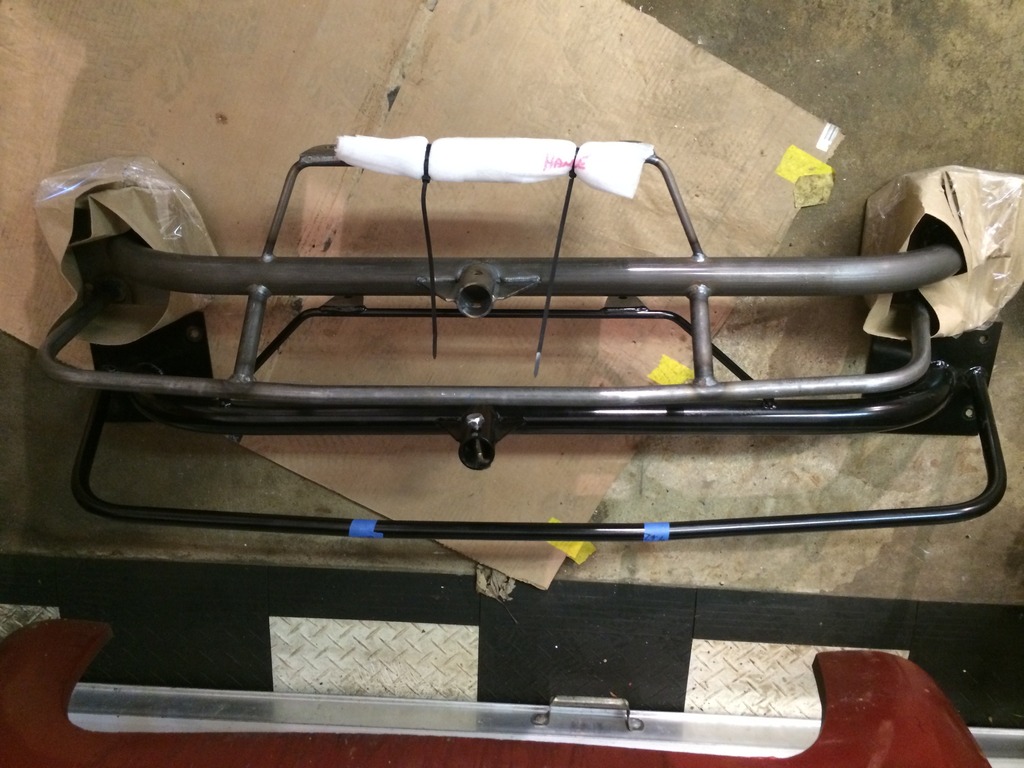
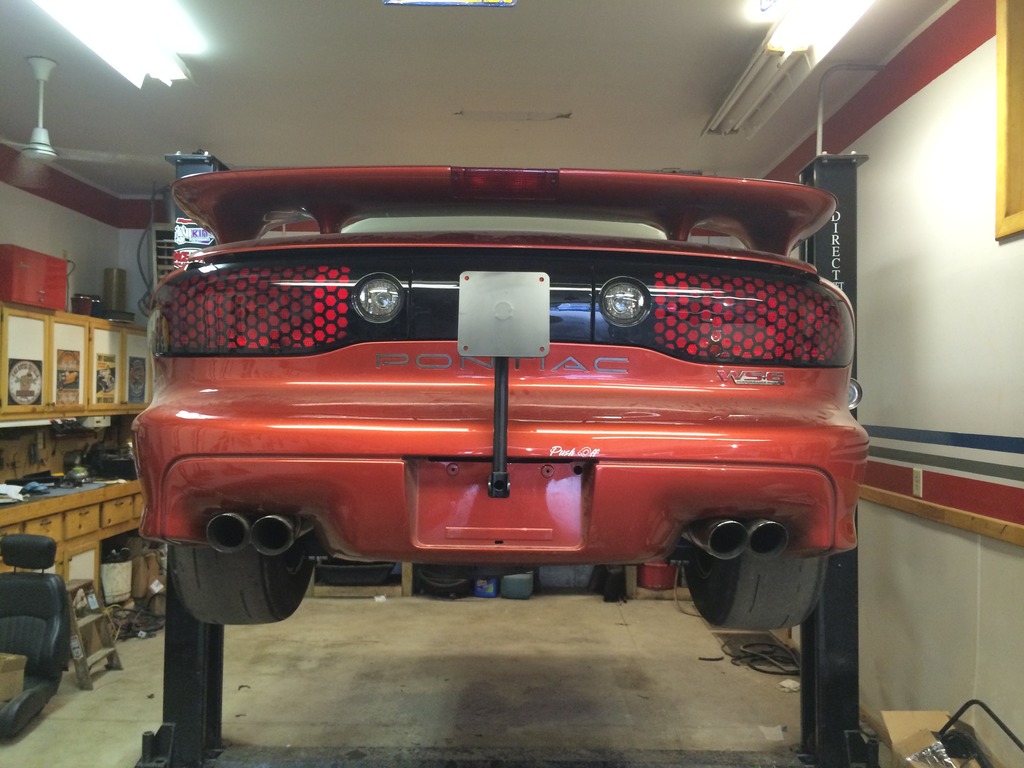
The other issue I ran into while fighting through the Holley stuff was my bumper support/chute mount. I had ordered a rear bumper support from MWC and got it about 5 months later. Needless to say, when I tried installing it, it did not fit. In my mind, the driver side of the bumper support was not configured properly and would not allow the bumper to be completely installed. We will find out more when I send it back to MWC.
Result of the bumper support not fitting:

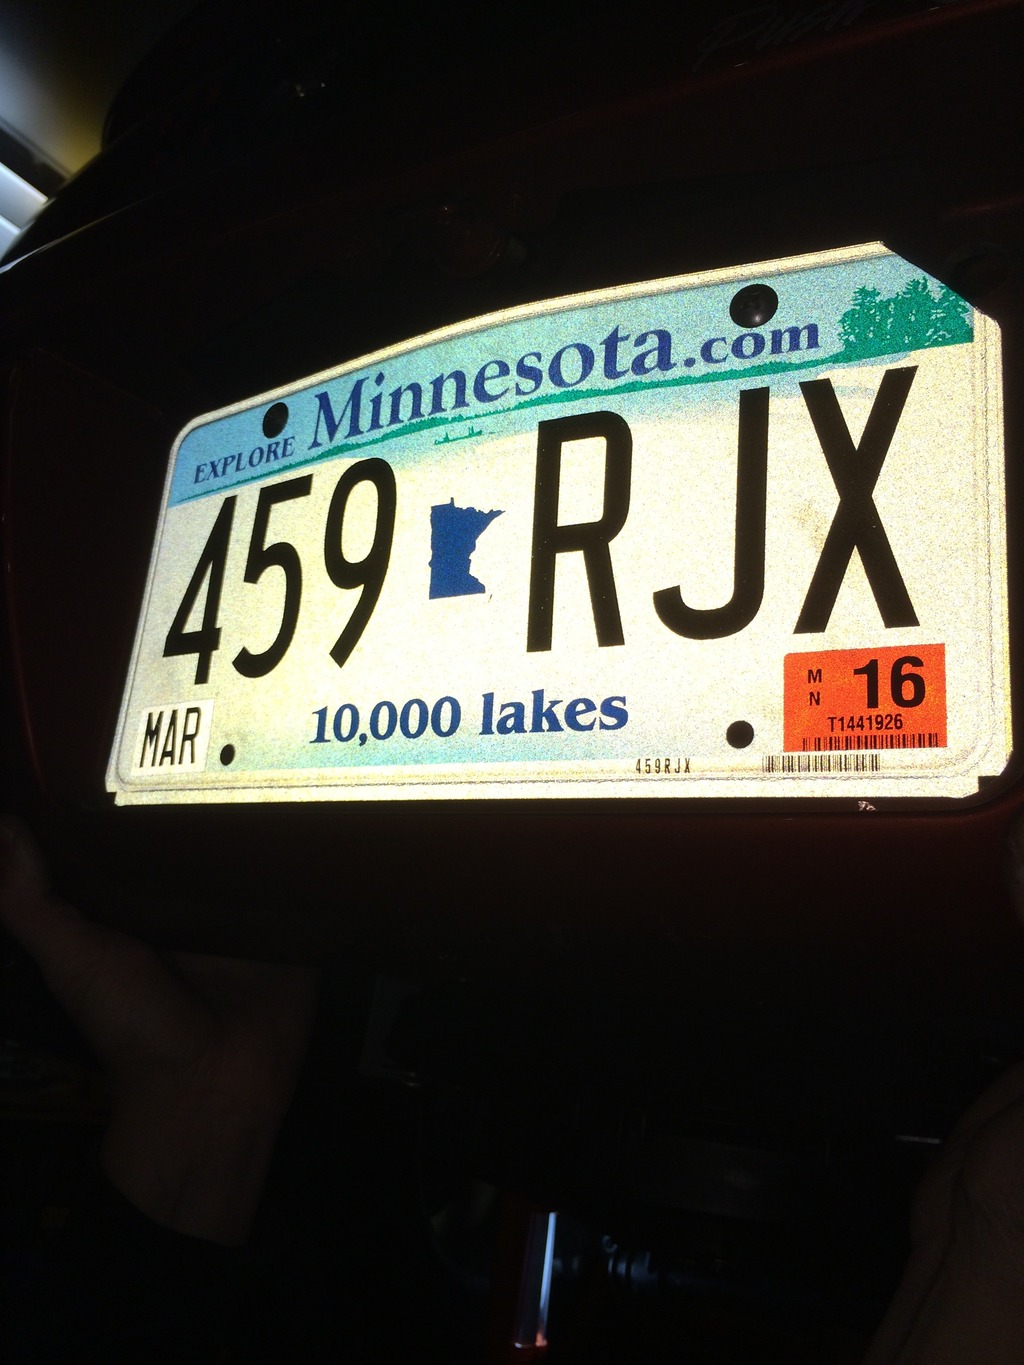
Chute mount pushing against the license plate:
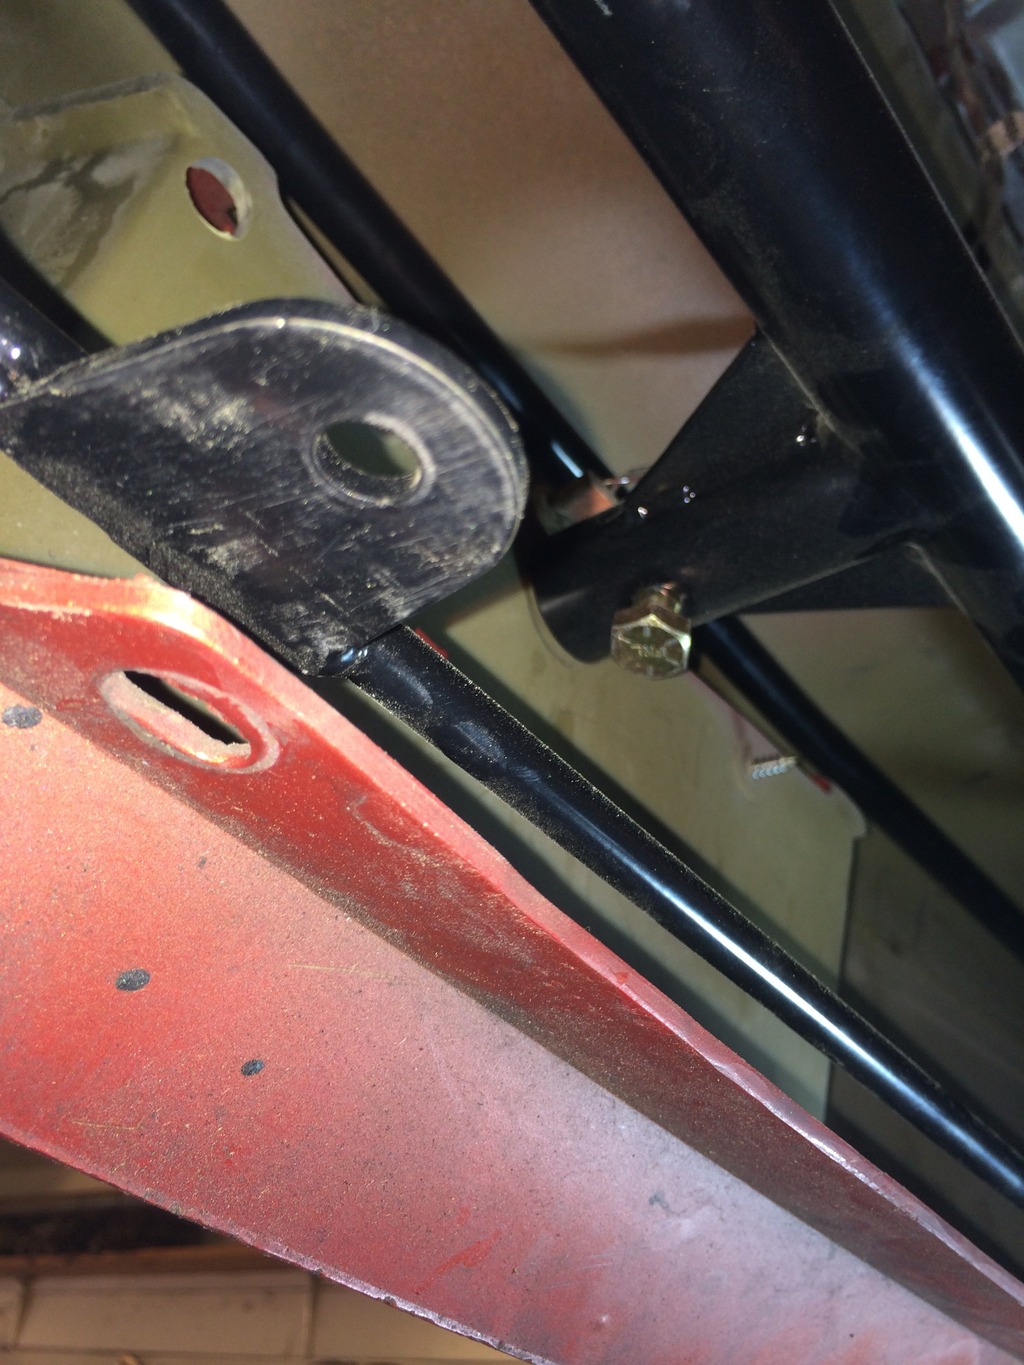
Support not aligning with the bumper brackets:
I talked to Jason at MWC and we were able to get another one built pretty quick. He assured me the first one works with a Trans Am, but not 2nd one that came looked quite a bit different. Oh, and the second one fits like a glove. Went right in with no issues.

Hopefully should have most of the car back together early next week and can finally get out and start working on the Holley tune. Was hoping to be doing that about a month ago. Things never go the way they should.
In the end, I had a bad pressure switch. It was a secondary pressure switch for the D3 brake. It ohmed out slightly different than a new one. Swapped the pressure switch and it shifts and communicates with the ECU properly. I am guessing the tolerances from a stock ECU was a little more lenient than Holley and that is why it worked with the factory ECU. What a nightmare it was.
With all the rewiring, testing, etc, I had sent the ECU/transmission harness to Holley for testing, got another ECU for testing, and basically jumped through all hoops. No fun, but it was a cool photo for the symmetry:

The other issue I ran into while fighting through the Holley stuff was my bumper support/chute mount. I had ordered a rear bumper support from MWC and got it about 5 months later. Needless to say, when I tried installing it, it did not fit. In my mind, the driver side of the bumper support was not configured properly and would not allow the bumper to be completely installed. We will find out more when I send it back to MWC.

Result of the bumper support not fitting:

Chute mount pushing against the license plate:

Support not aligning with the bumper brackets:

I talked to Jason at MWC and we were able to get another one built pretty quick. He assured me the first one works with a Trans Am, but not 2nd one that came looked quite a bit different. Oh, and the second one fits like a glove. Went right in with no issues.


Hopefully should have most of the car back together early next week and can finally get out and start working on the Holley tune. Was hoping to be doing that about a month ago. Things never go the way they should.


