Switch to YSI...
 12-03-2014, 07:21 PM
#1
TECH Apprentice
Thread Starter

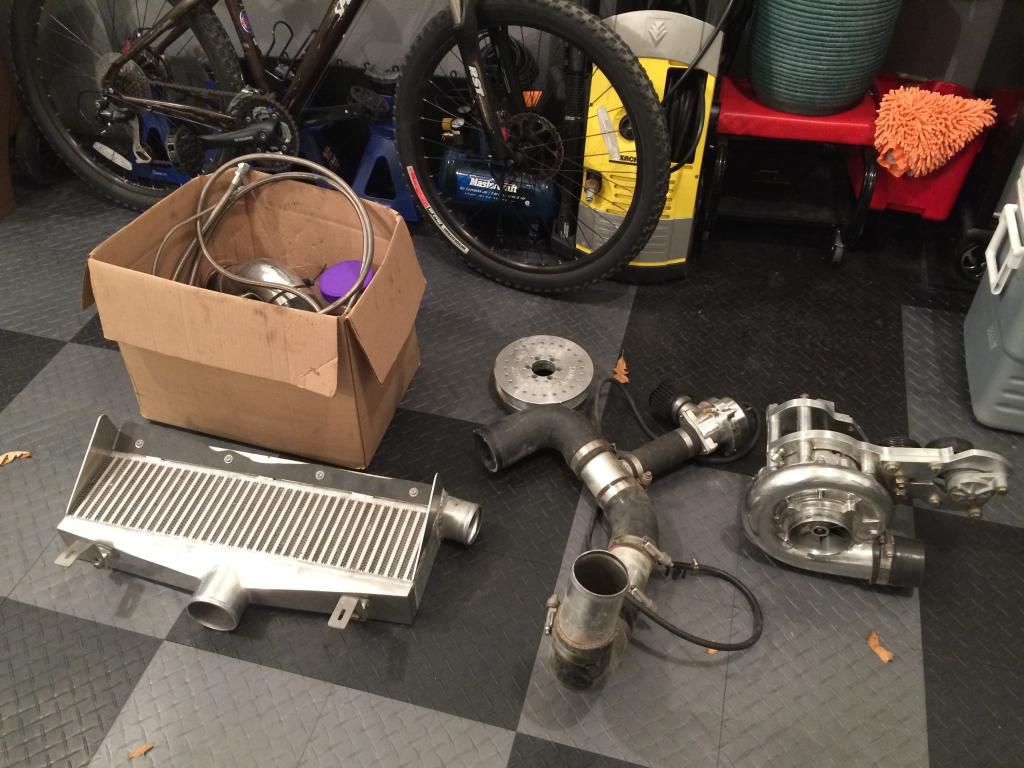
After pushing my little eforce supercharger to the limits, and making 780 RWHP, I decided I needed a winter project so I am back in it. Got a super deal on a A&A YSI kit used for one summer. The kit was from a C5 so to fit it to a C6 a little bit of fabrication is needed, but nothing serious.
Been at it for a few weeks now whenever I find the time. Its coming along nicely. Here is some progress up to date.
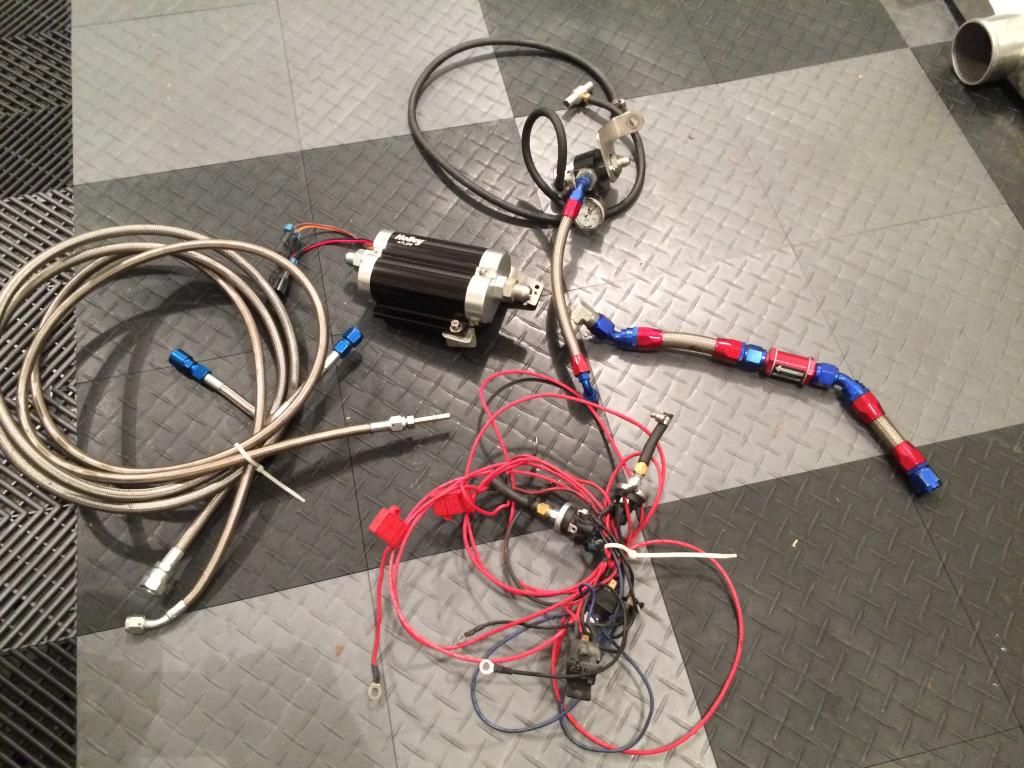
Bought this kit for a song, including a dual pump fuel system and ID 1000 injectors, secondary drive, and a IW damper which I sold.
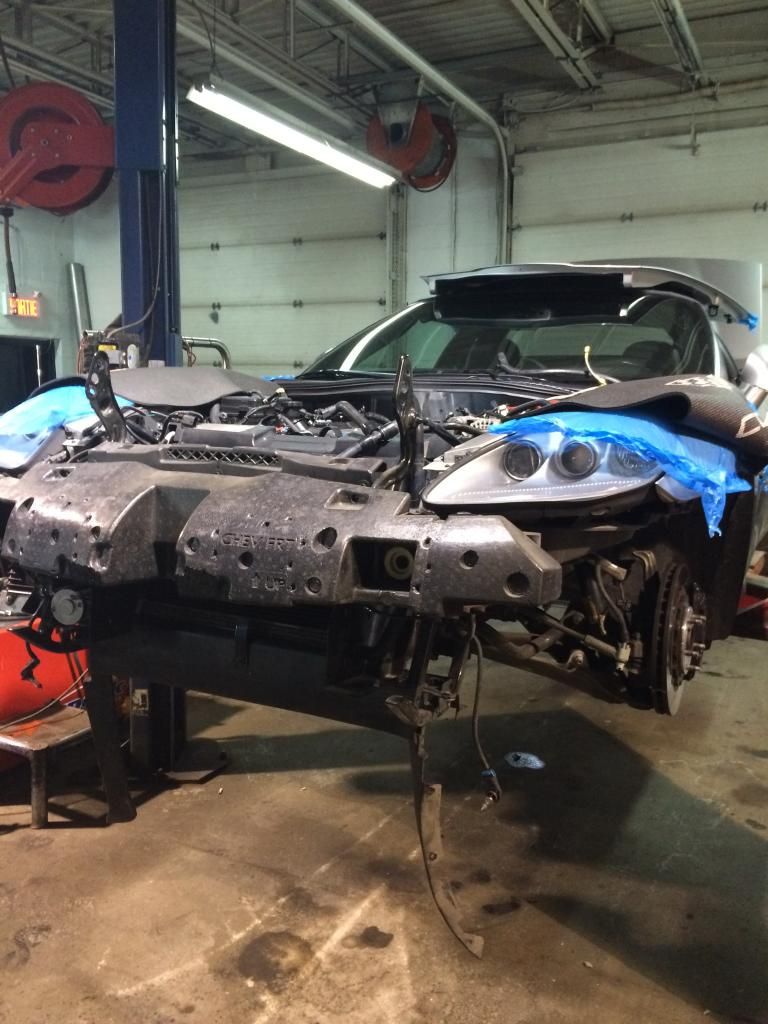
Off with the eforce...
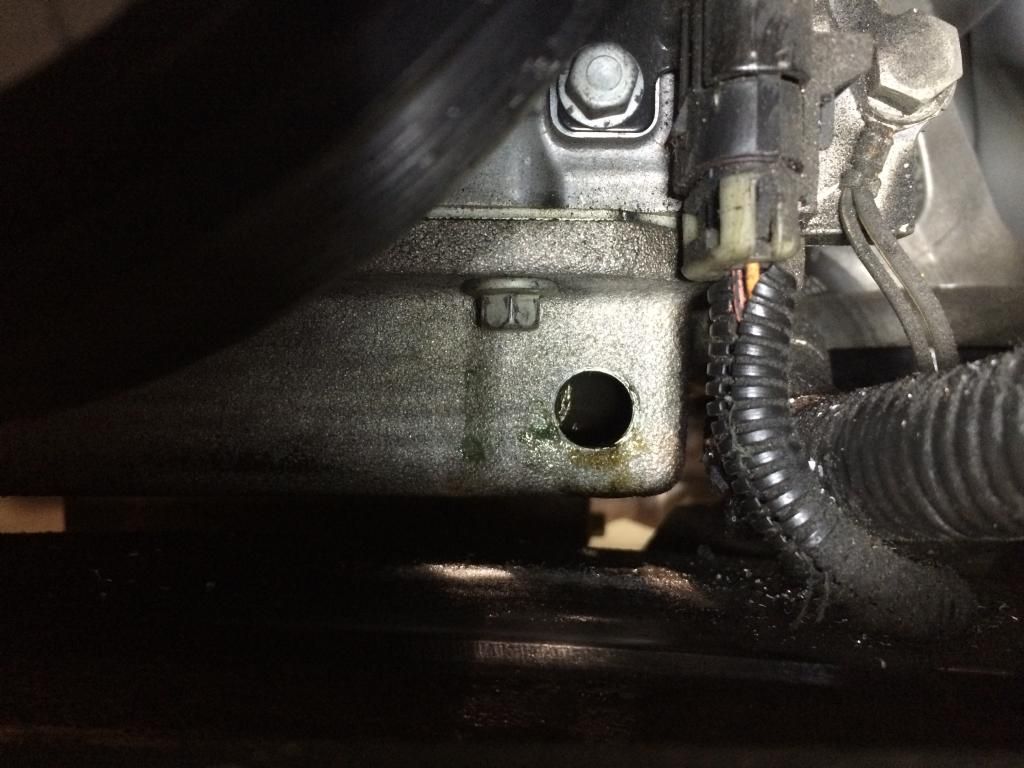
Drain hole in oil pan, with new fitting. I don't like the drain A&A supplies...

Installing a steam vent kit while I am at it...crappy Trickflow kit is like a puzzle. Next time I would just piece it together myself.....
Rear vents joined up......
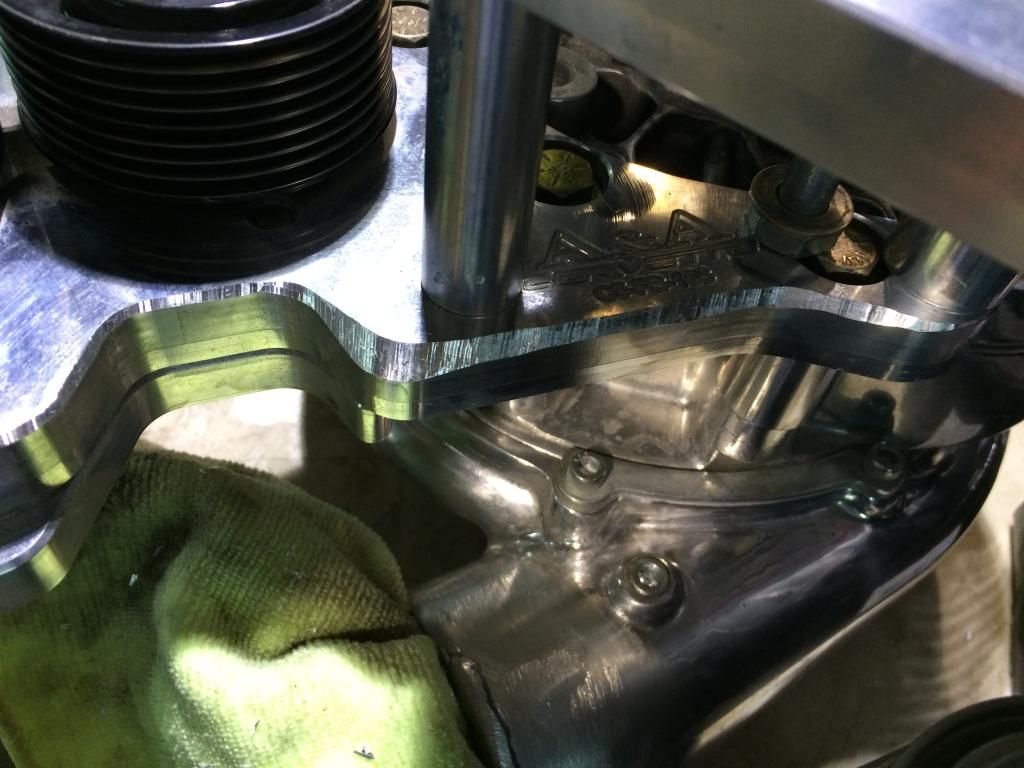
To make the C5 bracket work, we had to do some grinding on the water pump, and on the bracket.....
Finally... she fit....
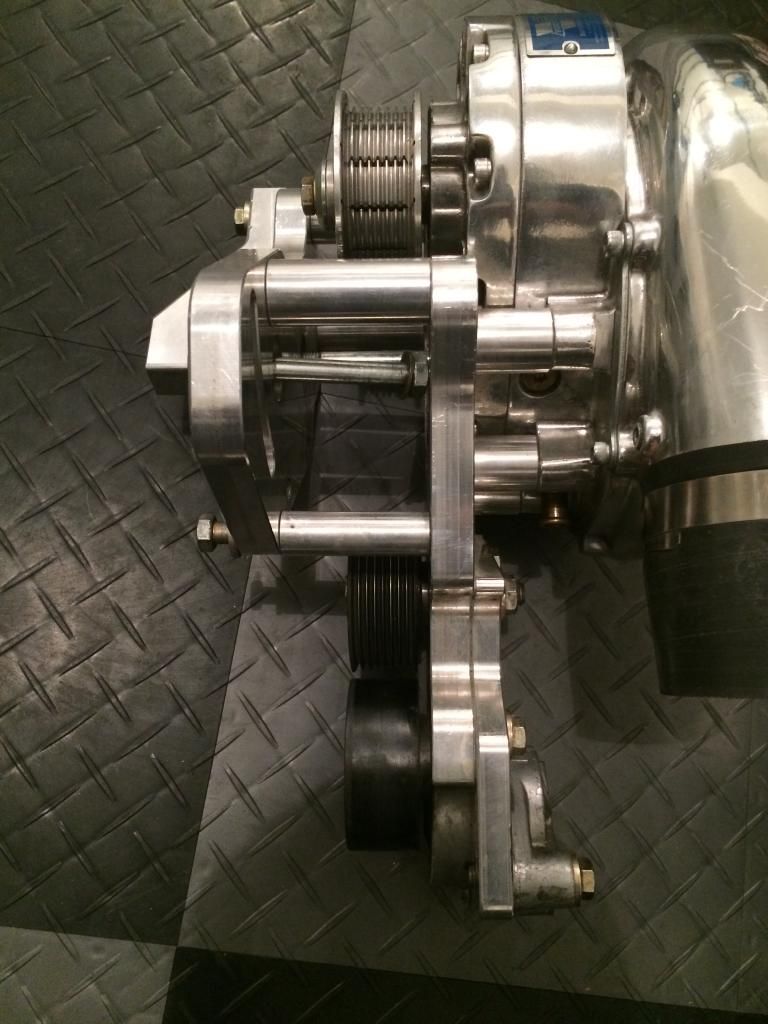
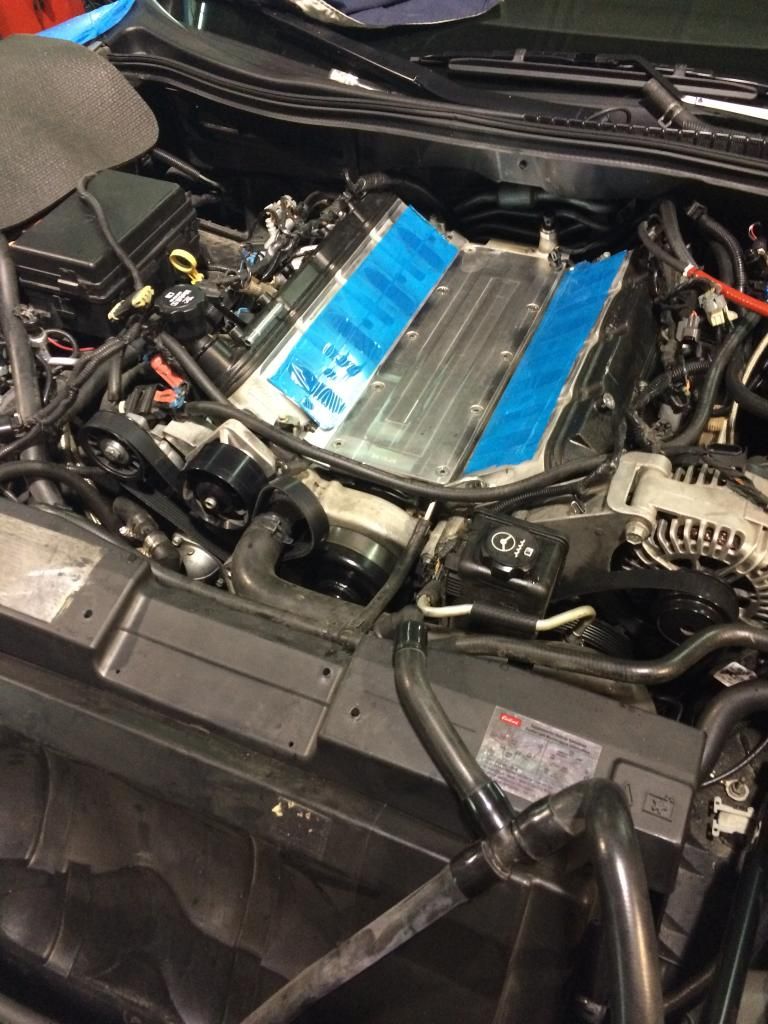
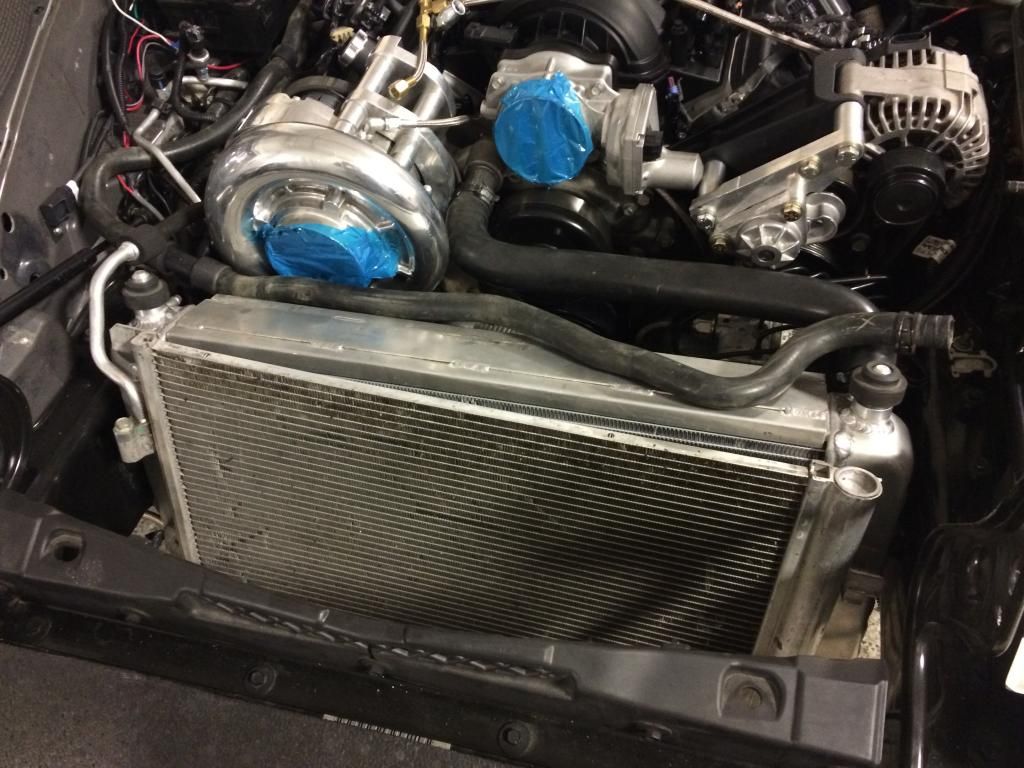
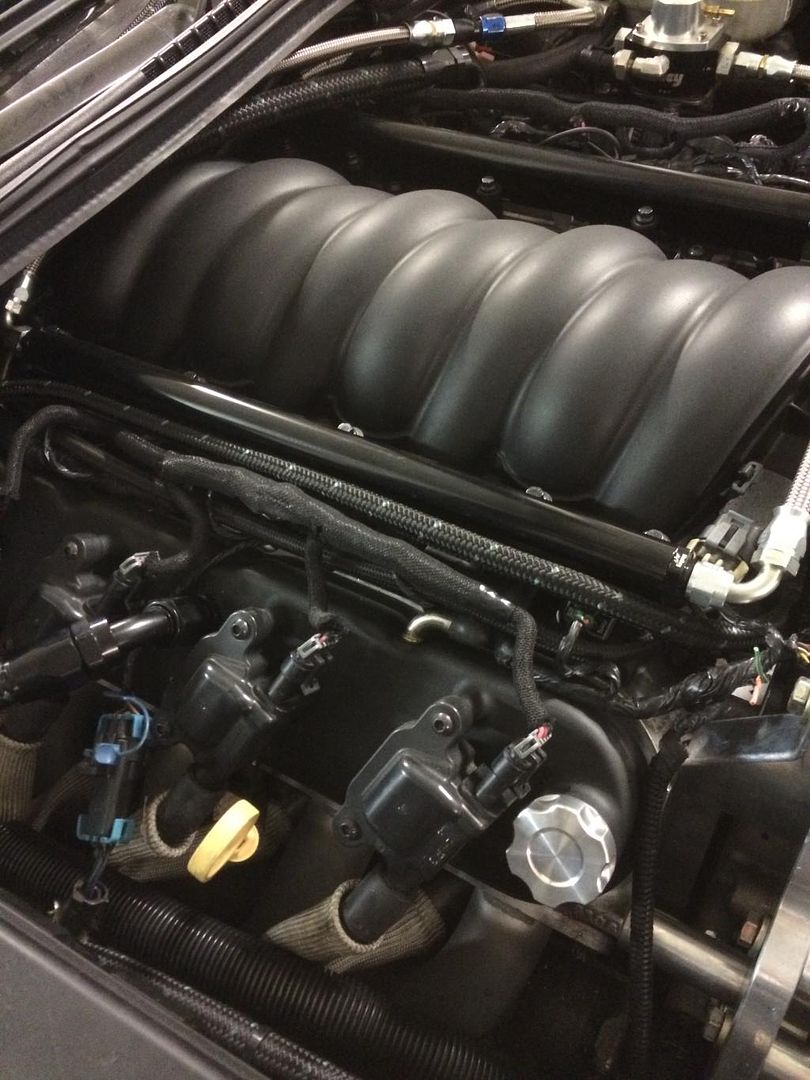
Blower, secondary drive, manifold and Holley fuel rails are on....also powder coated the alternator bracket because it didn't look good....
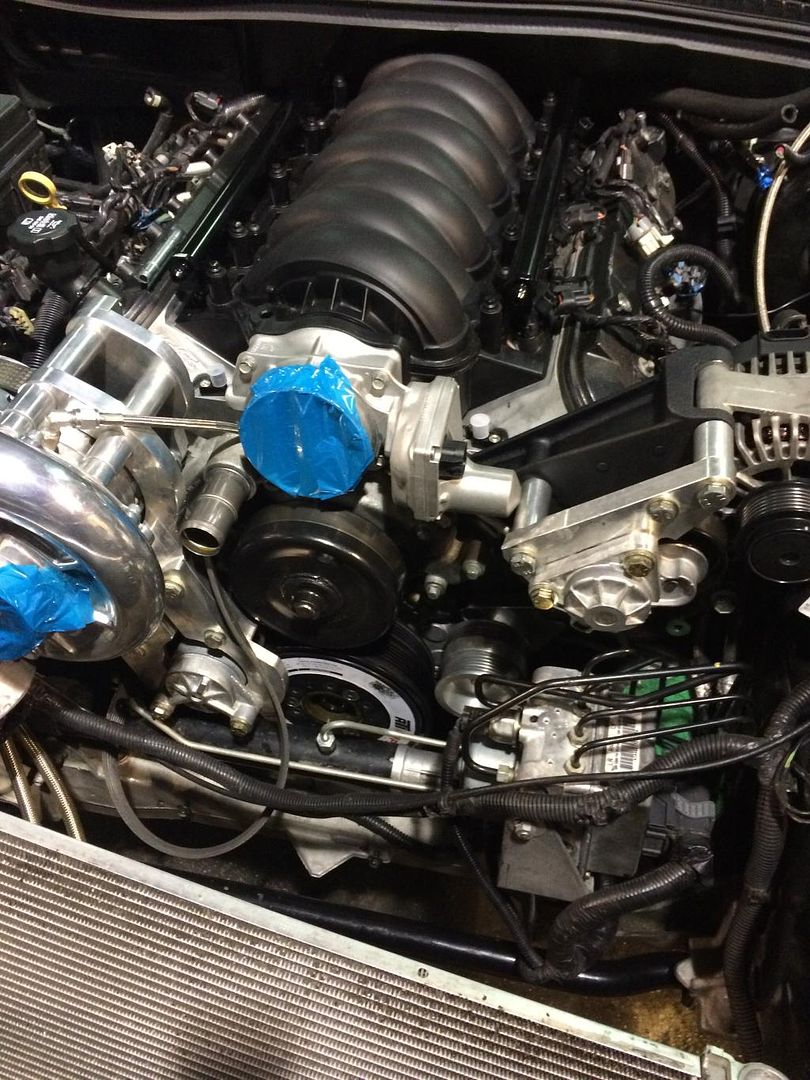
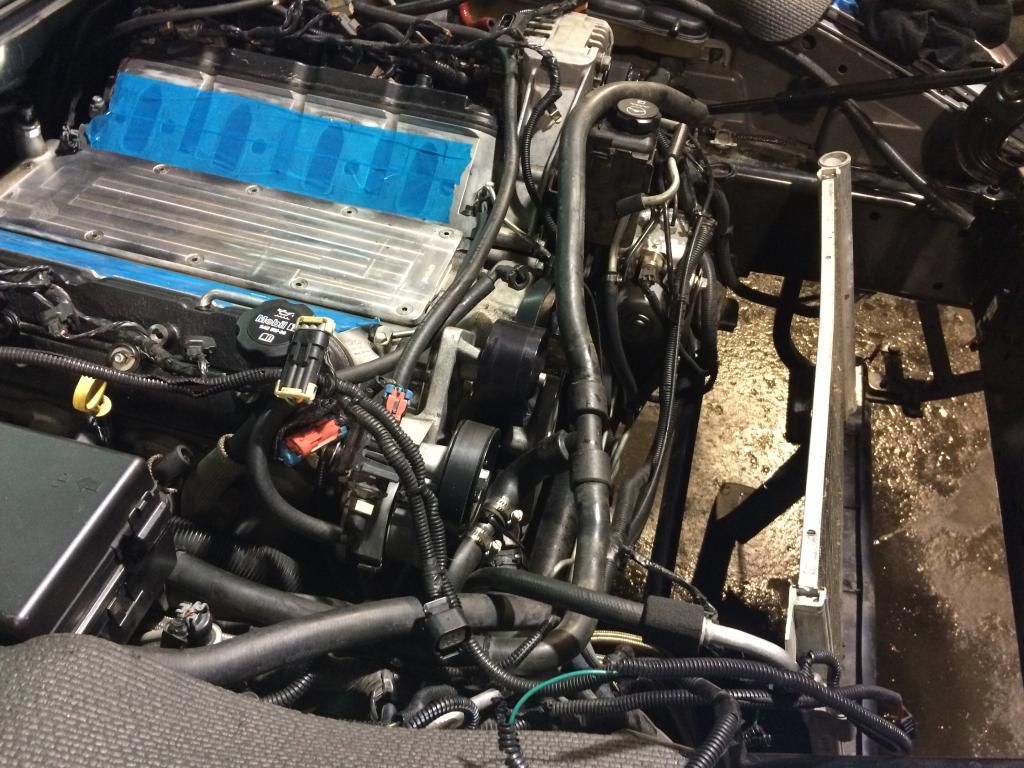
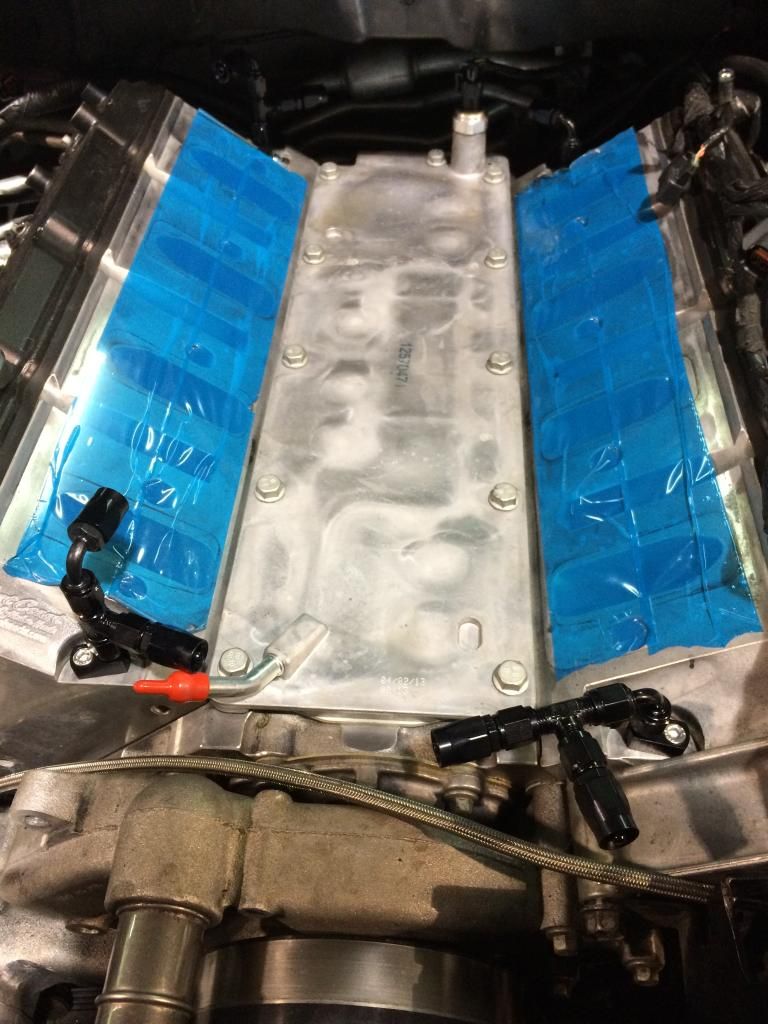
New Holley valve covers (installed -10 an fittings for venting) and more of steam vents connected....

That's where it stands after today. While the valve covers were off I found a broken valve seal so that is taken care of. Next to start on the fuel system and fabricating the rad, intercooler and piping install. I want to do nicer piping then supplied with the kit.
Any suggestions welcome in case I am forgetting stuff.
Been at it for a few weeks now whenever I find the time. Its coming along nicely. Here is some progress up to date.
Bought this kit for a song, including a dual pump fuel system and ID 1000 injectors, secondary drive, and a IW damper which I sold.


Off with the eforce...


Drain hole in oil pan, with new fitting. I don't like the drain A&A supplies...


Installing a steam vent kit while I am at it...crappy Trickflow kit is like a puzzle. Next time I would just piece it together myself.....

Rear vents joined up......

To make the C5 bracket work, we had to do some grinding on the water pump, and on the bracket.....


Finally... she fit....

Blower, secondary drive, manifold and Holley fuel rails are on....also powder coated the alternator bracket because it didn't look good....

New Holley valve covers (installed -10 an fittings for venting) and more of steam vents connected....

That's where it stands after today. While the valve covers were off I found a broken valve seal so that is taken care of. Next to start on the fuel system and fabricating the rad, intercooler and piping install. I want to do nicer piping then supplied with the kit.
Any suggestions welcome in case I am forgetting stuff.


 12-04-2014, 04:02 PM
#5
TECH Apprentice
Thread Starter
I am not really looking for more power, but wanted a project and a change. I know I could make 1000 with the YSI but will probably keep it to around 800. My 6L80 will screams in agony as it is.
02-06-2015, 08:22 PM
#6
TECH Apprentice
Thread Starter
Forgot to update this thread for a while. These are copied from my other thread so might be a little out of order.
The car is basically ready, and is waiting to go on the dyno next week and be tuned. Surprisingly, on first startup it ran perfectly. the AFR and trims were actually better than before the build. How is that even possible... LOL
A few more things done before the holidays, and then we continue in the brand new shop...... should be great.
Oil drain line done...
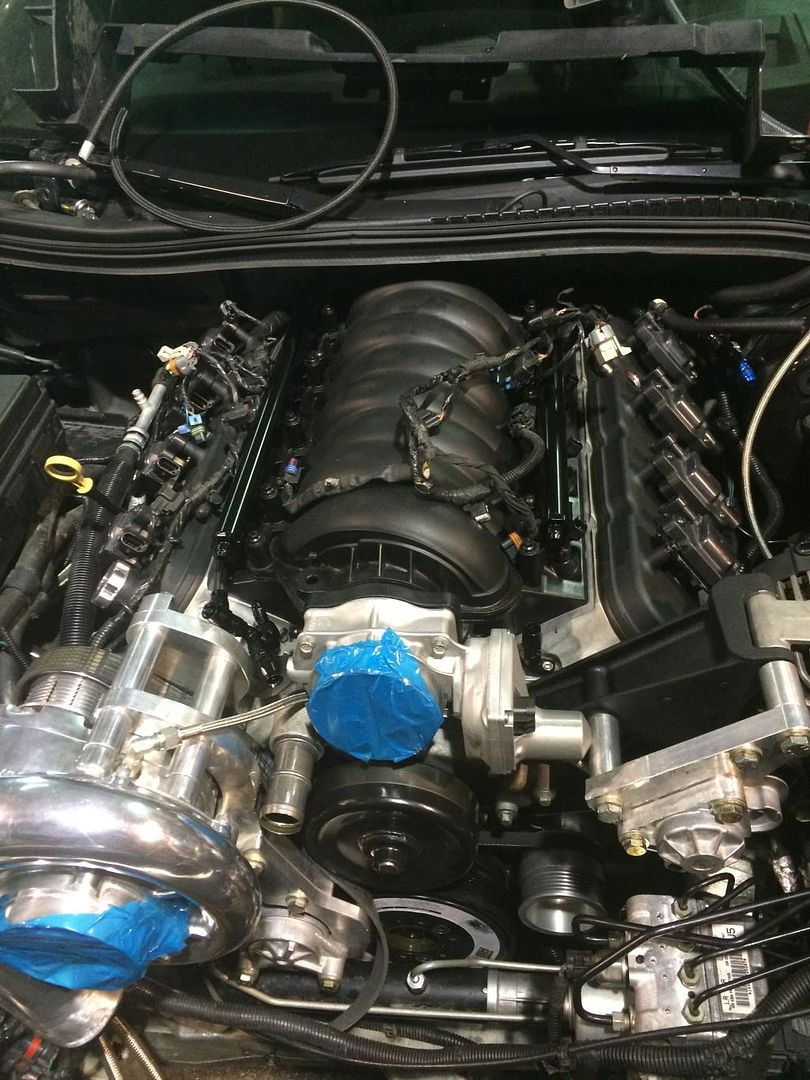
Changed out a broken valve seal and closed up with the Holley valve cover. Its starting to look like an engine again....
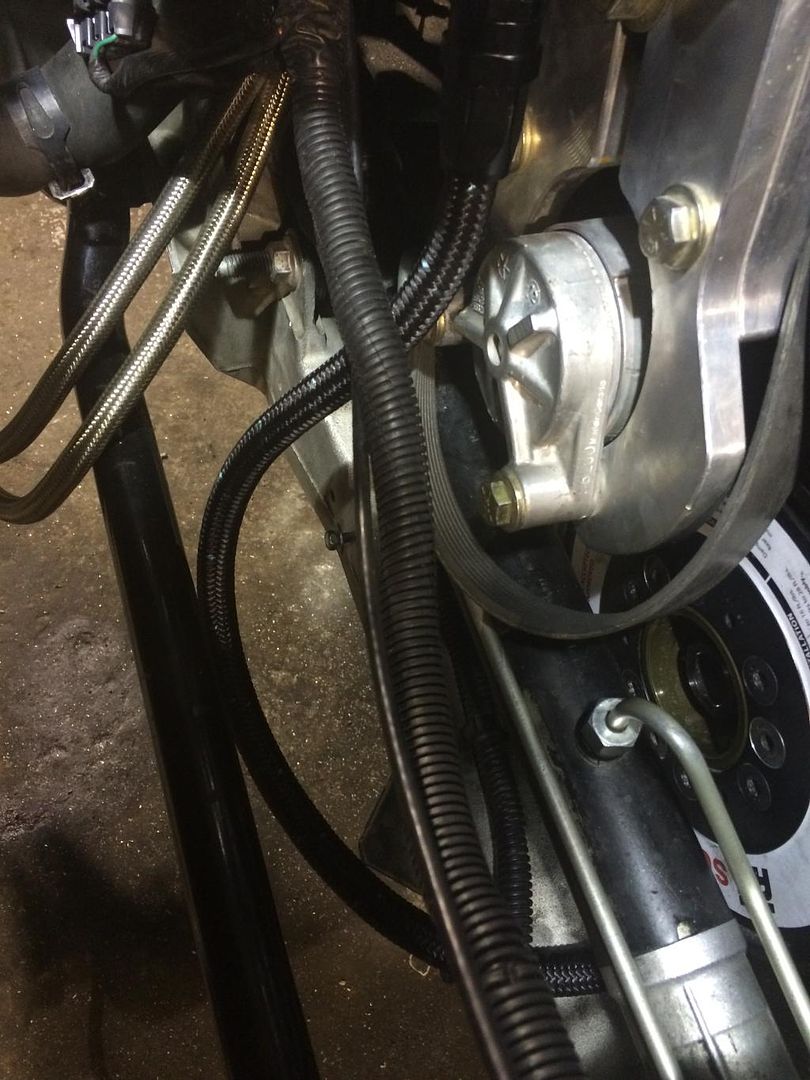
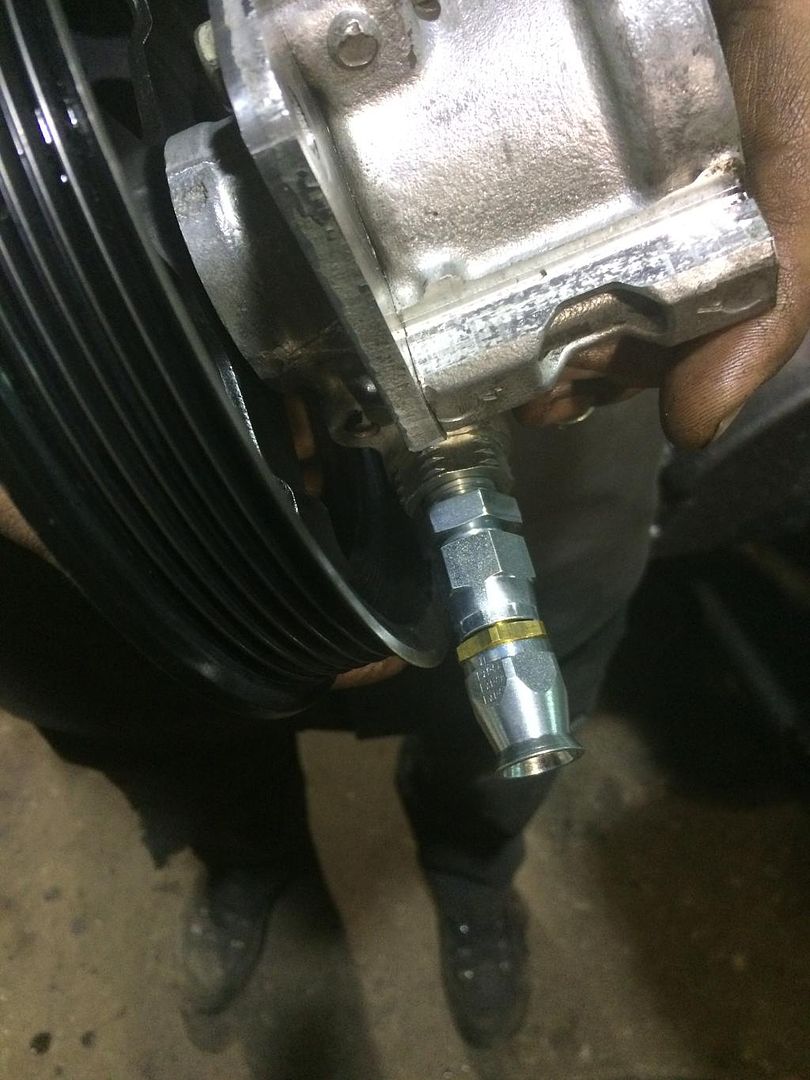
We then went at the power steering lines. That's a bit of a pain. We had to take a little off the pulley to make clearance for the fitting. Nice to have a full fab shop with equipment to do anything at your disposal. Thanks again Seth and Federal.
She clears....
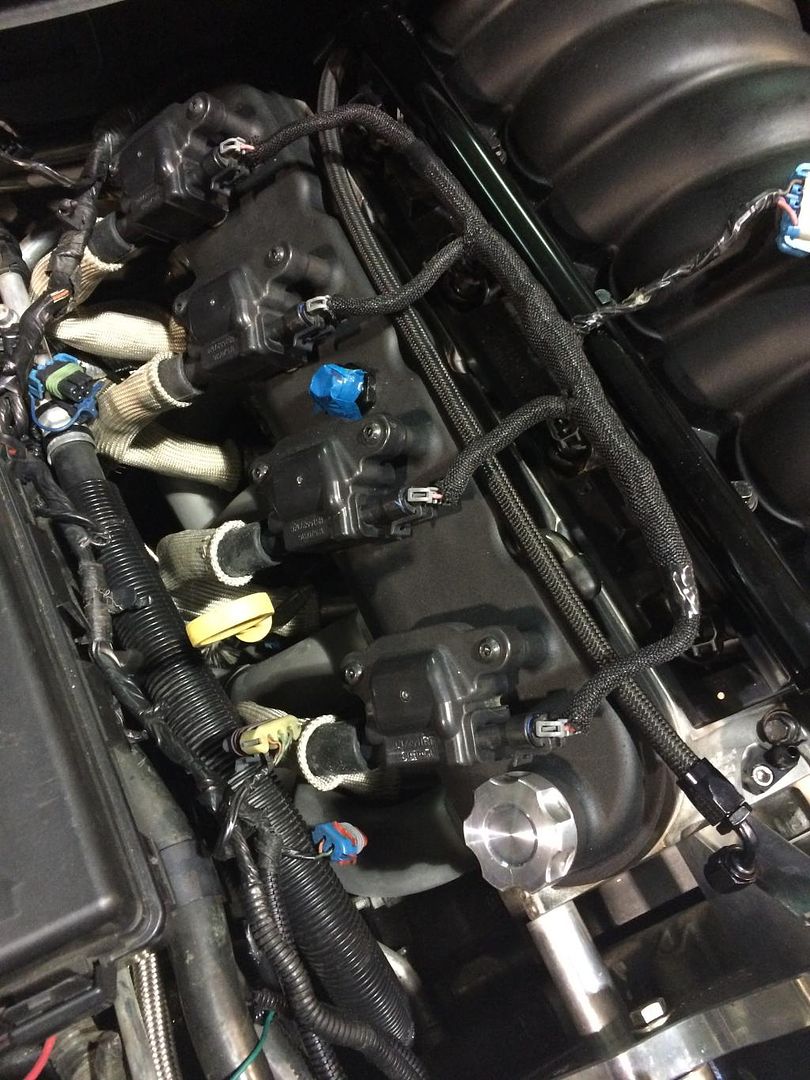
That's it. Done till after the holidays for now. Put on the new Firecore50 plug wires and attempted to make the coil harness look prettier. I am no artist!!
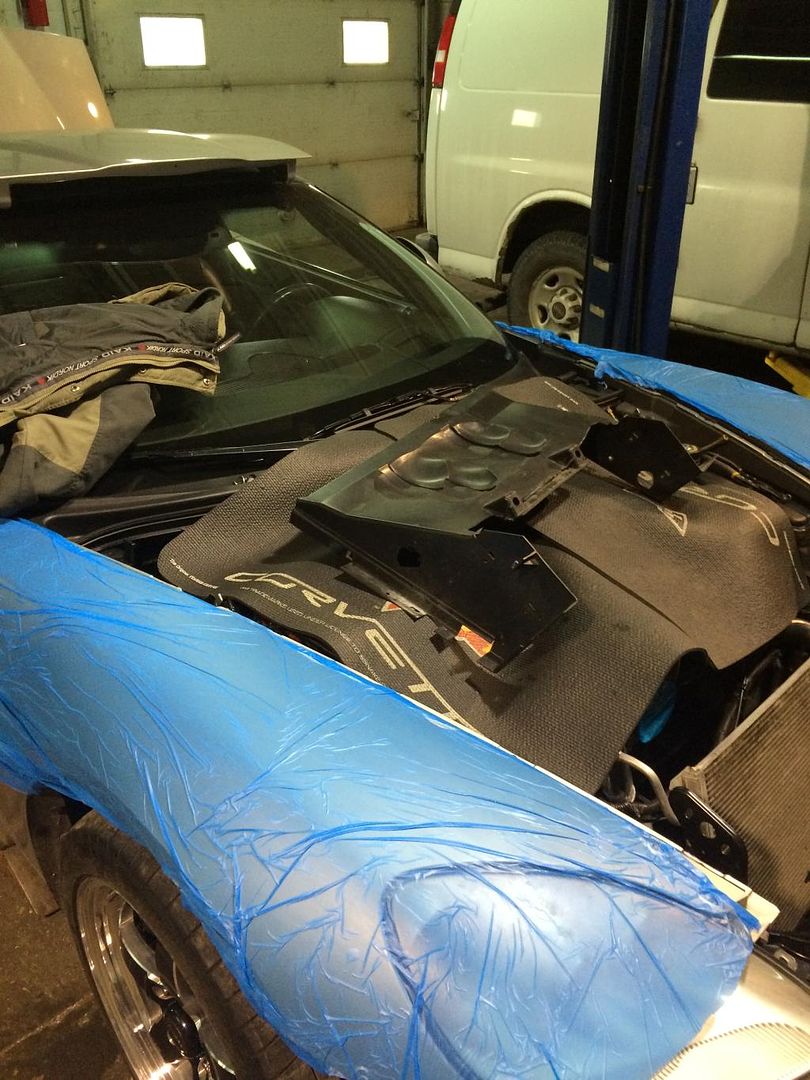
Car is packed up and moving to the new shop area over the holidays.

Next will be to fab up the piping. Kind of nice to have a full metal fabrication shop at your disposal....
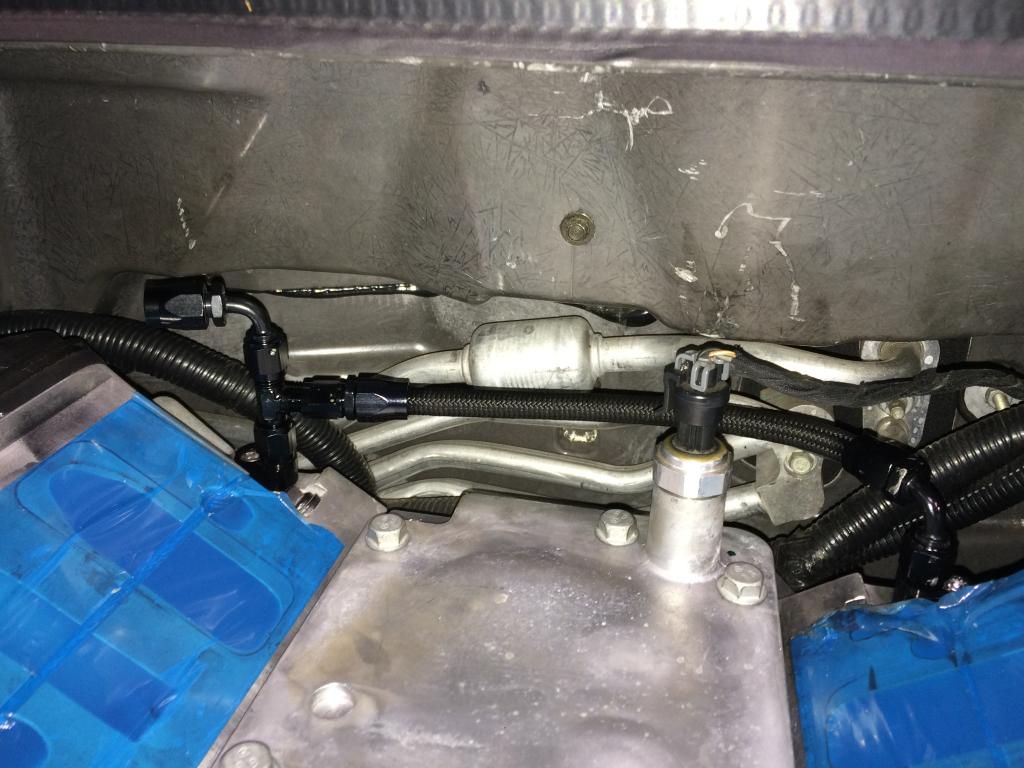
Kind of slacking until the new year but spent a few hours today and got the fuel pump installed along with the feed and return lines.

Holidays are over and the work continues.......
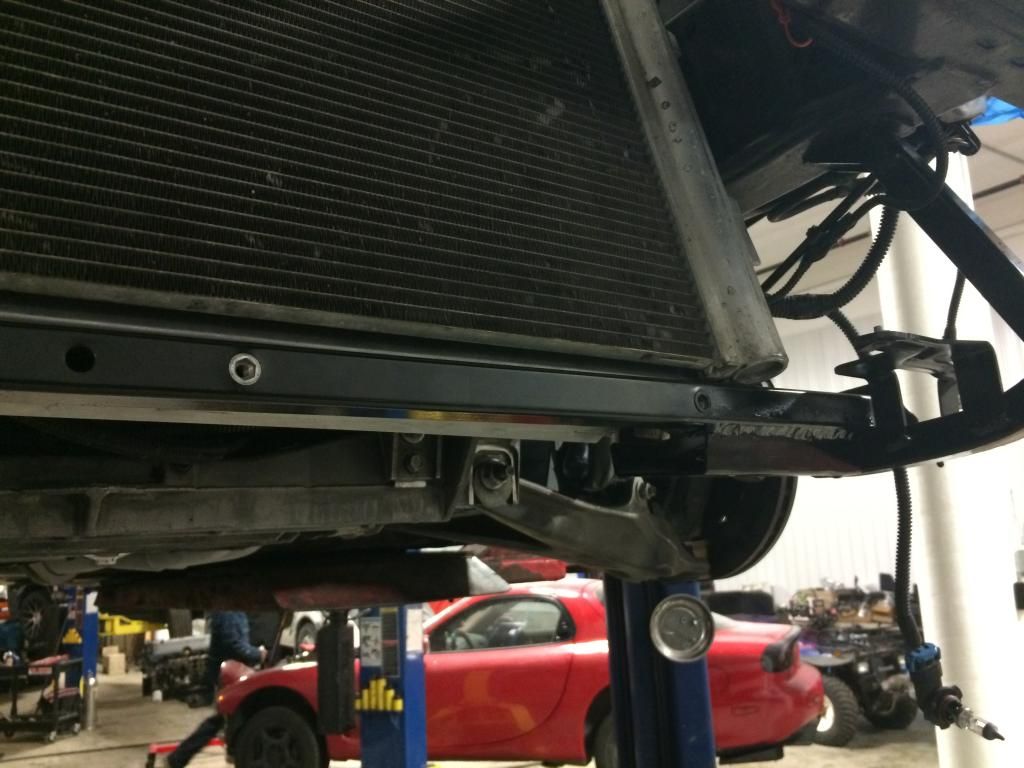
Today removed the radiator cradle and the moved the supports to lower the rad. I prefer this to spacers as that cradle is low enough as it is.
First cut off the rad supports....
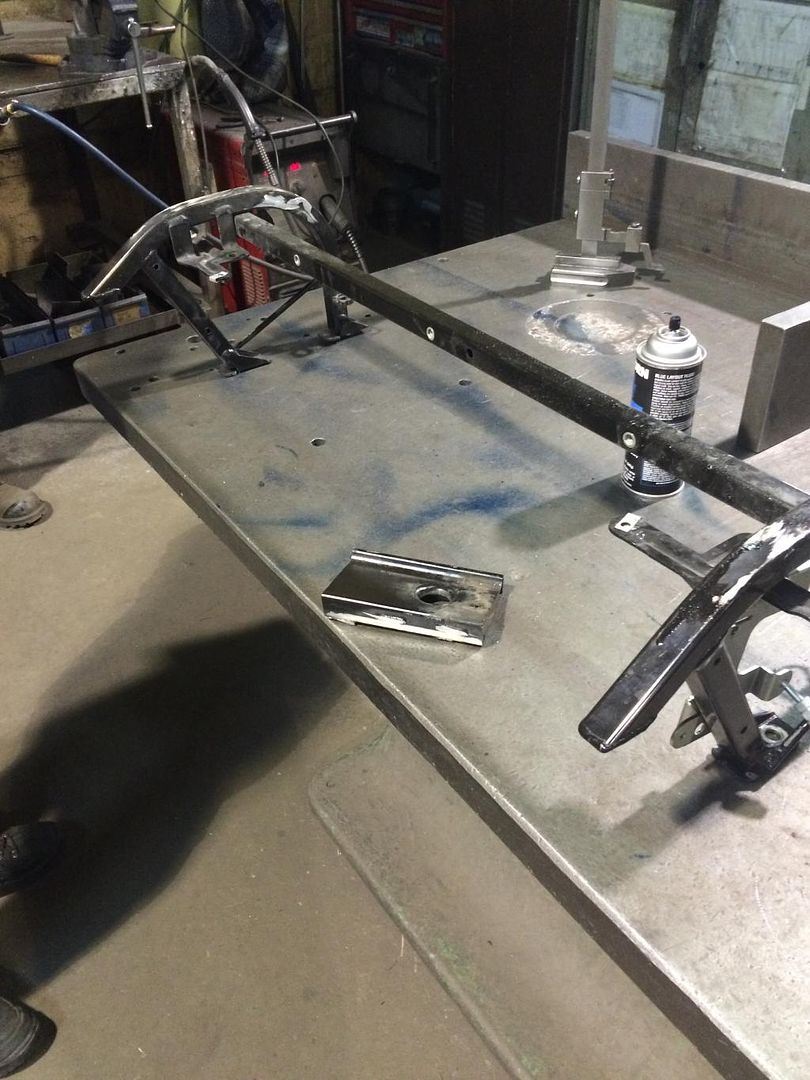
Then grind everything clean and reweld the supports to place the rad lower.

Then paint.
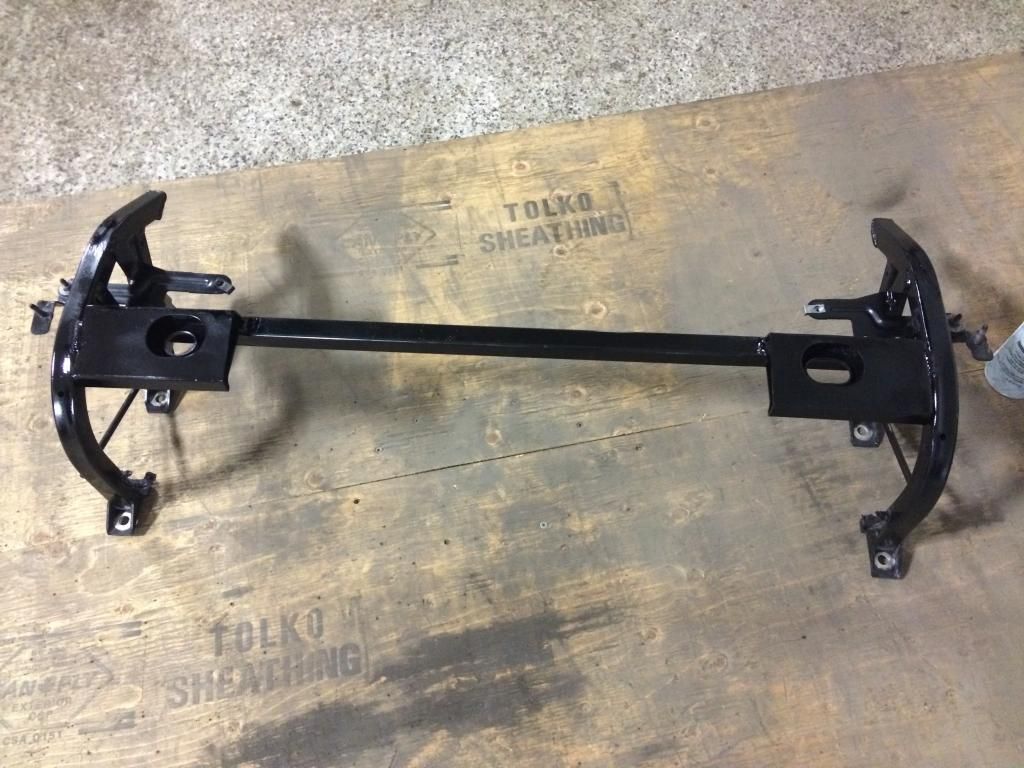
Came out pretty nice I would say.
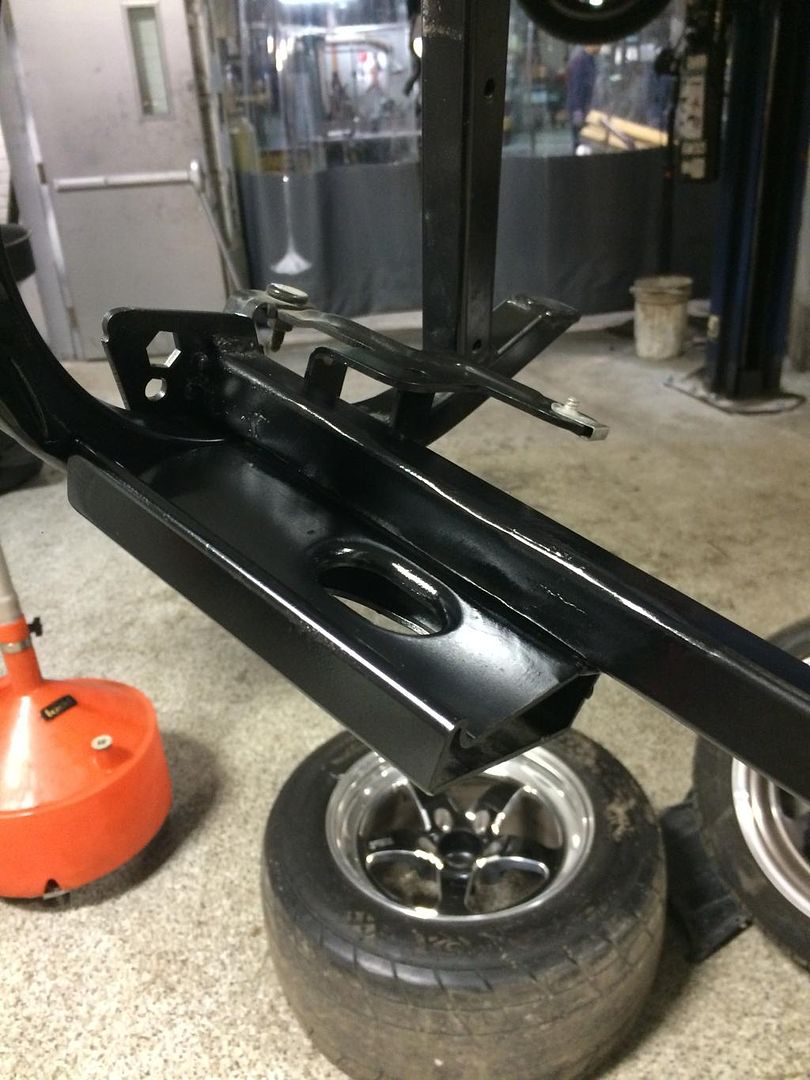
Rad and condenser going back in place.
Started measuring and planning the intercooler install but called it a day before finishing.

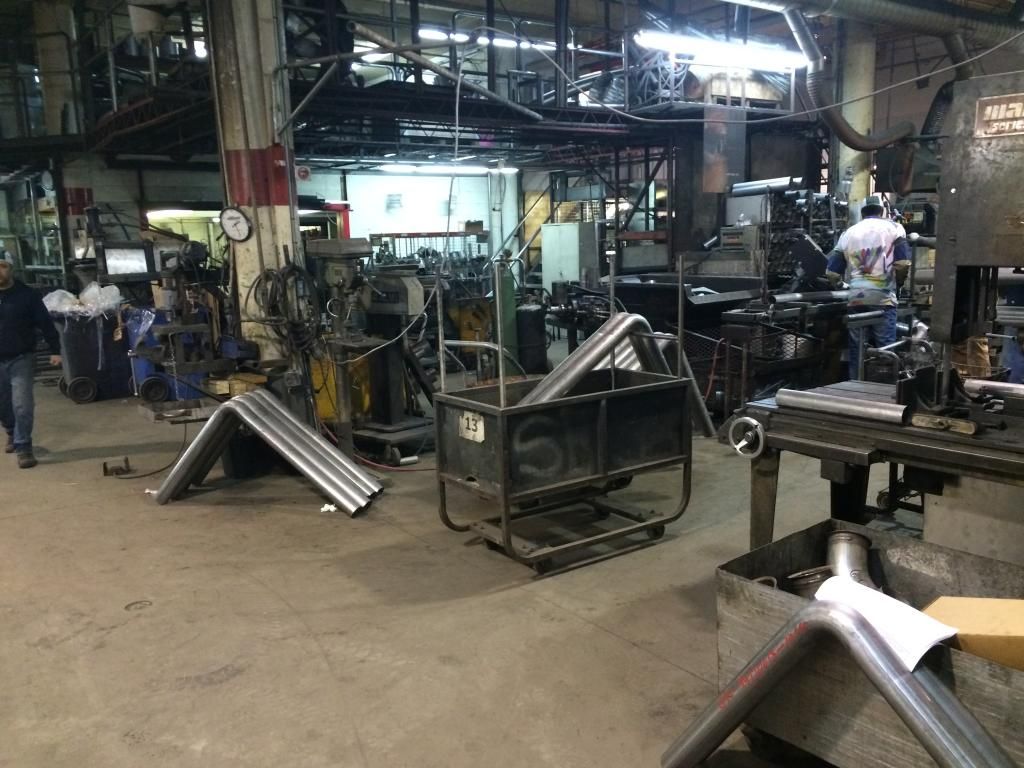
Just for fun an example of the variety of work that goes on at Federal Performance. They do lots of vettes and LS stuff but today there was others.
An eforce mustang getting a built engine...

A turbo RX7 getting.......I don't know what....

Twin supercharged Dodge truck...

Last but not least an old school chevelle got a Maggie.....

The car is basically ready, and is waiting to go on the dyno next week and be tuned. Surprisingly, on first startup it ran perfectly. the AFR and trims were actually better than before the build. How is that even possible... LOL
A few more things done before the holidays, and then we continue in the brand new shop...... should be great.
Oil drain line done...

Changed out a broken valve seal and closed up with the Holley valve cover. Its starting to look like an engine again....

We then went at the power steering lines. That's a bit of a pain. We had to take a little off the pulley to make clearance for the fitting. Nice to have a full fab shop with equipment to do anything at your disposal. Thanks again Seth and Federal.


She clears....

That's it. Done till after the holidays for now. Put on the new Firecore50 plug wires and attempted to make the coil harness look prettier. I am no artist!!
Car is packed up and moving to the new shop area over the holidays.


Next will be to fab up the piping. Kind of nice to have a full metal fabrication shop at your disposal....

Kind of slacking until the new year but spent a few hours today and got the fuel pump installed along with the feed and return lines.

Holidays are over and the work continues.......
Today removed the radiator cradle and the moved the supports to lower the rad. I prefer this to spacers as that cradle is low enough as it is.
First cut off the rad supports....

Then grind everything clean and reweld the supports to place the rad lower.

Then paint.

Came out pretty nice I would say.

Rad and condenser going back in place.

Started measuring and planning the intercooler install but called it a day before finishing.

Just for fun an example of the variety of work that goes on at Federal Performance. They do lots of vettes and LS stuff but today there was others.
An eforce mustang getting a built engine...

A turbo RX7 getting.......I don't know what....

Twin supercharged Dodge truck...

Last but not least an old school chevelle got a Maggie.....
 02-06-2015, 08:24 PM
#7
TECH Apprentice
Thread Starter
Little more done today...
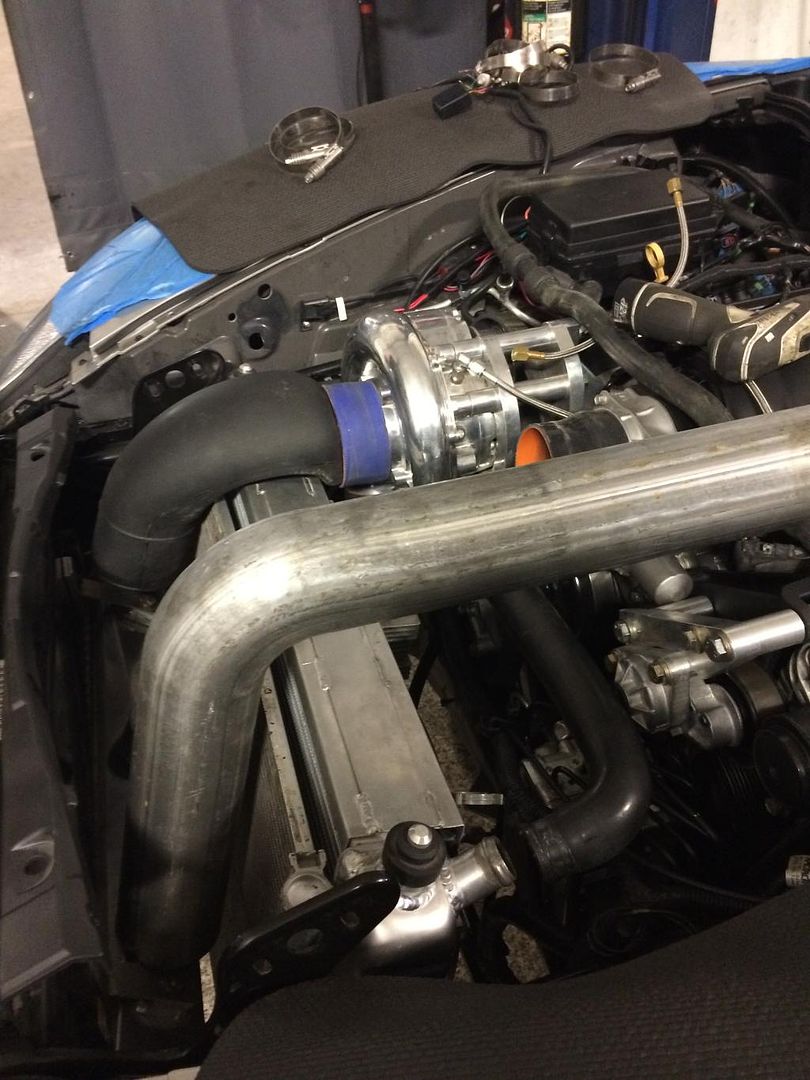
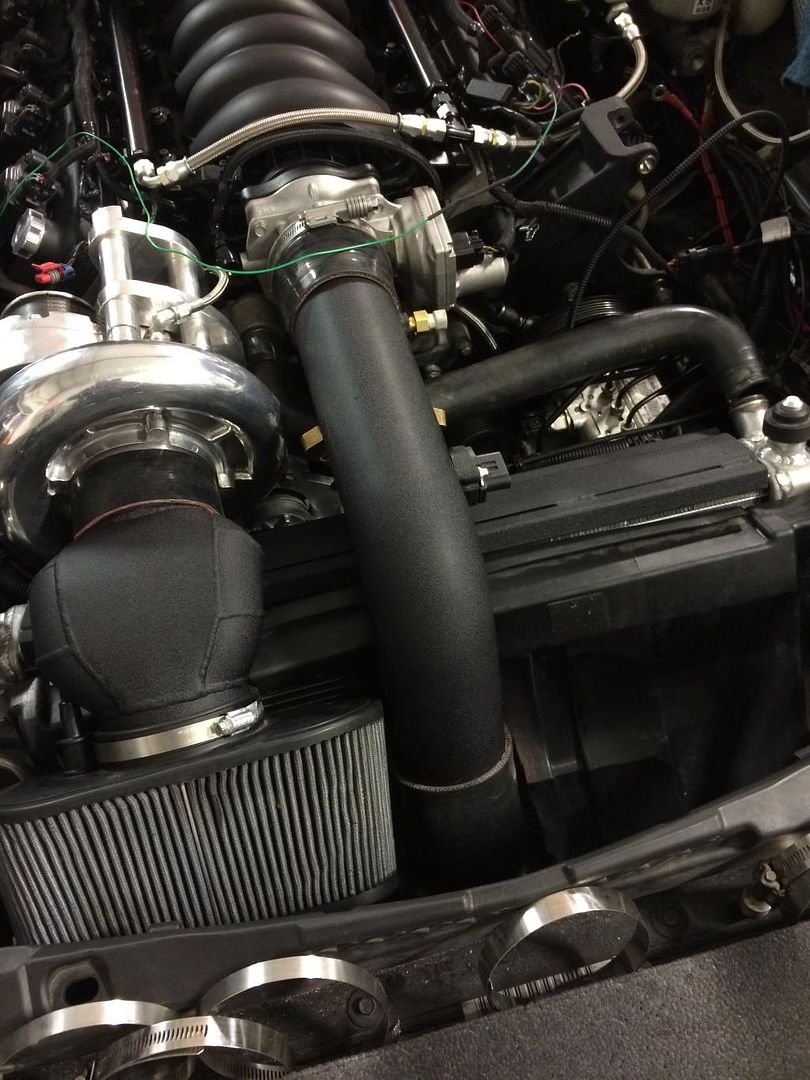
Mocked up the intercooler and placed the brackets. Started on some piping. It sure helps to have a full exhaust fabrication shop 10 steps away. Bend, cut and bead roll a pipe in 5 minutes.
I am also doing an experiment and trying to reuse the stock radiator shroud. We are cutting it up but it will still do the job and keep the air flowing through the rad, and not around it. I haven't seen this done with a blower kit. I am hoping it works out.
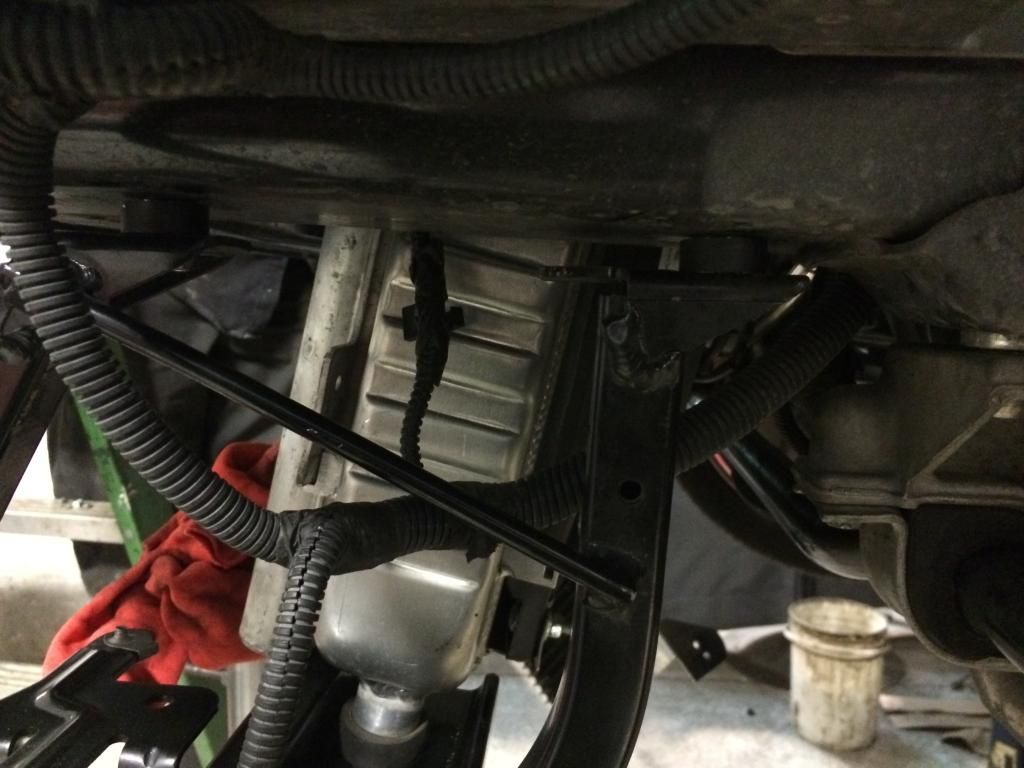
Rad and condenser in place with modified rad support...
Even with the modified support we decided to space the support down with some small spacers. Much smaller than what A&A uses, but will give just that little extra room I want without causing any issue being to low.
Ummm... where can we get pipe... LOL
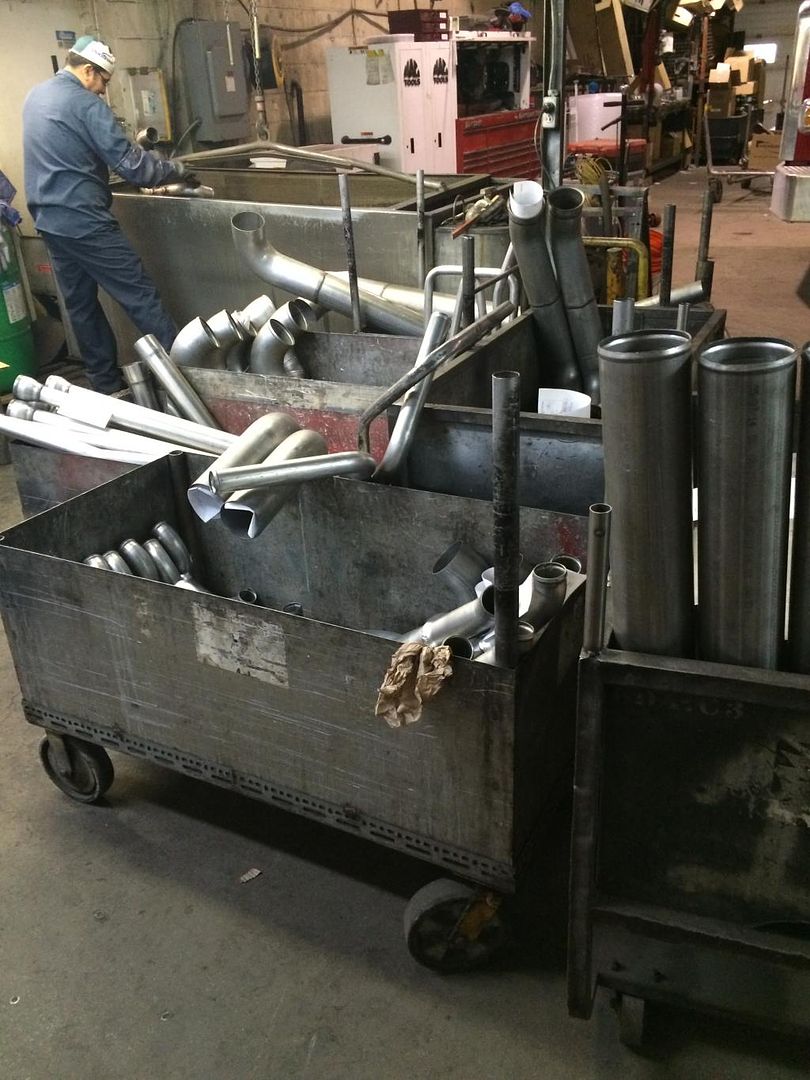
Start with a rough pipe.
Then cut and pass it on this crazy bead rolling machine
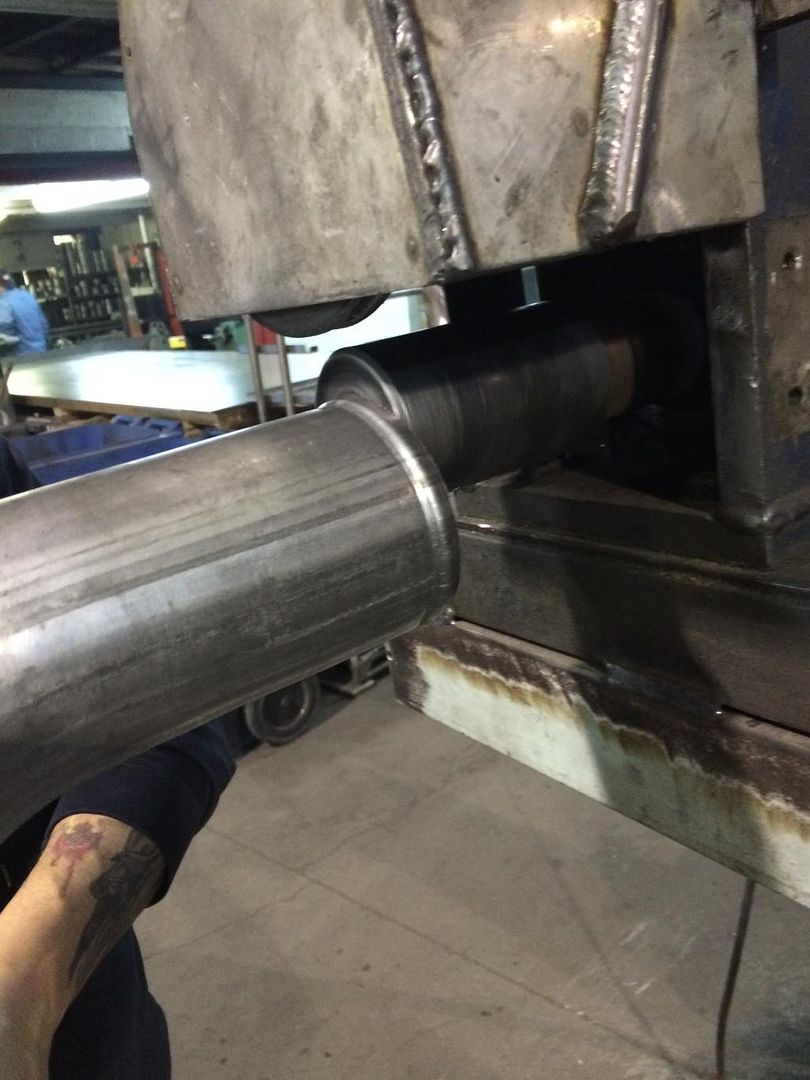
Then forget to take a picture of the finished pipe.........still have to weld bungs on and powder coat it. I will take one after all that.
Stock shroud cut up to fit back in place. I still have to cut holes for the pipe to pass through. This is with the intercooler in place....
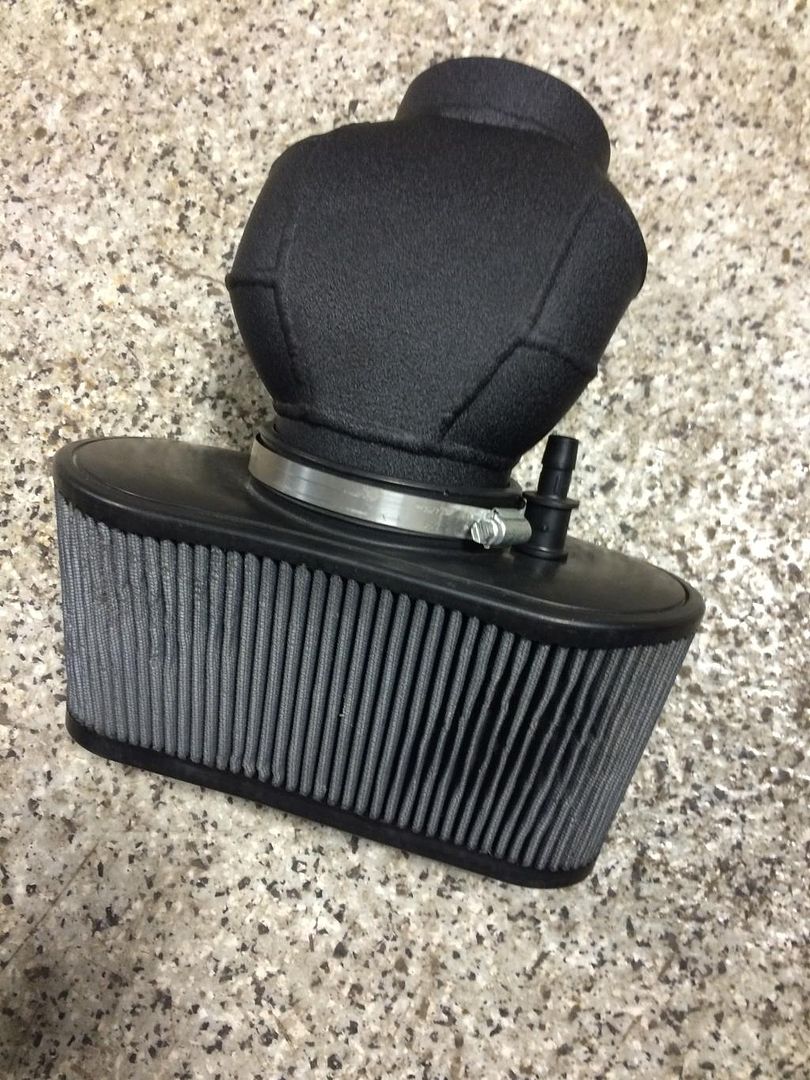
Since we are fabricating the intercooler piping, and I am too cheap to buy a cut down radiator, I have decided to attempt to make a custom intake. I could just use the A&A dongle, which I have, but I want to try and do something different and better looking.
I want to end up with the filter more or less in the same place as the dallas performance intake puts it, but I don't have room for a 4 inch pipe...sooooooooo
Very early stages.... more to come on this....
Lucky for me the boys at Federal can fabricate anything, and have some of the best welders around.

Some progress today. Always waiting on fittings and little parts.. bit of a pain.
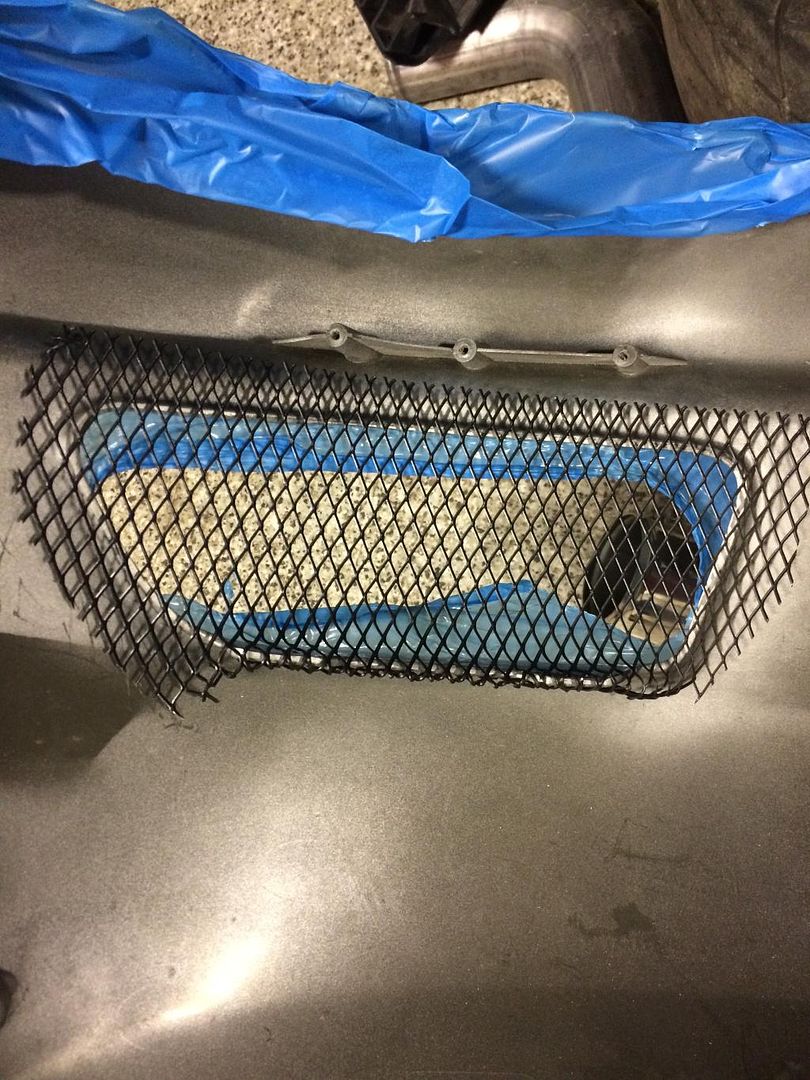
Making some grills for the fog light holes.. who needs fog lights anyways.... lol
Finished up the steam vent lines, except the one to the front...

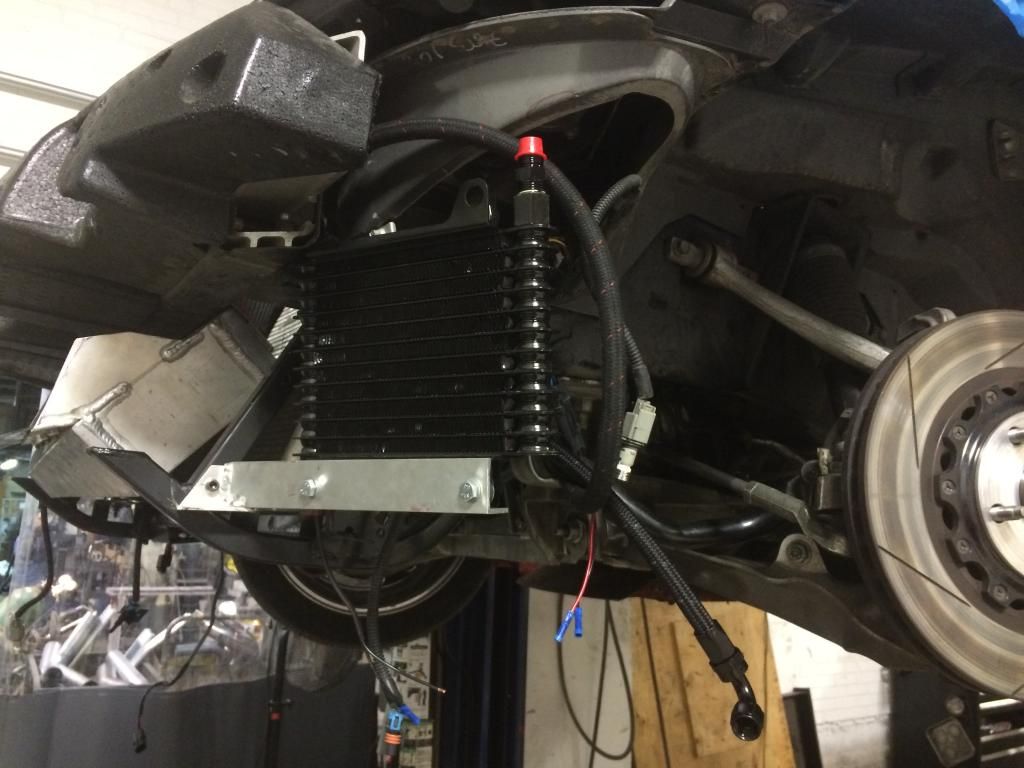
Very nice piece for the oil cooler install. Nice clearance to the header.

Removed a bit of weight for the track.....lol

Starting to measure for some piping.. I will have to slightly move my trans cooler to make room for the pipe and BOV.

And..... the super secret custom intake project progresses....

Worked a bit on intercooler piping and some other stuff today, but mostly got the oil cooler all done except for wiring the fan.
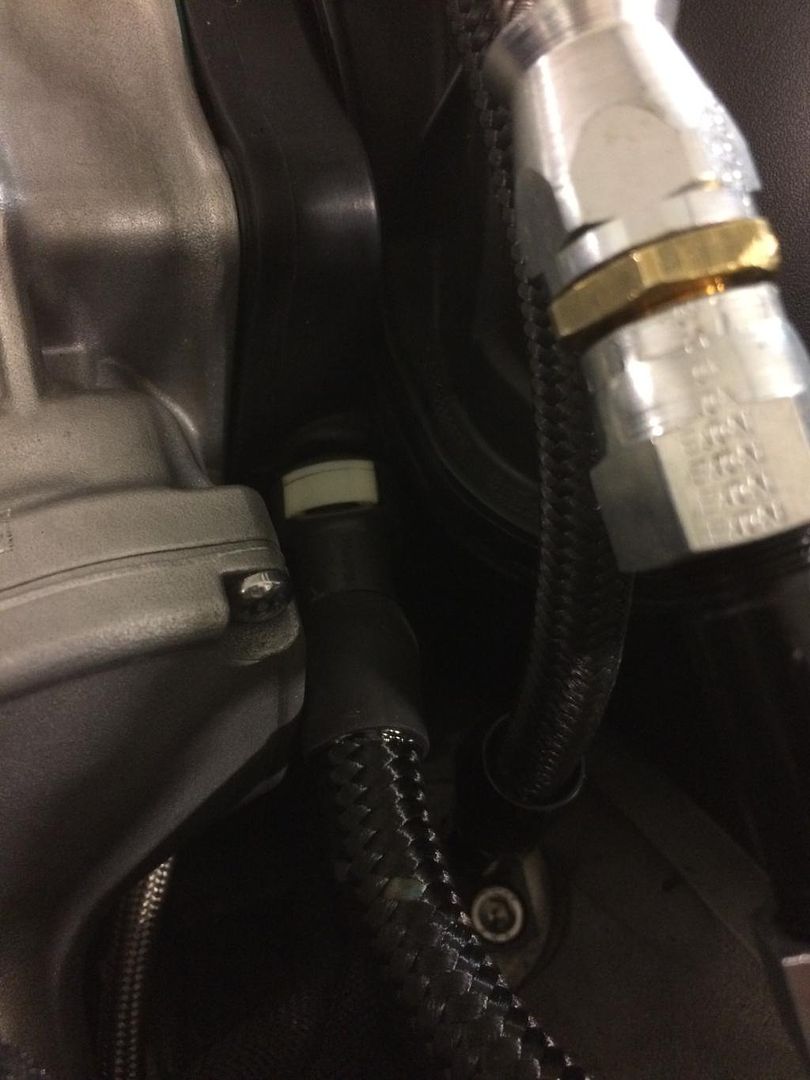
Adapter and lines put together and ready to go in. I added a bit of heat shield where it passes close to the headers.

Adaptor and lines installed. I attached the lines before bolting on the adapter as that seemed easier.

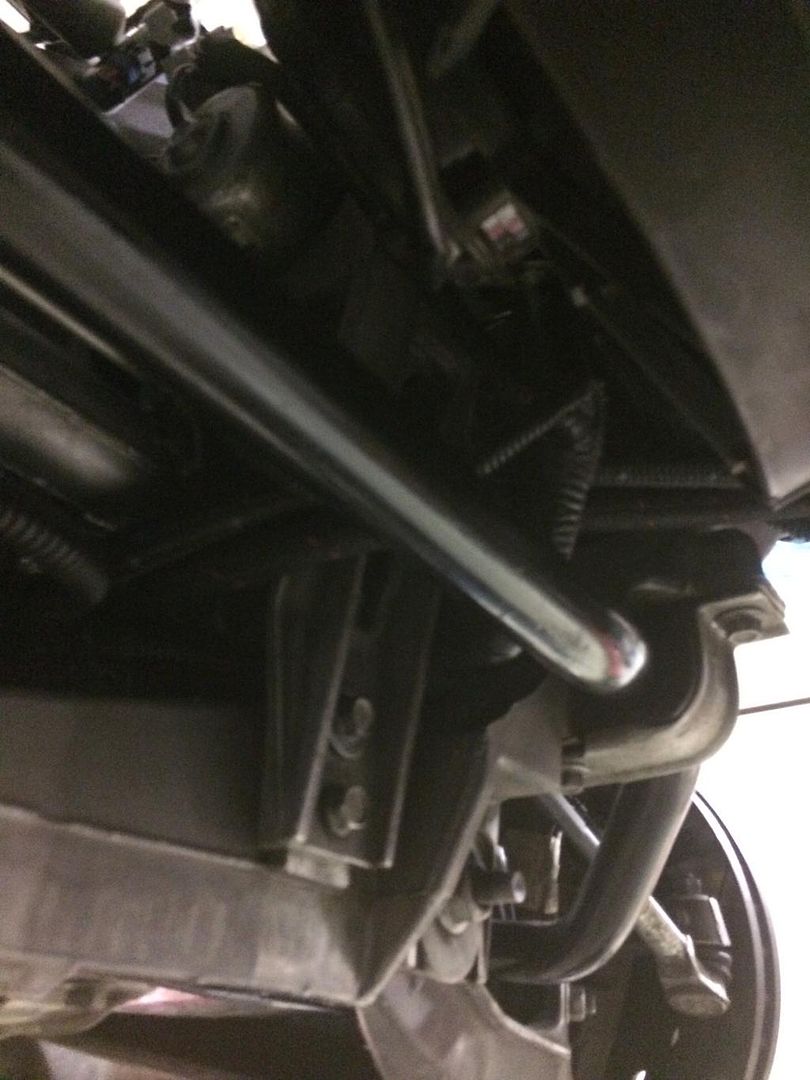
Lines passing between engine and engine mount.

Hard to see but lines passing over spring and cradle.
Just about done...
Top secret intake almost finished. Just needs cleaning up and powder coating now. :woohoo:
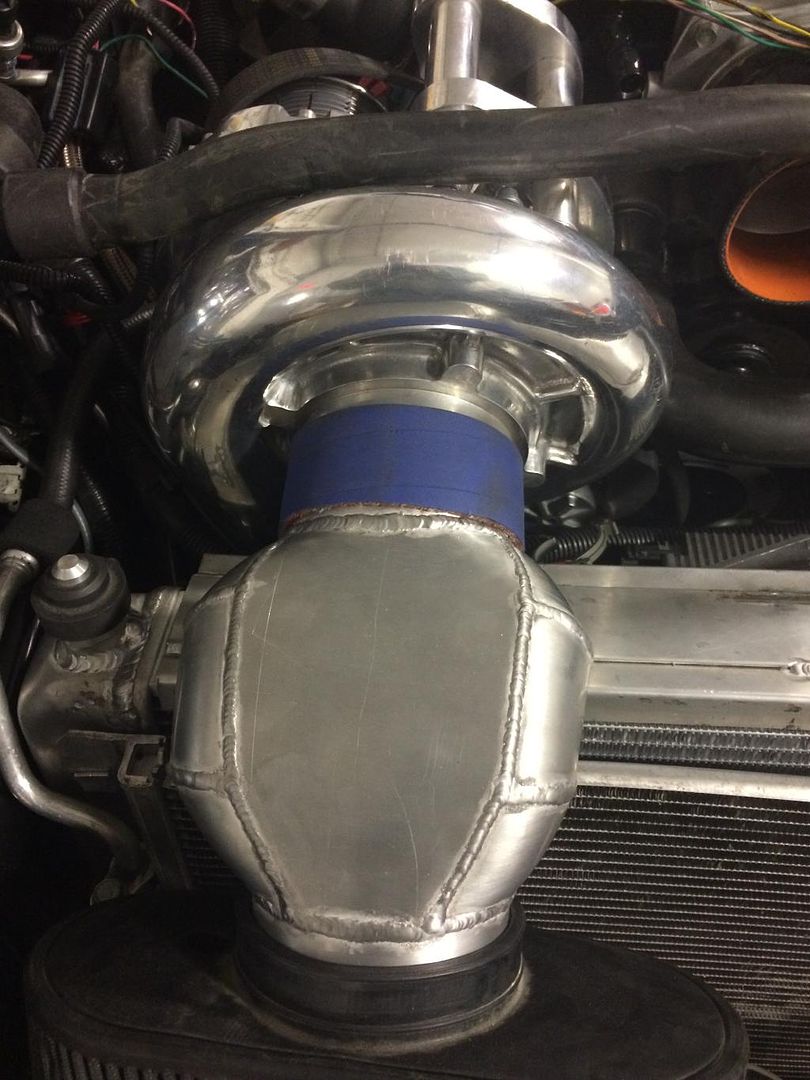
Mocked up the intercooler and placed the brackets. Started on some piping. It sure helps to have a full exhaust fabrication shop 10 steps away. Bend, cut and bead roll a pipe in 5 minutes.
I am also doing an experiment and trying to reuse the stock radiator shroud. We are cutting it up but it will still do the job and keep the air flowing through the rad, and not around it. I haven't seen this done with a blower kit. I am hoping it works out.
Rad and condenser in place with modified rad support...

Even with the modified support we decided to space the support down with some small spacers. Much smaller than what A&A uses, but will give just that little extra room I want without causing any issue being to low.

Ummm... where can we get pipe... LOL

Start with a rough pipe.

Then cut and pass it on this crazy bead rolling machine

Then forget to take a picture of the finished pipe.........still have to weld bungs on and powder coat it. I will take one after all that.
Stock shroud cut up to fit back in place. I still have to cut holes for the pipe to pass through. This is with the intercooler in place....

Since we are fabricating the intercooler piping, and I am too cheap to buy a cut down radiator, I have decided to attempt to make a custom intake. I could just use the A&A dongle, which I have, but I want to try and do something different and better looking.
I want to end up with the filter more or less in the same place as the dallas performance intake puts it, but I don't have room for a 4 inch pipe...sooooooooo
Very early stages.... more to come on this....
Lucky for me the boys at Federal can fabricate anything, and have some of the best welders around.


Some progress today. Always waiting on fittings and little parts.. bit of a pain.
Making some grills for the fog light holes.. who needs fog lights anyways.... lol

Finished up the steam vent lines, except the one to the front...

Very nice piece for the oil cooler install. Nice clearance to the header.

Removed a bit of weight for the track.....lol

Starting to measure for some piping.. I will have to slightly move my trans cooler to make room for the pipe and BOV.

And..... the super secret custom intake project progresses....

Worked a bit on intercooler piping and some other stuff today, but mostly got the oil cooler all done except for wiring the fan.
Adapter and lines put together and ready to go in. I added a bit of heat shield where it passes close to the headers.

Adaptor and lines installed. I attached the lines before bolting on the adapter as that seemed easier.

Lines passing between engine and engine mount.

Hard to see but lines passing over spring and cradle.

Just about done...

Top secret intake almost finished. Just needs cleaning up and powder coating now. :woohoo:

Trending Topics
02-06-2015, 08:26 PM
#8
TECH Apprentice
Thread Starter
Little more done today and I can see the light at the end of the tunnel. No real rush since car cant be driven for months yet.
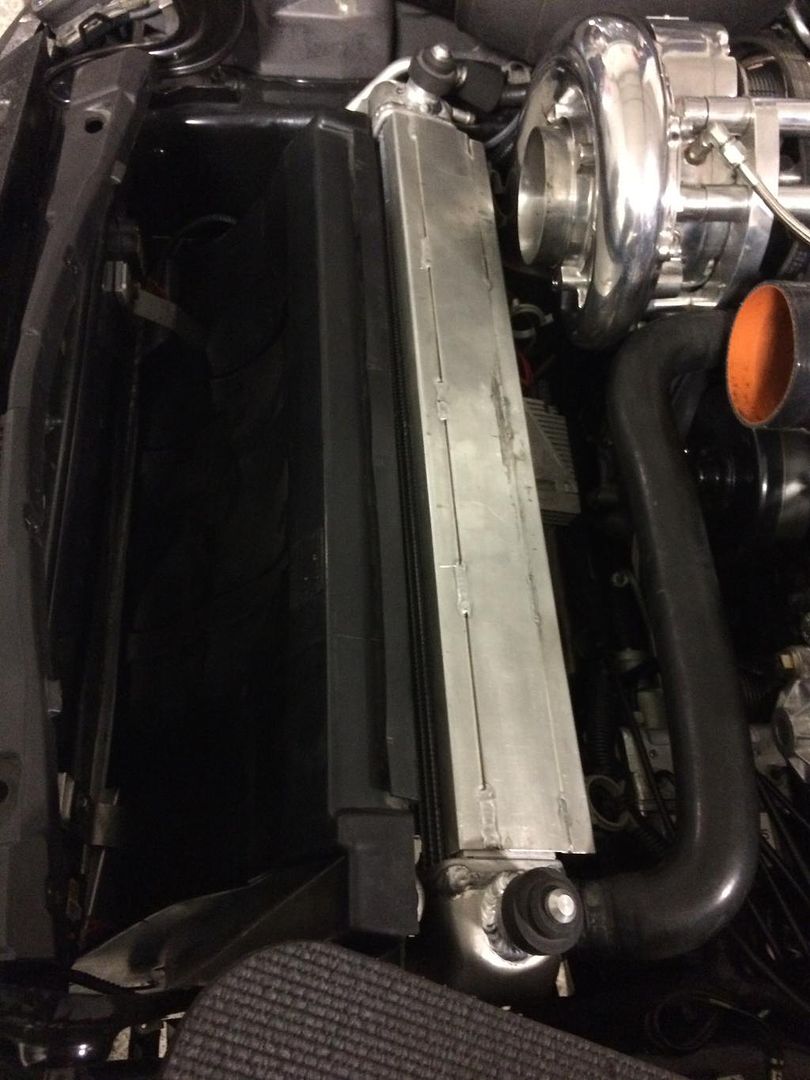
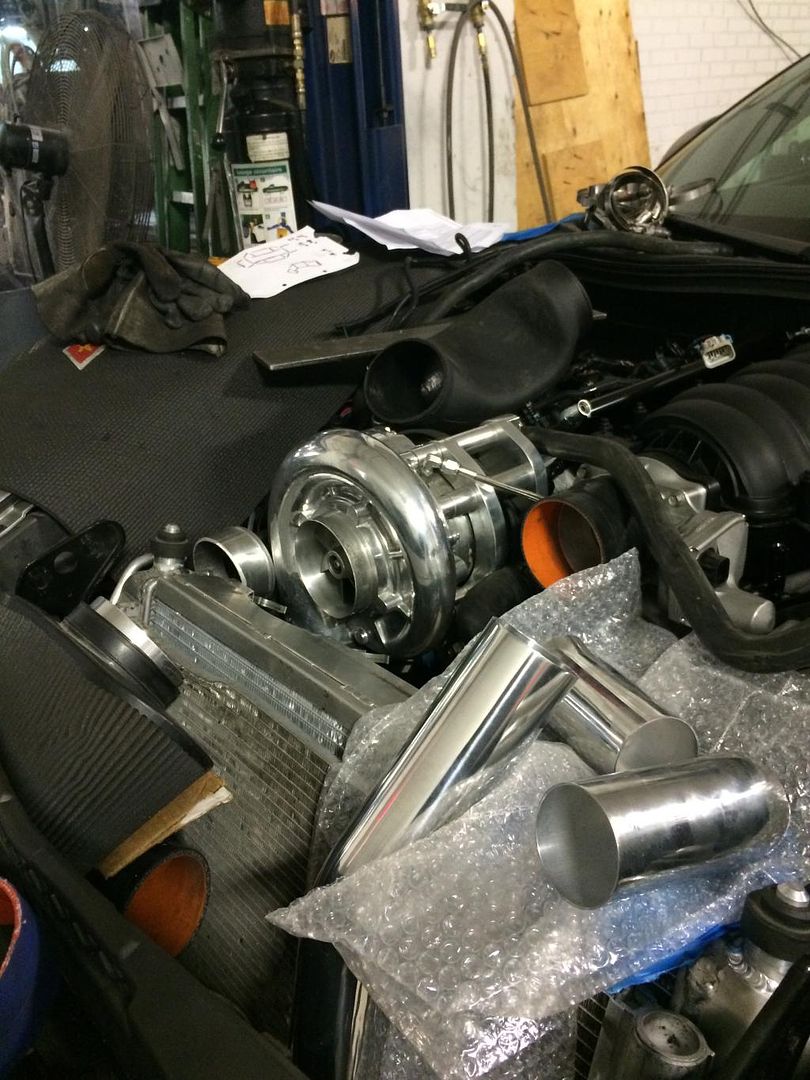
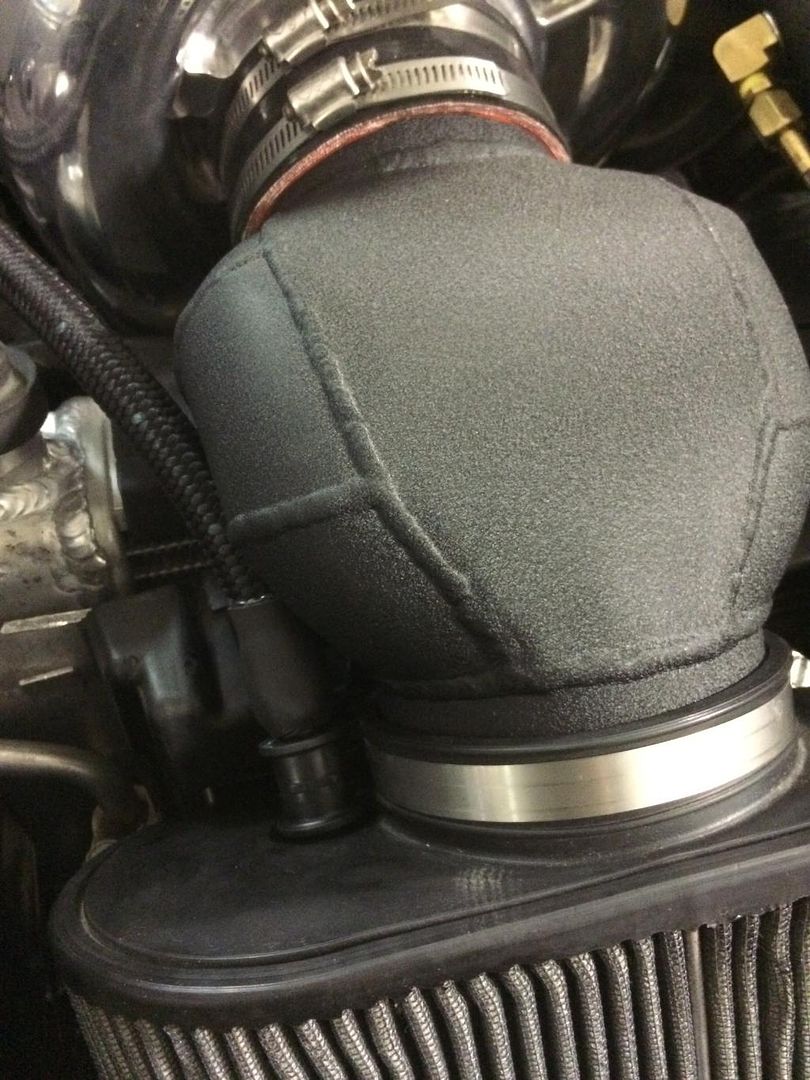
Intercooler is mounted and worked on the inlet pipe today. Welded a bung for the IAT sensor, made holes for the meth and the MAF. Next it will be powder coated.


Started on fuel lines and got most of that done....


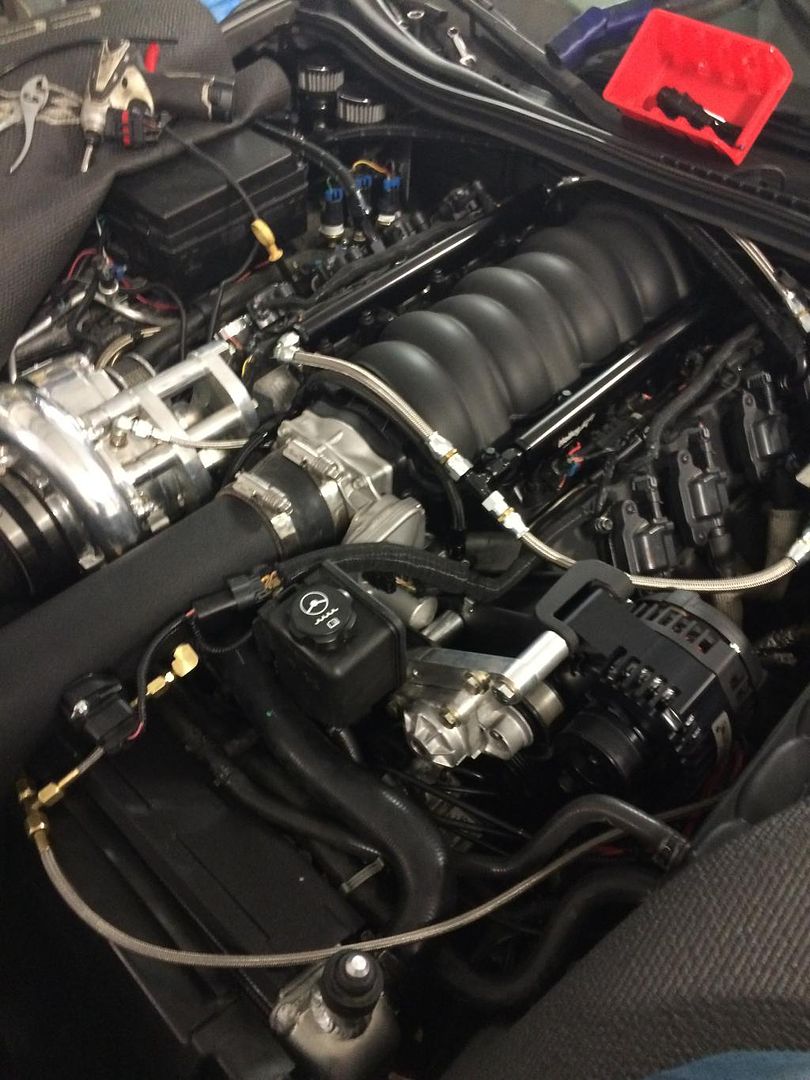
Intake and piping is powdercoated, assembled, and ready !!


Haven't seen (or haven't noticed) another centri car running with the fan shroud still in place. I am going to try it after some mods to make it fit. I am sure that this will give much better air flow to the rad and help with temps.
Little more progress.. getting there.. the little details take the most time. Hooked up the battery today and tested the fuel pumps. Seems all working.
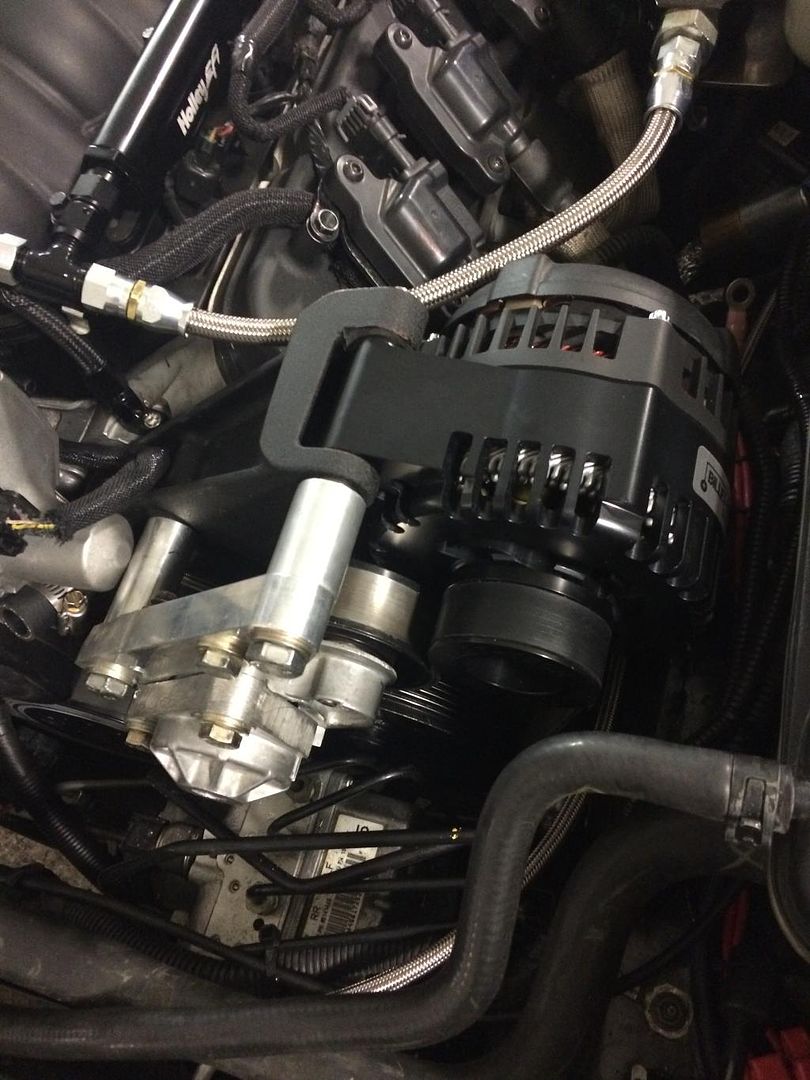
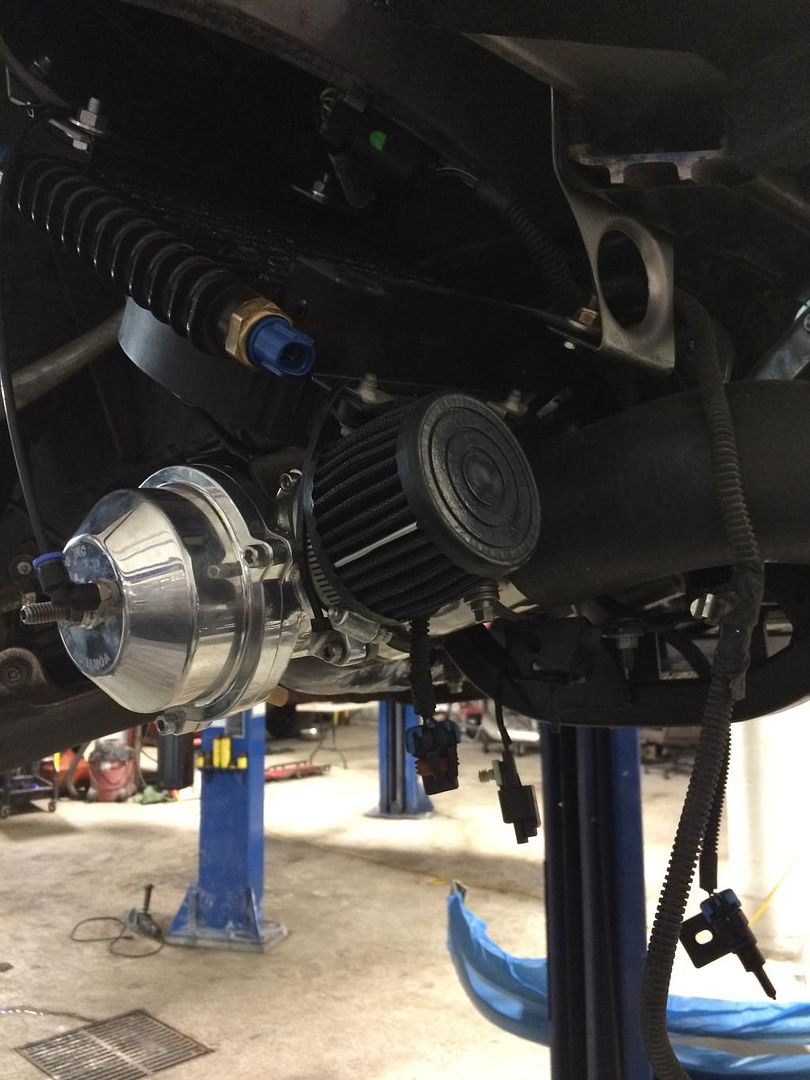
Installed a Billet Tech alternator....Beautiful piece... thanks Bret !!!
Also wired up the hobbs switches and a few other details.

Almost ready to fire up.........maybe tomorrow....
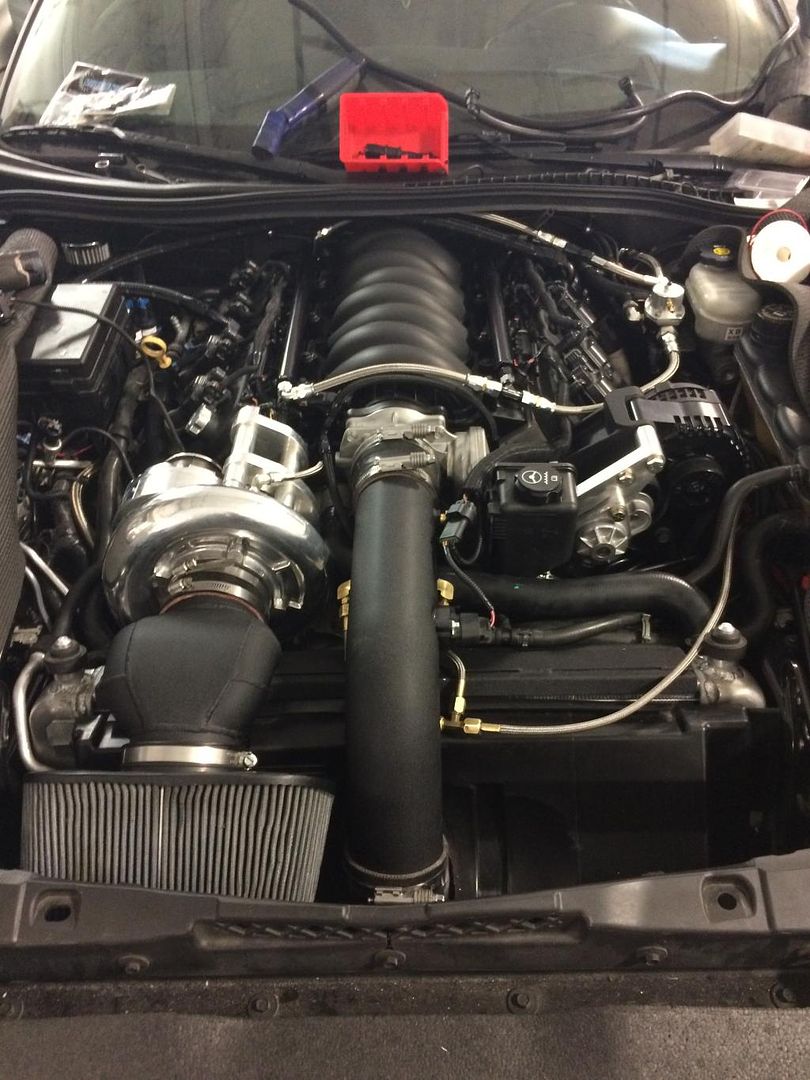
Well... she is alive !!!
Finished off the last vacuum and catch can hoses. Changed the oil and then went for the big moment. I just couldn't believe that with all the changes, she started right away and idled perfectly. Obviously we will be tuning but amazingly the AFR is dead on and fuel trims are as good or better than before.
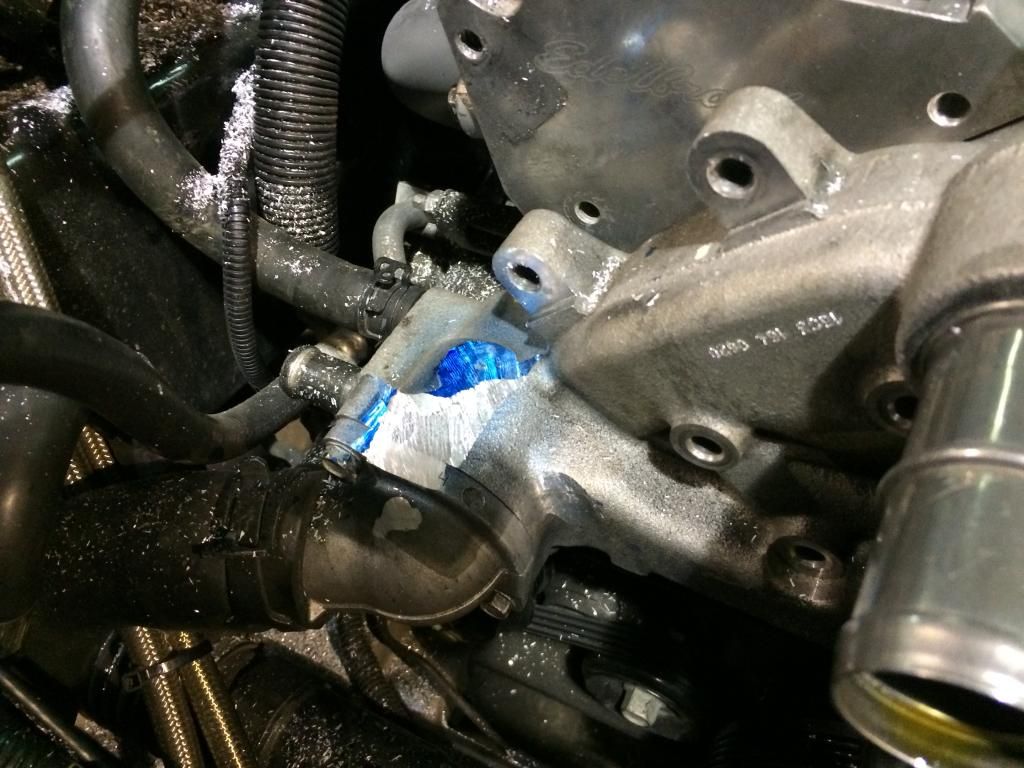
After running a bit I found a small coolant leak which will be taken care of tomorrow. then to the dyno she will go.

Click for start up video.... cant seem to embed it properly...

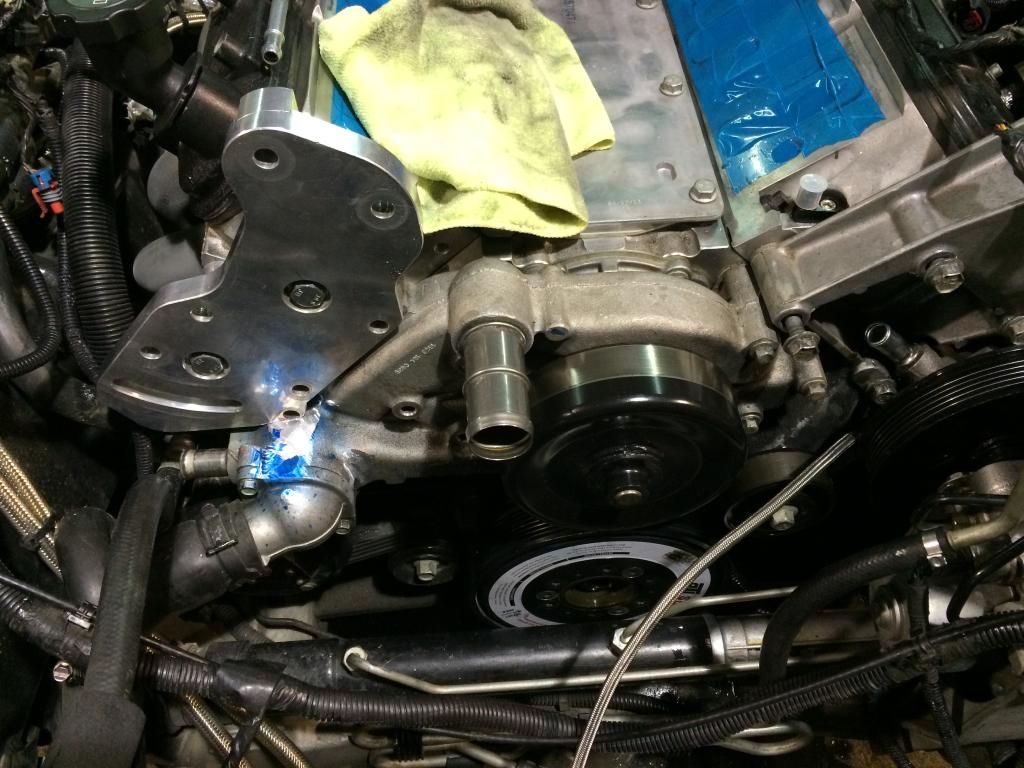
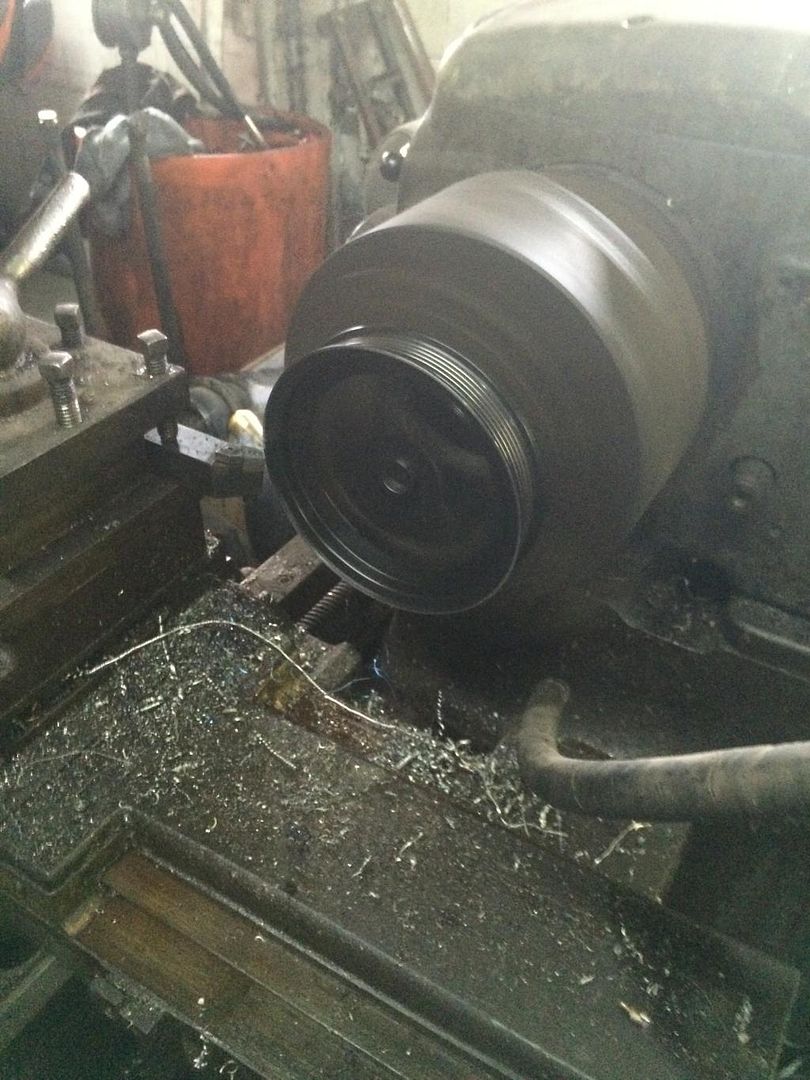
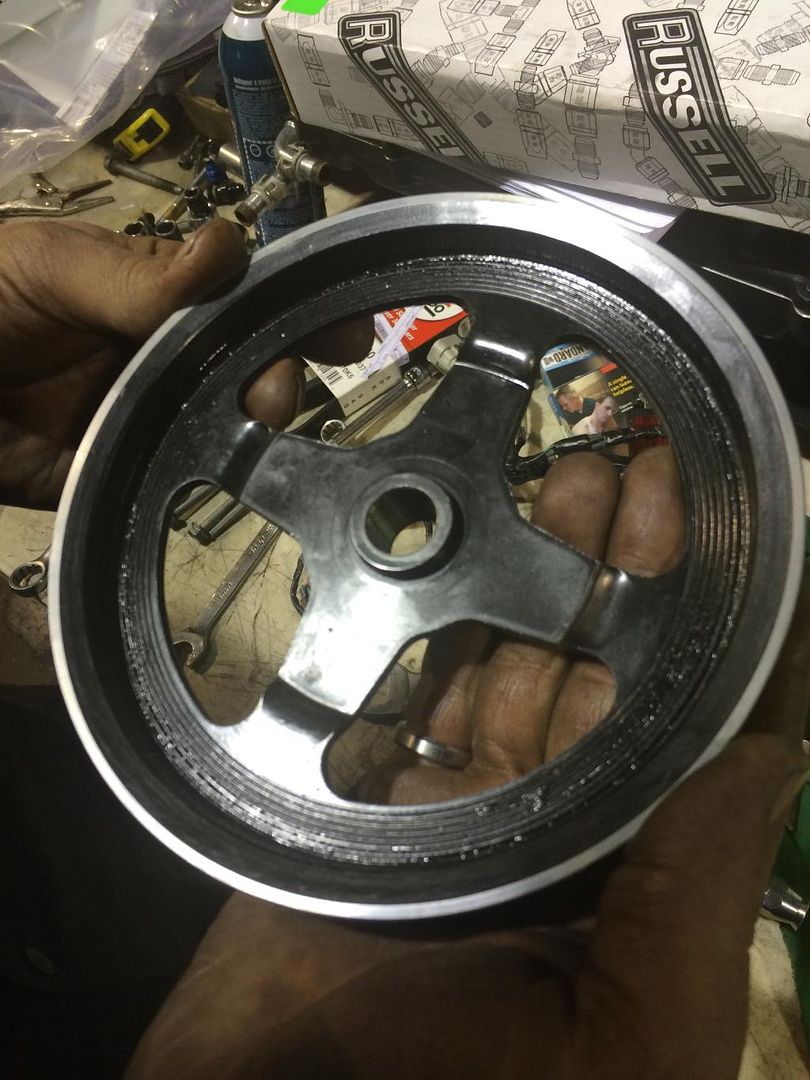
Today did a bit of cleanup in the engine bay. I had to remove the head unit to take care of a small coolant leak so I put on the 3.0 pulley. I will start with that and see where to go.
I changed the heater hose arrangement and put a tee from the side. Bit of a pain that the hoses are different sizes. Had to make a tee from scratch. The hose running under the blower is just a silly pain. I also relocated the fuel evap solenoid (I think its called) to fit in better.
Really not much left to do now. I will not put the front back together until we dyno it in case there are any issues. Still have to make a few brackets to hold the rad, and finish the catch can bracket. That is about it.


Intercooler is mounted and worked on the inlet pipe today. Welded a bung for the IAT sensor, made holes for the meth and the MAF. Next it will be powder coated.


Started on fuel lines and got most of that done....


Intake and piping is powdercoated, assembled, and ready !!


Haven't seen (or haven't noticed) another centri car running with the fan shroud still in place. I am going to try it after some mods to make it fit. I am sure that this will give much better air flow to the rad and help with temps.

Little more progress.. getting there.. the little details take the most time. Hooked up the battery today and tested the fuel pumps. Seems all working.
Installed a Billet Tech alternator....Beautiful piece... thanks Bret !!!
Also wired up the hobbs switches and a few other details.


Almost ready to fire up.........maybe tomorrow....


Well... she is alive !!!
Finished off the last vacuum and catch can hoses. Changed the oil and then went for the big moment. I just couldn't believe that with all the changes, she started right away and idled perfectly. Obviously we will be tuning but amazingly the AFR is dead on and fuel trims are as good or better than before.
After running a bit I found a small coolant leak which will be taken care of tomorrow. then to the dyno she will go.


Click for start up video.... cant seem to embed it properly...
Today did a bit of cleanup in the engine bay. I had to remove the head unit to take care of a small coolant leak so I put on the 3.0 pulley. I will start with that and see where to go.
I changed the heater hose arrangement and put a tee from the side. Bit of a pain that the hoses are different sizes. Had to make a tee from scratch. The hose running under the blower is just a silly pain. I also relocated the fuel evap solenoid (I think its called) to fit in better.
Really not much left to do now. I will not put the front back together until we dyno it in case there are any issues. Still have to make a few brackets to hold the rad, and finish the catch can bracket. That is about it.


