Fox Mustang Turbo LS Swap **Dyno Results** page 6
 12-26-2015, 08:30 PM
#61
Staging Lane
Thread Starter
Join Date: Nov 2012
Location: Vernal, Utah
Posts: 82
Likes: 0
Received 0 Likes
on
0 Posts

Starting on the cage.

Cage finished. Its not really to any sanctioning body specifications, close but not 100%. I just wanted some added protection and a good place to mount my 5 point harnesses to. I used Rustoleum Hammer Tone paint and used a roller and sponge brush and it turned out great!


Battery Location, and meth tank location finalized and start of the rear seat delete panels I am making. This is the first interior/upholstery project I have ever done and its a huge learning process and takes a ton of time. I'm covering it, the door panels, and the head liner with a high grade, heavy black leather-look vinyl.


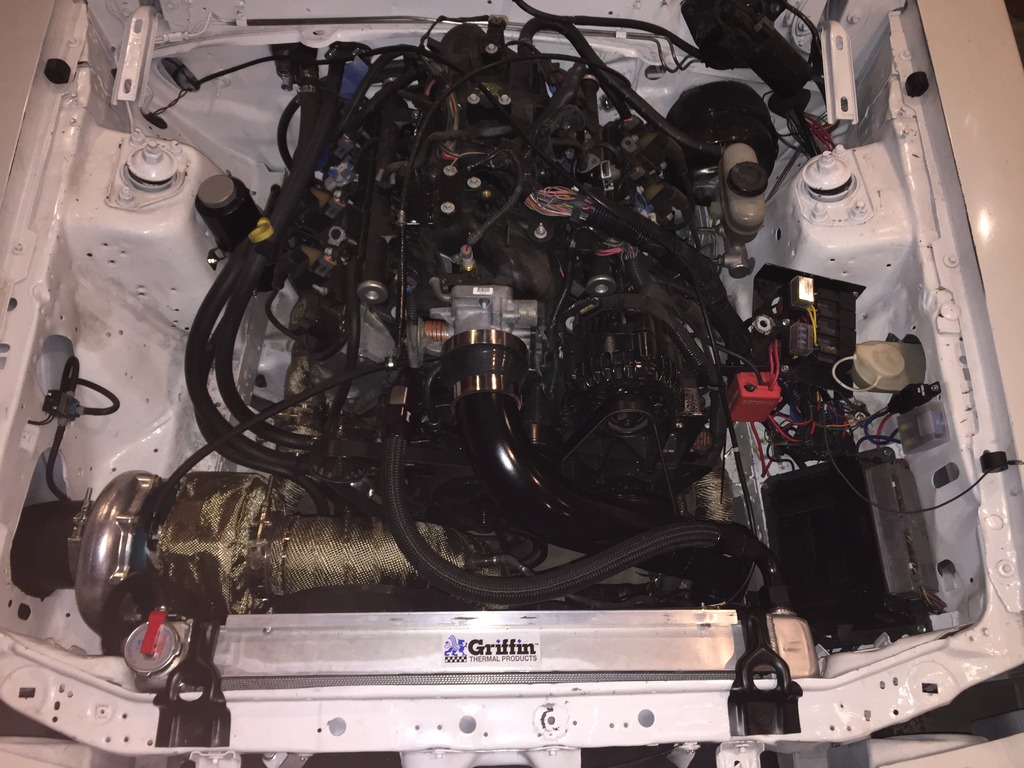
Water pump went out and since I didn't really like the last setup I decided to upgrade the whole cooling system. I started with a Griffin radiator. Its says it was meant for circle track but it was exactly what I needed. I think it was 30.5 x 19.5, had -16 AN fittings, and had a petcock and overflow fitting included for around $260. I know they aren't the best radiator out there but it has been working for a while no with no problems, but I have only driven in cold weather so far.

With a little modification, the Dorman replacement stock F-Body fans fit great.

I used pieces of aluminum channel and flat bar to mount the fans. I had to rebuild the down pipe but my O2 sensor placement is better than it was. Everything is a tight fit! I had to shave the fan shroud down a little to make it fit. In hind sight I should have bought the AJE k-member which would have spaced the engine down and back a little more I think.

I found an AC Delco water pump that had the OEM water neck flange and was about half the price of the dealership, make sure to get the 'Made in Canada' version. I then pulled out the top hose port and had a local guy weld an AN bung to the pump. I found a water neck that had an AN fitting built in and it has worked great so far. AN fittings and flexible hose make hose routing super easy and it looks better than regular hoses too. The price for it really isn't than much more than buying a high grade Gates hose.
The old setup wouldn't overheat if I was moving good, but stopped it would usually start to get hotter than I would have liked. The new setup seems to work great, but I really have only driven with it in 30 degree weather so who knows what will happen in the summer. I was a little worried about using 'small' -16 AN fittings but looking around the internet it looks like its pretty normal.
After driving around a little and getting the tune smoothed out some I decided I wanted to turn the boost up a few pounds and realized that the manual boost controller I bought wasn't working properly. So I decided to order an Eboost2 and while I was at it I bought a CoolingMist CMGS (you know, just to fill the empty space in my new gauge pod). Those will be going in this week and then I need to finish up the interior. I will be using Dash Command for my gauges. If anyone has any experience with it, please speak up.
Lastly I have 31 spline Mosers and a spool for the rear, which I will do as I am changing everything over to 5 Lug. All that's left after that is Wheels, Tires, and maybe Paint.
Last edited by Galgo; 12-26-2015 at 08:42 PM.
 12-26-2015, 08:48 PM
#62
Staging Lane
Thread Starter
Join Date: Nov 2012
Location: Vernal, Utah
Posts: 82
Likes: 0
Received 0 Likes
on
0 Posts
This was back in October. Just went for a little drive. Its running really rich and the video doesn't really it do it justice. It feels pretty quick and is only on 8 PSI. Don't mind the interior its a work in progress haha
12-27-2015, 07:10 PM
#63
Staging Lane
Join Date: Aug 2013
Posts: 98
Likes: 0
Received 0 Likes
on
0 Posts
Nice build man. you've pretty much done everything how I would do it.
did the 1/4 inch return end up being adequate?
that other foxbody kit came out really good, I cant believe how well everything fits together there.
did the 1/4 inch return end up being adequate?
that other foxbody kit came out really good, I cant believe how well everything fits together there.
12-29-2015, 07:42 PM
#64
Staging Lane
Thread Starter
Join Date: Nov 2012
Location: Vernal, Utah
Posts: 82
Likes: 0
Received 0 Likes
on
0 Posts
I'm not sure on the return because I just ended up pluming it all the way back with 3/8" and then it necks down to 1/4" right where it dumps into the Tank. That setup has been completely fine so far.
01-16-2016, 10:46 AM
#65
Staging Lane
Thread Starter
Join Date: Nov 2012
Location: Vernal, Utah
Posts: 82
Likes: 0
Received 0 Likes
on
0 Posts
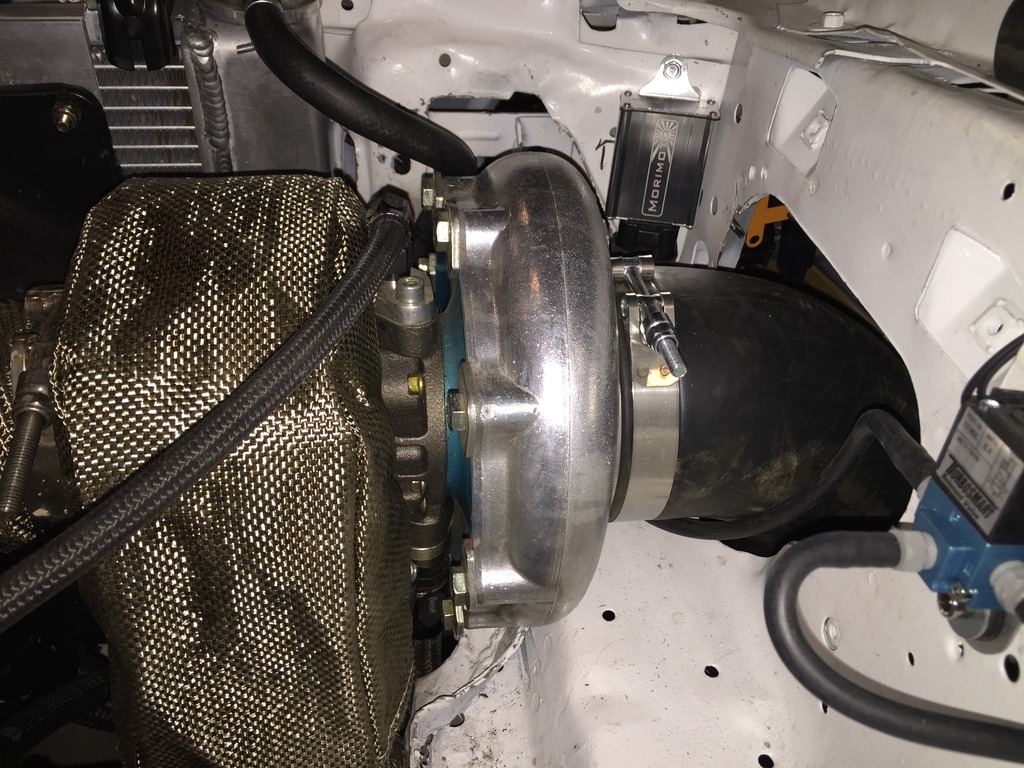
Since the last update I have gotten the methanol injection tank completely mounted and vented. I also got the wideband, EBoost2, and Cooling Mist CMGS installed. And just a word to the wise, I could never recommend the CMGS to anyone, feel free to PM me if you want more info.
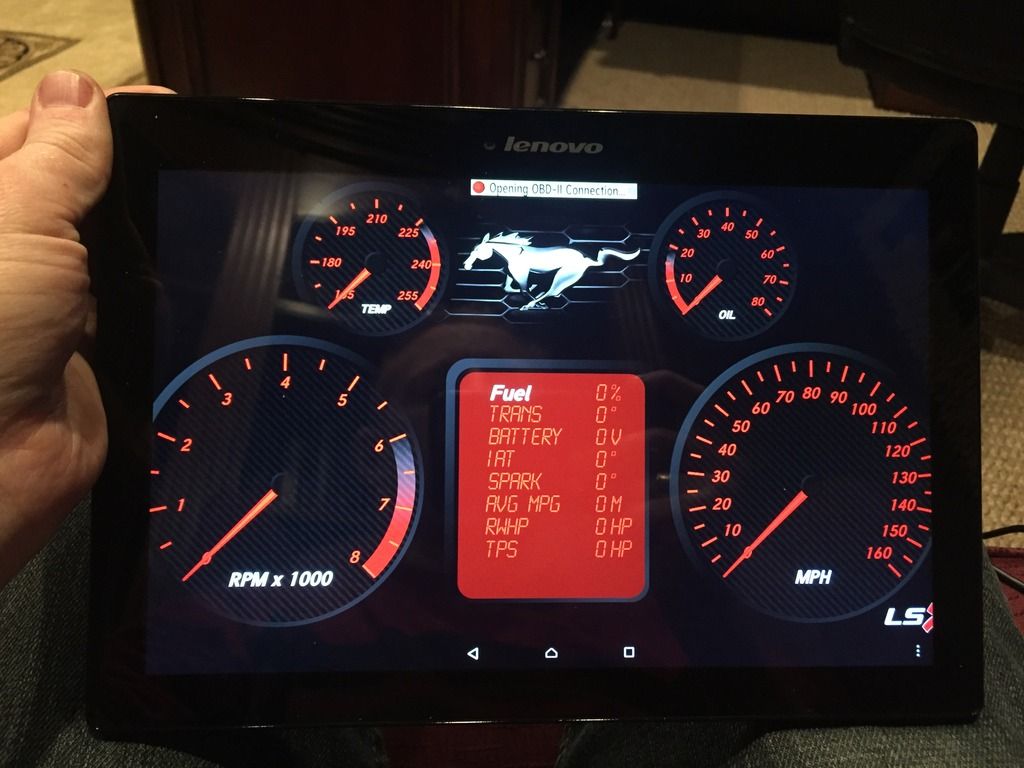
I got some of the interior installed and will get pictures of it when everything is in. I got turbo blanket on and redid the charge pipe. I had a guy weld it together for me because I really didn't like the way it turned out the first time. Lastly, I have been working on getting my gauges ready. I am going to be using Dash Command, with a custom skin of my own design. It looks A LOT better in person than in the pictures/video. Its still a work in progress, but so far I think the digital dash thing could work out really well. Lastly, I started installed Morimoto HID projectors and the control system to support them. I will also get pictures of them when the are finished.
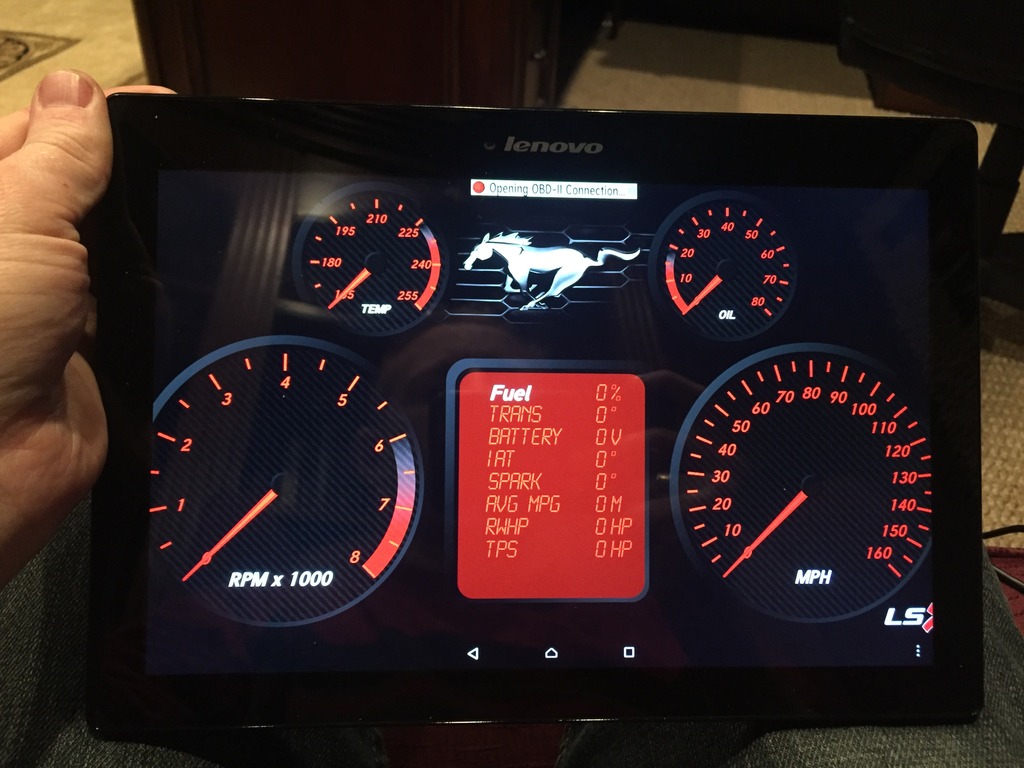
Still getting everything scaled correctly and its definitely a work in progress.
I got some of the interior installed and will get pictures of it when everything is in. I got turbo blanket on and redid the charge pipe. I had a guy weld it together for me because I really didn't like the way it turned out the first time. Lastly, I have been working on getting my gauges ready. I am going to be using Dash Command, with a custom skin of my own design. It looks A LOT better in person than in the pictures/video. Its still a work in progress, but so far I think the digital dash thing could work out really well. Lastly, I started installed Morimoto HID projectors and the control system to support them. I will also get pictures of them when the are finished.


Still getting everything scaled correctly and its definitely a work in progress.
01-16-2016, 11:56 AM
#66

Since the last update I have gotten the methanol injection tank completely mounted and vented. I also got the wideband, EBoost2, and Cooling Mist CMGS installed. And just a word to the wise, I could never recommend the CMGS to anyone, feel free to PM me if you want more info.
I got some of the interior installed and will get pictures of it when everything is in. I got turbo blanket on and redid the charge pipe. I had a guy weld it together for me because I really didn't like the way it turned out the first time. Lastly, I have been working on getting my gauges ready. I am going to be using Dash Command, with a custom skin of my own design. It looks A LOT better in person than in the pictures/video. Its still a work in progress, but so far I think the digital dash thing could work out really well. Lastly, I started installed Morimoto HID projectors and the control system to support them. I will also get pictures of them when the are finished.


Still getting everything scaled correctly and its definitely a work in progress.
https://youtu.be/xC8eHJBTI50
I got some of the interior installed and will get pictures of it when everything is in. I got turbo blanket on and redid the charge pipe. I had a guy weld it together for me because I really didn't like the way it turned out the first time. Lastly, I have been working on getting my gauges ready. I am going to be using Dash Command, with a custom skin of my own design. It looks A LOT better in person than in the pictures/video. Its still a work in progress, but so far I think the digital dash thing could work out really well. Lastly, I started installed Morimoto HID projectors and the control system to support them. I will also get pictures of them when the are finished.
Still getting everything scaled correctly and its definitely a work in progress.
https://youtu.be/xC8eHJBTI50
01-16-2016, 02:43 PM
#67
Staging Lane
Thread Starter
Join Date: Nov 2012
Location: Vernal, Utah
Posts: 82
Likes: 0
Received 0 Likes
on
0 Posts
01-16-2016, 02:53 PM
#68
The application is called Dash Command. It's available for Apple, android, and full version Windows (not mobile). They have a skin creator that allows you to make the dashboards/gauges look however you want. I made this one myself. I uploaded it to their website so once you have the app you can download the skin and use it. Or you can download it onto your computer and use the skin editor to change it however you want. This one isn't 100% function yet but it's getting there. Here is the page for the dash I did: http://dashxl.net/dashboard.php?dashboard=1333
01-18-2016, 12:36 PM
#69
Registered User

Join Date: Jan 2016
Posts: 1
Likes: 0
Received 0 Likes
on
0 Posts
good work. good starting point for ppl like me that know noting about ls enegines or mustangs. but I love them both and this is what I would like to build once I get a chance.
sub'ed
sub'ed
01-18-2016, 04:11 PM
#70

The application is called Dash Command. It's available for Apple, android, and full version Windows (not mobile). They have a skin creator that allows you to make the dashboards/gauges look however you want. I made this one myself. I uploaded it to their website so once you have the app you can download the skin and use it. Or you can download it onto your computer and use the skin editor to change it however you want. This one isn't 100% function yet but it's getting there. Here is the page for the dash I did: http://dashxl.net/dashboard.php?dashboard=1333
How much time ya got into that aspect of it?

 01-19-2016, 08:26 PM
#72
Staging Lane
Thread Starter
Join Date: Nov 2012
Location: Vernal, Utah
Posts: 82
Likes: 0
Received 0 Likes
on
0 Posts
01-19-2016, 08:40 PM
#73
Staging Lane
Thread Starter
Join Date: Nov 2012
Location: Vernal, Utah
Posts: 82
Likes: 0
Received 0 Likes
on
0 Posts
No issues with the stock rails, plenty of people have used them in 600-700whp builds without too many problems that I have heard of. The biggest problem I had was when I got the Siemens Deka injectors, the O-rings leaked and I had to use the old ones off the old injectors. I don't know what power level it has been to on my car, but it has supported 18psi without going lean.
01-19-2016, 09:25 PM
#74
01-19-2016, 09:49 PM
#75
Staging Lane
Thread Starter
Join Date: Nov 2012
Location: Vernal, Utah
Posts: 82
Likes: 0
Received 0 Likes
on
0 Posts
If you did it yourself maybe 2-3 hours. If you pulled something off the dashxl site and just put in the appropriate PID's, maybe 1-2 hours. If you just use the stock configuration that comes with the app when you download it then maybe 20 minutes.
Lots of options with it, but it takes some time if you really want something custom. For instance, I just learned that oil pressure is going to have to take a custom PID and I'm not really sure everything I have to do to make that work. The program works off of PID's (property Idenification?) which are built into the OBDII protocols. The makers of the Dash Command app included some of the most used PID's in the app to make them work. For some reason there were things like oil pressure that they didn't include and I'm not sure why. I think with some work I can make it come into the display using custom PID's, but it is going to take some time. Most of the other important stuff was included with the app but there was definitely a few things lacking.
Lots of options with it, but it takes some time if you really want something custom. For instance, I just learned that oil pressure is going to have to take a custom PID and I'm not really sure everything I have to do to make that work. The program works off of PID's (property Idenification?) which are built into the OBDII protocols. The makers of the Dash Command app included some of the most used PID's in the app to make them work. For some reason there were things like oil pressure that they didn't include and I'm not sure why. I think with some work I can make it come into the display using custom PID's, but it is going to take some time. Most of the other important stuff was included with the app but there was definitely a few things lacking.
01-19-2016, 11:02 PM
#76
I looked through some of the ones on there, 25 pages or so. I like the Maranelo one. I would have to change it back to standard.
I have a logger in HPT & a separate logger that has a lot of functions I can add like boost control, water injection trigger, etc. but this is pretty neat. I know you are using it as a virtual dashboard which is very cool.
Thanks for sharing! I am going to have to play with it.
Oh & how did you get the water neck out of the pump? I know they are pressed in & when I needed to angle mine different I cut it, turned it & welded it back on.
Did you heat the boss around the neck?
I love the stang builds. Brings back memories...
Last edited by gtfoxy; 01-19-2016 at 11:12 PM.
01-20-2016, 06:02 PM
#77
Staging Lane
Thread Starter
Join Date: Nov 2012
Location: Vernal, Utah
Posts: 82
Likes: 0
Received 0 Likes
on
0 Posts
If you aren't concerned with saving the water neck it isn't too bad. I don't know how you would get it out without destroying it. I used a hammer and screwdriver to collapse it in on itself. I went all the way around smashing it in. I then used a pair of vise grips to smash it more and then spin it around and pull it out.
01-21-2016, 08:24 PM
#78
I looked through some of the ones on there, 25 pages or so. I like the Maranelo one. I would have to change it back to standard.
I have a logger in HPT & a separate logger that has a lot of functions I can add like boost control, water injection trigger, etc. but this is pretty neat. I know you are using it as a virtual dashboard which is very cool.
Thanks for sharing! I am going to have to play with it.
Oh & how did you get the water neck out of the pump? I know they are pressed in & when I needed to angle mine different I cut it, turned it & welded it back on.
Did you heat the boss around the neck?
I love the stang builds. Brings back memories...
I have a logger in HPT & a separate logger that has a lot of functions I can add like boost control, water injection trigger, etc. but this is pretty neat. I know you are using it as a virtual dashboard which is very cool.
Thanks for sharing! I am going to have to play with it.
Oh & how did you get the water neck out of the pump? I know they are pressed in & when I needed to angle mine different I cut it, turned it & welded it back on.
Did you heat the boss around the neck?
I love the stang builds. Brings back memories...
01-21-2016, 09:47 PM
#79
That is awesome. Thanks for the tip, dm.
That's about how I envisioned it going.
If you aren't concerned with saving the water neck it isn't too bad. I don't know how you would get it out without destroying it. I used a hammer and screwdriver to collapse it in on itself. I went all the way around smashing it in. I then used a pair of vise grips to smash it more and then spin it around and pull it out.