AMS-1000 Version 3 highlights
 09-25-2008, 07:07 AM
#1
LS1TECH Sponsor
Thread Starter

Join Date: Nov 2007
Posts: 77
Likes: 0
Received 0 Likes
on
0 Posts
There is no charge for this update.
SO finally the new software for the AMS-1000 is far enough where I dont mind sharing. Its not released yet but if all goes good it will shortly. We have beta units out for testing and once we get the word we will release this software.
I have taken alot of pics and will breifly explain the additions etc.
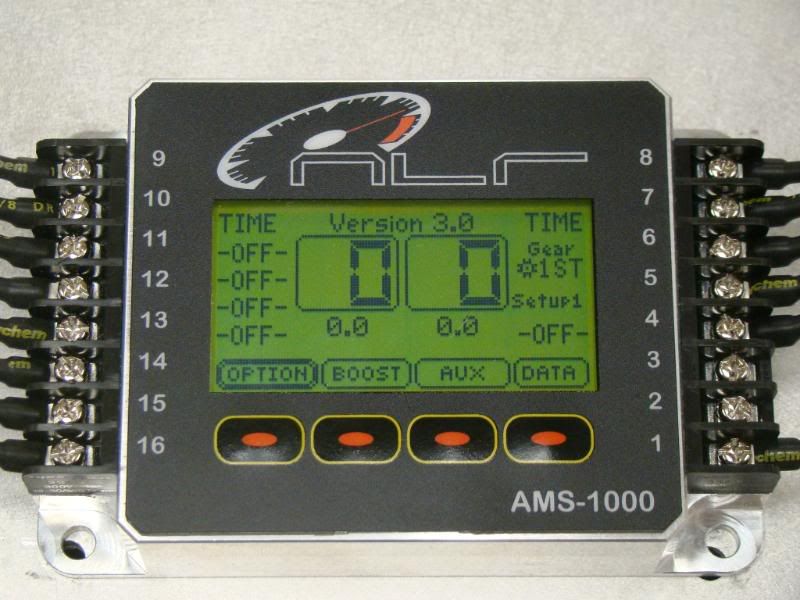
To identify what version you have locate the version on the top of the main screen. This one is version 3.
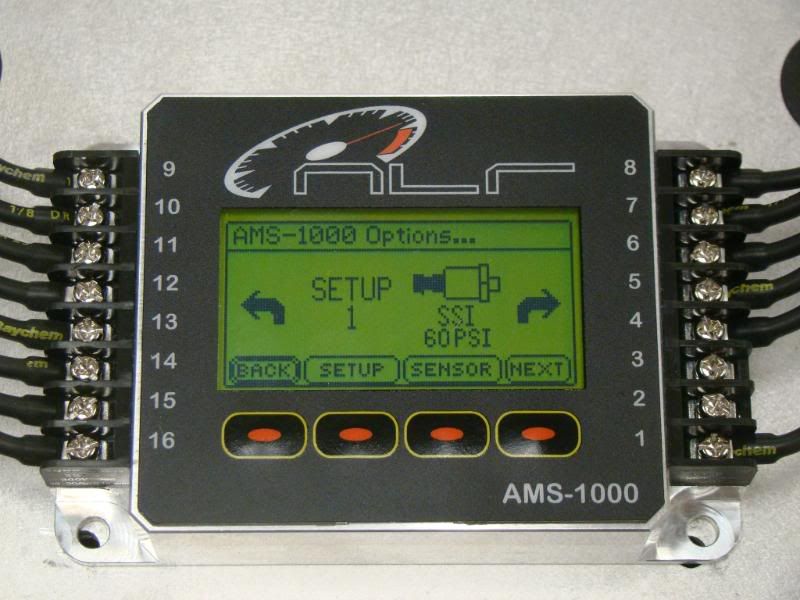
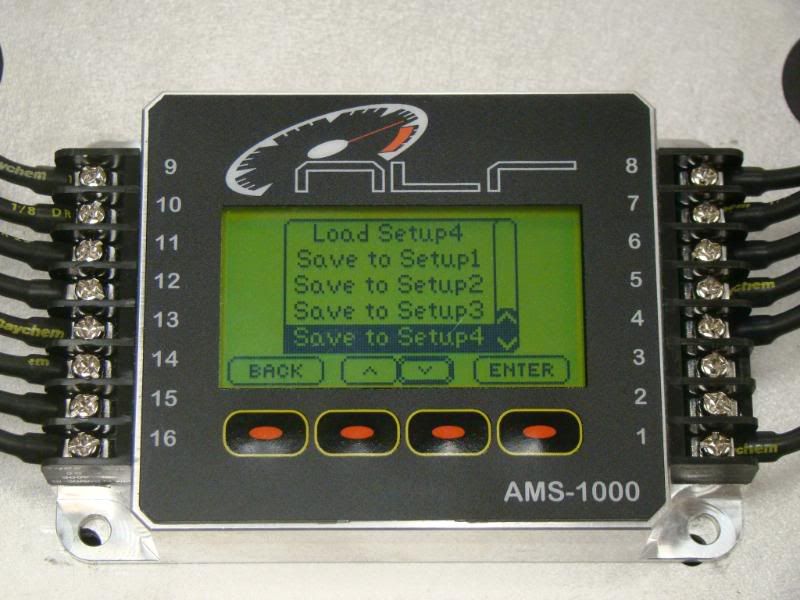
Hitting the options menu as normal will bring you over to this page where the entry/ set up screen config can be accessed.
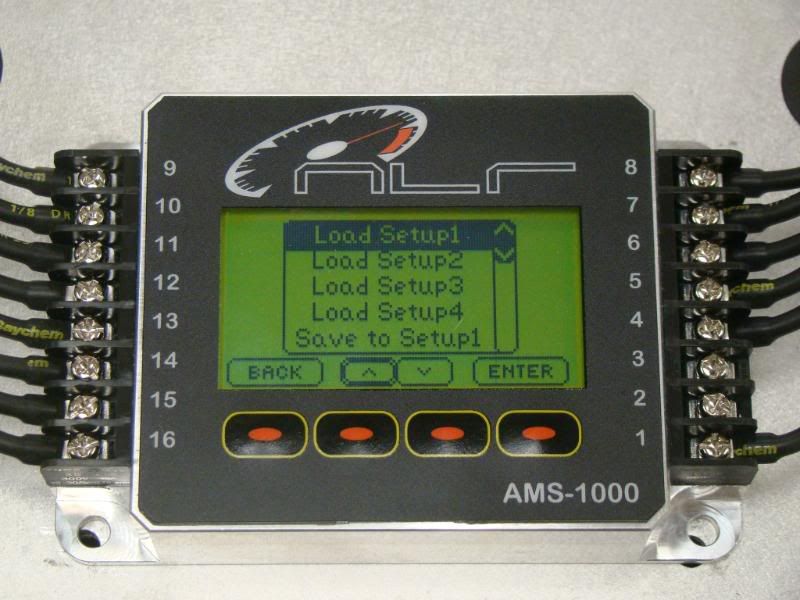
Once in this screen you can see where you can load and save 4 complete set ups.
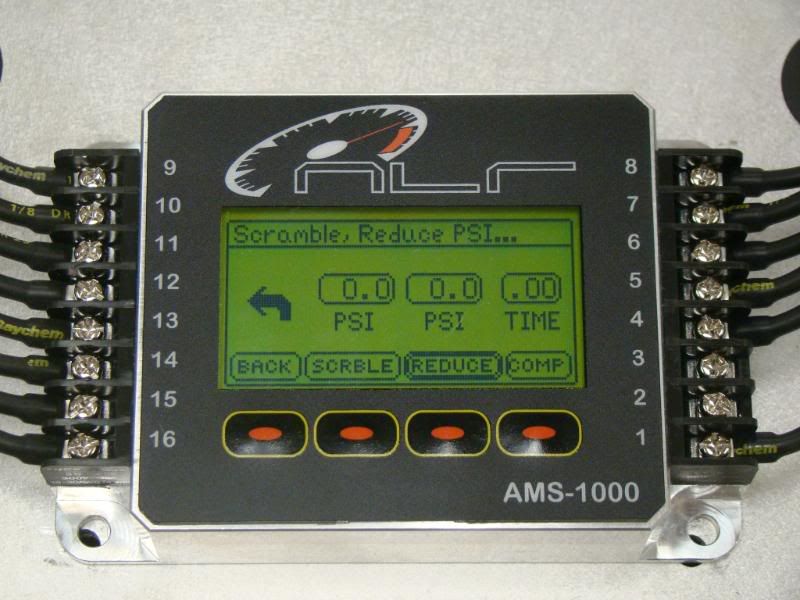
A feature that has been added is gate compensation. This is used when there is a ignition cut done for shifting. When this happens there is pressure wave that usually hits the valve of the gate which in turn compresses the pressure on the side of the gate that the ams-1000 sensor is. When the ams sees this change in pressure it tries to compensate. This comp feature takes whats programmed in scramble and adds it to the target for the amount of time programmed. What this does is preloads the gate with a pulse of pressure negating the effect of the pressure wave. This screen is entered by accessing scramble.
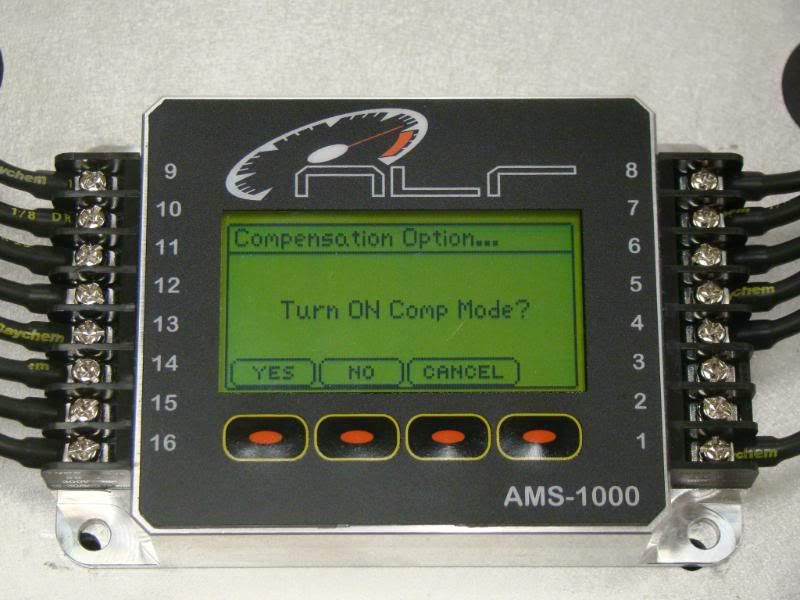
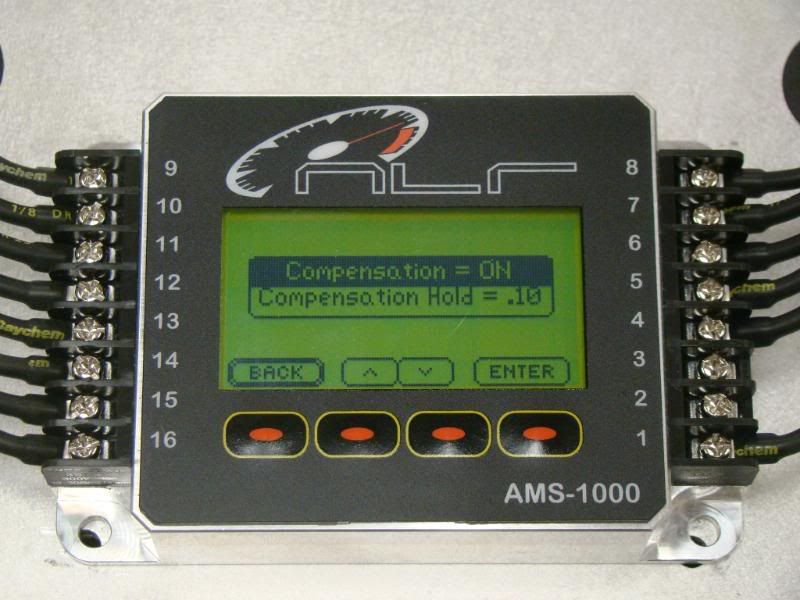
Hit the comp button and this will show up. To turn on enter yes
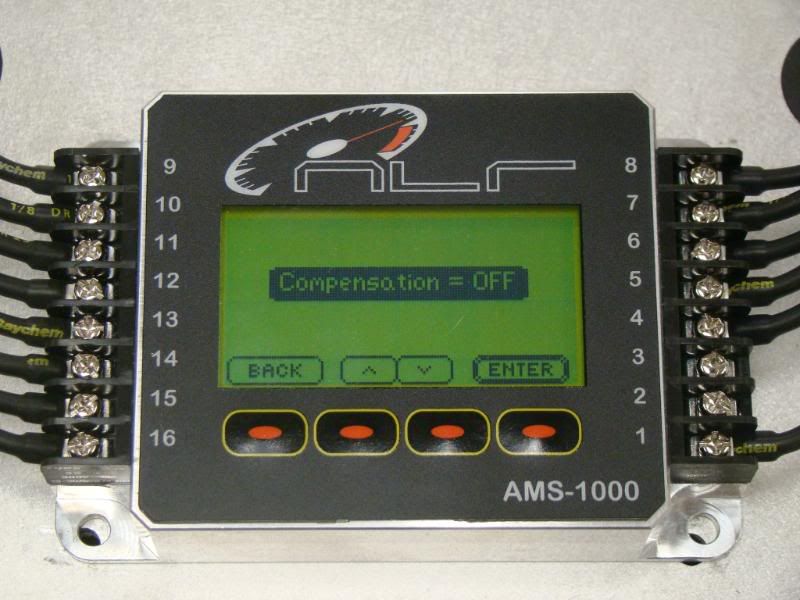
This screen identifies that comp is on
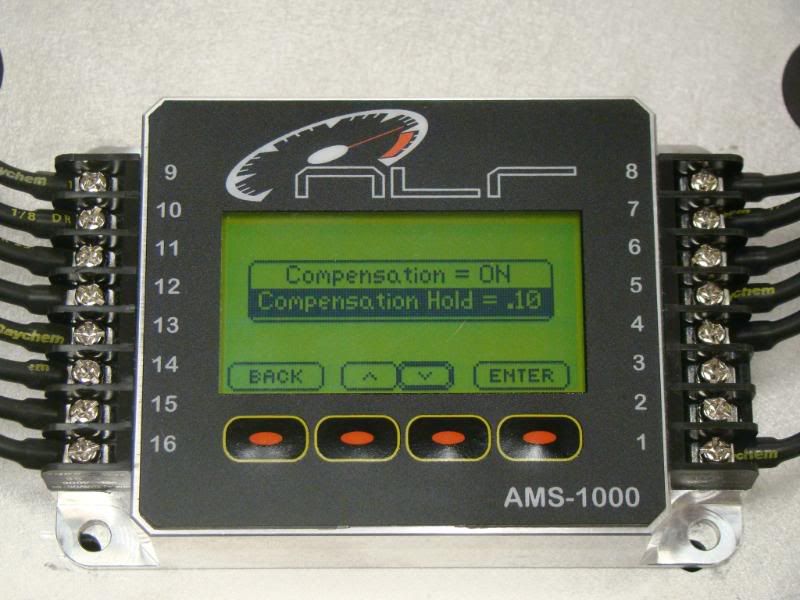
Move the cursor down to highlight the time and hit enter
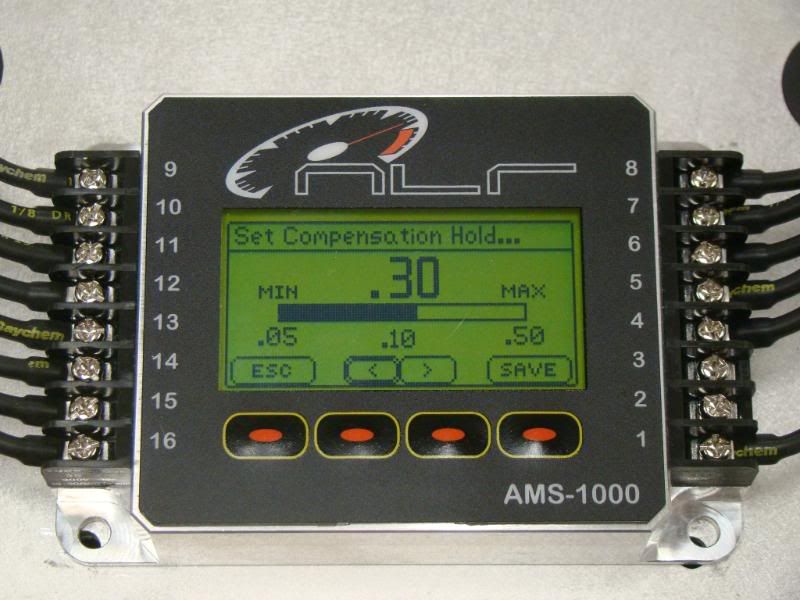
Here I entered .30 as the time it will hold the scramble function on for.
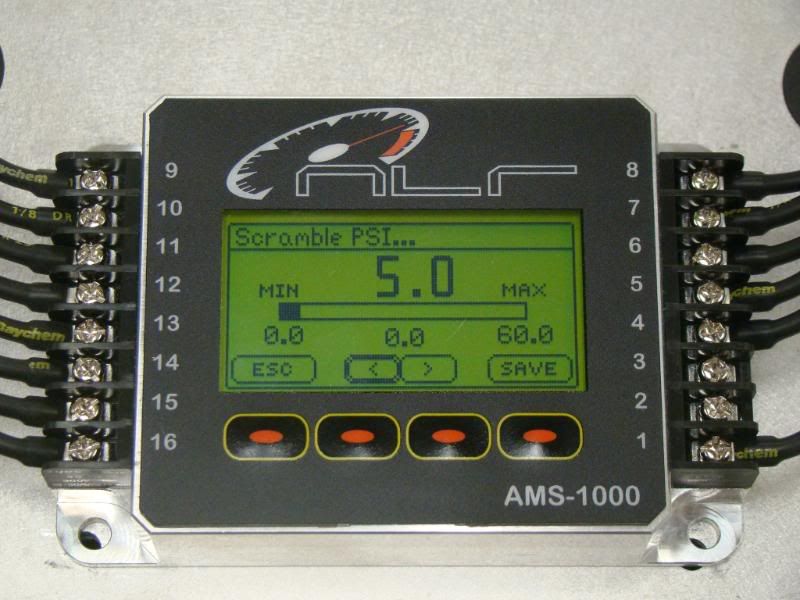
Here I enter 5 psi as the amount of pressure that I want to be targeted when this function is active.
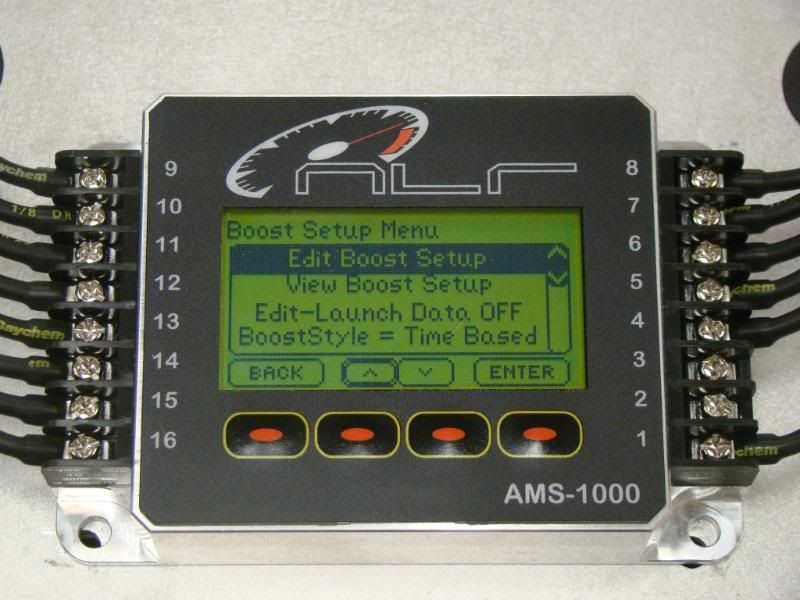
Off the main screen to enter and set up your pressures etc we have converted it to a drop down menu for ease of use.
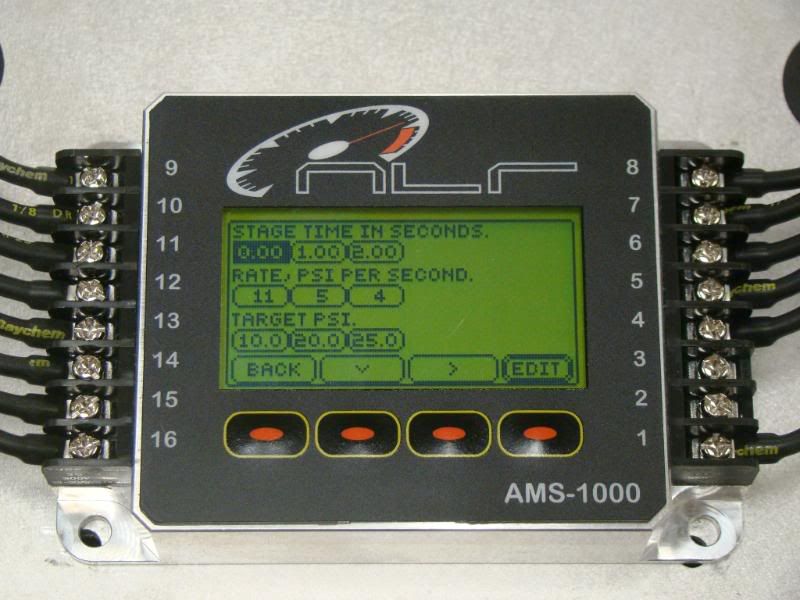
Editing your set up is very easy
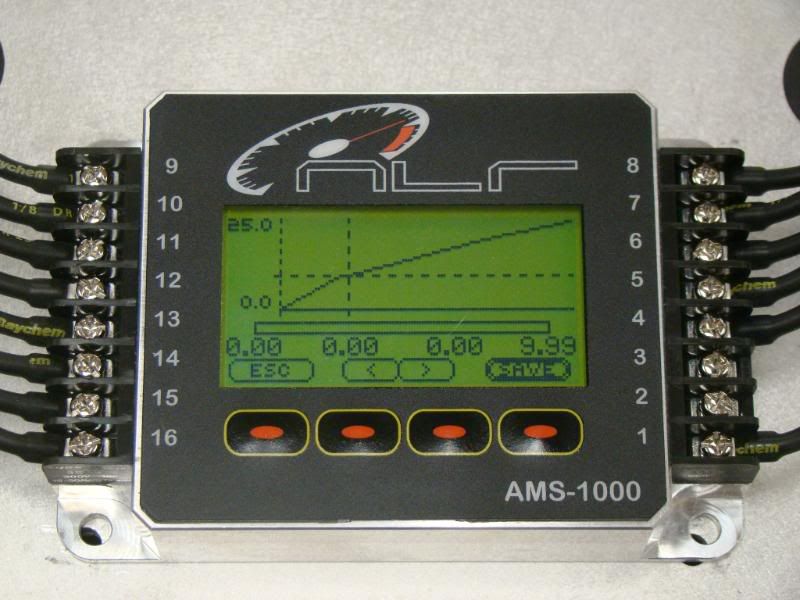
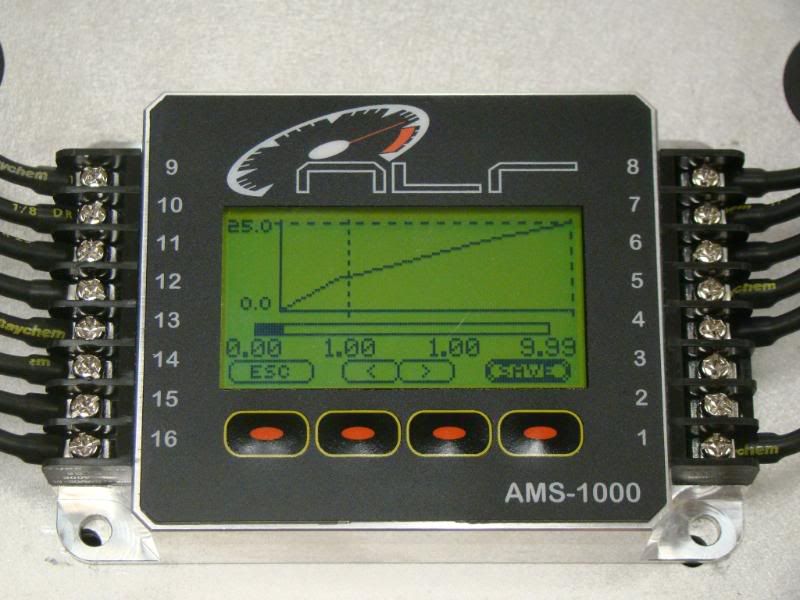
If I edit the first stage timer this screen auto pops up with the graph and timer indication on the bottom. The cross idicates where you are at and what you are modifying.
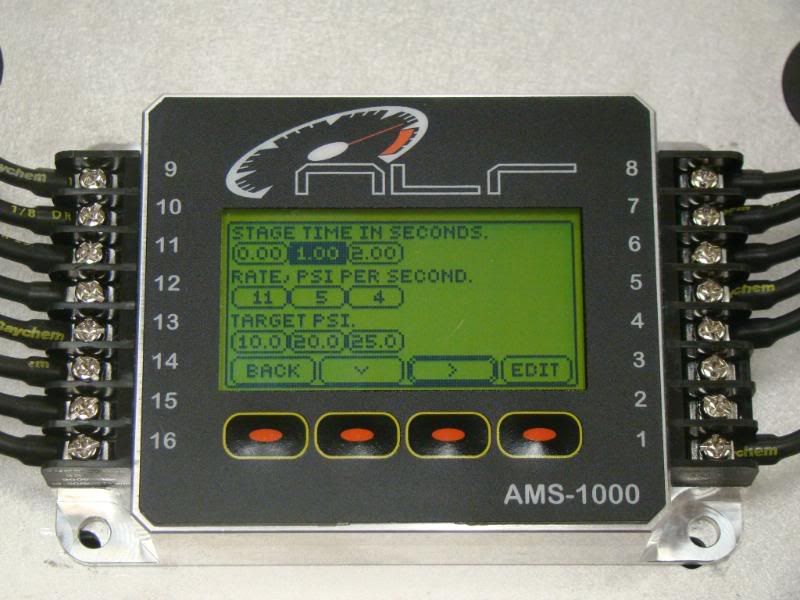
Moving onto the 2nd stage timer you repeat the process.
Ramps get modified the same
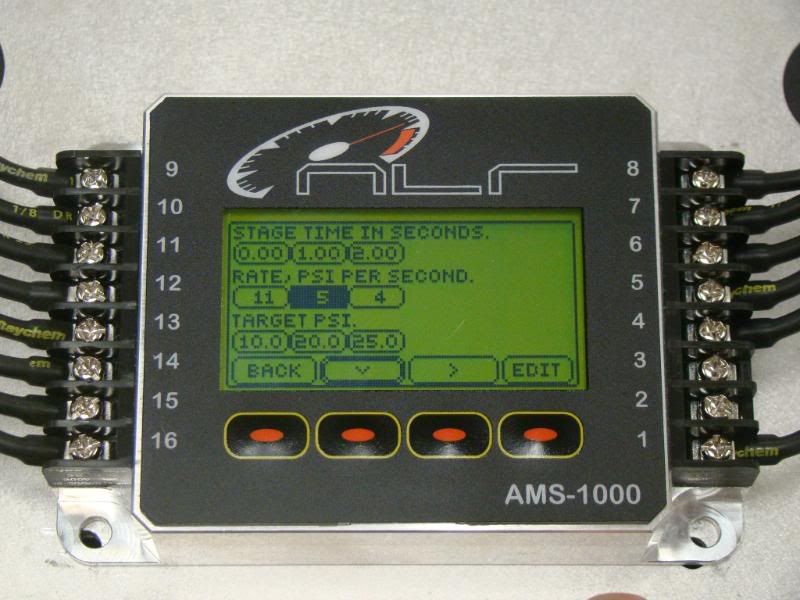
Notice the ramp rate is at 16 and teh portion of the graph between the 2 cross points is where you are modifying.

Changing the speed of the rate to a 6 slows it down which can be seen live, it will be moving when numbers are changed.

SO finally the new software for the AMS-1000 is far enough where I dont mind sharing. Its not released yet but if all goes good it will shortly. We have beta units out for testing and once we get the word we will release this software.
I have taken alot of pics and will breifly explain the additions etc.
To identify what version you have locate the version on the top of the main screen. This one is version 3.
Hitting the options menu as normal will bring you over to this page where the entry/ set up screen config can be accessed.
Once in this screen you can see where you can load and save 4 complete set ups.
A feature that has been added is gate compensation. This is used when there is a ignition cut done for shifting. When this happens there is pressure wave that usually hits the valve of the gate which in turn compresses the pressure on the side of the gate that the ams-1000 sensor is. When the ams sees this change in pressure it tries to compensate. This comp feature takes whats programmed in scramble and adds it to the target for the amount of time programmed. What this does is preloads the gate with a pulse of pressure negating the effect of the pressure wave. This screen is entered by accessing scramble.
Hit the comp button and this will show up. To turn on enter yes
This screen identifies that comp is on
Move the cursor down to highlight the time and hit enter
Here I entered .30 as the time it will hold the scramble function on for.
Here I enter 5 psi as the amount of pressure that I want to be targeted when this function is active.
Off the main screen to enter and set up your pressures etc we have converted it to a drop down menu for ease of use.
Editing your set up is very easy
If I edit the first stage timer this screen auto pops up with the graph and timer indication on the bottom. The cross idicates where you are at and what you are modifying.
Moving onto the 2nd stage timer you repeat the process.
Ramps get modified the same
Notice the ramp rate is at 16 and teh portion of the graph between the 2 cross points is where you are modifying.
Changing the speed of the rate to a 6 slows it down which can be seen live, it will be moving when numbers are changed.
 09-25-2008, 07:08 AM
#2
LS1TECH Sponsor
Thread Starter
Join Date: Nov 2007
Posts: 77
Likes: 0
Received 0 Likes
on
0 Posts
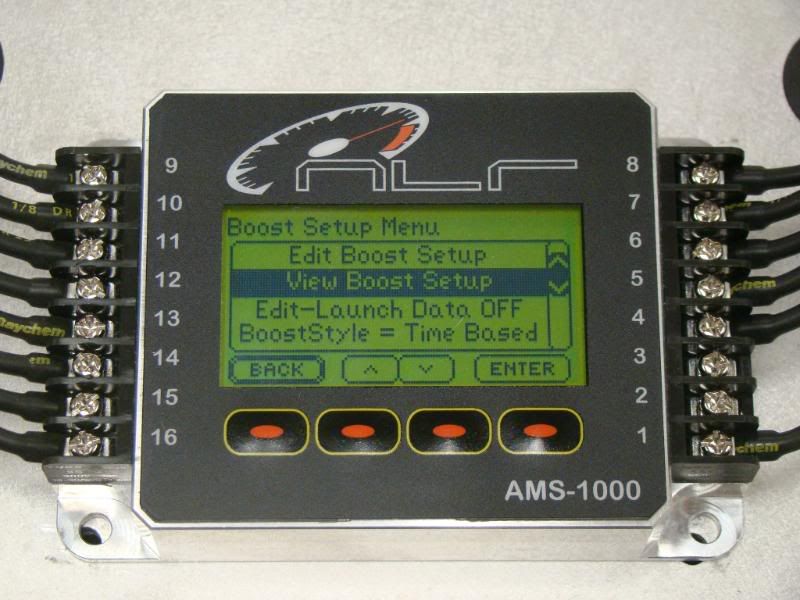
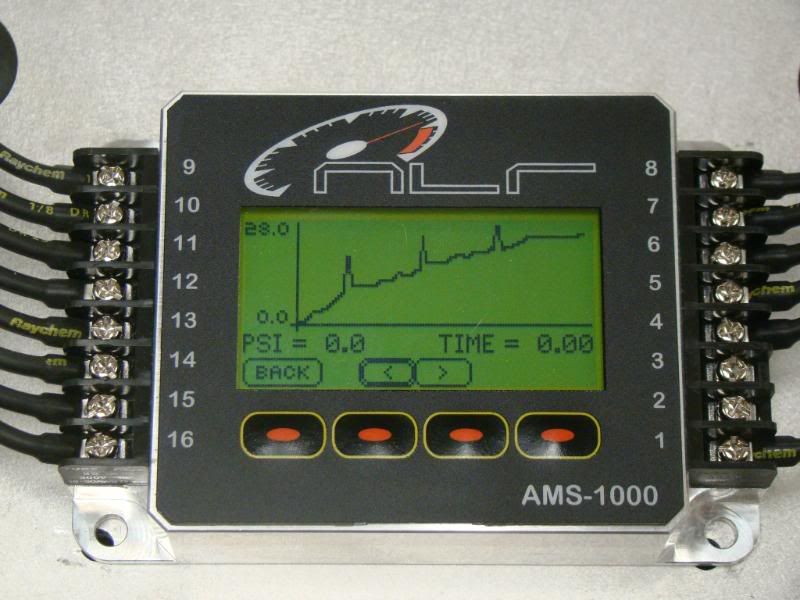
You can now view the boost profile by entering VIEW BOOST SETUP. This page is your normal view graph that will give time and psi readings.
I will now demonstrate the gate comp feature.

I hit the shift input which activates the comp feature 2 times during this test with a .30 second time
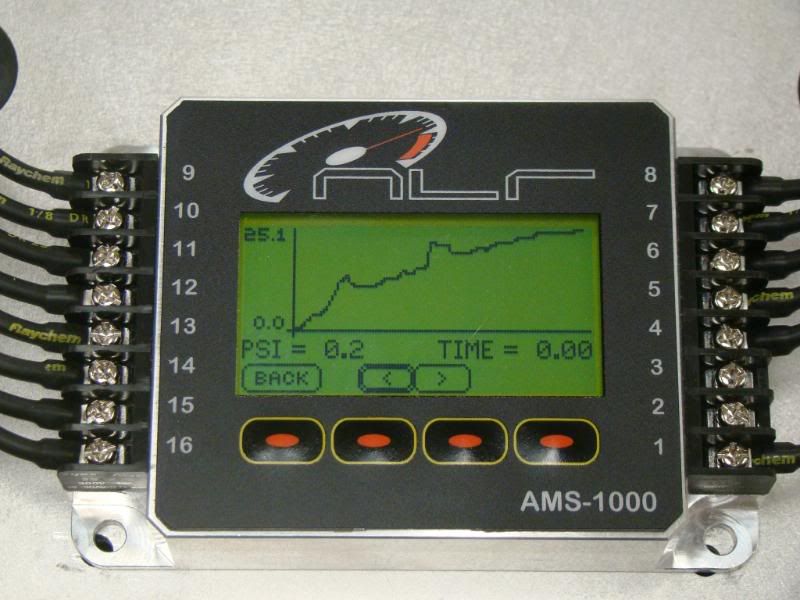
On this next test I fine tuned the comp by reducing the time to .10 and hit it 3 times
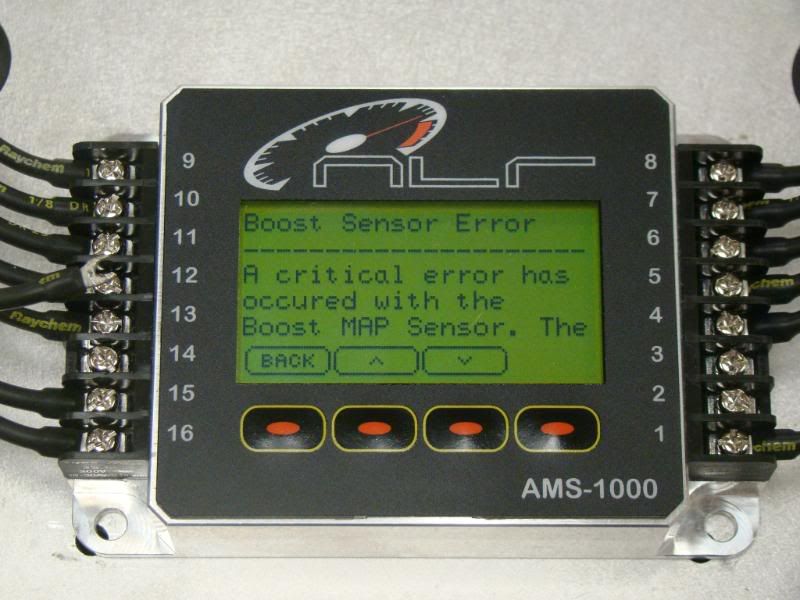
Some new features that have also been added are to help someone diagnose a problem with the sensor and wiring. An example is if the ams looses the sensor at any point in time it will flag this message. This is usually wiring.
One thing that can happen is lets say you have a loose ground to the sensor. The sensor has no reference now and when you power up the controller it samples and takes a reading after opening the decrease solenoid. Since there is no reference it zeros with the voltage present. Now you flip the activation switch on and the controllerand it goes for target pressure programmed, but hey it doesnt see any rise in pressure although there is pressure being applied...it just cant see it due to the ground to the sensor not being connected. What happens is it will keep applying pressure until it sees a rise to target..this never happens and it keep applying. Eventually youve got all your regulated co2 pressure on top of the gate.
In the middle of a run the ams-1000 is set up to instantly drop target pressure if any sensor error occurs!!!
Now to combat this we have the ams-1000 unit programmed to check the voltage on the sensor after startup. With no ground the sensor defaults to a preset voltage which we have no flagged and this screen will pop up. It tells you that a sensor error has occured and to check the ground, wiring, and or sensor. By hitting back you are acknowledging that there is a problem and you will fix it and any damage by not fixing this problem is your fault
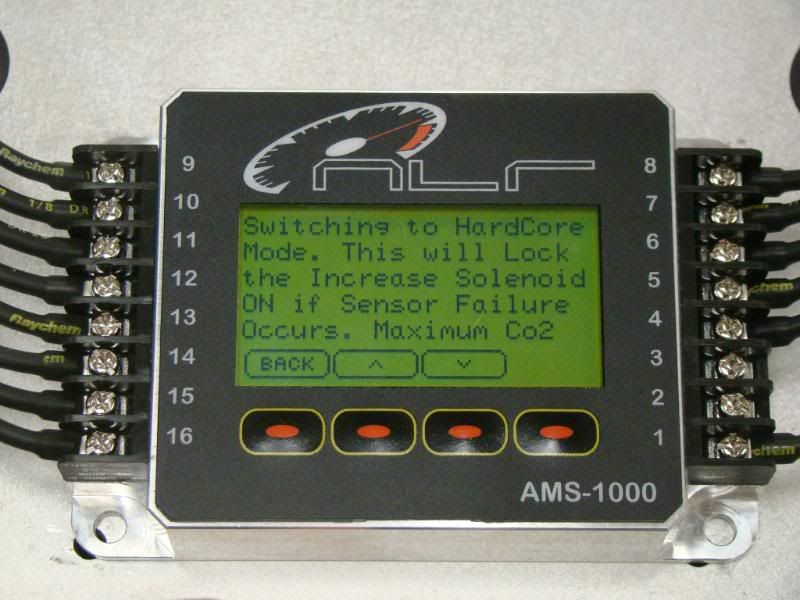
Another feature we have added is called Hardcore Mode. In this mode the programming defaults as follows.
In the event of any sensor error the controller will instantly flag an error like in the previous screen BUT instead of dumping target pressure it instanly hangs the increase solenoid open. This will take your regulated co2 pressure and apply it to the top of the gate. YOU MUST BE AWARE OF THE RESULTS!!!!!!!!!!!!!!!!!!!!!!!!!!! Set your co2 regulated supply to the maximum amount you would want to apply in this mode. This is not to be used as a fix. It is used so in the event of a problem it doesnt take you out of a race. FIX YOUR PROBLEM!!!
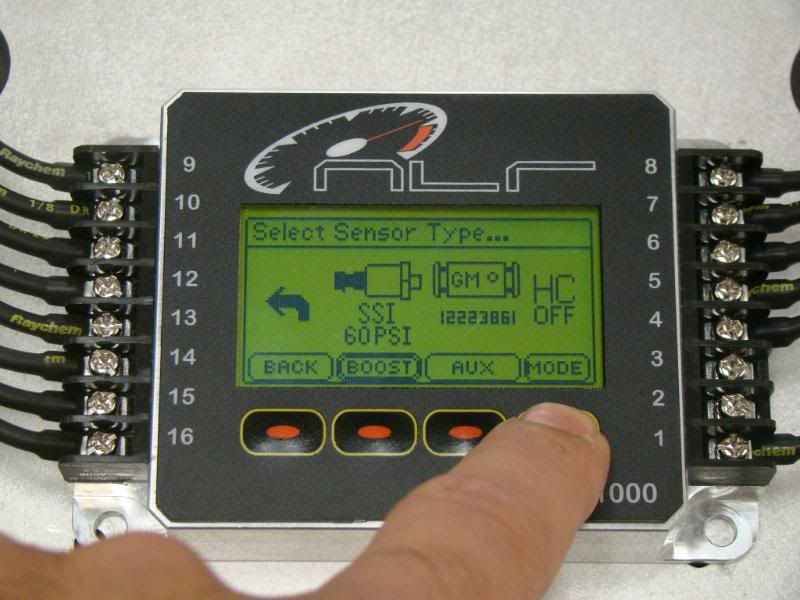
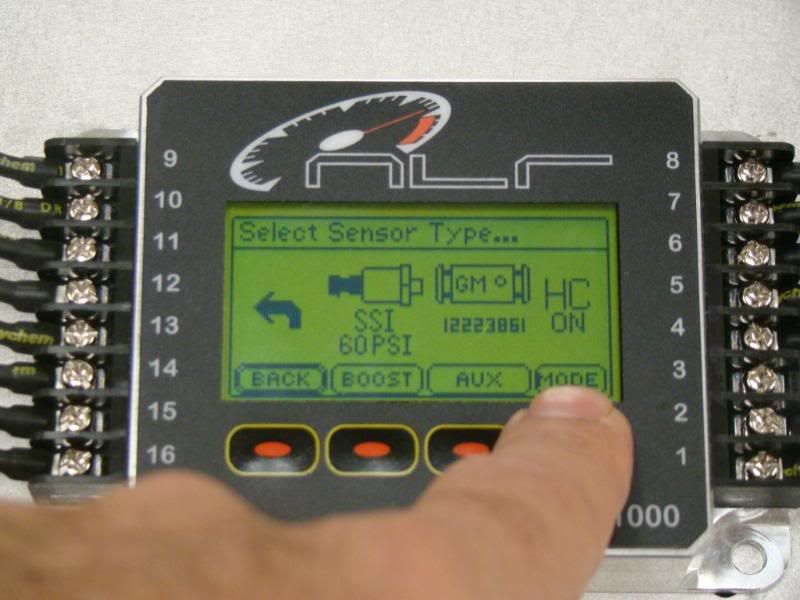
Click on sensor set up off the options screen

It will display what yoru about to do

Indicates the mode is on!
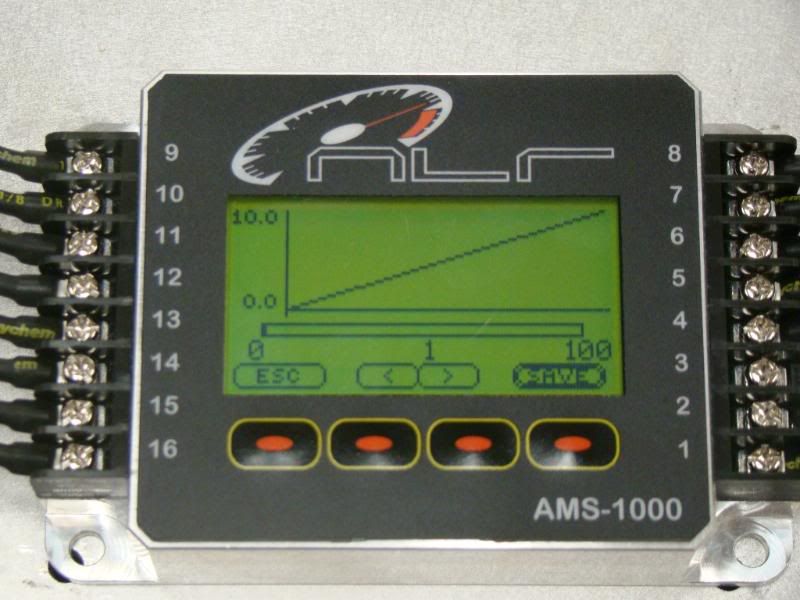
Now for those that needs some clarification on the rates and how they work.
Targeting 10 psi and using a rate of 1 psi per second. The controller will only allow 1 psi of air per second to go to the gate. This means it will get there in 10 seconds!
9.9 seconds close enough!
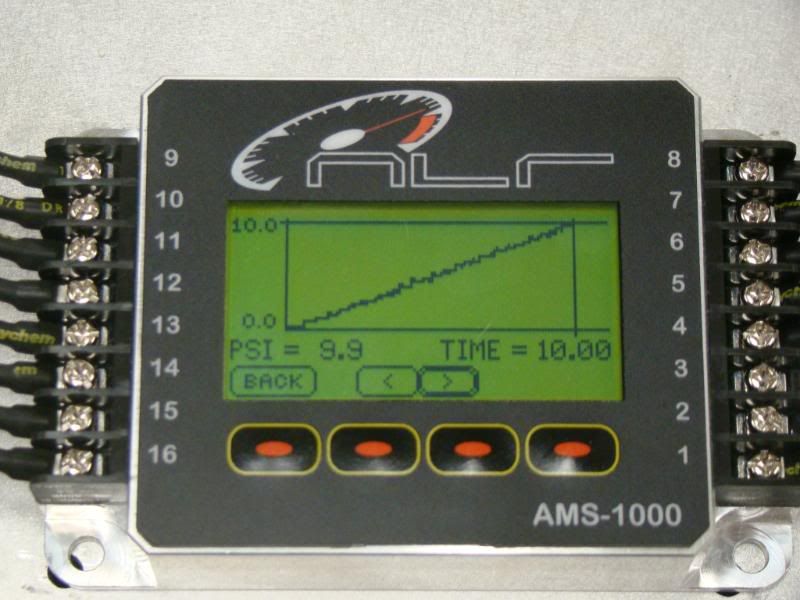
the higher the number of rate the quicker it will get to the target
Hope this sheds some light on what version 3 offers!
thanks seb
I will now demonstrate the gate comp feature.
I hit the shift input which activates the comp feature 2 times during this test with a .30 second time
On this next test I fine tuned the comp by reducing the time to .10 and hit it 3 times
Some new features that have also been added are to help someone diagnose a problem with the sensor and wiring. An example is if the ams looses the sensor at any point in time it will flag this message. This is usually wiring.
One thing that can happen is lets say you have a loose ground to the sensor. The sensor has no reference now and when you power up the controller it samples and takes a reading after opening the decrease solenoid. Since there is no reference it zeros with the voltage present. Now you flip the activation switch on and the controllerand it goes for target pressure programmed, but hey it doesnt see any rise in pressure although there is pressure being applied...it just cant see it due to the ground to the sensor not being connected. What happens is it will keep applying pressure until it sees a rise to target..this never happens and it keep applying. Eventually youve got all your regulated co2 pressure on top of the gate.
In the middle of a run the ams-1000 is set up to instantly drop target pressure if any sensor error occurs!!!
Now to combat this we have the ams-1000 unit programmed to check the voltage on the sensor after startup. With no ground the sensor defaults to a preset voltage which we have no flagged and this screen will pop up. It tells you that a sensor error has occured and to check the ground, wiring, and or sensor. By hitting back you are acknowledging that there is a problem and you will fix it and any damage by not fixing this problem is your fault
Another feature we have added is called Hardcore Mode. In this mode the programming defaults as follows.
In the event of any sensor error the controller will instantly flag an error like in the previous screen BUT instead of dumping target pressure it instanly hangs the increase solenoid open. This will take your regulated co2 pressure and apply it to the top of the gate. YOU MUST BE AWARE OF THE RESULTS!!!!!!!!!!!!!!!!!!!!!!!!!!! Set your co2 regulated supply to the maximum amount you would want to apply in this mode. This is not to be used as a fix. It is used so in the event of a problem it doesnt take you out of a race. FIX YOUR PROBLEM!!!
Click on sensor set up off the options screen
It will display what yoru about to do
Indicates the mode is on!
Now for those that needs some clarification on the rates and how they work.
Targeting 10 psi and using a rate of 1 psi per second. The controller will only allow 1 psi of air per second to go to the gate. This means it will get there in 10 seconds!
9.9 seconds close enough!
the higher the number of rate the quicker it will get to the target
Hope this sheds some light on what version 3 offers!
thanks seb
09-25-2008, 12:02 PM
#3

It looks like great unit with all those capabilities but where do you mount this thing.under the hood? It looks plenty ugly to mount it in car where its visible with all those wires going into it. One thing I like about the eboost2 is it is a guage and looks good in the car.
I might consider one of these would like to see a few pics of them mounted in fourth gens.
I might consider one of these would like to see a few pics of them mounted in fourth gens.
