2010 Camaro cosmetic mod prototyping
 06-28-2009, 11:43 PM
#1
FormerVendor
Thread Starter
iTrader: (32)
Join Date: Jul 2003
Location: Lexington, KY
Posts: 3,654
Likes: 0
Received 0 Likes
on
0 Posts

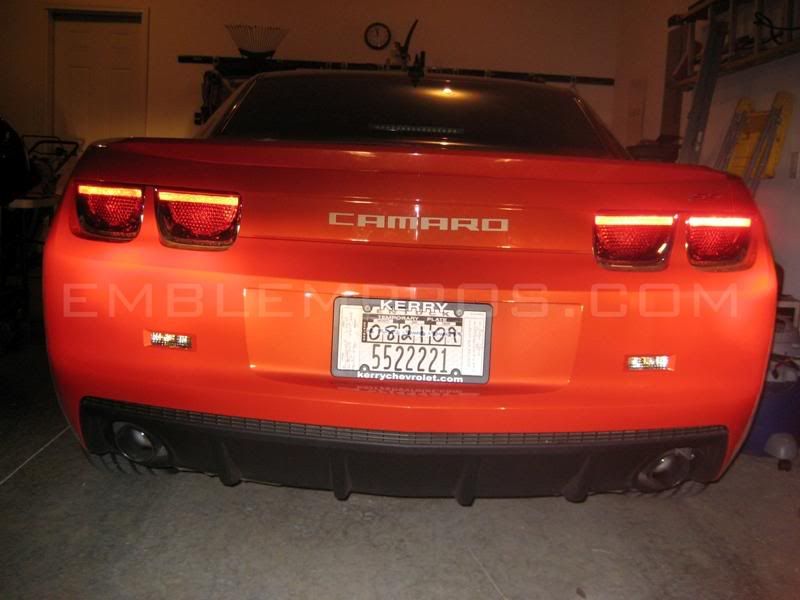
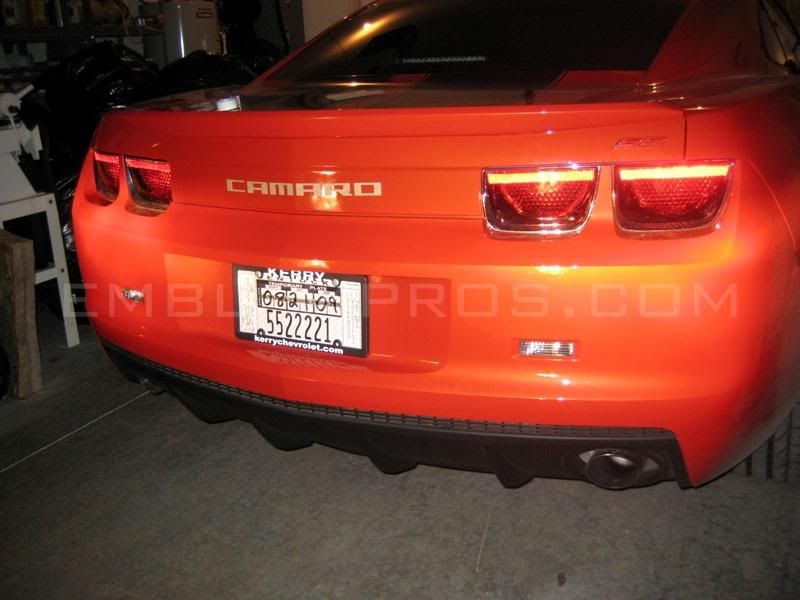
Final product will be mirror stainless steel letters:


I should have mirror stainless installed pics in the next few days...
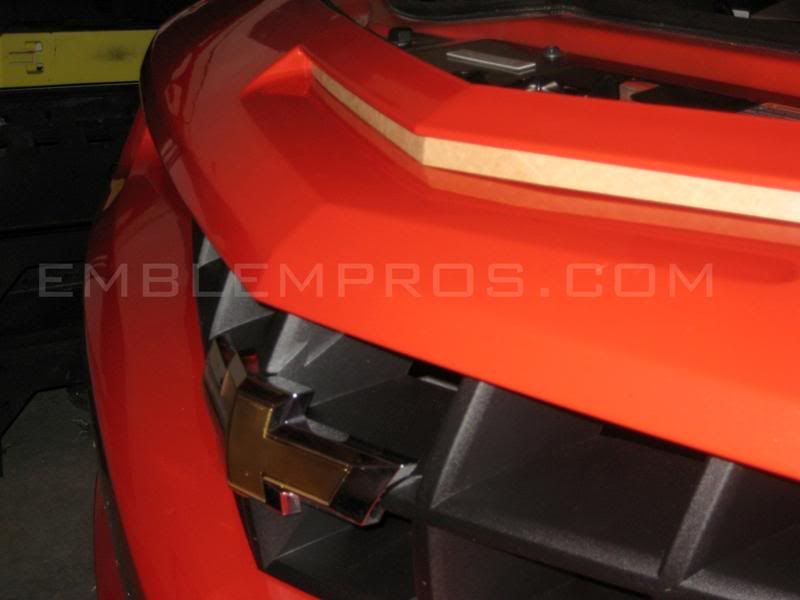
Gm decided to use alignment holes in the trunk lid for the stock bowtie to be installed correctly. One is a perfect hole, and the other is oblonged. These holes present a problem when we made these letters. We had the task of needing to make the letters as close as possible to the 2010 font, and scaling them to an appropriate size to covers these holes. No other size will work. I played with this trunk for hours tonight figuring out the biggest size that would be possible, and this is it.
These letters cover the holes and a little bit more. The problem is that the holes were punched from the factory, and because they were punched, they dimpled the metal around the hole. So, we had to do our best with covering the dimples up as well. The size we have installed in the above pics is the largest we can go, with the best letter spacing, to cover both the holes and their dimples. It did present a challenge to get it right, but we were determined to get it because these letters will look great, and it will really change the rear of the car.
Installation instructions are more complicated than most emblem installs because there are no indentations and a factory emblem has to be removed. I suggest that someone with confidence do this part.
1 - Trunk liner has to be removed, which exposes 2 holes; 1 driver and 1 passenger.
2 - Use a long screwdriver to push up on the alignment posts from inside the trunk via the exposed holes. This should loosen the bowtie.
3 - From the surface, carefully work to pull the loosened bowtie off the trunk.
4 - Use your fingers to remove as much tape as possible, and finish any remaining adhesive with Goof-Off.
5 - Clean the area with soap and water, and then rubbing alcohol.
6 - Using a screwdriver, apply supplied 3M tape to the tip of a screwdriver, and place on the inside of the trunk to cover the exposed holes from the backside. This will seal the trunk from moisture. Do this for each hole.
7 - Position the 2nd "A" first over the passenger side hole using supplied mounting template - Peel and stick.
8 - Position the "M" over the driver side hole using supplied mounting template - Peel and stick.
9 - Work outward from the "M" and "A" that are installed using a supplied letter spacer and apply the last 4 letters.
10 - Step back and witness the awesome new look.
I should have mirror stainless installed pics in the next few days...
Gm decided to use alignment holes in the trunk lid for the stock bowtie to be installed correctly. One is a perfect hole, and the other is oblonged. These holes present a problem when we made these letters. We had the task of needing to make the letters as close as possible to the 2010 font, and scaling them to an appropriate size to covers these holes. No other size will work. I played with this trunk for hours tonight figuring out the biggest size that would be possible, and this is it.
These letters cover the holes and a little bit more. The problem is that the holes were punched from the factory, and because they were punched, they dimpled the metal around the hole. So, we had to do our best with covering the dimples up as well. The size we have installed in the above pics is the largest we can go, with the best letter spacing, to cover both the holes and their dimples. It did present a challenge to get it right, but we were determined to get it because these letters will look great, and it will really change the rear of the car.
Installation instructions are more complicated than most emblem installs because there are no indentations and a factory emblem has to be removed. I suggest that someone with confidence do this part.
1 - Trunk liner has to be removed, which exposes 2 holes; 1 driver and 1 passenger.
2 - Use a long screwdriver to push up on the alignment posts from inside the trunk via the exposed holes. This should loosen the bowtie.
3 - From the surface, carefully work to pull the loosened bowtie off the trunk.
4 - Use your fingers to remove as much tape as possible, and finish any remaining adhesive with Goof-Off.
5 - Clean the area with soap and water, and then rubbing alcohol.
6 - Using a screwdriver, apply supplied 3M tape to the tip of a screwdriver, and place on the inside of the trunk to cover the exposed holes from the backside. This will seal the trunk from moisture. Do this for each hole.
7 - Position the 2nd "A" first over the passenger side hole using supplied mounting template - Peel and stick.
8 - Position the "M" over the driver side hole using supplied mounting template - Peel and stick.
9 - Work outward from the "M" and "A" that are installed using a supplied letter spacer and apply the last 4 letters.
10 - Step back and witness the awesome new look.
 06-28-2009, 11:43 PM
#2
FormerVendor
Thread Starter
iTrader: (32)
Join Date: Jul 2003
Location: Lexington, KY
Posts: 3,654
Likes: 0
Received 0 Likes
on
0 Posts
There are many items on the way. We designed about 10 new things today, and we still have more to do. I think the finished product will look amazing - 18GA mirror stainless steel.