
 04-28-2016, 06:57 PM
Last edit by: IB Advertising
See related guides and technical advice from our community experts:
Browse all: Chevrolet Camaro or Pontiac Firebird Interior Guides
- Camaro 2010-Present: How to Change Cabin Air Filter
Step by step instructions for do-it-yourself repairs.
- Camaro and Firebird How to Change Cabin Air Filter<br>Step by step instructions for do-it-yourself repairs.
Browse all: Chevrolet Camaro or Pontiac Firebird Interior Guides

Cabin Air Filter install 4th gen (if anyone cares lol)
05-31-2011, 08:25 PM
#1
Ever gone into the grocery store or get back to the car after work only to come out and see the lawn maintenece crew blew all the grass clippings and dirt all over your car. You know you cant use the air conditioning until you spray out under the cowl or you get dirt blown in your face. I got sick of that and did some searching on here to even see if we have cabin air filters in the 4th gen F-bodies. And no 2002 models do not have one just in case you thought they were special or I wouldn't be here. Well I went up the the parts store and picked up a STP CAF1851P cabin air filter and I was kinda bored so I wrote this up.
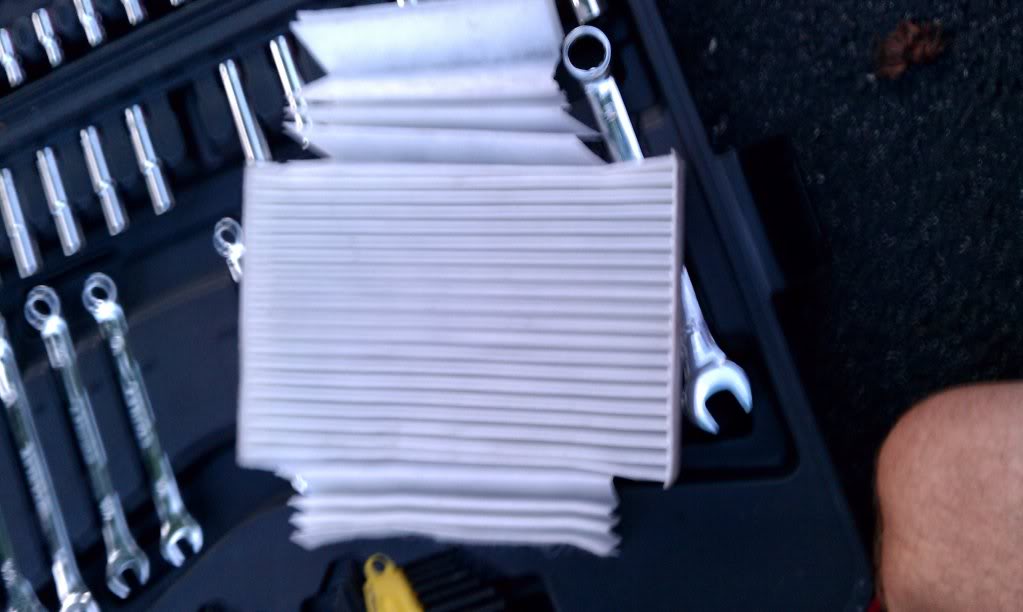
Parts: 7 mm socket with short extension or a deepwell, small pair of pliers and scissors, oh and the filter of course. You kind of have to guess which size but I took the blower into the store and did some matching.
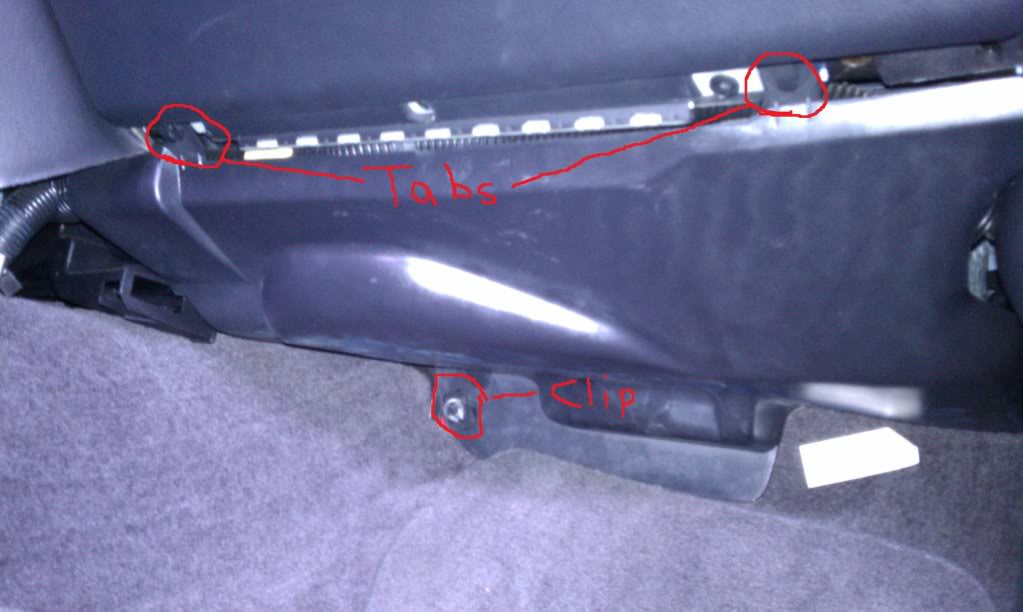
Step One: Remove the tabs with the pliers on the kick panel on the passenger side under the glove compartment. Then locate the clip holding the back of the kick panel to the firewall. Pull the panel away from the firewall and the clip will just shoot off, just be careful because it may shoot off and hit you in the face.
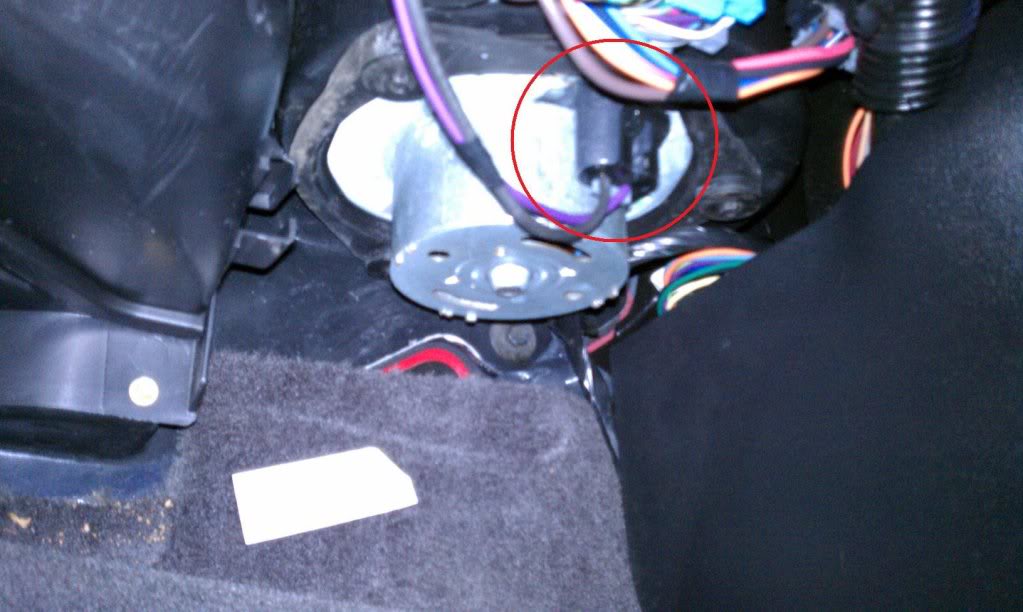
Step Two: Locate the blower motor electrical connector and pull up on the tab and separate from the motor and hang it out of the way.
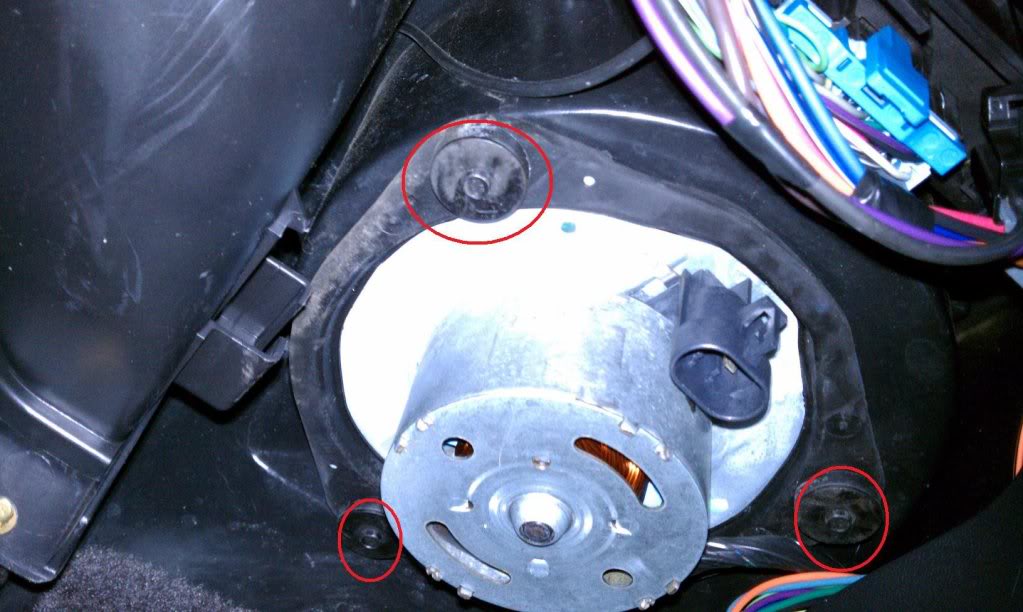
Step Three: Remove the three 7mm bolts holding the motor in the air box. Get the two in the back first, just makes it easier.
Step Four: Pull the motor out of the air box, while being careful not to catch the back of it on the mess of wiring behind it.
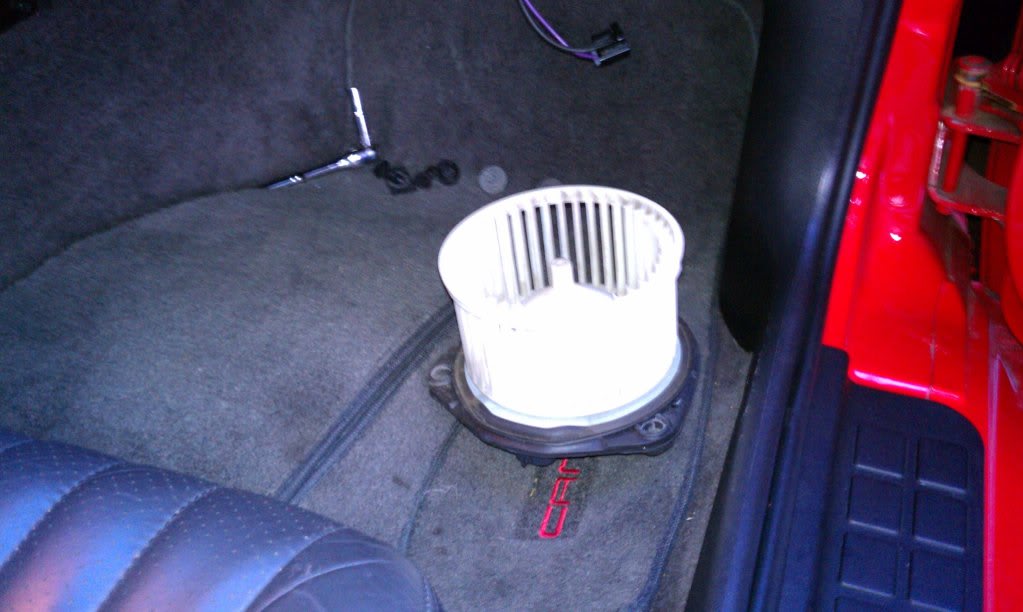
You should be able to see daylight up into the ducts from under the cowl.
also this would be a great time to clean the blower with a toothbrush and possibly a tiny amount of cleaning solution of your choice if you can handle not getting water into the electronics lol
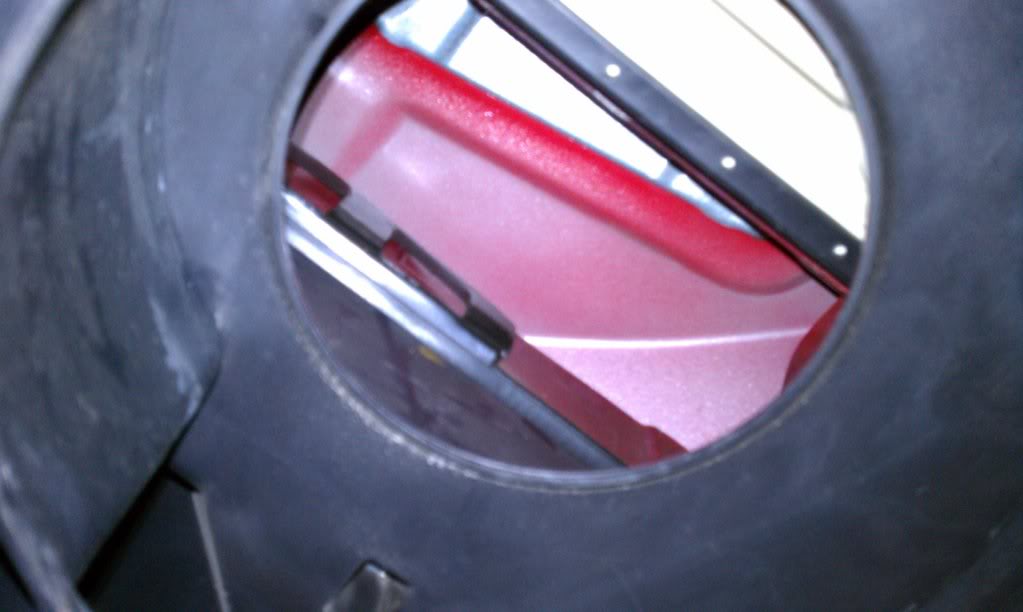
Step Five: Your going to want to take your filter and scrunch the sides to fit it up and into the second hole. Your going to have to do some guess work and feeling around to get familiar with the duct structure.
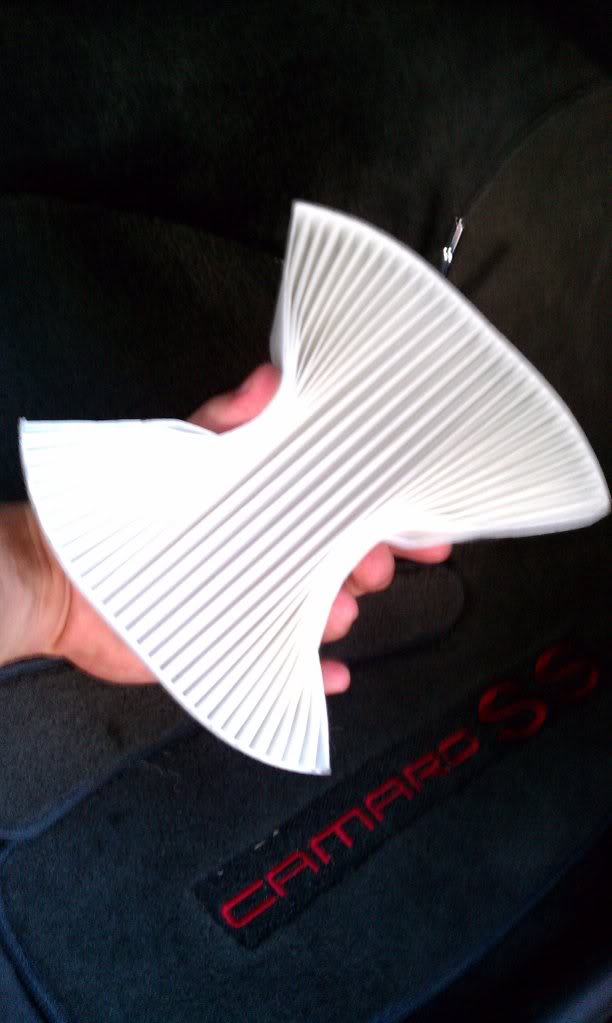
Step Six: Then you are going to want to remove the filter and trim it to fit. I ended up cutting the corners off to give it room to fit perfectly under the cowl.
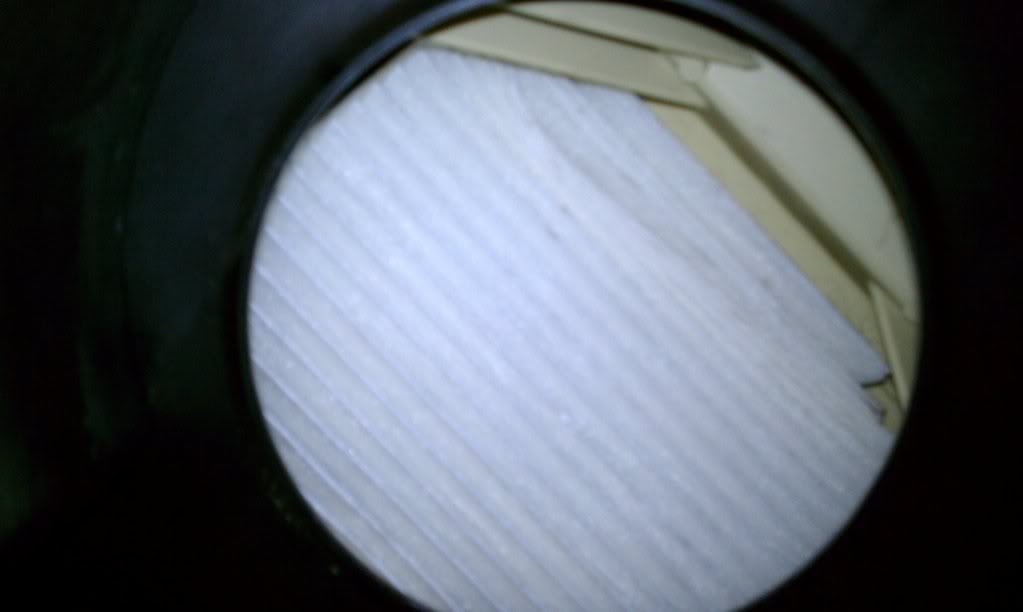
Step 7: It may not fit in there perfectly but just work with it and use some creativity. You want it to fit against the firewall side and on the other side beneath the black support (which can bee seen in the pic in step 4) and above the two white corners (seen here)
Finishing up: Just double check the fitment and make sure no part of the filter is going to fall into the blower, also I thought about using something to hold it in place like a small clip or something but I decided not to have a chance of a piece of metal being flung out of the vents on full blast lol. Then just work backwards from step 4. Replace motor in duct while watching for the wiring, insert and tighten all three motor bolts, insert wiring connector into the motor, then replace the kick panel using the 2 push tabs and clip.
Once again this was the result of boredom and I hope I helped some people with this problem and if I did enjoy the feeling of fresh dust free air, I dont know how long they should last but I will let you know once I start sneezing in the car again.
BTW if you wanna have some fun, check out how much torque this motor has, Dont recommend doing it but watch you fingers if you do lol, check out the video of my blower, all you gotta do if plug in the motor with the ignition off and hold on to the base with a firm grip (if you dont it will fly out of your hand) turn ignition on and then just turn on the ac and mess with the speeds.
http://youtu.be/PRYEE26Pfb0
Parts: 7 mm socket with short extension or a deepwell, small pair of pliers and scissors, oh and the filter of course. You kind of have to guess which size but I took the blower into the store and did some matching.
Step One: Remove the tabs with the pliers on the kick panel on the passenger side under the glove compartment. Then locate the clip holding the back of the kick panel to the firewall. Pull the panel away from the firewall and the clip will just shoot off, just be careful because it may shoot off and hit you in the face.
Step Two: Locate the blower motor electrical connector and pull up on the tab and separate from the motor and hang it out of the way.
Step Three: Remove the three 7mm bolts holding the motor in the air box. Get the two in the back first, just makes it easier.
Step Four: Pull the motor out of the air box, while being careful not to catch the back of it on the mess of wiring behind it.
You should be able to see daylight up into the ducts from under the cowl.
also this would be a great time to clean the blower with a toothbrush and possibly a tiny amount of cleaning solution of your choice if you can handle not getting water into the electronics lol
Step Five: Your going to want to take your filter and scrunch the sides to fit it up and into the second hole. Your going to have to do some guess work and feeling around to get familiar with the duct structure.
Step Six: Then you are going to want to remove the filter and trim it to fit. I ended up cutting the corners off to give it room to fit perfectly under the cowl.
Step 7: It may not fit in there perfectly but just work with it and use some creativity. You want it to fit against the firewall side and on the other side beneath the black support (which can bee seen in the pic in step 4) and above the two white corners (seen here)
Finishing up: Just double check the fitment and make sure no part of the filter is going to fall into the blower, also I thought about using something to hold it in place like a small clip or something but I decided not to have a chance of a piece of metal being flung out of the vents on full blast lol. Then just work backwards from step 4. Replace motor in duct while watching for the wiring, insert and tighten all three motor bolts, insert wiring connector into the motor, then replace the kick panel using the 2 push tabs and clip.
Once again this was the result of boredom and I hope I helped some people with this problem and if I did enjoy the feeling of fresh dust free air, I dont know how long they should last but I will let you know once I start sneezing in the car again.
BTW if you wanna have some fun, check out how much torque this motor has, Dont recommend doing it but watch you fingers if you do lol, check out the video of my blower, all you gotta do if plug in the motor with the ignition off and hold on to the base with a firm grip (if you dont it will fly out of your hand) turn ignition on and then just turn on the ac and mess with the speeds.
http://youtu.be/PRYEE26Pfb0
Last edited by jaxcam02; 11-16-2012 at 05:40 PM. Reason: relink pics
 05-31-2011, 09:29 PM
#3
yea but if it only needs to be changed every year, i think its worth not getting blasted in the eye with random dirt lol, also i thought about cutting a slit in the ducting behind the glove compartment which would make changing easy as long as everything fit right
05-31-2011, 10:04 PM
#4
TECH Fanatic
iTrader: (9)
Join Date: Dec 2004
Location: Schaumburg, IL
Posts: 1,693
Likes: 0
Received 0 Likes
on
0 Posts

Neat idea I won't be doing this to mine but I know about getting crap shooting out of the vents.. I have had to take mine apart to get crap out from the blower. lol.
06-01-2011, 11:49 AM
#5

looking at the 5th pic down, you can see up through the duct into the engine bay, why couldn't an air filter be mounted outside of the duct in the engine bay, prior to where air is drawn in? I imagine you'd have to fab up a filter holder, but that would make accessing the filter easy, and you could also possibly get a small cheaper engine air filter versus a cabin air filter. It's ridiculous they price cabin air filters at $20 plus when you can get an engine air filter for around $7.

 06-01-2011, 02:23 PM
#7
The ducting doesnt go up to the engine bay, It connects to the black plastic located beneath the windshield with the two sides of vents under the cowl of the hood but outside of the weatherstripping separating the bay from outside. I didnt really do much feeling up under the cowl but im pretty sure there is to much volume in the cowl collector for the induction plus the fact that any water that gets in the intake compartment is going to get to the filter with it in there possibly growing mold and other bacteria which thrive on water soaked materials. where I put it is pretty much the only place viable for the filter to keep it dry and do as much filtering as possible. The cabin filter I used was only ten bucks and cost me no extra for install except for a Full Throttle to drink while I did the install
As for the sound decrease I havent noticed any difference but perhaps on the highway with the engine at a constant rpm it could make a slight difference
As for the sound decrease I havent noticed any difference but perhaps on the highway with the engine at a constant rpm it could make a slight difference
Trending Topics
 06-02-2011, 08:03 AM
#11
Thanks for the compliments guys,
LS14ME --- I tried moving but no matter where I park at home they get me. And short of calling out of work they manage to get me on the hottest and sunniest days. Lol can't roll down the Windows or it gets all over the interior but its better than sweating in the car because I refuse to allow all that **** enter my ac ducts lol. So I'm screwed either way, until NOW that is Hahaha
LS14ME --- I tried moving but no matter where I park at home they get me. And short of calling out of work they manage to get me on the hottest and sunniest days. Lol can't roll down the Windows or it gets all over the interior but its better than sweating in the car because I refuse to allow all that **** enter my ac ducts lol. So I'm screwed either way, until NOW that is Hahaha
 07-11-2011, 10:30 PM
#15
Not to thread jack but I wanted to ask you guys since youve all recently had your blowers out. Does your blower sit flush when bolting it down? If I bolt mine all the way down ait will grind to a halt. It always has a 1/4 inch gap. Ive also noticed the wires are spliced going to the blower. I think some moron had ahold of my car at one point. 
Very nice write up! Ive always wanted to put in a filter! Very detailed.
Very nice write up! Ive always wanted to put in a filter! Very detailed.
 07-13-2011, 08:21 PM
#18
Hey guys, this the first time I been on in a while. So far the filter does prevent most of the dirt so far besides the tiniest and smallest amount of dust once a week or so, also so far the air pressure hasnt changed and still blows both strong and cold. I give it a A- on functionallity so far. As far as the actual blower goes, it does sit flush against the compartment it bolts to. Another thing I noticed is, I always have that clean leather smell in the car and it hasnt faded away with the outside odors since I cleaned it with that leather **** about two months ago.
07-13-2011, 08:38 PM
#20
Im sure you can but You may run into an issue with loosing pressure if the rubber seal doesnt touch, You may be able to use some silicon to get the fitment you'd like, just need to play around with some different materials, also maybe some foam tape would help.