
How to port a TB
 01-14-2007, 04:09 PM
#1
On The Tree
Thread Starter
Join Date: Nov 2006
Location: Philadelphia
Posts: 154
Likes: 0
Received 0 Likes
on
0 Posts
I want to port my own TB can anyone tell me the right and easy way to do it this would be my first time trying anything like this and I would like to try it out. What's the right tools to use for a job like this?
 01-14-2007, 05:07 PM
#2
On The Tree
iTrader: (1)

Join Date: Jun 2005
Location: Rochester NY
Posts: 186
Likes: 0
Received 0 Likes
on
0 Posts

try a search, there are many people that have done it. I just finished mine yesterday. I just searched and looked at what everyone else did.
heres one link. http://www.geocities.com/wilwaxu/throttlebody.html
heres one link. http://www.geocities.com/wilwaxu/throttlebody.html
01-14-2007, 05:42 PM
#3
You need an electric drill, a sanding drum for the drill and various grits of sandpaper (if you want to polish it). I ordered my sanding drum and extra rolls from a company online (not a sponsor) and their coarse grit rolls are strong enough to last about 1 roll per throttle body. I use the coarse roll to port it and then step up to medium and then fine sanding rolls to smooth it out. After that its relativeley smooth however I work them by hand with sanding paper followed by polishing wheels to get the inside to shine like a mirror.
01-14-2007, 06:12 PM
#4
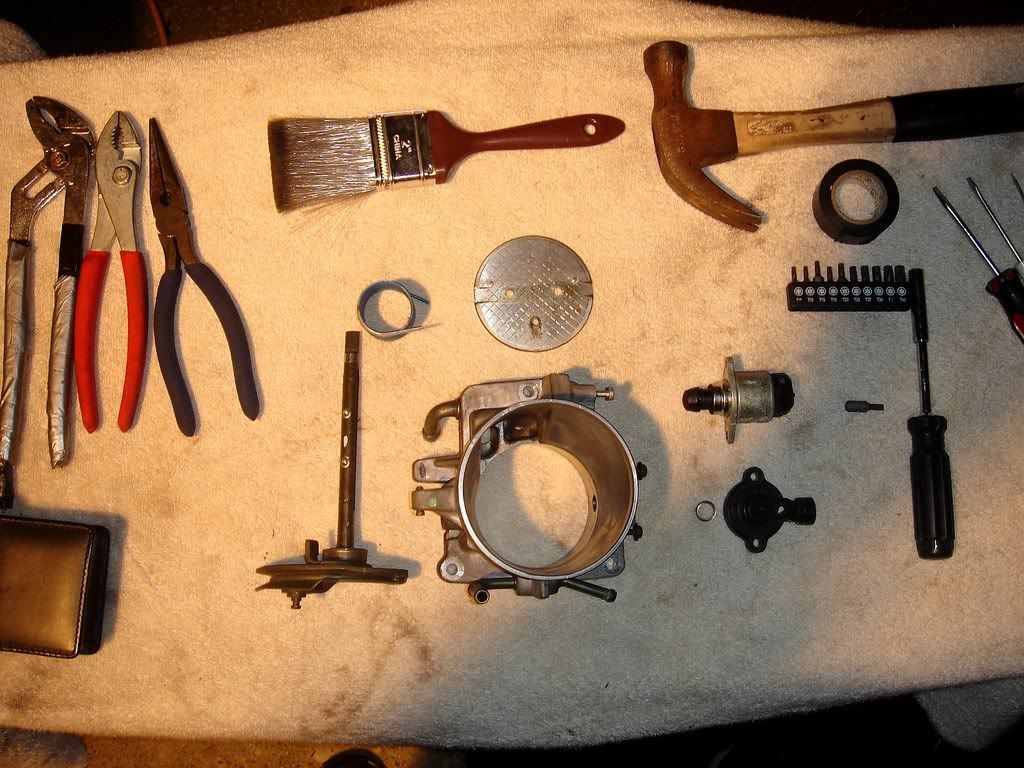
Here's a couple pics and description from when I did mine. Used a dremel with a cutting bit as well as a sanding drum bit with 80/120 grit.


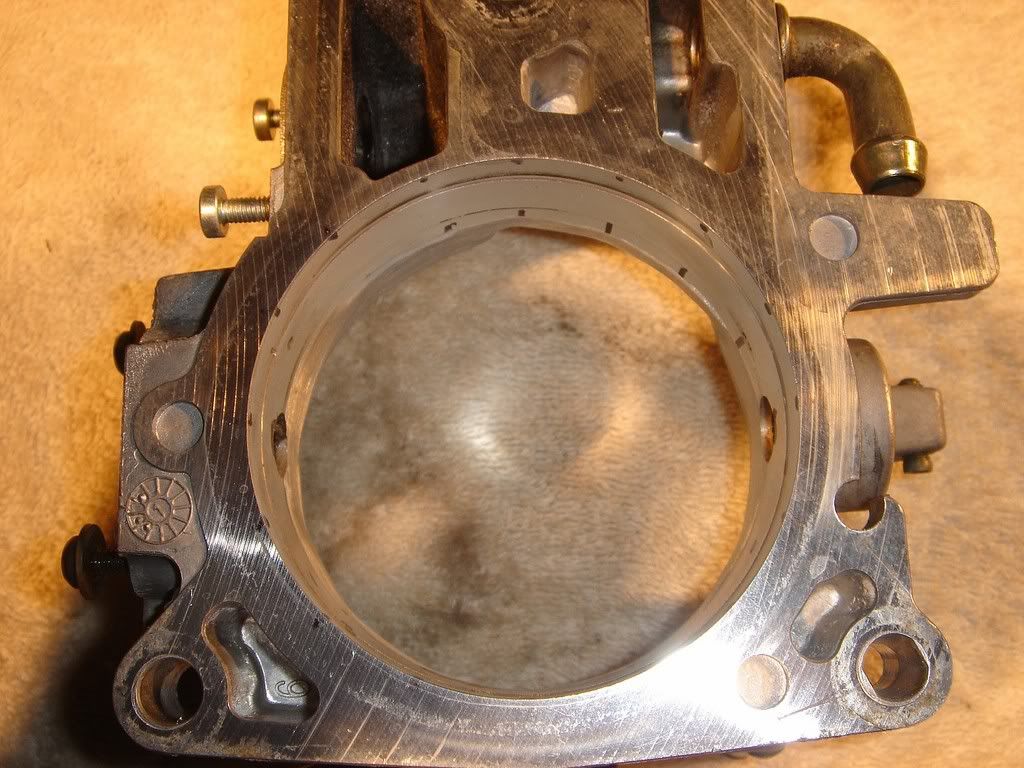


This was my first throttle body port. Came out alright. I didn't bother polishing it. Did the usual mods to it.
Bumpstop, cut half of the throttle shaft out, Knife edging the leading and trailing edge of the throttle blade, and porting and blending out the ridge.
One thing I did different though was I left a little bit of the cut-out throttle shaft sticking into the opening. I didn't like the idea of those 2 screws taking all the torsional stress from the throttle blade opening and closing. Now there's just enough that the load is still primarily on the throttle shaft. I chamfered the edges of the shaft to minimize the turbulence.


Trending Topics
01-28-2007, 11:29 PM
#8

Originally Posted by sledneck687
try a search, there are many people that have done it. I just finished mine yesterday. I just searched and looked at what everyone else did.
heres one link. http://www.geocities.com/wilwaxu/throttlebody.html
heres one link. http://www.geocities.com/wilwaxu/throttlebody.html
https://ls1tech.com/forums/showpost....6&postcount=22
 10-06-2007, 04:34 PM
#10
TECH Addict
iTrader: (41)
Join Date: Feb 2006
Location: Germantown Hills IL
Posts: 2,003
Likes: 0
Received 0 Likes
on
0 Posts
Did mine, (the right way this time) Here's some stuff to add....this is a great link, so is the one above that goes to the sticky....and alot of others i found with searches,,,,,all 3 digit number you see listed are dremel model numbers,,,i used a single speed multi pro 275,,,,35000 rpms for all listed
first off, this isnt hard at all, dont be to imtimidated,,,
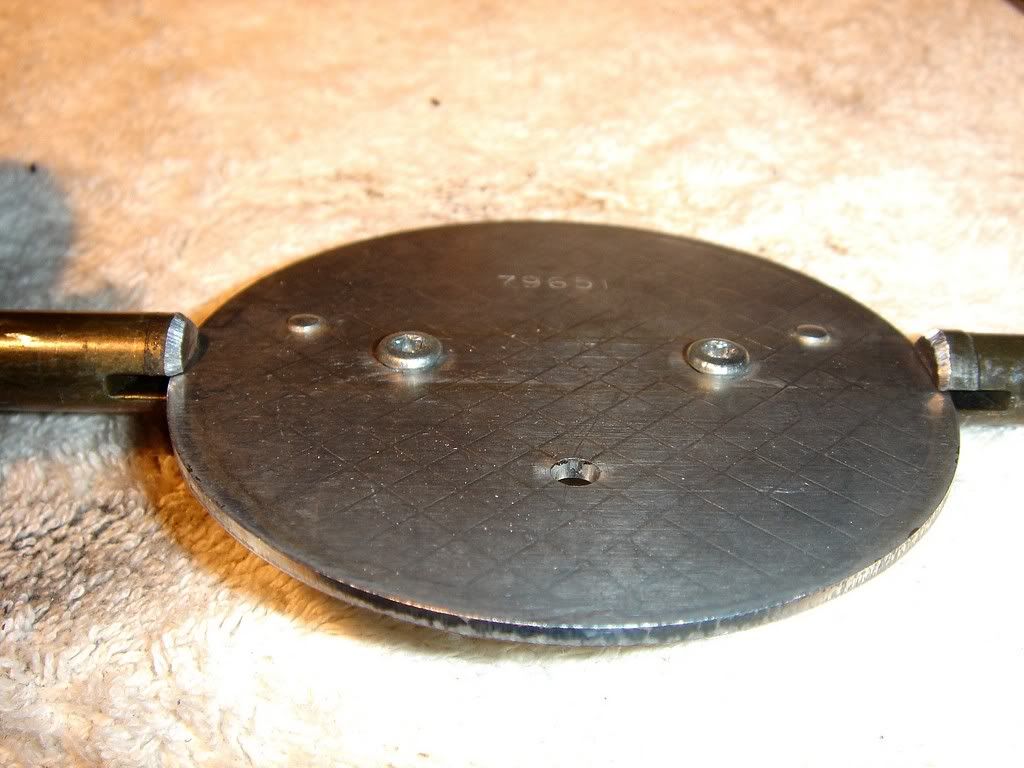
DRAW YOUR LINES TO MARK YOUR BLADE AND SHAFT LOCATIONS FIRST!!!!!!
Look at your spring now, remember how it goes, or use the pics on here to get it back on when the time comes
remove the sensors with a T20 bit bit, the TB blade comes out with a T15 bit
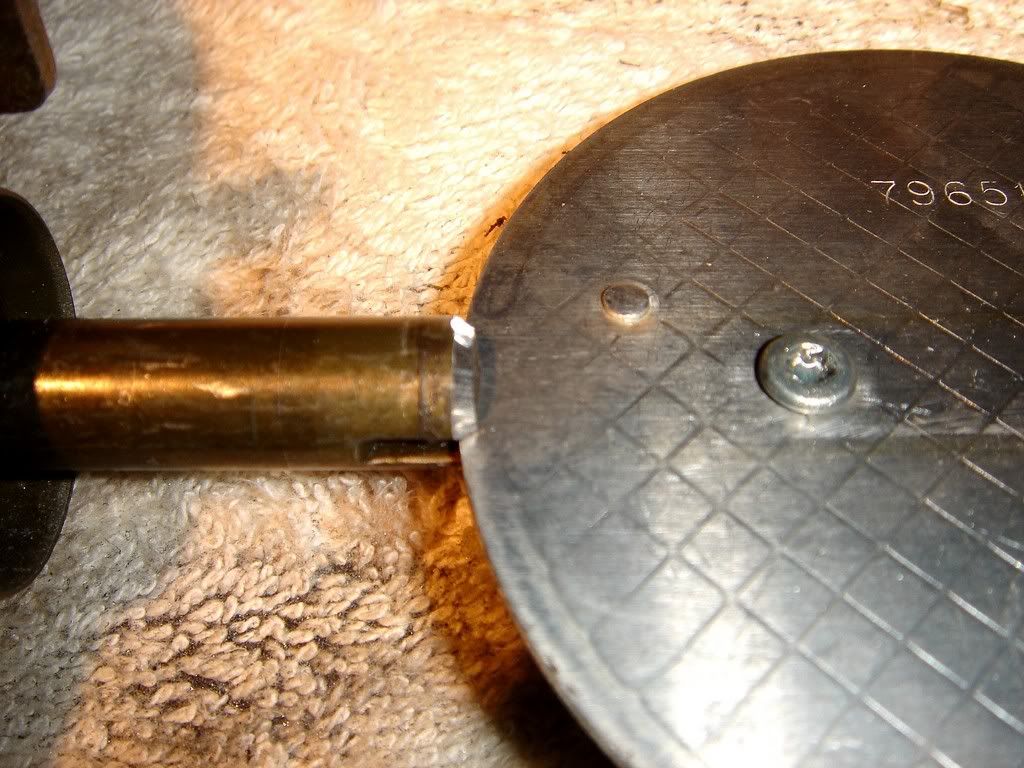
Just hammer the shaft out as they say,,,it only takes a tap or two,,,grab the lil ring and place somewhere safe for now. When you go to put this very tight fitting ring back on, use the back side (where the square is) of a 3/8 deep socket,,also only takes a tap to get back on.
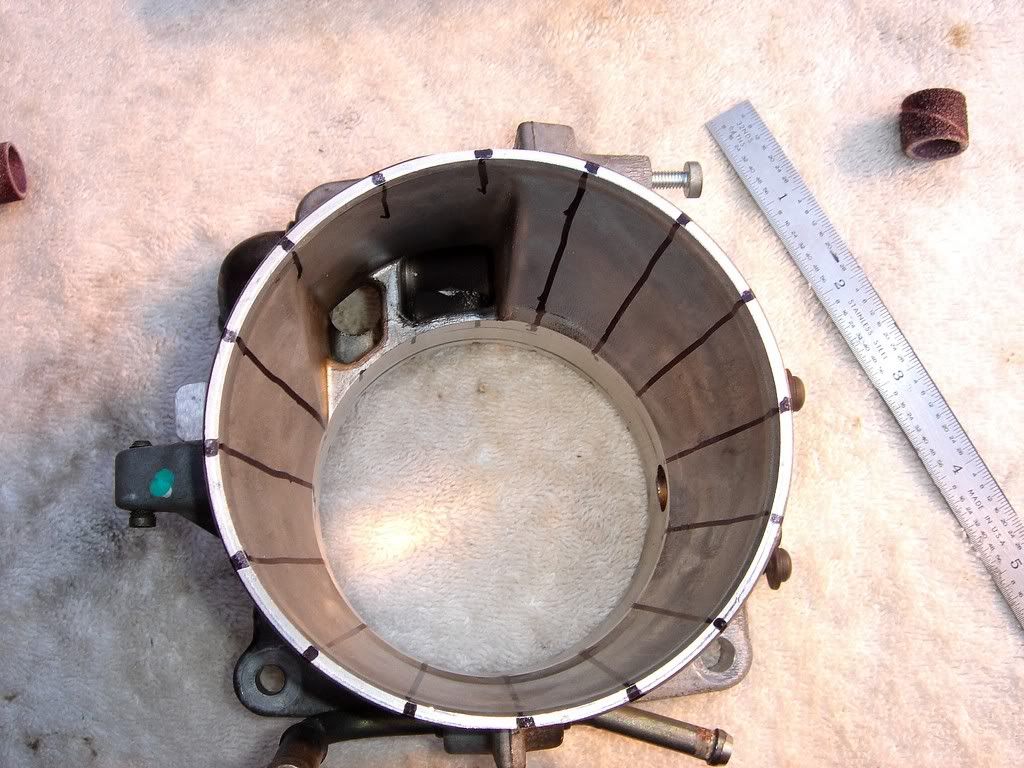
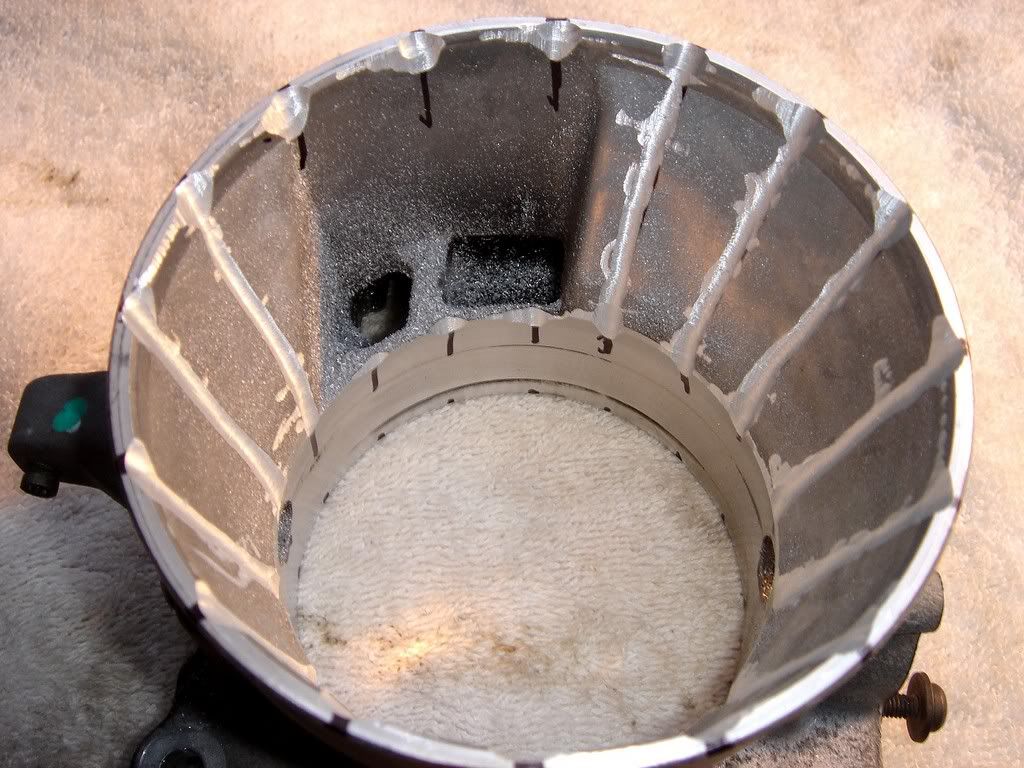
i used the sharpie lines as piced above,,helped to judge how much you've done,,,dont forget the lip,or outer edge too,,,those are important when your fine edgeing the very front of the TB
I used Dremel bits,,,
952 aluminum oxide griding stone,,,this is what i used to get the rough stuff done. IT TAKES A WHILE TO DO, BE PATIENT,,,it really does, takes some breaks so you dont burn up your tool. The bit will get heavily coated with aluminum,,,try to keep it clean as you go. The front lip of the wide opening of the TB is the hardest part,,take your time, and work in small areas, being aware of the outer edge, and how close you are to it,,,the two edges right next to the opening up top for the air flow are kinda tough, just work in small sections. Dont for get the restriction you can feel with your fingers back right in front of the TB blade,,kinda a hump there to get rid of. I used two of these bits as one of them fell apart during use
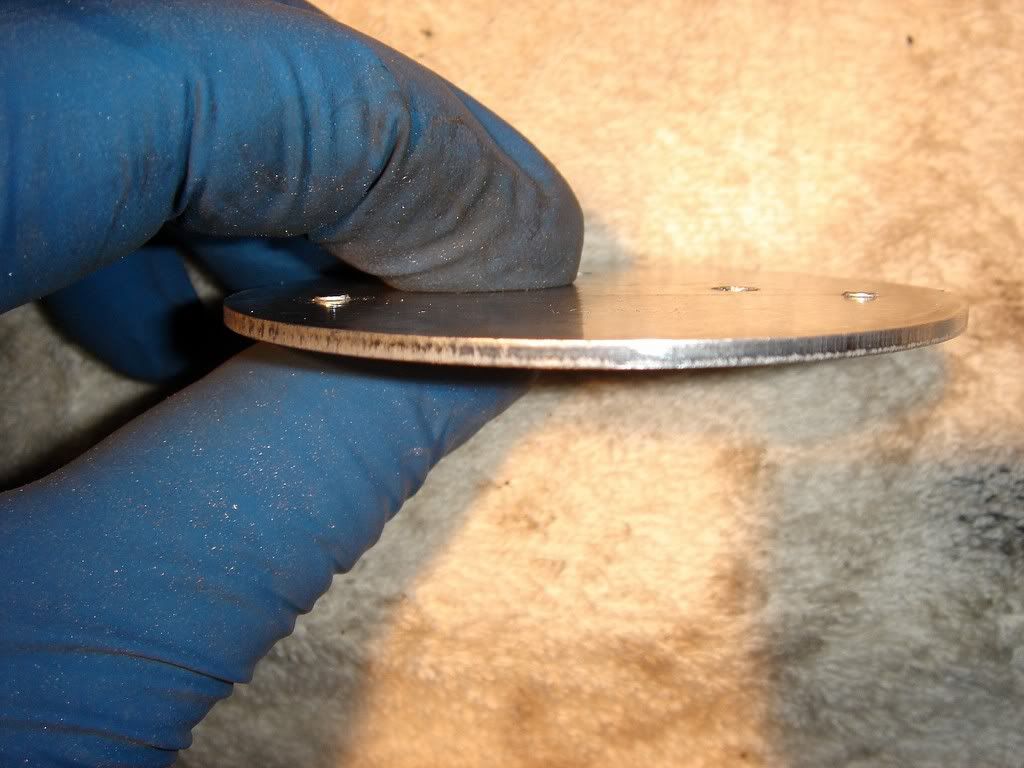
TB looks very thin on the bottom, and it was the easist part of the outer lip to get, so be careful down there when grinding
Be sure to work the very outer edge as you go, but dont worry about being perfect at this time,,just dont go beyond,or jimmy up the rim by cutting down into it,,stay at a nice angle working or feathering up into the TB main cavity
then i went to the sanding drums,,,i only found two kinds, one was 60 grit, the other was 120. 408 and 432 Using the 60, i went to town, it really makes light work of the more difficult areas when using the grinding stone,,wished i would of went to it sooner than i did (i did the entire inside with the stone before switching) I only used one 60 grit roll
Then,,the 120 to really clean things up,,used only one, went over everything inside. Take your time, do a nice work over in there.
then i hand sanded with a sheet of 220
THEN,,my lil kit came with a loofa lookin thing, small, Finish Abrasive Buff,,,511,,this thing was freakin awesome as a final clean up,,i also used it on the outside of my TB,,,made it extremlly shiney. Be fore warned though,,,the disk disinigrates as you use it, so be careful when you get down to a nub,,,,i coulda used two for the whole TB, inside and out
Assembly is just the opposite,,be sure your spring is on ther properly
i did'nt knife edge my blade, but i did cut the shaft frontoff to remove the restriction. I to left a edge on both sides just to keep an extra grab on the blade, though the screws feel that they hold pretty good. just use a file to make it nice and neat after you cut the shaft out with a reinforced cut off wheel, 426. The screws were placed with loctite upon reassembly, and i cut the extra screw sticking out the back side,,,also grinded down my cut marks.
A quick coat of polish to brighten things up made for a TB that i was bummed had to be hidden by all the other stuff.
All in all i spent about 4 hours on this
Now all i need to do is learn how to use my Multimeter for a bump stop mod, and will be doing the cable adjust if needed as well
first off, this isnt hard at all, dont be to imtimidated,,,
DRAW YOUR LINES TO MARK YOUR BLADE AND SHAFT LOCATIONS FIRST!!!!!!
Look at your spring now, remember how it goes, or use the pics on here to get it back on when the time comes
remove the sensors with a T20 bit bit, the TB blade comes out with a T15 bit
Just hammer the shaft out as they say,,,it only takes a tap or two,,,grab the lil ring and place somewhere safe for now. When you go to put this very tight fitting ring back on, use the back side (where the square is) of a 3/8 deep socket,,also only takes a tap to get back on.
i used the sharpie lines as piced above,,helped to judge how much you've done,,,dont forget the lip,or outer edge too,,,those are important when your fine edgeing the very front of the TB
I used Dremel bits,,,
952 aluminum oxide griding stone,,,this is what i used to get the rough stuff done. IT TAKES A WHILE TO DO, BE PATIENT,,,it really does, takes some breaks so you dont burn up your tool. The bit will get heavily coated with aluminum,,,try to keep it clean as you go. The front lip of the wide opening of the TB is the hardest part,,take your time, and work in small areas, being aware of the outer edge, and how close you are to it,,,the two edges right next to the opening up top for the air flow are kinda tough, just work in small sections. Dont for get the restriction you can feel with your fingers back right in front of the TB blade,,kinda a hump there to get rid of. I used two of these bits as one of them fell apart during use
TB looks very thin on the bottom, and it was the easist part of the outer lip to get, so be careful down there when grinding
Be sure to work the very outer edge as you go, but dont worry about being perfect at this time,,just dont go beyond,or jimmy up the rim by cutting down into it,,stay at a nice angle working or feathering up into the TB main cavity
then i went to the sanding drums,,,i only found two kinds, one was 60 grit, the other was 120. 408 and 432 Using the 60, i went to town, it really makes light work of the more difficult areas when using the grinding stone,,wished i would of went to it sooner than i did (i did the entire inside with the stone before switching) I only used one 60 grit roll
Then,,the 120 to really clean things up,,used only one, went over everything inside. Take your time, do a nice work over in there.
then i hand sanded with a sheet of 220
THEN,,my lil kit came with a loofa lookin thing, small, Finish Abrasive Buff,,,511,,this thing was freakin awesome as a final clean up,,i also used it on the outside of my TB,,,made it extremlly shiney. Be fore warned though,,,the disk disinigrates as you use it, so be careful when you get down to a nub,,,,i coulda used two for the whole TB, inside and out
Assembly is just the opposite,,be sure your spring is on ther properly
i did'nt knife edge my blade, but i did cut the shaft frontoff to remove the restriction. I to left a edge on both sides just to keep an extra grab on the blade, though the screws feel that they hold pretty good. just use a file to make it nice and neat after you cut the shaft out with a reinforced cut off wheel, 426. The screws were placed with loctite upon reassembly, and i cut the extra screw sticking out the back side,,,also grinded down my cut marks.
A quick coat of polish to brighten things up made for a TB that i was bummed had to be hidden by all the other stuff.
All in all i spent about 4 hours on this
Now all i need to do is learn how to use my Multimeter for a bump stop mod, and will be doing the cable adjust if needed as well
Last edited by Bad Blue WS6; 10-06-2007 at 04:36 PM. Reason: spelling
10-07-2007, 08:23 PM
#11
TECH Fanatic
Join Date: Oct 2007
Location: Ventura County, California
Posts: 1,129
Likes: 0
Received 0 Likes
on
0 Posts
Don't forget to grind the stock throttle body stop down, I hear they only open to 79* and it is noticeable under full throttle that the throttle body does not open to 90*, ground mine a little over an 1/8th" and it opens to 88*, but dont go past 90* I hear it will cause a trouble code.
 12-11-2007, 11:07 PM
#13
Staging Lane

Join Date: Sep 2007
Location: Hattiesburg MS
Posts: 87
Likes: 0
Received 0 Likes
on
0 Posts
those throttle body pictures look good i will have to try and do that good on my throttle body i am currently working on it but i didnt draw the lines to start porting it i just started porting it but hopefully it will turn out good thanks for whoever posted them
12-12-2007, 08:08 AM
#15
TECH Junkie
iTrader: (5)

Join Date: Feb 2007
Location: Key West, Florida
Posts: 3,183
Likes: 0
Received 0 Likes
on
0 Posts
or find someone with a metal lathe....bolt it in with a 3 jaw chuck using the rear of the TB opening.
machine down the lip a little at a time. set up a travel stop so you don't hit the blade-pin with the bit.
polish with some polishing paper.
if you want to pull the blade out...go for it, but most of the gains are from the TB housing work.
took me all of 15mins in my dad's machine shop.
make sure to use a lower speed setting, the TB is odd shapped so it doesn't balance well when spinning. although we were able to do it on a small lathe (maybe 8" radius max capacity), so any typical size machine would work.
call some machine shops...probably be about an hour's worth of labor.
i'll be home for Xmas...you could ship me the TB and i'll do it.
$60 and i'll pay for return shipping
12-12-2007, 08:14 AM
#17
TECH Addict
iTrader: (41)
Join Date: Feb 2006
Location: Germantown Hills IL
Posts: 2,003
Likes: 0
Received 0 Likes
on
0 Posts
ok, yeah, 15 is pushin it, but it still takes me forever due to the hand sanding,,,comes out very nice, with no tooling marks, etc. Havnt quite got the mirror shine down yet,,but im close,,very, very close.
12-13-2007, 07:16 AM
#18
TECH Junkie
iTrader: (5)
Join Date: Feb 2007
Location: Key West, Florida
Posts: 3,183
Likes: 0
Received 0 Likes
on
0 Posts
15hrs!!!!
holy crap!!
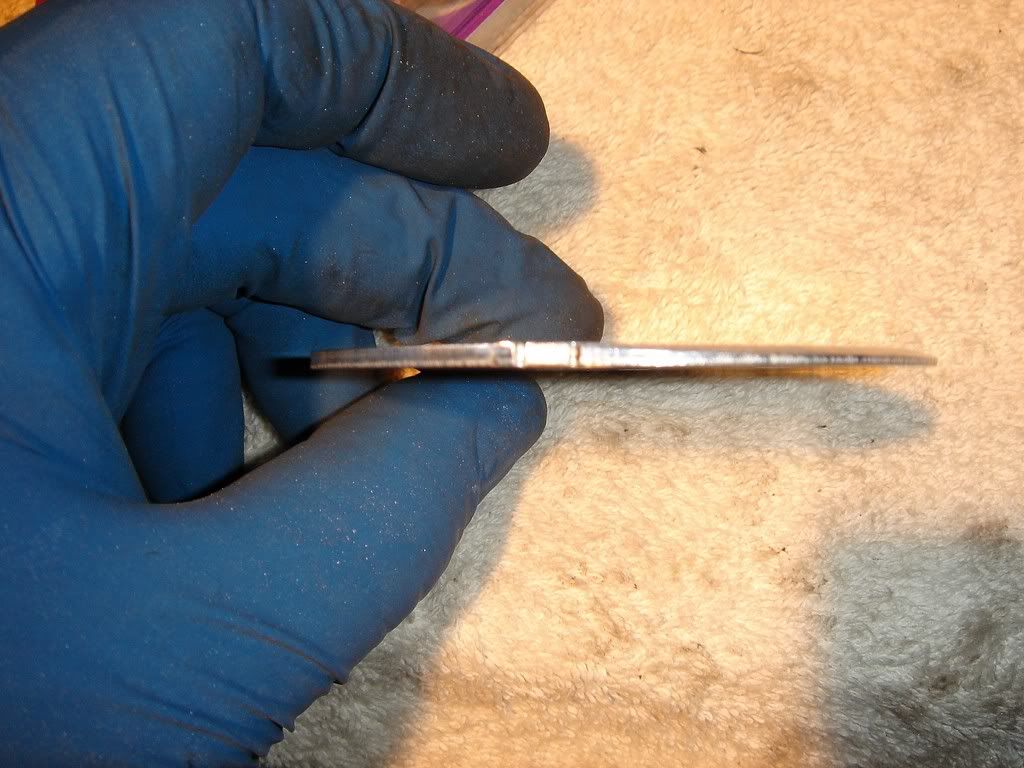
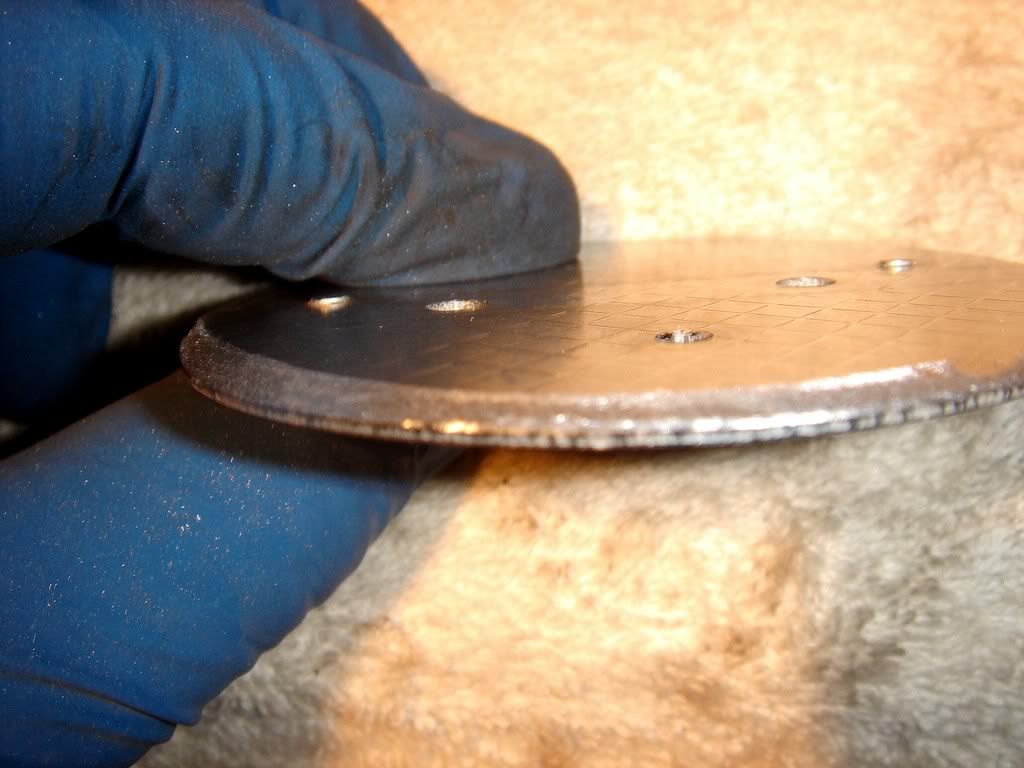
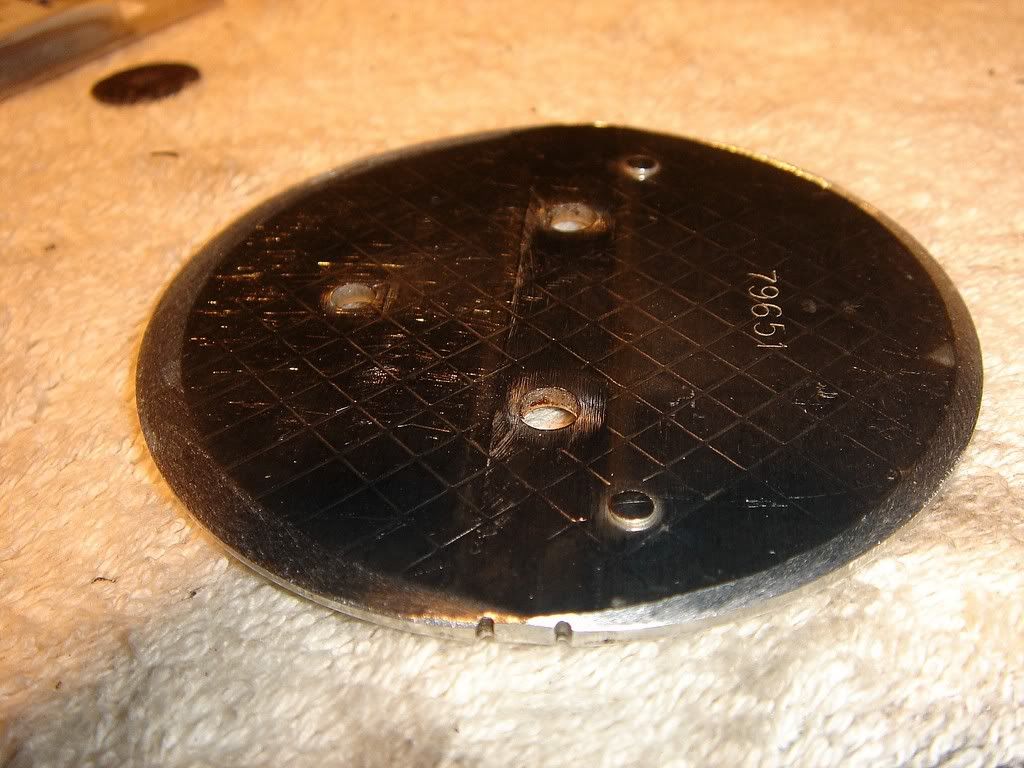
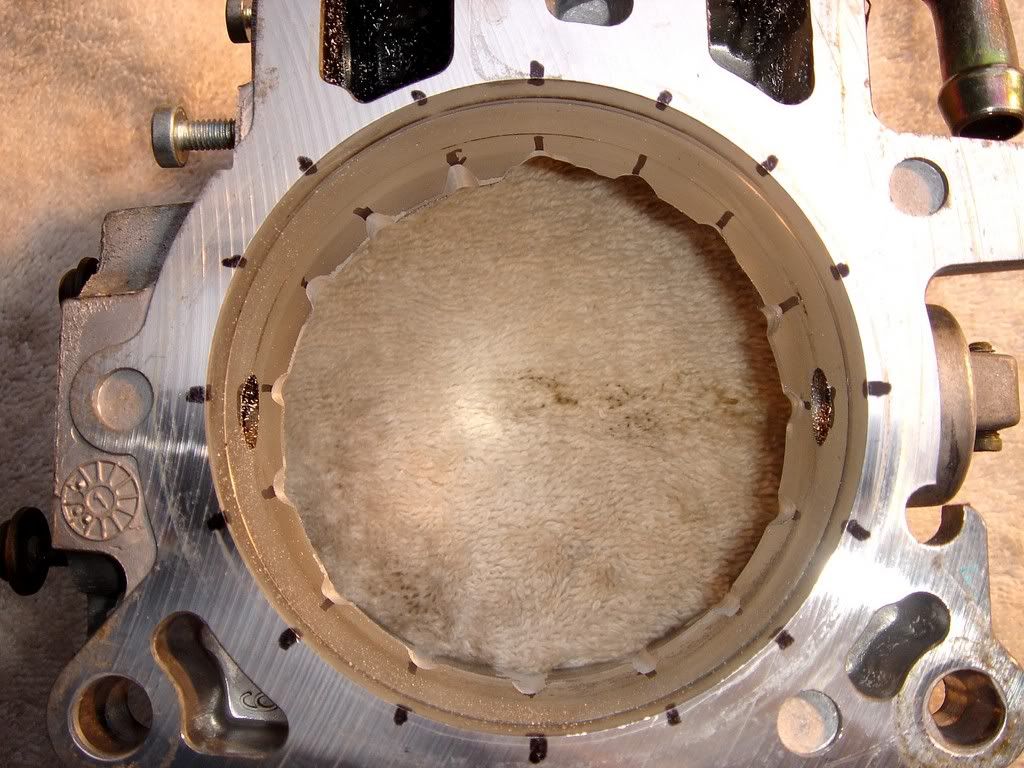
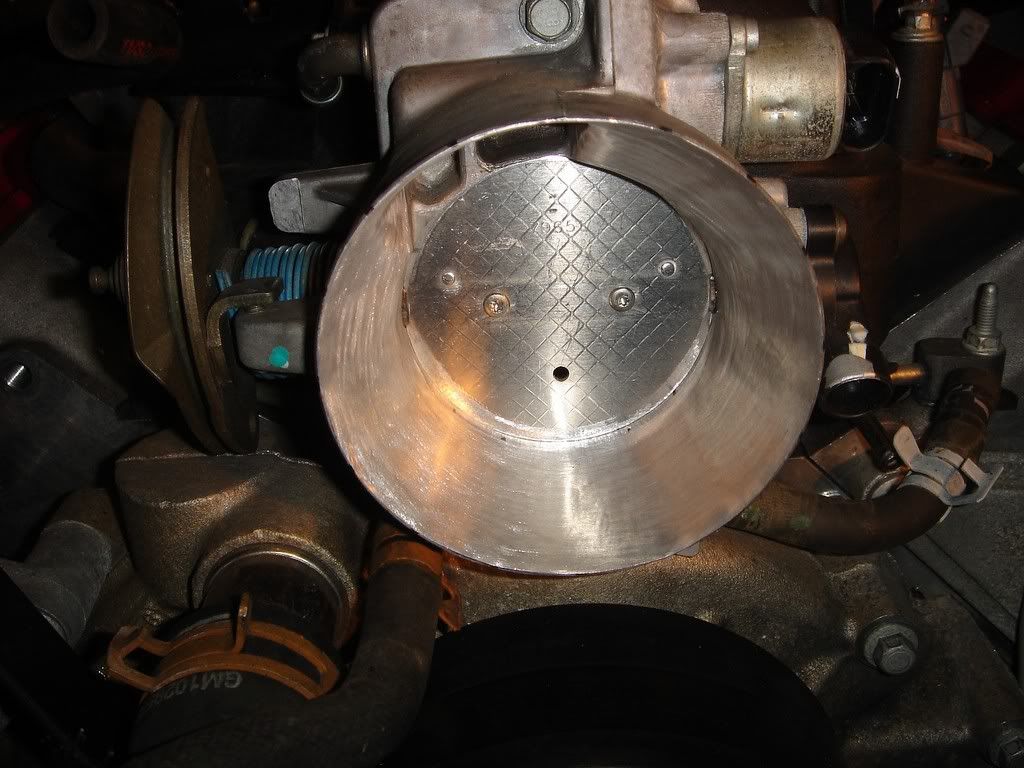
here is a pic of what 15-20 mins did....granted i didn't get a high polish on the inside, but it is a little polished.

and it's done on a lathe...but i guess if you think using a machine exact down to a couple thousandths of an inch is a rush job compared to grinding...so be it

holy crap!!
here is a pic of what 15-20 mins did....granted i didn't get a high polish on the inside, but it is a little polished.
and it's done on a lathe...but i guess if you think using a machine exact down to a couple thousandths of an inch is a rush job compared to grinding...so be it
12-13-2007, 09:42 AM
#19
TECH Addict
iTrader: (41)
Join Date: Feb 2006
Location: Germantown Hills IL
Posts: 2,003
Likes: 0
Received 0 Likes
on
0 Posts
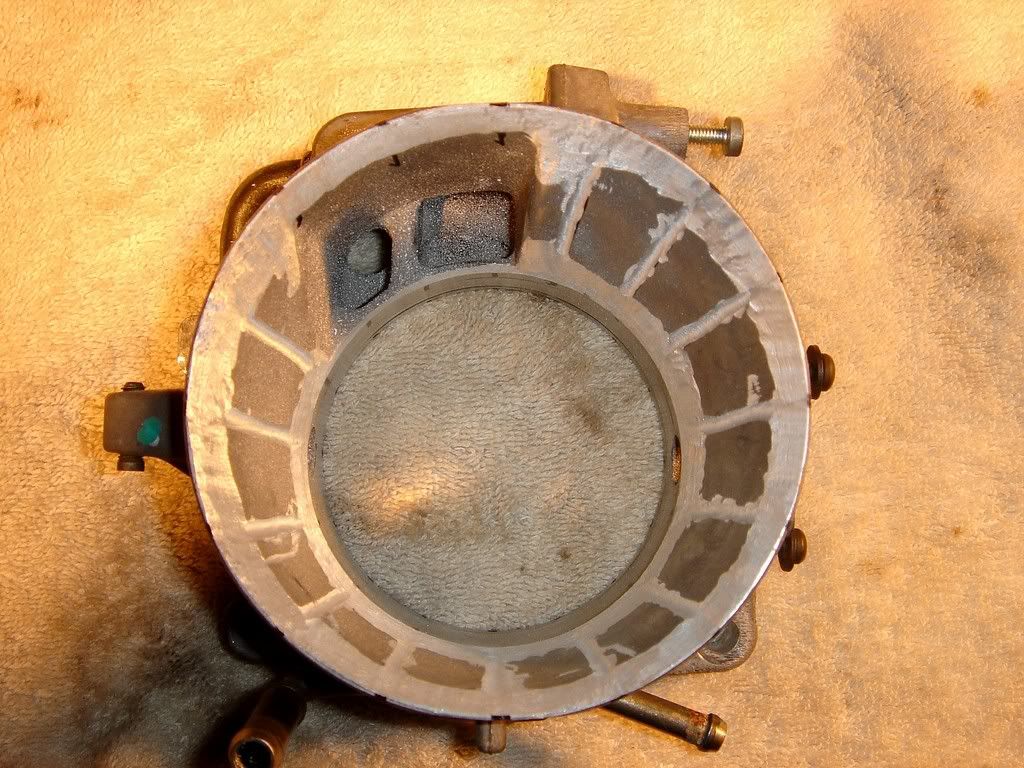
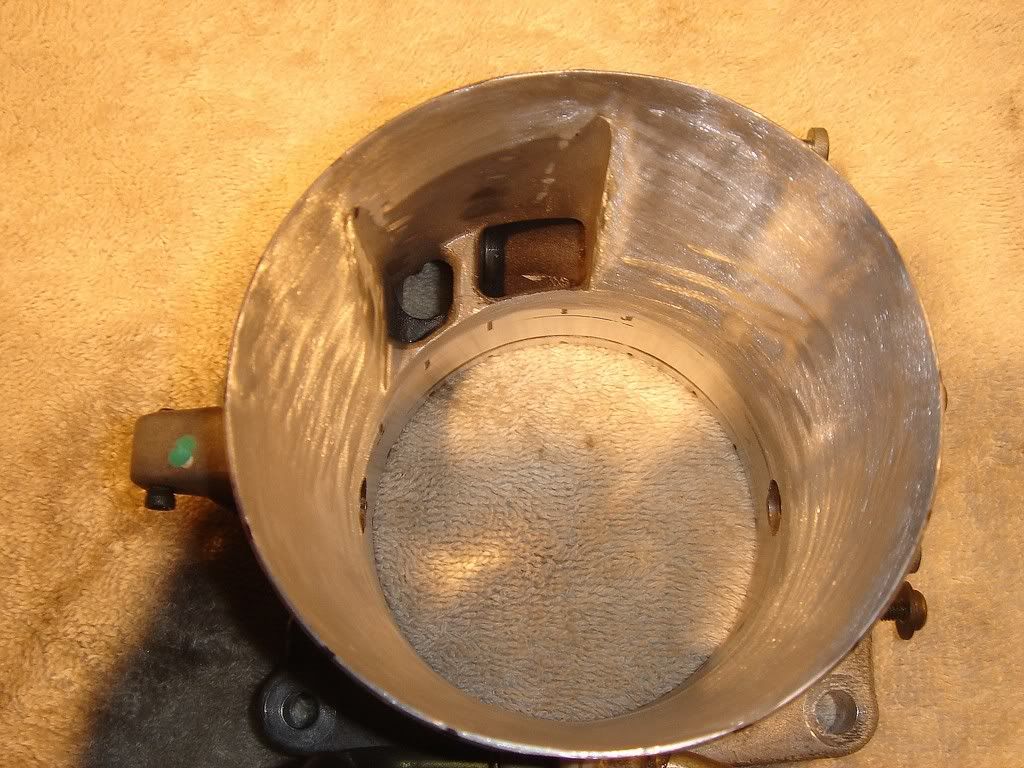
ahhhhh,,not trying to be a dick but,,,,your 15 min is , well,,looks like 15 min,,,,wheres the Port? wheres the polish?,,,,looks like it was sanded on lightly and thats it,,,,that is far from a PNP job. See that huge ridge on the very front?,,that should'nt be there after a port....Feel that hump right before the blade area? also shouldnt be there the shaft isnt cut, the blade isnt knife edged, etc, etc, etc........here is my 10 to 15 hour job....yeah,,it takes alot longer to hand sand, but the proof is in the pudding my friend...


12-13-2007, 04:01 PM
#20
ahhhhh,,not trying to be a dick but,,,,your 15 min is , well,,looks like 15 min,,,,wheres the Port? wheres the polish?,,,,looks like it was sanded on lightly and thats it,,,,that is far from a PNP job. See that huge ridge on the very front?,,that should'nt be there after a port....Feel that hump right before the blade area? also shouldnt be there the shaft isnt cut, the blade isnt knife edged, etc, etc, etc