Aluminum 454 Build
 11-22-2014, 10:43 PM
#641
TECH Enthusiast
Thread Starter
iTrader: (1)

Join Date: May 2012
Posts: 570
Likes: 0
Received 0 Likes
on
0 Posts
That's what in saying...no reason to throw more money at it just to say it is ss....my main reason for going ss was because I thought it would have been thinner walked pipe, this making the system lighter...so when I found out the ss system wasn't going to be any lighter it made the decision simple
 11-23-2014, 01:05 AM
#642
TECH Apprentice
iTrader: (1)

Join Date: Oct 2006
Location: NJ
Posts: 374
Likes: 0
Received 0 Likes
on
0 Posts

That's what in saying...no reason to throw more money at it just to say it is ss....my main reason for going ss was because I thought it would have been thinner walked pipe, this making the system lighter...so when I found out the ss system wasn't going to be any lighter it made the decision simple
11-23-2014, 10:44 AM
#644
TECH Enthusiast
Thread Starter
iTrader: (1)
Join Date: May 2012
Posts: 570
Likes: 0
Received 0 Likes
on
0 Posts
I think this is the X-pipe kit I will end up going with...just keep it aluminized steel and be done with it.
http://www.spintechmufflers.com/x-pi.../prod_775.html
http://www.spintechmufflers.com/x-pi.../prod_775.html
11-23-2014, 01:25 PM
#646
TECH Enthusiast
Thread Starter
iTrader: (1)
Join Date: May 2012
Posts: 570
Likes: 0
Received 0 Likes
on
0 Posts
It better be a one time thing...anyone got any suggestions for mufflers? I'm thinking the Sportsman 1000's
http://www.spintechmufflers.com/muff.../prod_464.html
http://www.spintechmufflers.com/muff.../prod_464.html
12-07-2014, 09:26 PM
#647
TECH Enthusiast
Thread Starter
iTrader: (1)
Join Date: May 2012
Posts: 570
Likes: 0
Received 0 Likes
on
0 Posts
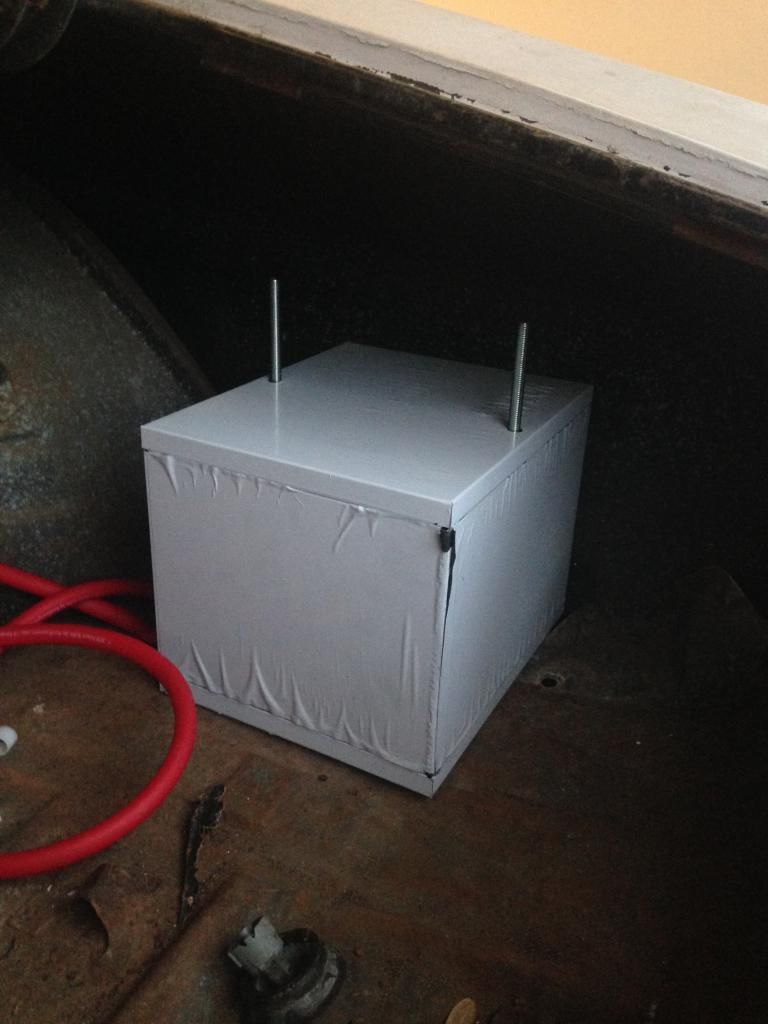
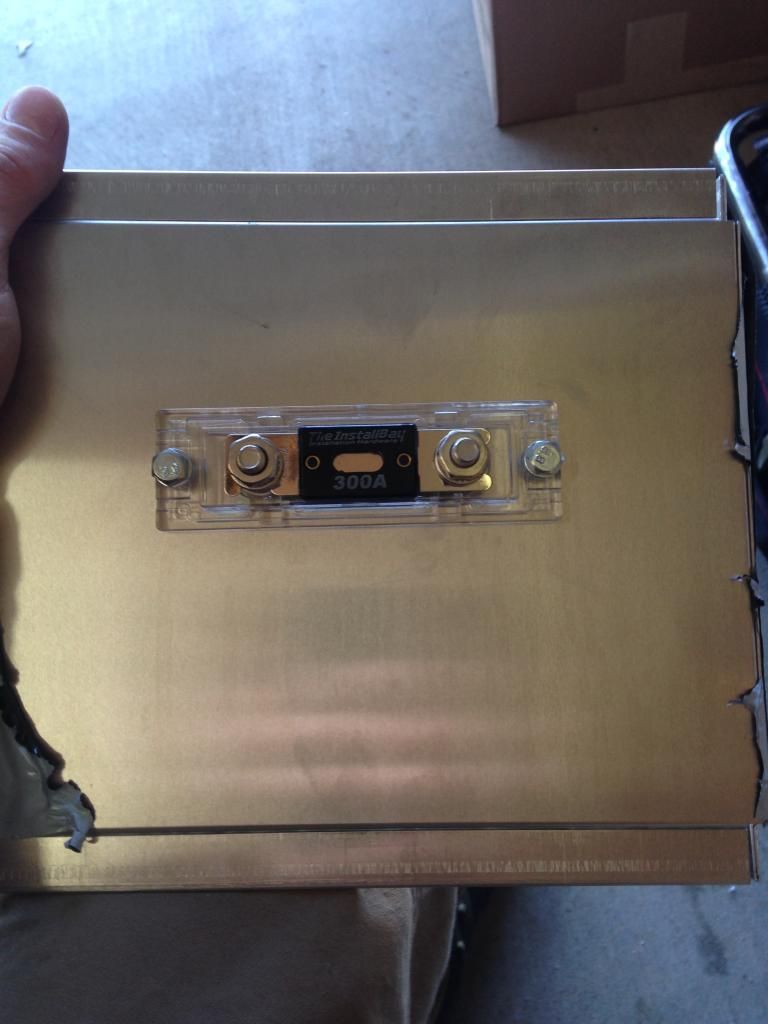
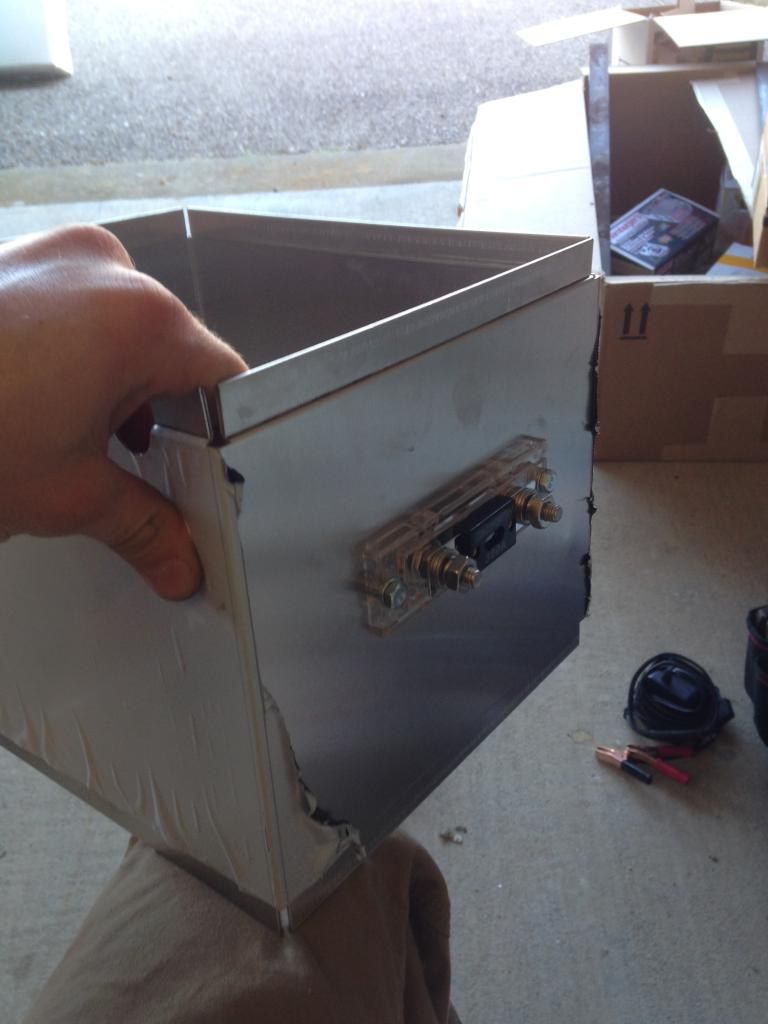
Ok so I am finally getting around to posing an update for what I got done over thanksgiving break…..So I got the battery box installed, power and ground cables run, firewall studs mounted, battery cut off switch mounted, and I got the front end harnesses mocked in, as well as mounting the oil filter.…..doesn’t sound like a lot, but the wiring takes me a little while to work through….
So on to the pictures….
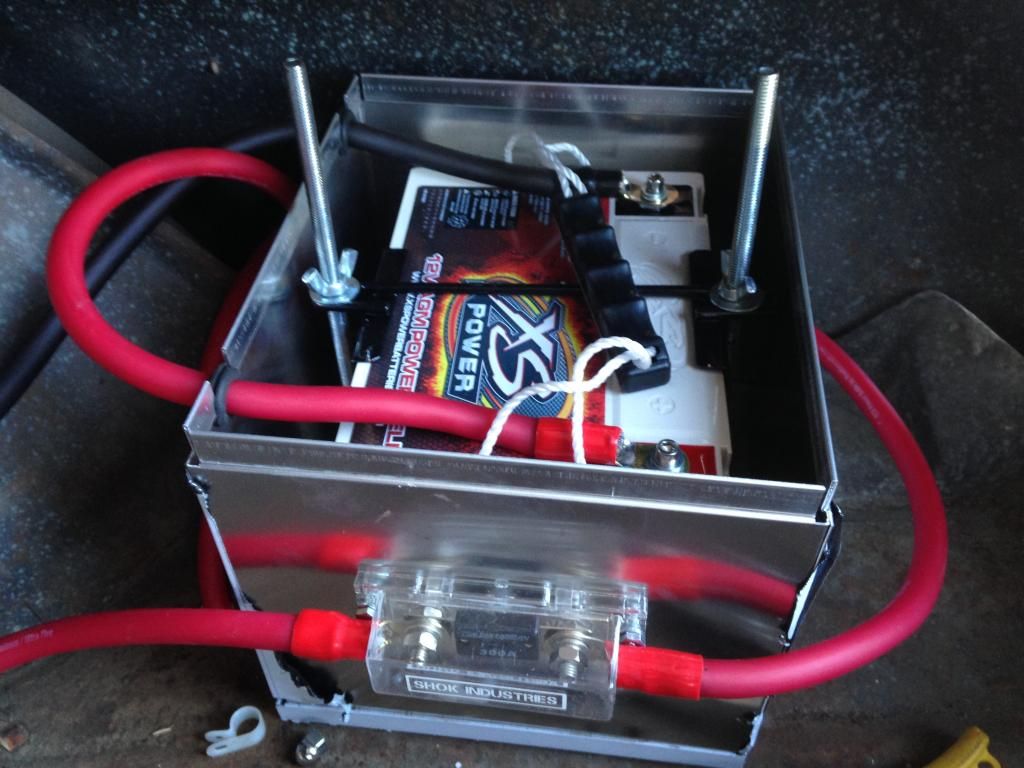
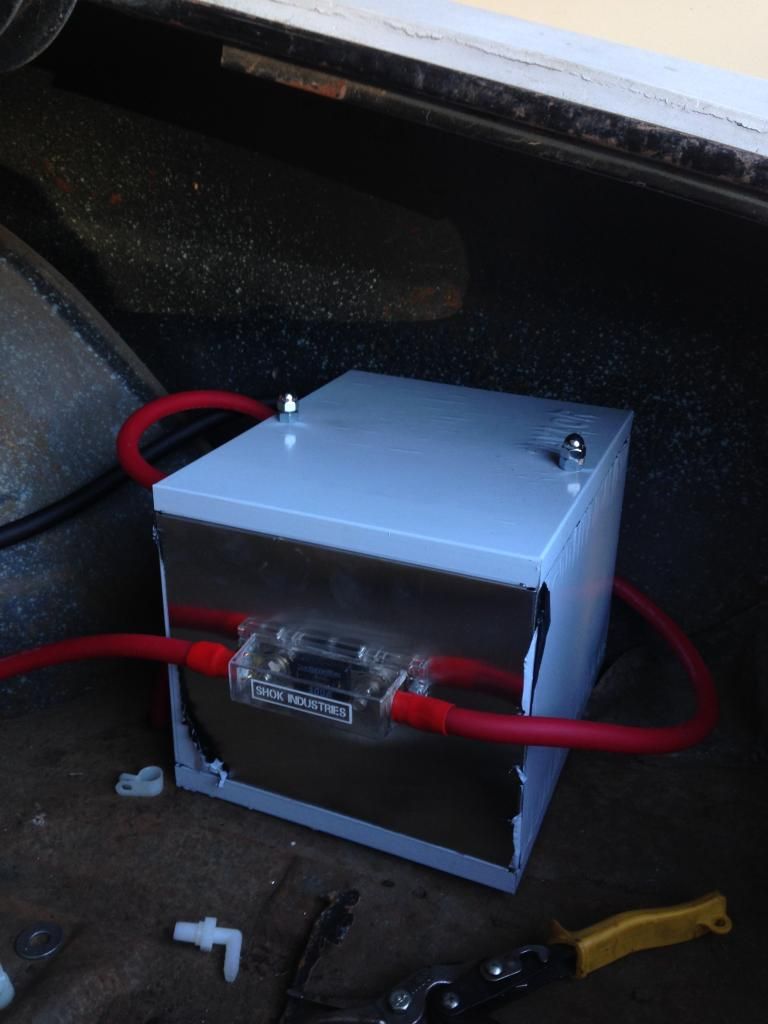
Battery box mounting
Mounted the 300amp ANL fuse holder on the outside of the box
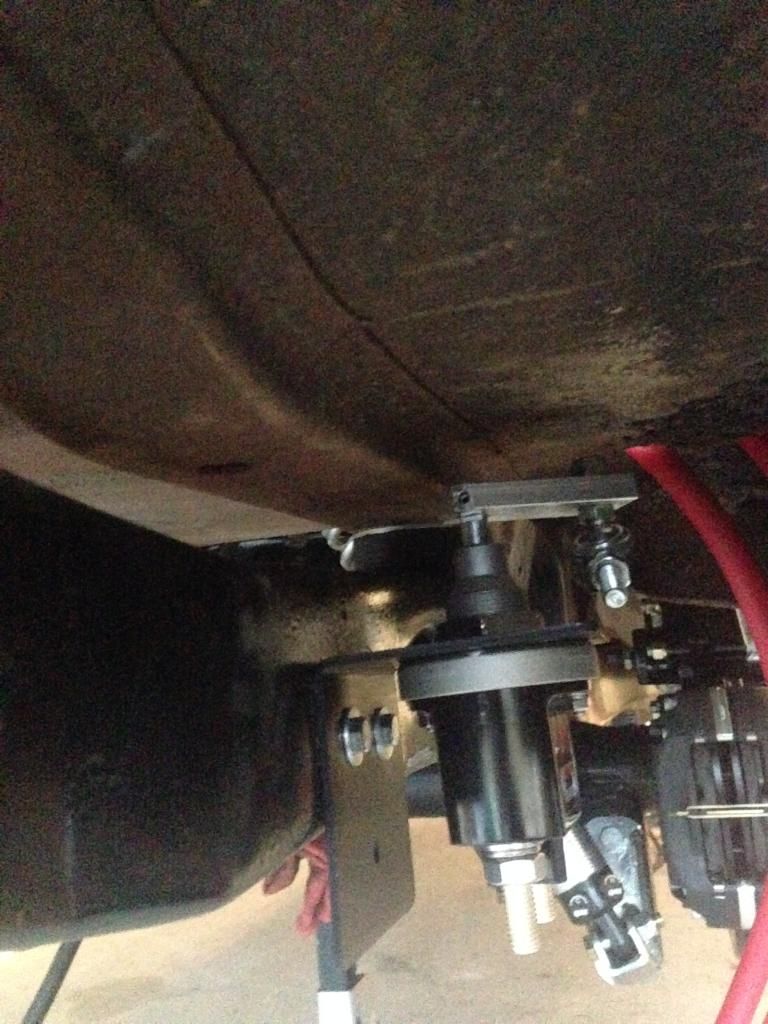
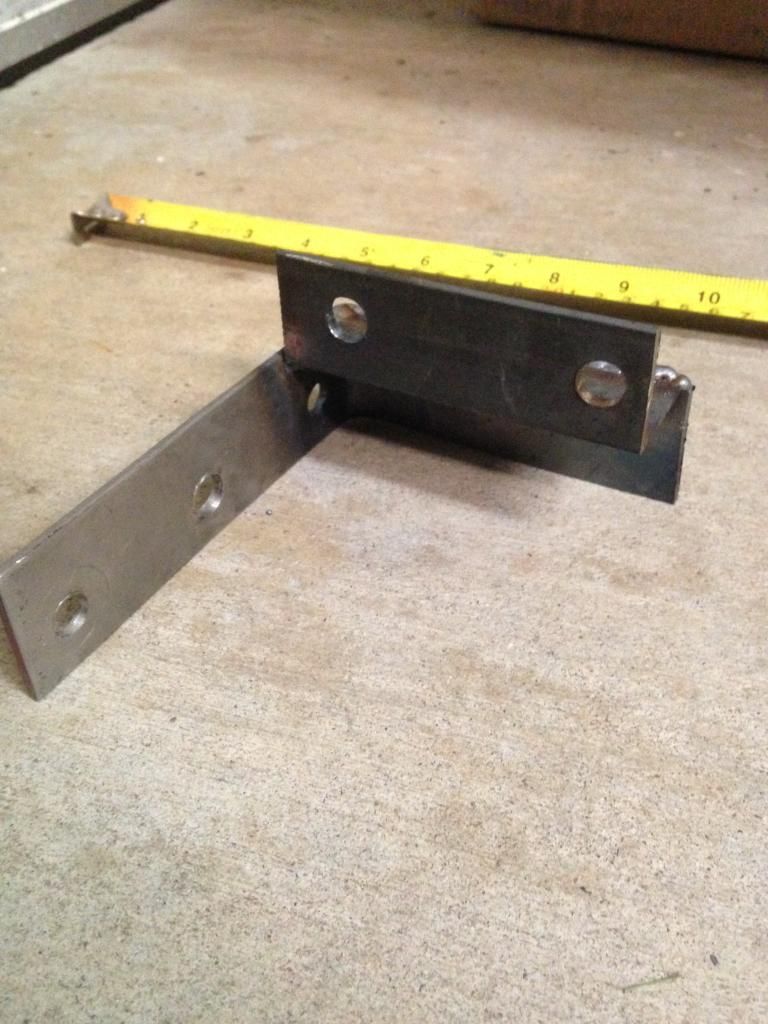
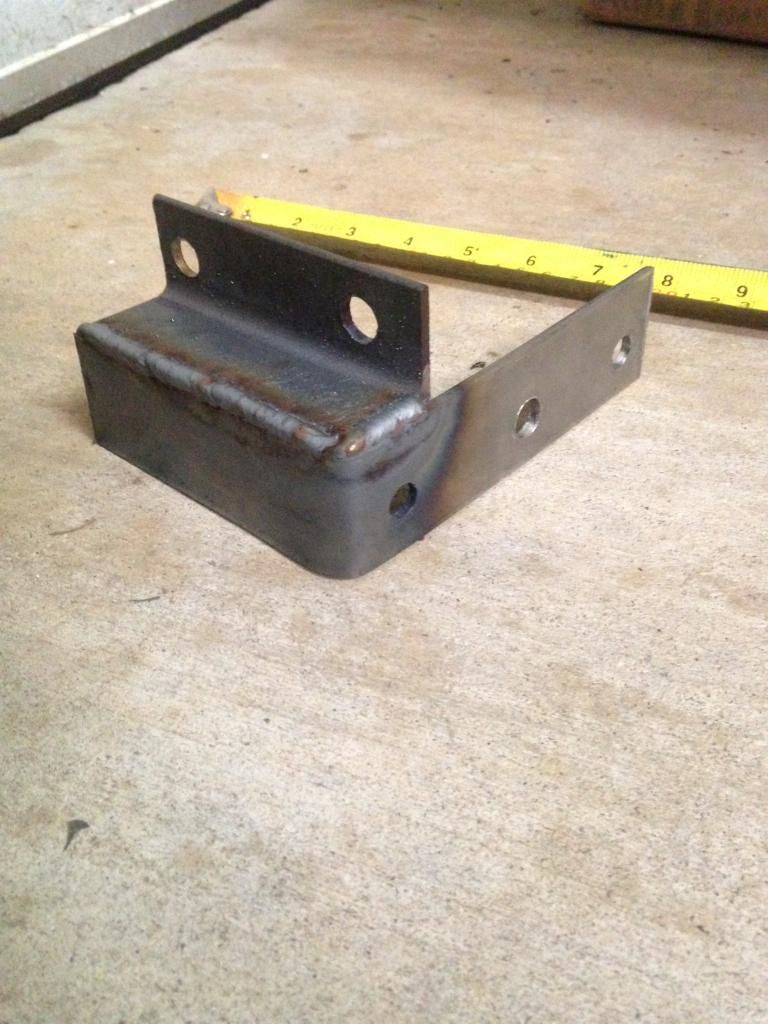
I mounted the cutoff switch on the outside of the passenger side frame rail….the push/pull rod will come through the valence under the rear bumper…I will drill that hole once I get the bumper I am going to use installed and the valence bolted down…
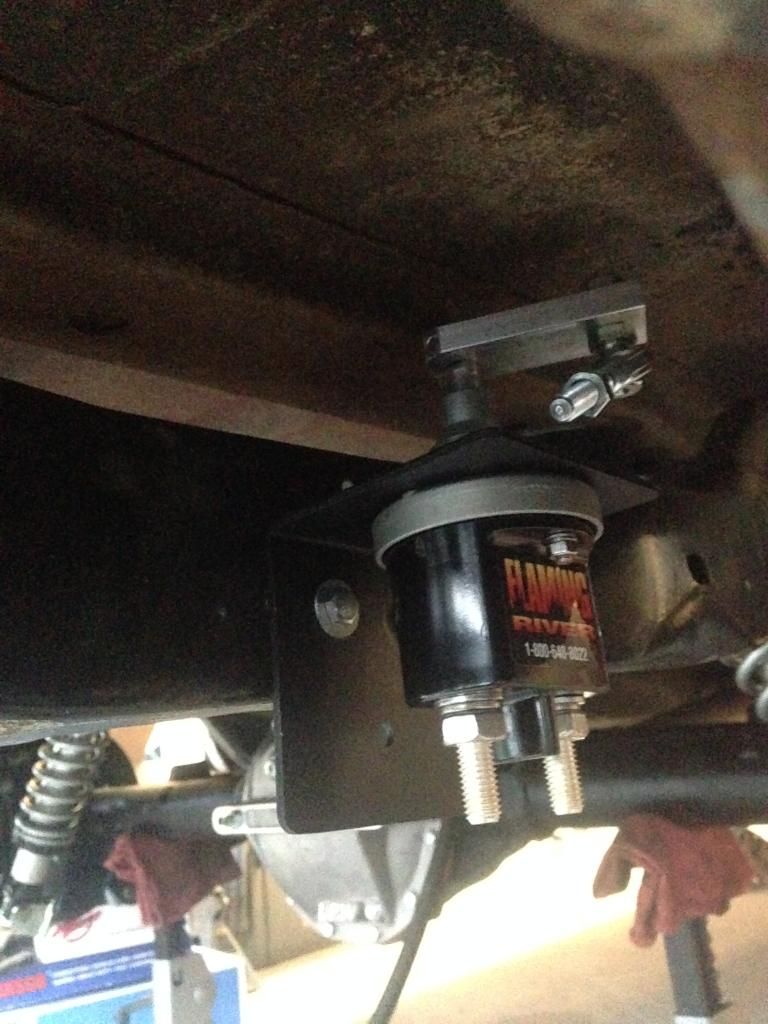
I plan to trim the bottom of the mounting bracket off at some point…I just forgot to do it while I was there haha….
Battery cables were then run…batt to the switch, switch to the fuse, fuse to the firewall, and the negative from the battery to the firewall…

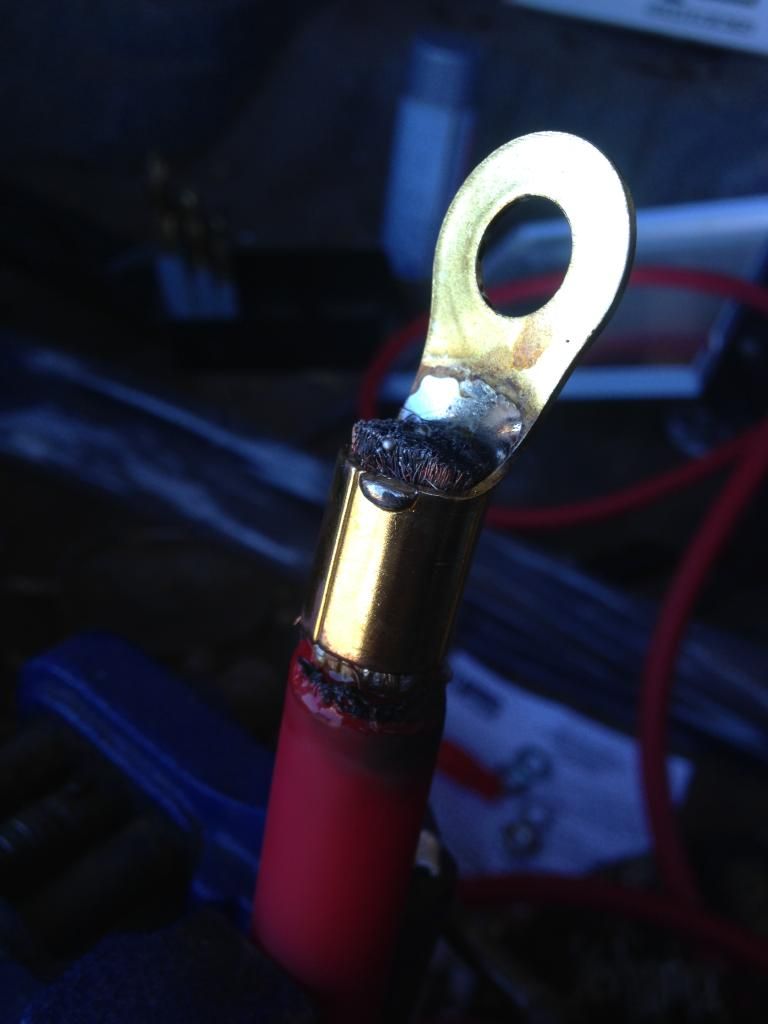
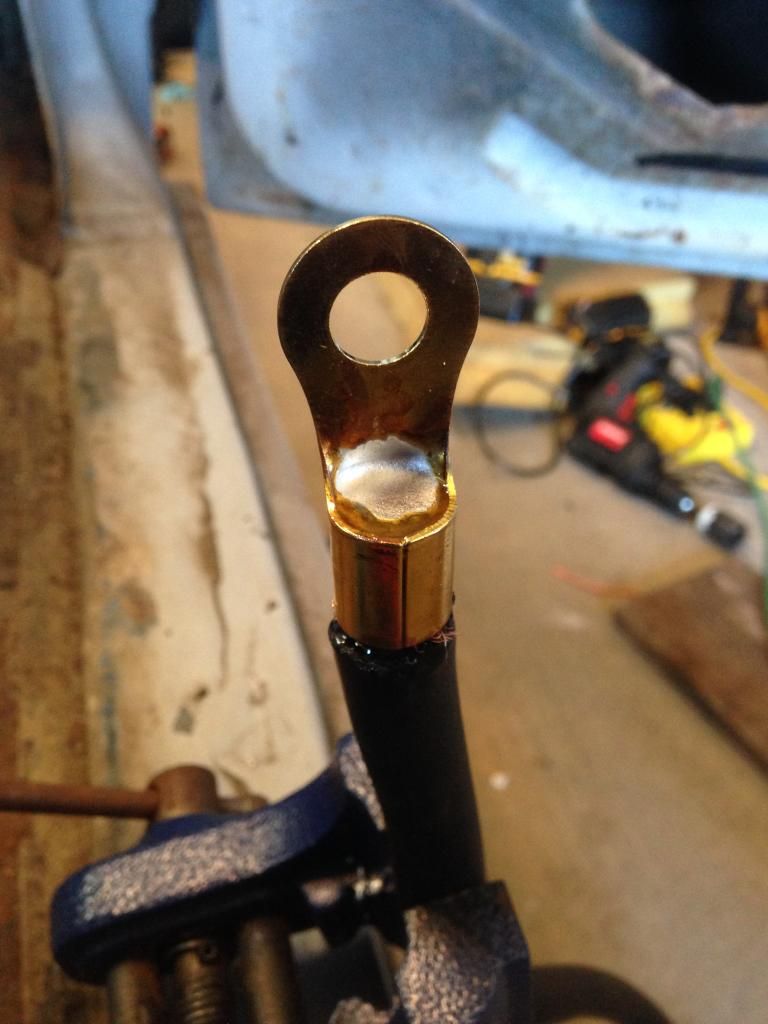
My first soldered terminal lug compared to my last….gave all of them a good tug and none of them slipped off so I should be good to go…
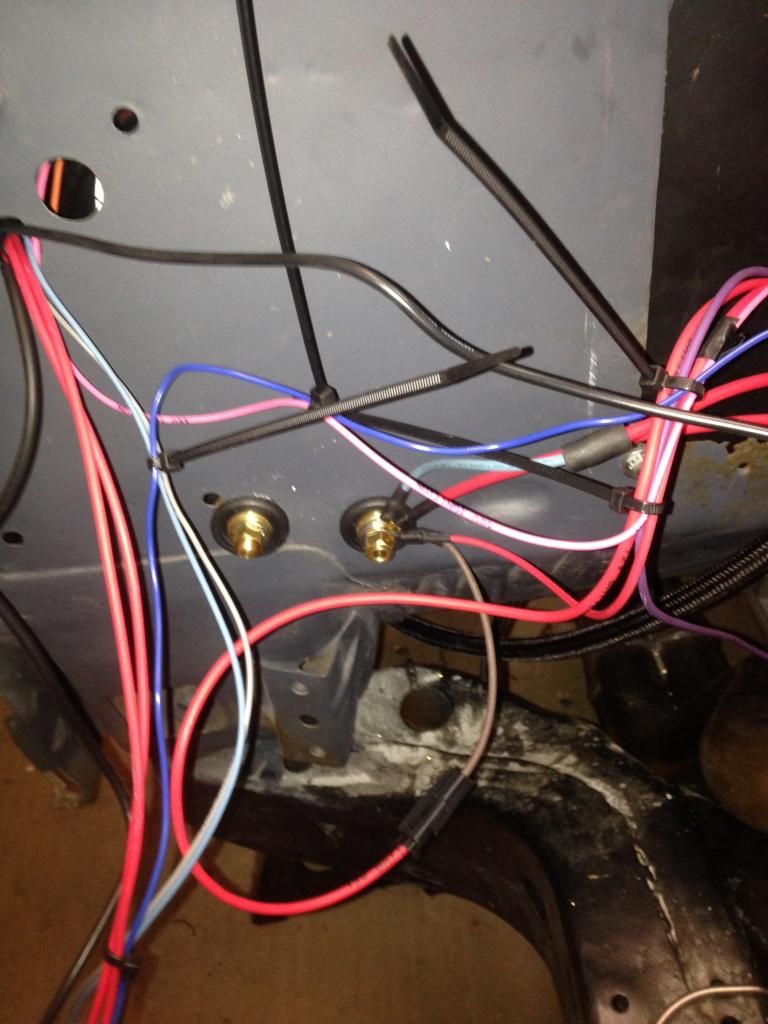
Power and ground studs coming through the firewall…
Finished product…minus the protective wrap on the box still…
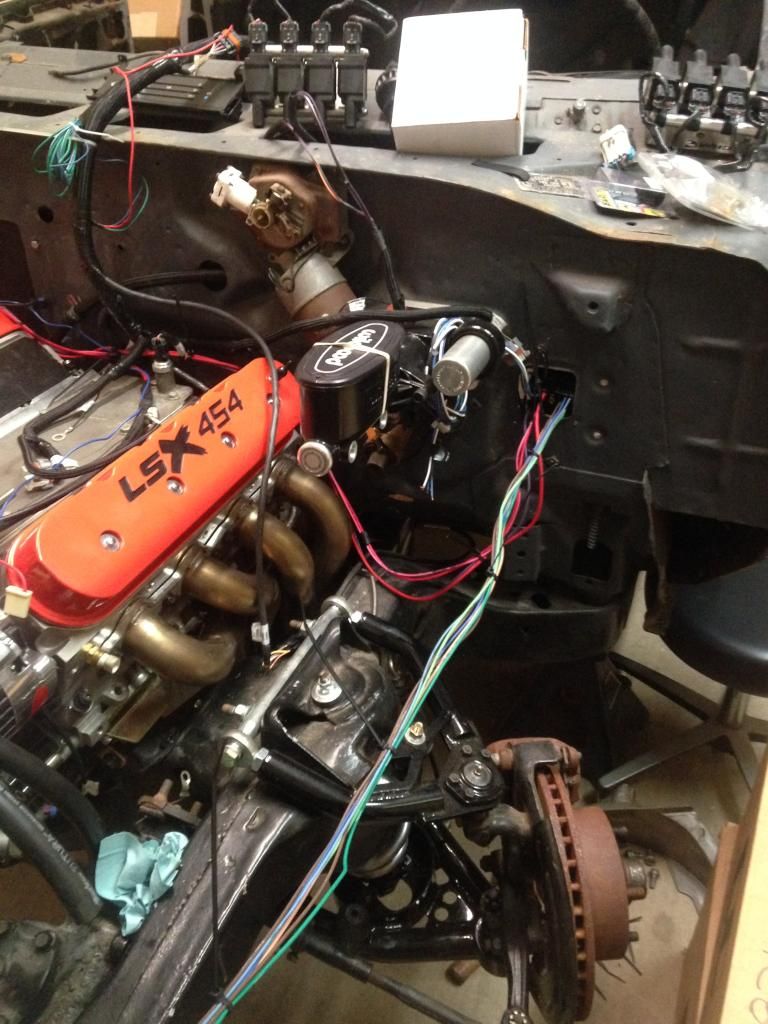
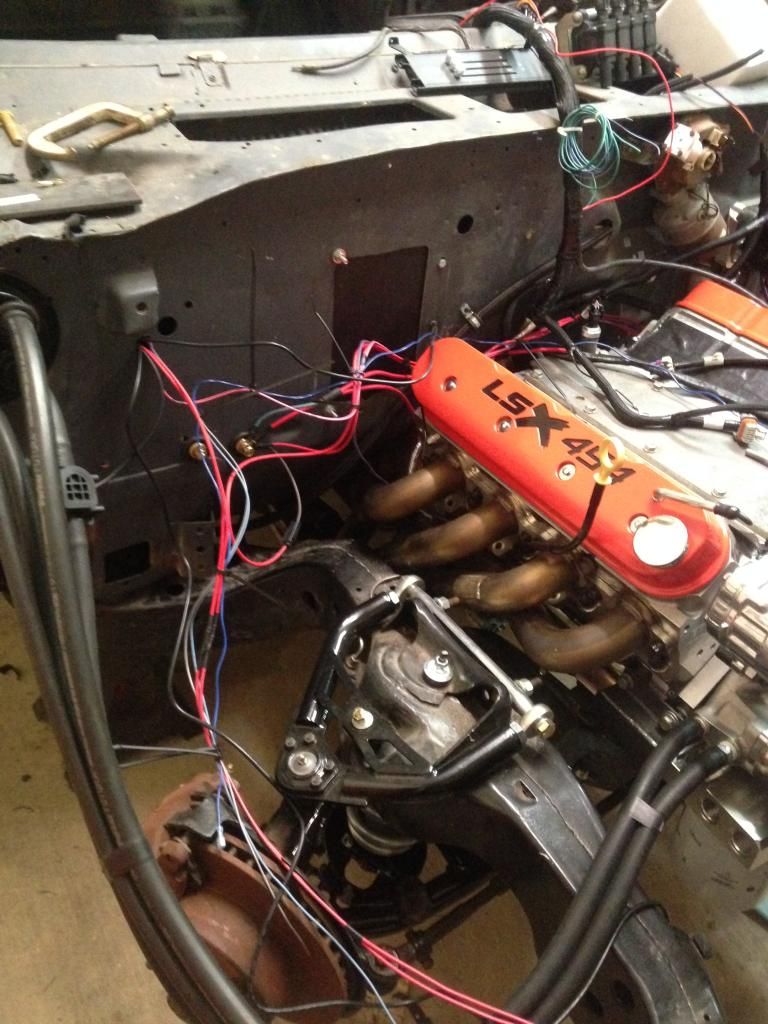
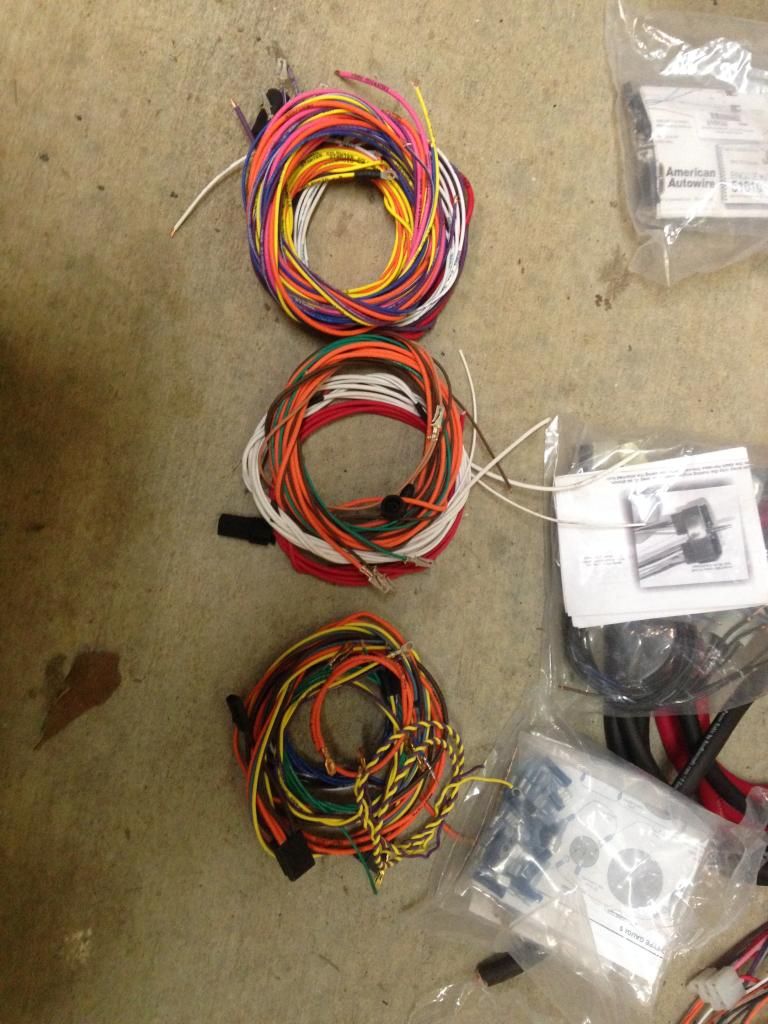
The two front end harnesses mocked in pretty easy…I didn’t really terminate anything because I’m still unsure of routing at this point…I did take a fare amount of wires out of the harnesses for stuff I didn’t need…
All the wires I eliminated…
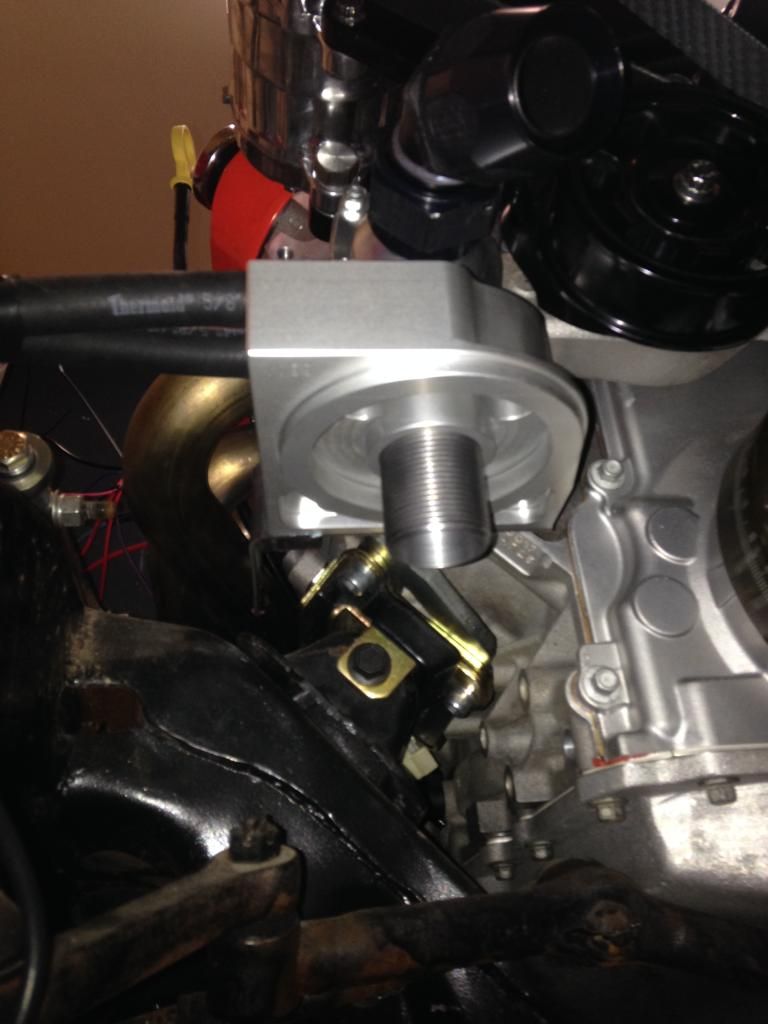
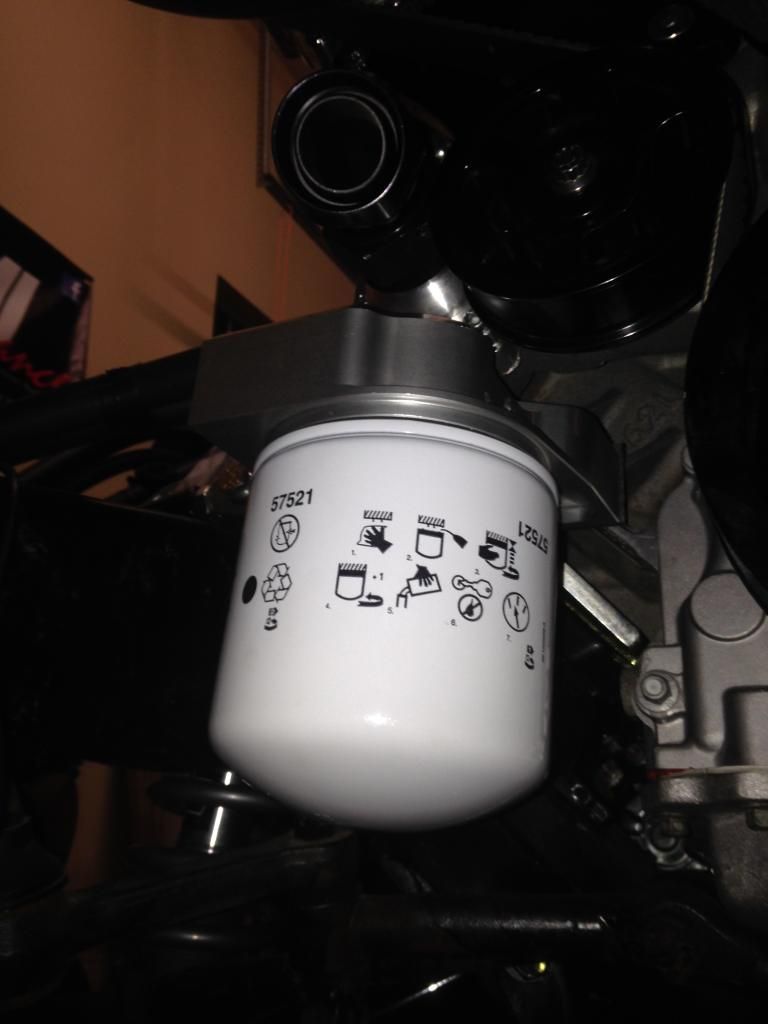
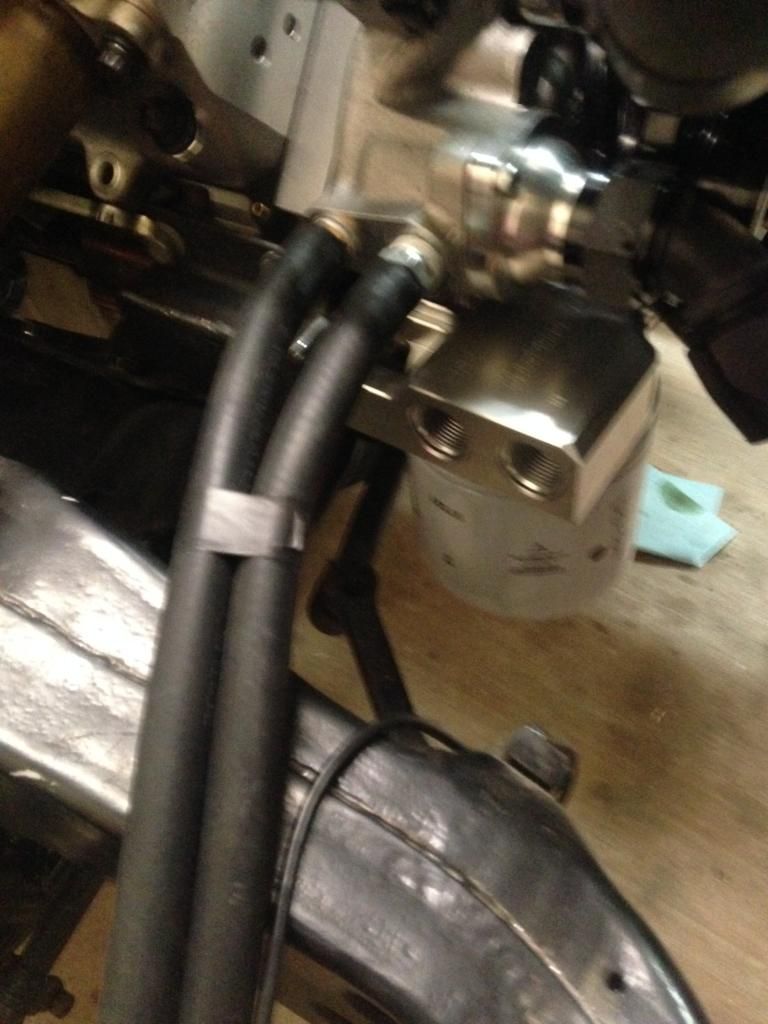
Last thing I did was make a bracket and mounted my oil filter relocation plate, and oil filter….I ran out of time so I couldn’t finish the bracket out for looks, but it does function perfectly…filter is mounted nice and tight to the engine…Just for a reference of the size of the oil filter, the threads for it are 1.5” in diameter….
So on to the pictures….
Battery box mounting

Mounted the 300amp ANL fuse holder on the outside of the box


I mounted the cutoff switch on the outside of the passenger side frame rail….the push/pull rod will come through the valence under the rear bumper…I will drill that hole once I get the bumper I am going to use installed and the valence bolted down…


I plan to trim the bottom of the mounting bracket off at some point…I just forgot to do it while I was there haha….
Battery cables were then run…batt to the switch, switch to the fuse, fuse to the firewall, and the negative from the battery to the firewall…


My first soldered terminal lug compared to my last….gave all of them a good tug and none of them slipped off so I should be good to go…


Power and ground studs coming through the firewall…

Finished product…minus the protective wrap on the box still…

The two front end harnesses mocked in pretty easy…I didn’t really terminate anything because I’m still unsure of routing at this point…I did take a fare amount of wires out of the harnesses for stuff I didn’t need…


All the wires I eliminated…

Last thing I did was make a bracket and mounted my oil filter relocation plate, and oil filter….I ran out of time so I couldn’t finish the bracket out for looks, but it does function perfectly…filter is mounted nice and tight to the engine…Just for a reference of the size of the oil filter, the threads for it are 1.5” in diameter….


 12-07-2014, 09:42 PM
#648
On The Tree

Join Date: Dec 2013
Location: Raleigh, NC
Posts: 157
Likes: 0
Received 0 Likes
on
0 Posts
Nice work - all looks good.
I'm sure you're planning on adding one but make sure you add a rubber grommet or wrap that +12VDC line in electrical tape a few times where it goes through the sheet metal down to the battery disconnect.
I'm sure you're planning on adding one but make sure you add a rubber grommet or wrap that +12VDC line in electrical tape a few times where it goes through the sheet metal down to the battery disconnect.
12-08-2014, 03:50 AM
#650

I probably missed it, but what batt. cable did you use? Any tips on soldering the batt/terminals? I seen in a racing mag ( I KNOW, I KNOW) a common mistake is not heating the cable up enough so the solder wicks down to the inner core of cable wires.
I tried this a few times, and I am having NO LUCK.
thanks,
Jim
I tried this a few times, and I am having NO LUCK.
thanks,
Jim
12-08-2014, 09:37 AM
#651
TECH Enthusiast
Thread Starter
iTrader: (1)
Join Date: May 2012
Posts: 570
Likes: 0
Received 0 Likes
on
0 Posts
I used Knu Koncepts 1/0 cable...you have to use a torch to get the solder to work...I used one of those bernzomatic propane torches...just trim the insulation, slip on the lug, and wave the torch back and forth around the lug...then just tap the end of your solder rod on the end of the wire and when it gets hot enough it will just melt like butter and disappear into the wire, keep adding solder until you see it start to drip out of the bottom of the lug and you are good....then you can add some more on the top as it is cooling down if you want it to look pretty...it took me a couple tries to figure that last part out...
12-11-2014, 08:11 AM
#652
Hey Briou, back on post 462 you were concerned about collapsed lifters and I assume when you primed the oil system, all was good.
I have the Morel HLT lifters and some of them collapsed when I was doing PR length checks and getting all of that right and I'm hoping everything will be good when I prime it.
How did you prime yours?
I have the Morel HLT lifters and some of them collapsed when I was doing PR length checks and getting all of that right and I'm hoping everything will be good when I prime it.
How did you prime yours?
12-11-2014, 09:37 AM
#653
TECH Enthusiast
Thread Starter
iTrader: (1)
Join Date: May 2012
Posts: 570
Likes: 0
Received 0 Likes
on
0 Posts
Hey Briou, back on post 462 you were concerned about collapsed lifters and I assume when you primed the oil system, all was good.
I have the Morel HLT lifters and some of them collapsed when I was doing PR length checks and getting all of that right and I'm hoping everything will be good when I prime it.
How did you prime yours?
I have the Morel HLT lifters and some of them collapsed when I was doing PR length checks and getting all of that right and I'm hoping everything will be good when I prime it.
How did you prime yours?
12-14-2014, 09:29 AM
#656
TECH Enthusiast
Thread Starter
iTrader: (1)
Join Date: May 2012
Posts: 570
Likes: 0
Received 0 Likes
on
0 Posts
Well I didn't take anything out of the EFI harness...that harness came straight from holley and it was perfect....those wires came out of the body harness from american autowire....things like the oil pressure, tach, water temp, TSS, HEI, etc....stuff that I would have used if I was using a sbc or bbc, but with the holley harness I don't need any of it....Pretty much just left the wires for the lights and wiper motor.
12-14-2014, 10:47 PM
#659
TECH Enthusiast
Thread Starter
iTrader: (1)
Join Date: May 2012
Posts: 570
Likes: 0
Received 0 Likes
on
0 Posts
Just ordered a weatherpack connector kit so hopefully I will be able to get most of the front end wiring buttoned up over Christmas break...I think I am going to try to get the fenders and wheel houses on also so I can work on routing the wires so they will all be hidden...should be some good progress made over the break...I will keep y'all posted...
12-21-2014, 09:53 AM
#660
TECH Senior Member
iTrader: (7)

Here is some excellent tech regarding the termination of battery cables. In short, they should be crimped and soldered.
http://blog.iimuchfabrication.com/?p=360#more-360
Andrew
http://blog.iimuchfabrication.com/?p=360#more-360
Andrew