
How to check pistons for damage?
 01-24-2009, 12:39 PM
#1

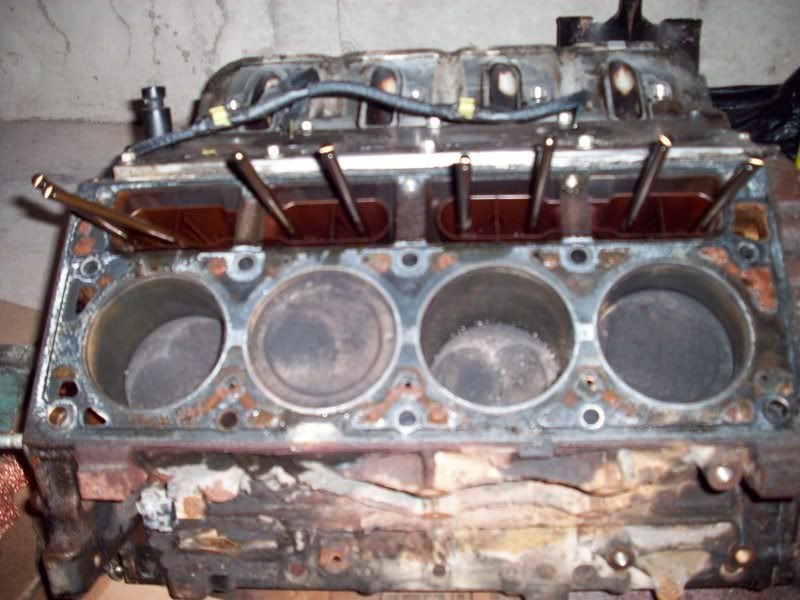
Got one of the heads off since I'm replacing the head gaskets, I wanted to check the pistons to see if there is a lot of life left in them. I was told to check the sides of them... well, whats the quickest way to check?

 01-24-2009, 07:31 PM
#5

Trending Topics
01-24-2009, 07:56 PM
#8
TECH Fanatic

Join Date: Jul 2007
Posts: 1,516
Likes: 0
Received 0 Likes
on
0 Posts
How much internal engine work have you done? From your posts it sounds like this is your first engine tear down. You might want to look into getting some help doing this so you dont have any problems getting it back together.
You need to flip the engine over and remove the oil pan. Then you have to remove the rod bolts and the caps. You need to keep the caps with the rod they go with and keep them in the correct orientation to the rod. Then you can push the rod and piston assembly out the top of the block.
You will need some more tools to get them back into the bores. You should check the crankshaft rod journals while you have them off. I would also replace the rod bolts with arp pieces while I had them apart.
01-24-2009, 08:01 PM
#9
Thats awesome, no one ever replies like that.
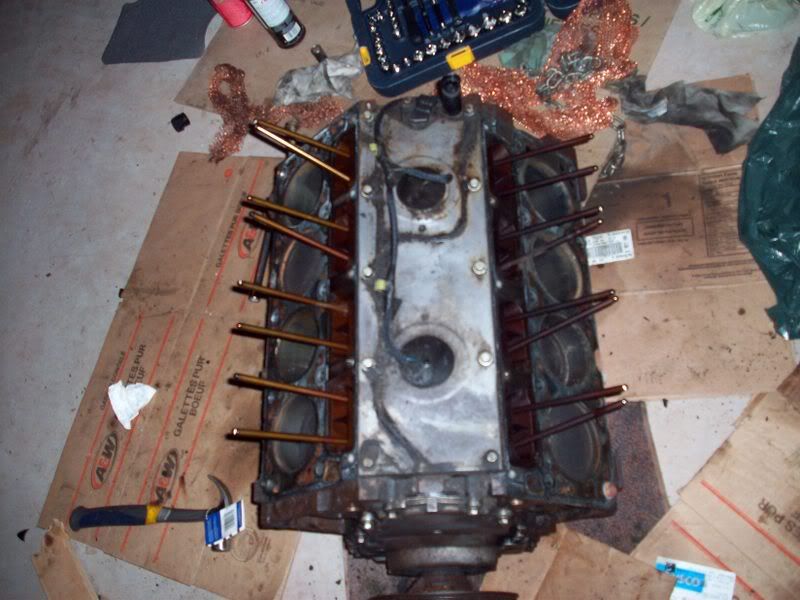
Take all the pushrods out, remove the oil pressure sending unit, and the cam position sensor so none of it gets damaged.
Hopefully you drained the oil out already, if not find a way to get it out. Then roll the engine upside down.
Remove all the oil pan bolts, and the pan.
Remove the windage tray, if you don't know what that is, you'll find out when you see it, you'll know.
Then you will see all the rod ends with the bolts.
Make sure you mark them all real good with something that won't wipe off, preferably stamp them.
Make sure each cap goes on the rod it came off of most important.
and make sure each piston/rod goes back in the cylinder you took it out of.
There should be a mark on the piston that points to the front, make sure you find it, or make you own marks.
Then post more pics.
01-24-2009, 08:14 PM
#10
How much internal engine work have you done? From your posts it sounds like this is your first engine tear down. You might want to look into getting some help doing this so you dont have any problems getting it back together.
You need to flip the engine over and remove the oil pan. Then you have to remove the rod bolts and the caps. You need to keep the caps with the rod they go with and keep them in the correct orientation to the rod. Then you can push the rod and piston assembly out the top of the block.
You will need some more tools to get them back into the bores. You should check the crankshaft rod journals while you have them off. I would also replace the rod bolts with arp pieces while I had them apart.
You need to flip the engine over and remove the oil pan. Then you have to remove the rod bolts and the caps. You need to keep the caps with the rod they go with and keep them in the correct orientation to the rod. Then you can push the rod and piston assembly out the top of the block.
You will need some more tools to get them back into the bores. You should check the crankshaft rod journals while you have them off. I would also replace the rod bolts with arp pieces while I had them apart.
Thats awesome, no one ever replies like that.
Take all the pushrods out, remove the oil pressure sending unit, and the cam position sensor so none of it gets damaged.
Hopefully you drained the oil out already, if not find a way to get it out. Then roll the engine upside down.
Remove all the oil pan bolts, and the pan.
Remove the windage tray, if you don't know what that is, you'll find out when you see it, you'll know.
Then you will see all the rod ends with the bolts.
Make sure you mark them all real good with something that won't wipe off, preferably stamp them.
Make sure each cap goes on the rod it came off of most important.
and make sure each piston/rod goes back in the cylinder you took it out of.
There should be a mark on the piston that points to the front, make sure you find it, or make you own marks.
Then post more pics.
 I think I'll get a stand before I proceed. Thanks for the info.
01-24-2009, 08:19 PM
I think I'll get a stand before I proceed. Thanks for the info.
01-24-2009, 08:19 PM
#11
How much internal engine work have you done? From your posts it sounds like this is your first engine tear down. You might want to look into getting some help doing this so you dont have any problems getting it back together.
You need to flip the engine over and remove the oil pan. Then you have to remove the rod bolts and the caps. You need to keep the caps with the rod they go with and keep them in the correct orientation to the rod. Then you can push the rod and piston assembly out the top of the block.
You will need some more tools to get them back into the bores. You should check the crankshaft rod journals while you have them off. I would also replace the rod bolts with arp pieces while I had them apart.
You need to flip the engine over and remove the oil pan. Then you have to remove the rod bolts and the caps. You need to keep the caps with the rod they go with and keep them in the correct orientation to the rod. Then you can push the rod and piston assembly out the top of the block.
You will need some more tools to get them back into the bores. You should check the crankshaft rod journals while you have them off. I would also replace the rod bolts with arp pieces while I had them apart.
There's no oil pan on the motor right now, which is a plus?
What are "crankshaft rod journals" and what are rod bolts?
01-24-2009, 08:20 PM
#12

 01-25-2009, 01:54 PM
#16
01-25-2009, 02:13 PM
#17
Just a heads-up for ALL the newbies out there. You might use the US bolts once and get by with it, but when the threads pull out of your block, it's Helicoil time!

Russ
01-25-2009, 03:38 PM
#18
Didn't mistype anything,  Epro is an obvious newbie and (like many other newbies) might be tempted to ruin his block by bolting it to his new engine stand with 3/8" US bolts instead of the required METRIC fasteners.
Just a heads-up for ALL the newbies out there. You might use the US bolts once and get by with it, but when the threads pull out of your block, it's Helicoil time!
Russ
Just a heads-up for ALL the newbies out there. You might use the US bolts once and get by with it, but when the threads pull out of your block, it's Helicoil time!
Russ
