
The new stripes (Sunoco) on my SS - My install in detail
 09-24-2009, 01:17 AM
#1
Staging Lane
Thread Starter
iTrader: (8)
Join Date: Sep 2004
Location: Phoenix, AZ
Posts: 62
Likes: 0
Received 0 Likes
on
0 Posts

So I ended installing a set of Sunoco stripes on my SS. I chose flat black because I love the subtle clean look against the black paint. I also like the nastalgia of it as a lot of muscle cars back in the day had flat black stripes. That's also why I picked the flat black manta stripe set that I have on it as well.
In addition to showing off my new stripes, I wanted to illustrate my installation process. I used this same installation process for the stripes on my spoiler and they came out perfect. Except for maybe those two really small dog hairs . Unfortunately, the one on my hood was the learning experience. I'm thinking of just replacinging it since there's a small imperfection due to installation. Anyway, here goes...
First, I prepped the car by clay-barring the area the vinyl was to be placed on. Then I cleaned the area with alcohol. This might be overkill, but I felt that I would rather be safe than sorry.
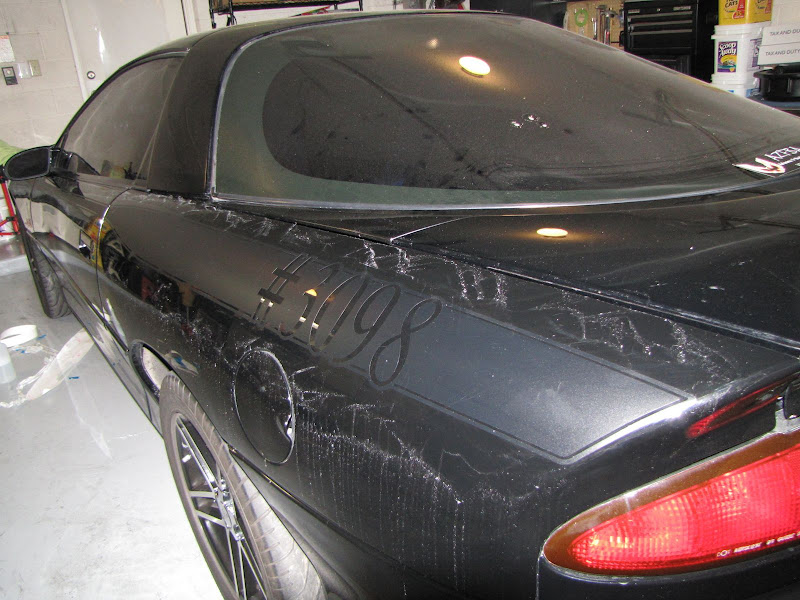
There are two sides to the stripes. The sticky side has the 3M backing, and the non-sticky side that has a heavy-duty paper. If you're interested in where I got the stripes from, send me a pm and I'll let you know over pm since I don't think they are a sponsor. Or just do a google search for Camaro Sunoco stripes and they come right up. The cool thing about these is that the vendor allows you to get have any script added to them at no charge. So I went ahead and got my build number to go one step further in making the SS a bit more unique.
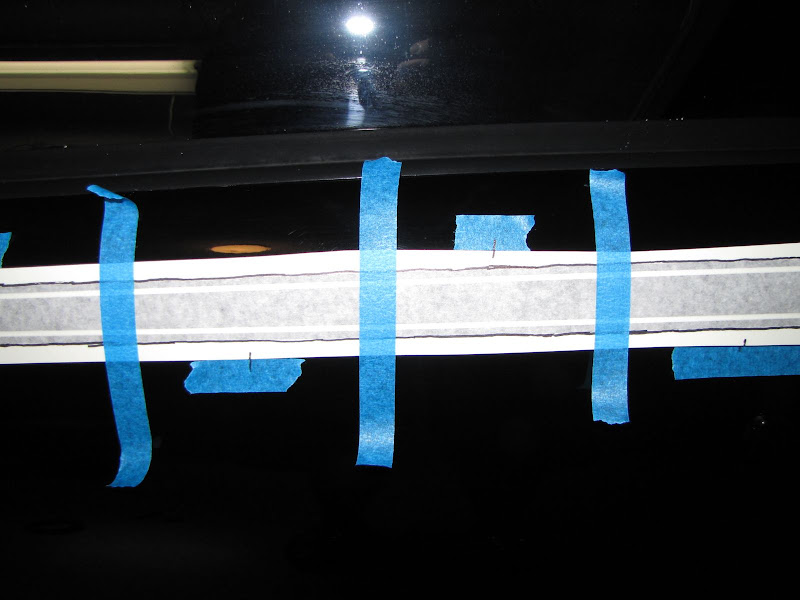
I'm not sure if it's the same for every color, but with black on black, the outline of the decal disappears on the car when the paper backing is wet, so I took a sharpie and traced the outline of the vinyl graphic on the paper side. You'll be able to see it in a later picture. I had to make sure to use a sharpie, because a regular pen will just smear when you apply the water.
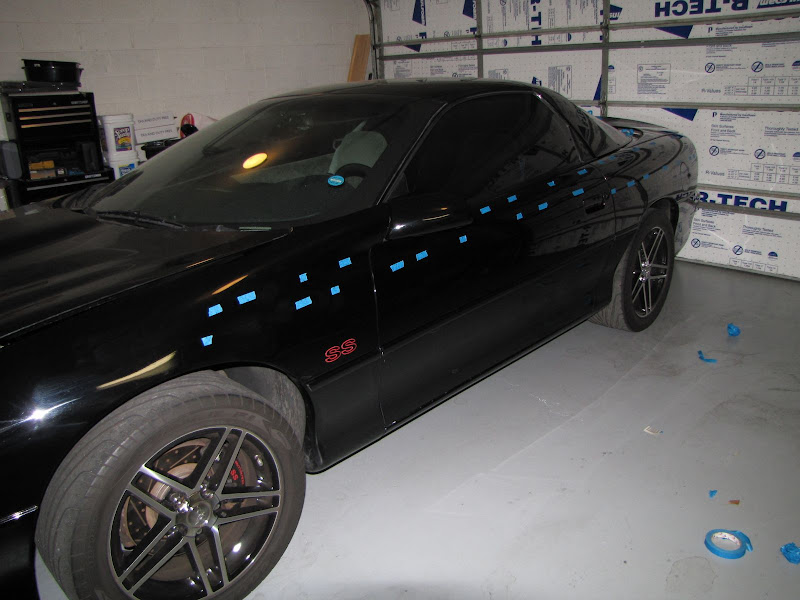
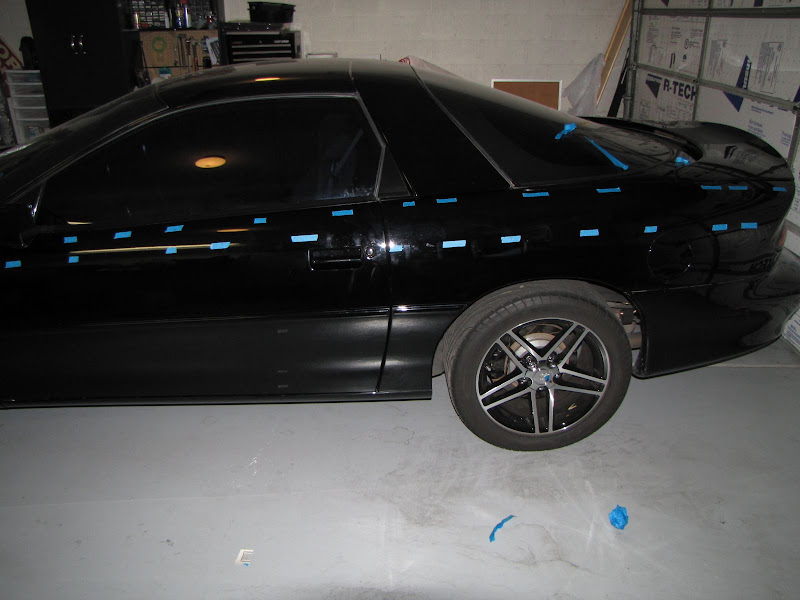
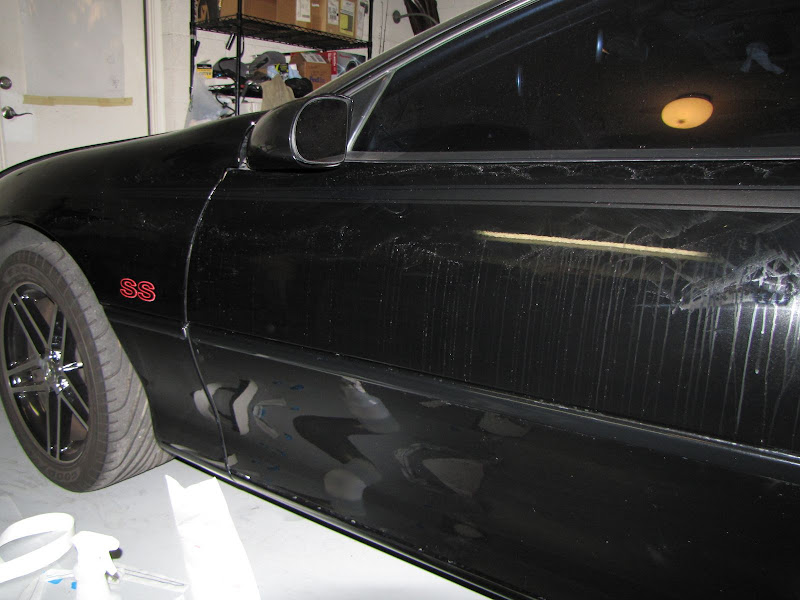
Next, I laid out all three peices (rear fender, door, front fender) on the car and positioned them to make sure that I liked where they would be placed. I used 3M blue painters tape. The cheap crap doesn't hold up very well.
Notice the outline?
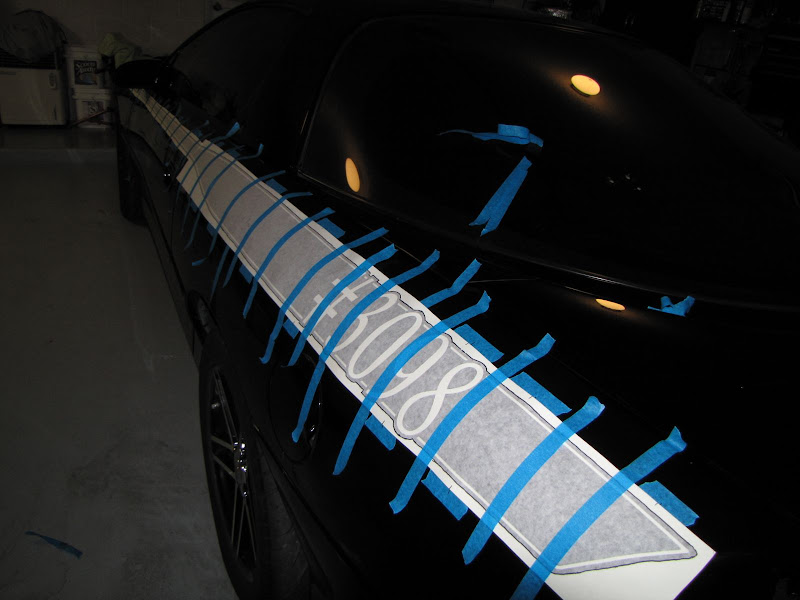

I then placed tape along the top and bottom of the graphic all along the car. I then put hash marks with a sharpie (half on the tape and half on the graphic backing paper) so that I could line it up once I had the sticky side exposed.
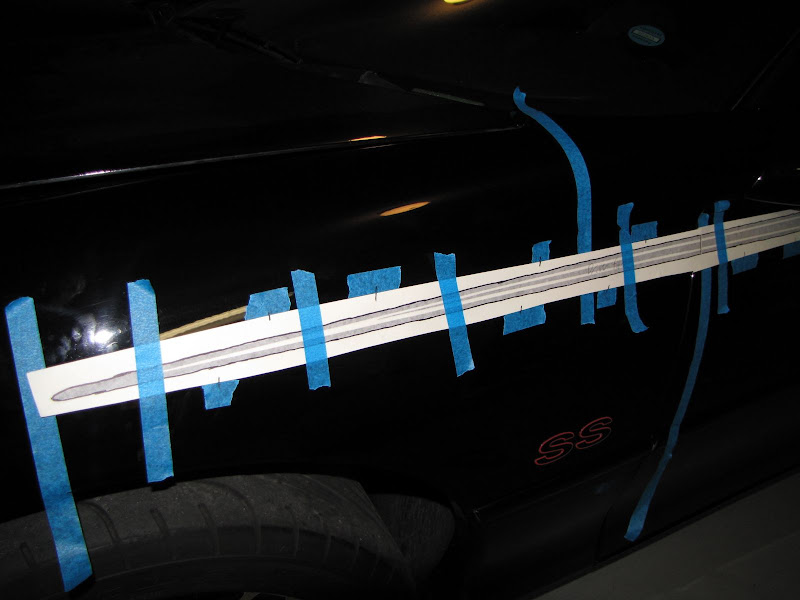
I then removed the graphic and the tape holding it on so that the only thing left on the car was the tape with the hash marks.
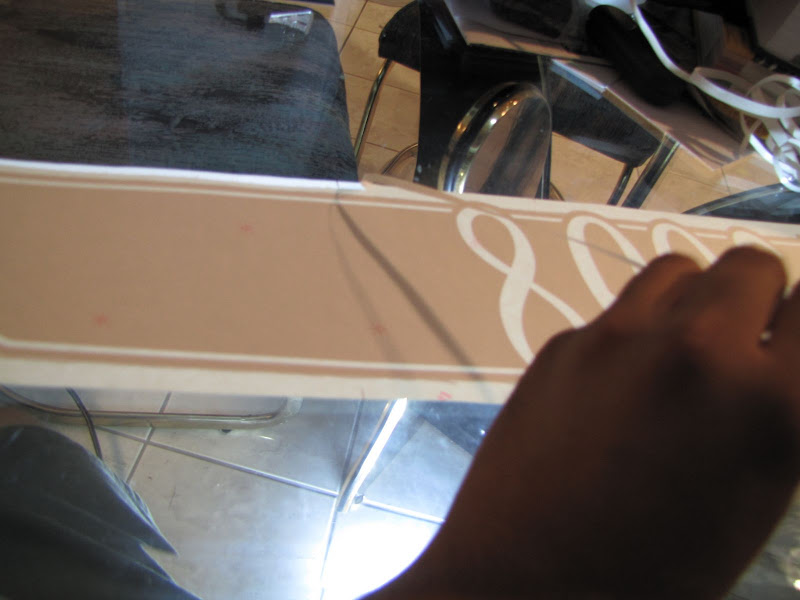
I then took the graphic and placed a light underneath it with the sticky side up so that the vinyl would be easier to see. Luckily, I have a glass table which made it a bit easier.

I then took a razor and cut off a small width of a strip off of the top of the graphic (sticky side) making sure only to cut the 3M backing layer.

Here's a close up of the cut.

I then slowly peeled off the strip I had just cut.
I then took the graphic back to the car and lined it up with the hash marks. The strip that I had removed exposed the sticky side of the paper allowing me to stick it to the car and line it up with the hash marks easier.
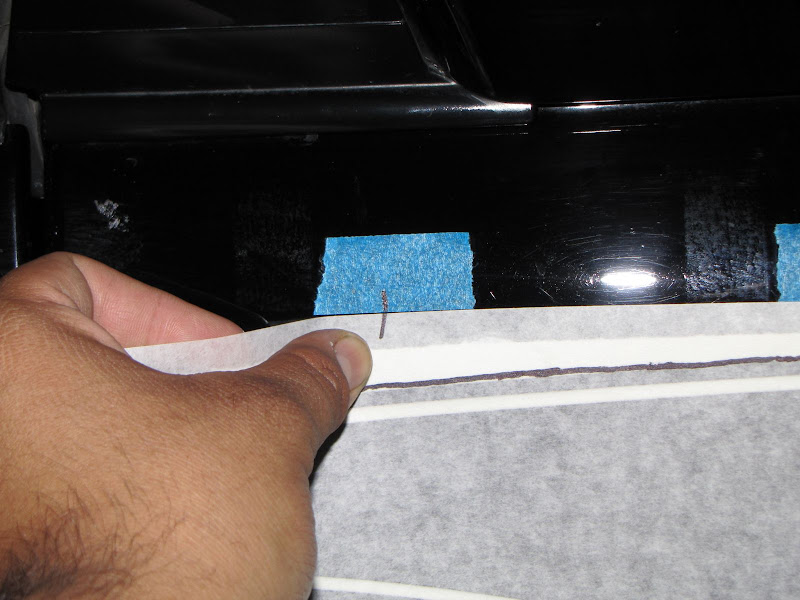
With the graphic lined up with the hash marks, I was able to peel off the 3M backing and spray both the car and vinyl with the soapy solution. For the soapy solution, I used a bottle full of distilled water with a drop, (maybe two) of dishwashing liquid. I made sure to use warm water to warm up the vinyl and keep it plyable (sp?). See how it's starting to disappear? That's where the sharpie outline comes in handy. Now I know exactly where the vinyl is.
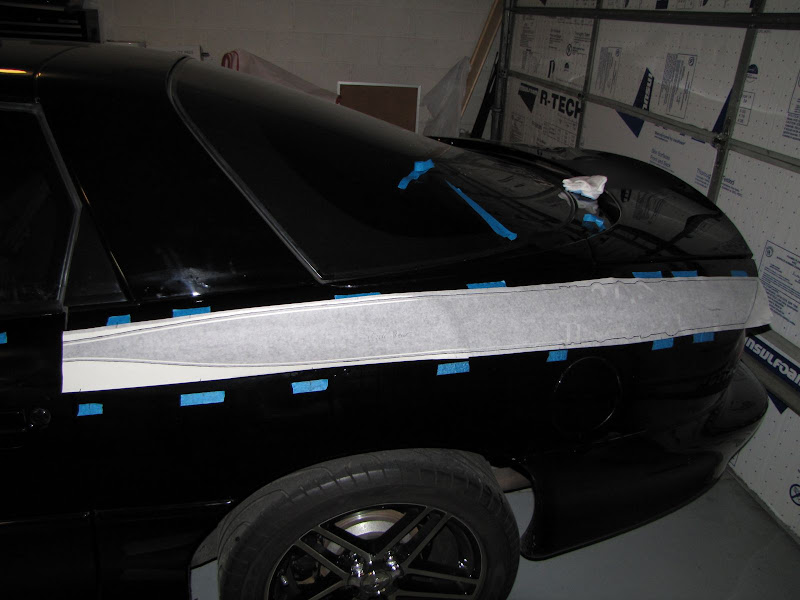
Squeegy out all the water. I felt that a hard plastic squeegy such as a bondo or spackle applicator would be too abrasive, especially since you'll be rubbing it on the car. I used a rubber one. I found that the best method for me was to squeegy at an angle. From the middle then out at a 45deg angle, not straight up and down. Bend the excess in the door jam over.

When I thought I had all of the water out, I then sprayed the paper surface of the graphic to act as a lubricant as I went over it a few more times. This also helped the paper separate from the vinyl a bit easier.

When I felt that it was dry enough, I peeled the paper off slowly. This is the result. No bubbles.
I then used the same strategy on the door and front fender.
In addition to showing off my new stripes, I wanted to illustrate my installation process. I used this same installation process for the stripes on my spoiler and they came out perfect. Except for maybe those two really small dog hairs
. Unfortunately, the one on my hood was the learning experience. I'm thinking of just replacinging it since there's a small imperfection due to installation. Anyway, here goes...First, I prepped the car by clay-barring the area the vinyl was to be placed on. Then I cleaned the area with alcohol. This might be overkill, but I felt that I would rather be safe than sorry.
There are two sides to the stripes. The sticky side has the 3M backing, and the non-sticky side that has a heavy-duty paper. If you're interested in where I got the stripes from, send me a pm and I'll let you know over pm since I don't think they are a sponsor. Or just do a google search for Camaro Sunoco stripes and they come right up. The cool thing about these is that the vendor allows you to get have any script added to them at no charge. So I went ahead and got my build number to go one step further in making the SS a bit more unique.
I'm not sure if it's the same for every color, but with black on black, the outline of the decal disappears on the car when the paper backing is wet, so I took a sharpie and traced the outline of the vinyl graphic on the paper side. You'll be able to see it in a later picture. I had to make sure to use a sharpie, because a regular pen will just smear when you apply the water.
Next, I laid out all three peices (rear fender, door, front fender) on the car and positioned them to make sure that I liked where they would be placed. I used 3M blue painters tape. The cheap crap doesn't hold up very well.
Notice the outline?
I then placed tape along the top and bottom of the graphic all along the car. I then put hash marks with a sharpie (half on the tape and half on the graphic backing paper) so that I could line it up once I had the sticky side exposed.
I then removed the graphic and the tape holding it on so that the only thing left on the car was the tape with the hash marks.
I then took the graphic and placed a light underneath it with the sticky side up so that the vinyl would be easier to see. Luckily, I have a glass table which made it a bit easier.
I then took a razor and cut off a small width of a strip off of the top of the graphic (sticky side) making sure only to cut the 3M backing layer.
Here's a close up of the cut.
I then slowly peeled off the strip I had just cut.
I then took the graphic back to the car and lined it up with the hash marks. The strip that I had removed exposed the sticky side of the paper allowing me to stick it to the car and line it up with the hash marks easier.
With the graphic lined up with the hash marks, I was able to peel off the 3M backing and spray both the car and vinyl with the soapy solution. For the soapy solution, I used a bottle full of distilled water with a drop, (maybe two) of dishwashing liquid. I made sure to use warm water to warm up the vinyl and keep it plyable (sp?). See how it's starting to disappear? That's where the sharpie outline comes in handy. Now I know exactly where the vinyl is.
Squeegy out all the water. I felt that a hard plastic squeegy such as a bondo or spackle applicator would be too abrasive, especially since you'll be rubbing it on the car. I used a rubber one. I found that the best method for me was to squeegy at an angle. From the middle then out at a 45deg angle, not straight up and down. Bend the excess in the door jam over.
When I thought I had all of the water out, I then sprayed the paper surface of the graphic to act as a lubricant as I went over it a few more times. This also helped the paper separate from the vinyl a bit easier.
When I felt that it was dry enough, I peeled the paper off slowly. This is the result. No bubbles.
I then used the same strategy on the door and front fender.
 09-24-2009, 01:17 AM
#2
Staging Lane
Thread Starter
iTrader: (8)
Join Date: Sep 2004
Location: Phoenix, AZ
Posts: 62
Likes: 0
Received 0 Likes
on
0 Posts
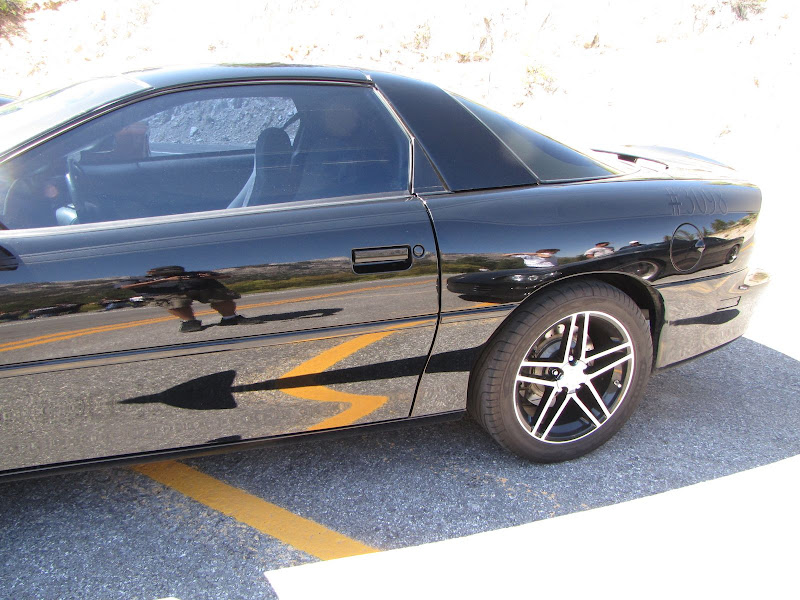
Some pics of the finished product...

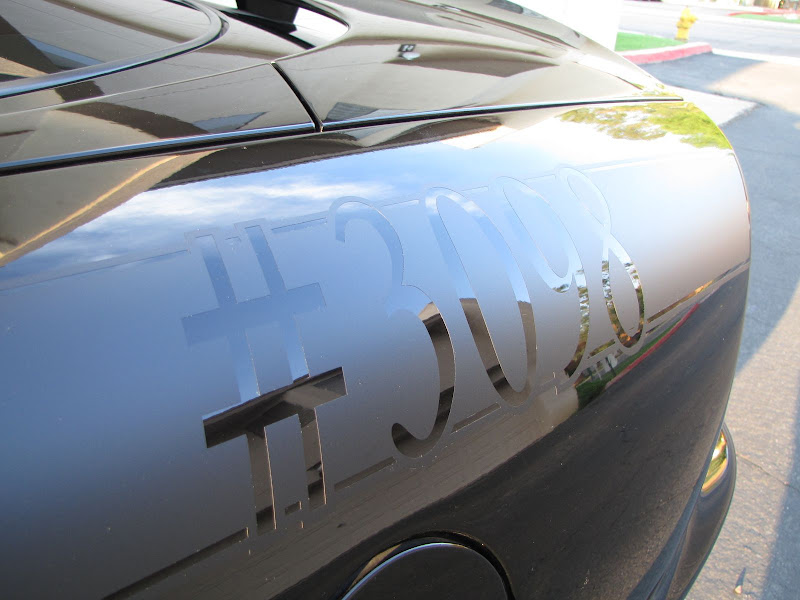
You can also see my flat black hood scoop in this pic. I love how subtle everything is. Almost ghosted.


One more pic to show off the nightshades...
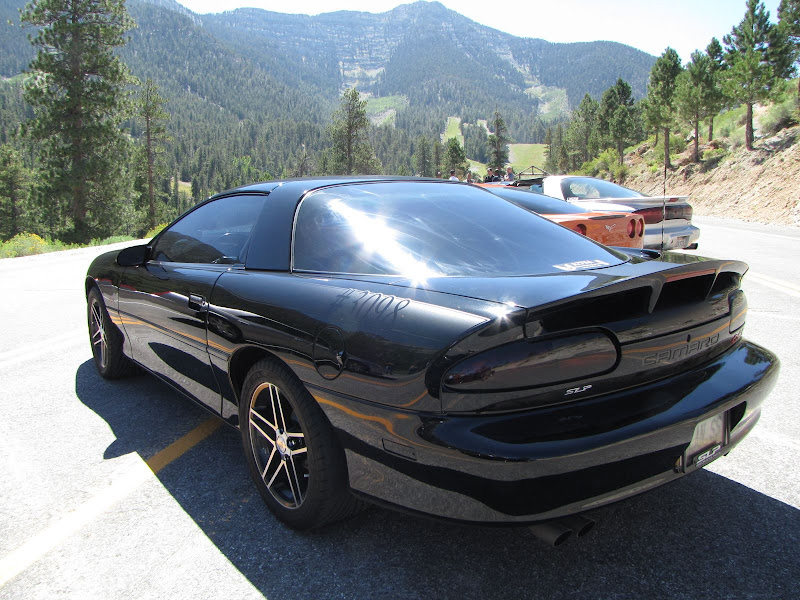
I have now had them on the car for about 3 weeks and I love them. I've gotten so many positive comments on their appearance. Overall, it took me a total of about 8 hours to install these stripes, but that's only because I like to take my time and make sure everything is perfect. It's definately not very hard, but I guess that's all relative.
You can also see my flat black hood scoop in this pic. I love how subtle everything is. Almost ghosted.
One more pic to show off the nightshades...
I have now had them on the car for about 3 weeks and I love them. I've gotten so many positive comments on their appearance. Overall, it took me a total of about 8 hours to install these stripes, but that's only because I like to take my time and make sure everything is perfect. It's definately not very hard, but I guess that's all relative.
Last edited by 02SS3098; 09-24-2009 at 01:24 AM.
 09-24-2009, 02:22 AM
#4
12 Second Club
iTrader: (17)

Join Date: Dec 2004
Location: Cooper City, FL
Posts: 1,449
Likes: 0
Received 0 Likes
on
0 Posts
looks awesome and I definitely see what you mean by ghost in the sunny outside picture.
stupid question but does this only go on one side of the car?
Chad
stupid question but does this only go on one side of the car?
Chad


Trending Topics
09-24-2009, 07:06 PM
#12
That looks AWESOME! I love how subtle the flat black on black paint is. I'm normally not a big fan of stripes but WOW that looks good. If my car was black I would totally copy off you 
