Forced Induction Superchargers | Turbochargers | Intercoolers

ATI balancer crank pinning write-up.

Old 12-27-2009, 07:40 PM
  #1  
TECH Addict
Thread Starter
iTrader: (66)
 
blk00ss's Avatar
 
Join Date: Feb 2007
Location: Jasper, AL
Posts: 2,366
Likes: 0
Received 5 Likes on 5 Posts

Default ATI balancer crank pinning write-up.

I decided I would try and do a write-up, with some pictures to try and show you how to do this. I searched and searched to try and find some pictures, to no avail. I will try my best to describe my process, it differed a little diffrent then ATI's instructions.

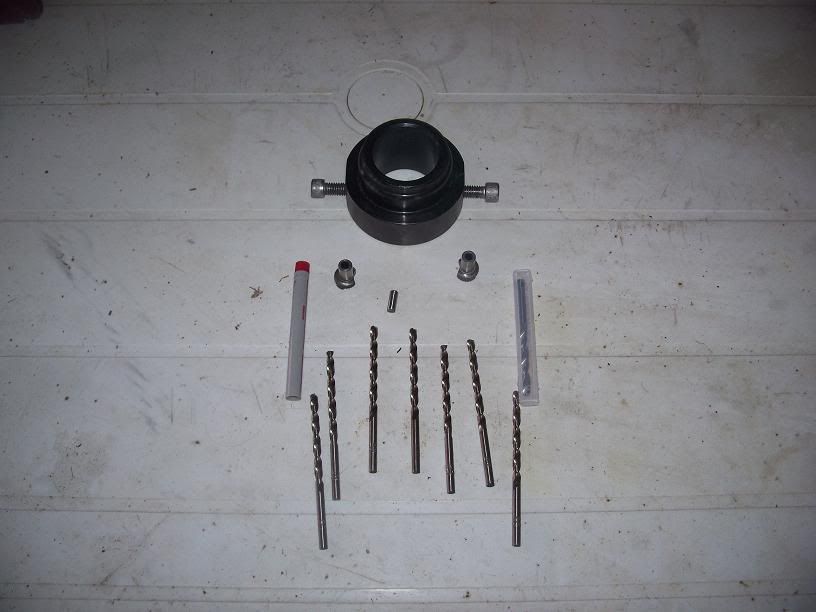
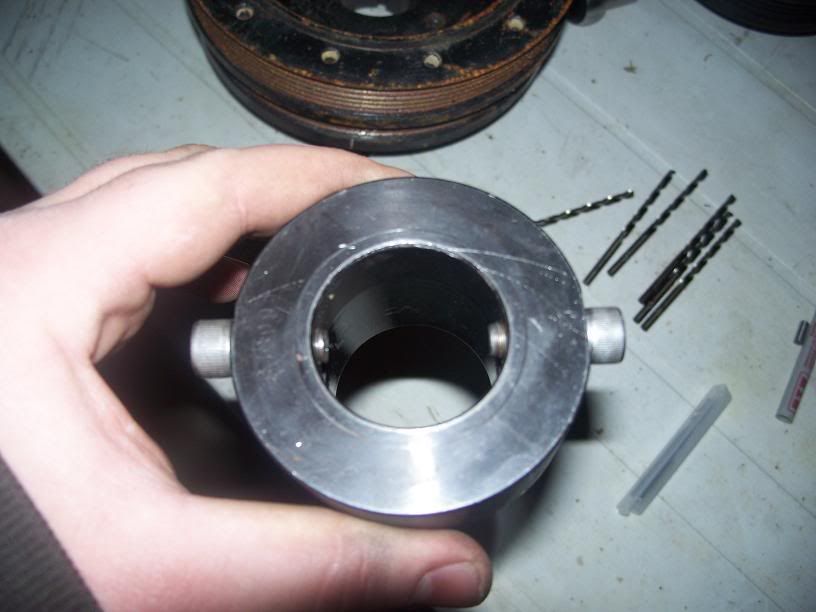
Here's what I started with. A hand full of "cobalt" 11/64" drill bits. Couldnt find any carbide bits locally. Then I got a hold of 2 "carbide" 3/16" drill bits. I used 2 bolts screwed into the collar that stick into the middle of the collar just long enough to touch the crank. They kept the collar from going to far into the timing cover when the balancer bolt was bolted on to hold the collar in place.
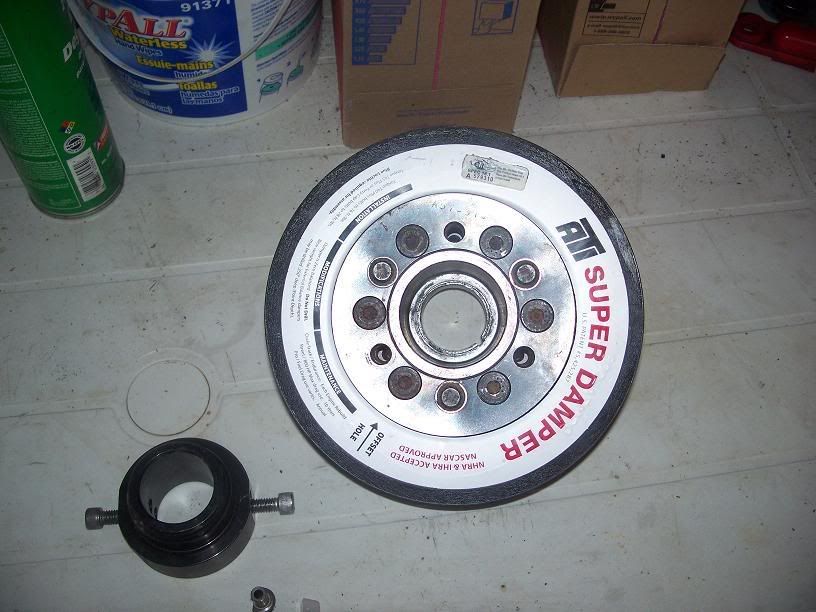

Firs things first, take old balancer off.
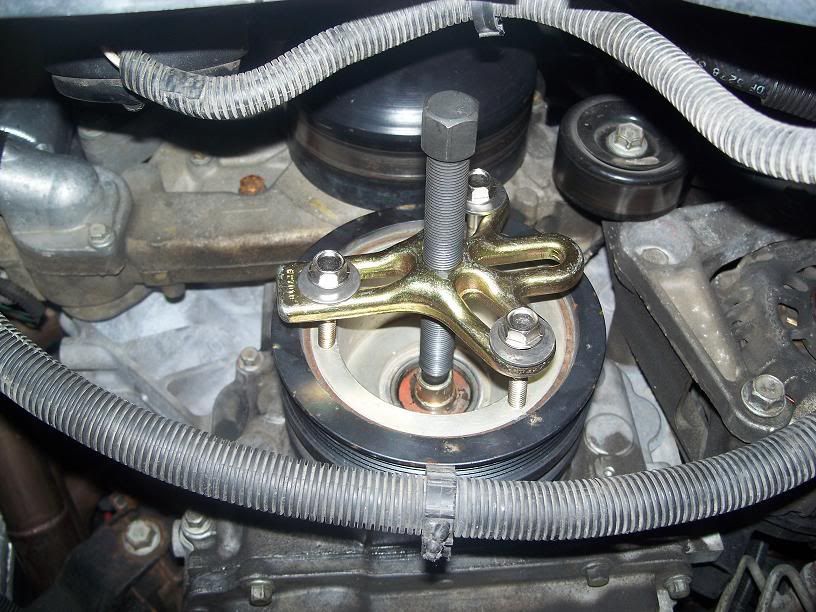

Then we did some measuring and taped off the drill bit to make sure we didnt drill to far into the crank. And the collar was installed with the 11/64" bushing. Tried drilling for about 5 minutes solid without even making a dent in the crank. By the way this is a forged Eagle crank! So out came the 11/64" bushing and went in the 3/16" bushing and a carbide 3/16" bit. Now were talking! Cut like butta!
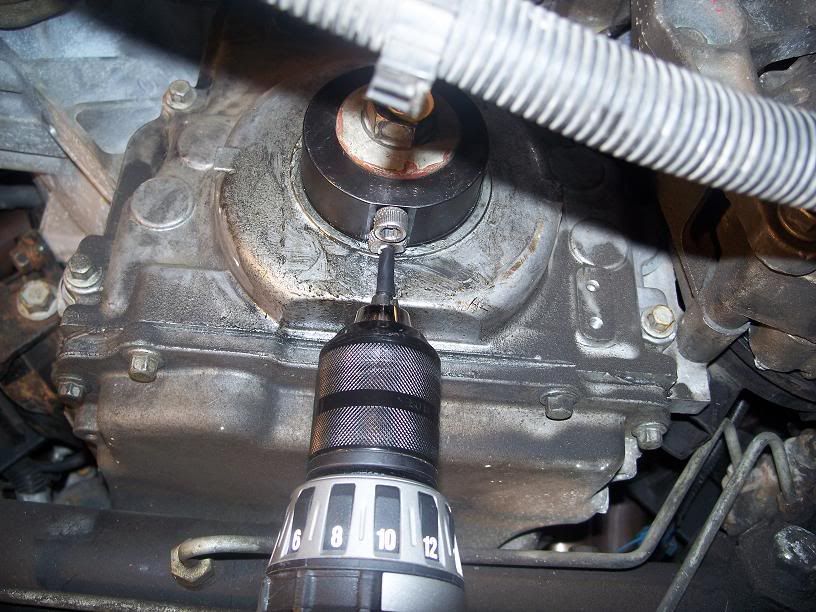

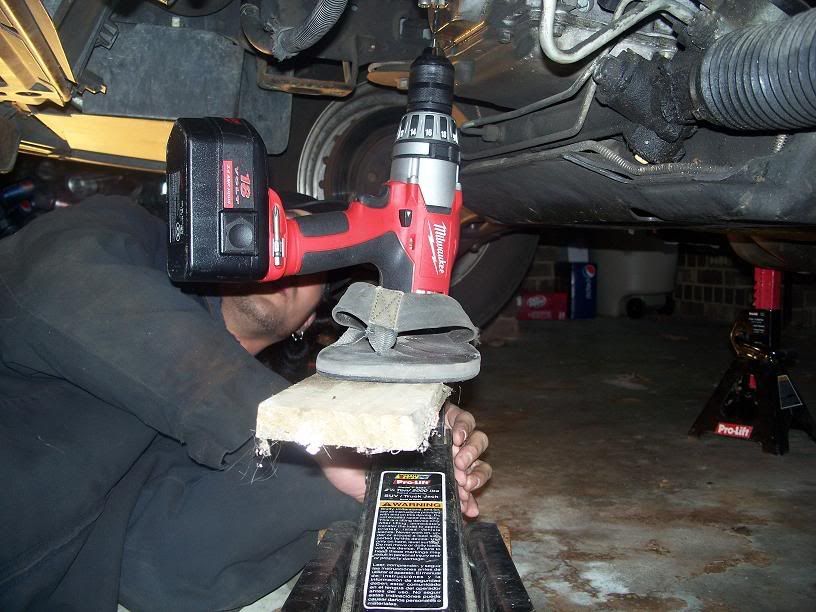
Here was our home made drill press

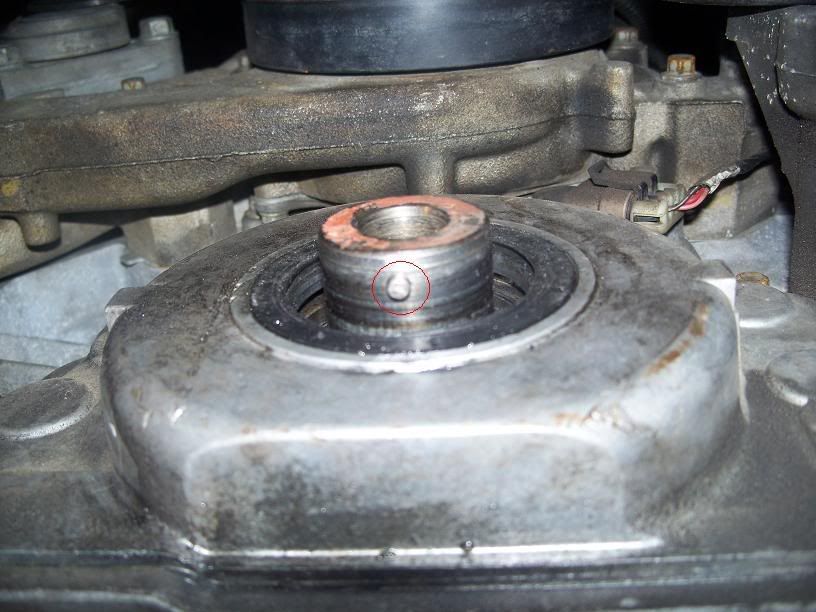
Here is the dowel pin installed

Installing the new ATI balancer with my buddy's home made install tool lol
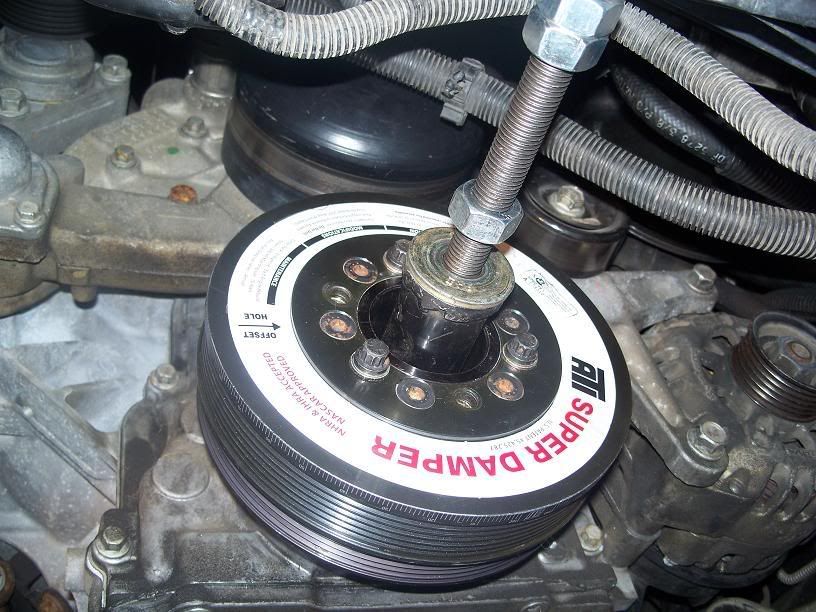

And fully installed...just wating for the 8rib pulley to be installed
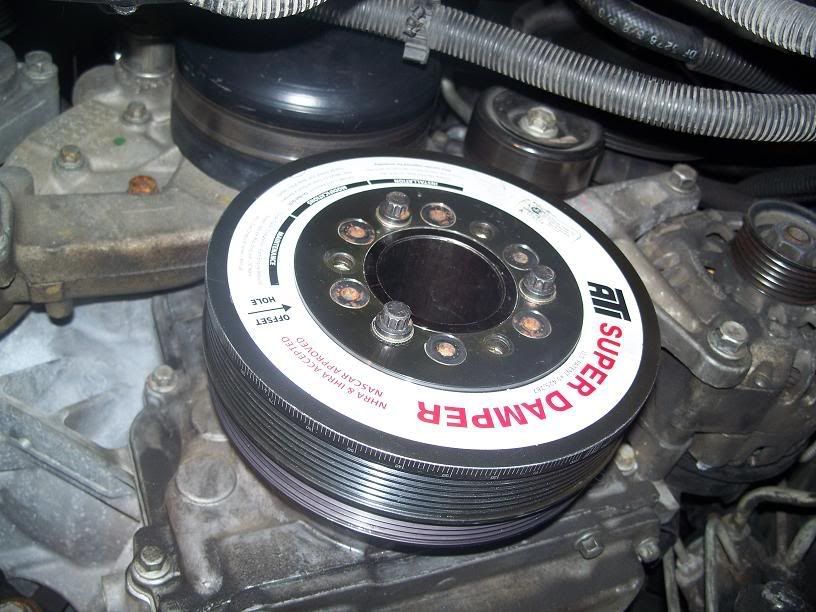

Ok now I know this isnt really that hard, but kind of confusing as the instructions found online are a joke. Maybe someone will run across this one day and it will help!
Old 12-27-2009, 09:55 PM
  #2  
Staging Lane
iTrader: (11)
 
whywhine's Avatar
 
Join Date: Aug 2006
Location: Down south
Posts: 93
Likes: 0
Received 0 Likes on 0 Posts

Default

Nice info to have!!!!
Old 12-29-2009, 02:48 PM
  #3  
TECH Enthusiast
iTrader: (35)
 
baylove's Avatar
 
Join Date: Jun 2008
Location: mesa,arizona
Posts: 734
Likes: 0
Received 0 Likes on 0 Posts

Default

thanks man nice write up greatly appreciated
Old 12-29-2009, 03:18 PM
  #4  
TECH Enthusiast
iTrader: (8)
 
TracyRR's Avatar
 
Join Date: Sep 2009
Location: Louisiana
Posts: 699
Likes: 0
Received 2 Likes on 2 Posts

Default

A++++ Thanks!
Old 12-29-2009, 03:32 PM
  #5  
Registered User
iTrader: (125)
 
stangeater01's Avatar
 
Join Date: Oct 2003
Location: New Orleans
Posts: 569
Likes: 0
Received 0 Likes on 0 Posts

Default

Originally Posted by whywhine
Nice info to have!!!!
by far the best advar i have seen.. nice write up
Old 01-08-2010, 09:03 PM
  #6  
Launching!
 
red 454's Avatar
 
Join Date: Apr 2005
Location: CAIRNS QLD AUST
Posts: 208
Likes: 0
Received 0 Likes on 0 Posts
Default

SO DOES THE DOWEL PIN IN THE CRANK FIT IN TO THE KEYWAY IN THE BALANCER ?
sorrey about the cap locks
Old 01-08-2010, 10:52 PM
  #7  
TECH Apprentice
iTrader: (10)
 
WS6Drop's Avatar
 
Join Date: Oct 2005
Posts: 355
Likes: 0
Received 0 Likes on 0 Posts

Default

Originally Posted by red 454
SO DOES THE DOWEL PIN IN THE CRANK FIT IN TO THE KEYWAY IN THE BALANCER ?
sorrey about the cap locks
Yes it does, nice write up OP
Old 01-08-2010, 11:26 PM
  #8  
TECH Addict
Thread Starter
iTrader: (66)
 
blk00ss's Avatar
 
Join Date: Feb 2007
Location: Jasper, AL
Posts: 2,366
Likes: 0
Received 5 Likes on 5 Posts

Default

Yes it does!
Old 01-09-2010, 01:15 PM
  #9  
Launching!
iTrader: (3)
 
jeejee's Avatar
 
Join Date: Oct 2006
Posts: 250
Likes: 0
Received 0 Likes on 0 Posts
Default

your crank had a rough life prior to the pinning, by the look of it
Old 01-10-2010, 12:10 AM
  #10  
TECH Addict
iTrader: (8)
 
elias_799's Avatar
 
Join Date: Oct 2008
Location: toronto ontario canada
Posts: 2,047
Likes: 0
Received 2 Likes on 2 Posts
Default

Originally Posted by jeejee
your crank had a rough life prior to the pinning, by the look of it
yea, it looks like the crank pulley turned on the crank a couple of times
Old 01-10-2010, 11:19 AM
  #11  
TECH Enthusiast
 
COPO9560's Avatar
 
Join Date: May 2008
Posts: 537
Likes: 0
Received 0 Likes on 0 Posts

Default

The ATI damper looks to have timing markings on it. Did you do any attempt to line these up to be accurate for TDC on #1 so they would be of any use?
Old 01-10-2010, 12:14 PM
  #12  
TECH Addict
Thread Starter
iTrader: (66)
 
blk00ss's Avatar
 
Join Date: Feb 2007
Location: Jasper, AL
Posts: 2,366
Likes: 0
Received 5 Likes on 5 Posts

Default

No I didn't try and line the timing marks up.

And I really don't know why the crank looks so rough in the pics. It's always been used in all motor applications. Never had a blower on it til now.
Old 03-28-2010, 10:00 PM
  #13  
TECH Resident
iTrader: (12)
 
LSXFORMULA99's Avatar
 
Join Date: Nov 2007
Location: Alton IL.
Posts: 873
Likes: 0
Received 0 Likes on 0 Posts
Default

yeah man thanks for this, im to the point in my install of doing this and had so clue what to do lol.
Old 05-25-2011, 07:24 PM
  #14  
On The Tree
 
81cuttysupreme's Avatar
 
Join Date: Jan 2008
Location: Delaware
Posts: 175
Likes: 0
Received 0 Likes on 0 Posts
Default

why the tape for depth measurement? do you not just drill into the center(threaded portion) of the crank? the ati instructions didnt give any good depth information.
Old 05-26-2011, 10:00 AM
  #15  
10 Second Club
iTrader: (37)
 
JRENIGAR's Avatar
 
Join Date: Dec 2010
Location: 72396
Posts: 2,069
Likes: 0
Received 1 Like on 1 Post

Default

Originally Posted by 81cuttysupreme
why the tape for depth measurement? do you not just drill into the center(threaded portion) of the crank? the ati instructions didnt give any good depth information.
No the threaded part of the crank dosent start till about 3inches from the end. I pinned mine from the end but I would assume you wouldnt want to go too deep drilling because you would want the pin to bottom out on something solid and still be clear of the inside where the crank bolt goes in. Make sense???
Old 05-26-2011, 01:55 PM
  #16  
TECH Addict
Thread Starter
iTrader: (66)
 
blk00ss's Avatar
 
Join Date: Feb 2007
Location: Jasper, AL
Posts: 2,366
Likes: 0
Received 5 Likes on 5 Posts

Default

No you don't want to go into the middle of the crank because the pin needs to bottom out before it gets to the crank bolt. That's why I made this thread, because there isn't any instructions out there about this.
Old 05-29-2011, 10:02 AM
  #17  
On The Tree
 
81cuttysupreme's Avatar
 
Join Date: Jan 2008
Location: Delaware
Posts: 175
Likes: 0
Received 0 Likes on 0 Posts
Default

oh boy. well i drilled mine all the way through the crank thinking that the pin depth would be designed to have the pin rest on the crank bolt. will the pin slide in too deep like this? any way to fix this, or do i need to drill another hole?
Old 05-29-2011, 10:48 AM
  #18  
On The Tree
 
81cuttysupreme's Avatar
 
Join Date: Jan 2008
Location: Delaware
Posts: 175
Likes: 0
Received 0 Likes on 0 Posts
Default

would it be ok to just wrap some duct tape around the crank bolt to take up the diameter between the bolt and inside of the crank?
Old 05-29-2011, 12:46 PM
  #19  
TECH Addict
Thread Starter
iTrader: (66)
 
blk00ss's Avatar
 
Join Date: Feb 2007
Location: Jasper, AL
Posts: 2,366
Likes: 0
Received 5 Likes on 5 Posts

Default

Why not just drill another hole?
Old 05-30-2011, 06:00 PM
  #20  
TECH Enthusiast
iTrader: (3)
 
Black01M6SS's Avatar
 
Join Date: Nov 2002
Location: Louisiana
Posts: 546
Likes: 0
Received 0 Likes on 0 Posts

Default

I'm sure no one doing this wants to hear this but that little pin sheared off on my setup with 850 miles on it. I'm not saying don't bother to pin it. I just hope the pin works for everyone else better than it did for me. It didn't look like my balancer had spun at all. The keyway was still lined up with the pin but the pin had sheared. I'm sure it would have caused problems later if the number 7 ring land wouldn't have given up so soon. I know there isn't many other options as I highly doubt anyone wants to pull the stock crank to have a keyway cut into it but that's the only way to do it right imo. Just some food for thought I guess. I know others have had better luck with the pins holding. I just don't have much faith in it after finding mine broken after putting 850 miles on it.

Thread Tools
Search this Thread
Quick Reply: ATI balancer crank pinning write-up.


All times are GMT -5. The time now is 03:16 AM.