
1973 RS Camaro LSX Swap
 06-19-2010, 10:28 AM
#1

Here’s my swap project. I figured I’d post this on here now since I’m finally getting around to the LSX part of my build. I’ve had a progress thread running on NastyZ8.com since I started on the car last fall, but I wasn’t sure anyone here would be terribly interested until the engine part of the build came around.
I’ll put up the Readers Digest version (mostly just pics) of what I’ve done to the car so far. I’ll be skipping a lot of the details contained in the full build thread on the other site. The plan for the car is a street/strip machine with a carb’d 6.0L LY6 (for now), a Rossler TH400 with a brake, and a nine inch (eventually) out back.
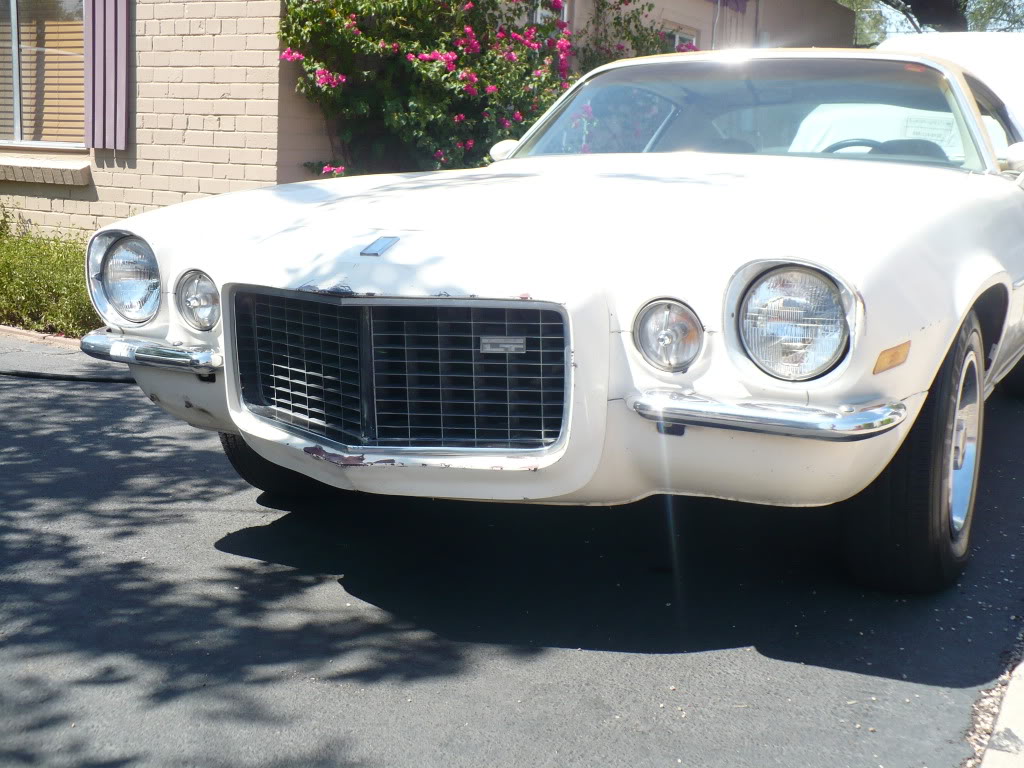
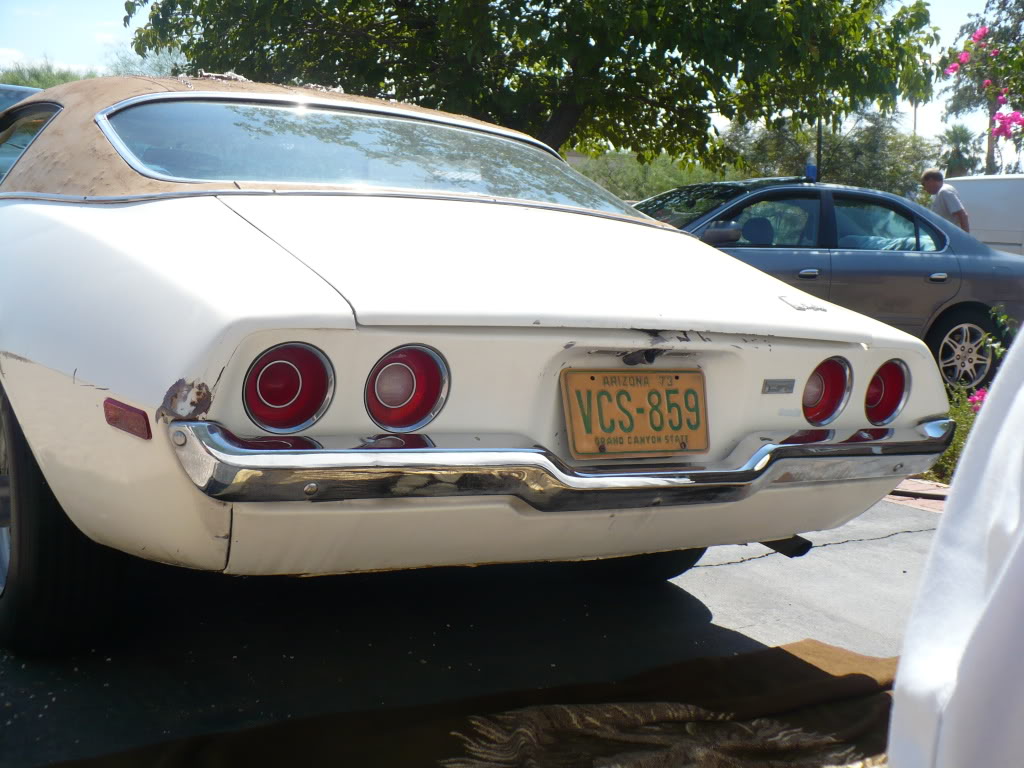
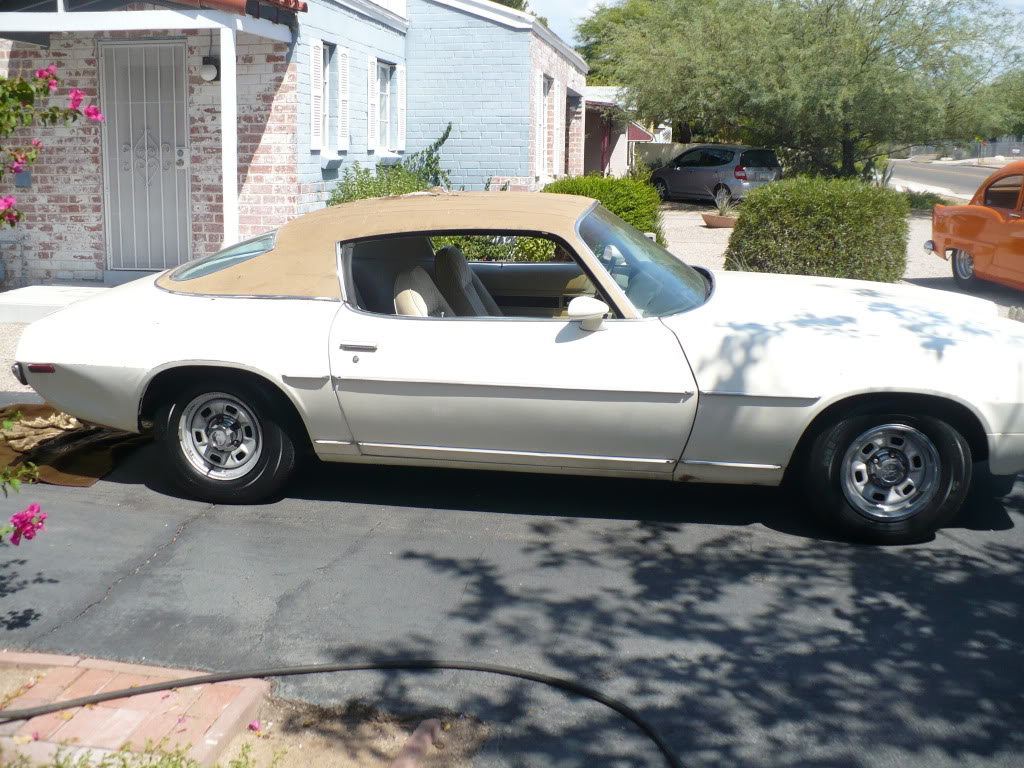
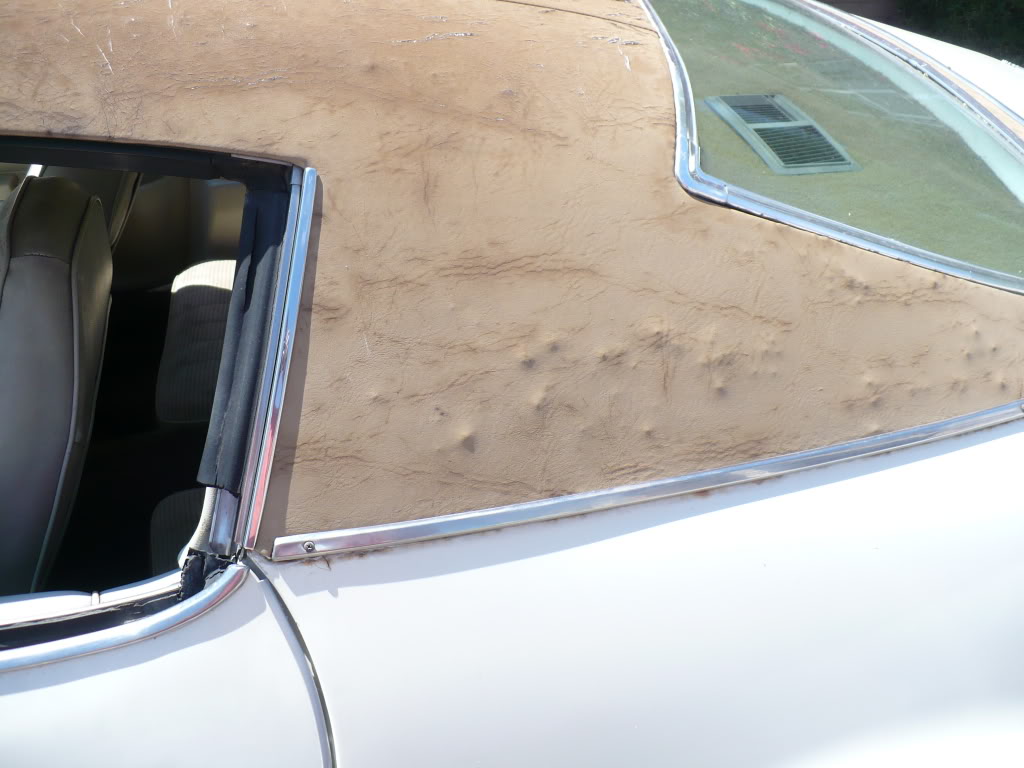
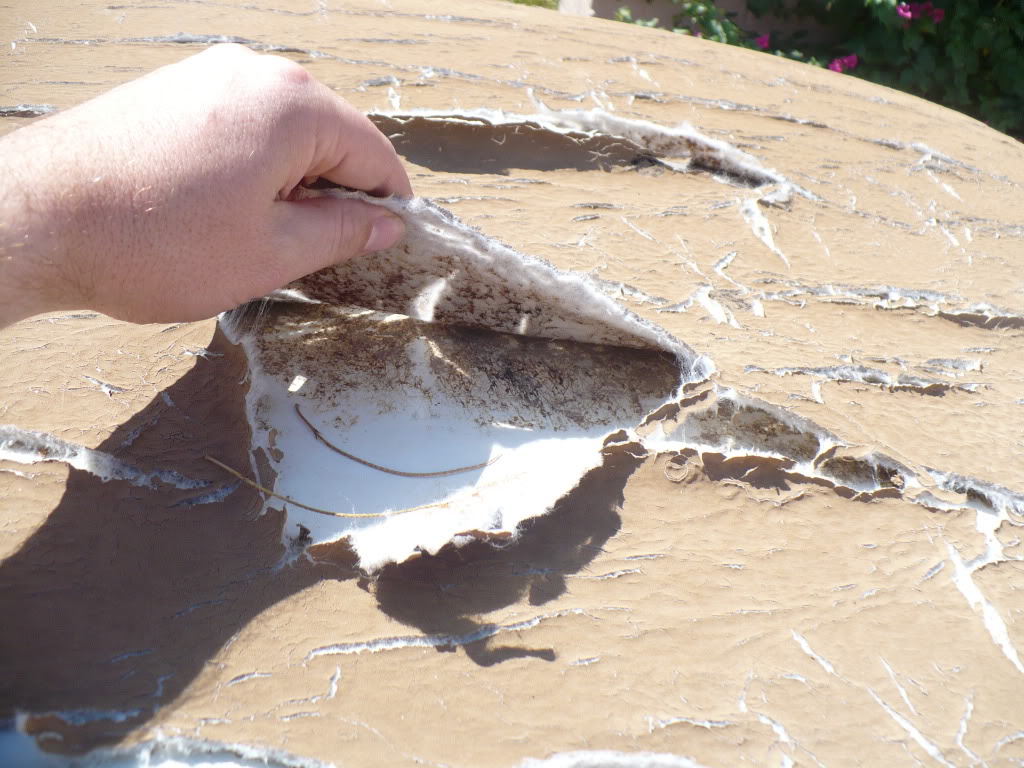
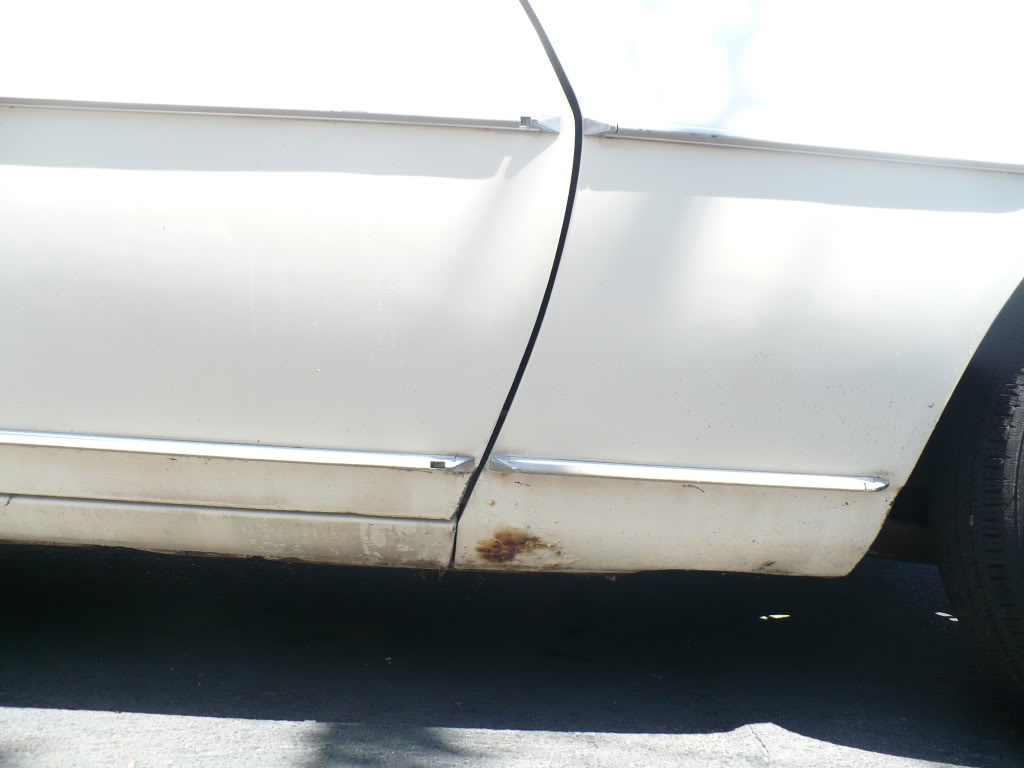
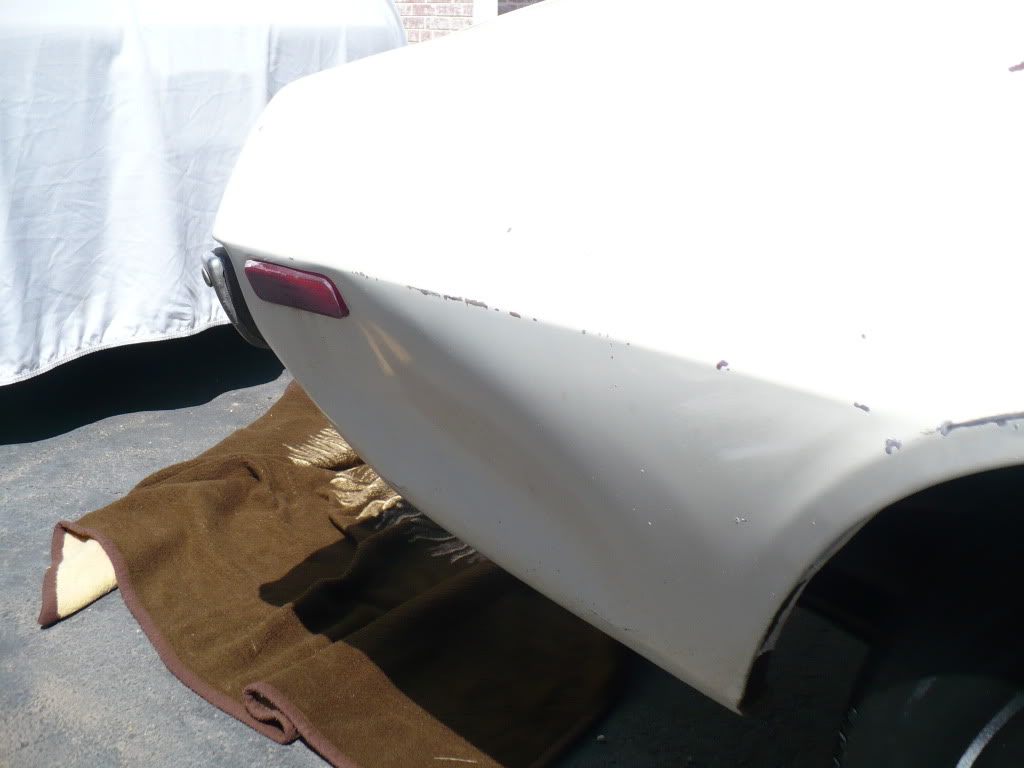
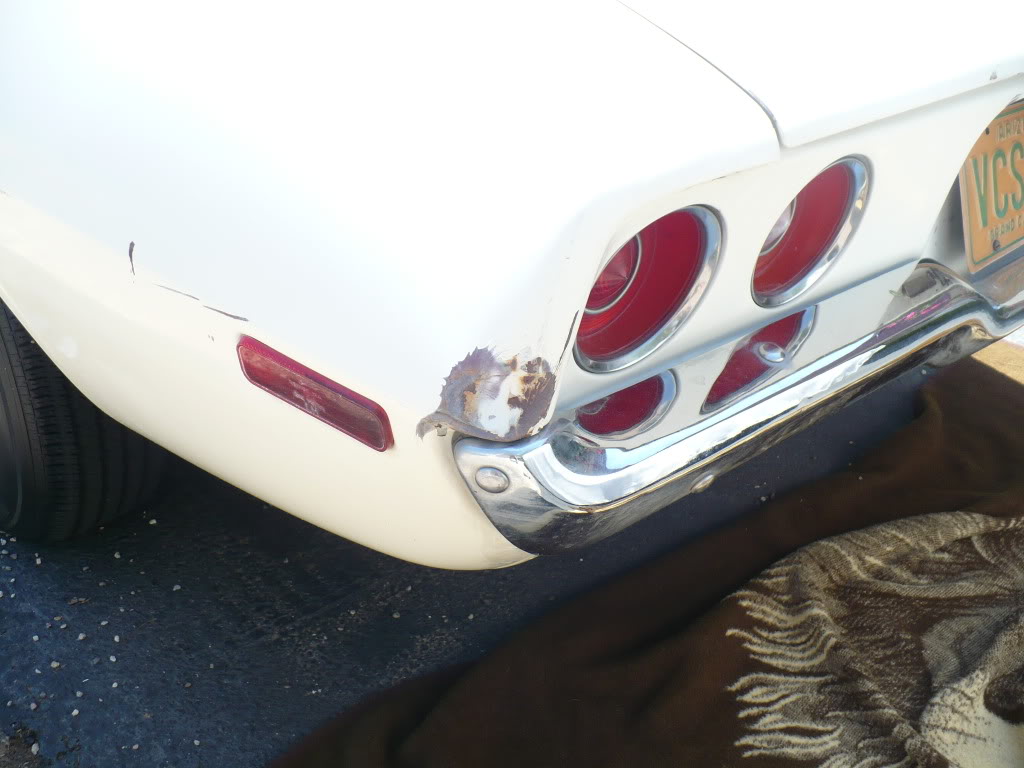
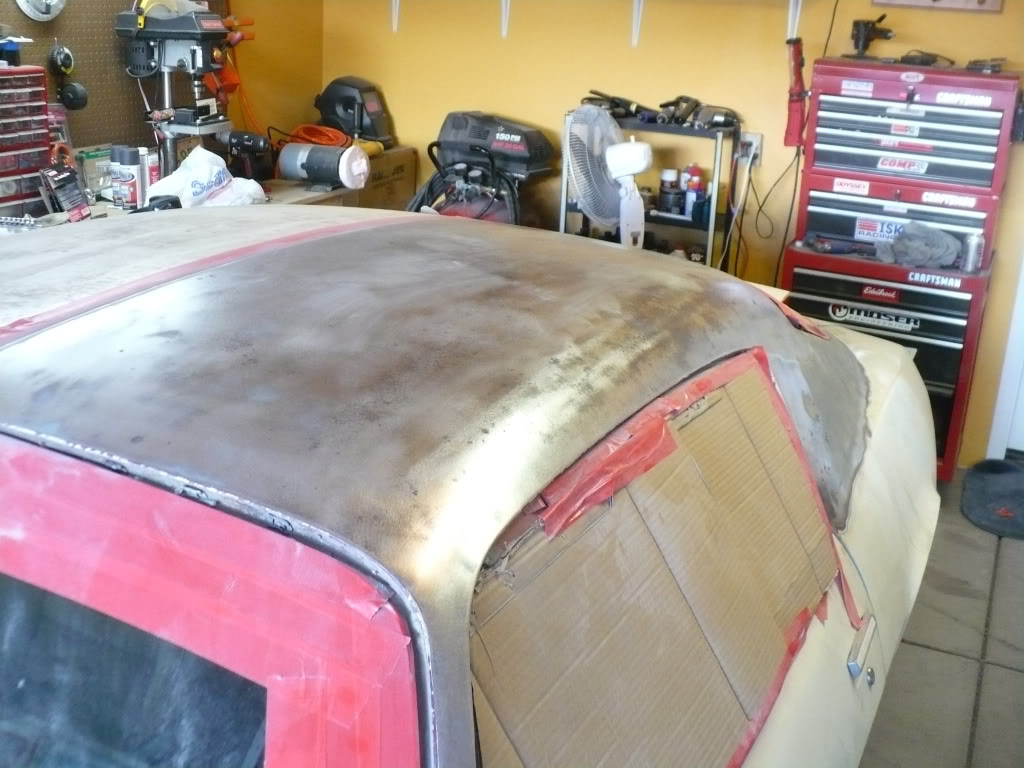
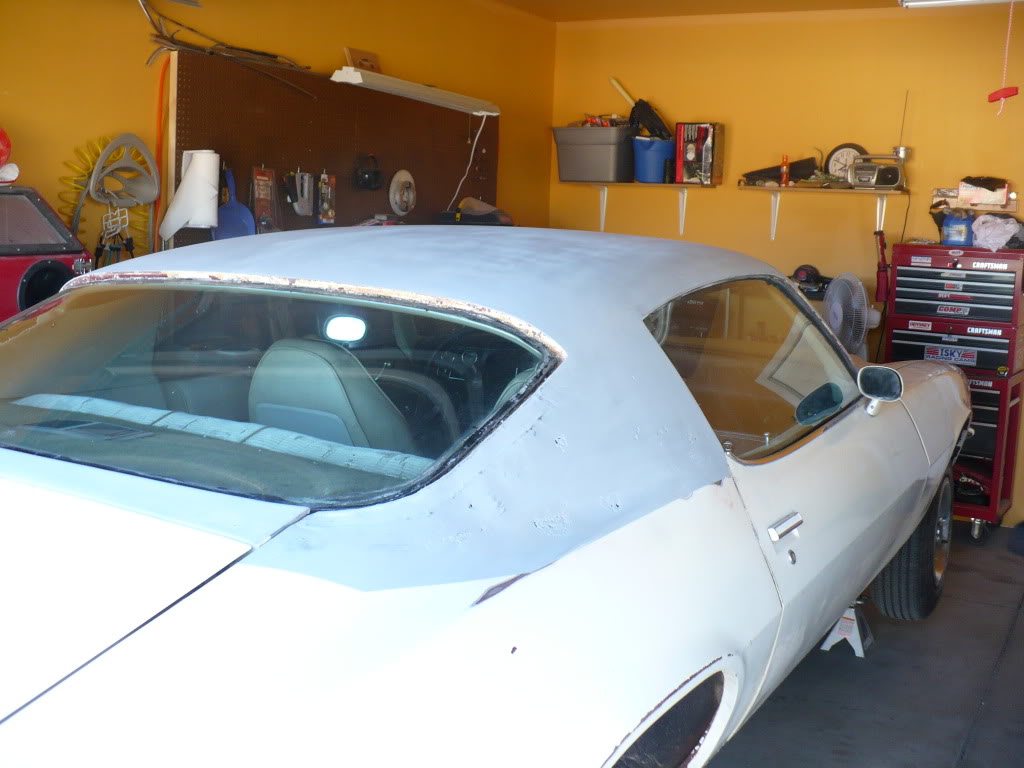
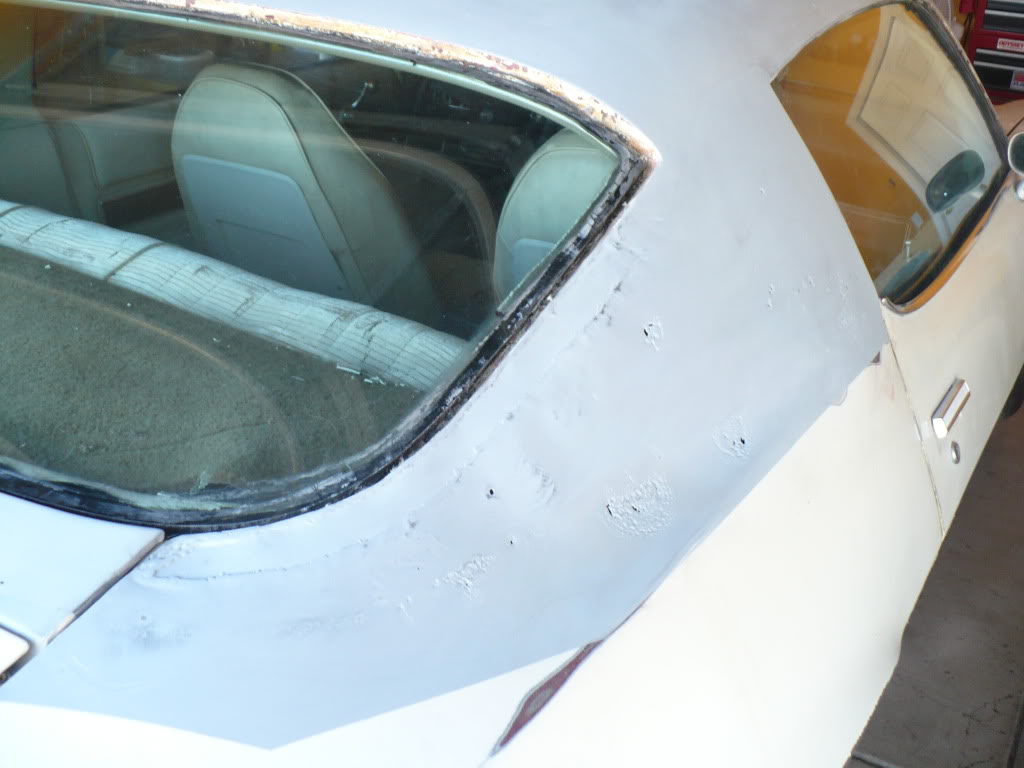
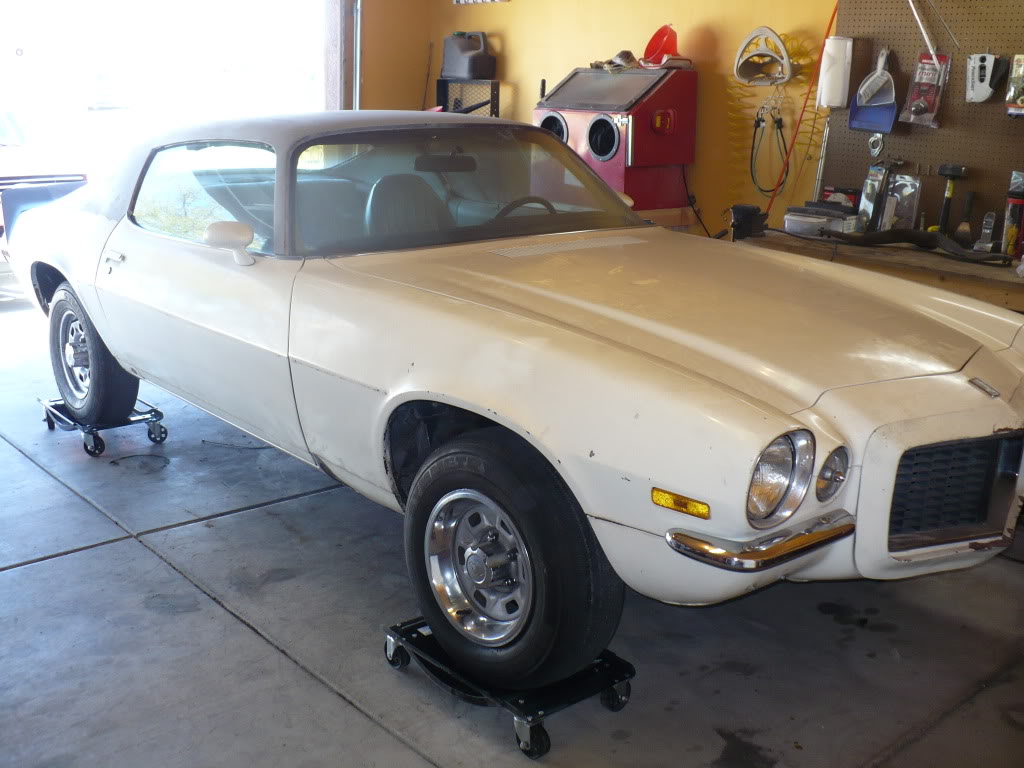
Here’s what the car looked like when I bought it last September. It’s a one owner 73 RS/Type LT that’s been in Tucson AZ since 1976. The only rust issues were under the vinyl top and the typical clogged lower drain at the bottom of the passenger side fender. The rest of the body issues come from the original owner (older lady) running in to just about anything she could get to stand still. The car was originally Dark Red Metallic with a Neutral top and interior. She had it repainted this cream color in 1986.

I’ll put up the Readers Digest version (mostly just pics) of what I’ve done to the car so far. I’ll be skipping a lot of the details contained in the full build thread on the other site. The plan for the car is a street/strip machine with a carb’d 6.0L LY6 (for now), a Rossler TH400 with a brake, and a nine inch (eventually) out back.
Here’s what the car looked like when I bought it last September. It’s a one owner 73 RS/Type LT that’s been in Tucson AZ since 1976. The only rust issues were under the vinyl top and the typical clogged lower drain at the bottom of the passenger side fender. The rest of the body issues come from the original owner (older lady) running in to just about anything she could get to stand still. The car was originally Dark Red Metallic with a Neutral top and interior. She had it repainted this cream color in 1986.
 06-19-2010, 10:29 AM
#2
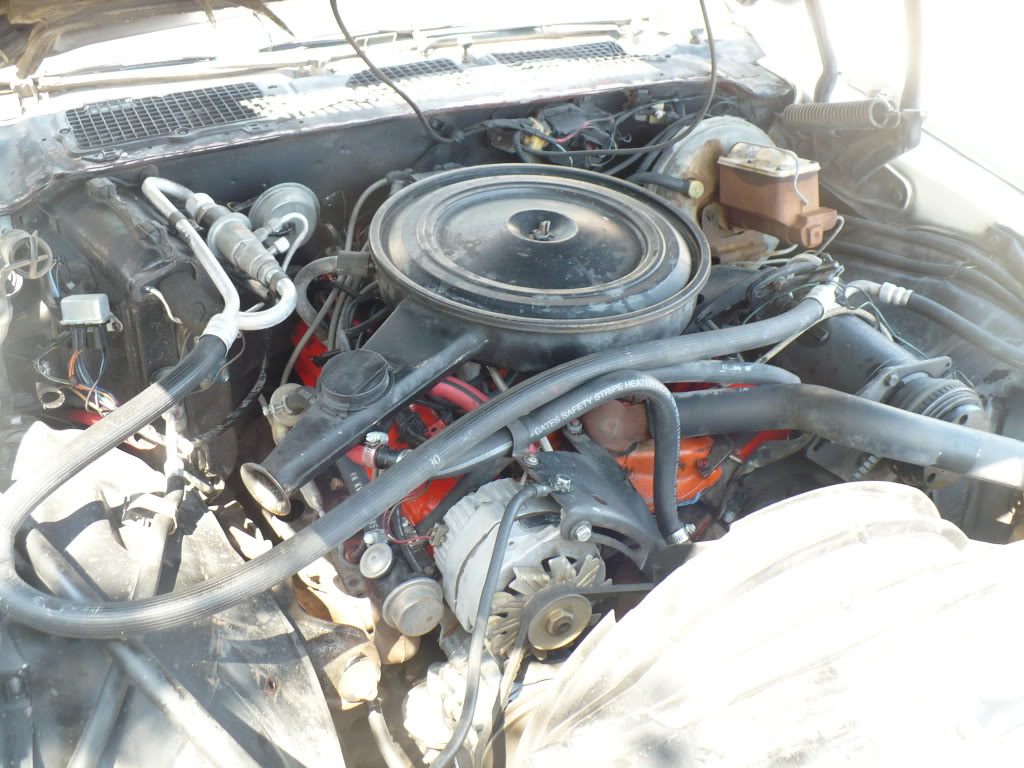
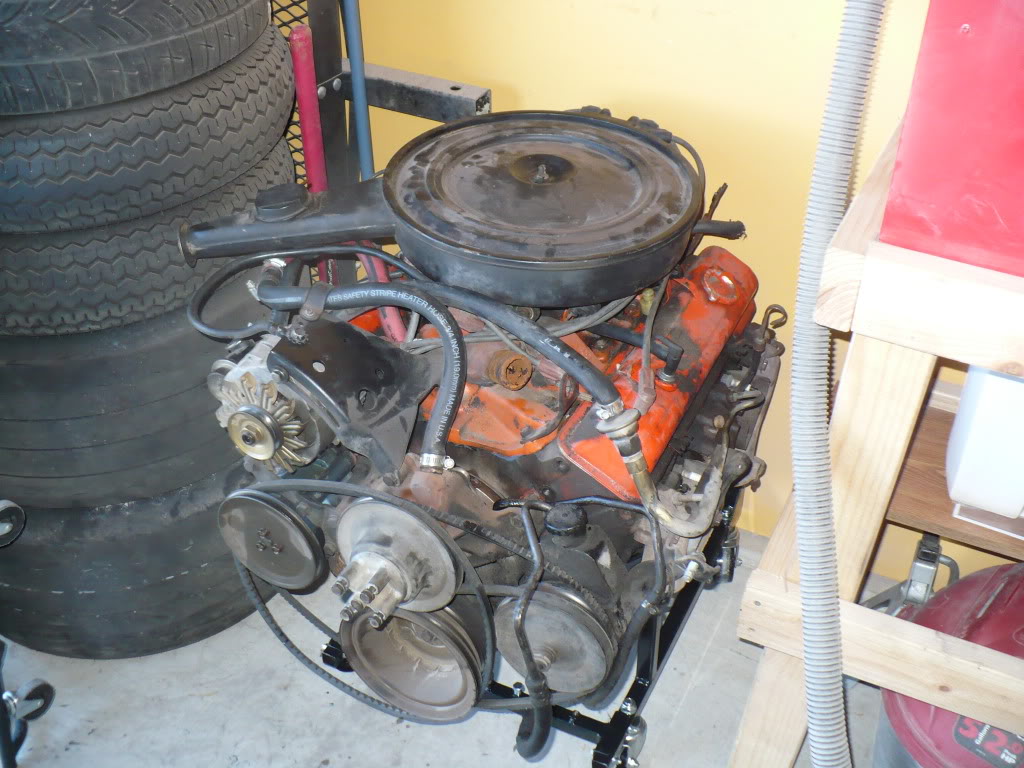
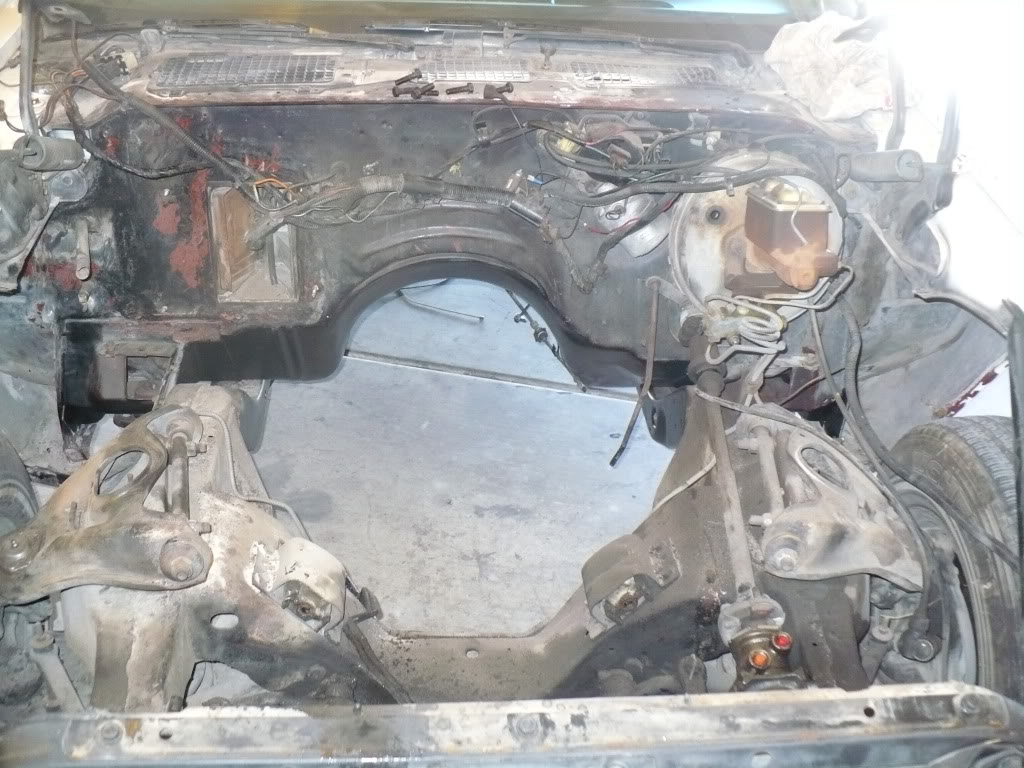
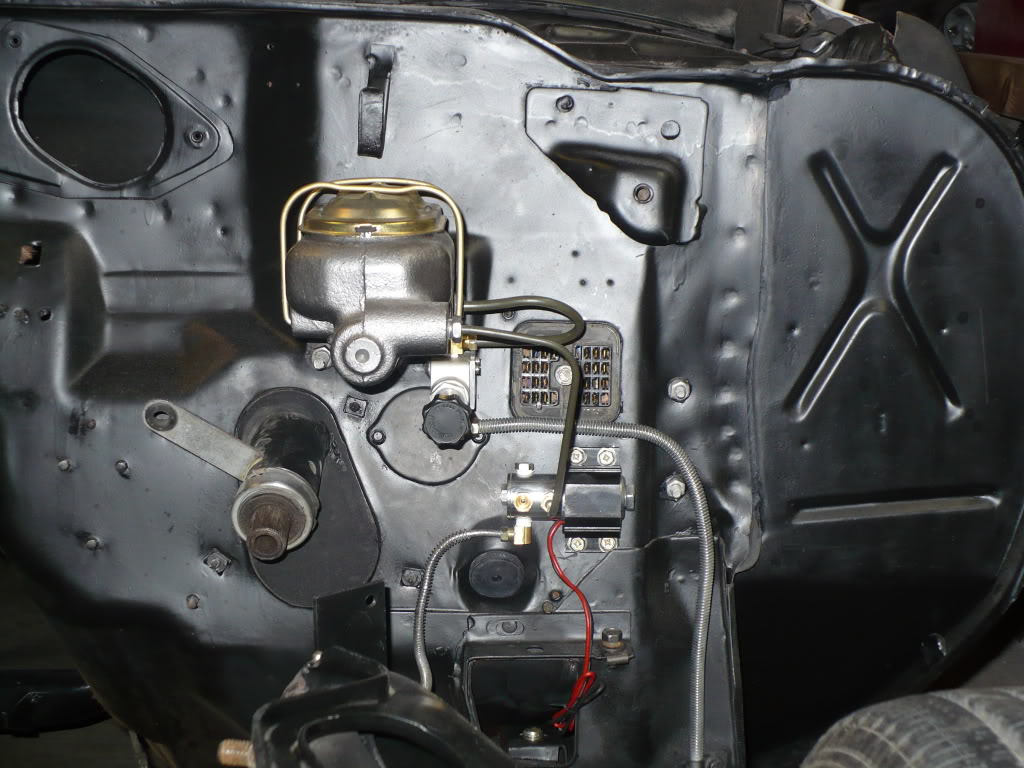
Here's an underhood shot. Everything is pretty much still there.
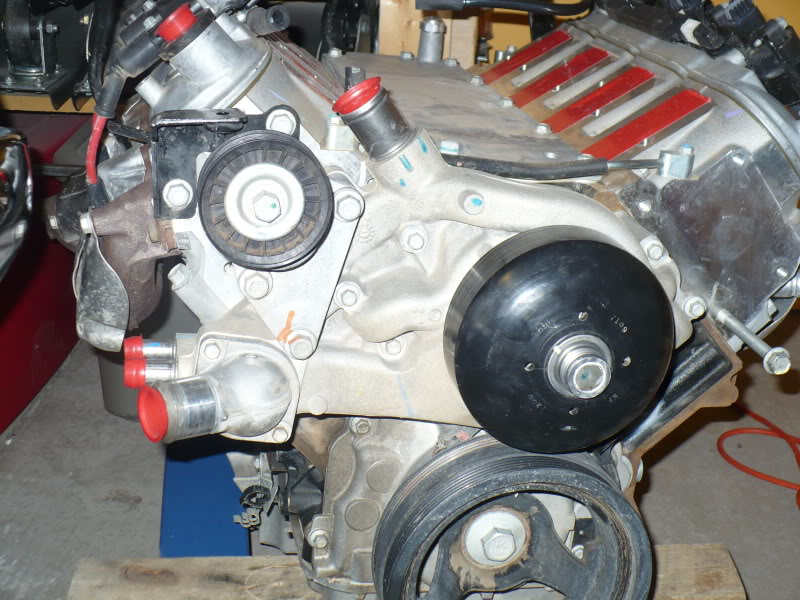
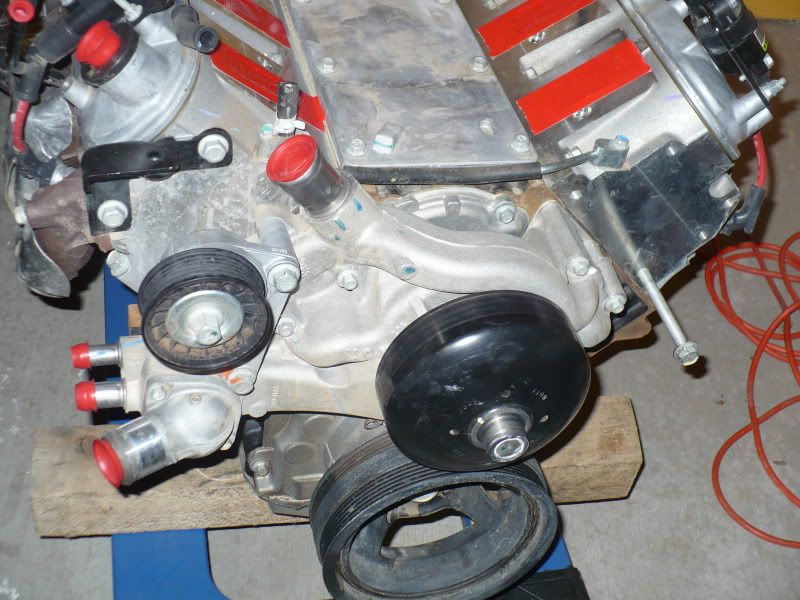
But, here's the new power plant. It's an LY6 6.0L out of a 2008 Chevy 3500 van. It was actually a Fed-Ex van that got totaled with less than 3,000 miles on the clock. I picked mine up complete for $1800.00 and was able to sell the parts off of it that I'm not going to use (intake with injectors and rails, exhaust manifolds, water pump....). I’ll be running an Edelbrock Vic Jr. intake and F-body front accessories.
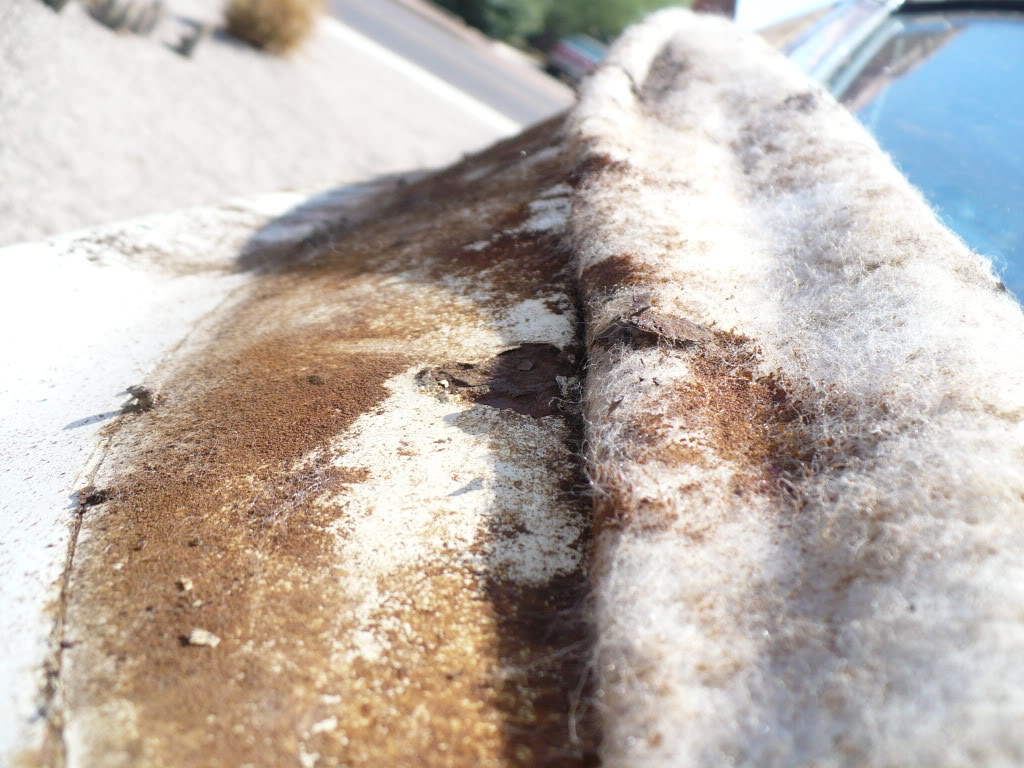
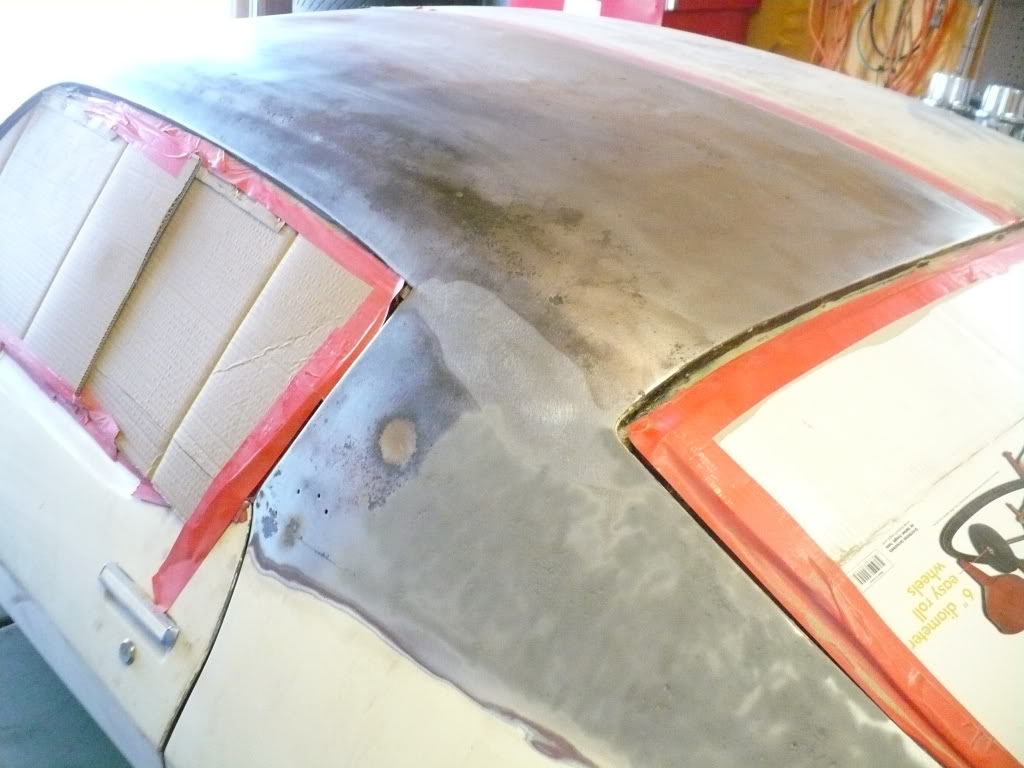
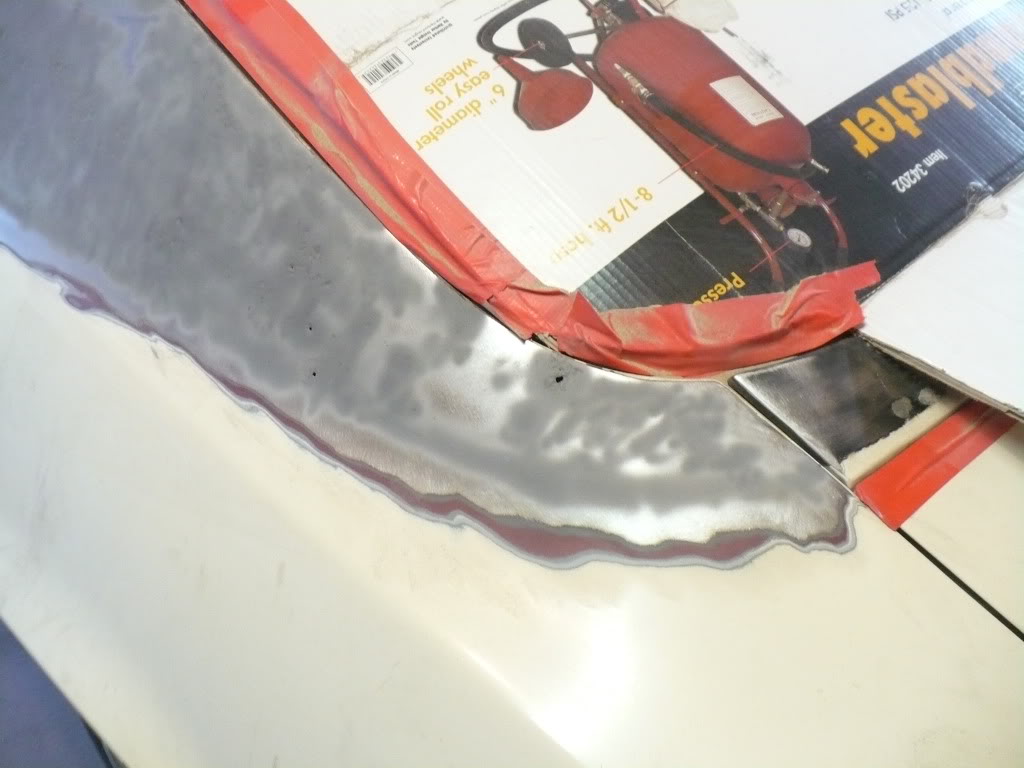
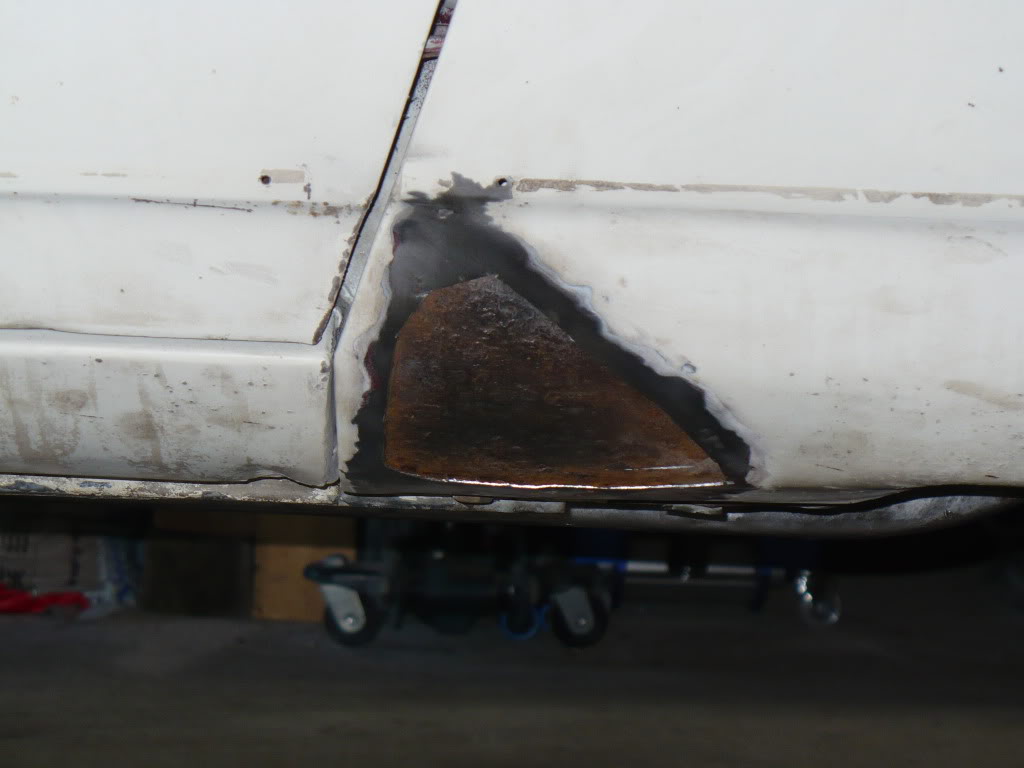
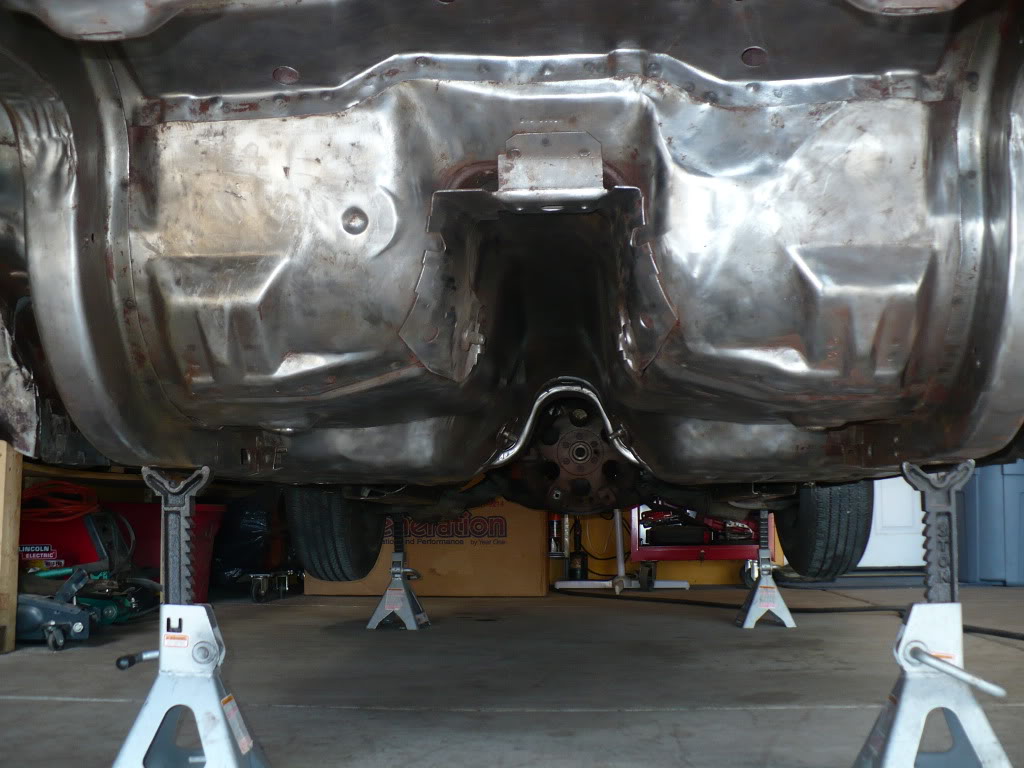
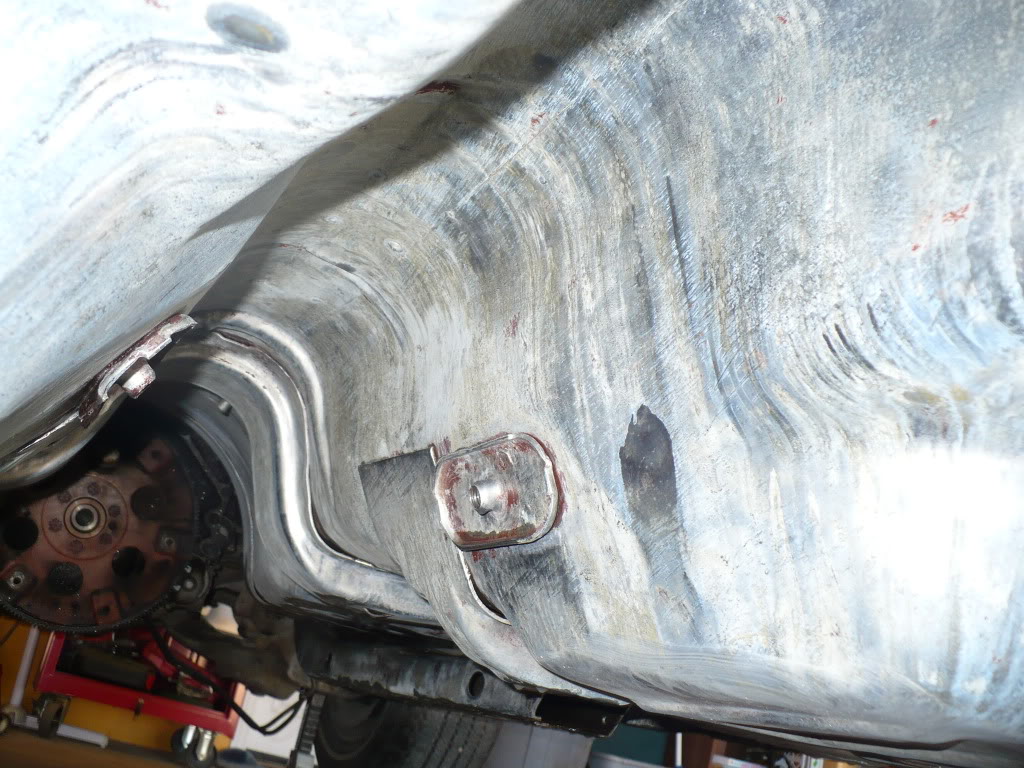
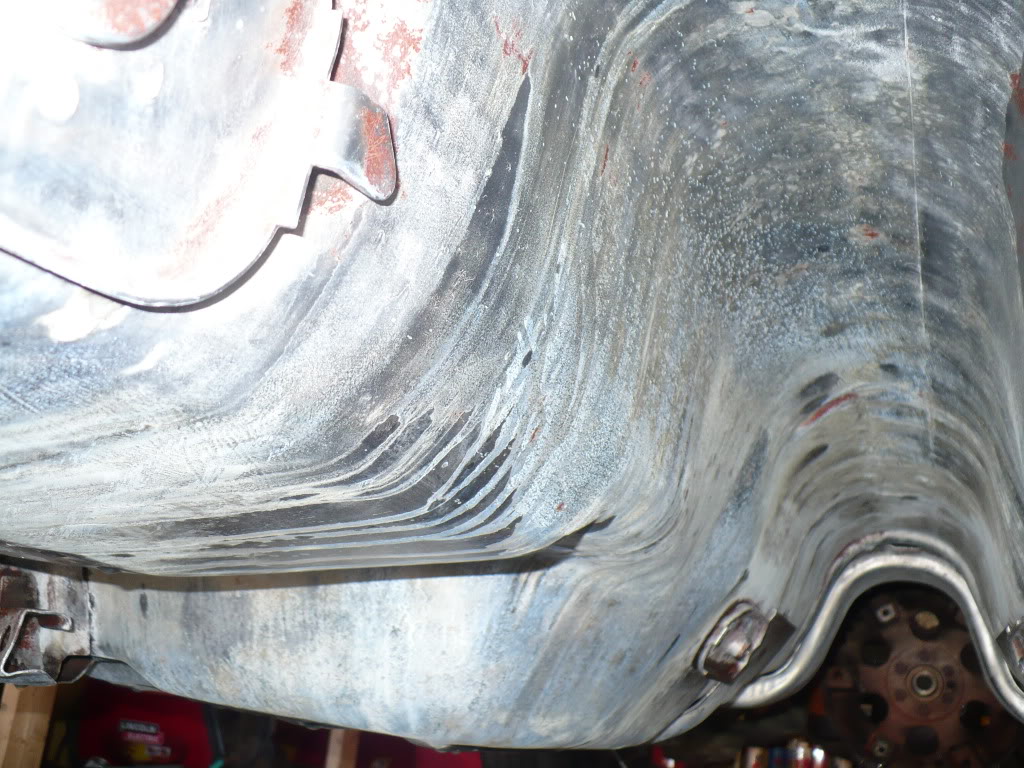
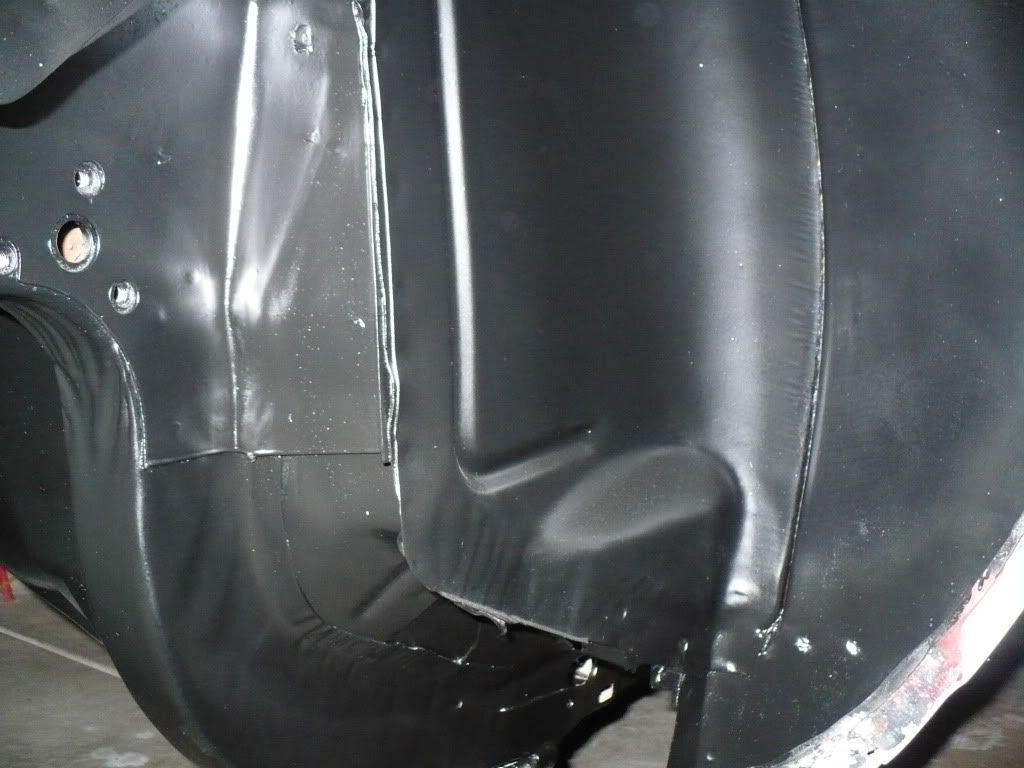
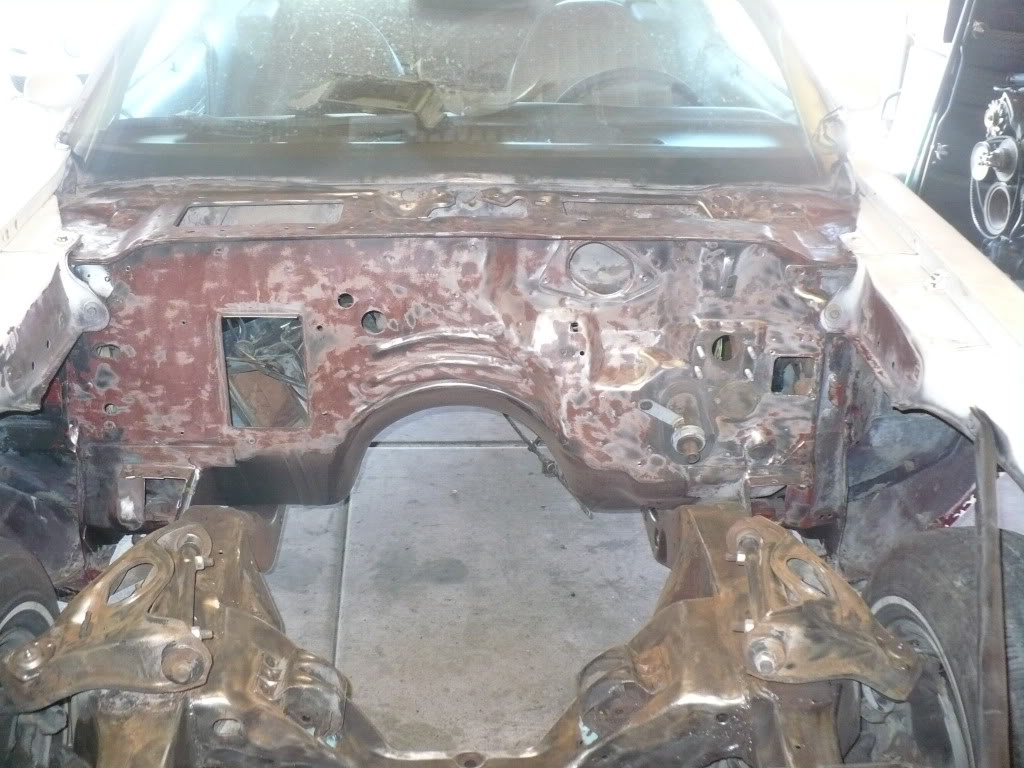
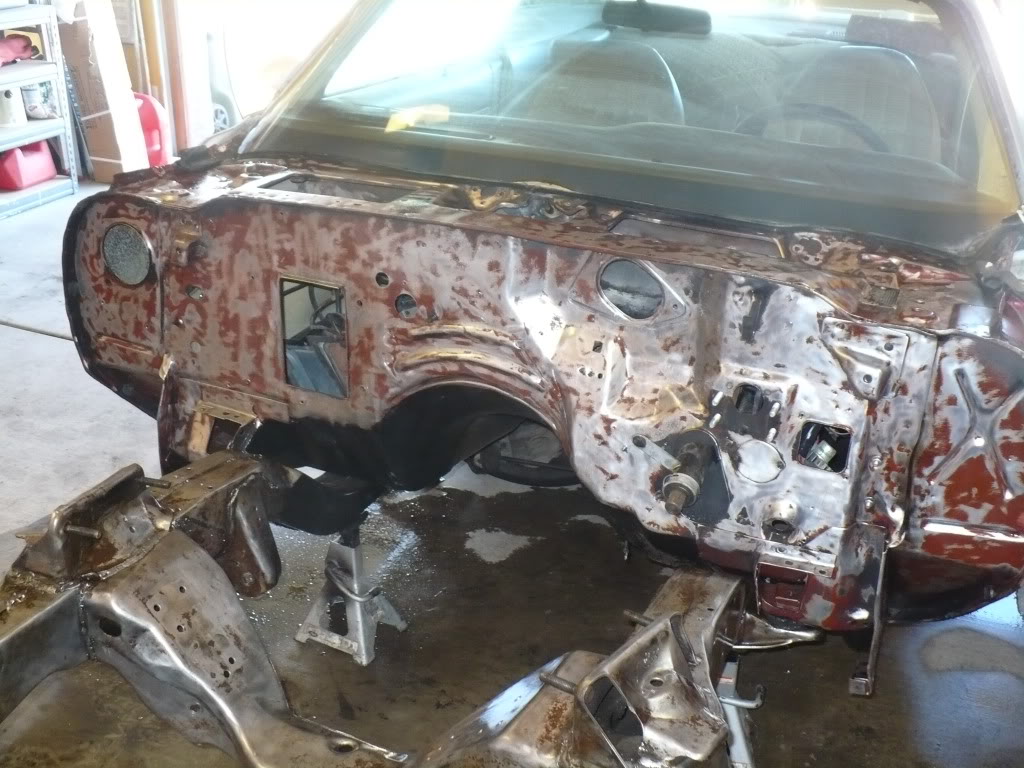
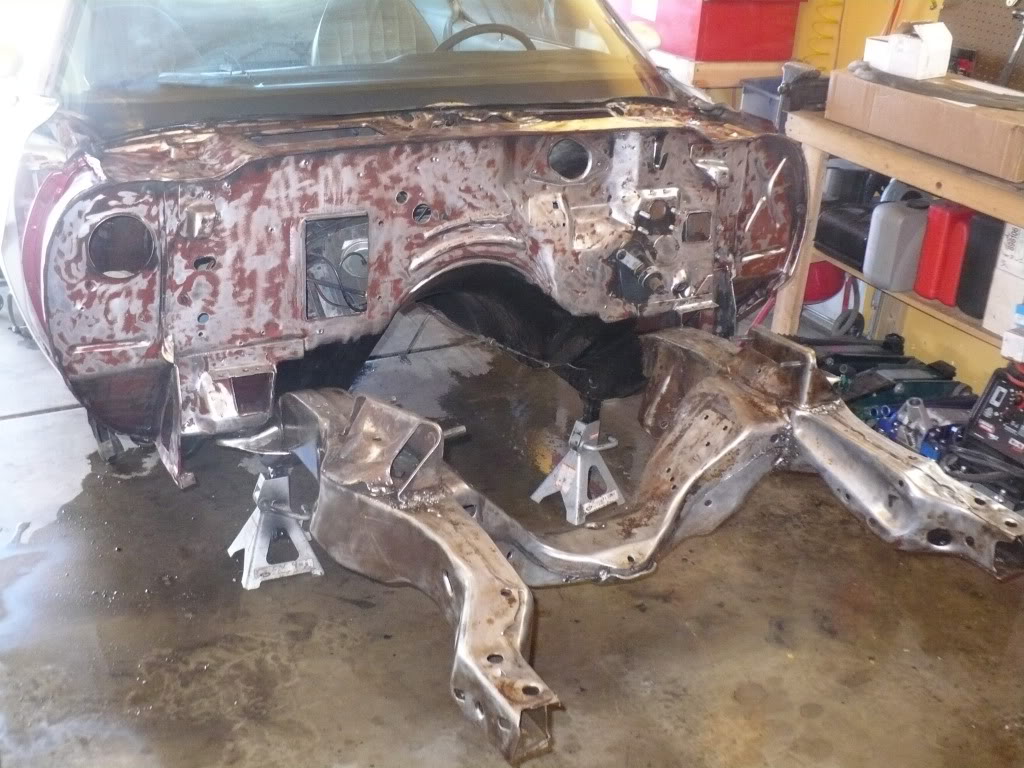
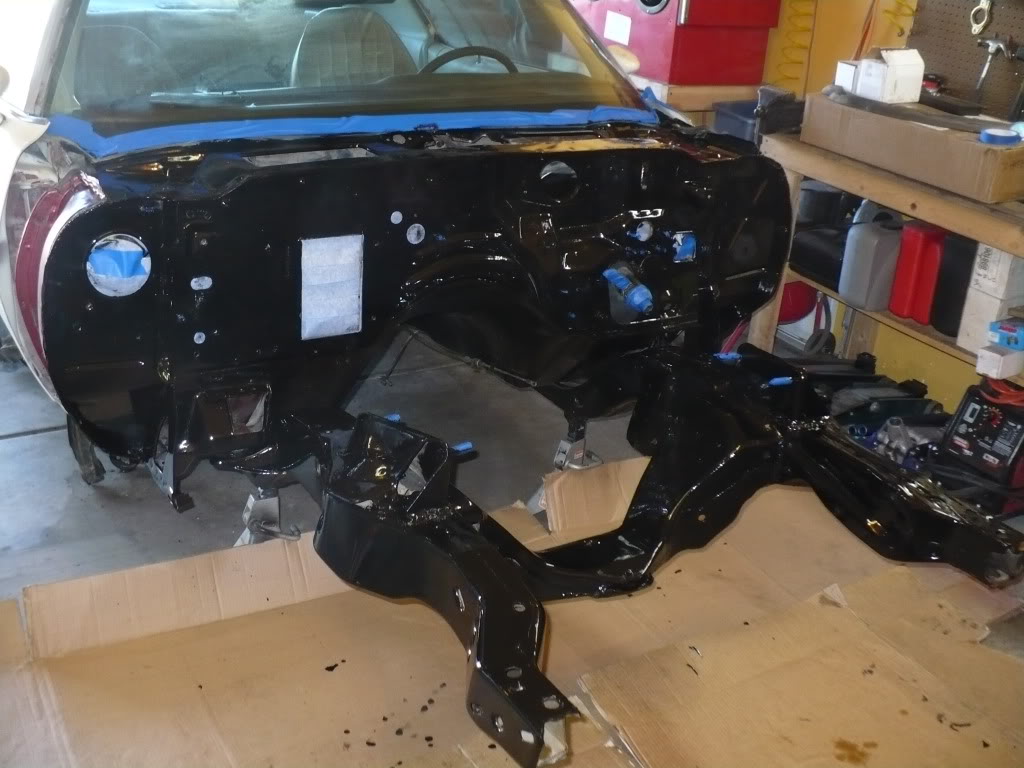
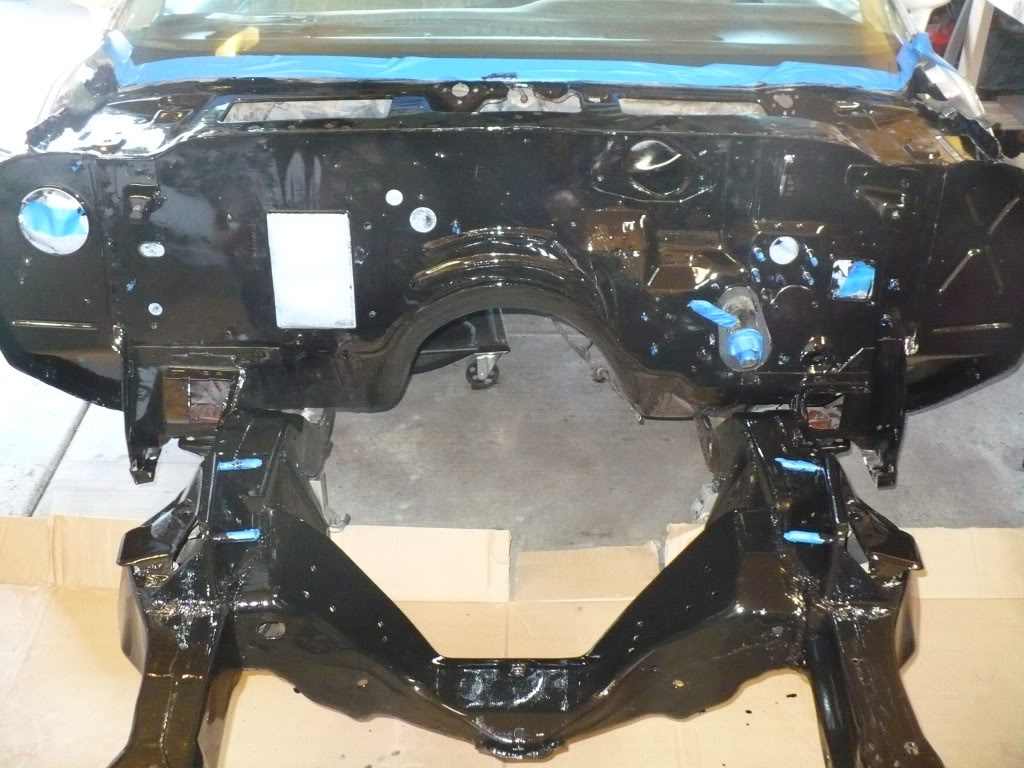
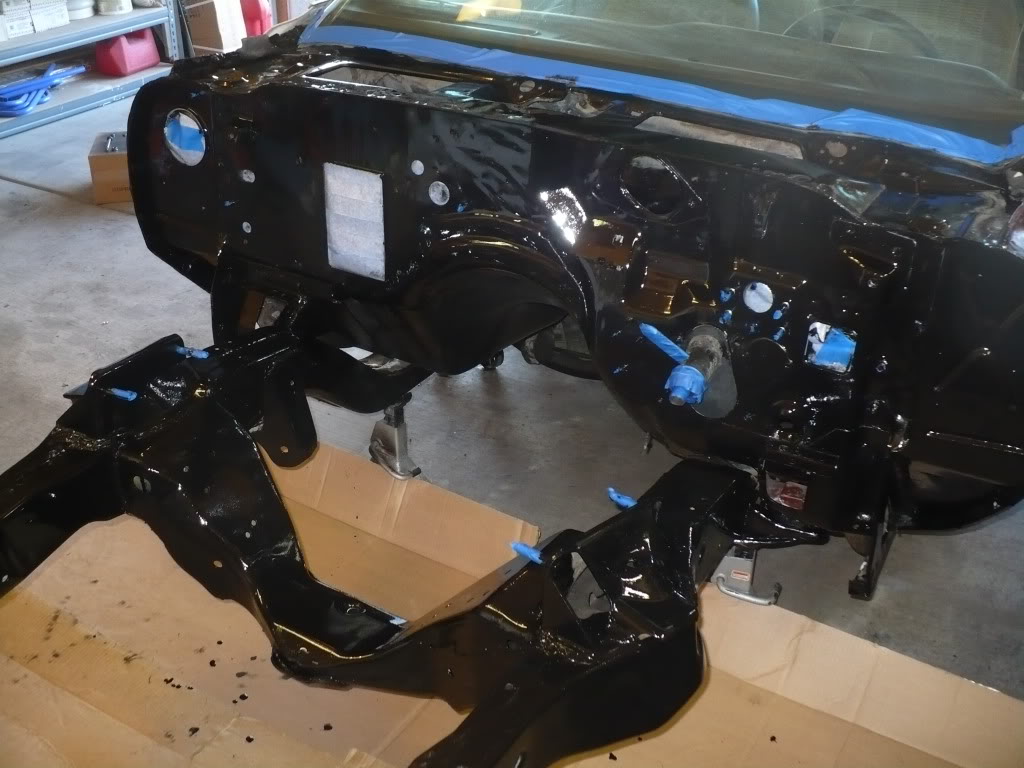
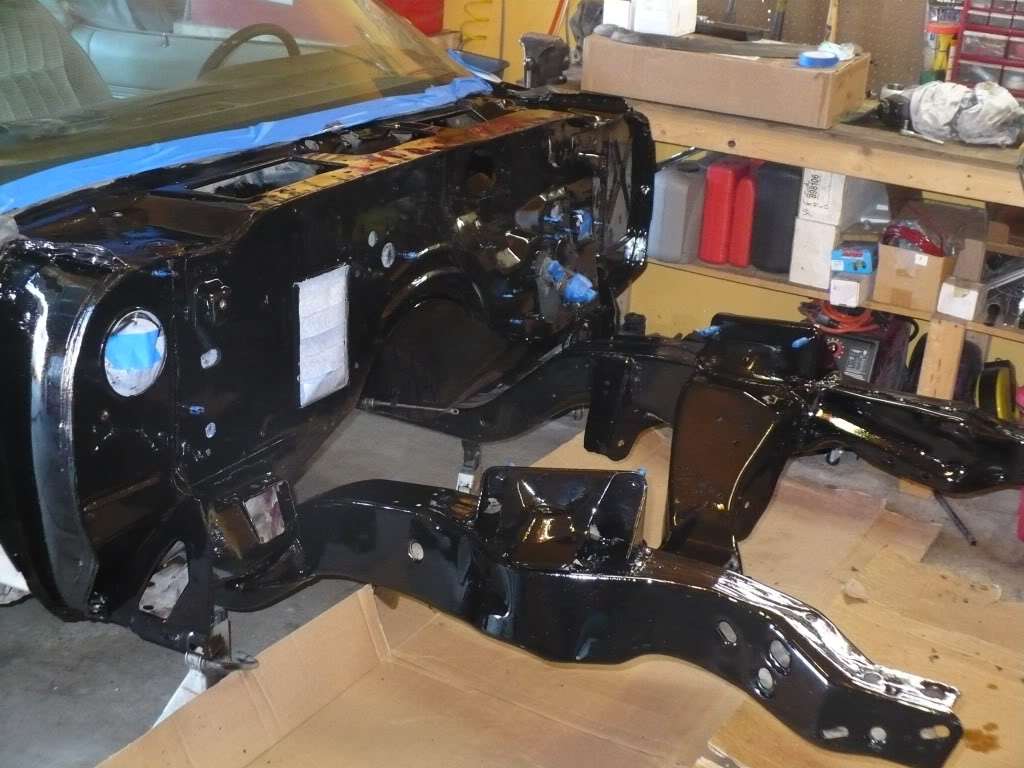
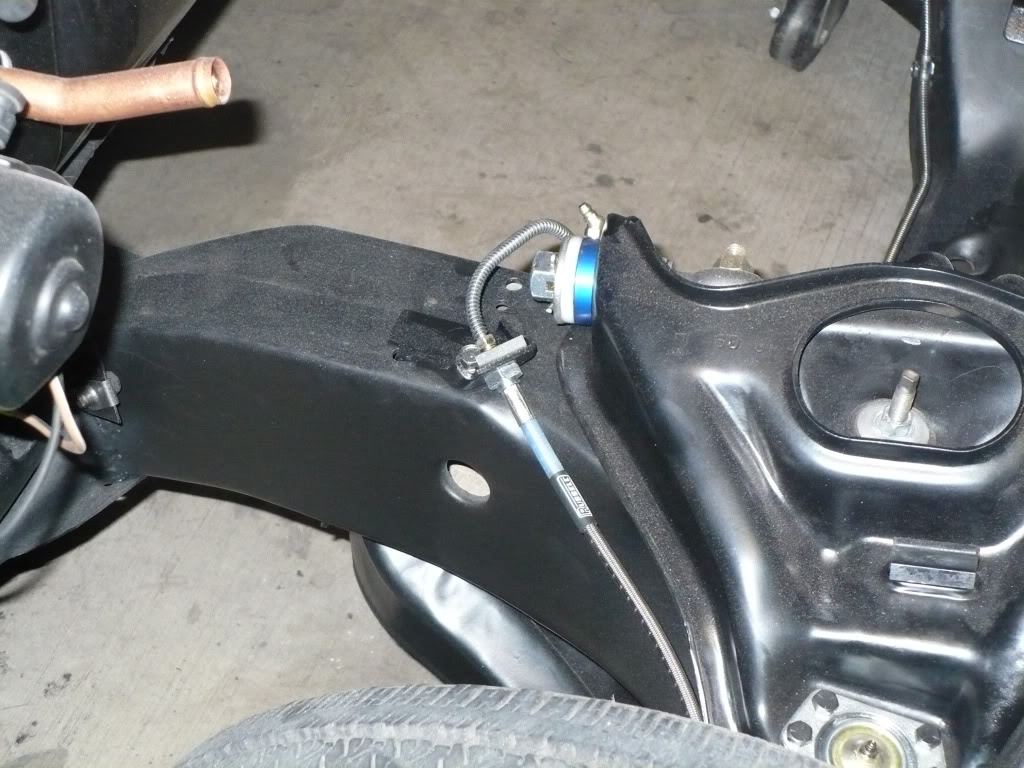
Here’s the start of the rust repair. I’m no body man so this is just my attempt to keep it from getting worse until it actually goes for body work and paint.
But, here's the new power plant. It's an LY6 6.0L out of a 2008 Chevy 3500 van. It was actually a Fed-Ex van that got totaled with less than 3,000 miles on the clock. I picked mine up complete for $1800.00 and was able to sell the parts off of it that I'm not going to use (intake with injectors and rails, exhaust manifolds, water pump....). I’ll be running an Edelbrock Vic Jr. intake and F-body front accessories.
Here’s the start of the rust repair. I’m no body man so this is just my attempt to keep it from getting worse until it actually goes for body work and paint.

 06-19-2010, 10:30 AM
#4
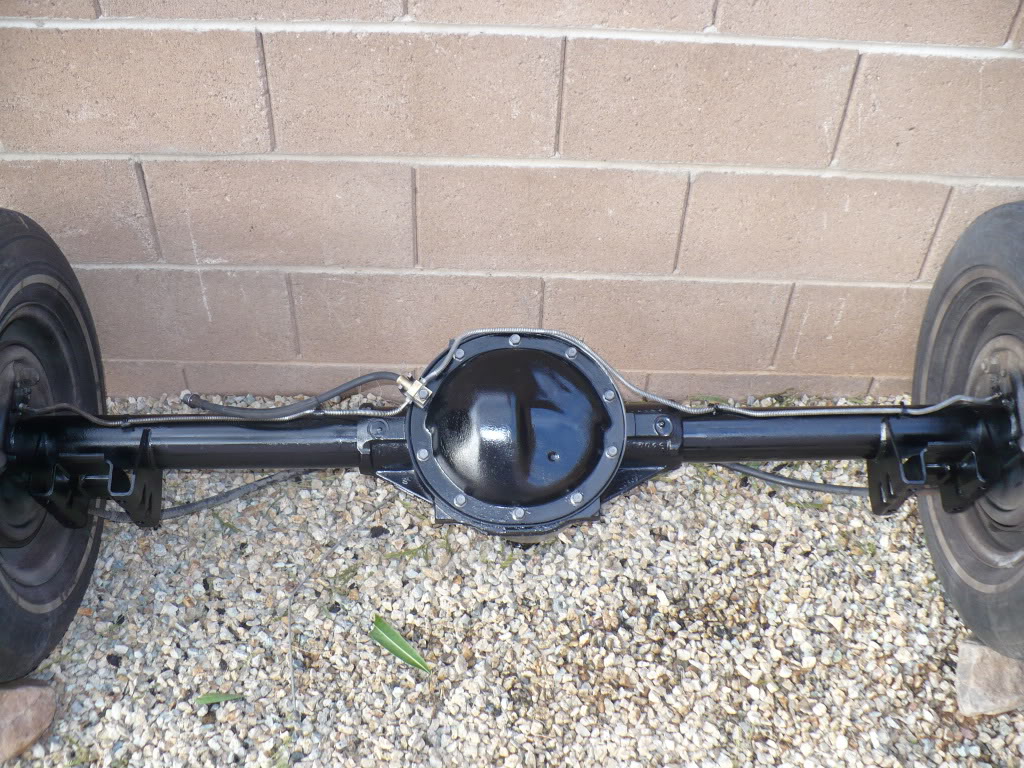
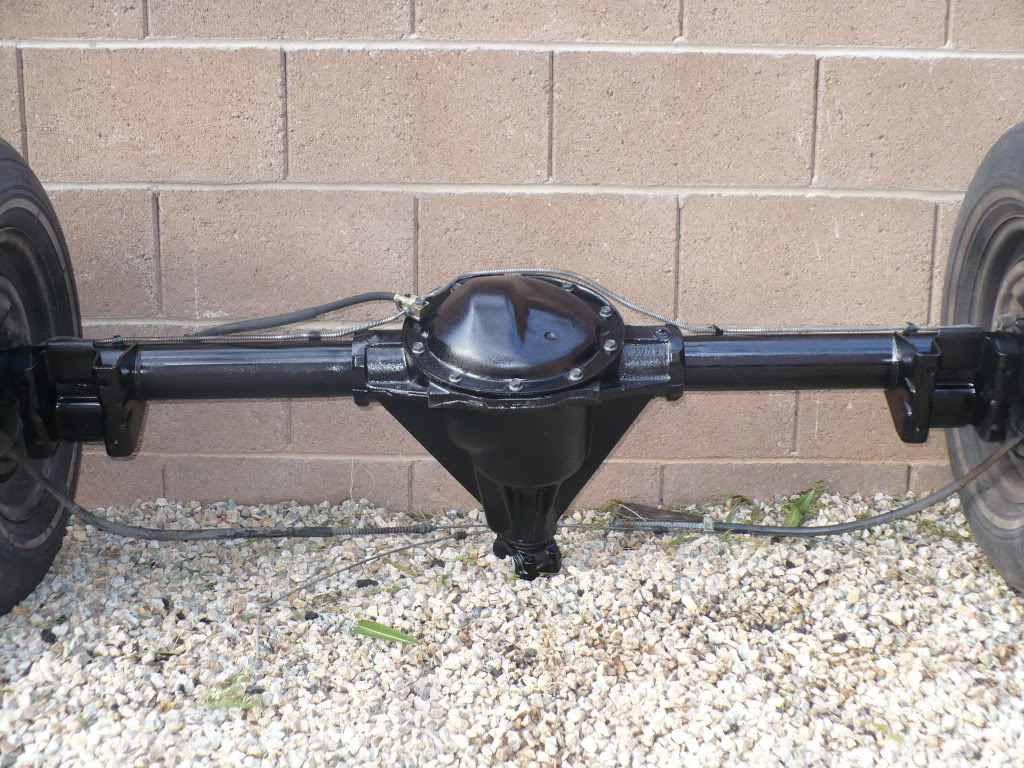
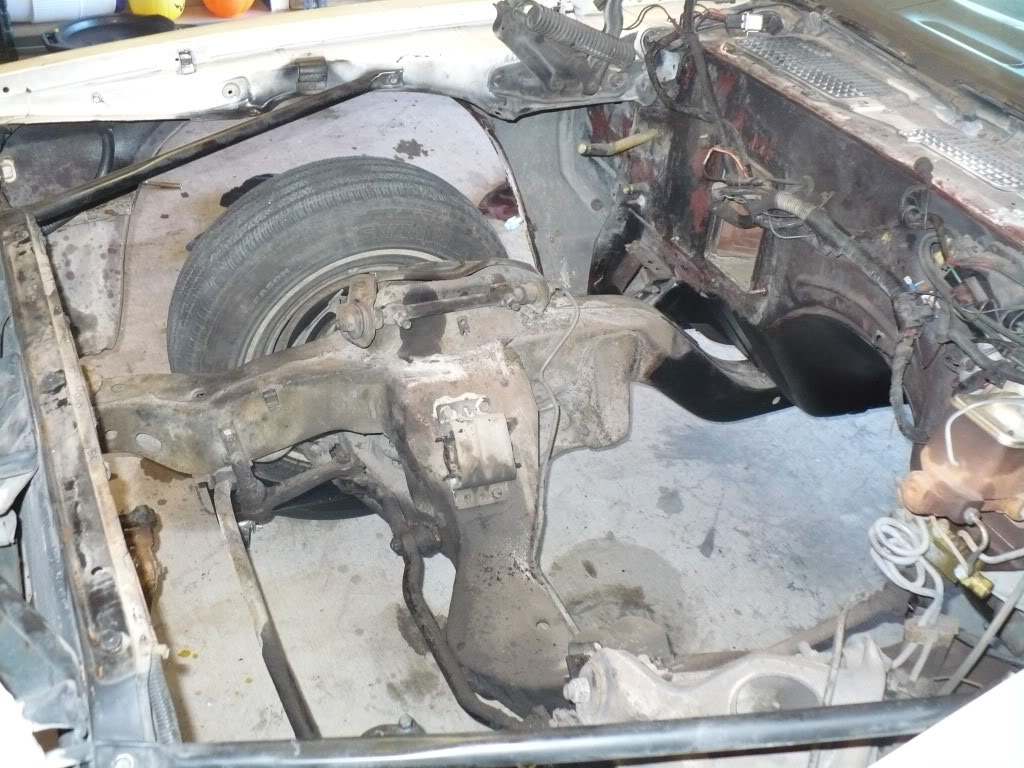
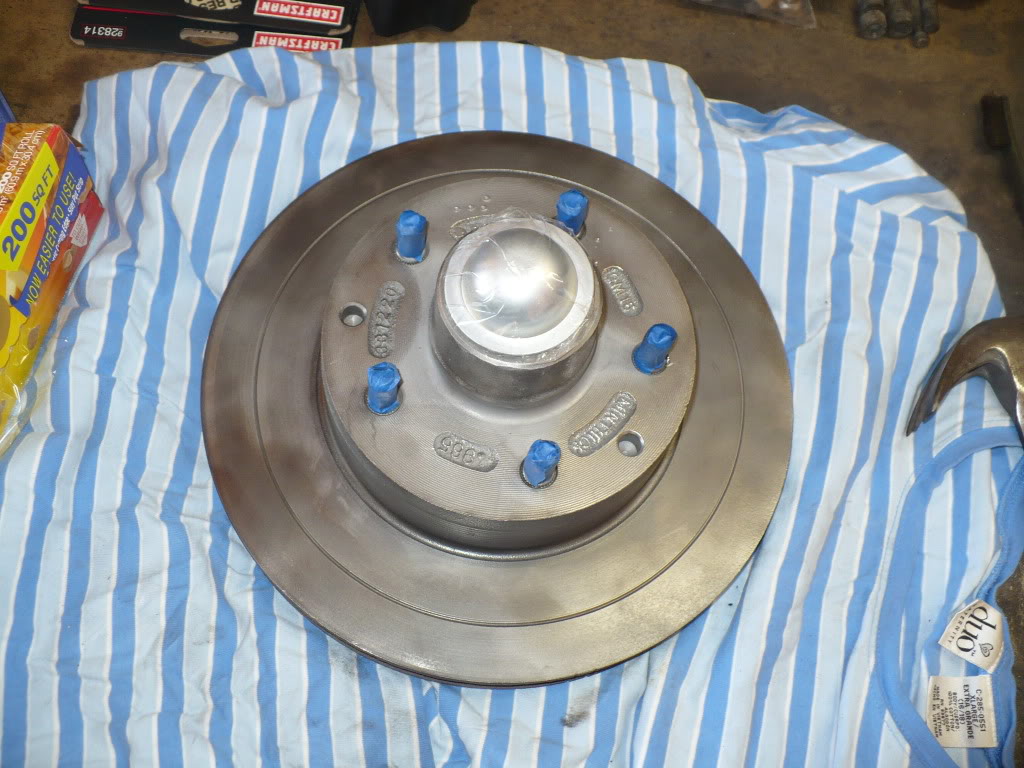
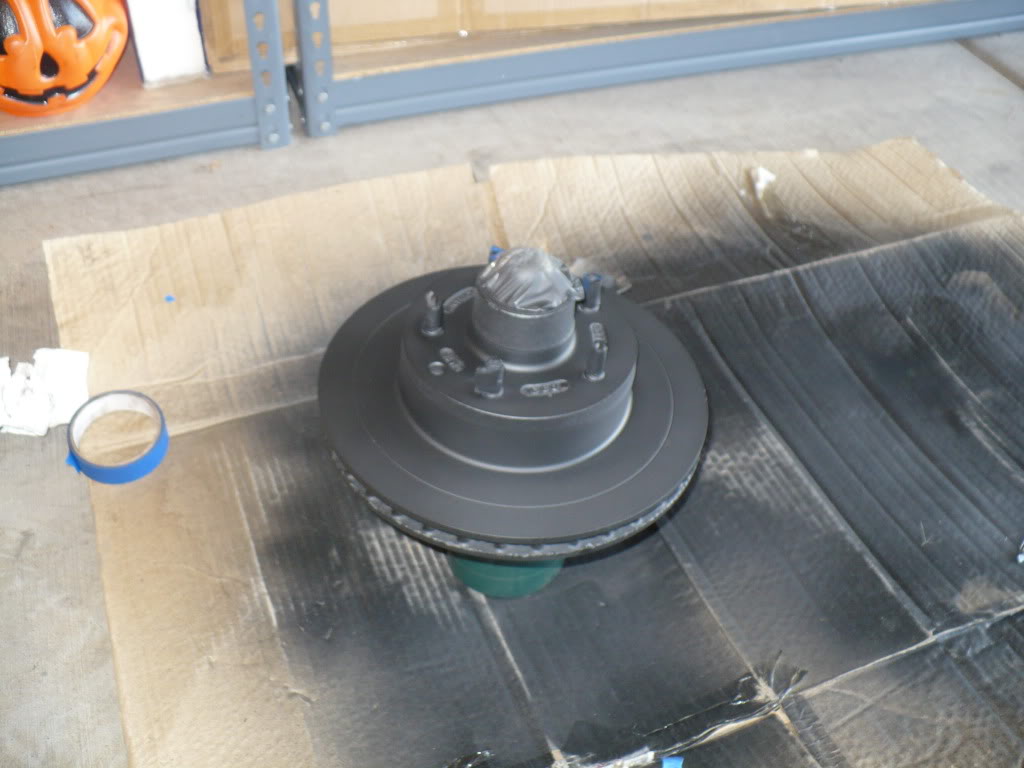
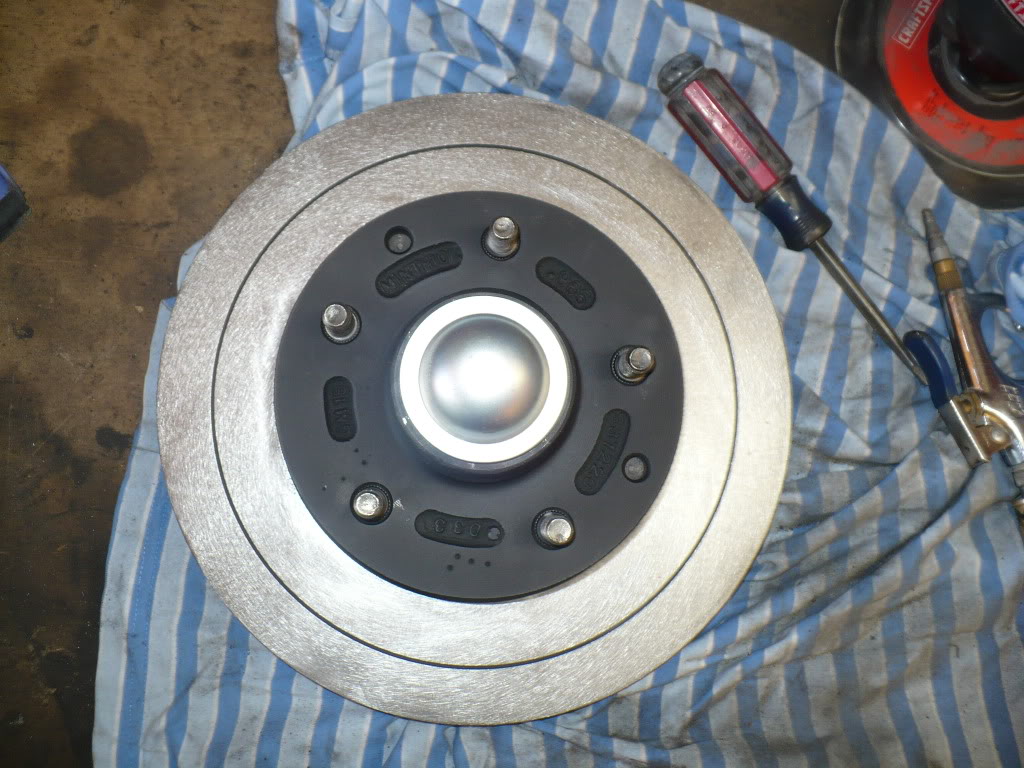
Here’s the stock 8.5 inch 10-bolt. It’s an open diff with 2.73 gears so it’ll eventually have to go, but until I can buy a 9-inch it’s sticking around. So I cleaned it up and threw some paint at it.
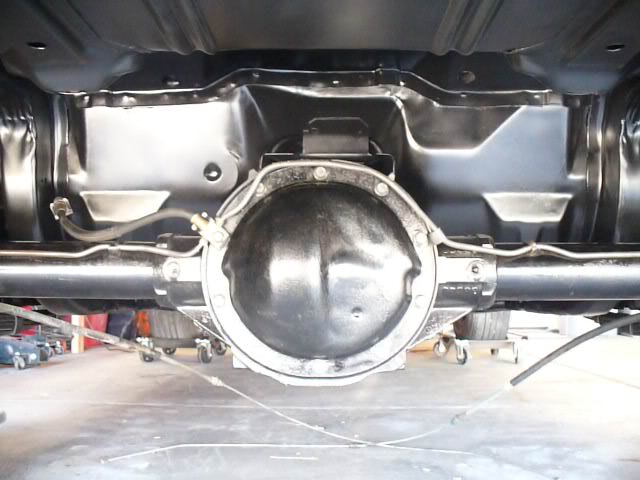
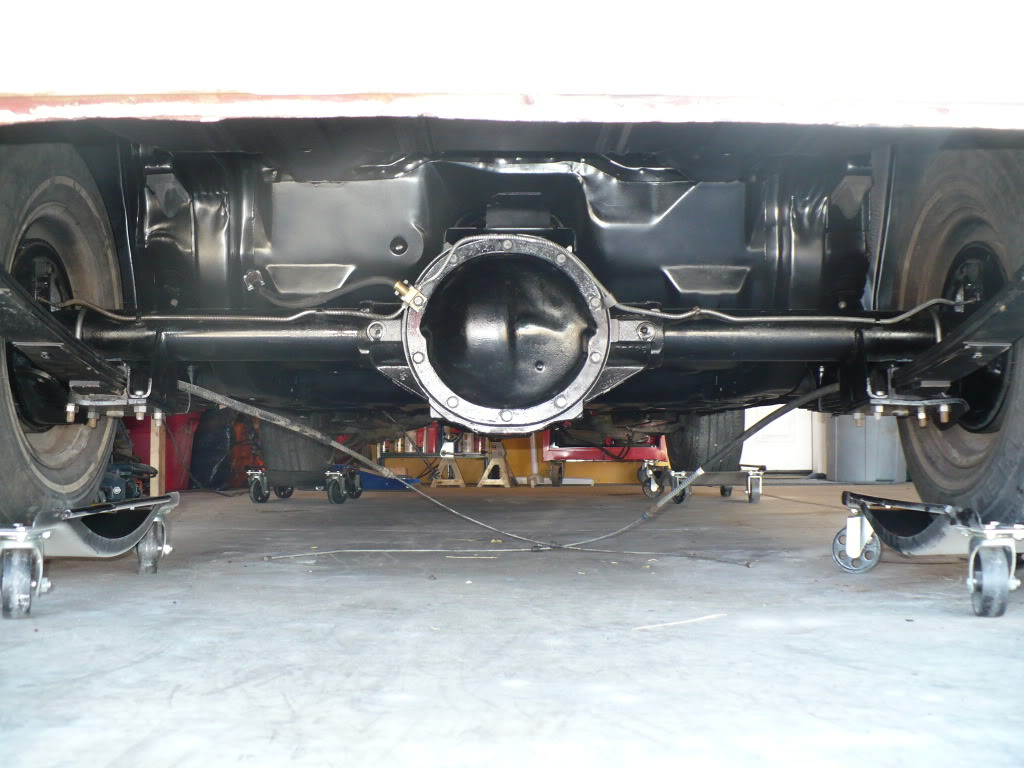
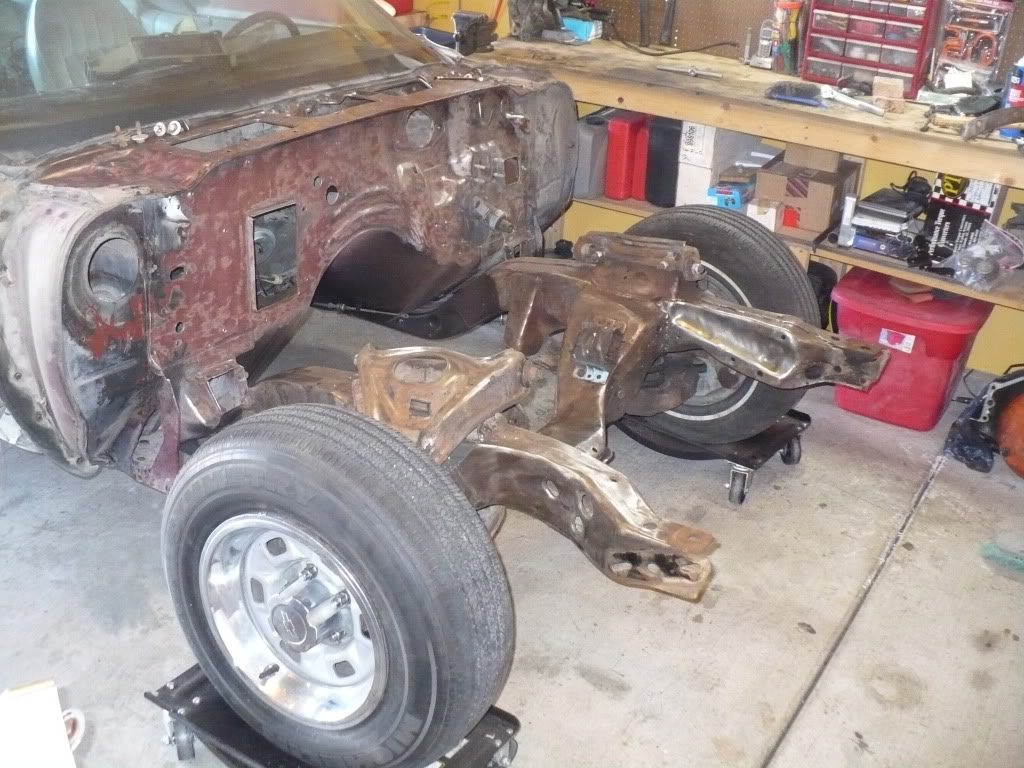
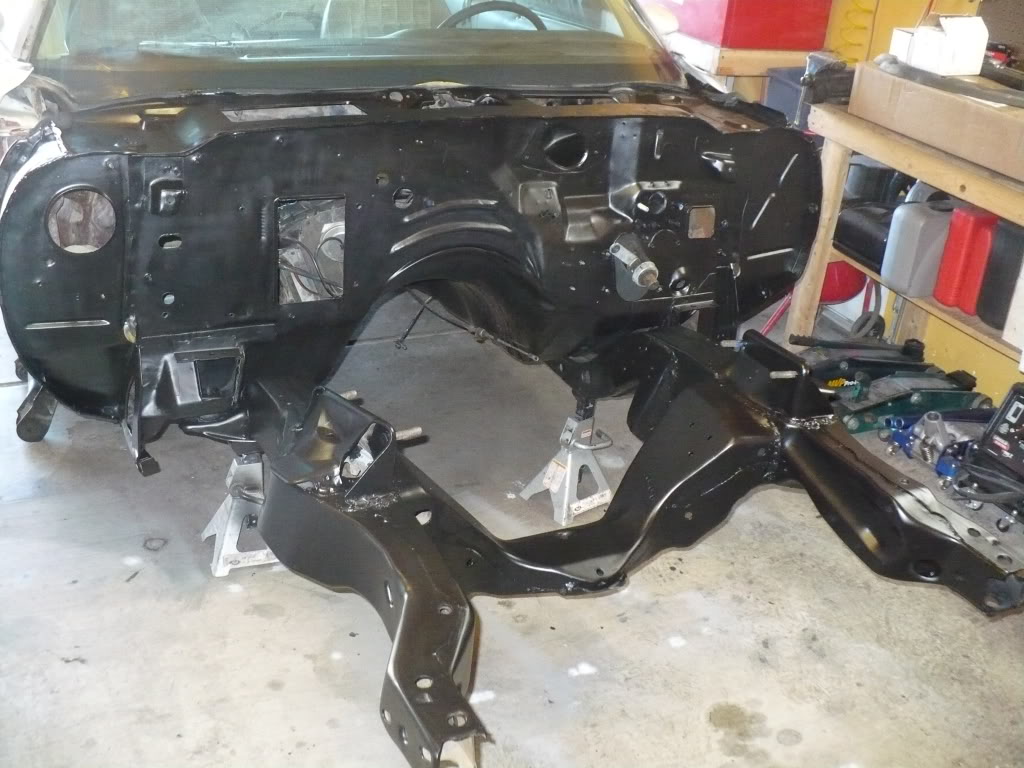
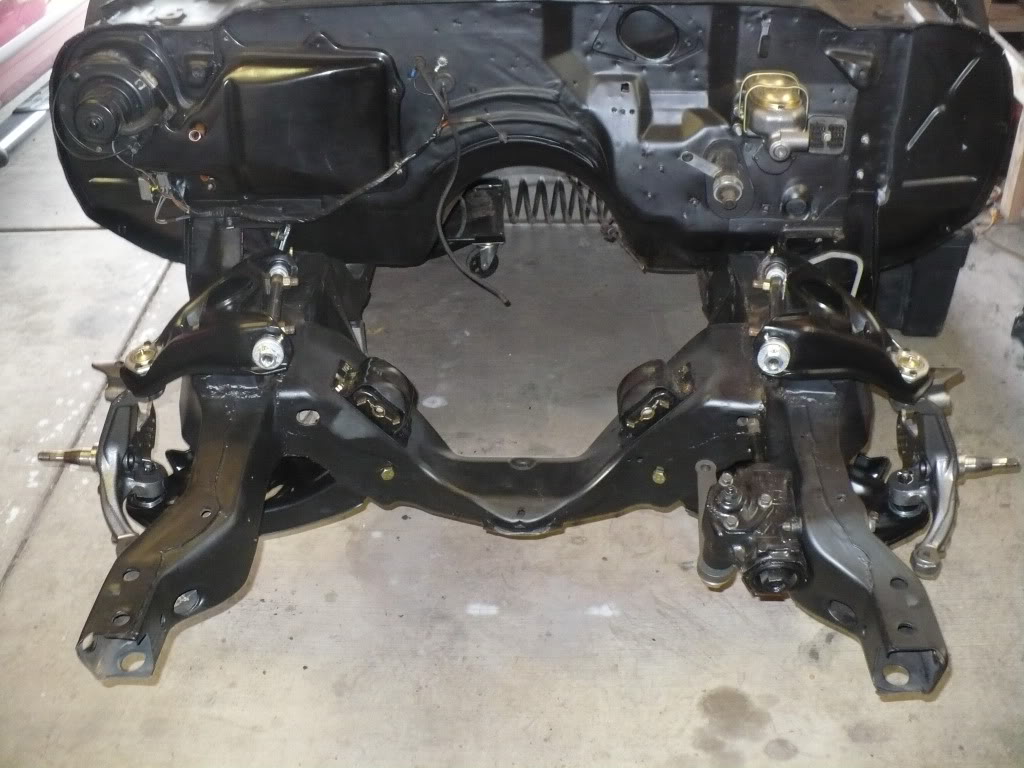
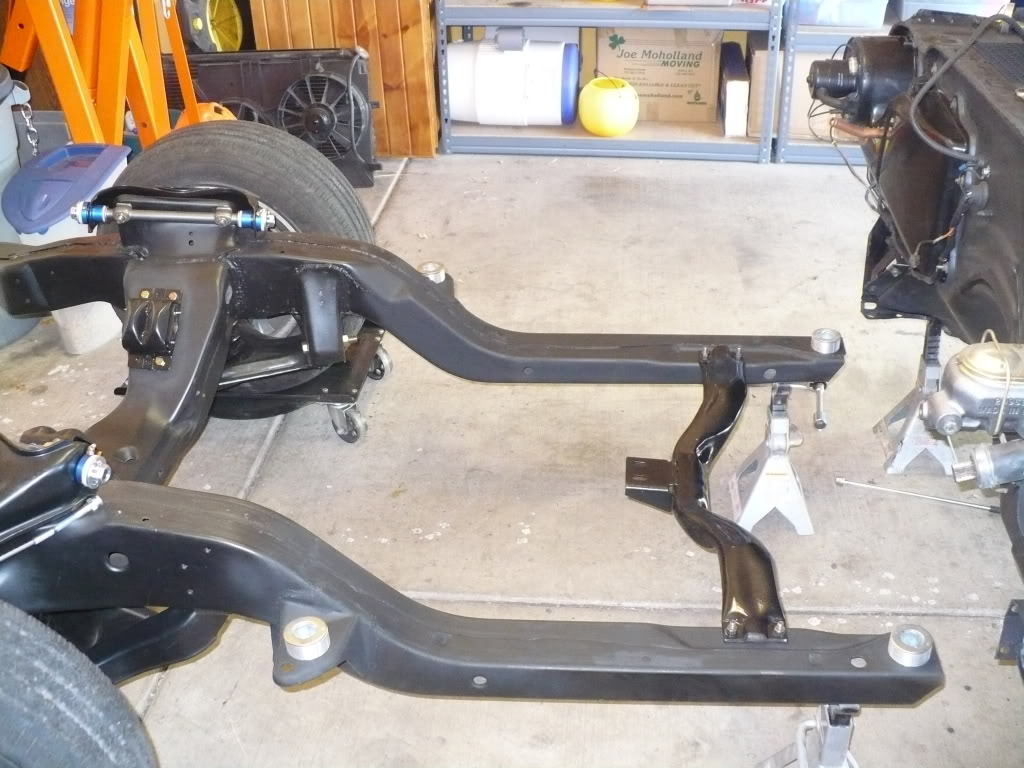
And back on all fours……
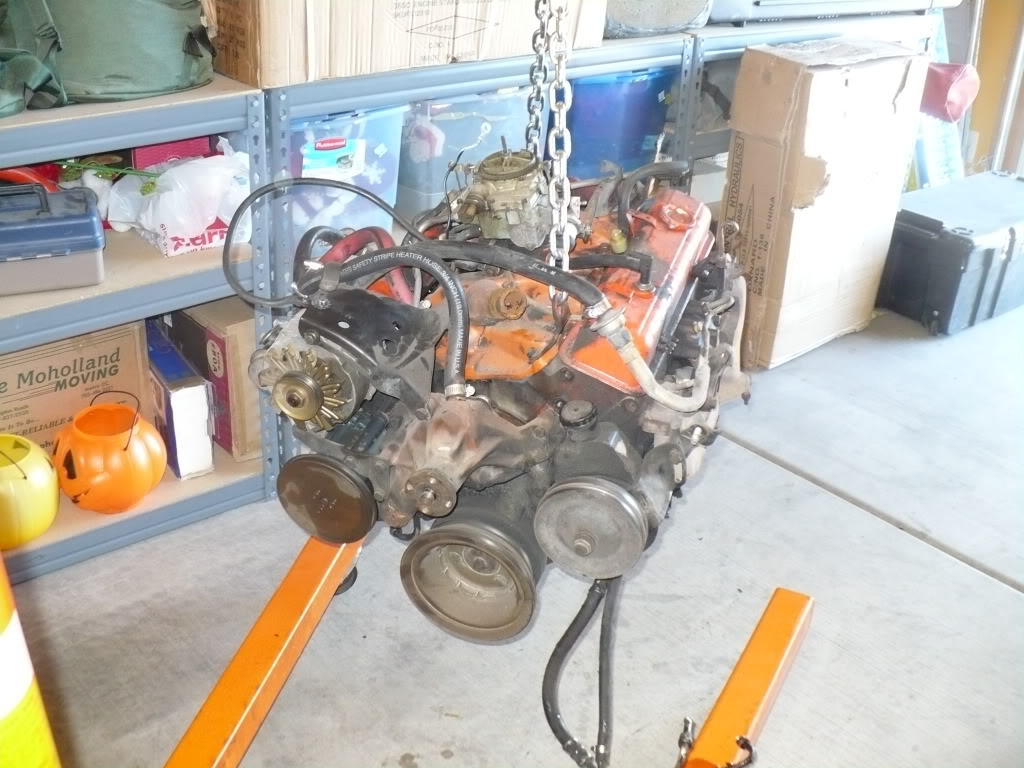
Next the stock 350 came out.
And back on all fours……
Next the stock 350 came out.


Trending Topics
06-19-2010, 10:32 AM
#8
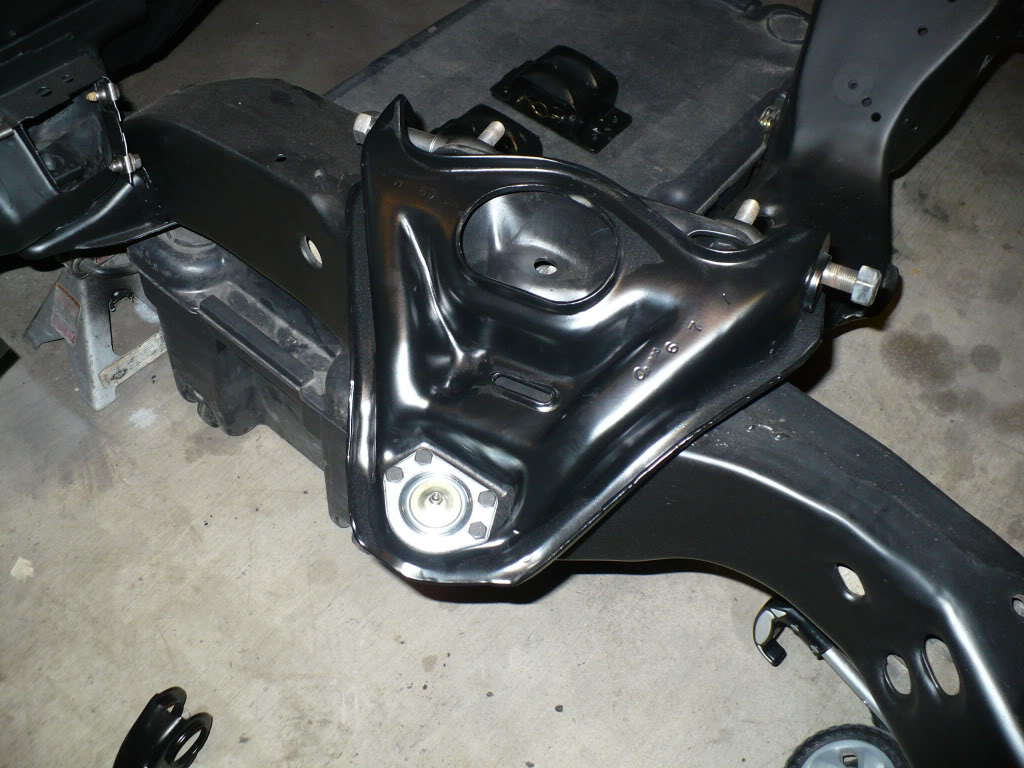
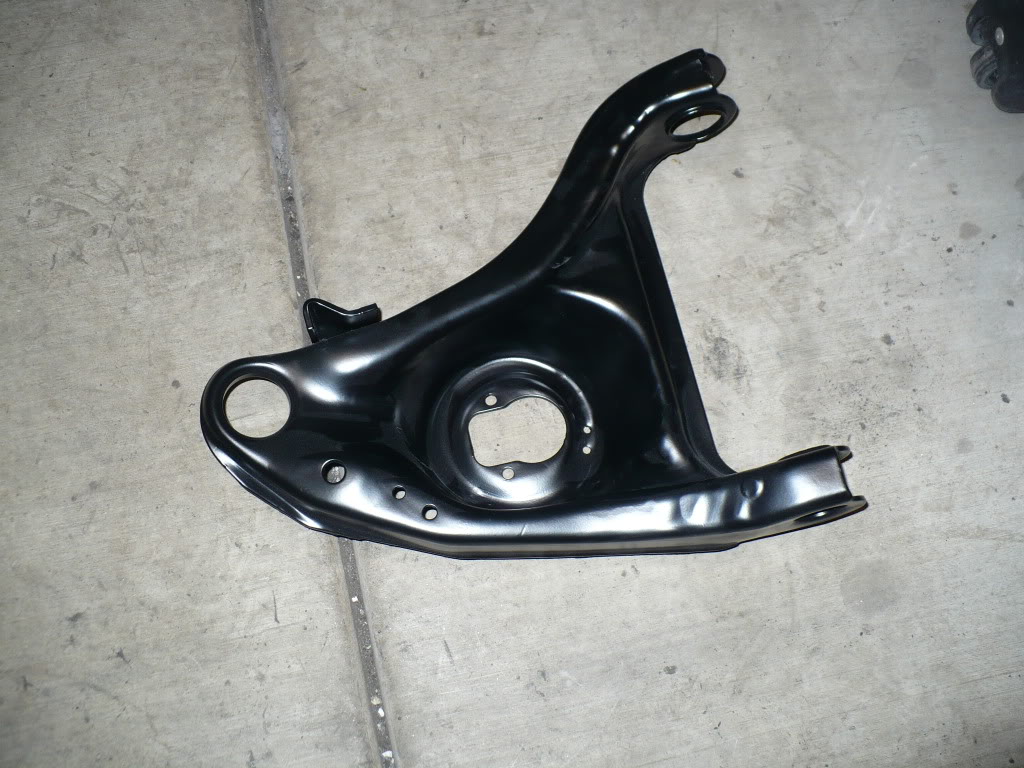
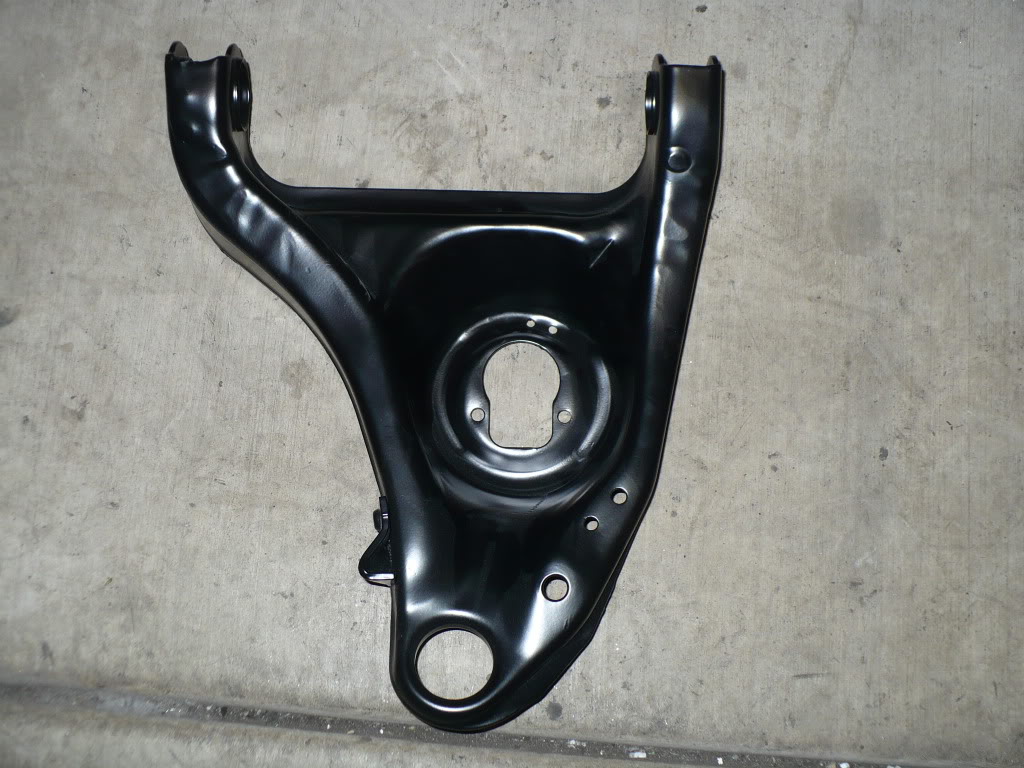
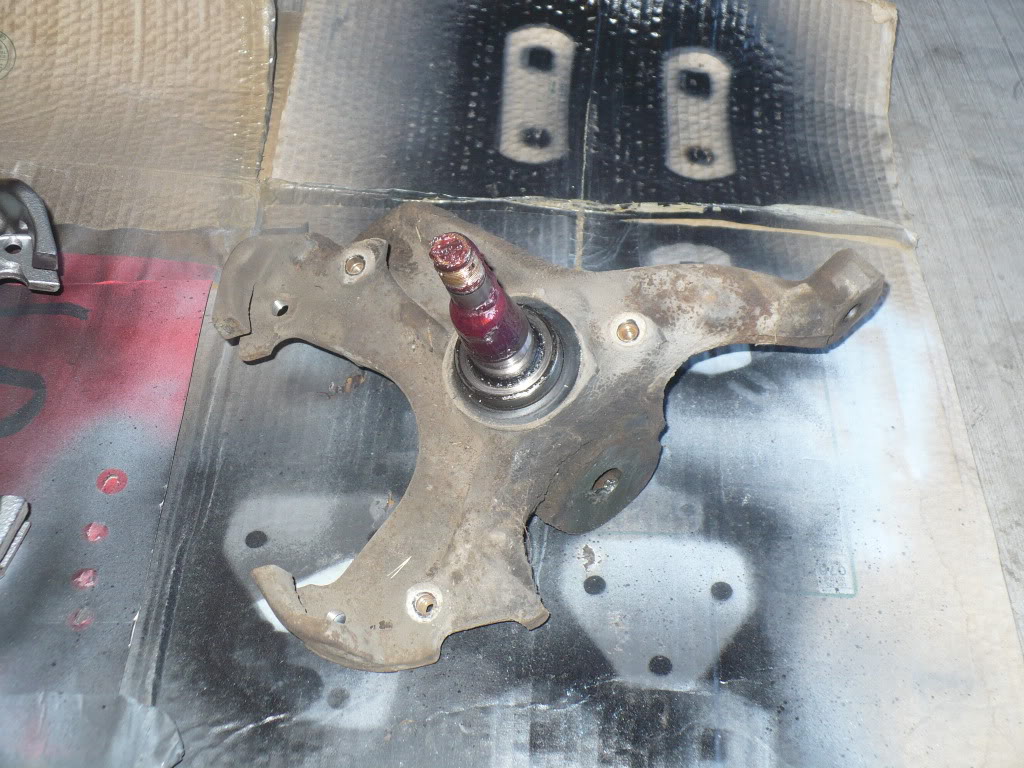
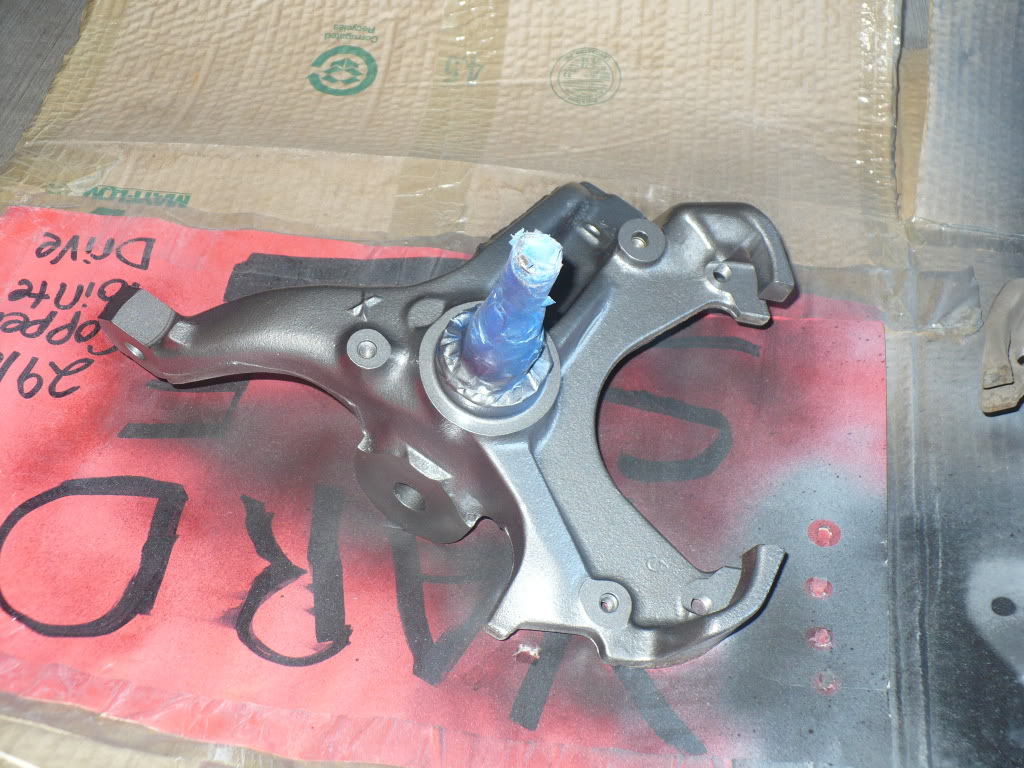
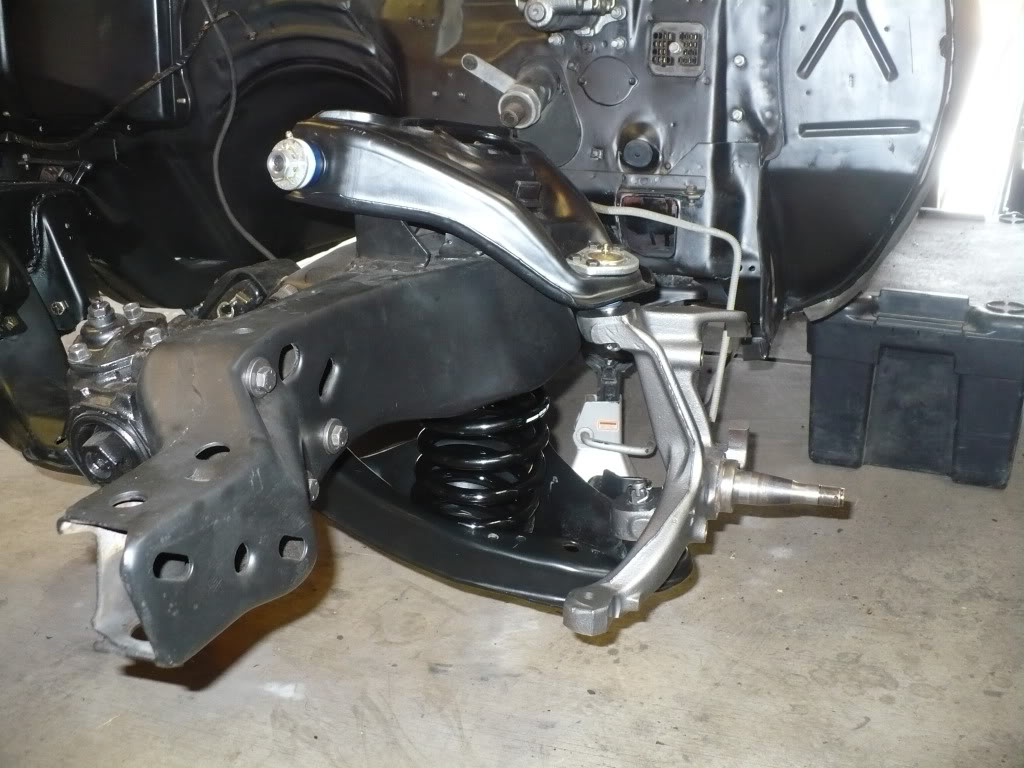
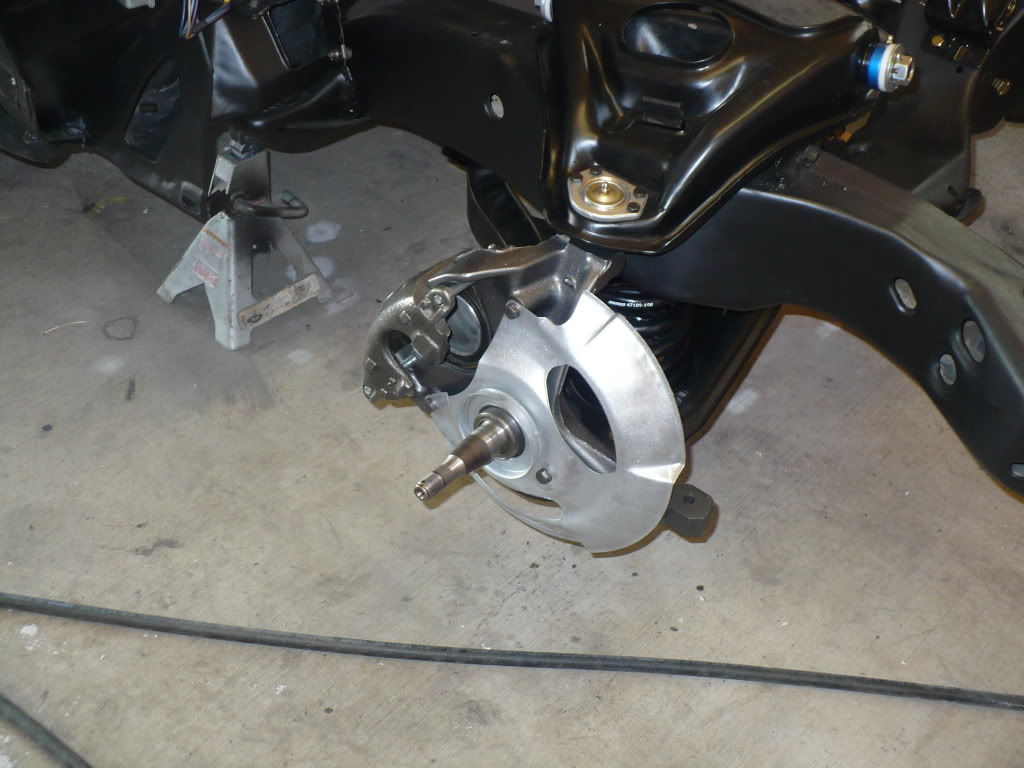
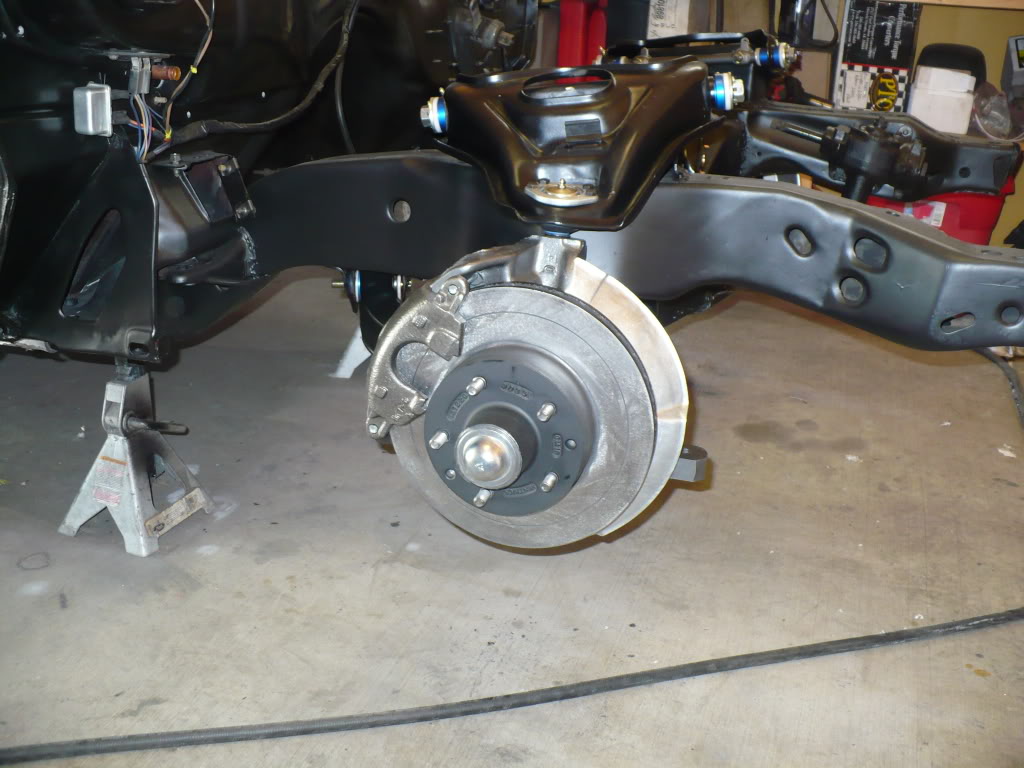
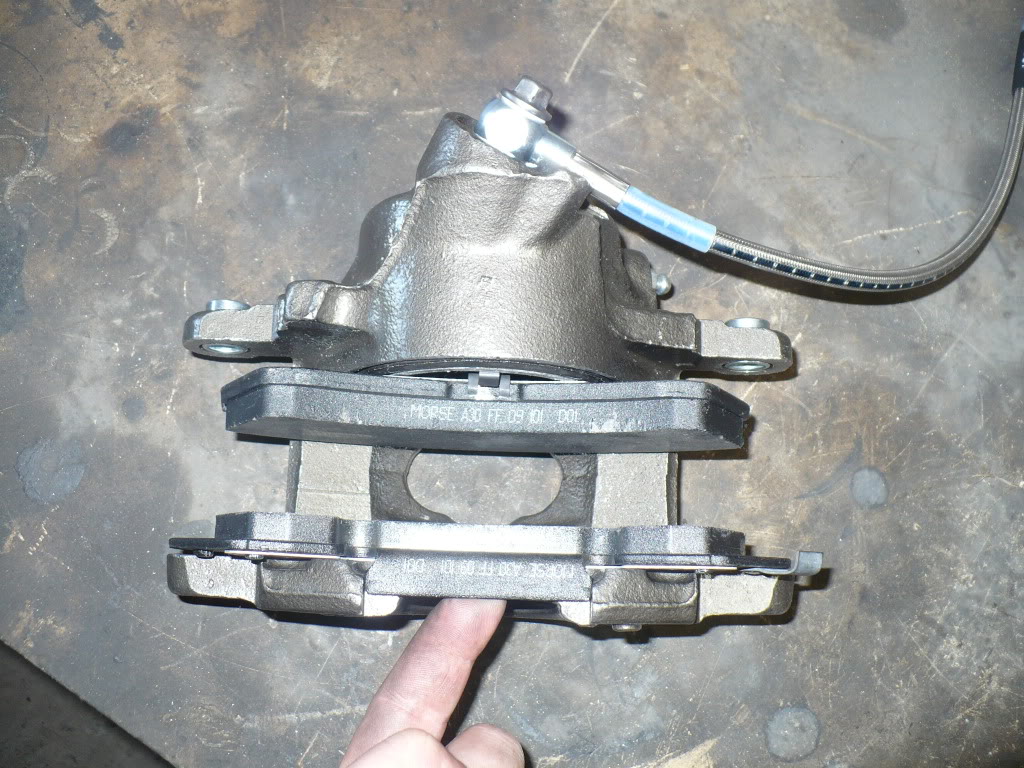
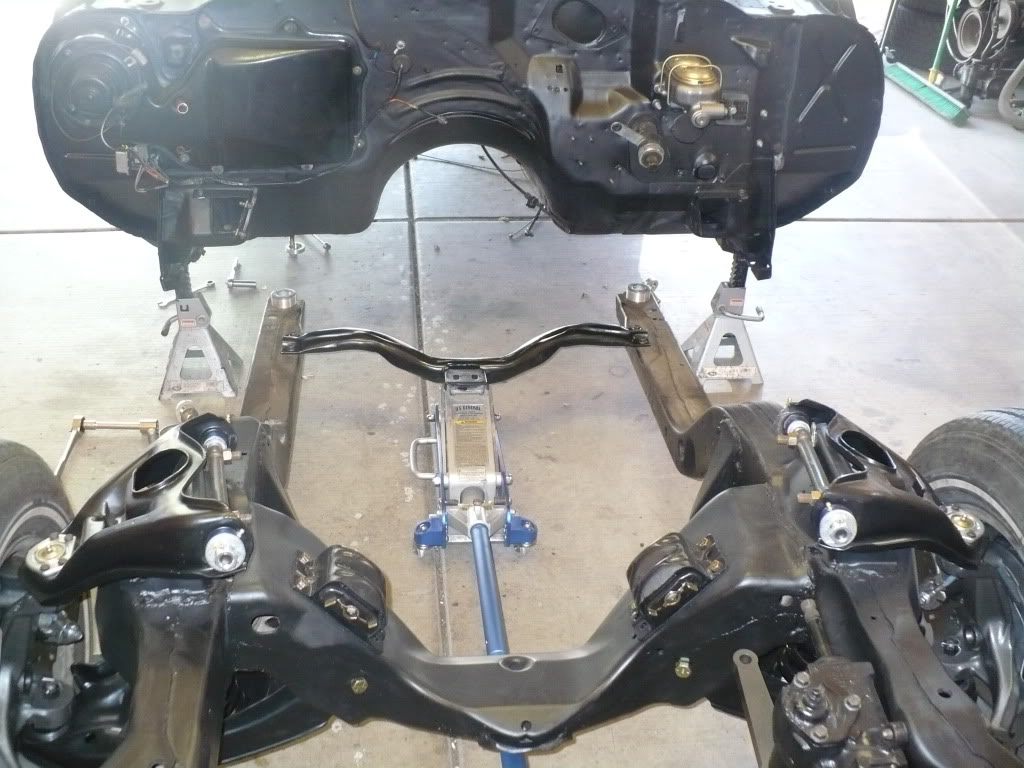
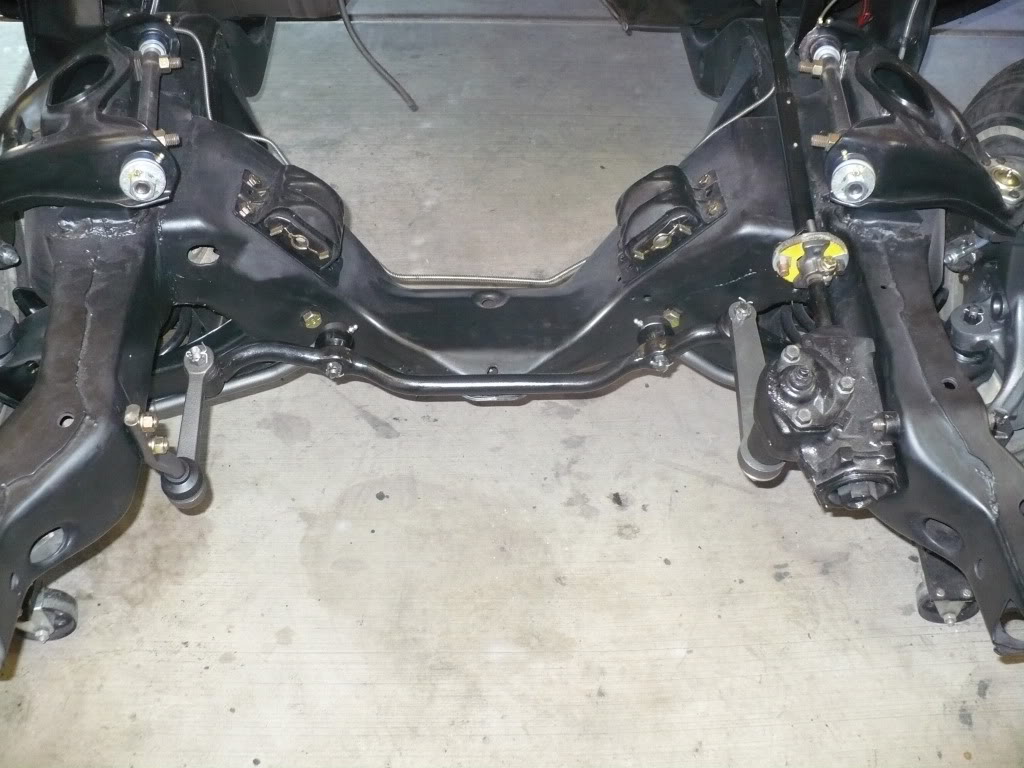
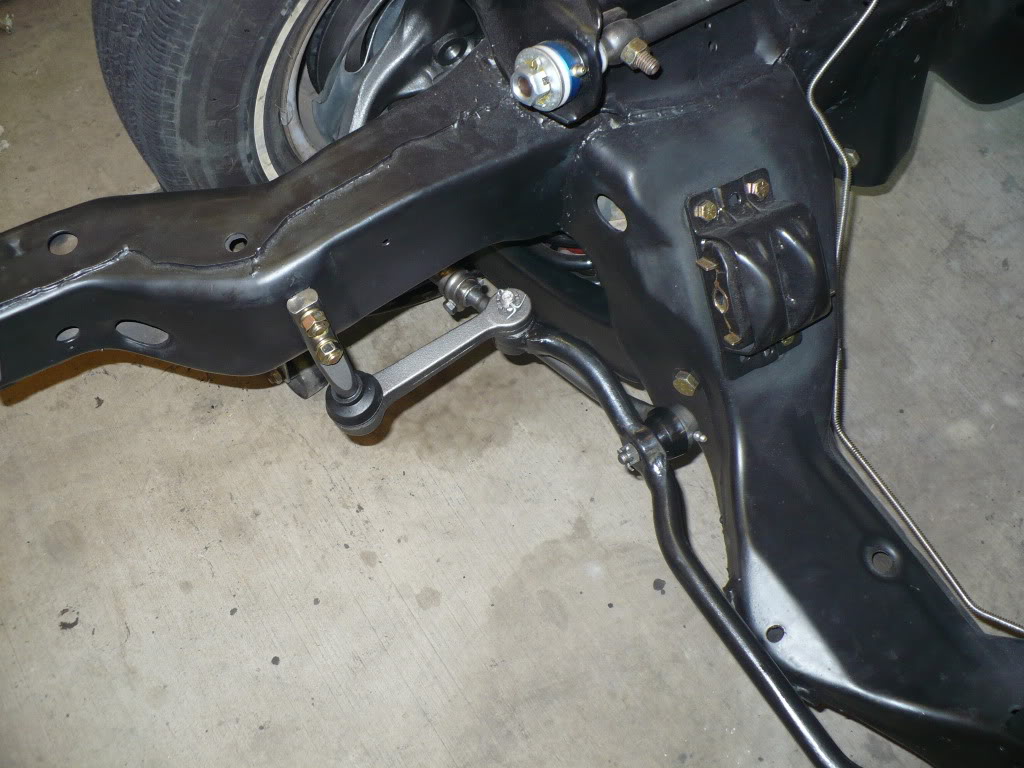
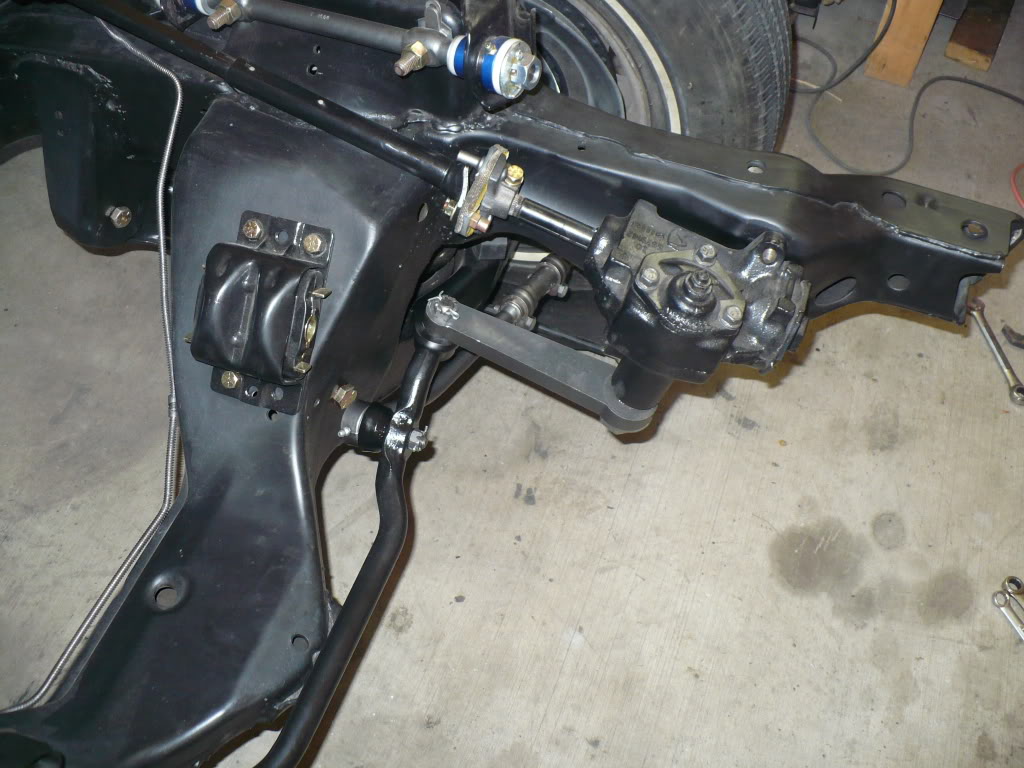
Steering reassembly………
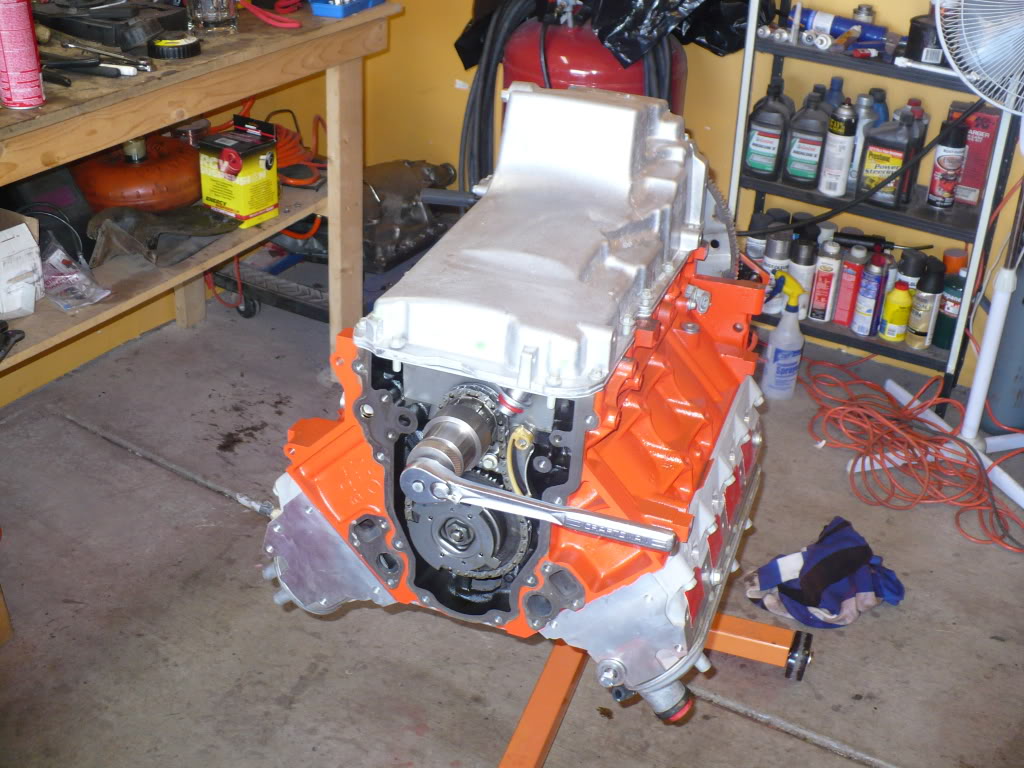
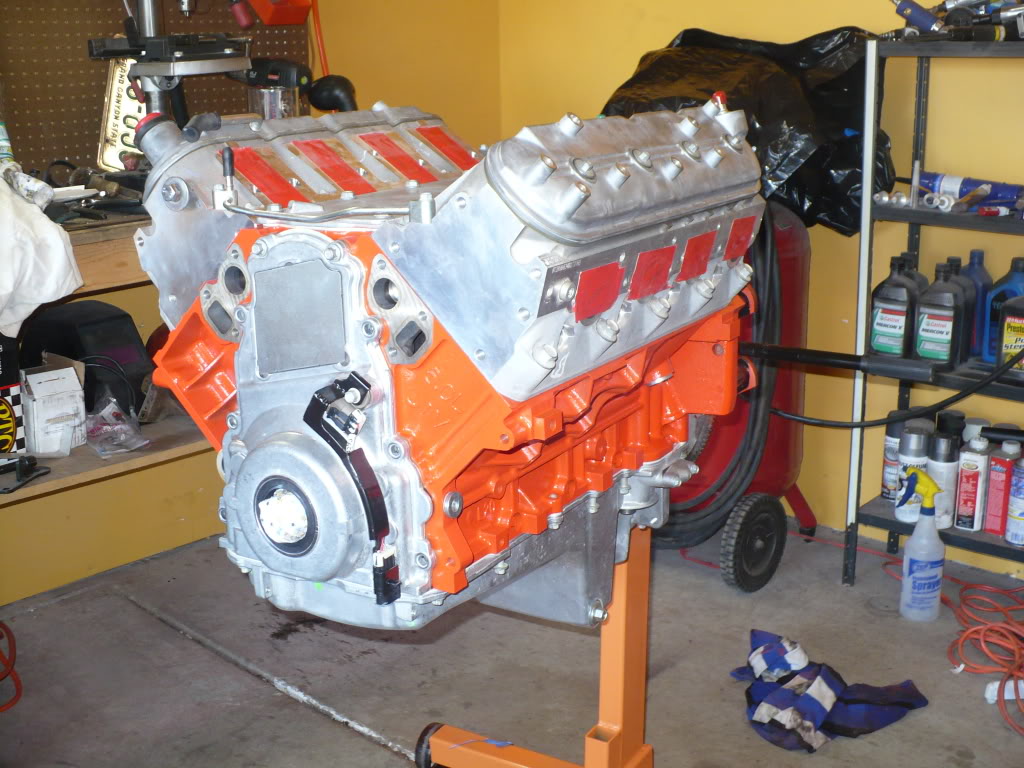
Then I finally rolled the LY6 out and put it on the engine stand and got to work.
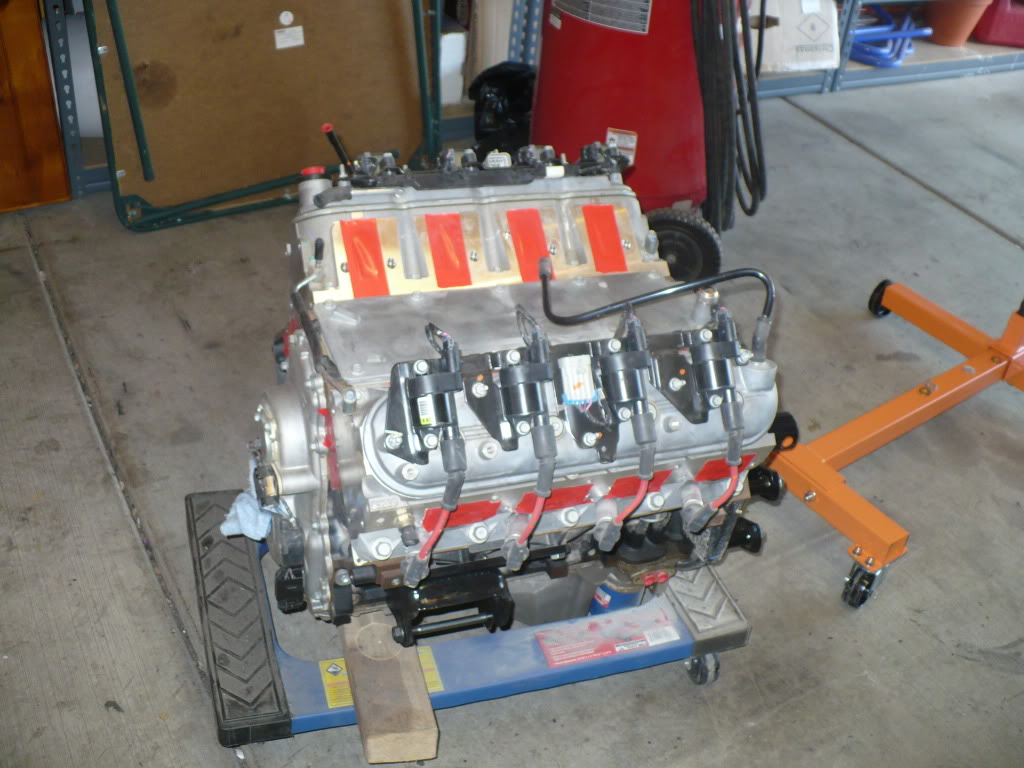
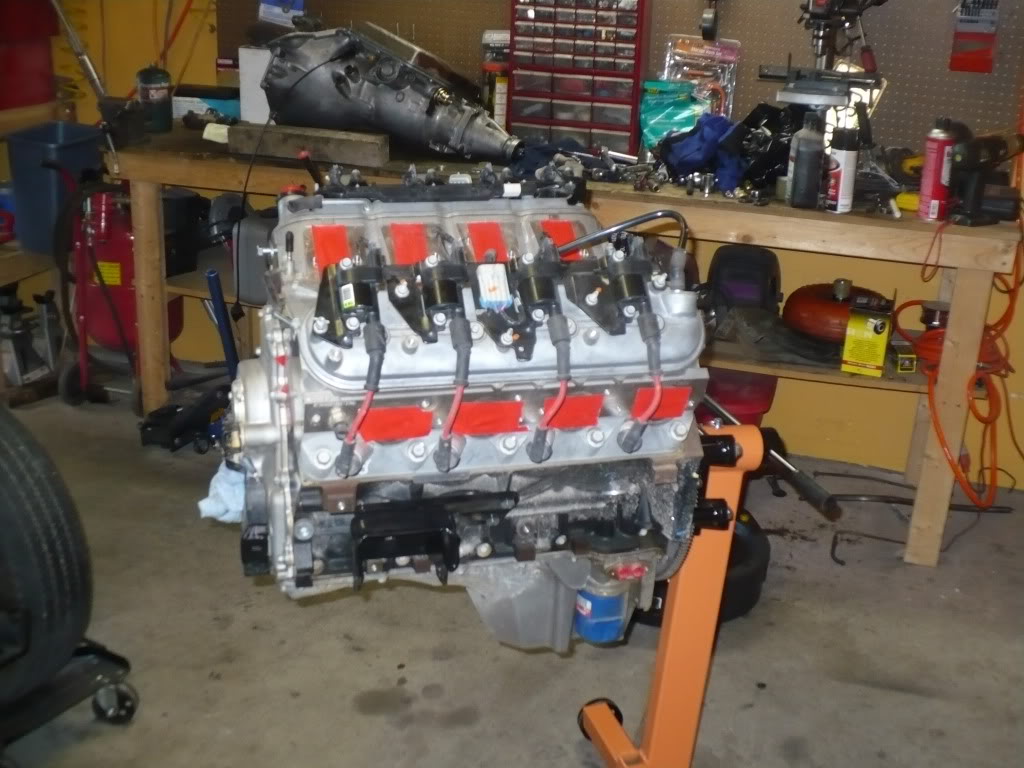
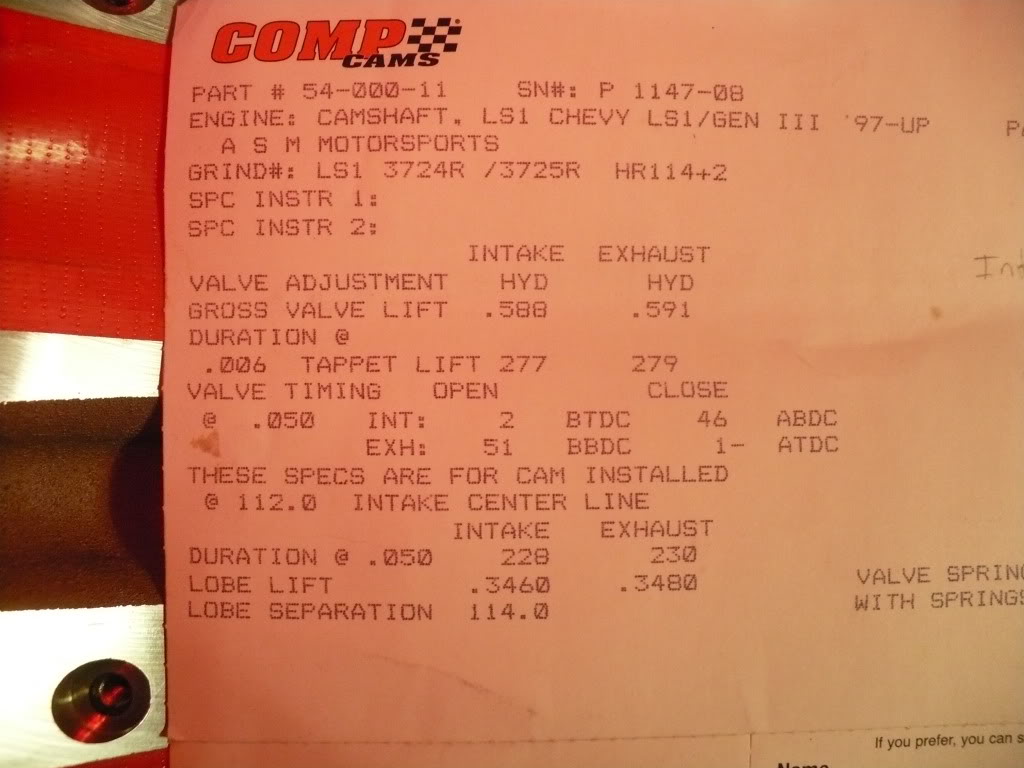
This very low mileage motor is getting Katech rod bolts, Comp 228/230-114+2 cam, LS2 front cover (deleting Variable Valve Timing stuff), the Hummer H3 (LH8) pan, TCI SFI flexplate, an ATI Super Damper, F-Body front drive accessories, and a fresh coat of Chevy Orange on the block. It'll also eventually get a set of Patriot Extreme Dual Golds and Thunder hardened pushrods, as well as a Victor JR carb intake and an MSD ignition.
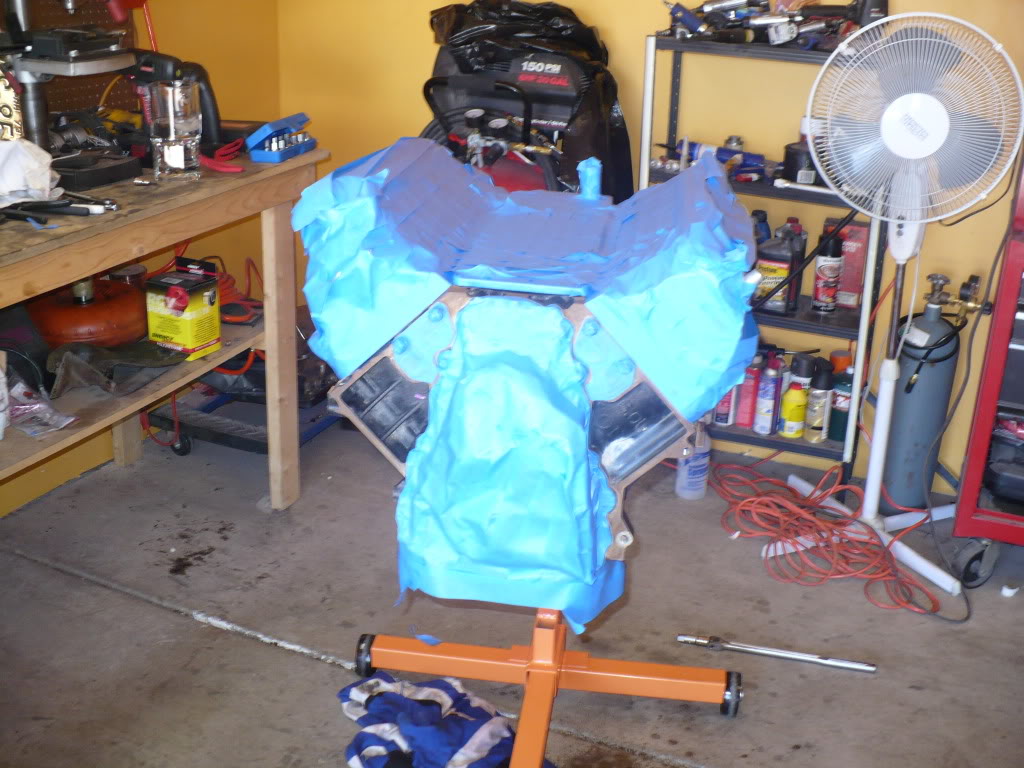
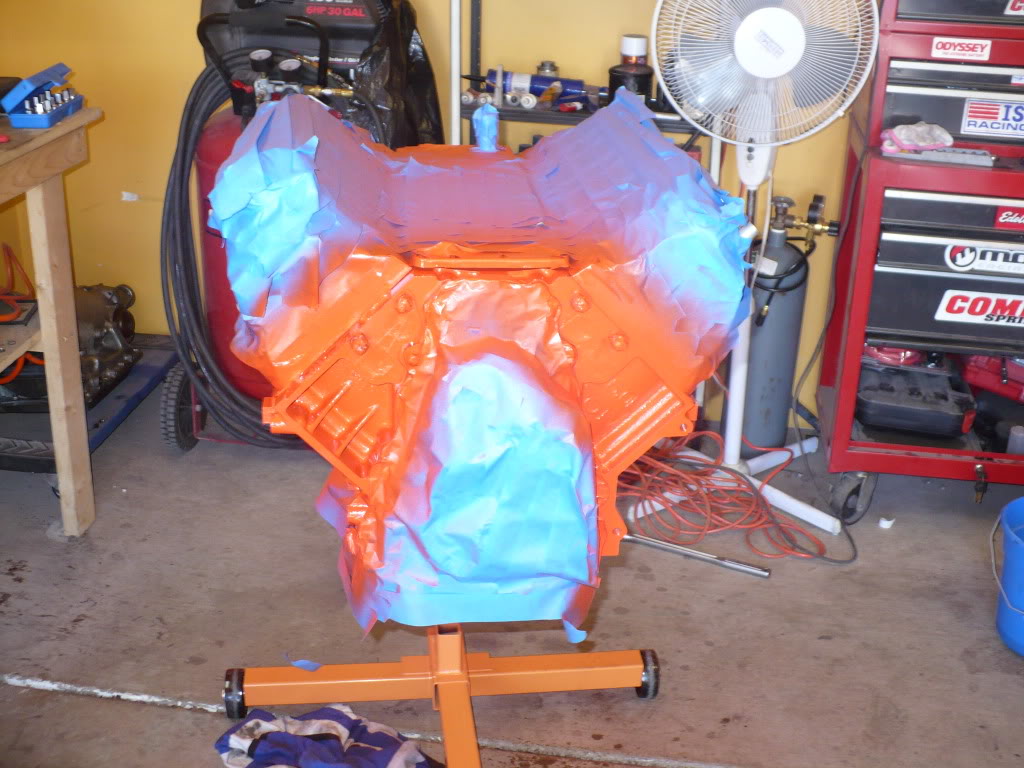
The first thing I wanted to do was clean up the block, mask it off and get it painted while the old truck oil pan and VVT timing cover were still on it….just in case my masking job wasn’t so great. Here it is all mummified in masking tape. I’m sure some paper mixed in would have been more efficient, but once I got taping I just kept going.
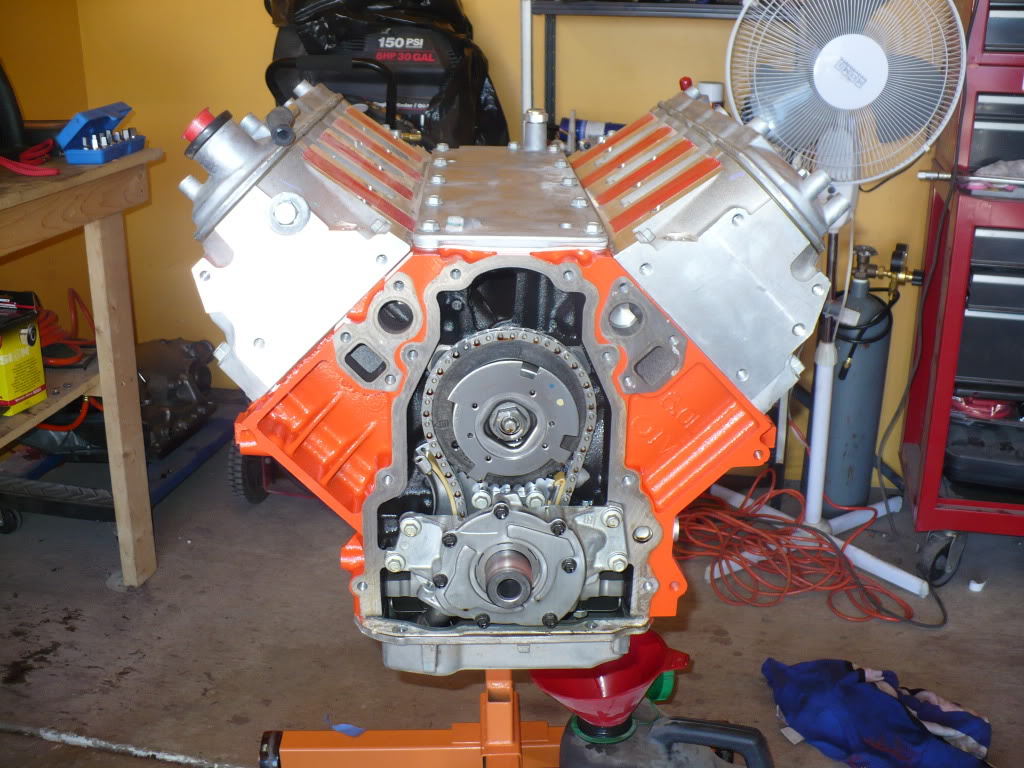
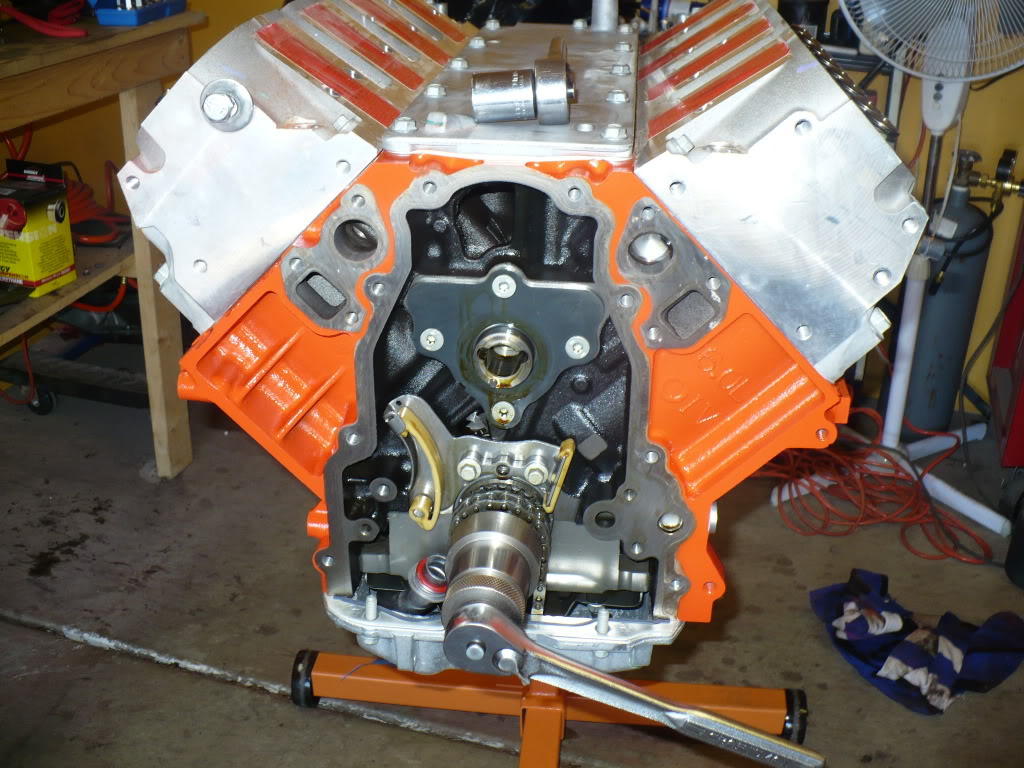
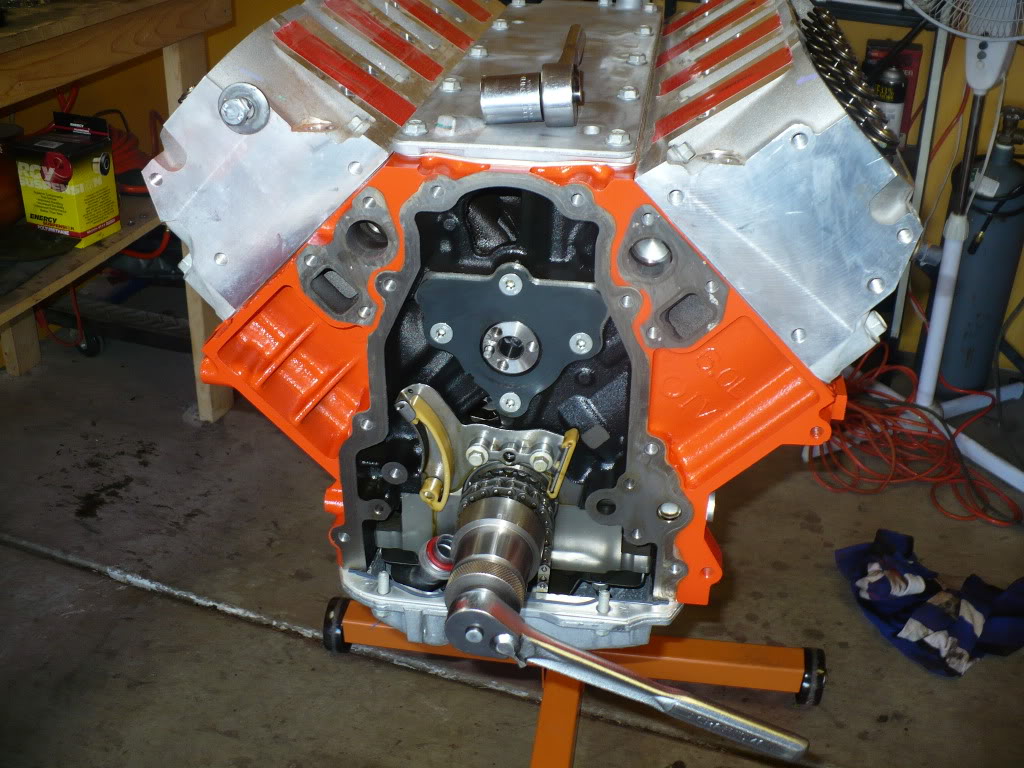
After it had some time to dry, I unmasked it and pulled the timing cover off. Note the single bolt cam and cam phaser. LY6’s are Variable Valve Timing (VVT) motors, but since I’m going carb’d, I’ll be doing away with the VVT stuff and going to a standard 3-bolt camshaft.
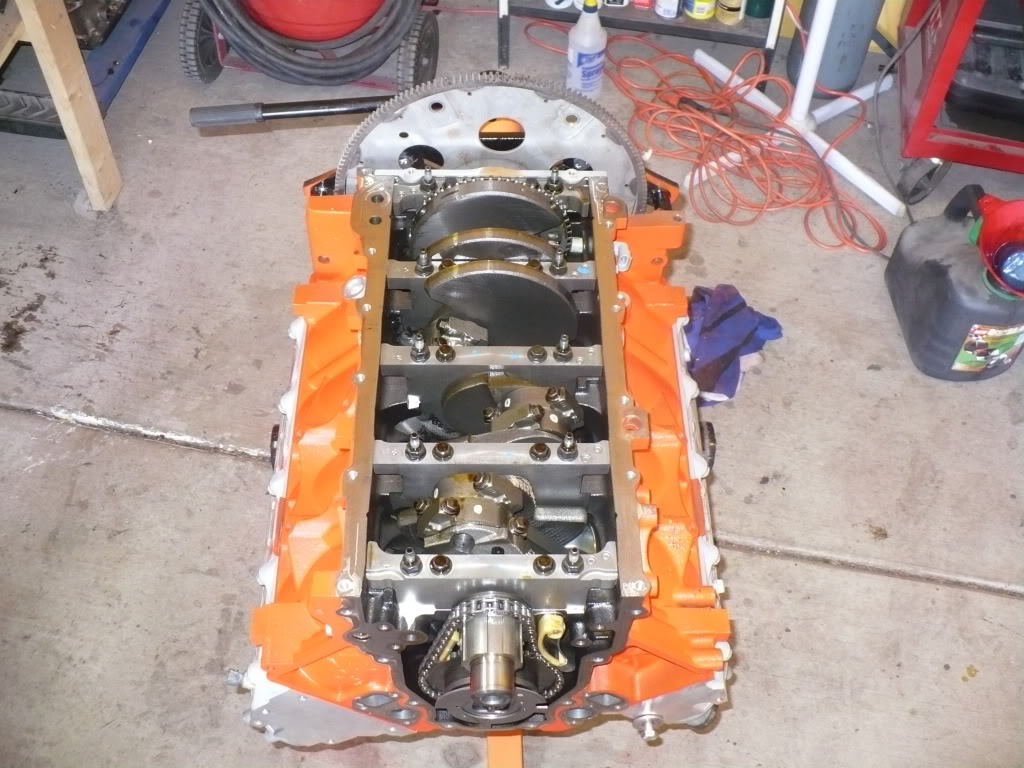
Next I pulled off the oil pan so I could swap the rod bolts. Here’s a shot of the windage tray and pickup tube still on.
And removed……
Then I finally rolled the LY6 out and put it on the engine stand and got to work.
This very low mileage motor is getting Katech rod bolts, Comp 228/230-114+2 cam, LS2 front cover (deleting Variable Valve Timing stuff), the Hummer H3 (LH8) pan, TCI SFI flexplate, an ATI Super Damper, F-Body front drive accessories, and a fresh coat of Chevy Orange on the block. It'll also eventually get a set of Patriot Extreme Dual Golds and Thunder hardened pushrods, as well as a Victor JR carb intake and an MSD ignition.
The first thing I wanted to do was clean up the block, mask it off and get it painted while the old truck oil pan and VVT timing cover were still on it….just in case my masking job wasn’t so great. Here it is all mummified in masking tape. I’m sure some paper mixed in would have been more efficient, but once I got taping I just kept going.
After it had some time to dry, I unmasked it and pulled the timing cover off. Note the single bolt cam and cam phaser. LY6’s are Variable Valve Timing (VVT) motors, but since I’m going carb’d, I’ll be doing away with the VVT stuff and going to a standard 3-bolt camshaft.
Next I pulled off the oil pan so I could swap the rod bolts. Here’s a shot of the windage tray and pickup tube still on.
And removed……
06-19-2010, 10:33 AM
#9
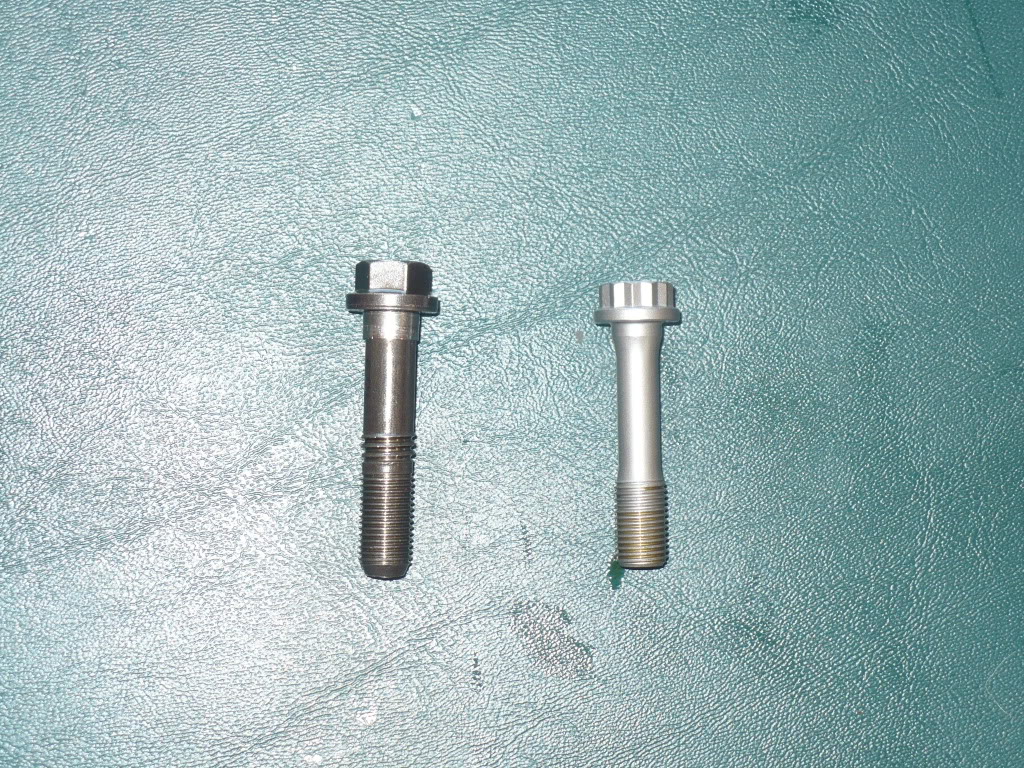
Since this motor will see some RPM and abuse, I wanted to upgrade the rod bolts with Katech bolts. Their rod bolts are made from H-11 material and are rated at 260,000psi yield strength. Here’s a comparison of a stock rod bolt with a Katech. The LY6’s actually have a pretty decent rod bolt compared to the earlier LS motors. These are the same rod bolts that go into the LS3 as far as I know. The Katech bolt is on the right.
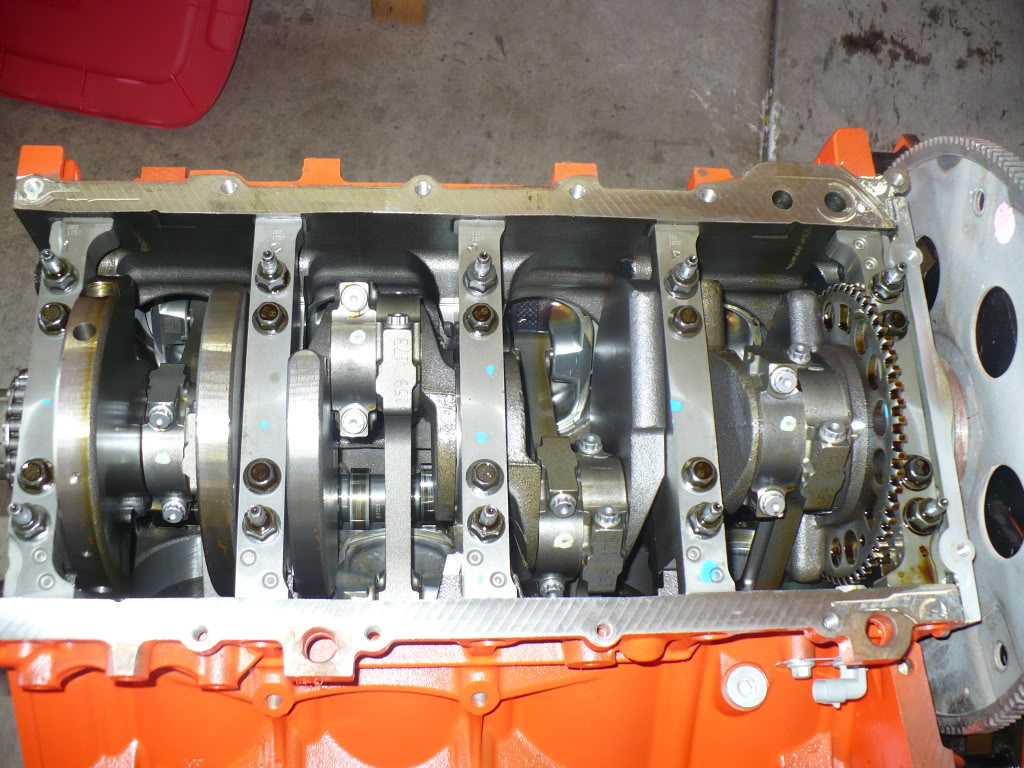
Katech recommends you torque and loosen each bolt at least three times to 35ft lbs to burnish the threads and achieve the proper stretch. I did mine four times for good measure. Then you final torque them to 45ft lbs. They also provide high pressure lubricant to use on the threads and under the heads of the bolts. Here’s a shot of the new bolts installed.
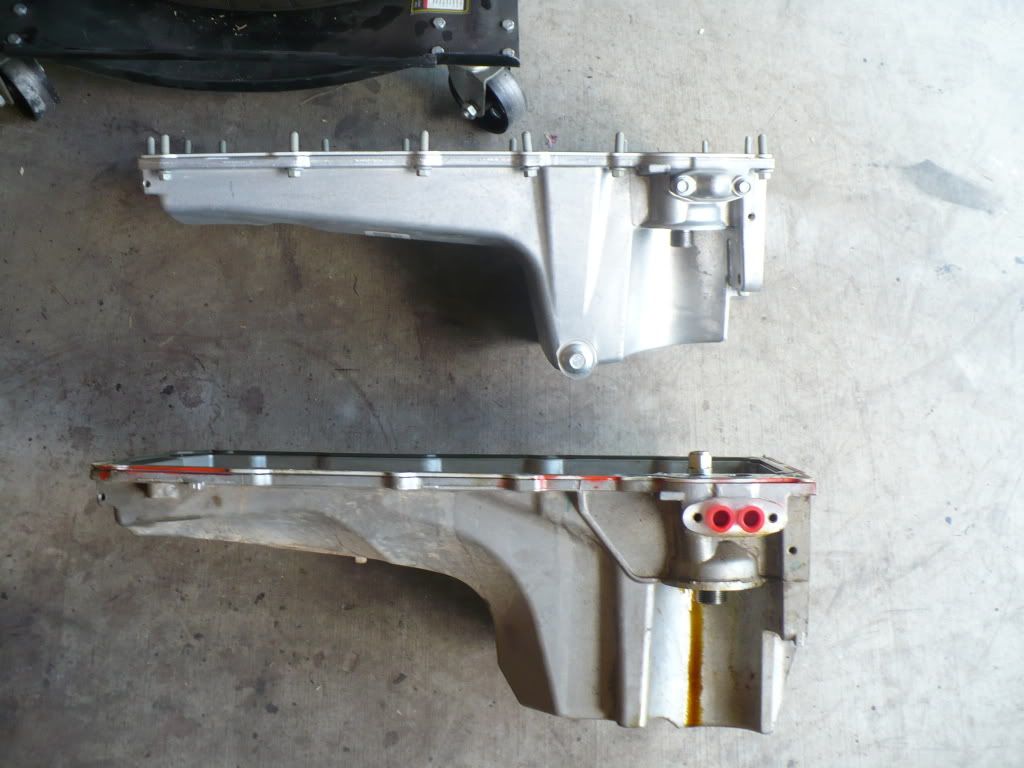
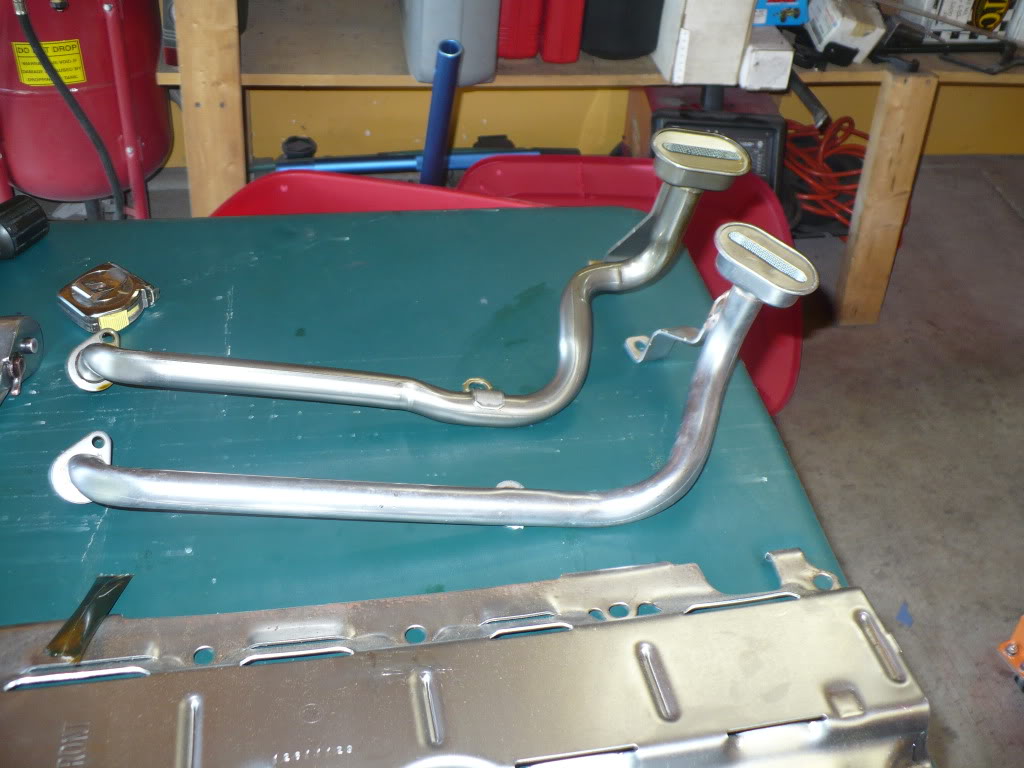
Once the rod bolts were installed, I wanted to put the new pan on temporarily, just to keep things covered up and clean. I’ll be running the Hummer H3 pan. Most folks prefer the F-body pan in 2nd Gen swaps for better ground clearance, but for the money the H3 pan is a great choice. It’s the pan GM advertises and sells as its Muscle Car LS swap pan because it provides great cross member clearance up front. It looks like the sump will hang maybe a few inches below the cross member, but most traditional SBC deep pans do the same thing. Here’s a comparison of the H3 pan to the truck pan that came off my LY6, and a comparison of the two different pick up tubes. Lastly is a shot of the new H3 Pan loosely bolted in place for the time being.
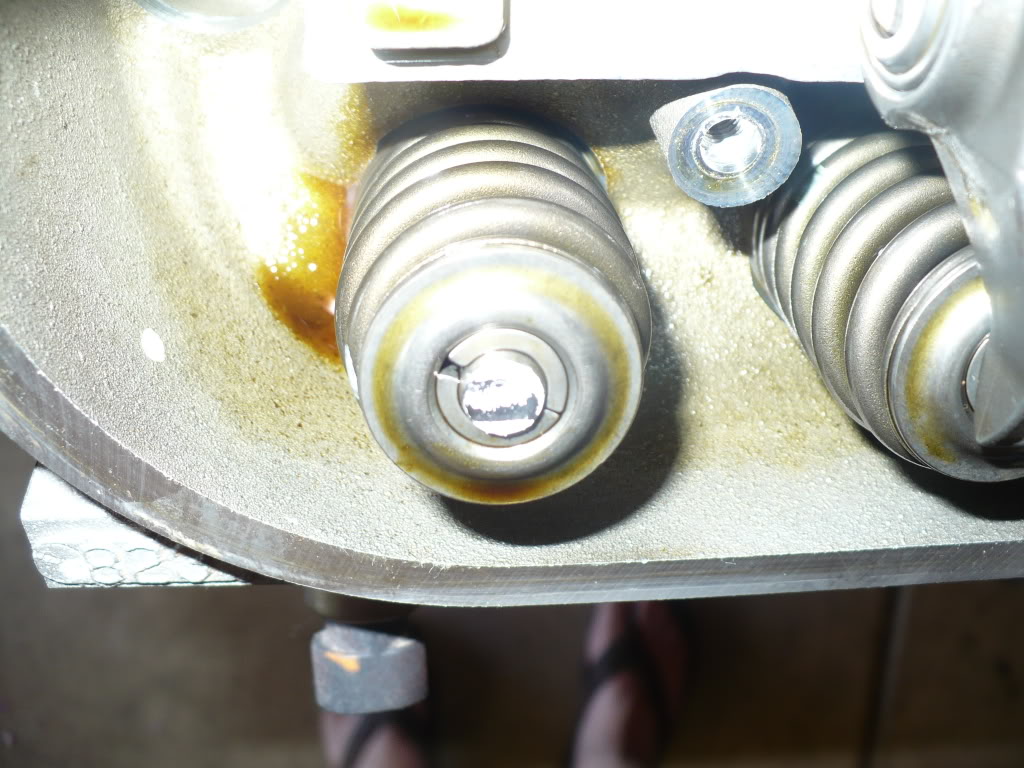
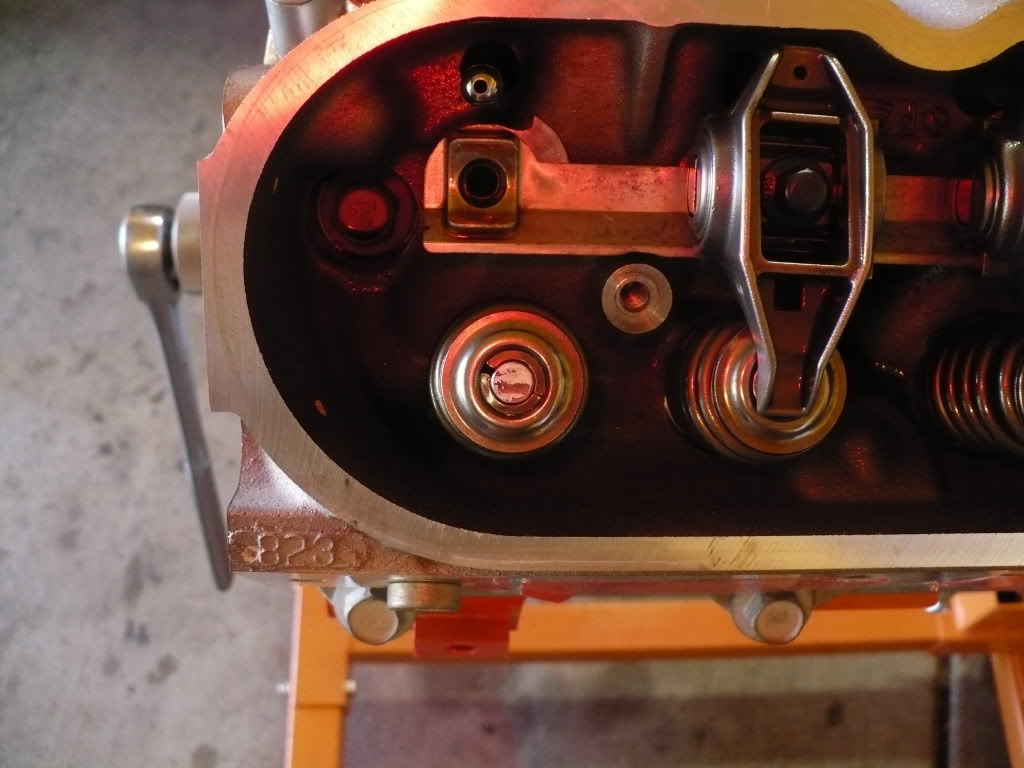
Once the bottom end was buttoned up, it was time to move on to the cam swap. Before I disassembled the stock valve train, I wanted to see what the stock wipe pattern looked like. So, I painted up a valve tip and gave it a couple spins. It looks to be a pretty narrow pattern, but a little bottom of center. More on this later.
Next I pulled all the rockers and pushrods and rotated the motor a few times to lock the lifters up in the guide cups.
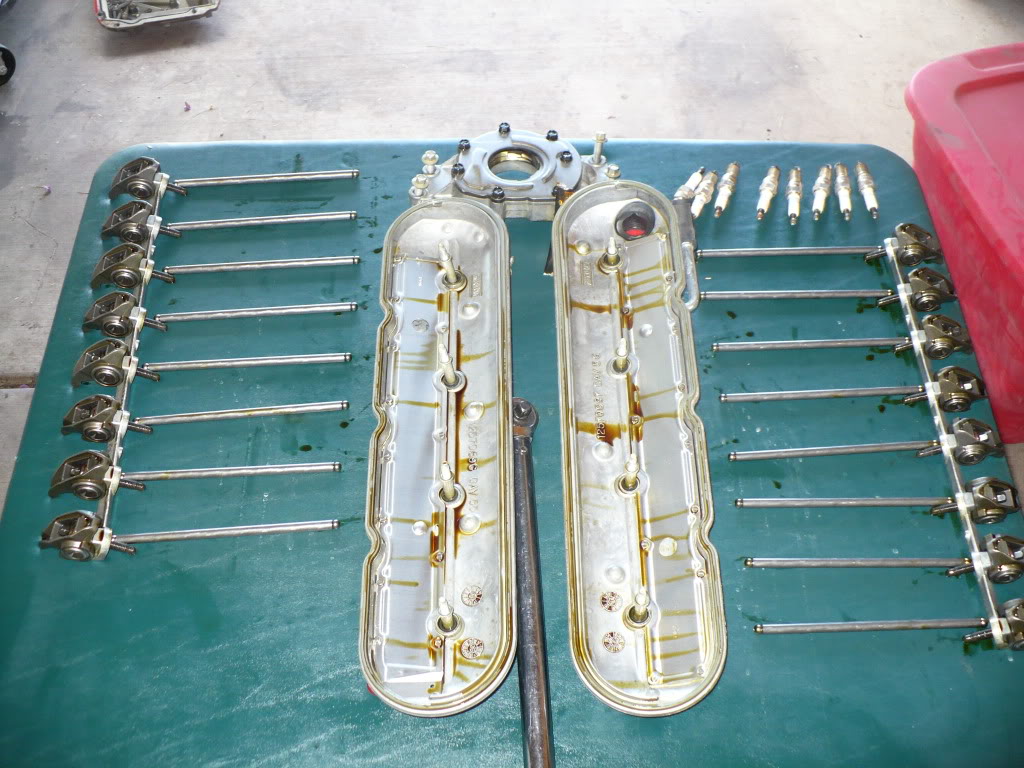
Here’s a shot of the VVT cam phaser and sprocket assembly removed. Notice the single bolt cam.
Katech recommends you torque and loosen each bolt at least three times to 35ft lbs to burnish the threads and achieve the proper stretch. I did mine four times for good measure. Then you final torque them to 45ft lbs. They also provide high pressure lubricant to use on the threads and under the heads of the bolts. Here’s a shot of the new bolts installed.
Once the rod bolts were installed, I wanted to put the new pan on temporarily, just to keep things covered up and clean. I’ll be running the Hummer H3 pan. Most folks prefer the F-body pan in 2nd Gen swaps for better ground clearance, but for the money the H3 pan is a great choice. It’s the pan GM advertises and sells as its Muscle Car LS swap pan because it provides great cross member clearance up front. It looks like the sump will hang maybe a few inches below the cross member, but most traditional SBC deep pans do the same thing. Here’s a comparison of the H3 pan to the truck pan that came off my LY6, and a comparison of the two different pick up tubes. Lastly is a shot of the new H3 Pan loosely bolted in place for the time being.
Once the bottom end was buttoned up, it was time to move on to the cam swap. Before I disassembled the stock valve train, I wanted to see what the stock wipe pattern looked like. So, I painted up a valve tip and gave it a couple spins. It looks to be a pretty narrow pattern, but a little bottom of center. More on this later.
Next I pulled all the rockers and pushrods and rotated the motor a few times to lock the lifters up in the guide cups.
Here’s a shot of the VVT cam phaser and sprocket assembly removed. Notice the single bolt cam.
06-19-2010, 10:34 AM
#10
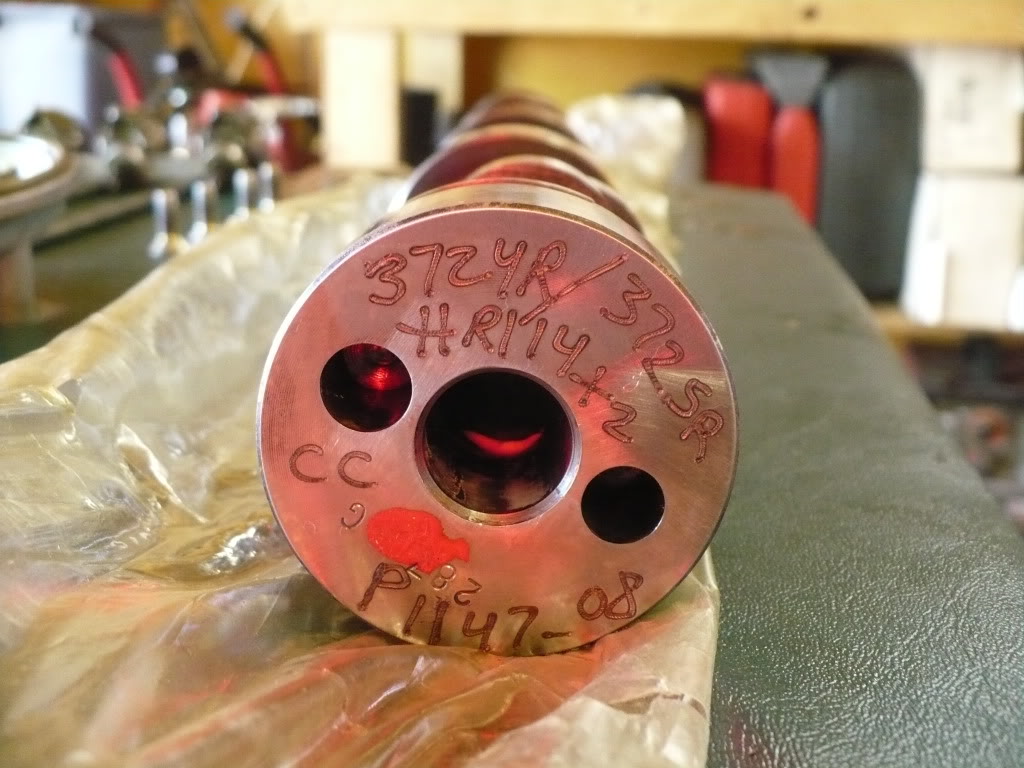
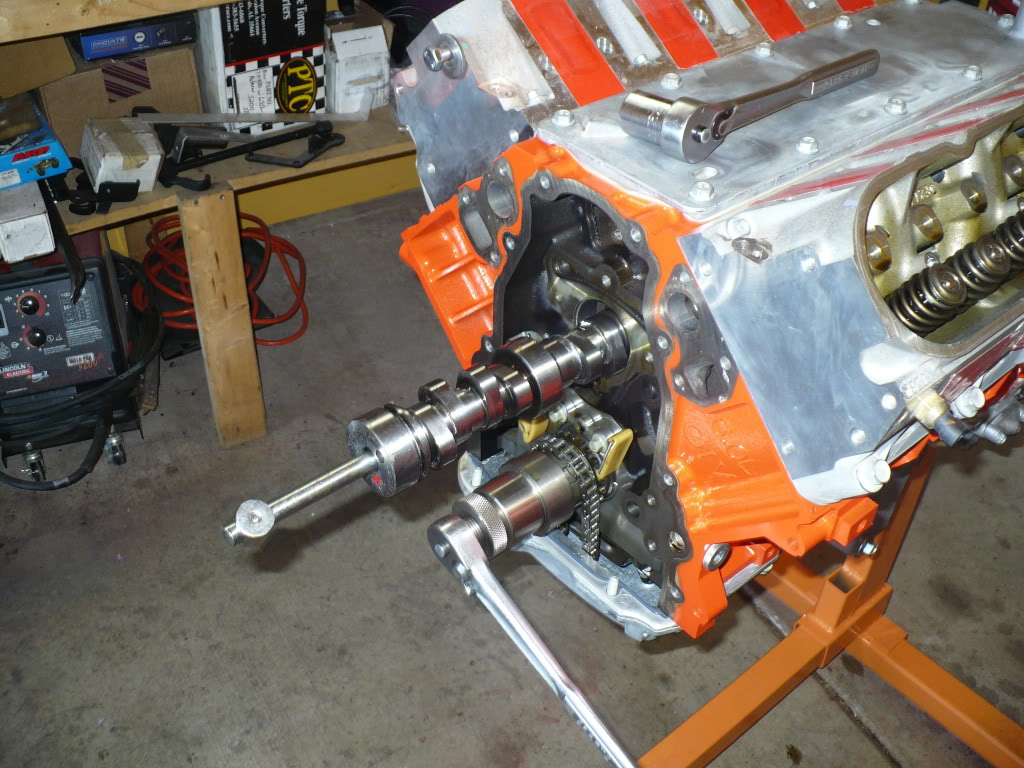
Here’s a shot of the new three bolt Comp Cam, the cam going in, and all buttoned up. The first shot is of the back of the cam. A keen eye will catch that in the second pic, I had actually started in stalling the cam backwards! I caught myself just after I took the picture.
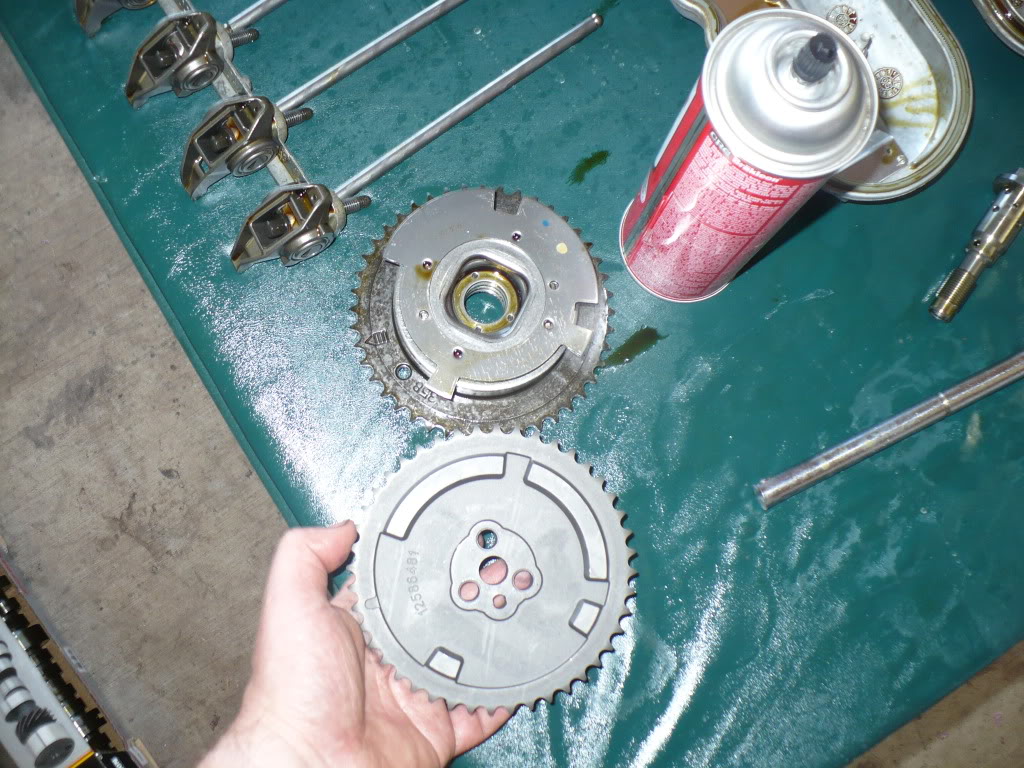
Since this is a Gen IV motor with a 58 tooth crank reluctor wheel and I’m doing away with the VVT and going with a standard three-bolt cam, I had to pick up a three bolt cam sprocket that still has the four position cam sensor (GM part number 12586481). Here’s a comparison between the new sprocket and the old cam phaser. Note how the four raised portions of the sprocket correspond with the four tabs on the phaser. Those four tabs are what the cam position sensor would have read.
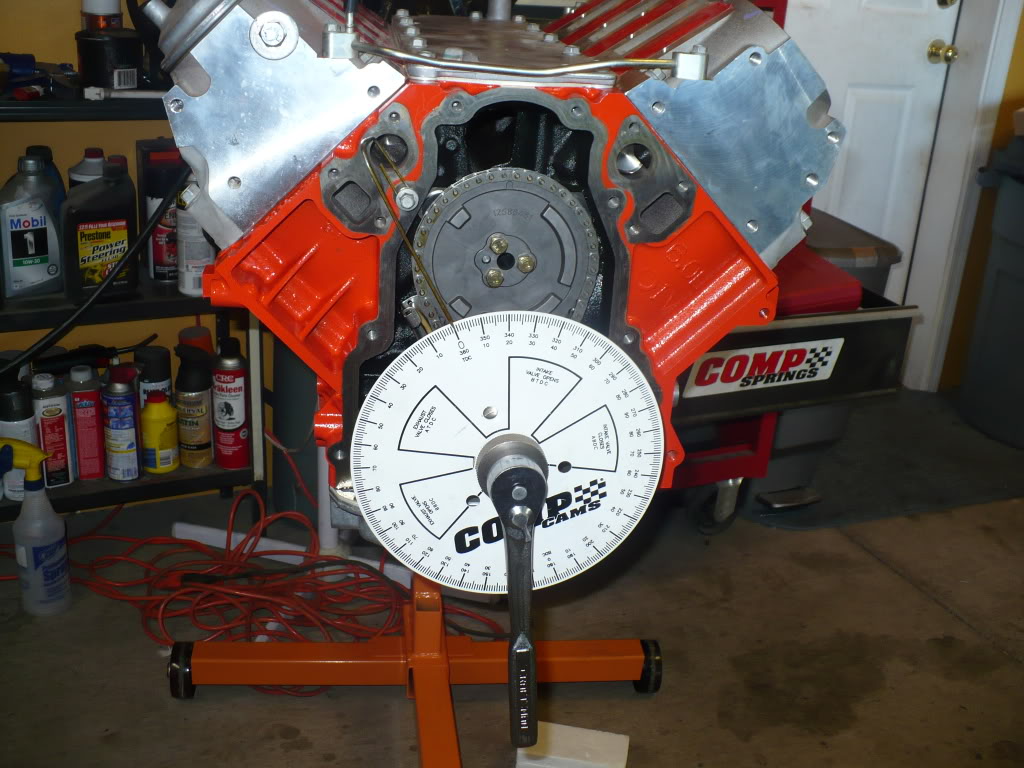
Here’s a couple shots of the new sprocket installed and the dots all lined up. Everything looks good but I’ll put a degree wheel on it later in the week just to be sure. I’m still waiting for my piston stop tool to show up so I can locate TDC.


Once the new cam was installed, I wanted to check the pushrod length since I wasn’t certain if this cam had a lower base circle or not. It doesn’t seem like it does because the lifter preload is unchanged from the stock cam. I also check the rocker wipe pattern again just for GP and got the same results (no surprise there).
Since I was pretty much done for the day, I went ahead and loosely bolted the new LS2 timing cover on.
Since this is a Gen IV motor with a 58 tooth crank reluctor wheel and I’m doing away with the VVT and going with a standard three-bolt cam, I had to pick up a three bolt cam sprocket that still has the four position cam sensor (GM part number 12586481). Here’s a comparison between the new sprocket and the old cam phaser. Note how the four raised portions of the sprocket correspond with the four tabs on the phaser. Those four tabs are what the cam position sensor would have read.
Here’s a couple shots of the new sprocket installed and the dots all lined up. Everything looks good but I’ll put a degree wheel on it later in the week just to be sure. I’m still waiting for my piston stop tool to show up so I can locate TDC.
Once the new cam was installed, I wanted to check the pushrod length since I wasn’t certain if this cam had a lower base circle or not. It doesn’t seem like it does because the lifter preload is unchanged from the stock cam. I also check the rocker wipe pattern again just for GP and got the same results (no surprise there).
Since I was pretty much done for the day, I went ahead and loosely bolted the new LS2 timing cover on.
06-19-2010, 10:34 AM
#11
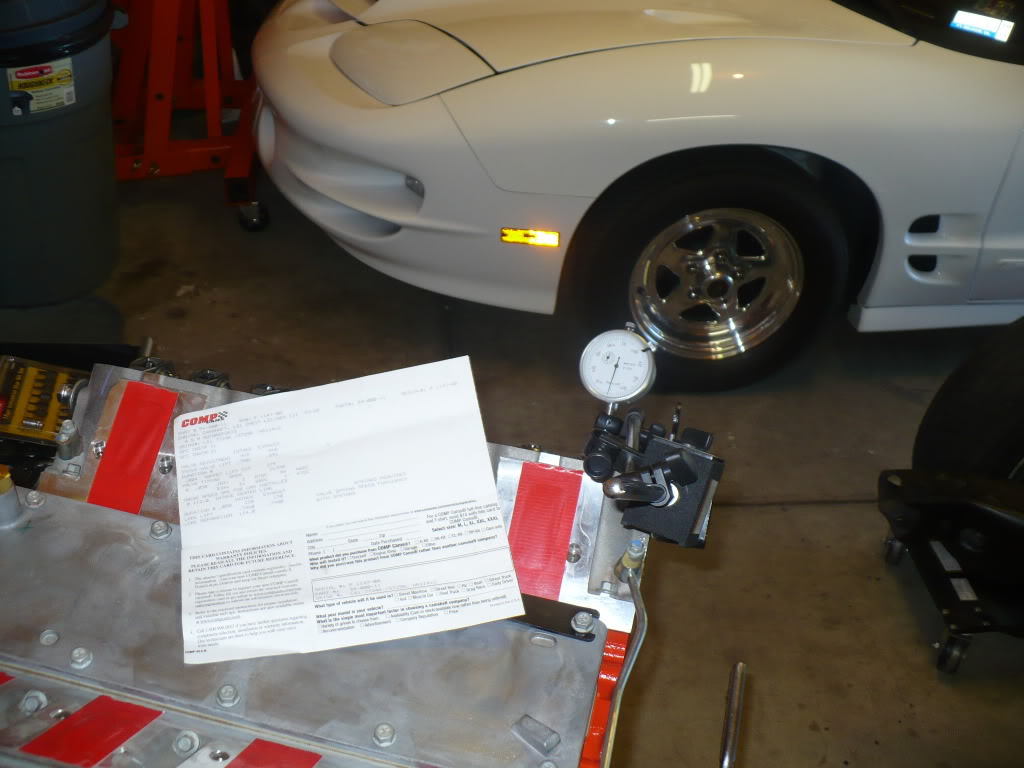
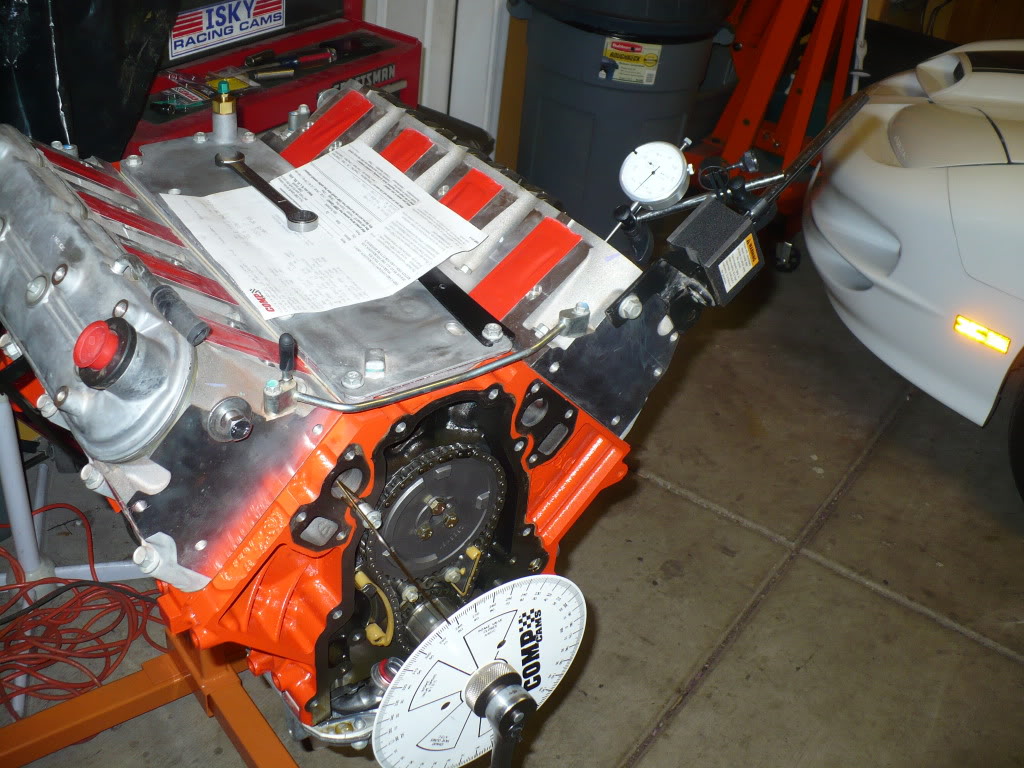
The next step was to degree in the cam. Everything checked out right on the numbers so I'm happy with that. Still need to check the piston to valve clearance and install the new springs and pushrods to finish off the valve train.
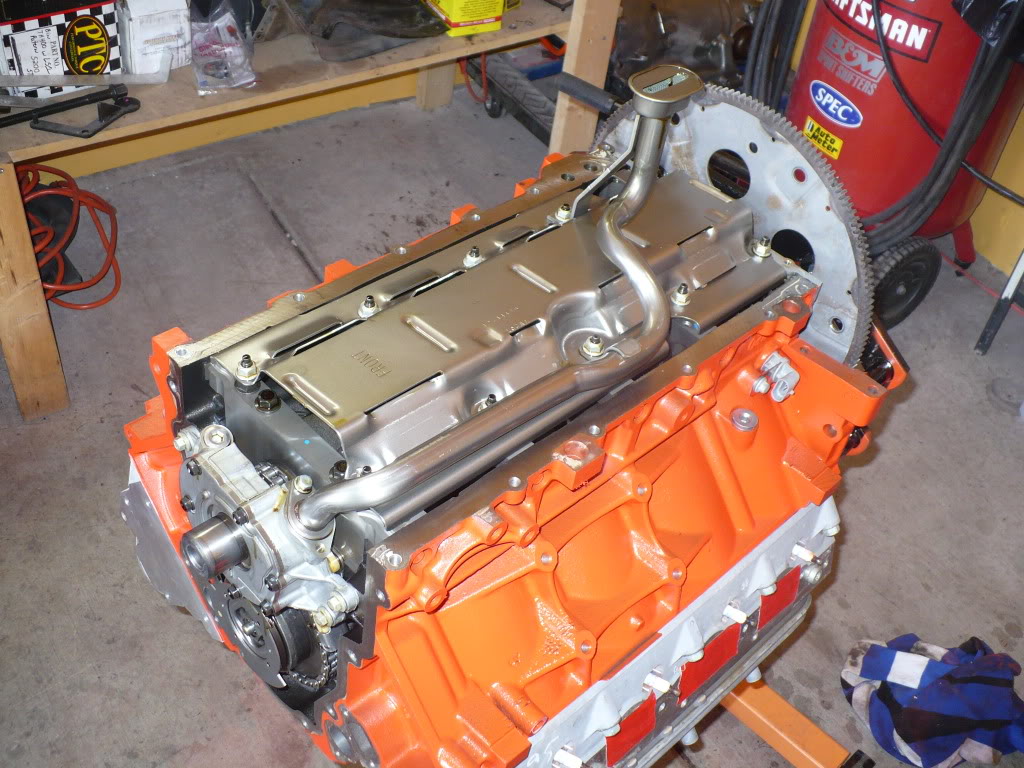
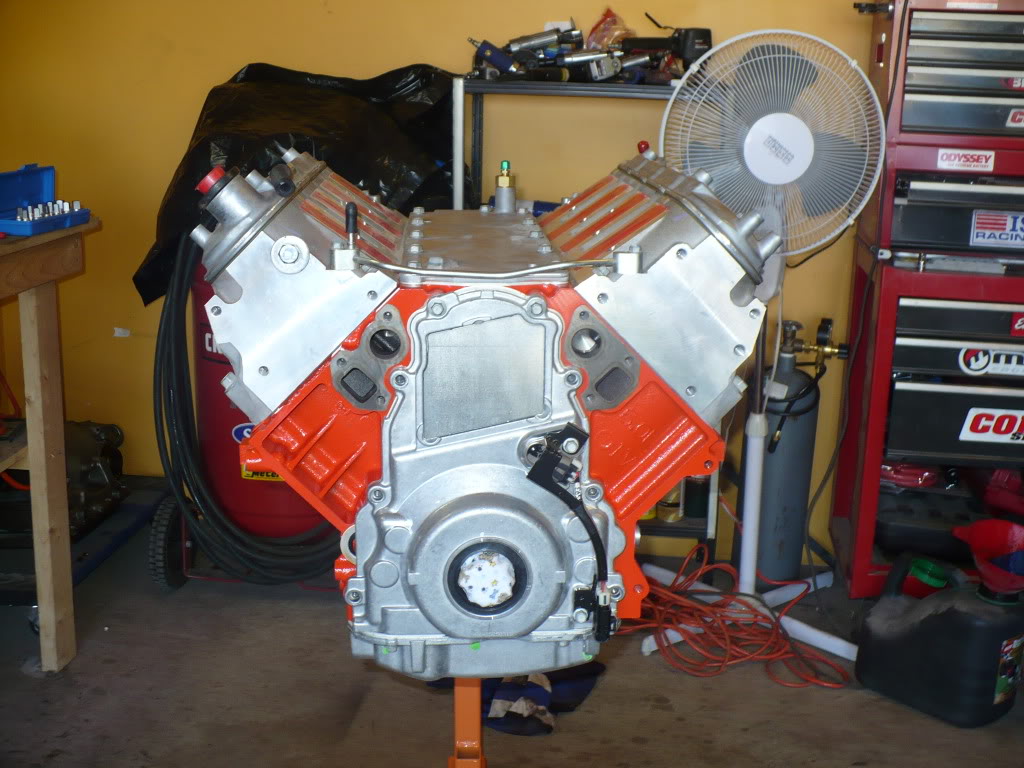
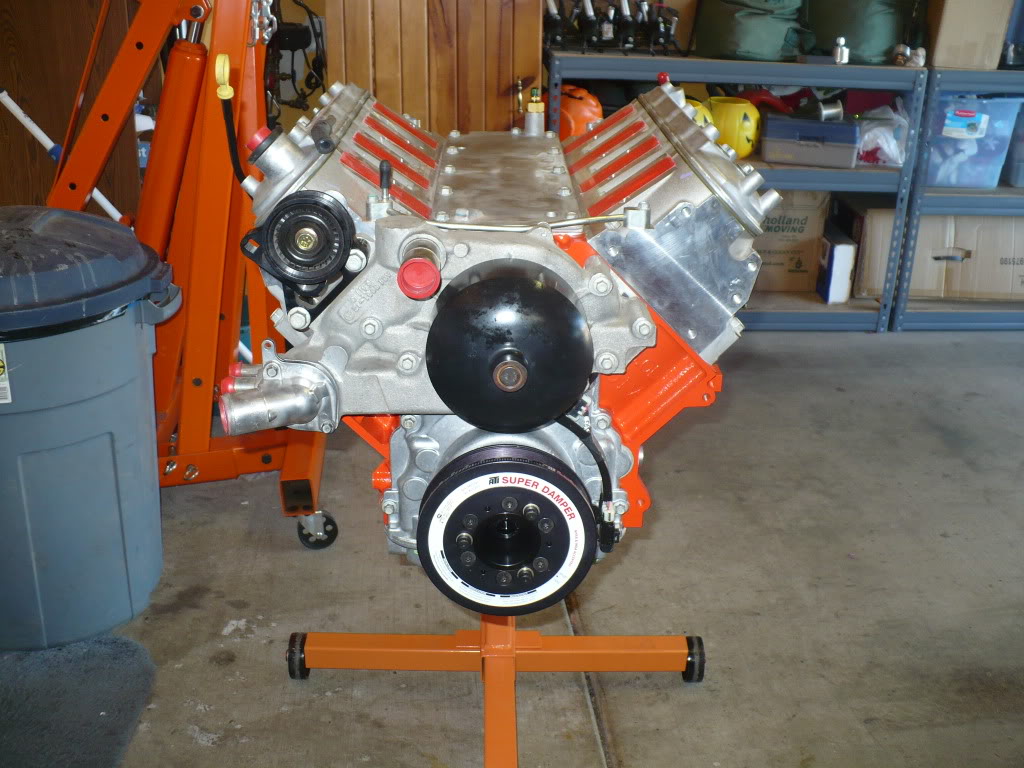
Well, my valve springs and pushrods are on back order, so I won’t be able to get to that job for at least another week. So last night I went ahead and installed the oil pump and ATI damper and buttoned up the oil pan and front cover. I also mocked up the water pump just to check for belt alignment and any other issues. I did find that one of the rear cover bolts on the water pump is contacting the timing cover on the motor so I’ll grind the head of that one bolt down just a little bit. Here’s a shot of the motor with the damper and water pump installed.
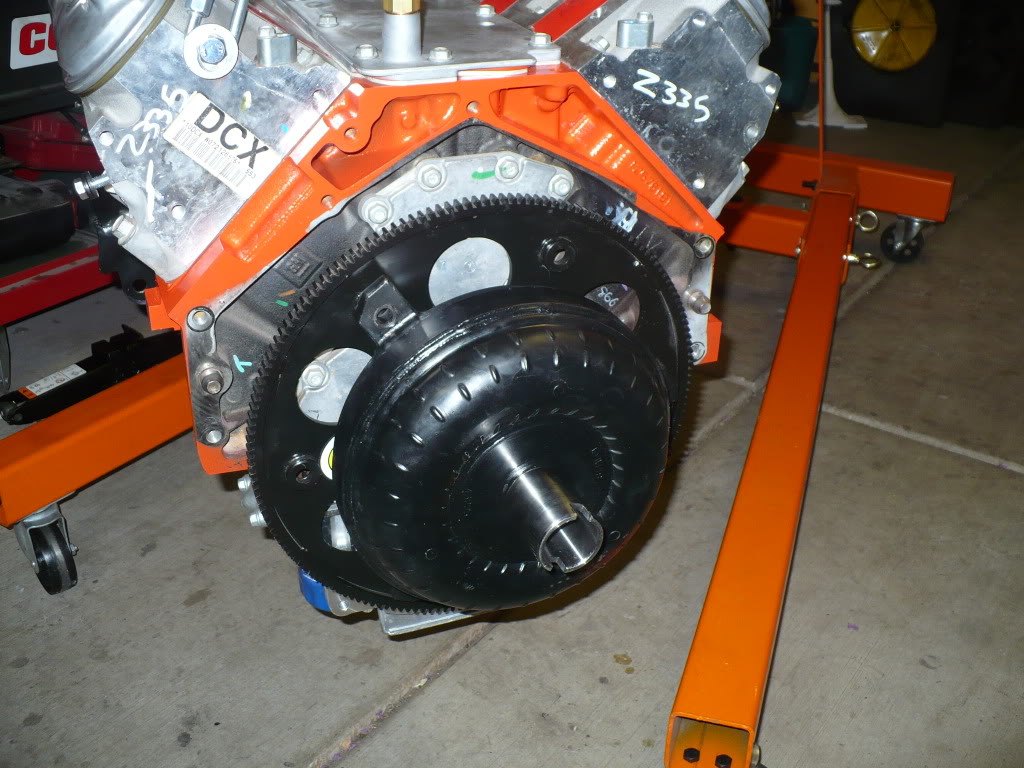
And a shot of the TCI flex plate installed with my PTC LS-specific TH350/400 8-inch converter mocked up on it.
Tonight I decided to start mocking up a few more things. Previously I had set the motor down in the car real quickly and had noticed that it didn’t want to set down in the clamshell mounts with them bolted in the stock location. I had read where a couple other guys had this same problem with the clamshell mounts and adapter plates, but with some persuasion they got everything lined up. However, I think they were using rubber mount inserts and I’m using the less forgiving poly inserts. In this earlier picture you can see how far off (too wide) the mounts are. Only one side will line up at a time.
I’m pretty sure that the adapter plates I’m using are what’s spacing it out too wide. They are 3/8in thick where I believe some of the other adapter plates are a little thinner. Here’s a shot of the plates bolted to the block, and then with the factory mount bolted to the plate.

Well, my valve springs and pushrods are on back order, so I won’t be able to get to that job for at least another week. So last night I went ahead and installed the oil pump and ATI damper and buttoned up the oil pan and front cover. I also mocked up the water pump just to check for belt alignment and any other issues. I did find that one of the rear cover bolts on the water pump is contacting the timing cover on the motor so I’ll grind the head of that one bolt down just a little bit. Here’s a shot of the motor with the damper and water pump installed.
And a shot of the TCI flex plate installed with my PTC LS-specific TH350/400 8-inch converter mocked up on it.
Tonight I decided to start mocking up a few more things. Previously I had set the motor down in the car real quickly and had noticed that it didn’t want to set down in the clamshell mounts with them bolted in the stock location. I had read where a couple other guys had this same problem with the clamshell mounts and adapter plates, but with some persuasion they got everything lined up. However, I think they were using rubber mount inserts and I’m using the less forgiving poly inserts. In this earlier picture you can see how far off (too wide) the mounts are. Only one side will line up at a time.
I’m pretty sure that the adapter plates I’m using are what’s spacing it out too wide. They are 3/8in thick where I believe some of the other adapter plates are a little thinner. Here’s a shot of the plates bolted to the block, and then with the factory mount bolted to the plate.
06-19-2010, 10:35 AM
#12
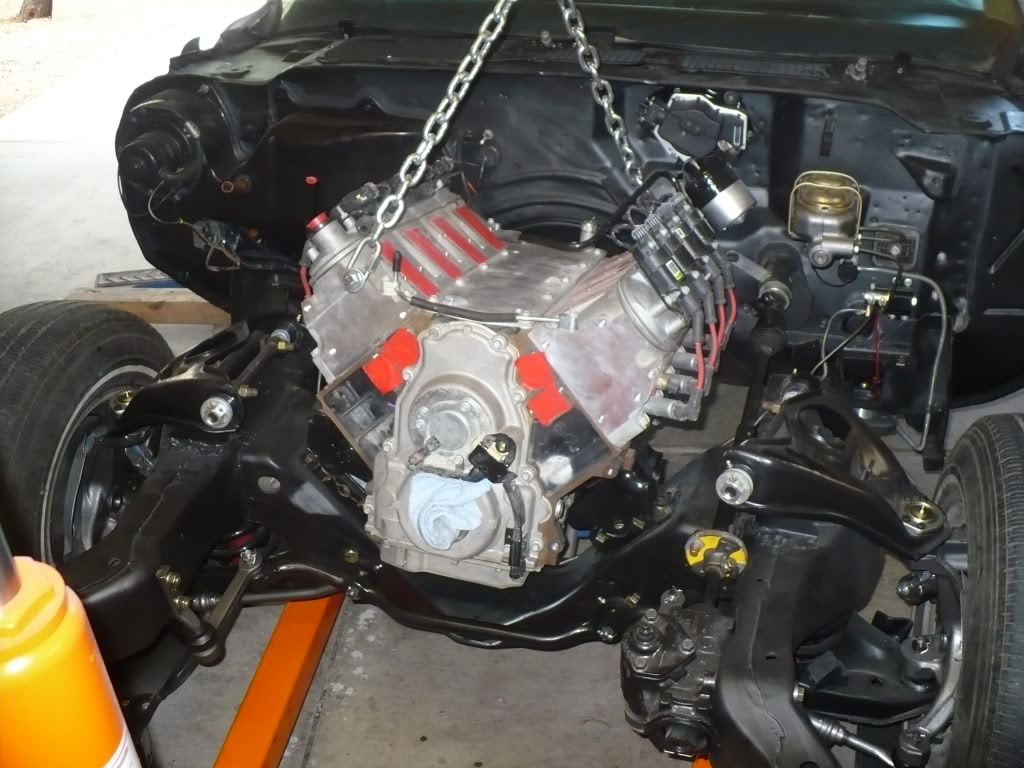
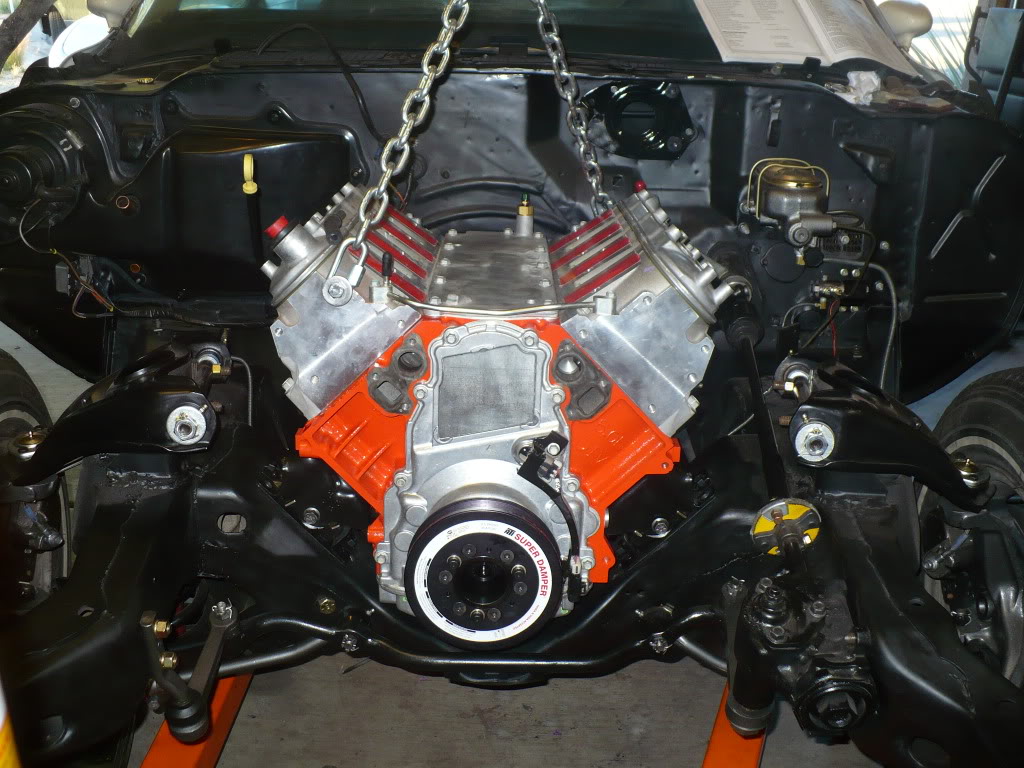
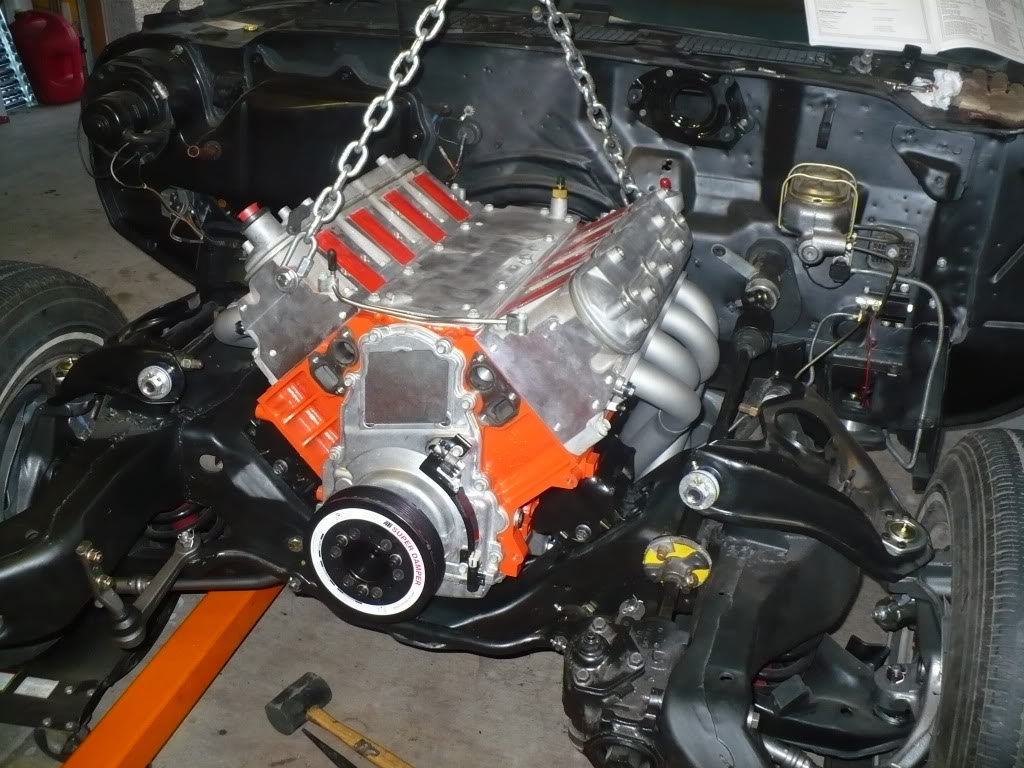
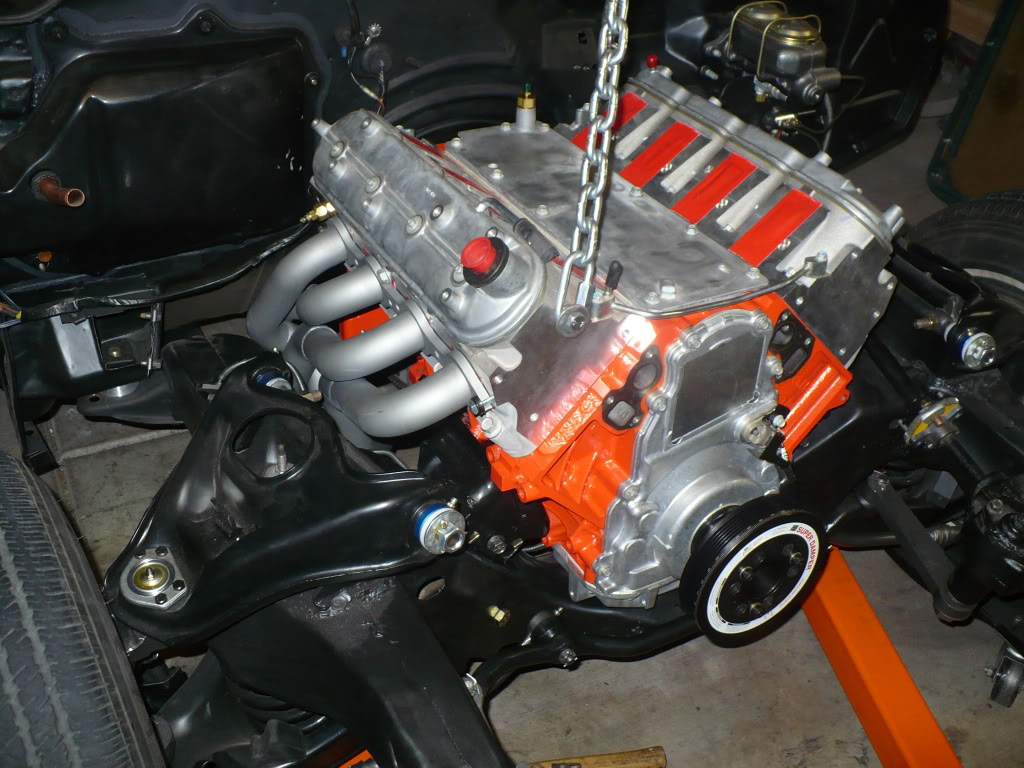
I messed around for a couple hours trying to get the thing to drop down onto the factory clamshells with no luck. Only one side would drop down at a time, just like in the pic above of my first trial fit. I even tried loosening up the frame mounts from the frame to allow for more movement, but it won’t come close to dropping into place. In the end I think I’m going to just have to put it where I want it and re-drill some new holes in the frame. Here’s a shot of it sitting in place with the mounts bolted up to the motor, but the holes in the frame not lined up.
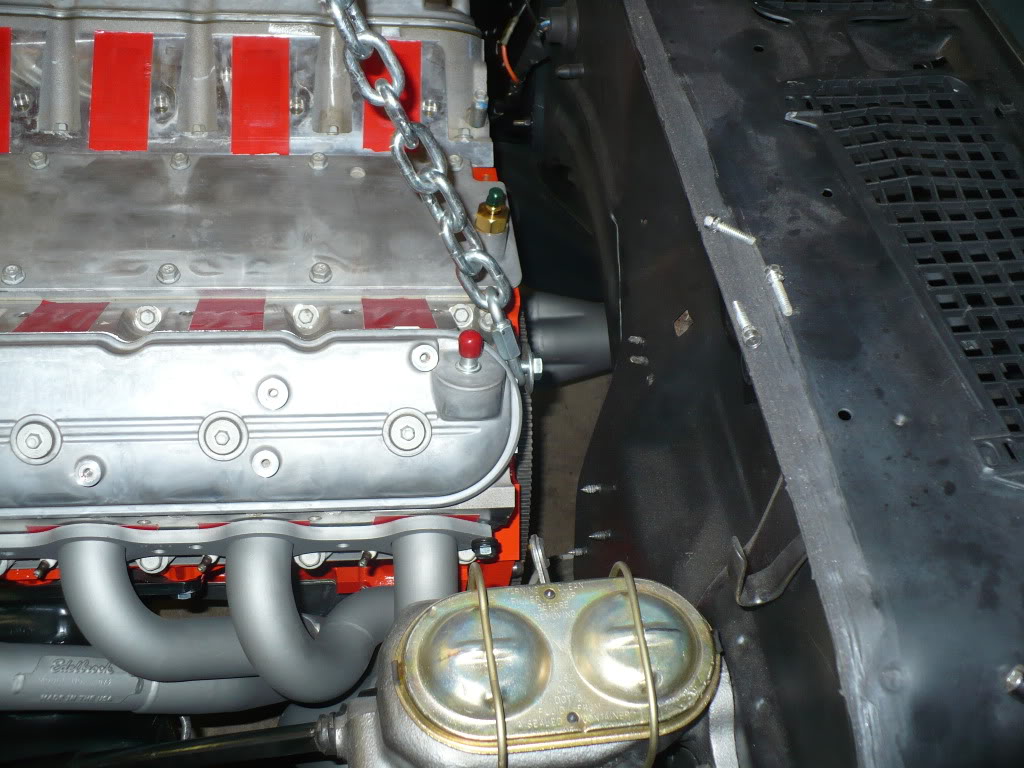
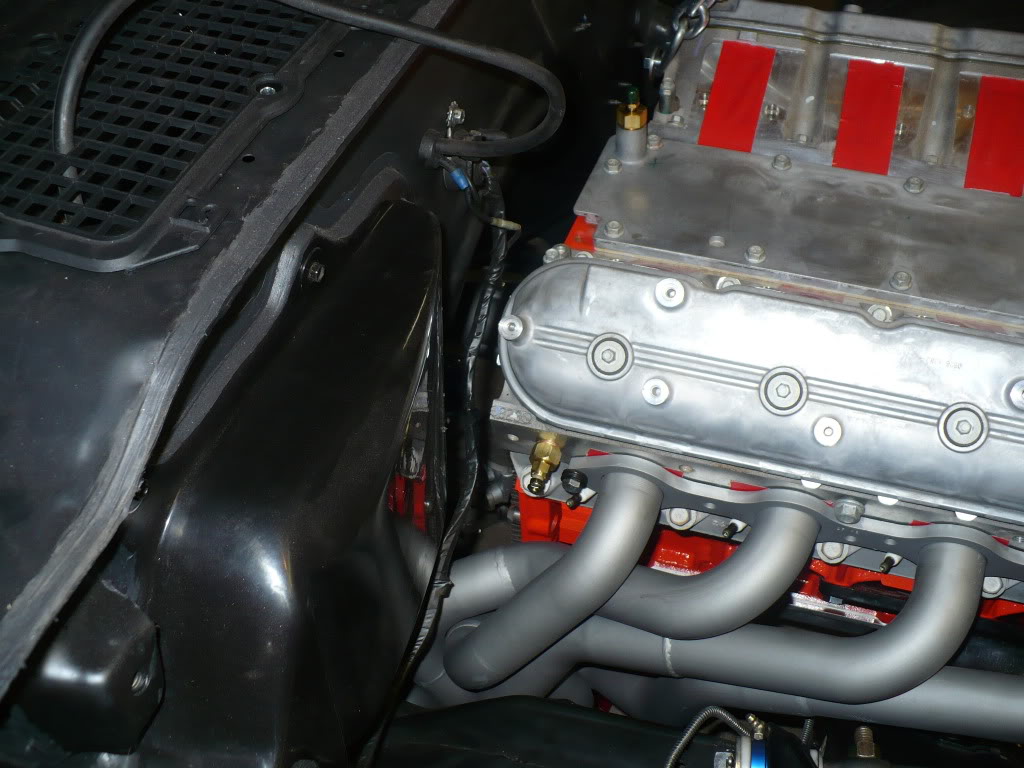
While I had it in place where it will probably end up, I went ahead and bolted the headers on to check for clearance issues. There seemed to be plenty of room with the Edelbrocks, even if I moved the engine around a little bit. I think I’ll wait to do the final mock up once I’ve got my transmission here.
Well guys, that pretty much brings me up to today. I’ll update this as things progress.
06-19-2010, 11:59 AM
#13

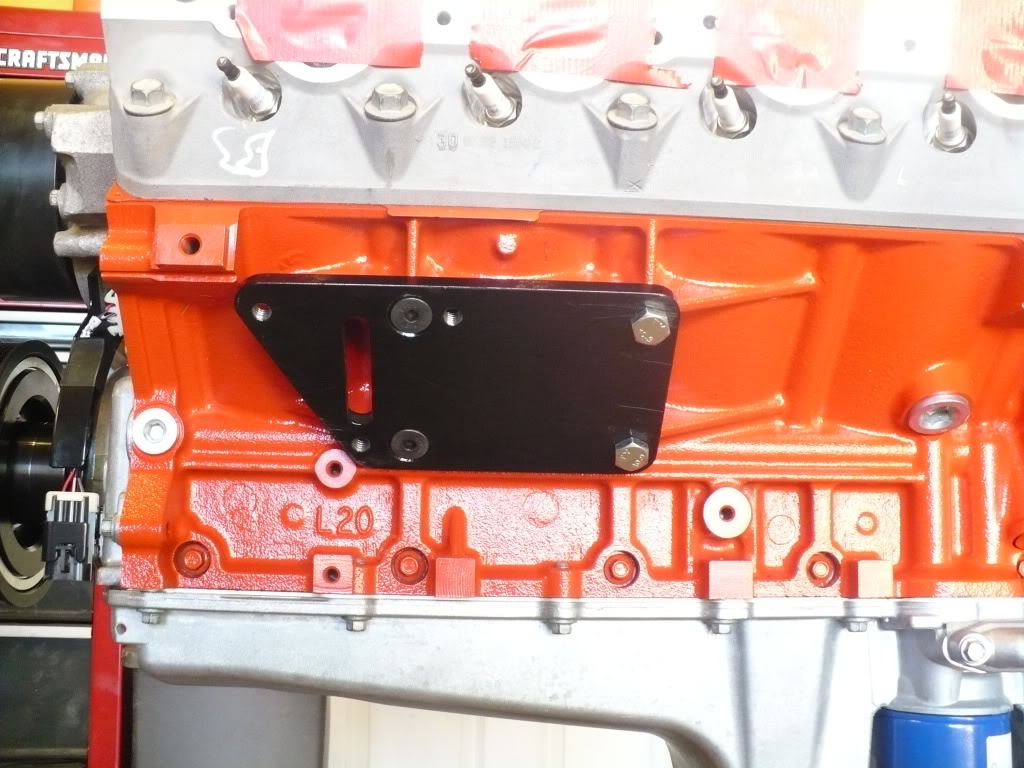
Car looks great and your work looks awesome. Your motor mount issue is due to the crap adapter plate design. Some companies still don't get it and continue to sell those. If you add x amount of width to the engine via the plates the holes have to move down to compensate the difference.
example of good plates...
.jpg)
example of good plates...
06-19-2010, 01:05 PM
#14
Thanks!
Yeah, I see exactly what you mean now that I look at the Car Shop plates. I see how they've moved the holes for the stock mounts lower, which would put them closer together. Mine are at the same height as the holes that mount the plates to the block. I wonder how thick the Car Shop plates are? Mine are 3/8th which is good and sturdy, but probably not necessary. If the Car Shop plates are a little thinner, that would probably help this issue too. Do you know of anyone who has run those plates with clam shell mounts and poly inserts by chance? Thanks for the info!
EDIT: Just ordered a set of the 1-inch set back Car Shop Inc plates like pictured above. Hopefully they work out.
EDIT: Just ordered a set of the 1-inch set back Car Shop Inc plates like pictured above. Hopefully they work out.
Last edited by GC99TA; 06-19-2010 at 01:15 PM.
06-19-2010, 01:30 PM
#15
We run the Carshop plates on all swaps. You usually have to grind/ remove the hump on the back of the clamshells if needed like with most plates. Occasionally a small clearancing because of the distance drop. All said and done they bolt up and fit correctly, taking into account the thickness of the plate and dropping the motor mount accordingly. The plates measure closest to 5/16ths. I have them right in front of me. These have been ran in our 1000hp turbo cars with no signs of movement or deflection.
06-19-2010, 01:49 PM
#16
We run the Carshop plates on all swaps. You usually have to grind/ remove the hump on the back of the clamshells if needed like with most plates. Occasionally a small clearancing because of the distance drop. All said and done they bolt up and fit correctly, taking into account the thickness of the plate and dropping the motor mount accordingly. The plates measure closest to 5/16ths. I have them right in front of me. These have been ran in our 1000hp turbo cars with no signs of movement or deflection.
This will effectively raise the engine up a little bit from where I thought it'd be, but it shouldn't be a big deal. It'll keep the headers tighter to the floor boards, give me more oil pan clearance (both ground and crossmember), and I'll be running a 4-inch cowl, so hood clearance doesn't concern me either. I'm also running the F-body front accessories and I know some guys have had a minor centerlink/pitman nut clearance issue with the alternator. This slight raising of the motor should help out there as well. All in all, other than having a slightly higher CG, I think this will be a good thing.

 06-19-2010, 07:33 PM
#20
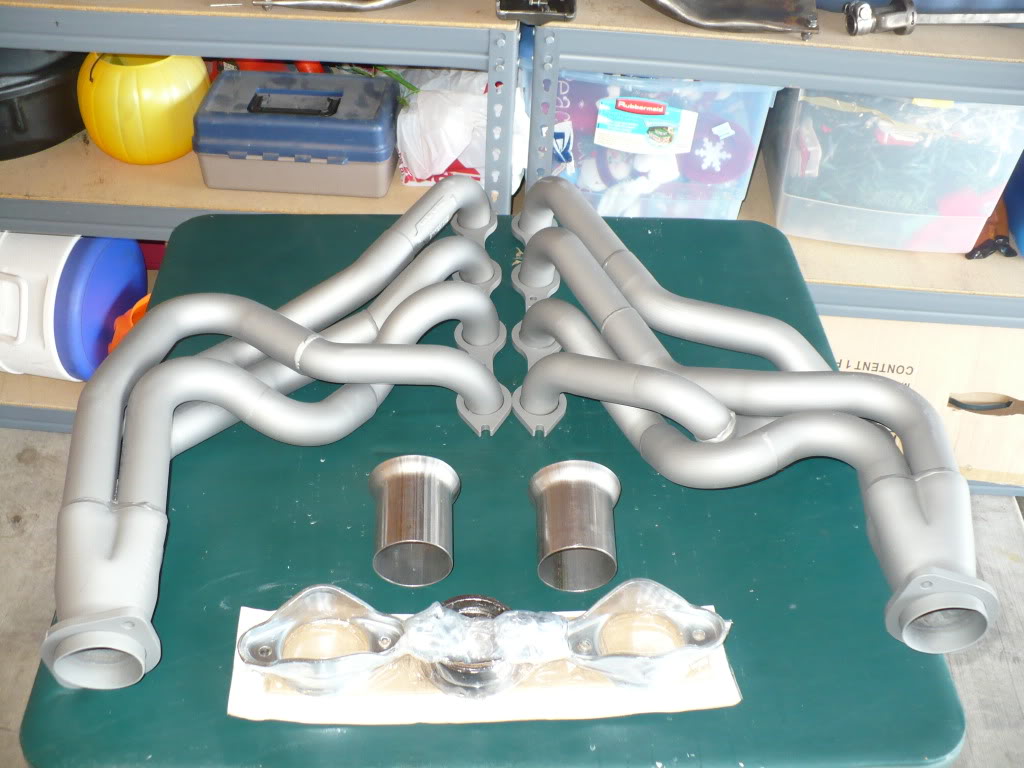
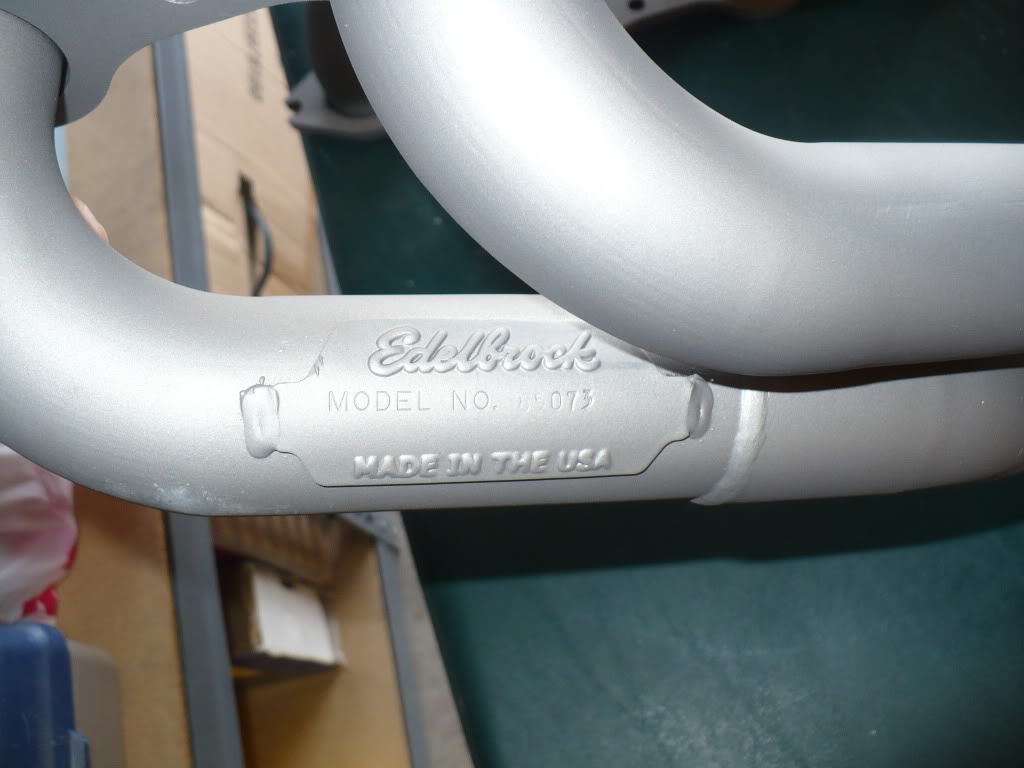
Yeah, the headers are the same for all the LSX-style heads. Only the intake ports are different. I got them from Summit. They ran me about $520.00. Pretty good deal considering they're made from 409 stainless and then are ceramic coated too. Plus I like how they come with the ball flange collectors as well. They should seal up pretty well.

