My Battery Relocation Install...
 07-13-2010, 10:30 PM
#1
Ive been wanting to do this for quite some time now. And when i modified my Radiators and dropped them down. It became a need for clearance purposes. I searched and found alot of helpful information on this site (as always) and just went for it!
First thing was to get a battery box.. In this case i decided to fabricate my own...
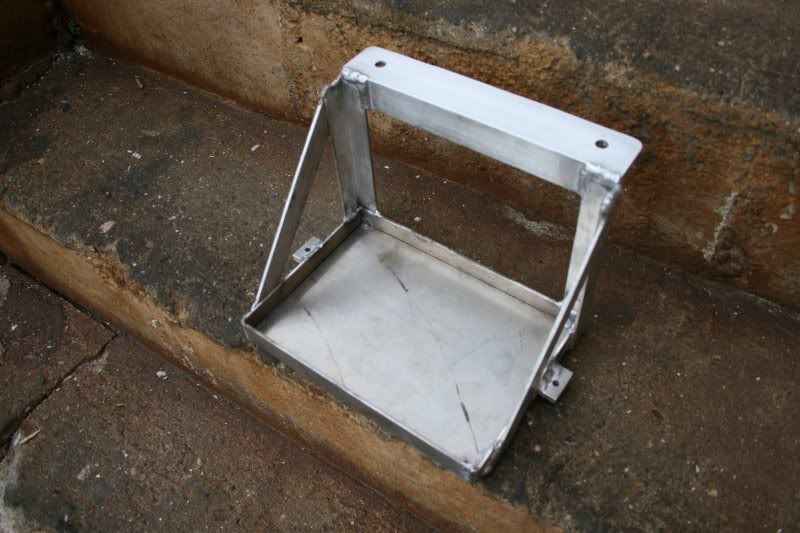
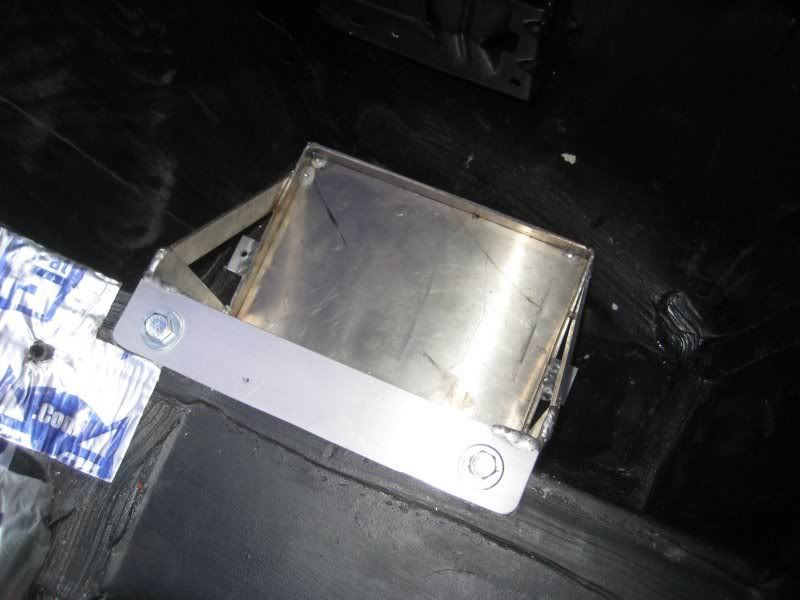
2, 3/8" bolts secure it in the spare tire well...
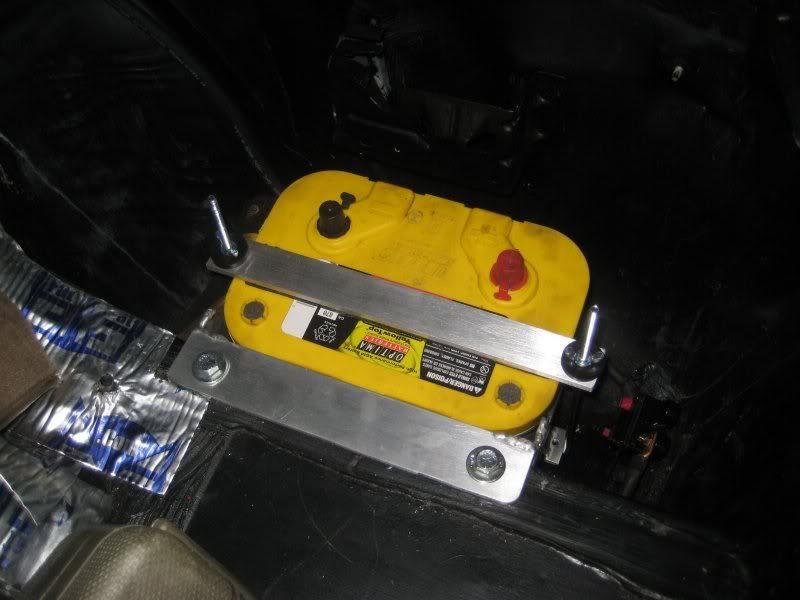
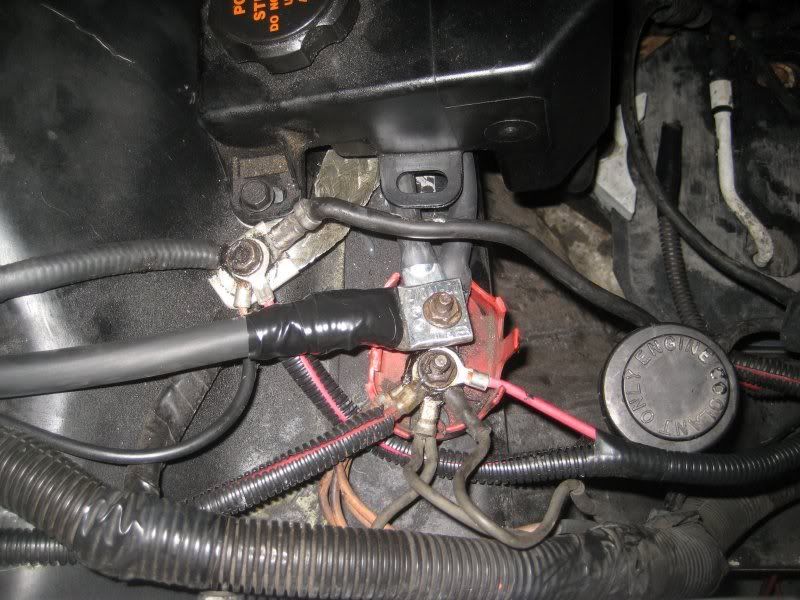
Battery mounted and all wired up Note: the 200 amp circuit breaker (bottom right) in line with the ground cable
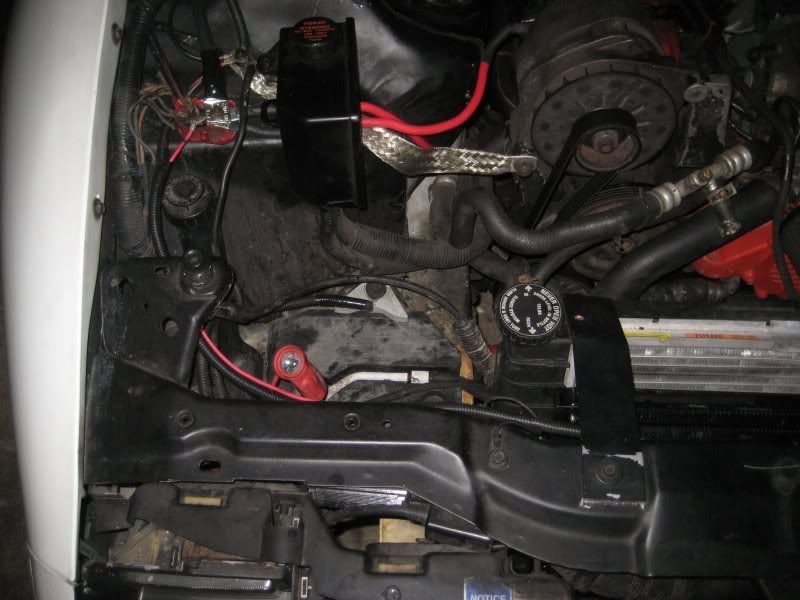
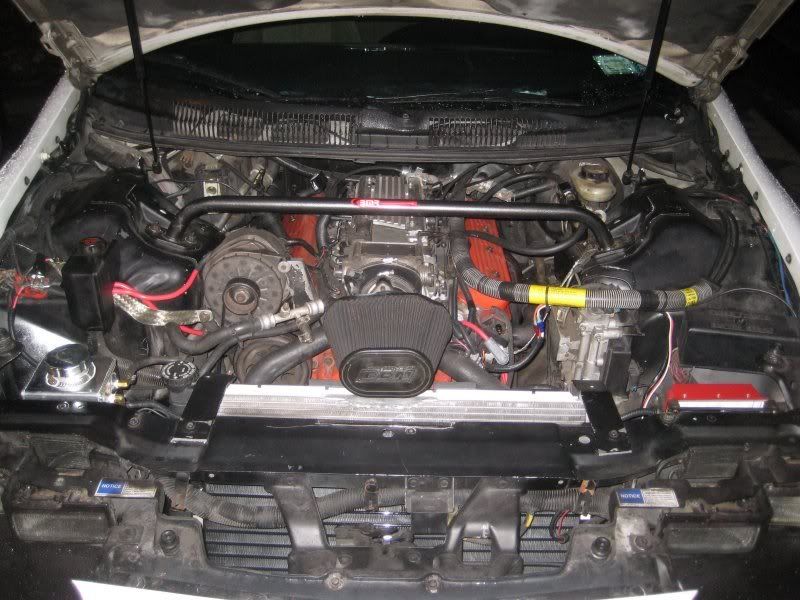
Look no more battery!
Rough setup of how the wires are set. Subject to change.
All in all im very happy with the setup! it cleans up Alot of room in the engine bay, and it also puts a nice chunk of weight over the rear tires. I have not noticed any difference in first startup, or alternator drain. It starts up just fine like it always has. It also runs if anything, Smoother then what it did with the stock wiring..
For the wires i used #1 cable from the battery to the terminal in the engine bay. and from the engine bay splitter i used #4 wire to go to the alternator and the starter. I also used #4 wire for the ground in the rear...
I was going to run the main cable to the starter, but i wasnt sure how it was going to fit with my LT headers. I could always change it around next time if i notice any issues with power loss. The ground from the battery goes to the rear bumper support off the rail of the car. I took out the stock bolt and cleaned up the surfaces of everything the best i could. I hope that this will help others just like alot of others threads helped me!
First thing was to get a battery box.. In this case i decided to fabricate my own...
2, 3/8" bolts secure it in the spare tire well...
Battery mounted and all wired up Note: the 200 amp circuit breaker (bottom right) in line with the ground cable
Look no more battery!
Rough setup of how the wires are set. Subject to change.
All in all im very happy with the setup! it cleans up Alot of room in the engine bay, and it also puts a nice chunk of weight over the rear tires. I have not noticed any difference in first startup, or alternator drain. It starts up just fine like it always has. It also runs if anything, Smoother then what it did with the stock wiring..
For the wires i used #1 cable from the battery to the terminal in the engine bay. and from the engine bay splitter i used #4 wire to go to the alternator and the starter. I also used #4 wire for the ground in the rear...
I was going to run the main cable to the starter, but i wasnt sure how it was going to fit with my LT headers. I could always change it around next time if i notice any issues with power loss. The ground from the battery goes to the rear bumper support off the rail of the car. I took out the stock bolt and cleaned up the surfaces of everything the best i could. I hope that this will help others just like alot of others threads helped me!
 07-14-2010, 10:15 AM
#4
TECH Enthusiast

Join Date: Dec 2009
Posts: 529
Likes: 0
Received 0 Likes
on
0 Posts
mount looks good.
you need an emergency cutoff switch or they wont let you run it down the track.
also isnt that style of battery suppose to be in a box thats vented outside the car?
i'm not sure, but, i dont think you have to mount a gel sealed battery in a vented box.
you need an emergency cutoff switch or they wont let you run it down the track.
also isnt that style of battery suppose to be in a box thats vented outside the car?
i'm not sure, but, i dont think you have to mount a gel sealed battery in a vented box.
Trending Topics
 07-15-2010, 10:50 PM
#14
Thanks for all the kind words guys! I really appreciate it. It wasnt that bad of a swap at all! and i highly suggest it to anybody looking for not only more room, but a much cleaner looking engine bay. I will look into getting a switch for whenever i do decide to take it to the track. Ill also figure out some sort of cover too so i dont have to hear everyone complain about it lol. Today i decided to change alittle more things under my hood. And come up with something good for that new room. Whatcha think ??
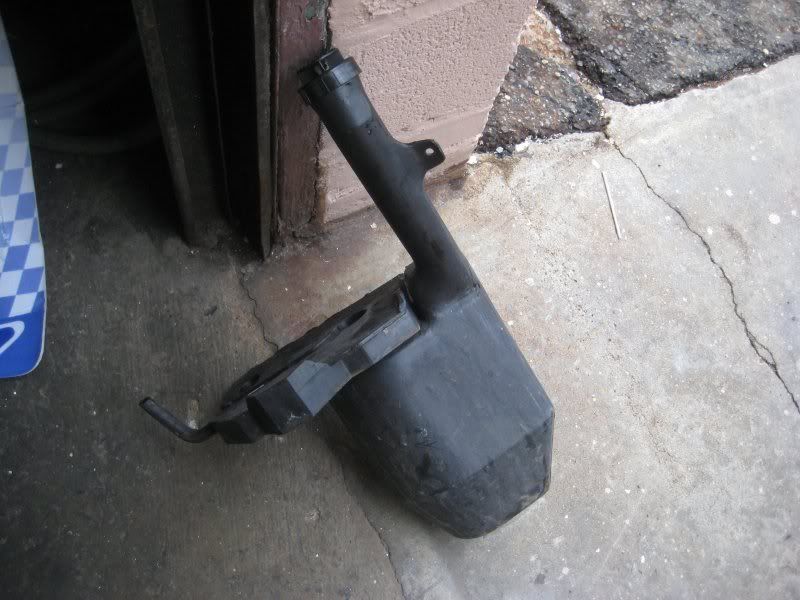
out with the old...
And in with the new... (canton 2 quart overflow tank)
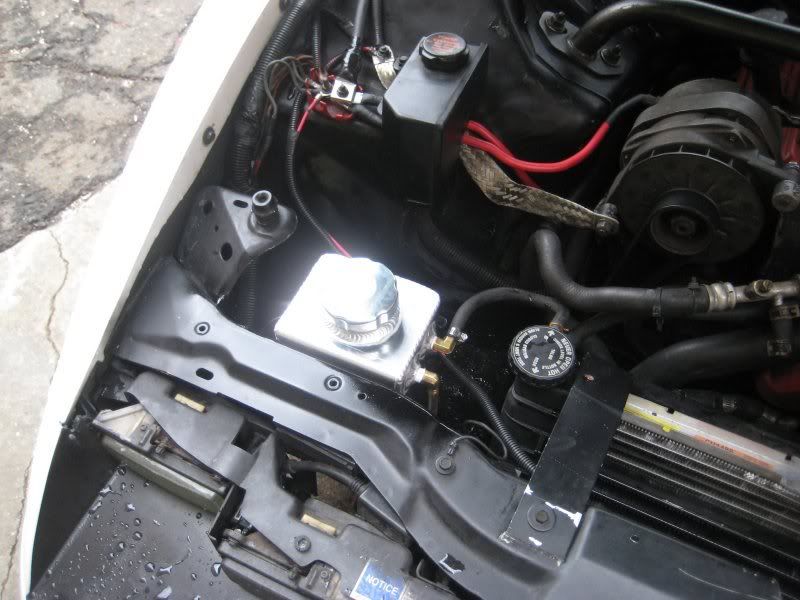
It adds a certain badass touch to the whole engine bay i think.
out with the old...
And in with the new... (canton 2 quart overflow tank)
It adds a certain badass touch to the whole engine bay i think.
07-16-2010, 07:14 AM
#15
Thanks for all the kind words guys! I really appreciate it. It wasnt that bad of a swap at all! and i highly suggest it to anybody looking for not only more room, but a much cleaner looking engine bay. I will look into getting a switch for whenever i do decide to take it to the track. Ill also figure out some sort of cover too so i dont have to hear everyone complain about it lol. Today i decided to change alittle more things under my hood. And come up with something good for that new room. Whatcha think ??
out with the old...
And in with the new... (canton 2 quart overflow tank)
It adds a certain badass touch to the whole engine bay i think.
out with the old...
And in with the new... (canton 2 quart overflow tank)
It adds a certain badass touch to the whole engine bay i think.
 07-16-2010, 02:55 PM
#16
10 Second Club
iTrader: (8)
Join Date: Jan 2009
Location: Central, PA
Posts: 487
Likes: 0
Received 0 Likes
on
0 Posts

so where would a kill switch have to be? My new chassis already had the battery cables ran to the rear so I decided to leave it there but I didn't know I needed a kill switch on a 13sec car
07-16-2010, 03:15 PM
#17
TECH Enthusiast
Join Date: Dec 2009
Posts: 529
Likes: 0
Received 0 Likes
on
0 Posts
on an nhra track and probably ihra, if you have a battery relocation kit, battery needs to be in a sealed box, and a shutoff switch located at the rear, in plain sight and labeled.
dont have a rulebook so i dont know the exact wording..
dont have a rulebook so i dont know the exact wording..
