
My History And The Building of my "LS44"
 02-28-2011, 11:50 PM
#1
On The Tree
Thread Starter
iTrader: (8)

Join Date: May 2009
Posts: 199
Likes: 0
Received 0 Likes
on
0 Posts
Hey, I haven’t really ever done a "Build Thread"... So here's my attempt...
History- my passion for Porsche in general was started when I was 15 and my dad brought home an 81 924... It had this HORRIBLE clutch problem... Occasionally when you would release the clutch the car would vibrate badly till you re-engaged the clutch and it would go away... So I set out to replace the clutch, got it apart, got my *** kicked BAAAAAADDDDD by those damn 12pt Triple Square bolts on the axles. Anyway long story short, I ended up pulling the clutch apart 3 times, because even after replacing the clutch it STILL did it... Well, after the second time, I just said hell with it and started driving the car... It had been given to me for Christmas shortly after I started working on it, so it was now OFFICALLY my car... I ended up pulling it apart the last time and removing the flywheel to get it checked and to replace the pilot bearing as a last effort... WELL the damn Pilot Bearing was GONE!!! No needles, just the housing... I sold it in this disassembled state.... In the mean time my dad had bought a 944, it had a dash fire due to the plastic guard that goes around the base of the relay panel being removed and the clutch spring wore through the wires... He paid an "Electronics Expert" quite a bit of money to diagnose issues after he had laid upside down under the dash every night for a week or two soldering in splices to repair the damage... the were minor issues, blinkers don’t blink etc. Well the car ended up sitting due to these issues and normal 944 Issues. Well these two cars are what actually helped me decide what I wanted to do for a living... An unfortunate accident, and 8" Titanium plate and a dozen screws in my left ankle also helped... I saw one of those wonderful UTI commercials on PowerBlock one weekend and decided that I wanted to Work on Porsche's. I have always had a knack for working on cars, it really does come naturally for me, but I really enjoyed it, so I never wanted to make it a career, never wanted it to be a "Job"... So my wife agreed there was nothing worth staying in MI for, we moved, I went to school, Slept through MOST of it, had either the highest or second highest score in all of my classes while working fulltime delivering pizza's (really good money) Got accepted into PTAP (Porsche Technology Apprenticeship Program) which at the time they were only taking about 30 students A YEAR!!! Was lucky enough to get into the dealer I wanted and still currently work at Leith Porsche in Cary NC!!!
V8- I read online A LOT! I promise, if you are reading this, I have read your entire build End to end, top to bottom… I really liked the people who were swapping in different engines, but I wanted a swap that kept the awesome handling of the vehicle… The LS was the answer! I had been planning my build and didn’t even realize it, I would see someone’s build thread and see things I loved and things I didn’t and I would make note of it and have used that information to build my car.
My car
So the car i was talking about above, my dad's after it sat in a field for a few years I decided I wanted a project... WOW!!! I got one... When I pulled this thing into the shop The JAGUAR guys were looking at me like i was nuts... Thats bad... First thing i did is rip the origonal wiring harness out and replace it... The funny thing... It DIDNT fix the main problem.. the blinkers... All the sockets were corroded... :x :shock:
  :oops:
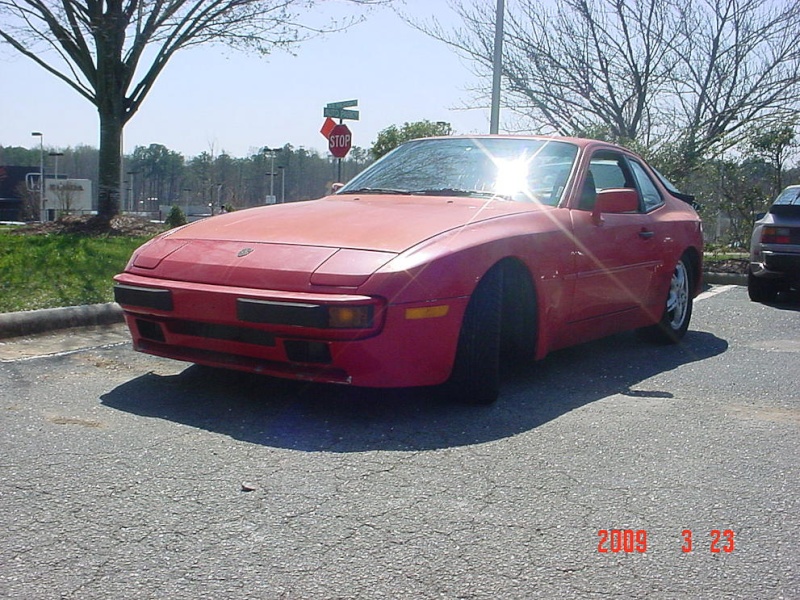
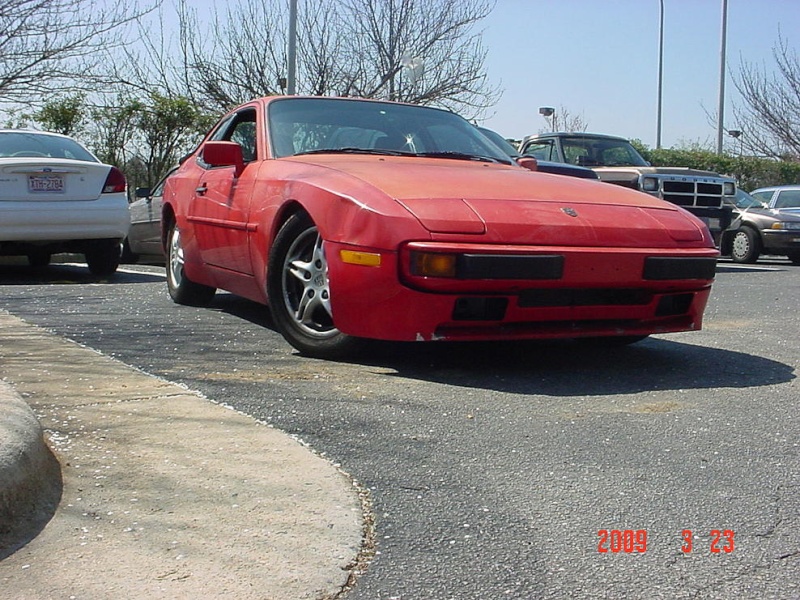
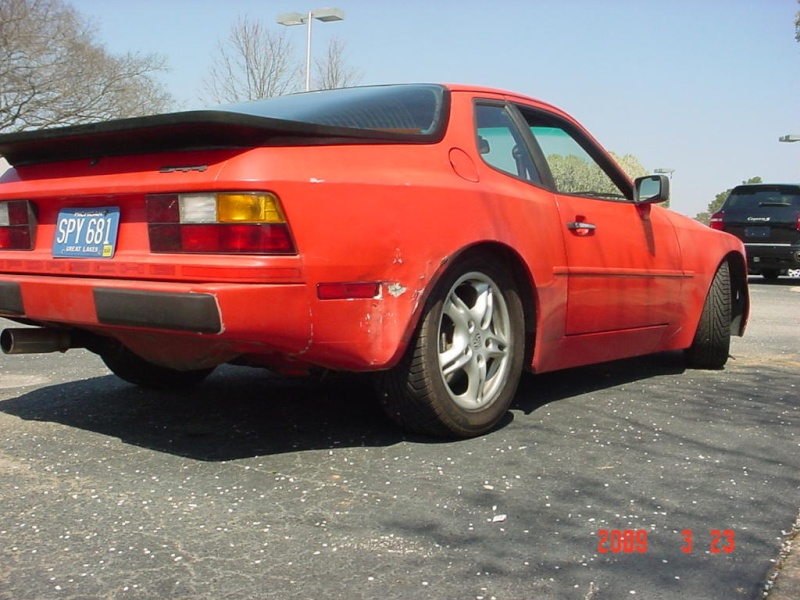
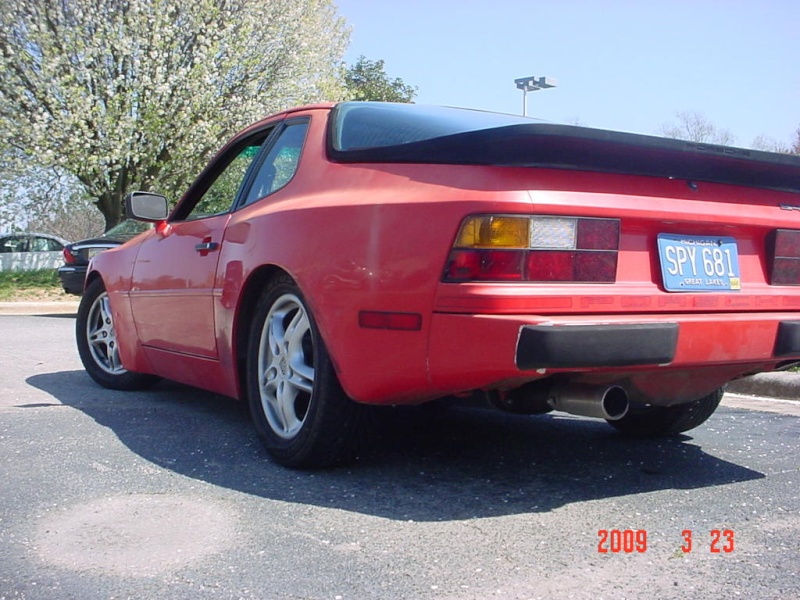
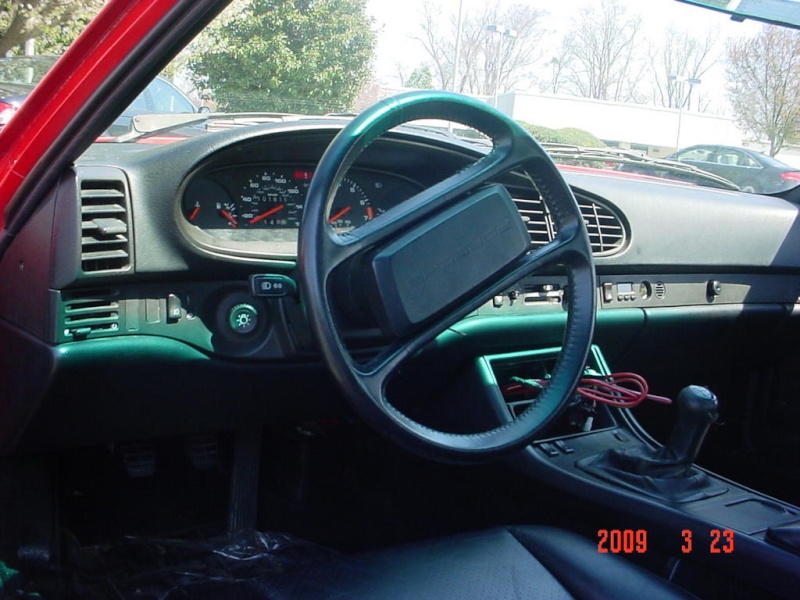
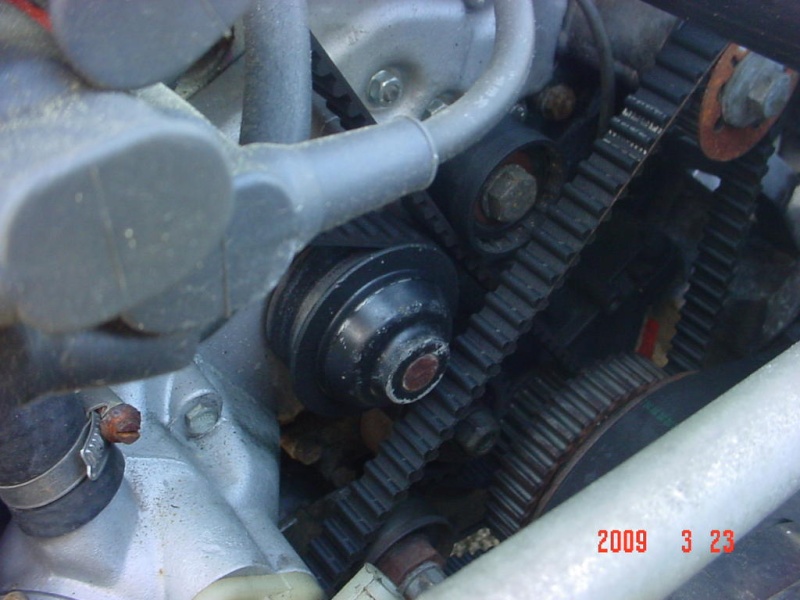
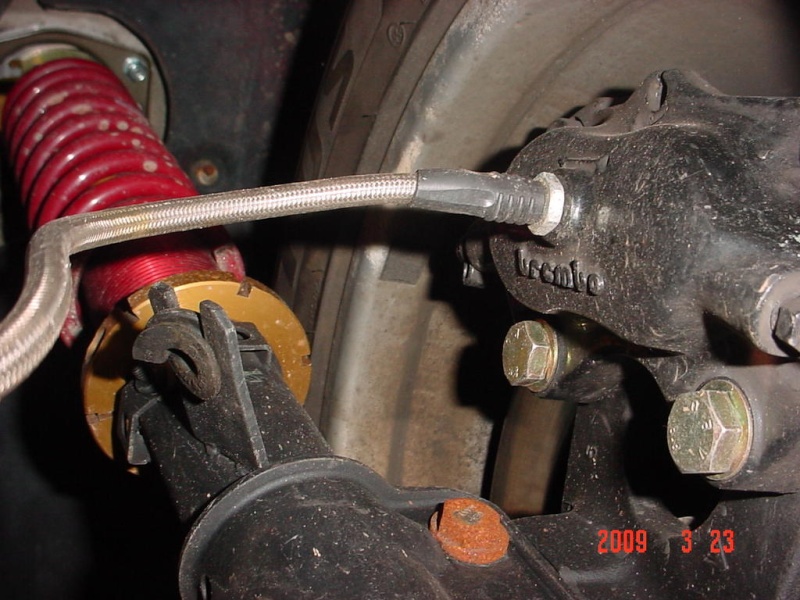
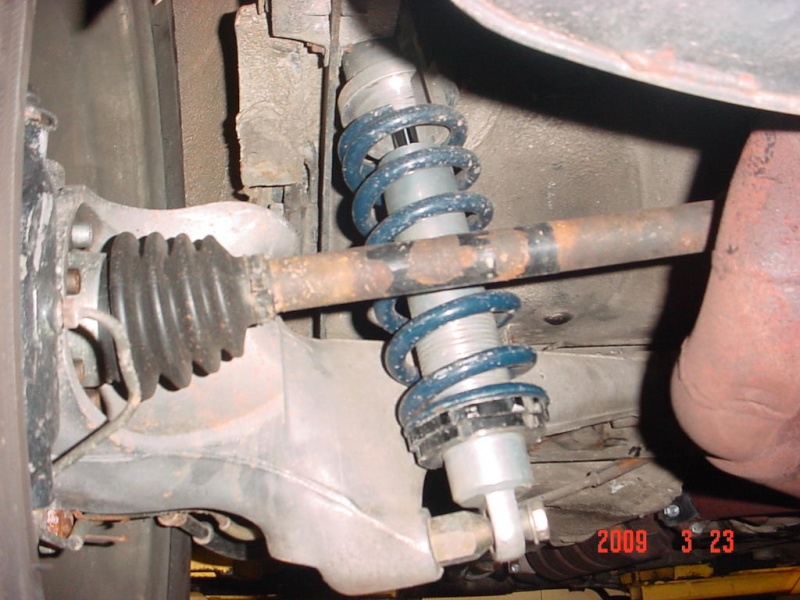
So i systematically went over the entire car, and piece by piece cleaned and refurbished it, replaced the waterpump and belts, the seals, Got it running-VERY well actually. Upgraded the brakes to 86 turbo brakes. relocated the battery. Upgraded suspension, manual steering. The car was a blast to drive, it was a GO-cart.... I actually replaced the clutch in 4 hours one afternoon at work when we were slow...
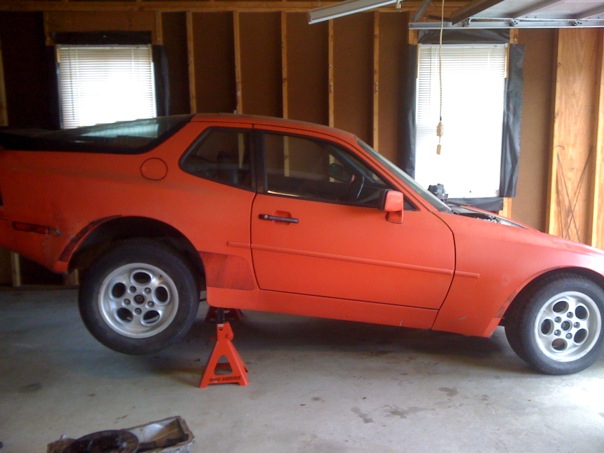
Pics of how it was after all that ...

My Swap
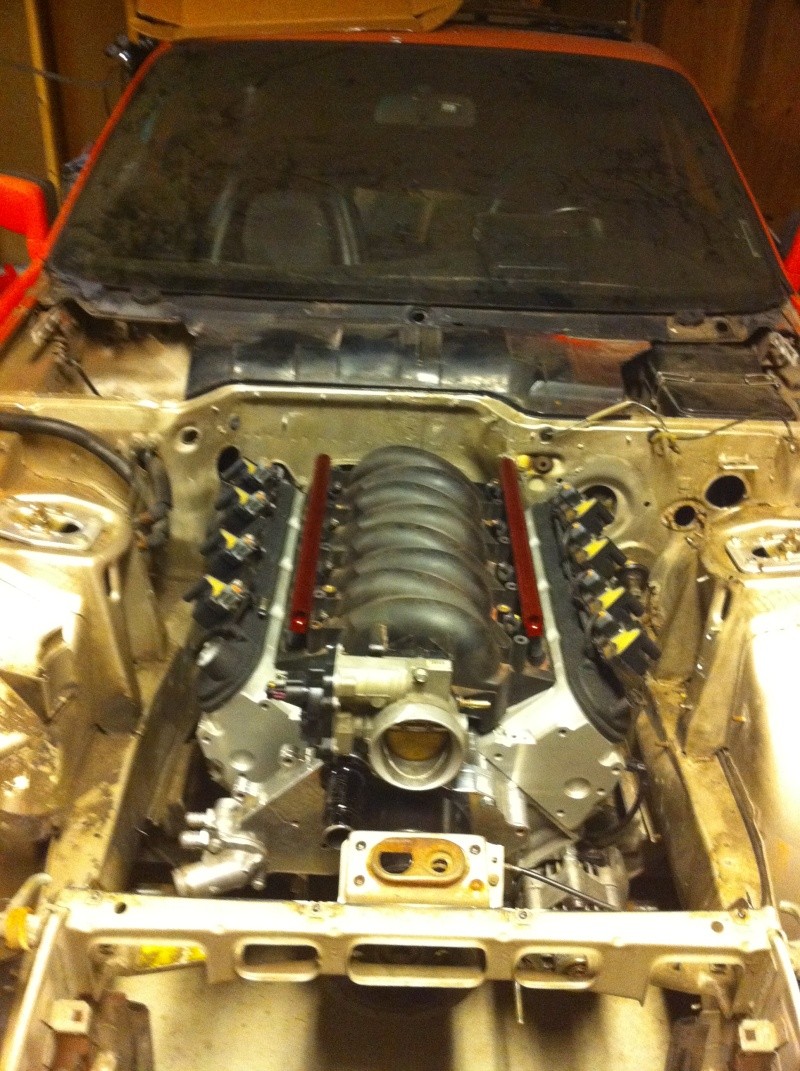
My swap started with what i believed to be a GREAT DEAL on a LS1... :roll: :roll: I origonally wanted to go with a 6.0L LQ9 High Compression, 500HP with a cam.... But i let people talk me out of it due to weight... I got a bare longblock with intake... No accessories, etc. for $600... The only parts of the swap i actually didnt build are the uprights and the adapter plate from XSCHOP before the takeover... Once I looked my engine over, i realized that there was kitty litter/floor dry everywhere on the engine... IT was only supposed to have 90K on it out of a 99 Vette, so i wasnt planning on tearing it down... Well so much for that idea... I did origonally order engine mount plates for the car, but ordered the wrong ones and it was 4th of July weekend so I built a set off the measurements here. I ended up getting a really good deal on a truck wiring harness, PCM already flashed, DBW-TB, Pedal and TAC module for $400 shipped, so i was quite happy about that. Thenit all got put on hold because my wife and i had to correct some debt issues so we could buy a house, so it sat for about a year, till exactly a year ago today, when it was towed to my new house, to be parked in my new (to me) 2 car garage... And since I have made tons of progress... Heres a pic of it when i rolled it in and set it up for the first time!!!
Different "Mini Projects"
Wiring
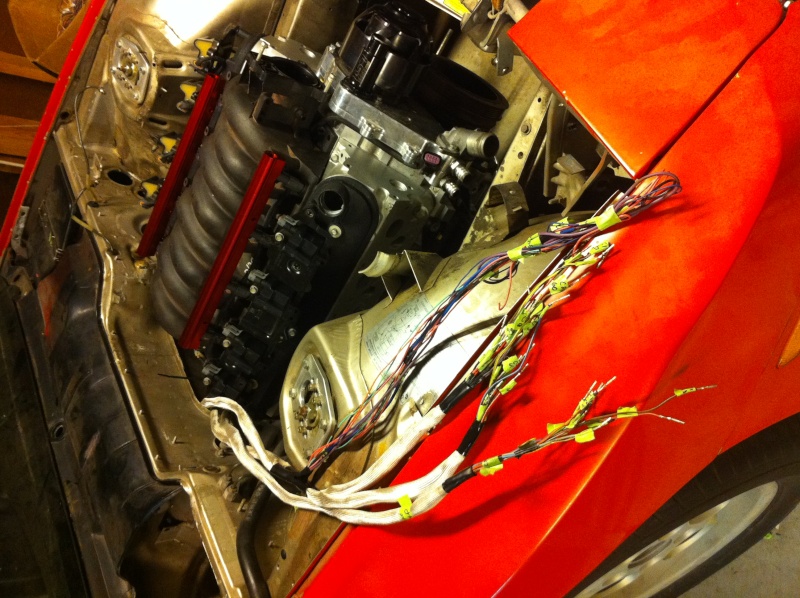
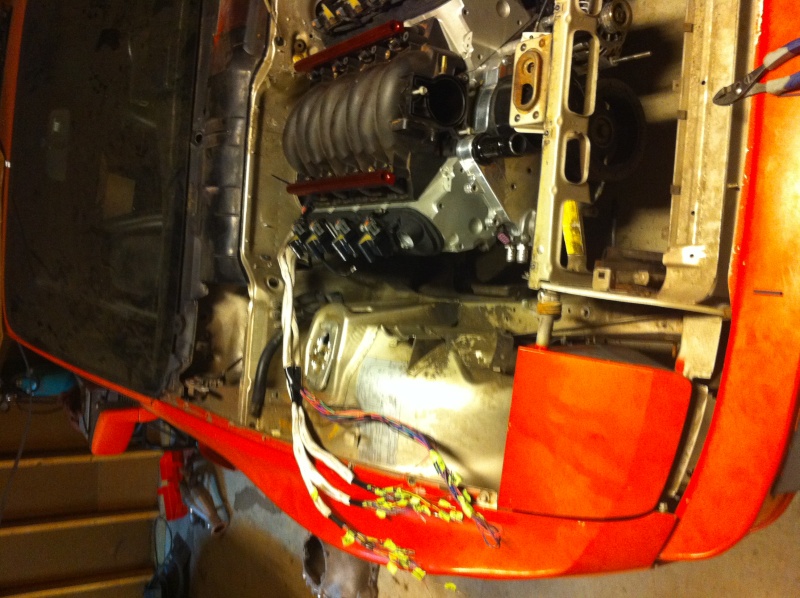
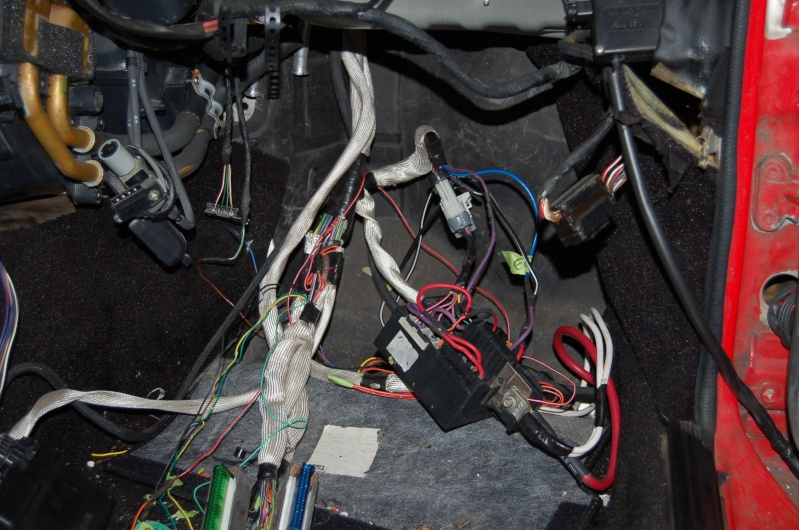
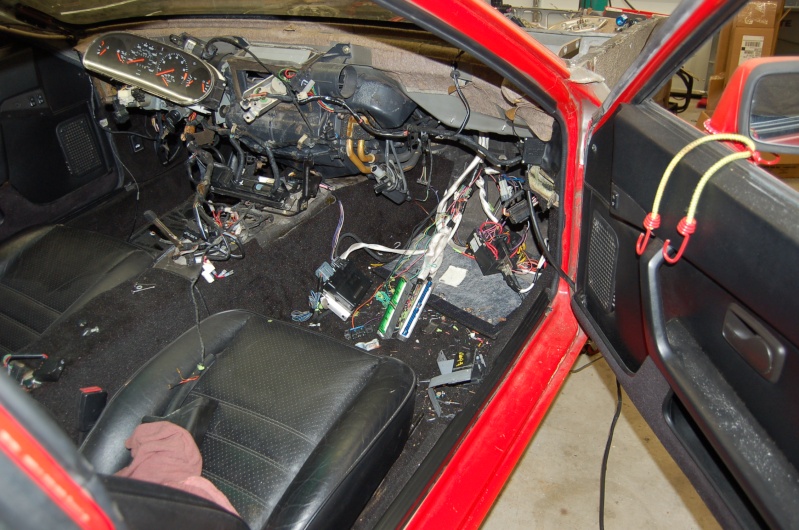
My goal with wiring was to make it as invisible as possible, How did i do?
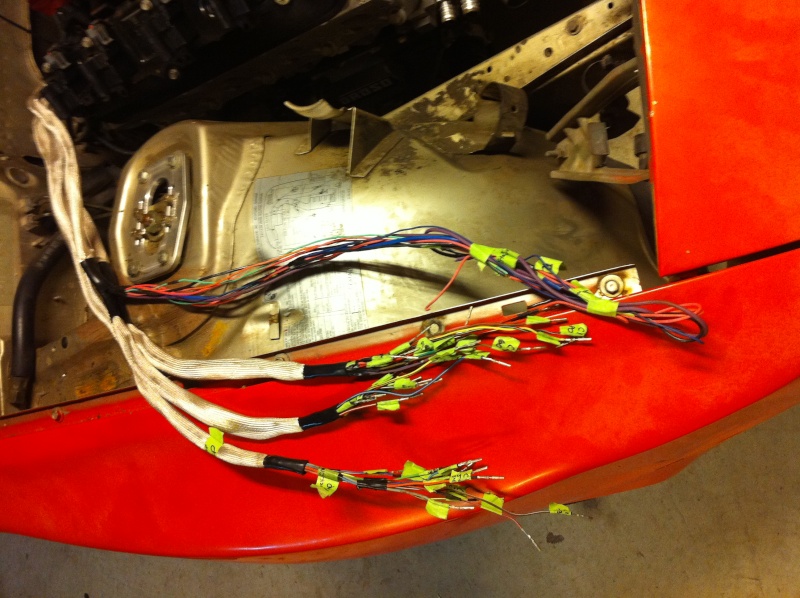
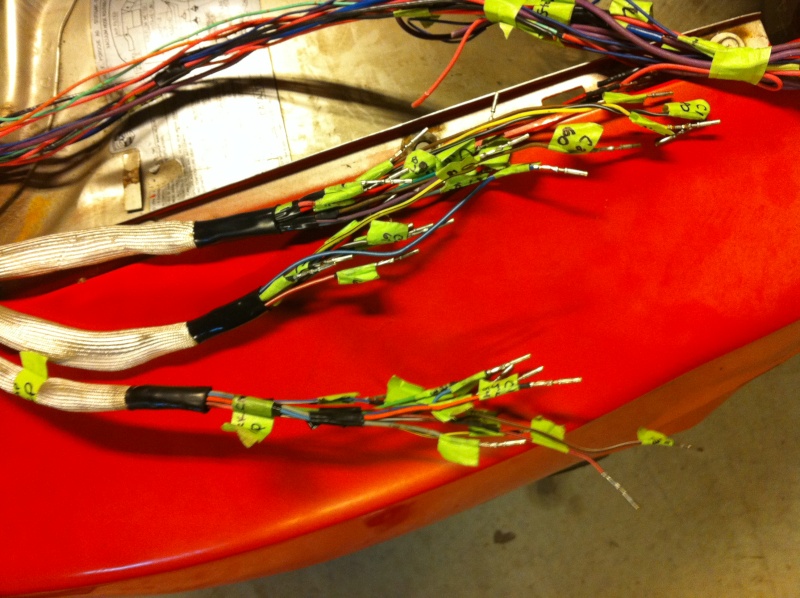
And just incase you dont believe thats wired...
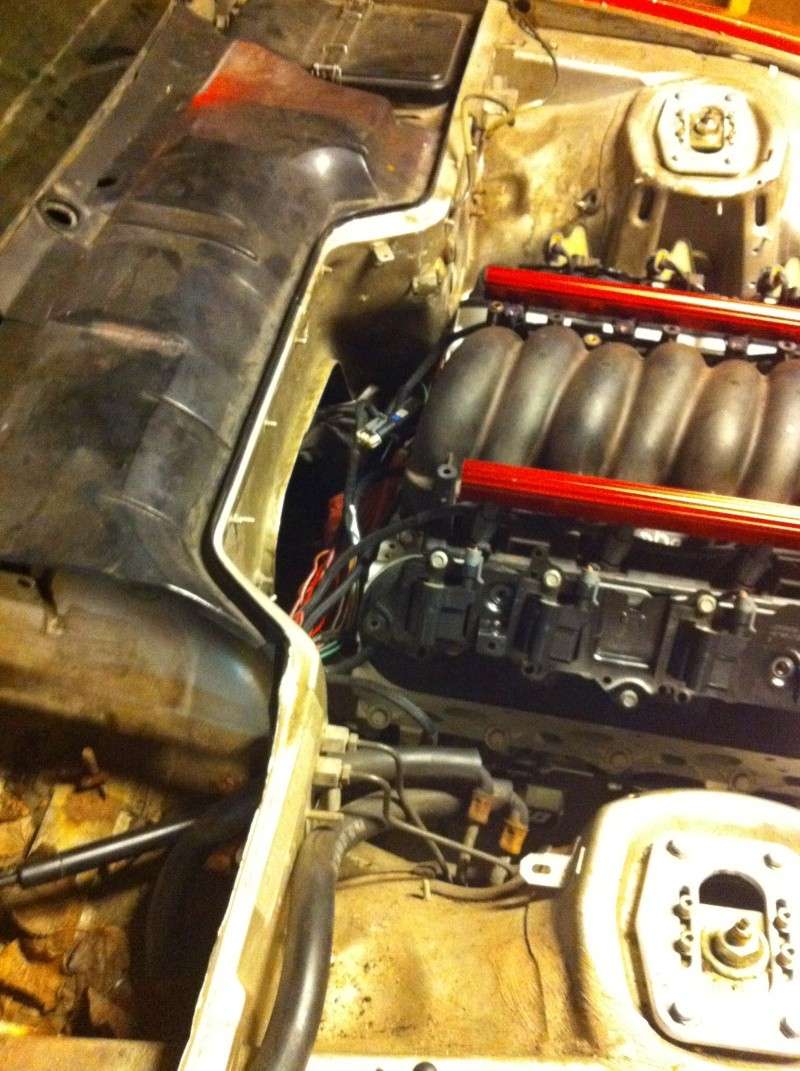
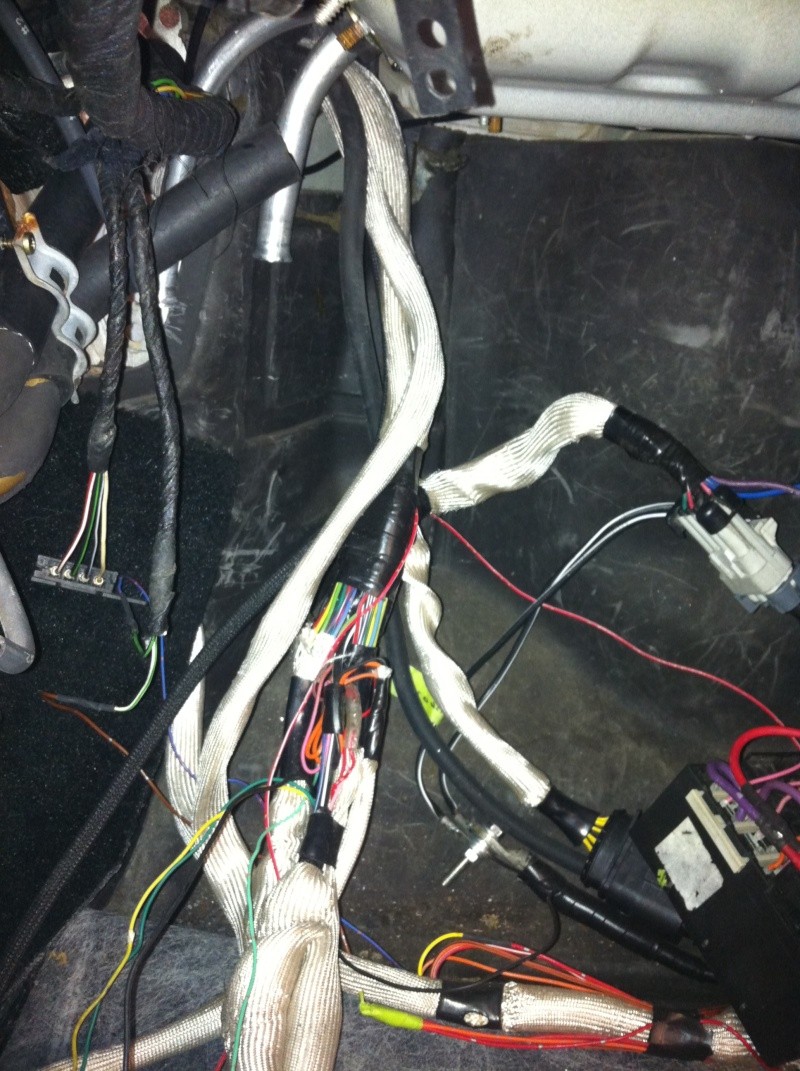
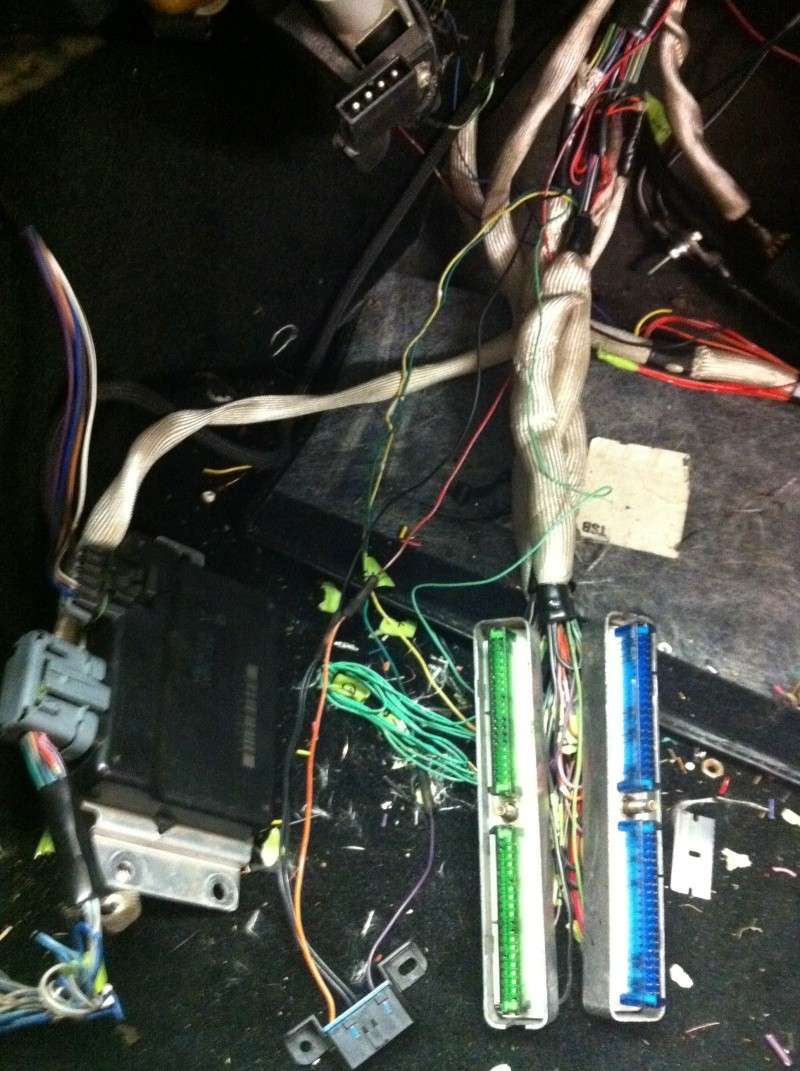
I tore apart a truck wiring harness Circuit by circuit, I de-pinned every thing till i had 2 bare 80 pin connectors... Laid each one exactly how i wanted it, there was some definate trial and error... I honestly rebuilt the coil harness for the drivers side 10 times... and that isnt a quick process, it took me probably 4 nights to be happy with it... Every connection has a factory style crimp connector utilizing the Porsche Wire crimping tool (dont tell work!!) then soldered and double heat shrunk (all 3 to 1 shrink tube, glue lined) I was nervous about running all circuits off one of each circuit, so I ran individual power circuits, one circuit for the coils, one for injectors, and one for the rest. All of my circuits ground through the harness to my fuse block ground which is where the PCM grounds, so no noise/interference issues having to ground through the block, Just the starter will have to do that of course. My DBW Harness runs under my intake, and my EWP gets power directly from the Alternator, and the ground side is controlled by a relay that is activated anytime the fuel pump is on, I can easily add a temp control bypass to activate it, or a switch. I may remove this setup eventually as that water pump is HUGE, and go with an inline Electric, I just found the adapters to do it, but will need to research how to run the heater if i do that. If i removed the EWP It would clean the engine bay up even more.
History- my passion for Porsche in general was started when I was 15 and my dad brought home an 81 924... It had this HORRIBLE clutch problem... Occasionally when you would release the clutch the car would vibrate badly till you re-engaged the clutch and it would go away... So I set out to replace the clutch, got it apart, got my *** kicked BAAAAAADDDDD by those damn 12pt Triple Square bolts on the axles. Anyway long story short, I ended up pulling the clutch apart 3 times, because even after replacing the clutch it STILL did it... Well, after the second time, I just said hell with it and started driving the car... It had been given to me for Christmas shortly after I started working on it, so it was now OFFICALLY my car... I ended up pulling it apart the last time and removing the flywheel to get it checked and to replace the pilot bearing as a last effort... WELL the damn Pilot Bearing was GONE!!! No needles, just the housing... I sold it in this disassembled state.... In the mean time my dad had bought a 944, it had a dash fire due to the plastic guard that goes around the base of the relay panel being removed and the clutch spring wore through the wires... He paid an "Electronics Expert" quite a bit of money to diagnose issues after he had laid upside down under the dash every night for a week or two soldering in splices to repair the damage... the were minor issues, blinkers don’t blink etc. Well the car ended up sitting due to these issues and normal 944 Issues. Well these two cars are what actually helped me decide what I wanted to do for a living... An unfortunate accident, and 8" Titanium plate and a dozen screws in my left ankle also helped... I saw one of those wonderful UTI commercials on PowerBlock one weekend and decided that I wanted to Work on Porsche's. I have always had a knack for working on cars, it really does come naturally for me, but I really enjoyed it, so I never wanted to make it a career, never wanted it to be a "Job"... So my wife agreed there was nothing worth staying in MI for, we moved, I went to school, Slept through MOST of it, had either the highest or second highest score in all of my classes while working fulltime delivering pizza's (really good money) Got accepted into PTAP (Porsche Technology Apprenticeship Program) which at the time they were only taking about 30 students A YEAR!!! Was lucky enough to get into the dealer I wanted and still currently work at Leith Porsche in Cary NC!!!
V8- I read online A LOT! I promise, if you are reading this, I have read your entire build End to end, top to bottom… I really liked the people who were swapping in different engines, but I wanted a swap that kept the awesome handling of the vehicle… The LS was the answer! I had been planning my build and didn’t even realize it, I would see someone’s build thread and see things I loved and things I didn’t and I would make note of it and have used that information to build my car.
My car
So the car i was talking about above, my dad's after it sat in a field for a few years I decided I wanted a project... WOW!!! I got one... When I pulled this thing into the shop The JAGUAR guys were looking at me like i was nuts... Thats bad... First thing i did is rip the origonal wiring harness out and replace it... The funny thing... It DIDNT fix the main problem.. the blinkers... All the sockets were corroded...
:oops: So i systematically went over the entire car, and piece by piece cleaned and refurbished it, replaced the waterpump and belts, the seals, Got it running-VERY well actually. Upgraded the brakes to 86 turbo brakes. relocated the battery. Upgraded suspension, manual steering. The car was a blast to drive, it was a GO-cart.... I actually replaced the clutch in 4 hours one afternoon at work when we were slow...
Pics of how it was after all that ...
My Swap
My swap started with what i believed to be a GREAT DEAL on a LS1... :roll: :roll: I origonally wanted to go with a 6.0L LQ9 High Compression, 500HP with a cam.... But i let people talk me out of it due to weight... I got a bare longblock with intake... No accessories, etc. for $600... The only parts of the swap i actually didnt build are the uprights and the adapter plate from XSCHOP before the takeover... Once I looked my engine over, i realized that there was kitty litter/floor dry everywhere on the engine... IT was only supposed to have 90K on it out of a 99 Vette, so i wasnt planning on tearing it down... Well so much for that idea... I did origonally order engine mount plates for the car, but ordered the wrong ones and it was 4th of July weekend so I built a set off the measurements here. I ended up getting a really good deal on a truck wiring harness, PCM already flashed, DBW-TB, Pedal and TAC module for $400 shipped, so i was quite happy about that. Thenit all got put on hold because my wife and i had to correct some debt issues so we could buy a house, so it sat for about a year, till exactly a year ago today, when it was towed to my new house, to be parked in my new (to me) 2 car garage... And since I have made tons of progress... Heres a pic of it when i rolled it in and set it up for the first time!!!
Different "Mini Projects"
Wiring
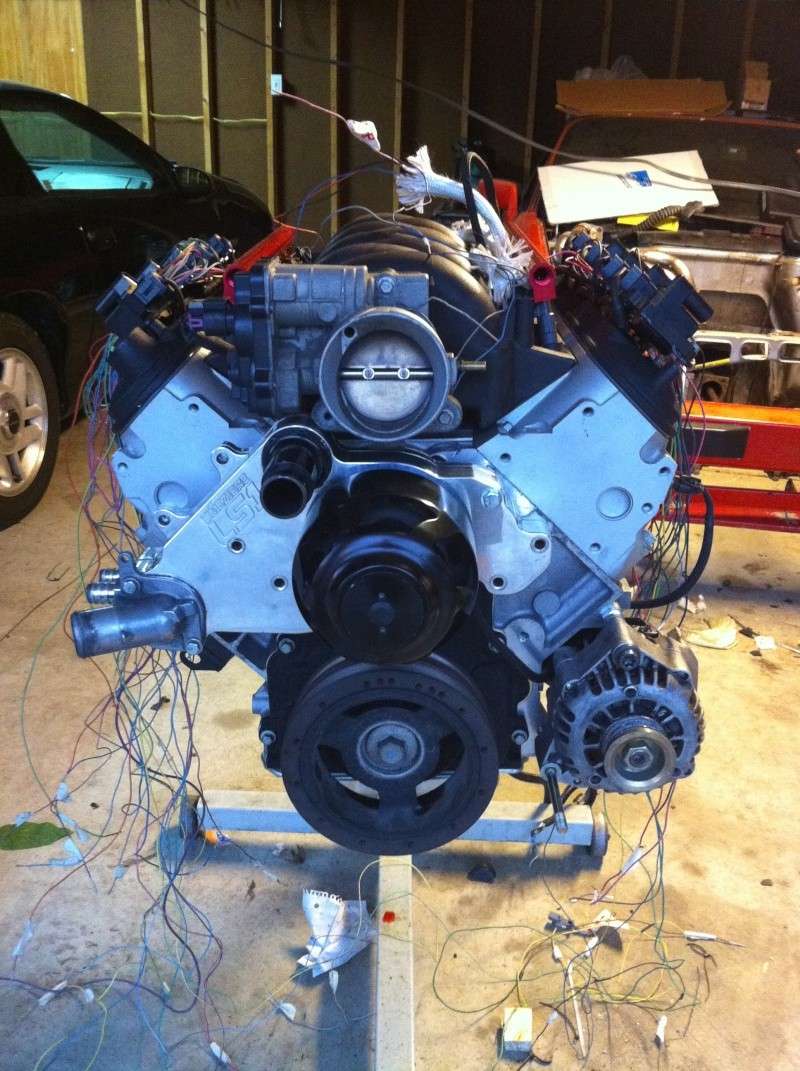
My goal with wiring was to make it as invisible as possible, How did i do?
And just incase you dont believe thats wired...
I tore apart a truck wiring harness Circuit by circuit, I de-pinned every thing till i had 2 bare 80 pin connectors... Laid each one exactly how i wanted it, there was some definate trial and error... I honestly rebuilt the coil harness for the drivers side 10 times... and that isnt a quick process, it took me probably 4 nights to be happy with it... Every connection has a factory style crimp connector utilizing the Porsche Wire crimping tool (dont tell work!!) then soldered and double heat shrunk (all 3 to 1 shrink tube, glue lined) I was nervous about running all circuits off one of each circuit, so I ran individual power circuits, one circuit for the coils, one for injectors, and one for the rest. All of my circuits ground through the harness to my fuse block ground which is where the PCM grounds, so no noise/interference issues having to ground through the block, Just the starter will have to do that of course. My DBW Harness runs under my intake, and my EWP gets power directly from the Alternator, and the ground side is controlled by a relay that is activated anytime the fuel pump is on, I can easily add a temp control bypass to activate it, or a switch. I may remove this setup eventually as that water pump is HUGE, and go with an inline Electric, I just found the adapters to do it, but will need to research how to run the heater if i do that. If i removed the EWP It would clean the engine bay up even more.
 02-28-2011, 11:50 PM
#2
On The Tree
Thread Starter
iTrader: (8)
Join Date: May 2009
Posts: 199
Likes: 0
Received 0 Likes
on
0 Posts
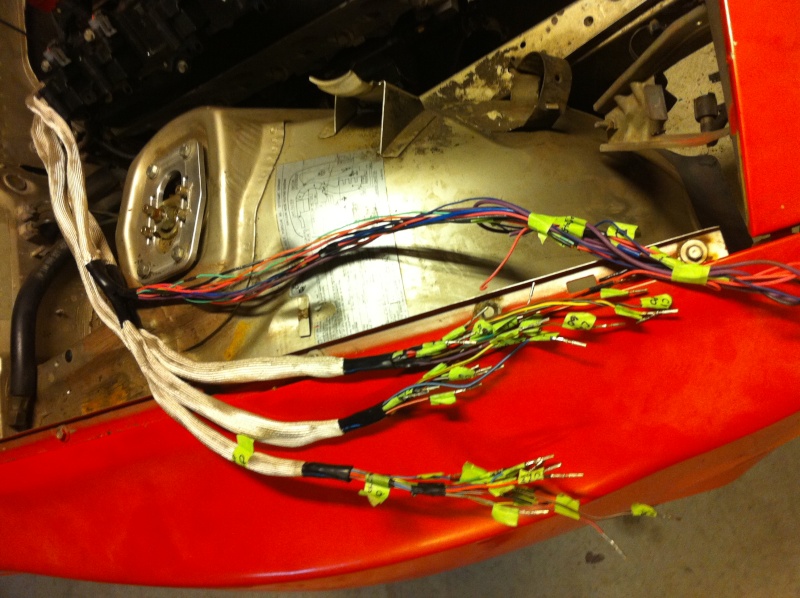
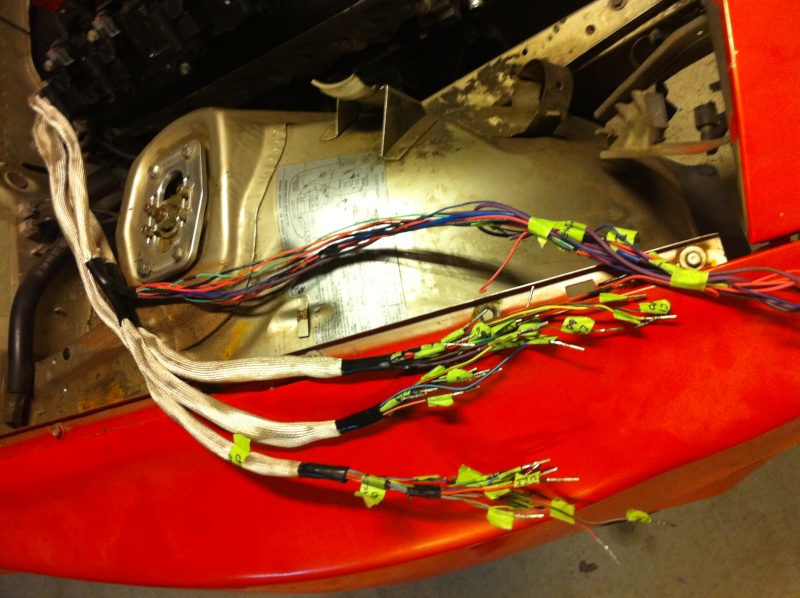
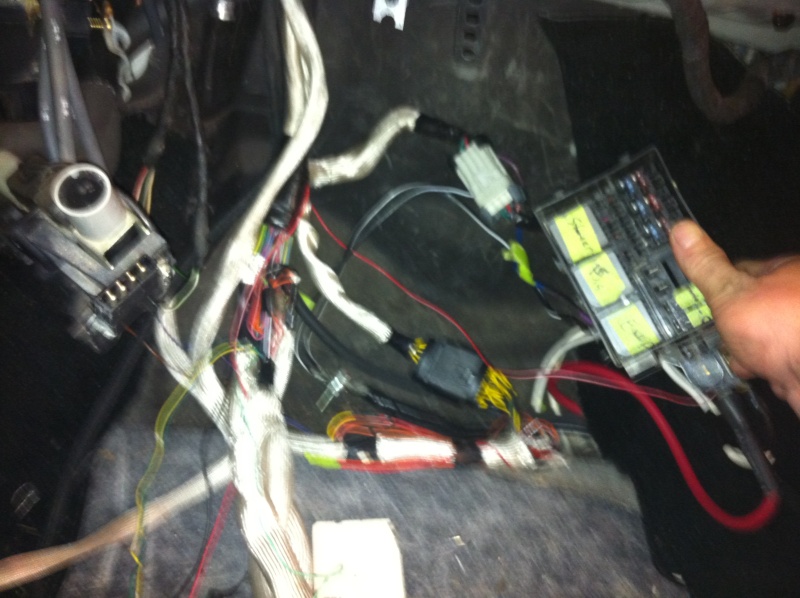
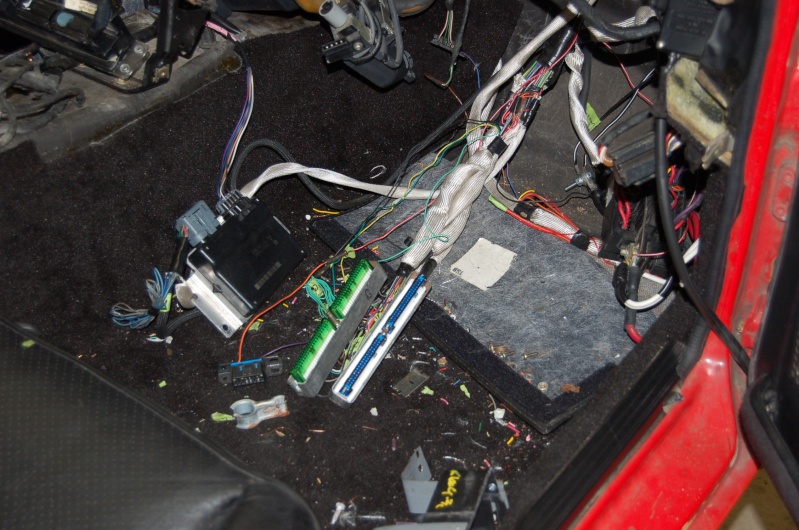
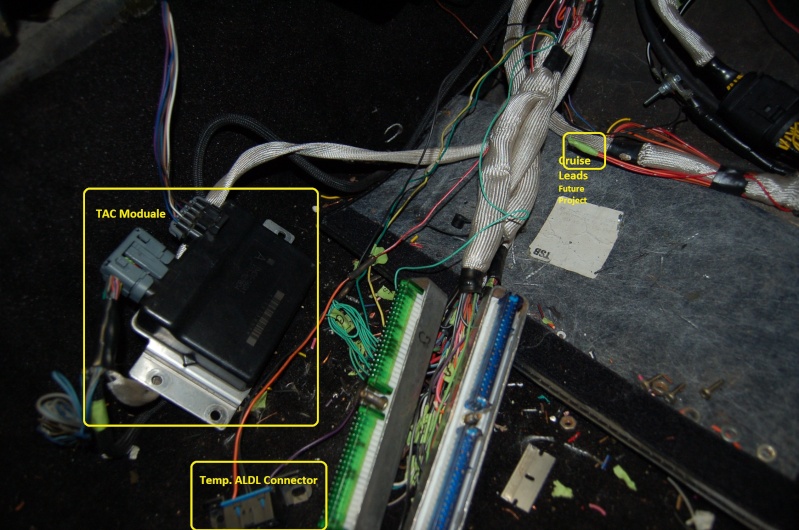
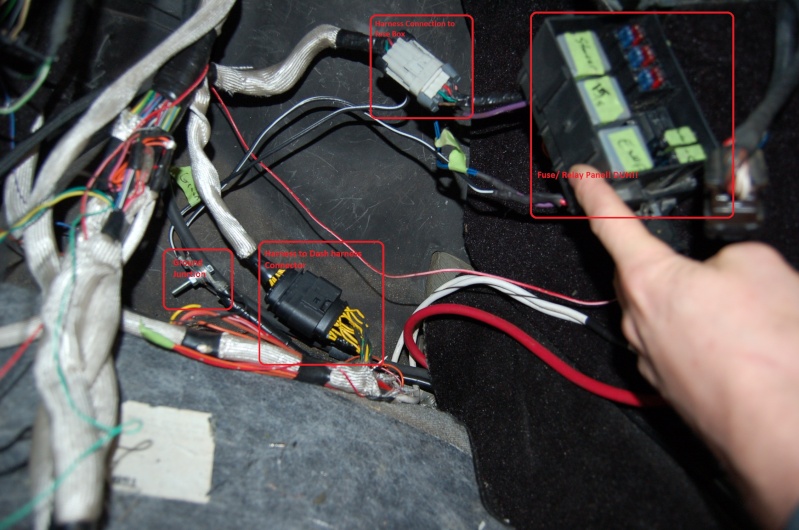
Here are some pics of my Fuse panel, it is out of a early 90's GM FWD car. ITs great, has like 9 spots for fuses, spots for a couple relays, its compact, has room for MEGA fuses... Oh and I was able to grab them for less than $15 for TWO!!! So i had extra pins/terminals... The pic looks VERY cluttered because I have everything pulled out, but your looking at the main connection of everything, the connector laying on the bottom is my budy harness connector, the box on the left with wires running to it is my TAC modual for the DBW, you see the heavy Black wire with a nut through it is my Ground for the computer/Engine 2 Gauge all the way to the battery... My fuse box has a harness discconect so when i pull the engine, I simply undo 2 connectors, undo the PCM connector and unplug the TAC box and push the harness through...
Sorry for the blurry pic...
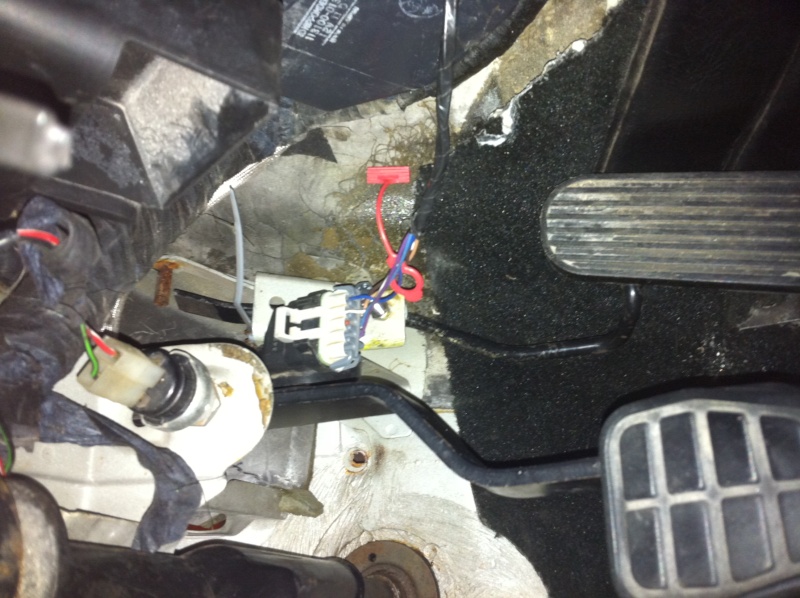
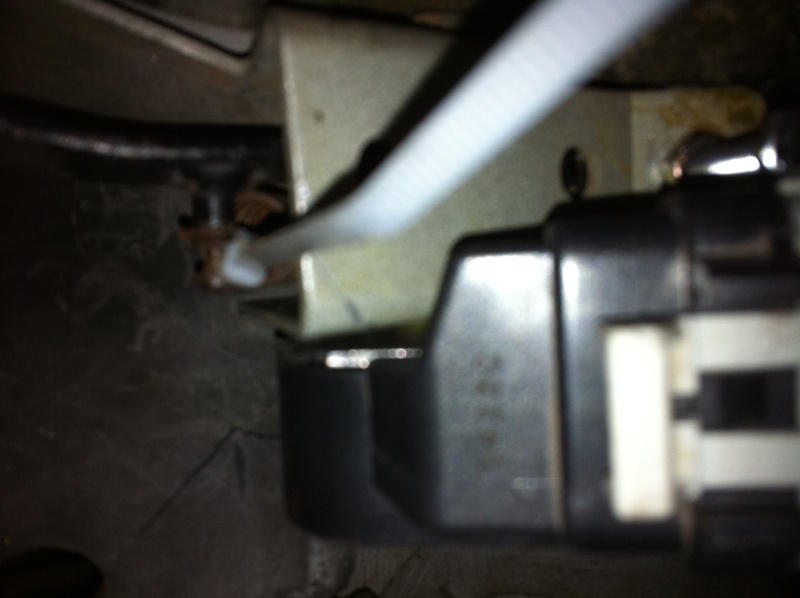
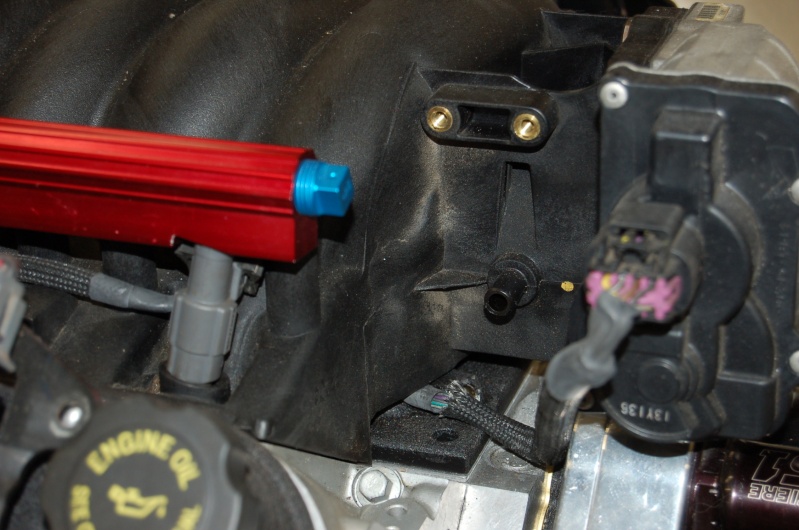
I also have pics of how i mounted the Pedal sensor, I didnt want to mount the truck pedal so i mounted the pedal sensor to the factory pedal, i just pulled the porsche pedal out, built the pin that comes out the left side with my welder and shaped it flat, clocked the way i wanted.- Note- When mounting these, they need a slight preload at rest or you will set a fault and it will not work... I purposly set mine with a little less preload then necessary, and there is an adjustable stop now ( the bolt in the pic) so i could fine tune it perfectly! About 3/4 sweep is full throttle, now i just need to find my factory bottom pedal stop...


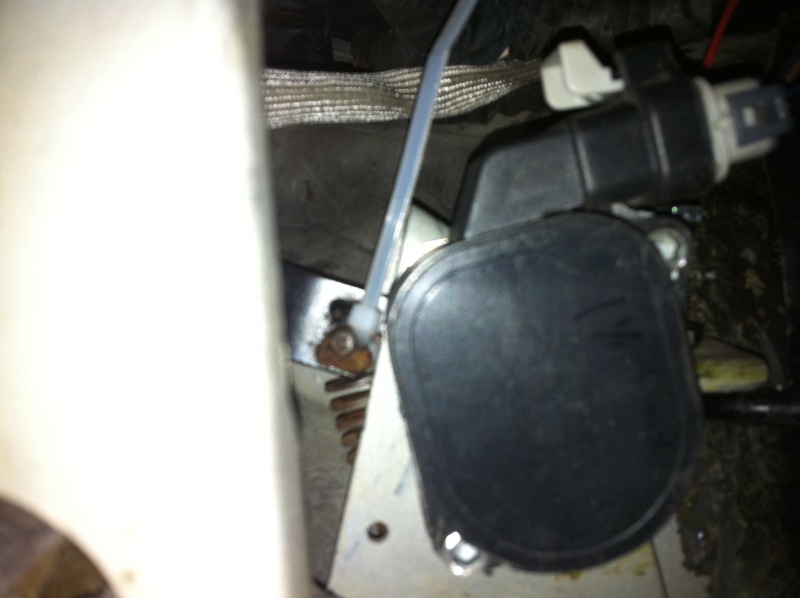
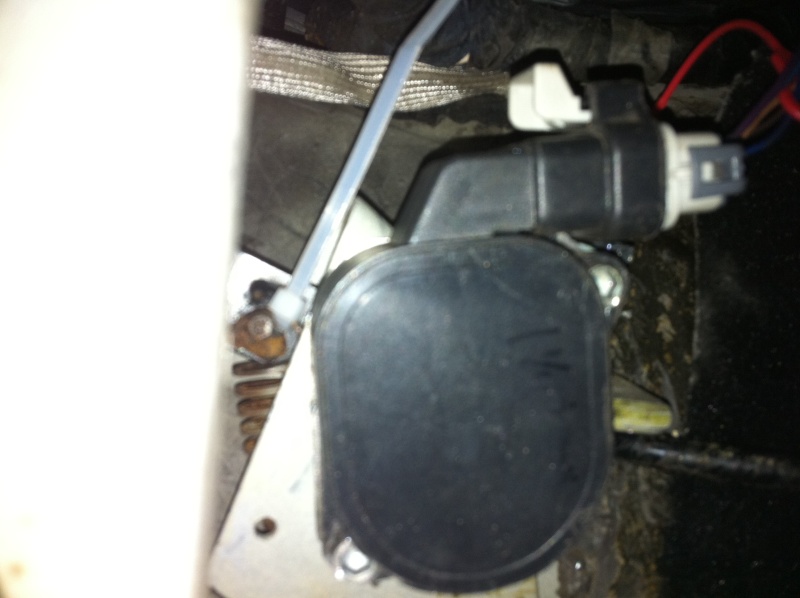
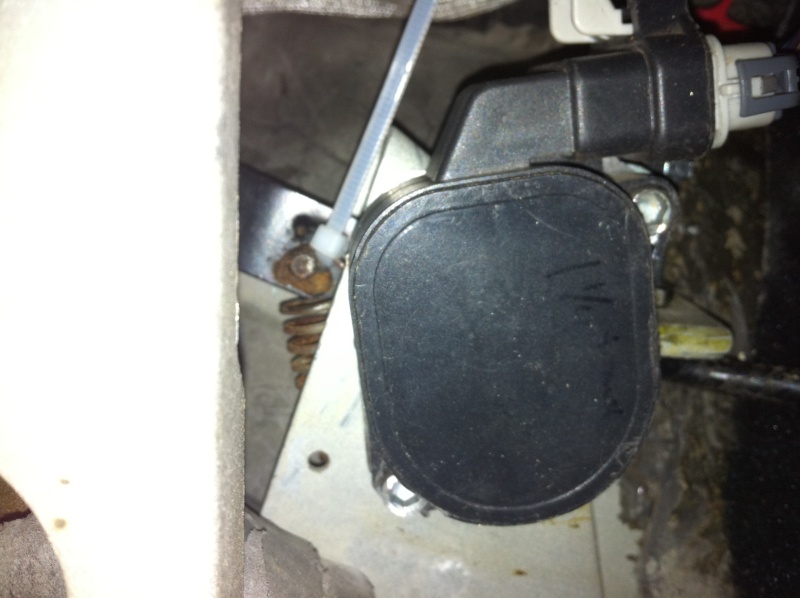
Big Plus!!!- All of the wiring has been tested and works, throttle works all sensors are reading correctly ETC... So thats a nice bonus!!!
More to come, Been typing this from 856 till now 1143... Will start typing next section... See you in 3 hours...
Mark
Note.... Preview SUCKS... Sure doesnt look like it should have taken 3 hours to write that...
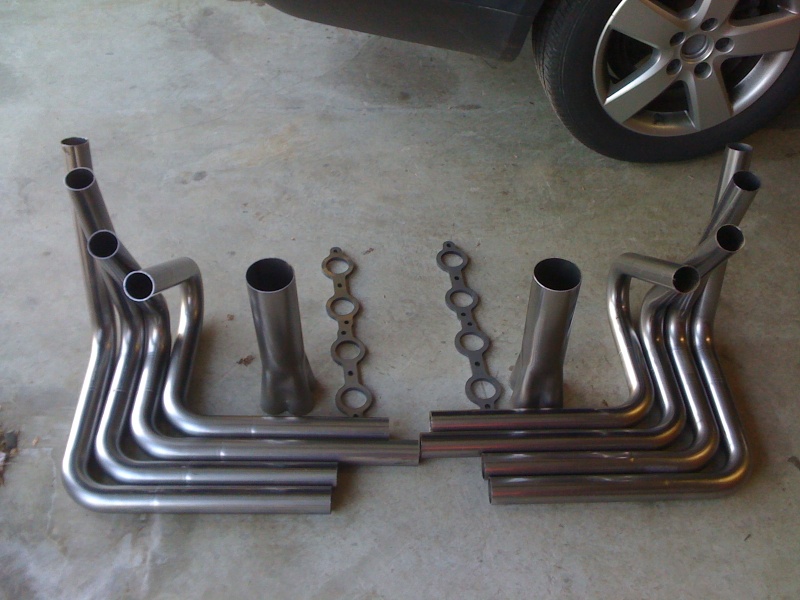
Headers-
Scariest part of my build... Cause i had no clue what to do... So i decided I would build my own... Heres what i started with...
And here is what i created...
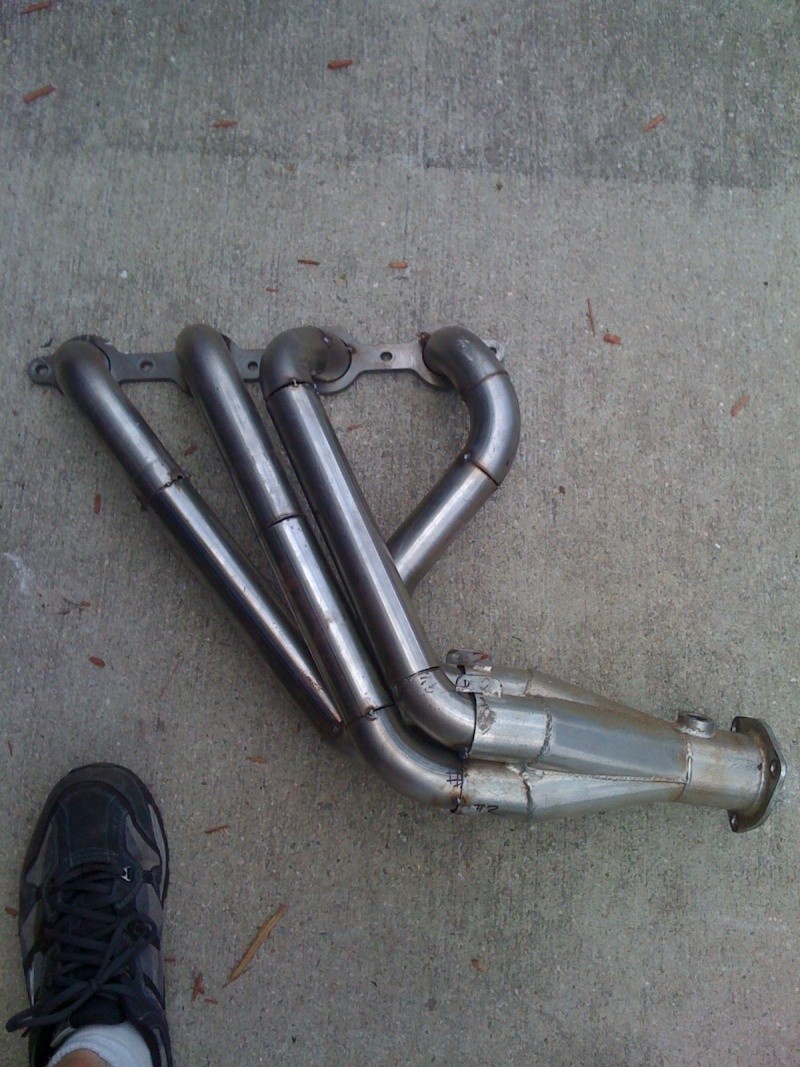
But i have another thread on that... And they havent progressed much except for modifing the passenger front primary to tuck it closer to the other primaries, and gain clearance on the crossmember.
:affraid: :affraid: :affraid: PLUMBING :affraid: :affraid: :affraid:
I wanted my plumbing to be clean and more importantly INVISIBLE!!! Heres my progress...
This was my first layout...
Then i added my Heater control Valve, But there is something still wrong with the next 3 pics, it has to do with how i have it plumbed, and has to do with the GM layout, and just assume the lines connect directly to the pump at the right... (its not the vac line)
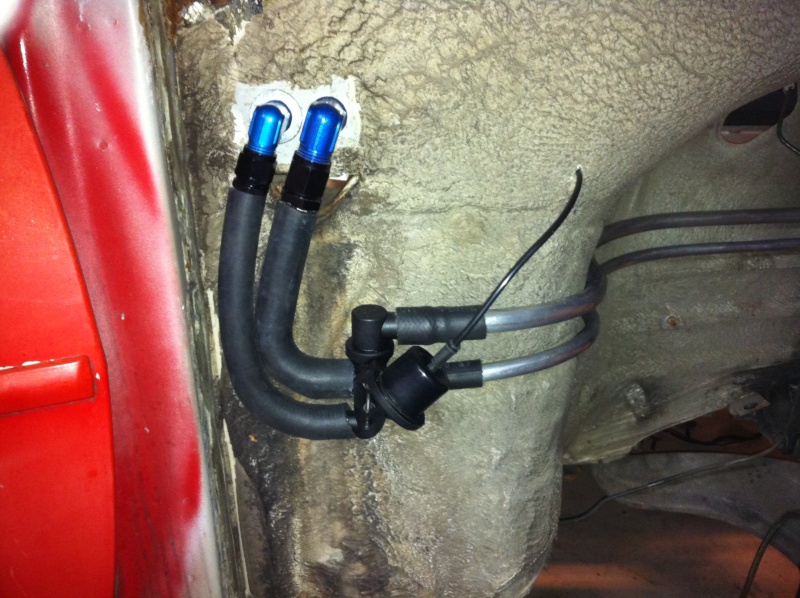

Did you figure it out... Come on... you should be able too...
This should help...
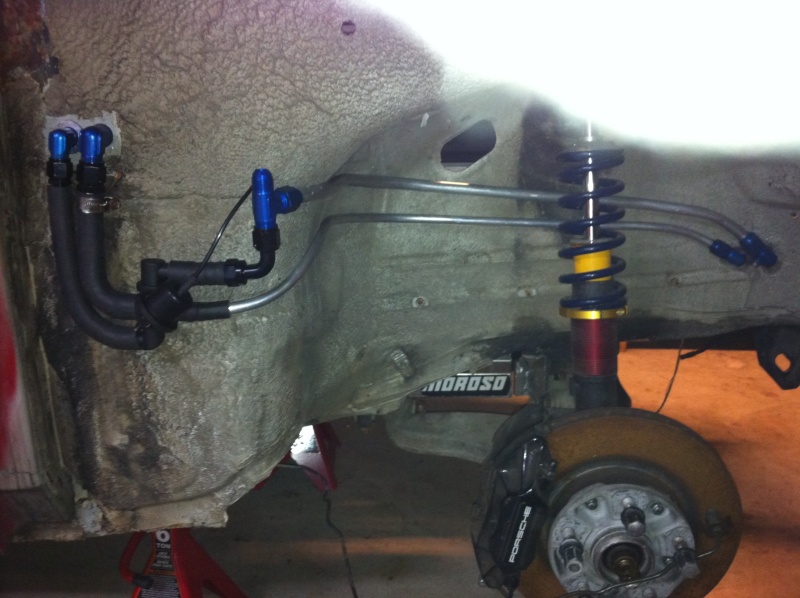
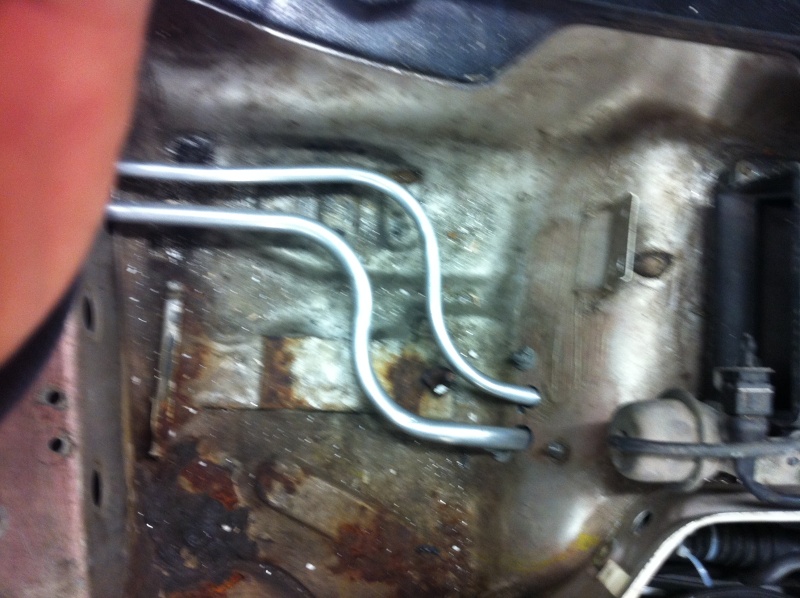
figure it out? I keep forgetting to order another bulkhead fitting or i would already have it plumbed in Right next to the other too... Here is the pic showing the routing in the Battery tray...
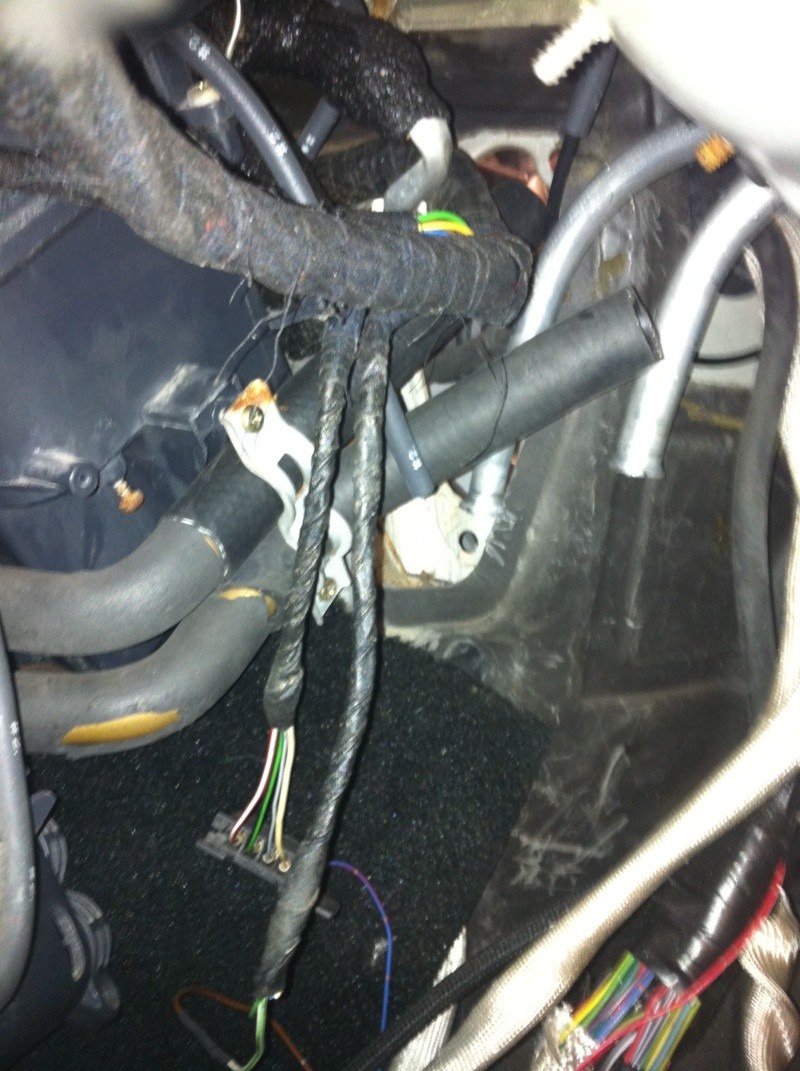
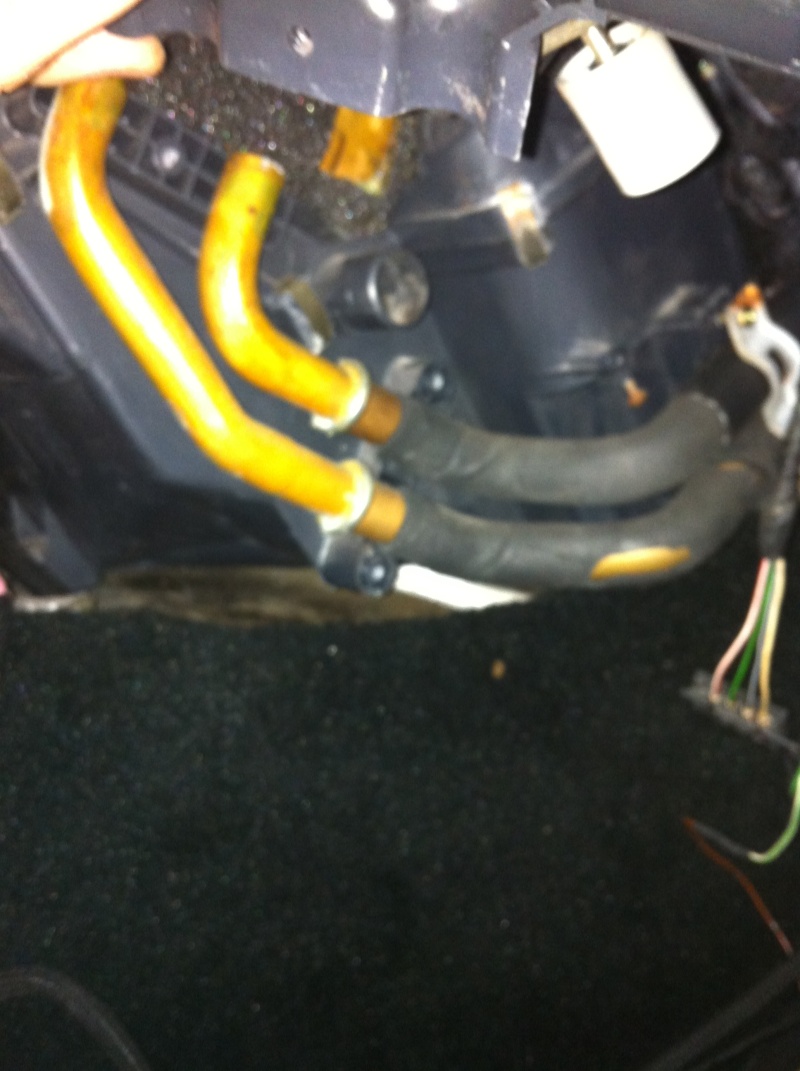
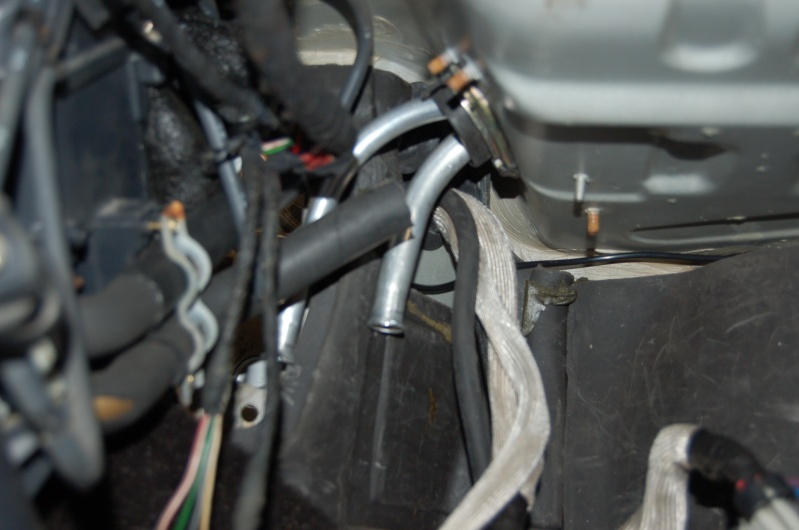
And here they are currently in the interior, you will see the two aluminum tubes sticking through from the top right, and the rubber hose sticking out from the copper tubes, Porsche actually made it really easy to do this, because they used 2 intermediate copper pipes that connected to the heater core, then went to the firewall, i just cut them, and will flare them so i can clamp the hose to them. I still need to bend the aluminum tubes into place.
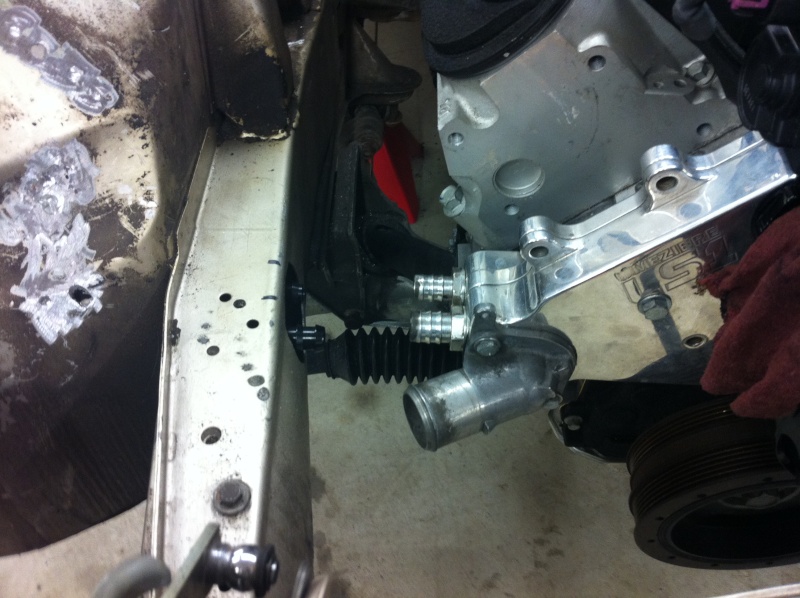
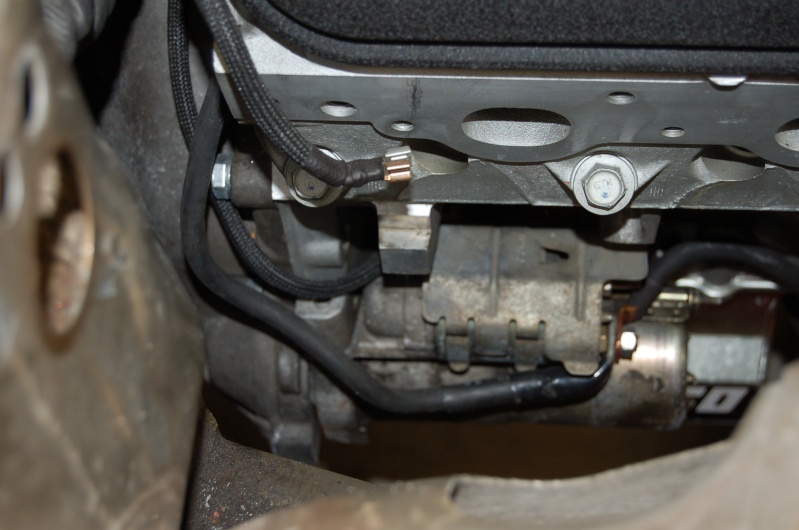
And here is my heater hose connection to the engine...
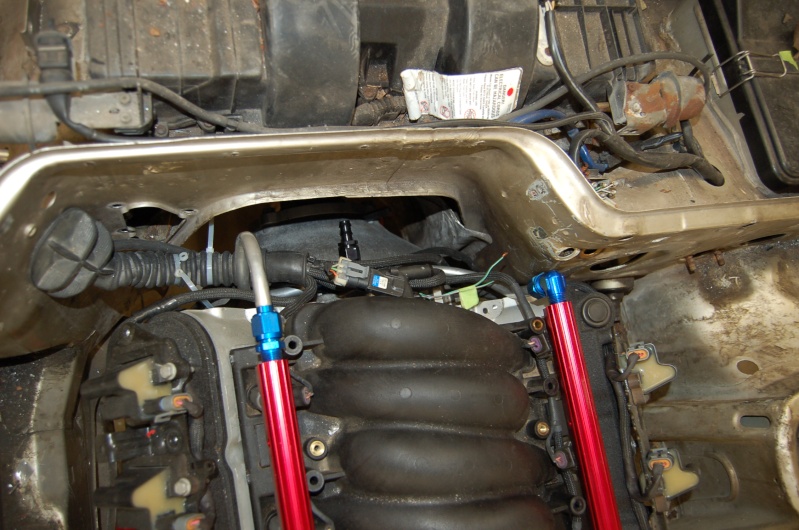
And Now the oil System...
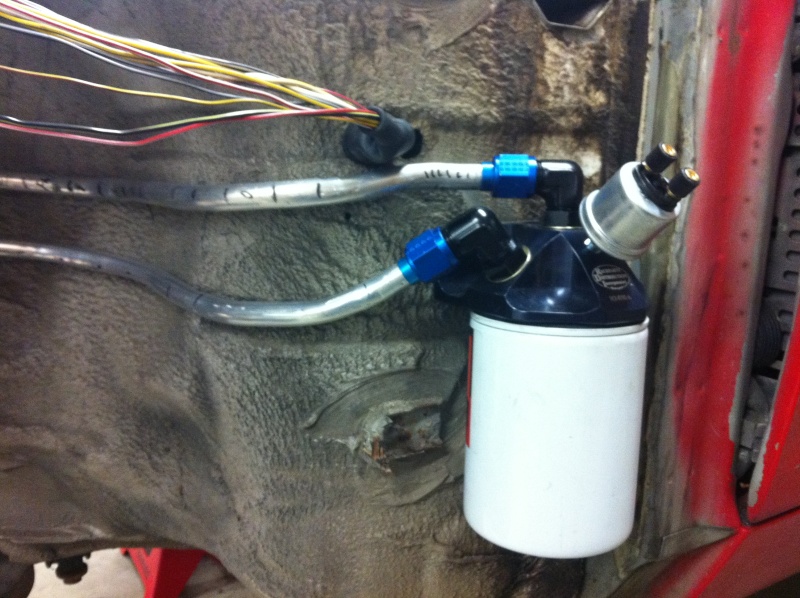
I know the filter is Huge... It really didnt look that big in the EBAY add... And it was pretty cheap, $70 shipped with the K&N!!!! The lines look beatup on this side cause i used a sharpie to mark them where they needed tweeking...
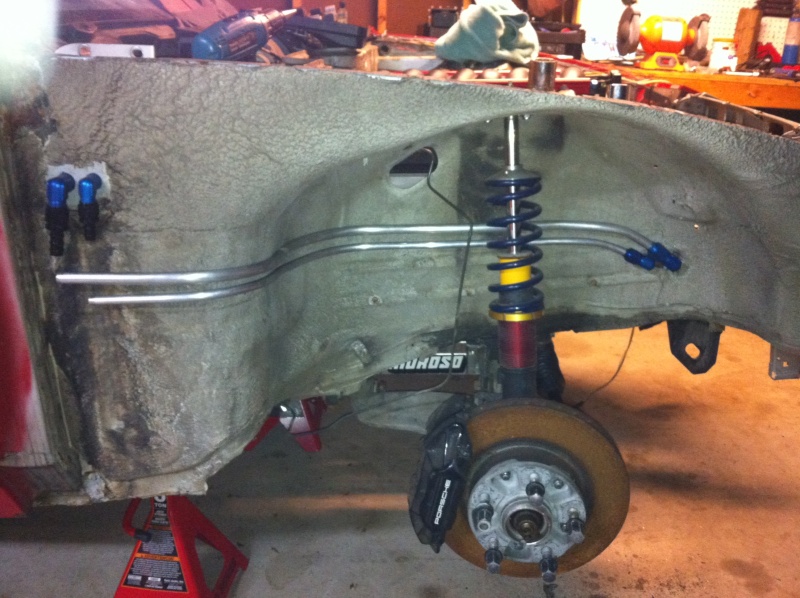
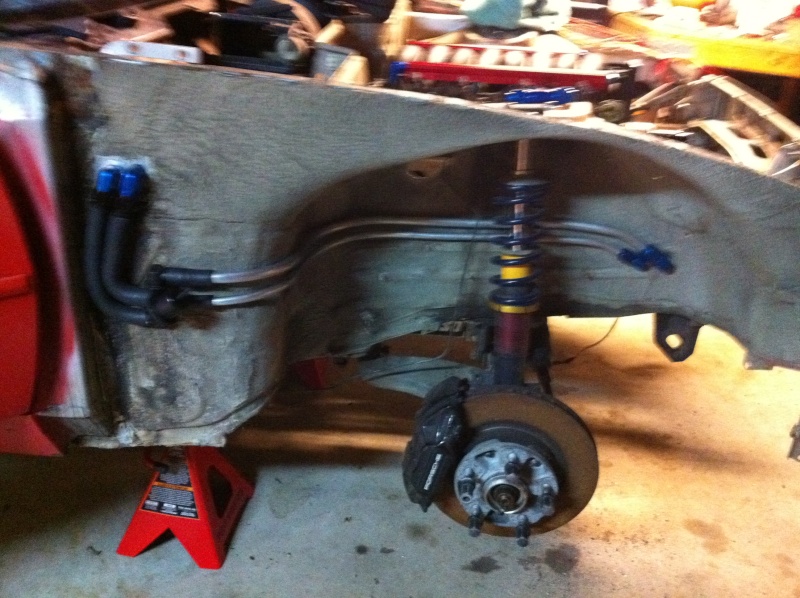
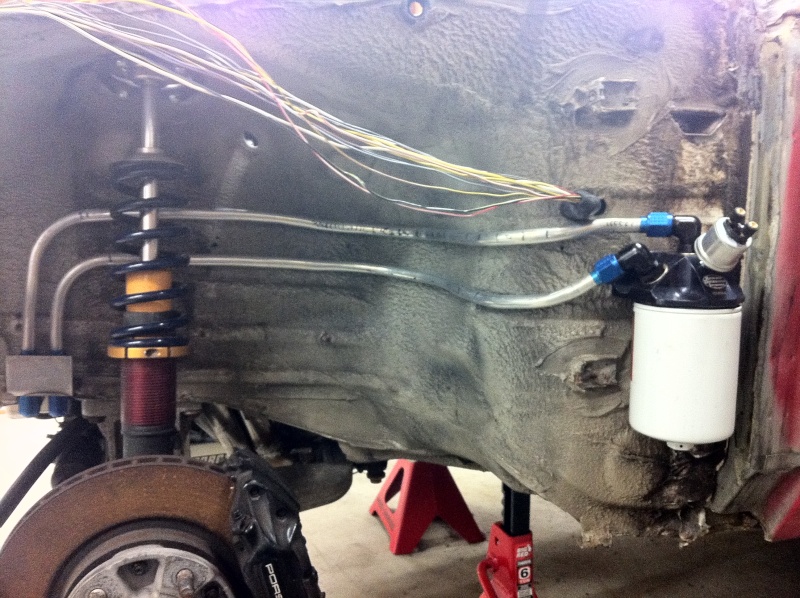
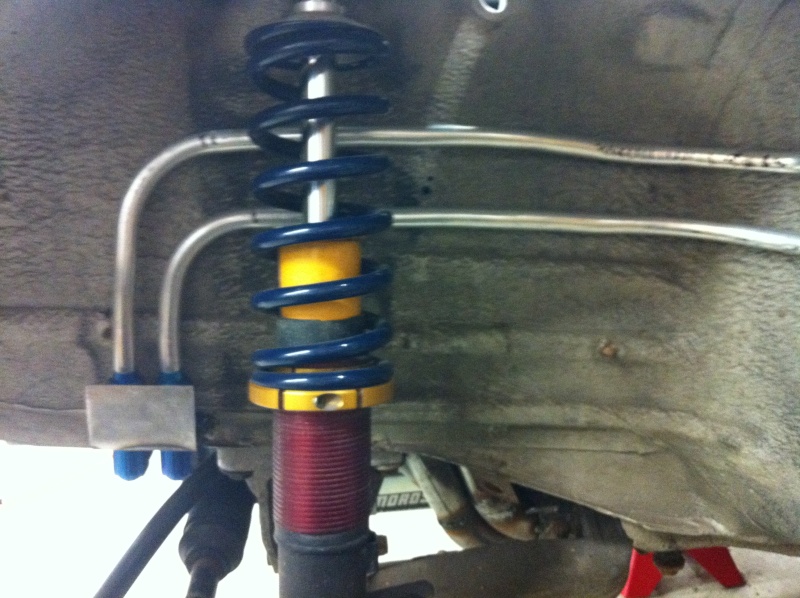
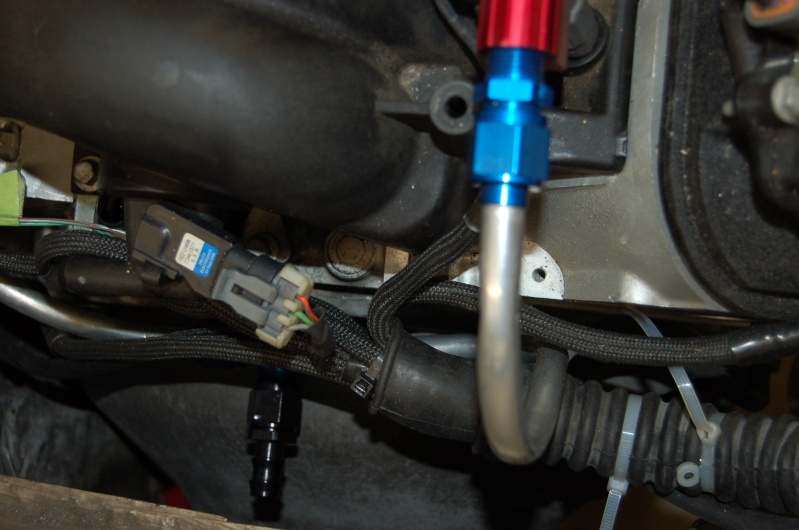
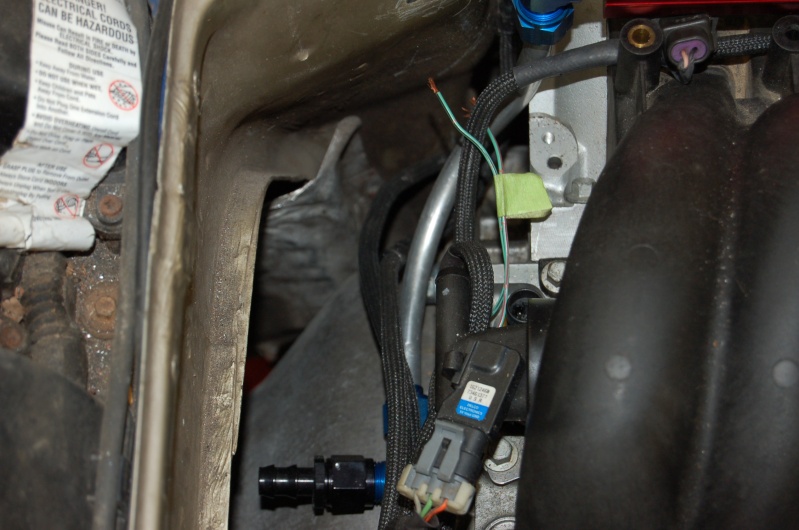
And here is the lines... They have plenty of clearance from the wheels, and they will have a protective cover, the wheel well with be used only in the rear, it will be cut where it curves forward and i will rivet aluminum strips that i can bolt to the body to keep the liner in place, same in the front. This will protect my filter/lines. And the sensor is just waiting on a 90 bend so i can reclock it.
You can see better in this one, the metal spot where the lines disappear is where the bulkhead 90 bends are and the rubber lines connect on the other side.
IT appears i dont have a pic of my oil lines from the engine to the 90... Ill remedy that tomorrow... They were a pain in my ***...
Mark
Sorry for the blurry pic...
I also have pics of how i mounted the Pedal sensor, I didnt want to mount the truck pedal so i mounted the pedal sensor to the factory pedal, i just pulled the porsche pedal out, built the pin that comes out the left side with my welder and shaped it flat, clocked the way i wanted.- Note- When mounting these, they need a slight preload at rest or you will set a fault and it will not work... I purposly set mine with a little less preload then necessary, and there is an adjustable stop now ( the bolt in the pic) so i could fine tune it perfectly! About 3/4 sweep is full throttle, now i just need to find my factory bottom pedal stop...
Big Plus!!!- All of the wiring has been tested and works, throttle works all sensors are reading correctly ETC... So thats a nice bonus!!!
More to come, Been typing this from 856 till now 1143... Will start typing next section... See you in 3 hours...
Mark
Note.... Preview SUCKS... Sure doesnt look like it should have taken 3 hours to write that...
Headers-
Scariest part of my build... Cause i had no clue what to do... So i decided I would build my own... Heres what i started with...
And here is what i created...
But i have another thread on that... And they havent progressed much except for modifing the passenger front primary to tuck it closer to the other primaries, and gain clearance on the crossmember.
:affraid: :affraid: :affraid: PLUMBING :affraid: :affraid: :affraid:
I wanted my plumbing to be clean and more importantly INVISIBLE!!! Heres my progress...
This was my first layout...
Then i added my Heater control Valve, But there is something still wrong with the next 3 pics, it has to do with how i have it plumbed, and has to do with the GM layout, and just assume the lines connect directly to the pump at the right... (its not the vac line)
Did you figure it out... Come on... you should be able too...
This should help...
figure it out? I keep forgetting to order another bulkhead fitting or i would already have it plumbed in Right next to the other too... Here is the pic showing the routing in the Battery tray...
And here they are currently in the interior, you will see the two aluminum tubes sticking through from the top right, and the rubber hose sticking out from the copper tubes, Porsche actually made it really easy to do this, because they used 2 intermediate copper pipes that connected to the heater core, then went to the firewall, i just cut them, and will flare them so i can clamp the hose to them. I still need to bend the aluminum tubes into place.
And here is my heater hose connection to the engine...
And Now the oil System...
I know the filter is Huge... It really didnt look that big in the EBAY add... And it was pretty cheap, $70 shipped with the K&N!!!! The lines look beatup on this side cause i used a sharpie to mark them where they needed tweeking...
And here is the lines... They have plenty of clearance from the wheels, and they will have a protective cover, the wheel well with be used only in the rear, it will be cut where it curves forward and i will rivet aluminum strips that i can bolt to the body to keep the liner in place, same in the front. This will protect my filter/lines. And the sensor is just waiting on a 90 bend so i can reclock it.
You can see better in this one, the metal spot where the lines disappear is where the bulkhead 90 bends are and the rubber lines connect on the other side.
IT appears i dont have a pic of my oil lines from the engine to the 90... Ill remedy that tomorrow... They were a pain in my ***...
Mark
03-02-2011, 07:03 AM
#5
On The Tree
Thread Starter
iTrader: (8)
Join Date: May 2009
Posts: 199
Likes: 0
Received 0 Likes
on
0 Posts
Thanks guys I really appreciate the compliments! By the time i was done wiring that engine... I was ready to beat my head into the wall... And so was my wife... I would bring the harness into the house at night and work on it in front of the TV... She would wake up in the morning to a large mess...
Mark
Mark
03-02-2011, 07:03 AM
#6
On The Tree
Thread Starter
iTrader: (8)
Join Date: May 2009
Posts: 199
Likes: 0
Received 0 Likes
on
0 Posts
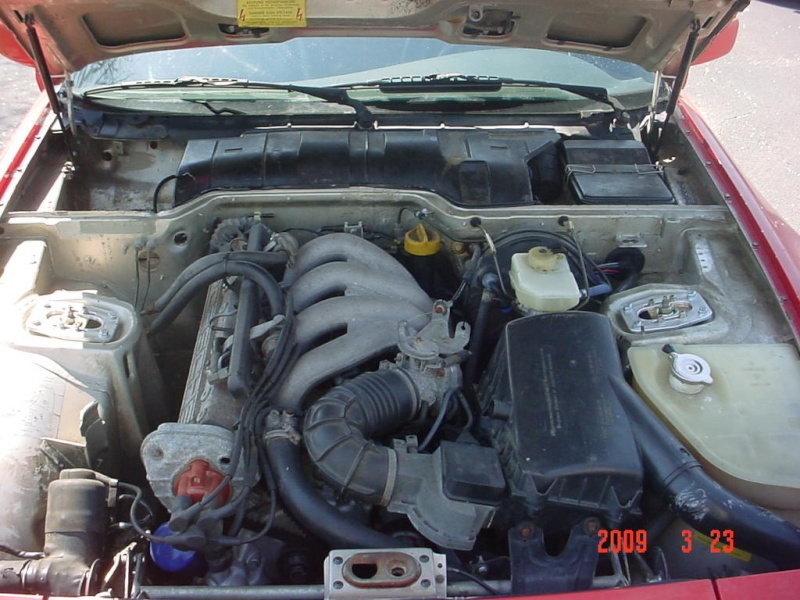
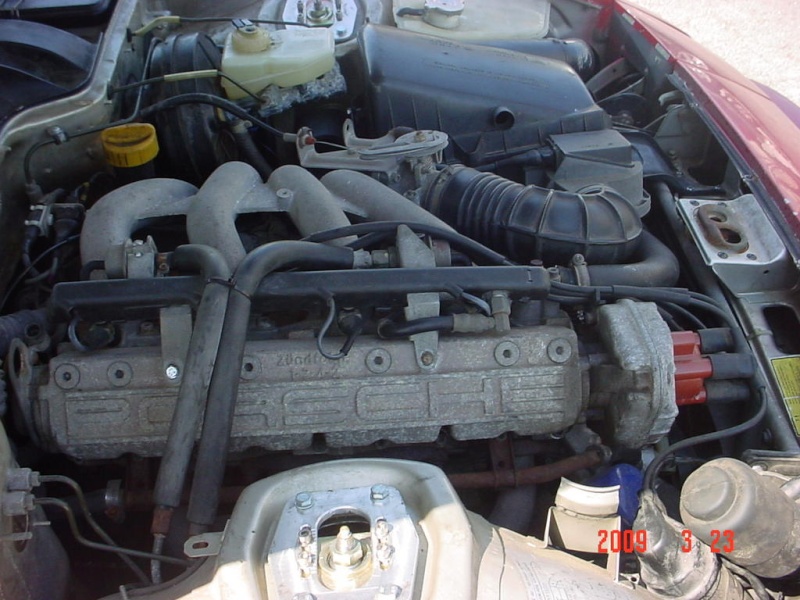
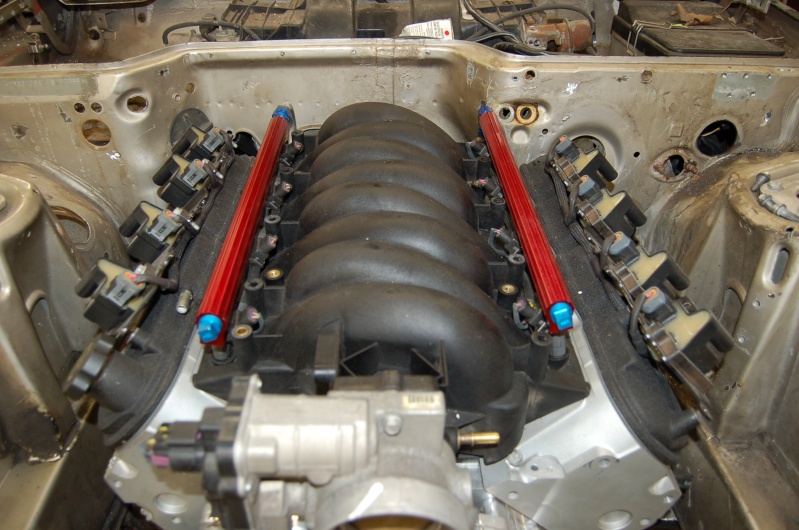
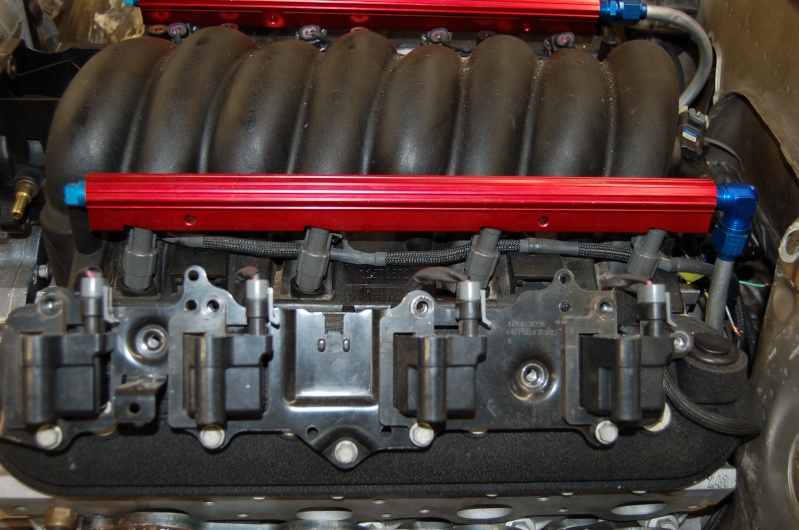
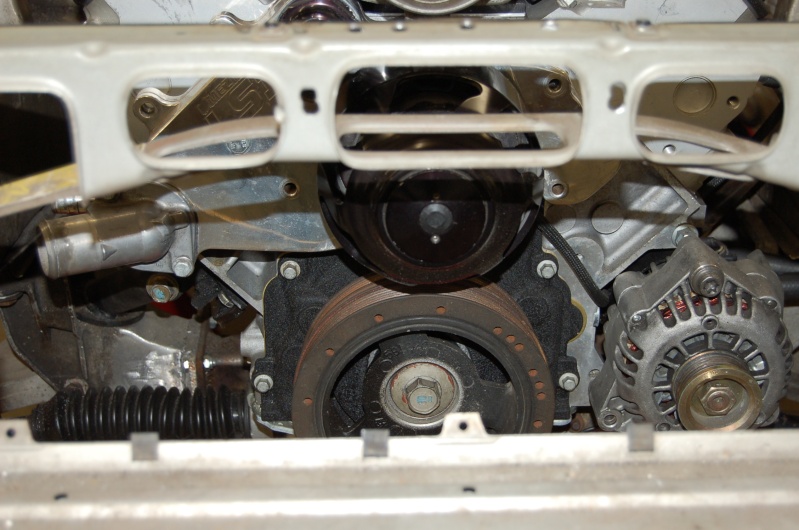
Engine
My "Deal" of an engine... That was full of oil dry/kitty litter.... Well I owe a friend a Pat on the back... I was going to blow off the little i could see.... IT was a good thing he convinced me to crack it open... My lifter trays were FULL of it... So i had the block dipped, and checked with a light honing... Everything was actually really good for 90K, rod bearings were just worn into the first layer... Block still had cross hatch. I had my crank dipped also, reassembled everything with stock sized bearings, and updated rod bolts. I did upgrade from my stock 853 Heads to a set of 241 that had a recent valve job and 918 springs. And i ended up replacing my stock LS1 intake with a LS6, and a late LS6 cam, so basically I paid $600 for a complete shortblock with no bearings and no cam... So the rebuild kit i sourced was a Fel-Pro kit i believe with FM bearings I think... (its been almost a year...) that was pricey... Like the best price i found was $600.... so my engine cost me...
Block/Crank/Pistons $600
Heads 241 $200
Intake - LS6 $300
Cam - Late LS6 $200
REbuild kit $600
Meizere EWP $500
oil pan & pickup $320
Then there is the misc stuff like... Coils, rcokers, sensors, bolts, Alternator, Starter......
I will eventually add it all up.... I forgot to mention... My goal is a running driving, clean example of a swap... for under 10K Im stll well within that buget, because my initial investment in the car as you saw in my history when i was driving it as a 4cyl with the brake and suspension upgrades was only $3000.... Then i sold the engine for $400<----- HUGE mistake BTW......
More later....
Trending Topics
03-02-2011, 07:01 PM
#8
TECH Enthusiast
iTrader: (1)

Join Date: Jan 2006
Location: Charlotte, NC
Posts: 581
Likes: 0
Received 0 Likes
on
0 Posts

Hmmm I see another transplant in NC...
How do you like the Raleigh area?
I moved from Chicago to Charlotte - the winters are much better here.... lol.
Awesome looking swap!
How do you like the Raleigh area?
I moved from Chicago to Charlotte - the winters are much better here.... lol.
Awesome looking swap!
03-02-2011, 08:22 PM
#9
On The Tree
Thread Starter
iTrader: (8)
Join Date: May 2009
Posts: 199
Likes: 0
Received 0 Likes
on
0 Posts
If you do a 944 swap, feel free to ask any questions, there is a WORLD of info just floating in my head... I am honestly NERVOUS of finishing this project... I could possibly never sleep again... I go to sleep every night thinking of the "Next Step"
Mark
03-02-2011, 08:27 PM
#10
On The Tree
Thread Starter
iTrader: (8)
Join Date: May 2009
Posts: 199
Likes: 0
Received 0 Likes
on
0 Posts
Awesome, I was in MI, NE of Detroit. I actually went to NTI, one of the few to be successful from what i here. That is a Beautiful area, I lived in Mooresville, Man.. Such a nice area..
I live about 20 minutes south of Raleigh, and i LOVE it... beautiful farm country all around me. Oh hell yeah, The winters are much nicer, I was complaining about how cold our winter was, till i talked to my buddy back home and he told me they had more snow than he had ever seen. He said you would pull up to an intersection and couldnt see around the corner the snow was piled so high!!!
Thanks for the compliment!!!
Mark
03-02-2011, 08:32 PM
#11
On The Tree
Thread Starter
iTrader: (8)
Join Date: May 2009
Posts: 199
Likes: 0
Received 0 Likes
on
0 Posts
HOLY $#**!!!!!! who ever said dont add up your reciepts... they were right... ill still be done for less than 10K... But ouchie...... so far this swap including full engine rebuild has cost me $6700, that doesnt inlcude the $3000 I had in the car Pre-swap, but that also doesnt factor a few things i sold... so my 10K goal is going to be tight!!!
Mark
Mark
03-02-2011, 09:55 PM
#13
On The Tree
Thread Starter
iTrader: (8)
Join Date: May 2009
Posts: 199
Likes: 0
Received 0 Likes
on
0 Posts
Mark
03-02-2011, 09:57 PM
#14
TECH Enthusiast
iTrader: (9)
Join Date: Mar 2008
Location: IL
Posts: 698
Likes: 0
Received 0 Likes
on
0 Posts
Awesome thanks Ms Mark!
I've got a complete integrated harness from Painless (PN 60608) for my car, so I've got to custom fit everything else on the harness to my car anyways, so why not make it like yours!
I've got a complete integrated harness from Painless (PN 60608) for my car, so I've got to custom fit everything else on the harness to my car anyways, so why not make it like yours!
03-02-2011, 10:54 PM
#15
On The Tree
Thread Starter
iTrader: (8)
Join Date: May 2009
Posts: 199
Likes: 0
Received 0 Likes
on
0 Posts
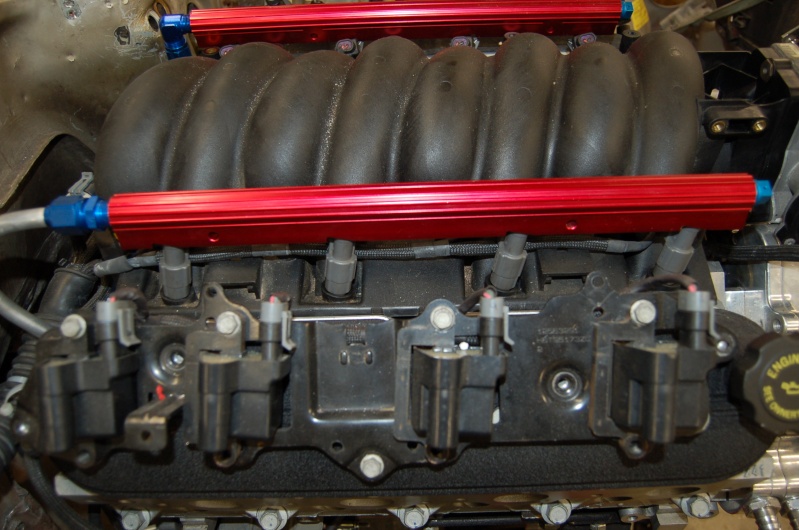
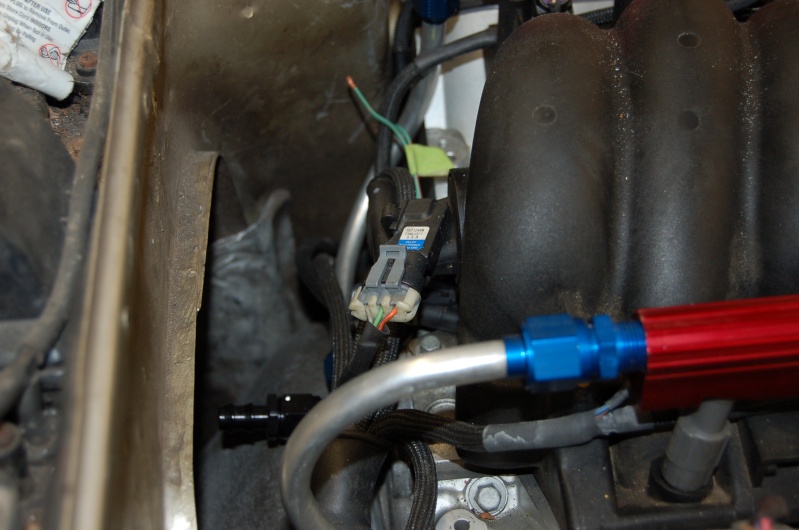
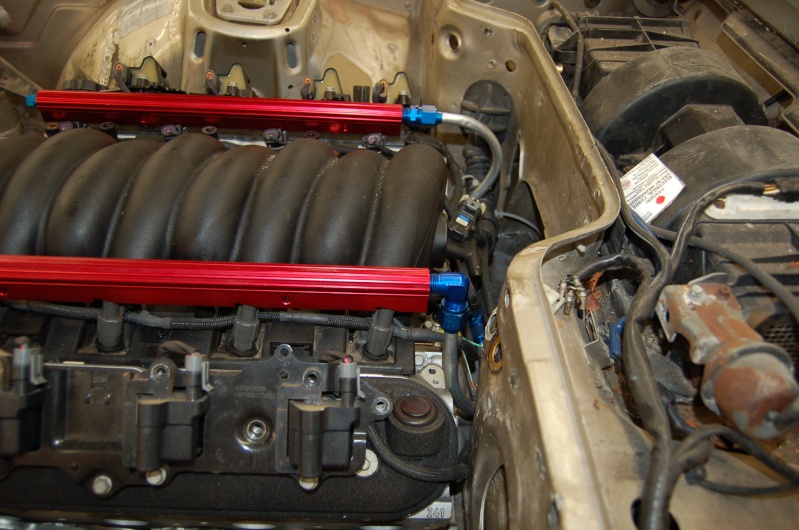
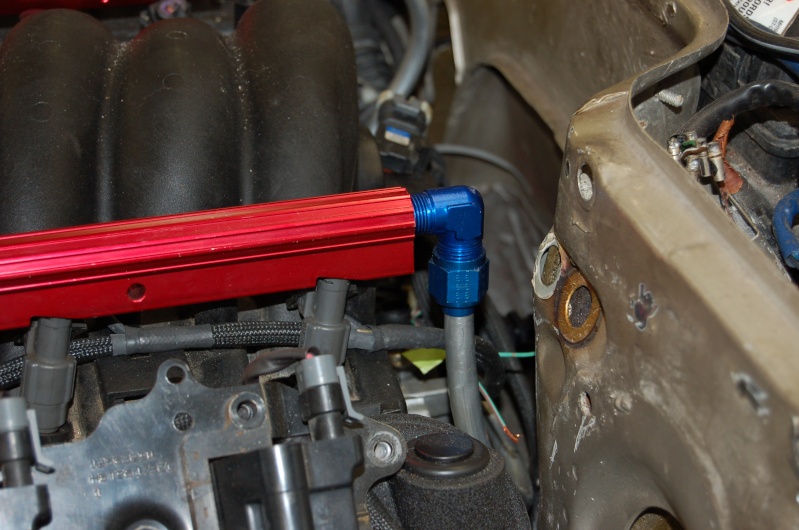
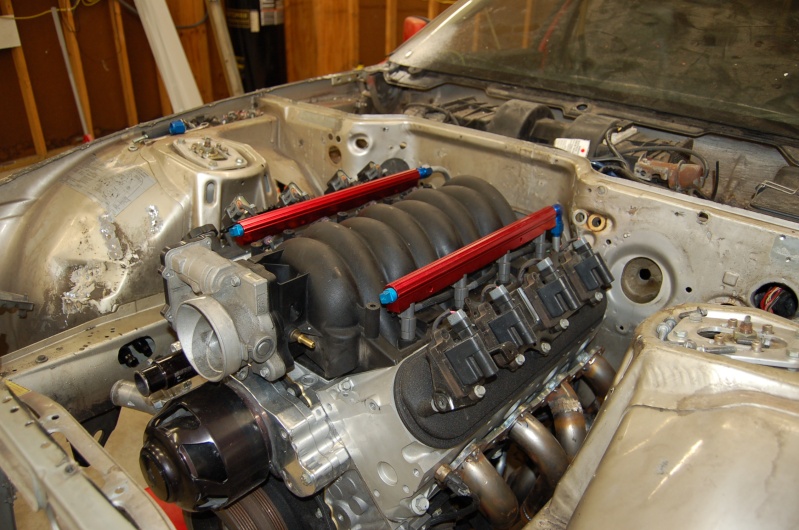
Here Ya Go. Please keep in mind I am currently working on the fuel system and have the wires on the back of the intake really messed up, they actually bundle up nicely tight against the back of the intake. Only other thing i need to do is attach the harness in certain spots like the harness coming from the EWP.


Any others just ask
Any others just ask
Last edited by Marky522; 03-02-2011 at 11:14 PM.
03-03-2011, 06:55 AM
#17
On The Tree
Thread Starter
iTrader: (8)
Join Date: May 2009
Posts: 199
Likes: 0
Received 0 Likes
on
0 Posts
Hey, make sure you post up pics, I would love to see some pics of the Correct way to do it! But wait... Then i would have to pull mine back out and fix it... On second thought! Good luck, but no pics.... 
Get some pics up as you go i would love to see them!
Mark
Get some pics up as you go i would love to see them!
Mark

