
LT1 Ram Air box on LS1 conversion for 85mm MAF
 08-27-2011, 12:23 AM
#1
Teching In
Thread Starter

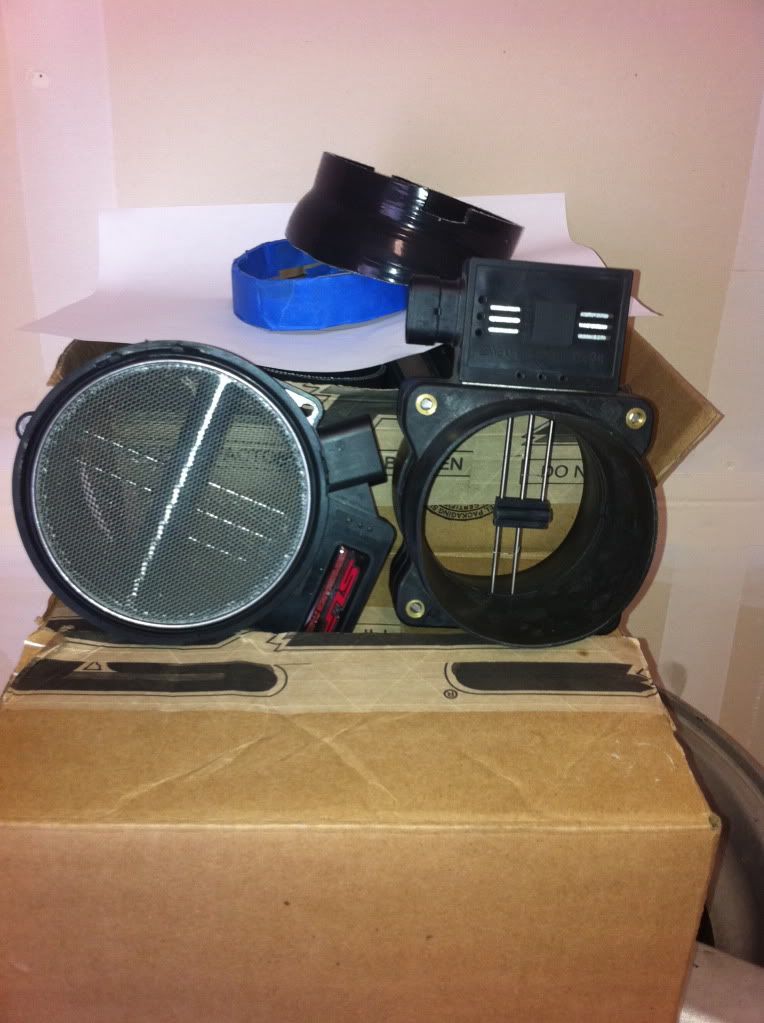
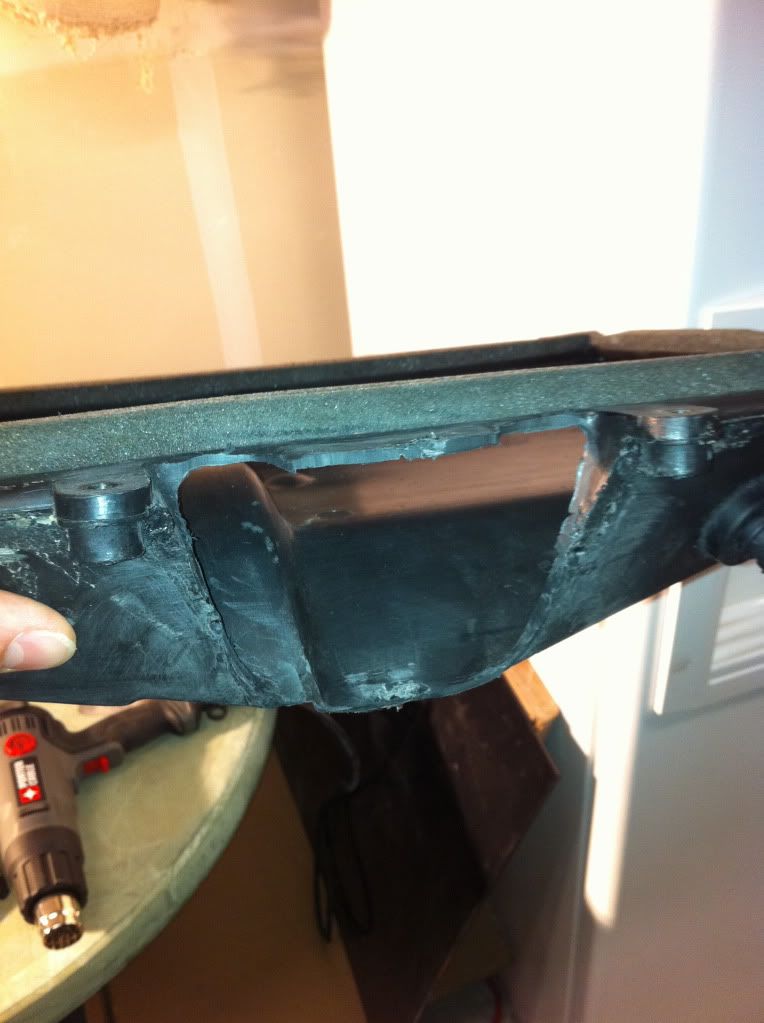
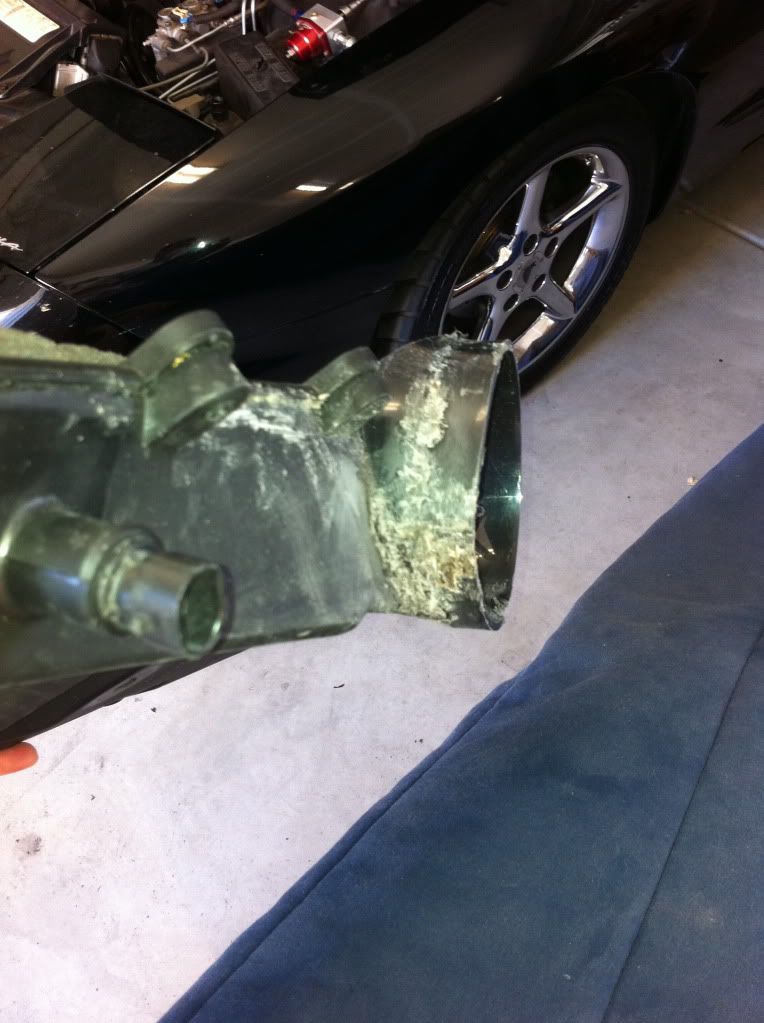
This thread is for the LS1 conversion from LT1 who would like to keep their stock Ram Air box and add the 85mm MAF. Long story short, during the LS1 conversion, the Ram Air box needed to be modified a bit to fit the new geometry of the LS1 intake track. However, the air outlet size was not changed since we used the LT1 MAF for the conversion. Shortly thereafter a couple of things happened. The MAF bit the dust and the glue that was holding the air outlet together broke apart. To the MAF problem, I figured an upgrade was in order so I bought an 85mm MAF. The problem, as you can imagine, was about a 15mm difference. Realize, of course, the 85mm is the I.D. of the MAF, not the O.D. of the housing, but you get the idea.
Therefore, the Ram Air box needed to be repaired and modified to fit the larger MAF. This time I modified the box myself and decided not to glue it back together. The 94-97 air boxes are made from PA6, or Nylon 6, and this material welds together very well. The 98-02 boxes are made from PP, or Polypropylene, which also welds together very well. The first step was to identify the plastic, which can be found somewhere on the plastic piece. Then I did some research here on LS1TECH and found Jason at the Urethane Supply Store. He gave me some great advice about plastic welding and sent some supplies my way to include nylon welding rod and 20/20 bonder/filler for finishing. I ordered the plastic from a supplier in Bakersfield. As it turns out, PA6 is not that easy to come by, but a two foot square piece was pretty reasonable and I ended up using very little for the project. For the later airboxes, PP is cheaper if you need to do any large scale mods, �large scale� being relative, of course. Some other tools I used included
BUTANE SOLDERING IRON - there are kits available designed for welding plastic. A google search will give you a host of options. The main advantage to these is keeping the material and the welding rod hot at the same time. After discussing some options with professionals, I was steered toward a hot soldering iron due to the small scale of the project. In the end, the plastic welder would have cut some time however, for over half of the project, the plastic welder would not reach into the spaces and you would need to use the soldering iron anyhow. I am going to get a plastic welder anyway just to have on hand. Nylon has a pretty high melting point when compared to PP and ABS so make sure the soldering iron is hot. I was told nothing less than 60W if you go electric. My benzomatic butane one worked well, but in hindsight, I would opt for a hotter tip.
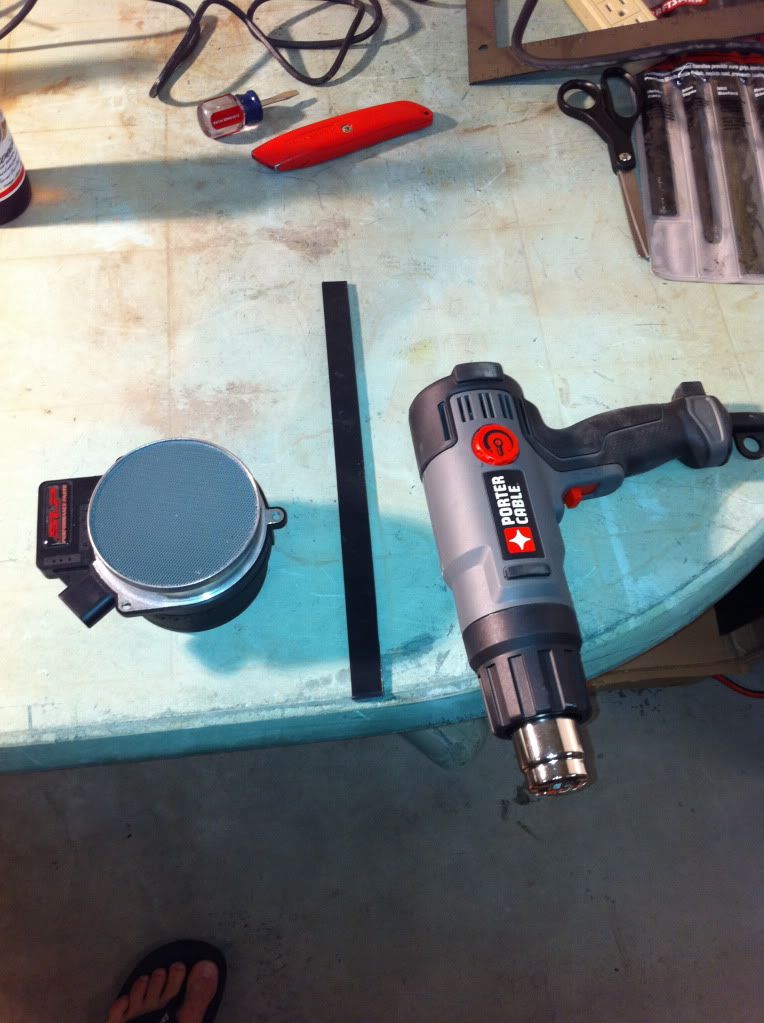
HEAT GUN - Mine was rated at over 1500 degrees F and was plenty to soften the Nylon for the bends. I also used this to pre-heat the material and the welding rod during the welding process.
I/O CALIPER
VISE GRIPS
PAPER - I was able to use the paper to build templates for the six plastic pieces that were welded together.
DREMEL TOOL - To the original tool compliment I added the high speed cutter in various shapes and sizes. The cut-off wheel and the sanding drums were used a bunch during the process.
The first order of business was to determine the angle for the air outlet duct. Due to the limited space between the throttle body and the air outlet, I decided to fit the O.D. of the MAF intake into the I.D. of the air outlet of the air box just like the OEM design. The SLP smooth bellow was to long for the fitment so I used the OEM accordion bellow. Using the calipers, I measured the O.D. of the intake of the MAF, added one-quarter of an inch for the gasket, and figured the circumference. To figure the width of the plastic piece I measured the width of the intake of the MAF and added an eighth of an inch. Finally, I cut the straight piece.
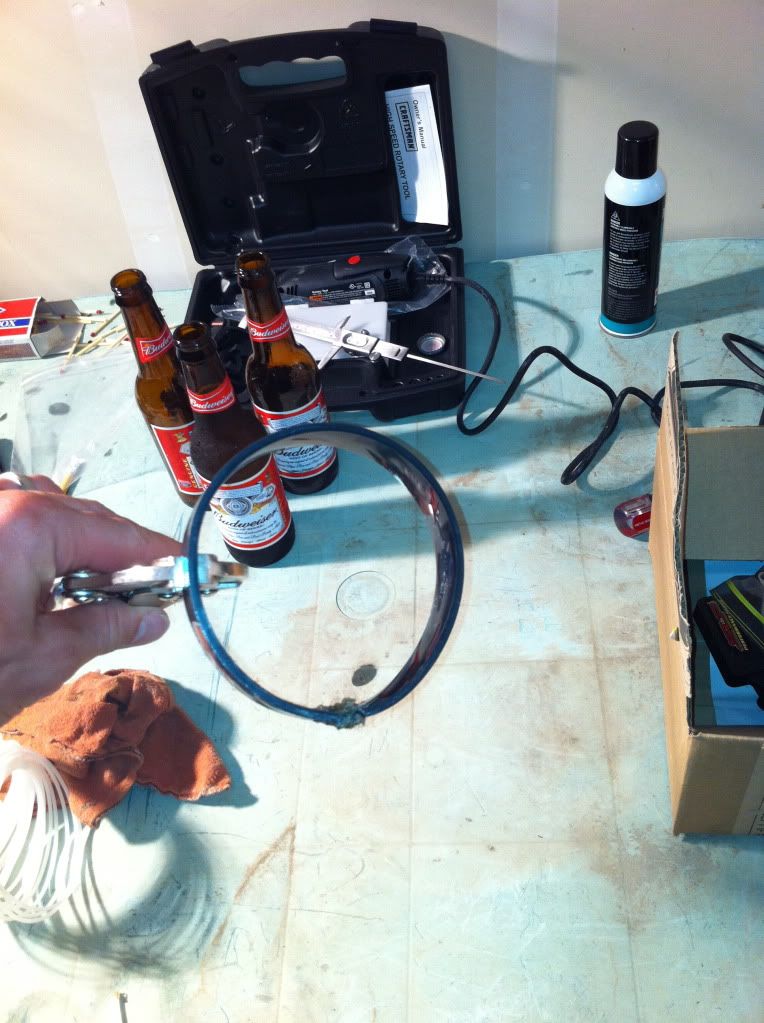
After heating the piece up with the heat gun, I bent it around the MAF and secured the ends together with vise grips. This gave me just enough room to tack the two pieces together prior to welding them.
A quick google search of �plastic welding� will yield several videos on the technique with a soldering iron. First step is to make a few grooves across the joint. Once these cool, the pieces will be secured together. From there, the principle is the same as gas welding. Get the material melted, and feed the welding rod into the joint. Through some trial and error, I found the best way for me was to heat the joint with the heat gun. Then starting from one end of the joint, I ran over the welding rod, rather than feed the welding rod into the top. The second way turns out well it is just takes much longer.
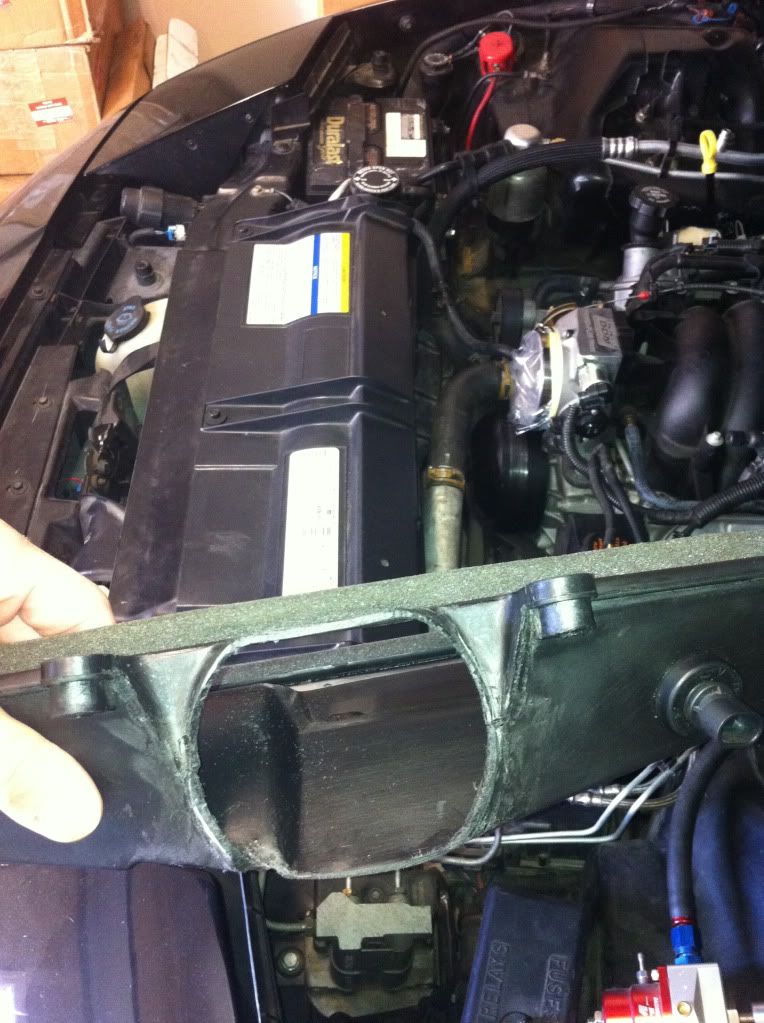
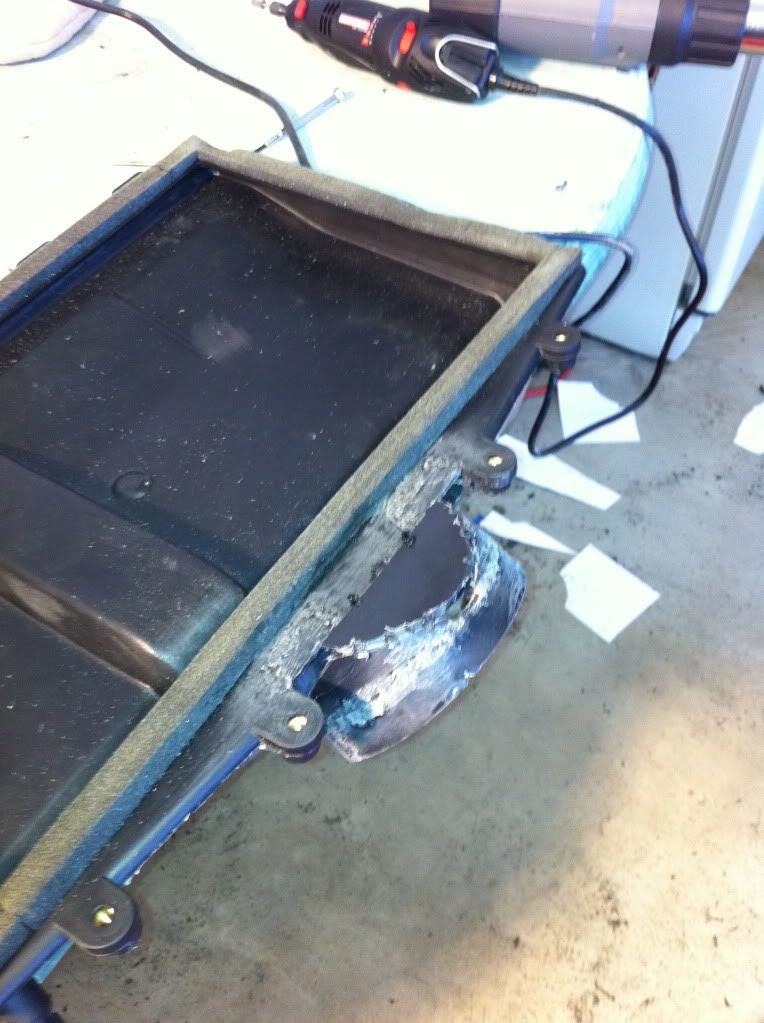
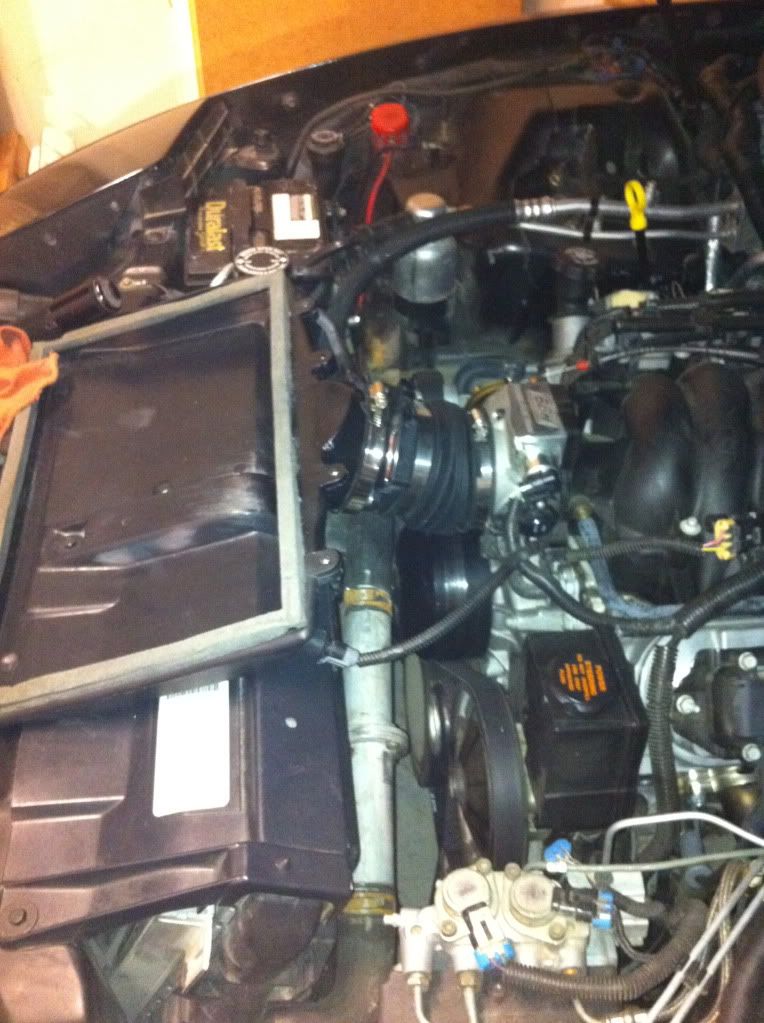
Once the MAF housing part of the air outlet was constructed, I fit the MAF in place with the air box installed. This gave me an idea of where I needed to cut the air box. Form the picture, you can see the initial and final cut on the air box. Once cut, I put the MAF in place to the desired angle and temporarily secured it with a piece of plastic.

Only five more pieces to weld. I used the paper to build a template for the two side pieces. These ran from the tack weld at the bottom of the air box to the top of the air box on each side. They left a D shaped opening which I closed up in the same fashion using paper to build a template. Finally, immediately next to the air outlet on each side, there were two small triangle opening, which I closed up with plastic.
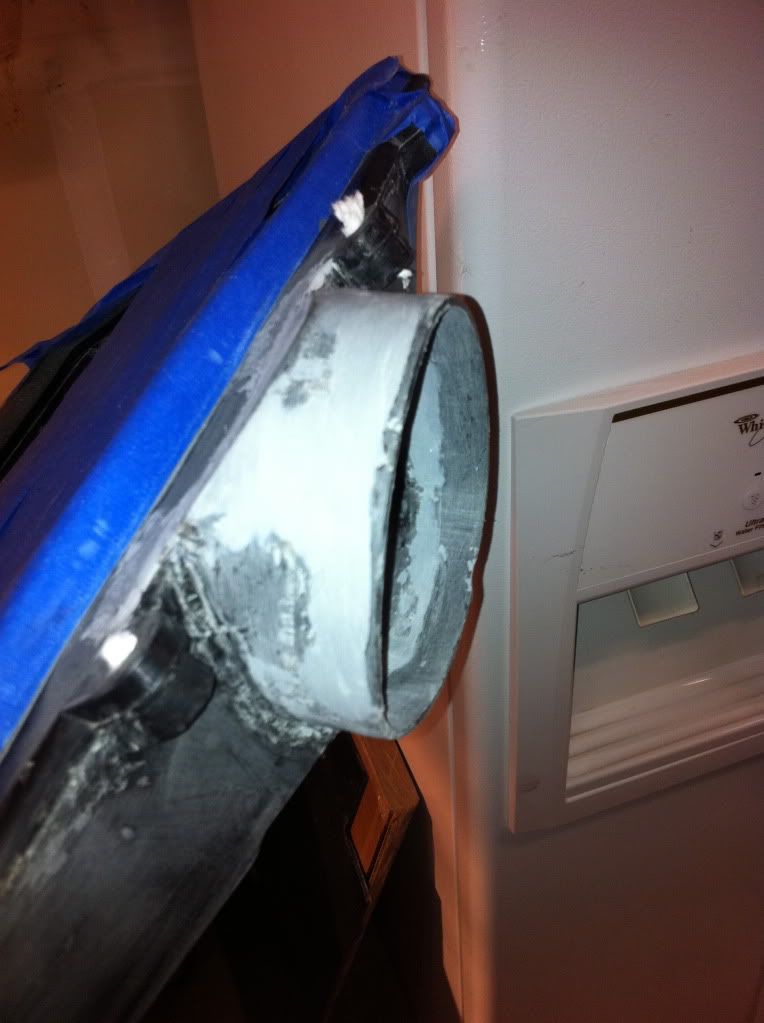
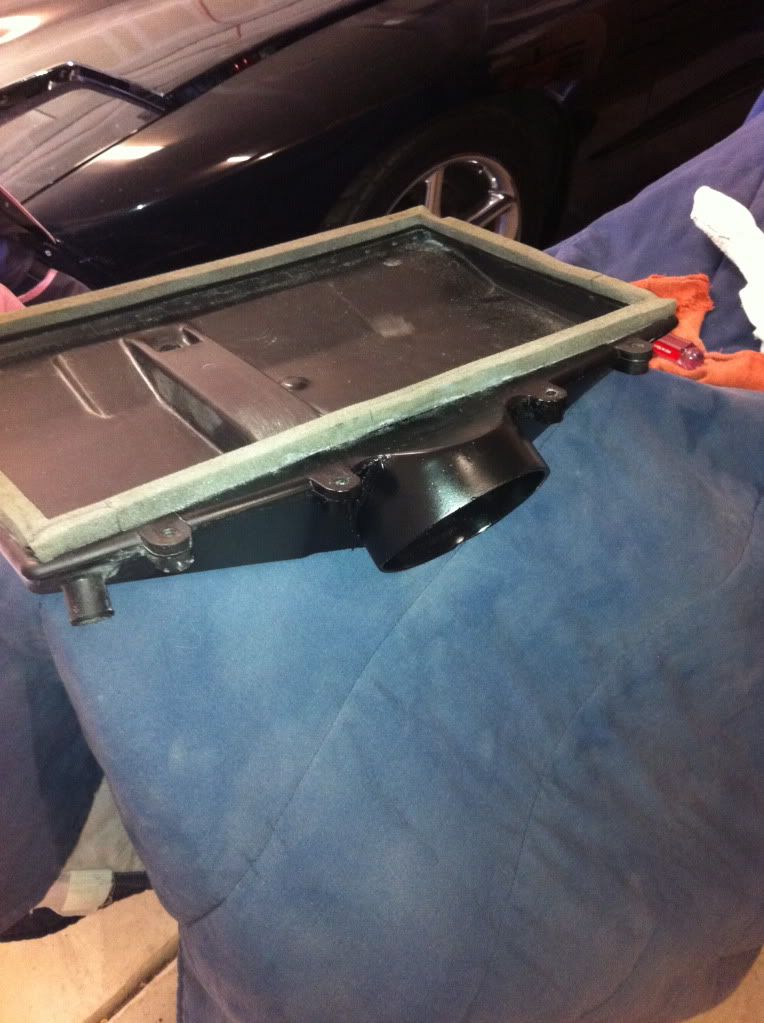
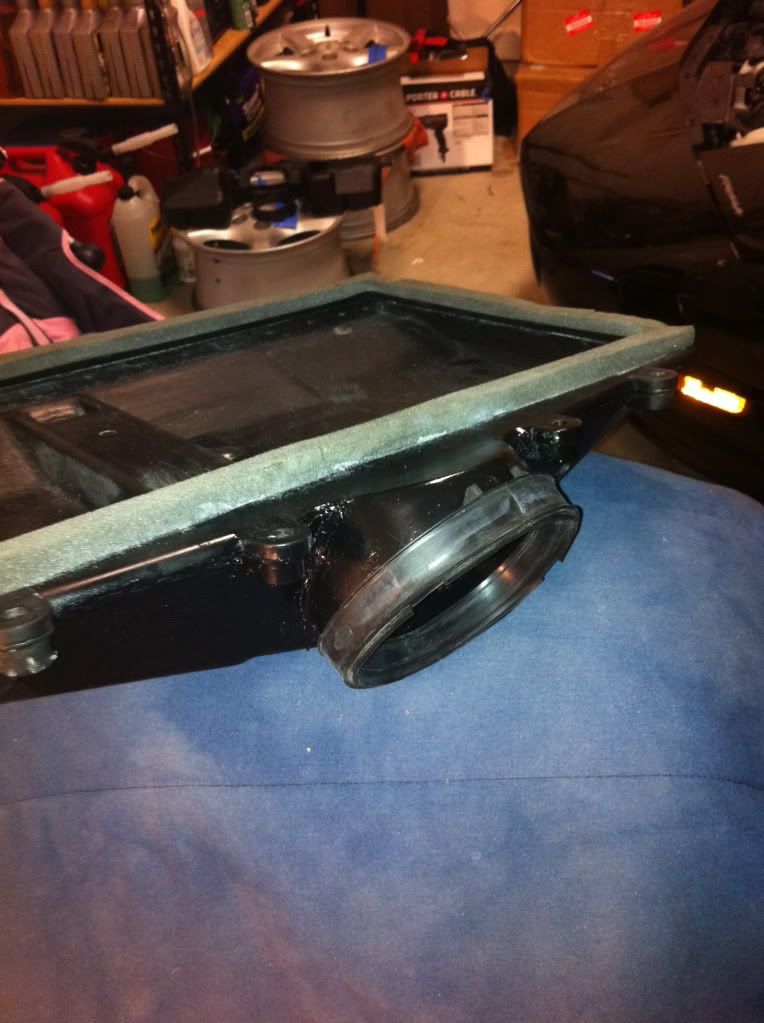
With the welding complete, I ground the welds down much like you would a metal weld, and filled the seams in with the 20/20 bonder/filler. The filler sanded well with the 80 grit Dremel sanding drum and I used 120, 240, and 800 grit to finish off the project. Finally, I primed and painted the air outlet. Satin black, as it turns out, is not the correct color choice. In the next few weeks, I plan to weld up the IAT bungs and repaint the box in flat black.

Thanks for reading if you made it this far. The goal was to keep the stock ram air box while using the 85mm MAF on the LS1. The fit is perfect for that set-up. I do not see why it wouldn�t work for the LT1 set-up either, but I haven�t tested it on an LT1. Please, I welcome any feedback or suggestions. I certainly enjoy all of the discussions on this forum in hopes that we can all learn from each other to build a better product. I have a line on a supplier that would be interested in making this product if anybody is interested. The final product would be molded, not welded, just like the OEM piece. I will keep my ears open if an interest arises.
Therefore, the Ram Air box needed to be repaired and modified to fit the larger MAF. This time I modified the box myself and decided not to glue it back together. The 94-97 air boxes are made from PA6, or Nylon 6, and this material welds together very well. The 98-02 boxes are made from PP, or Polypropylene, which also welds together very well. The first step was to identify the plastic, which can be found somewhere on the plastic piece. Then I did some research here on LS1TECH and found Jason at the Urethane Supply Store. He gave me some great advice about plastic welding and sent some supplies my way to include nylon welding rod and 20/20 bonder/filler for finishing. I ordered the plastic from a supplier in Bakersfield. As it turns out, PA6 is not that easy to come by, but a two foot square piece was pretty reasonable and I ended up using very little for the project. For the later airboxes, PP is cheaper if you need to do any large scale mods, �large scale� being relative, of course. Some other tools I used included
BUTANE SOLDERING IRON - there are kits available designed for welding plastic. A google search will give you a host of options. The main advantage to these is keeping the material and the welding rod hot at the same time. After discussing some options with professionals, I was steered toward a hot soldering iron due to the small scale of the project. In the end, the plastic welder would have cut some time however, for over half of the project, the plastic welder would not reach into the spaces and you would need to use the soldering iron anyhow. I am going to get a plastic welder anyway just to have on hand. Nylon has a pretty high melting point when compared to PP and ABS so make sure the soldering iron is hot. I was told nothing less than 60W if you go electric. My benzomatic butane one worked well, but in hindsight, I would opt for a hotter tip.
HEAT GUN - Mine was rated at over 1500 degrees F and was plenty to soften the Nylon for the bends. I also used this to pre-heat the material and the welding rod during the welding process.
I/O CALIPER
VISE GRIPS
PAPER - I was able to use the paper to build templates for the six plastic pieces that were welded together.
DREMEL TOOL - To the original tool compliment I added the high speed cutter in various shapes and sizes. The cut-off wheel and the sanding drums were used a bunch during the process.
The first order of business was to determine the angle for the air outlet duct. Due to the limited space between the throttle body and the air outlet, I decided to fit the O.D. of the MAF intake into the I.D. of the air outlet of the air box just like the OEM design. The SLP smooth bellow was to long for the fitment so I used the OEM accordion bellow. Using the calipers, I measured the O.D. of the intake of the MAF, added one-quarter of an inch for the gasket, and figured the circumference. To figure the width of the plastic piece I measured the width of the intake of the MAF and added an eighth of an inch. Finally, I cut the straight piece.
After heating the piece up with the heat gun, I bent it around the MAF and secured the ends together with vise grips. This gave me just enough room to tack the two pieces together prior to welding them.
A quick google search of �plastic welding� will yield several videos on the technique with a soldering iron. First step is to make a few grooves across the joint. Once these cool, the pieces will be secured together. From there, the principle is the same as gas welding. Get the material melted, and feed the welding rod into the joint. Through some trial and error, I found the best way for me was to heat the joint with the heat gun. Then starting from one end of the joint, I ran over the welding rod, rather than feed the welding rod into the top. The second way turns out well it is just takes much longer.
Once the MAF housing part of the air outlet was constructed, I fit the MAF in place with the air box installed. This gave me an idea of where I needed to cut the air box. Form the picture, you can see the initial and final cut on the air box. Once cut, I put the MAF in place to the desired angle and temporarily secured it with a piece of plastic.
Only five more pieces to weld. I used the paper to build a template for the two side pieces. These ran from the tack weld at the bottom of the air box to the top of the air box on each side. They left a D shaped opening which I closed up in the same fashion using paper to build a template. Finally, immediately next to the air outlet on each side, there were two small triangle opening, which I closed up with plastic.
With the welding complete, I ground the welds down much like you would a metal weld, and filled the seams in with the 20/20 bonder/filler. The filler sanded well with the 80 grit Dremel sanding drum and I used 120, 240, and 800 grit to finish off the project. Finally, I primed and painted the air outlet. Satin black, as it turns out, is not the correct color choice. In the next few weeks, I plan to weld up the IAT bungs and repaint the box in flat black.
Thanks for reading if you made it this far. The goal was to keep the stock ram air box while using the 85mm MAF on the LS1. The fit is perfect for that set-up. I do not see why it wouldn�t work for the LT1 set-up either, but I haven�t tested it on an LT1. Please, I welcome any feedback or suggestions. I certainly enjoy all of the discussions on this forum in hopes that we can all learn from each other to build a better product. I have a line on a supplier that would be interested in making this product if anybody is interested. The final product would be molded, not welded, just like the OEM piece. I will keep my ears open if an interest arises.
