My 444 CI F1x C6Z build
 08-12-2012, 02:55 PM
#1
On The Tree
Thread Starter
iTrader: (4)
Join Date: Jul 2003
Location: Hillsboro, MO
Posts: 199
Likes: 0
Received 0 Likes
on
0 Posts

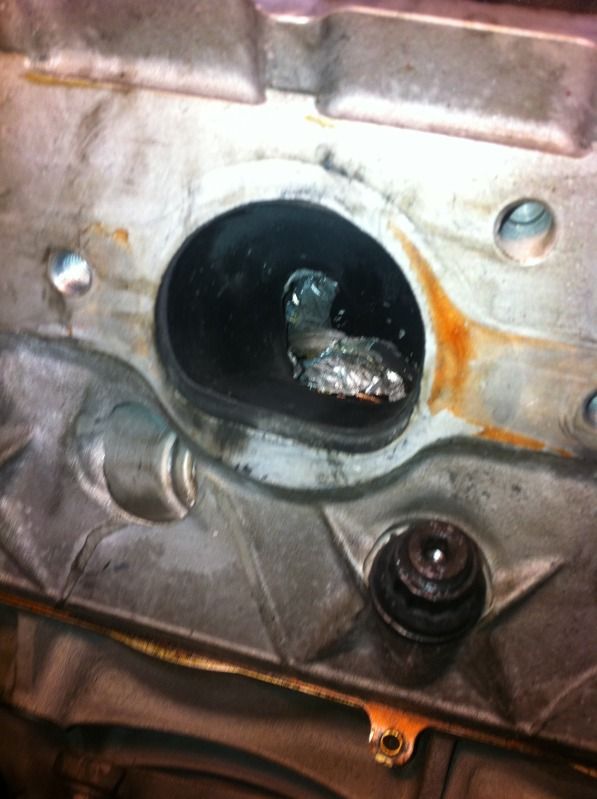
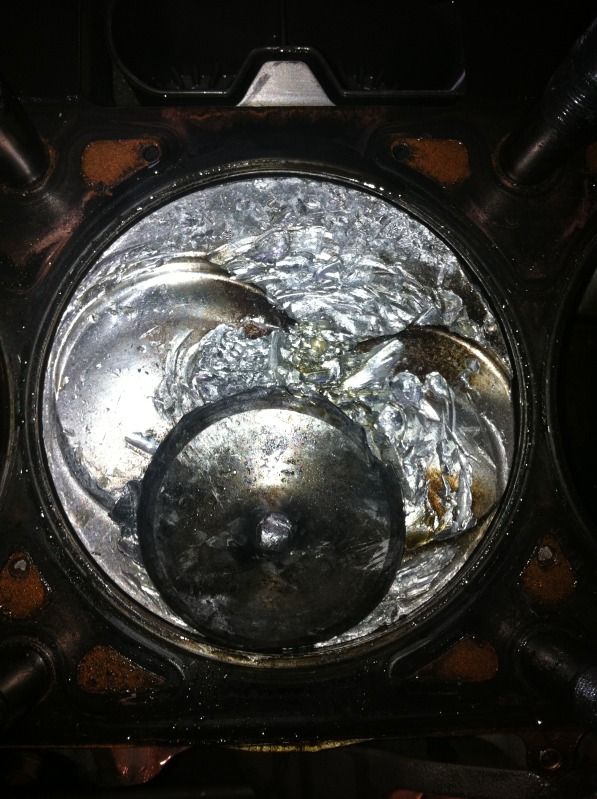
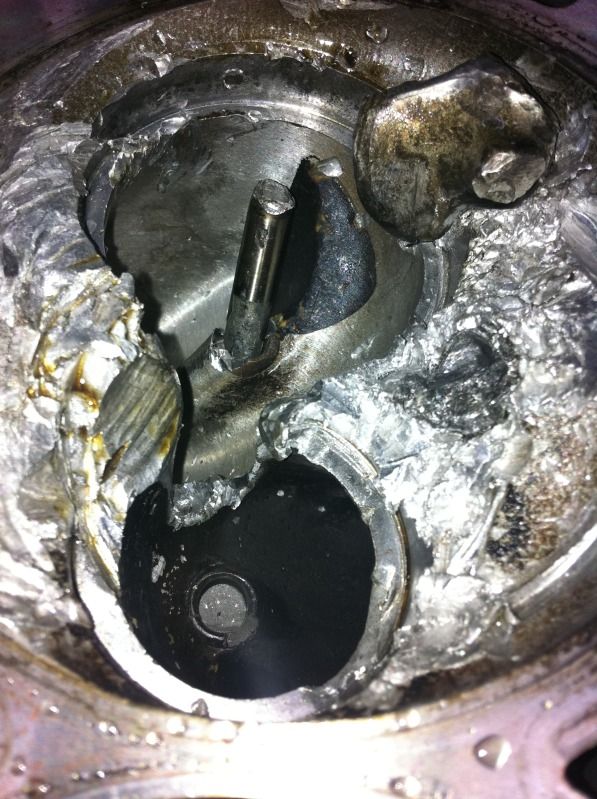
Earlier this year at the track I had a little bit of bad luck and dropped a valve on my last high compression 441 CI engine. Apparently there have been a lot of issues with the stock LS7 valve guides having excessive wear in them, even with lower mileage cars. some of the LS7 heads that have been removed for porting with only 5000 miles on them are showing a lot of valve wobble in the guide. When the valve head broke off on my engine, the damage was too bad to find out exactly what happened, but I am assuming it was from excessive guide wear also. The dropped/broken valve pretty much destroyed everything, but luckily my block was still good.
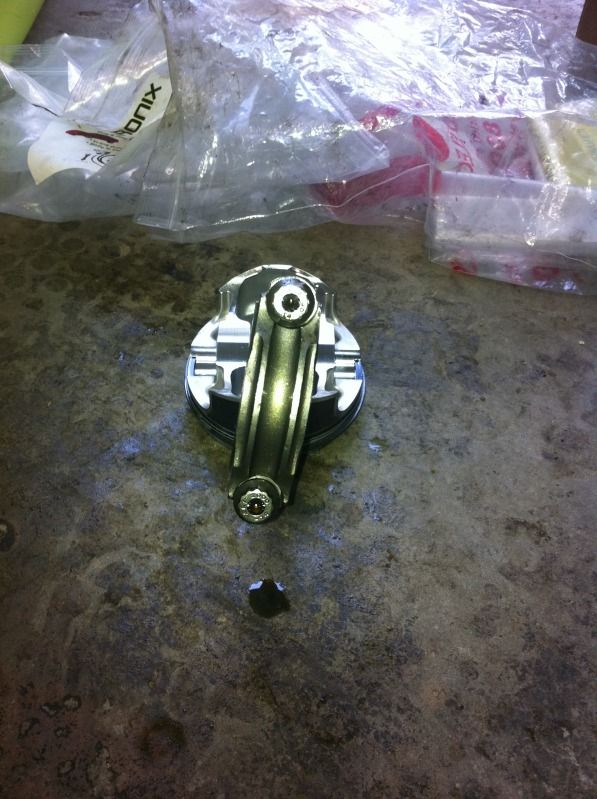
Bent my rod too
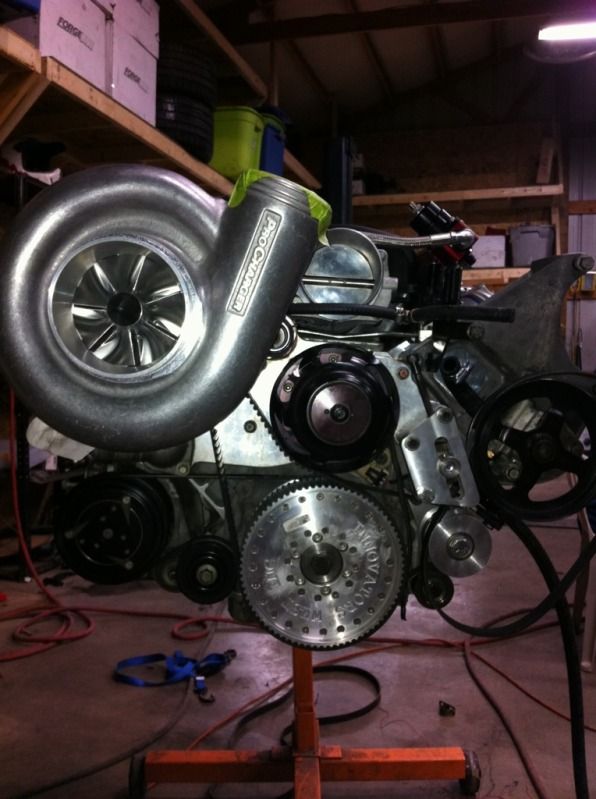
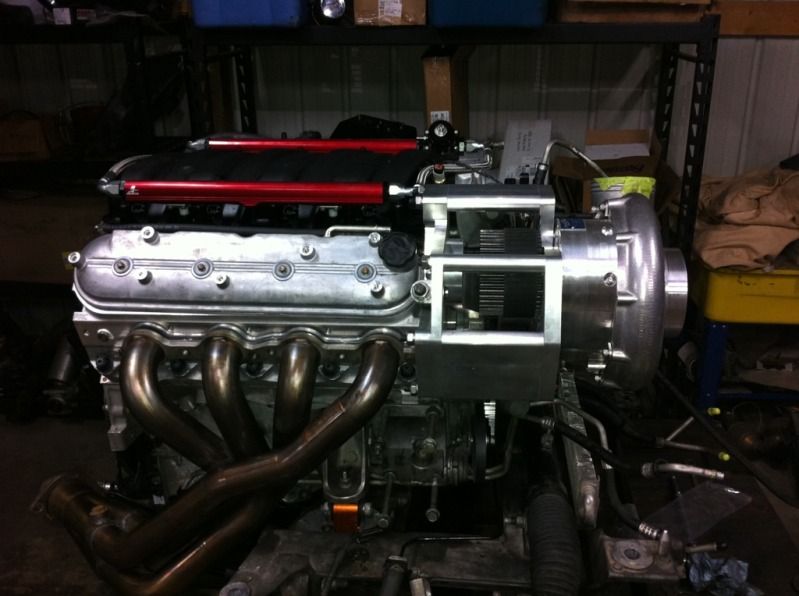
Since I was starting from scratch, I wanted to go lower compression and do a supercharger build. Procharger's new F1x fit my needs perfectly. The F1x is supposed to have similar output to an F2 with over 2000 CFM, but easier to turn than the F1r.
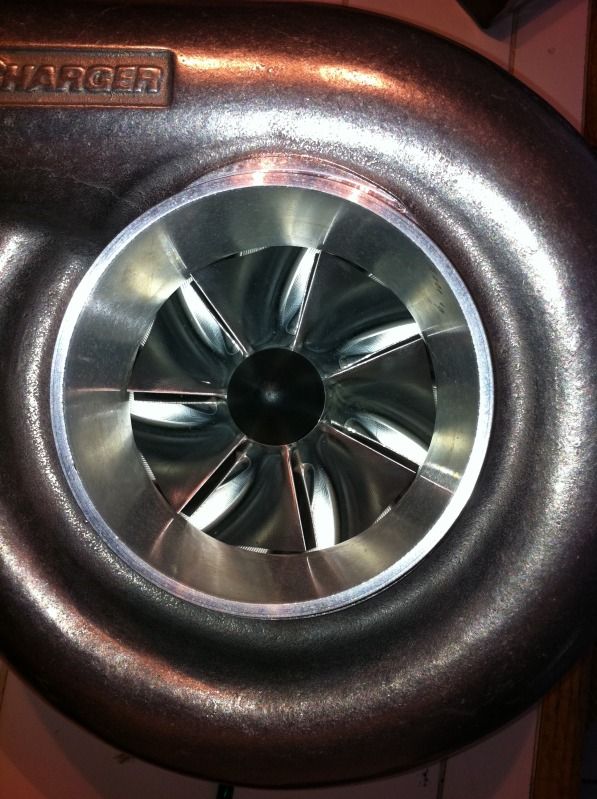
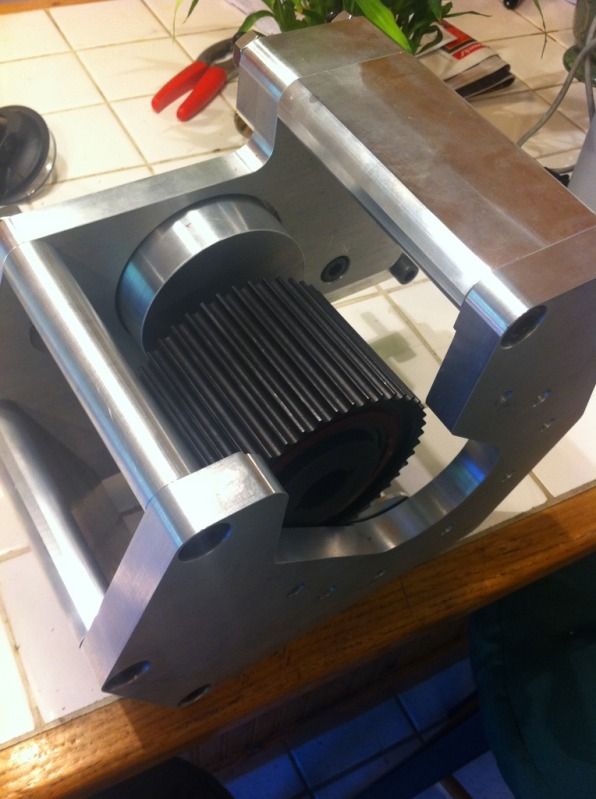
I didn't want to deal with any belt slip issues, and I wanted to keep all my accessories so I got with House of Boost to test their Cog drive for the F1x. I also went with the sprag (turns one way, free spins the other) blower pulley so it will be a little easier on belts and my crank snout.
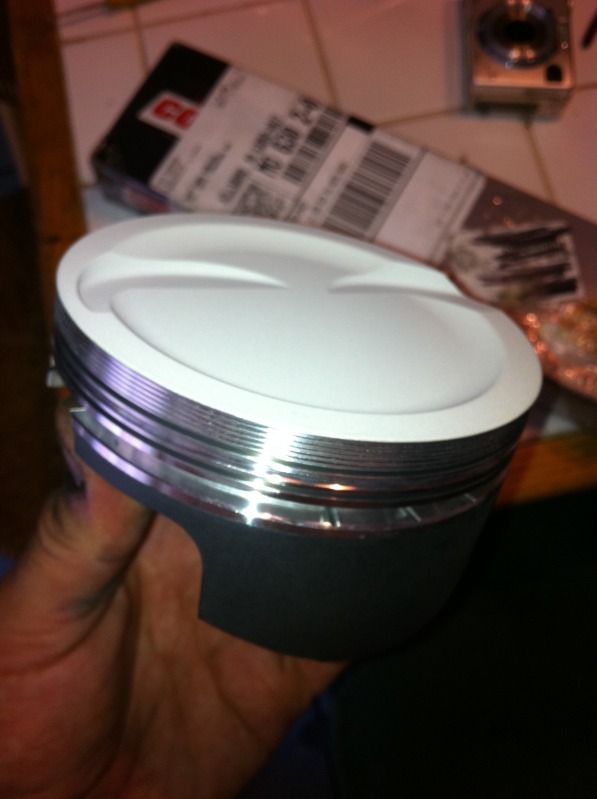
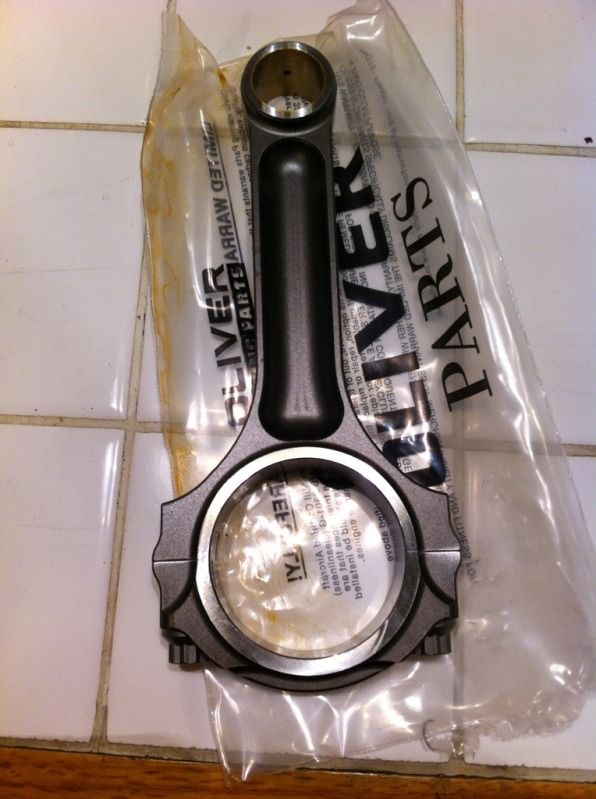
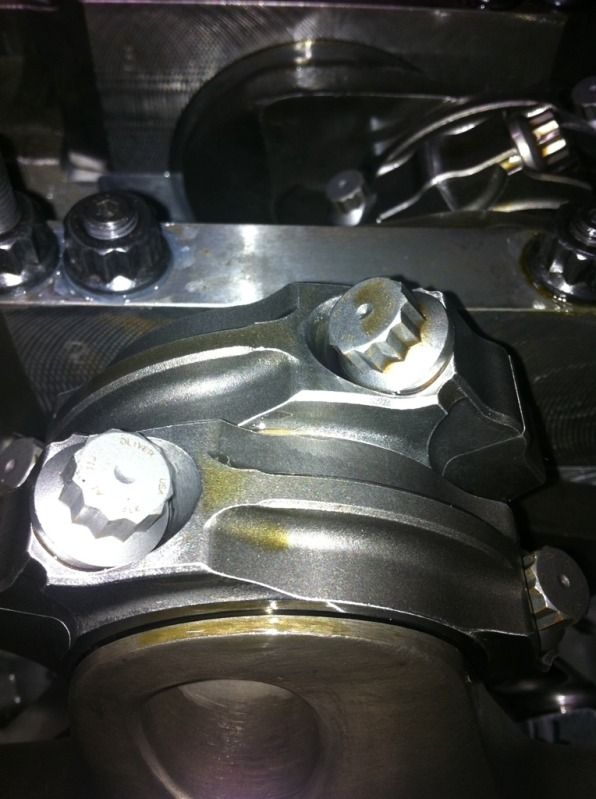
For the rotating assembly, I went with the callies 4.125" stroker crank, custom Wiseco boost pistons, Oliver billet rods, and my ERL superdeck 1 sleeved LS7 block.
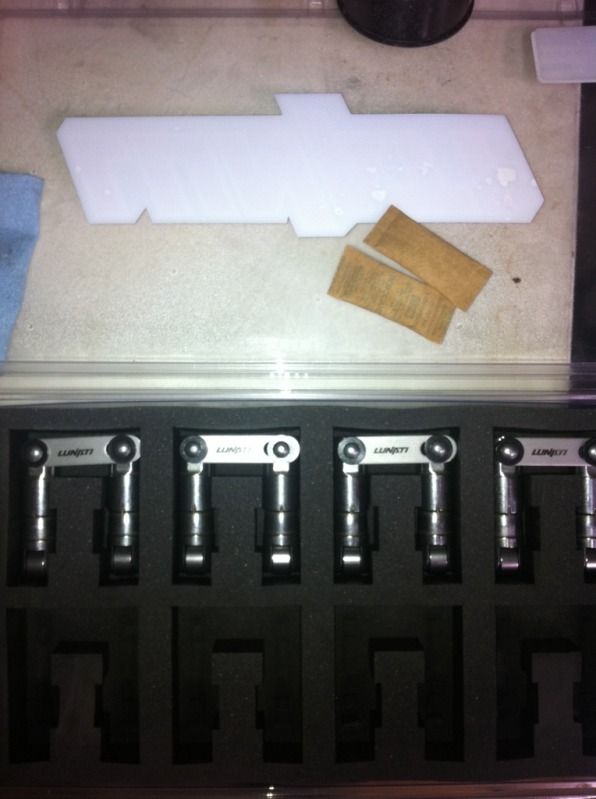
I decided to try lunati's Hi RPM linkbar hydraulic lifters this time around also.
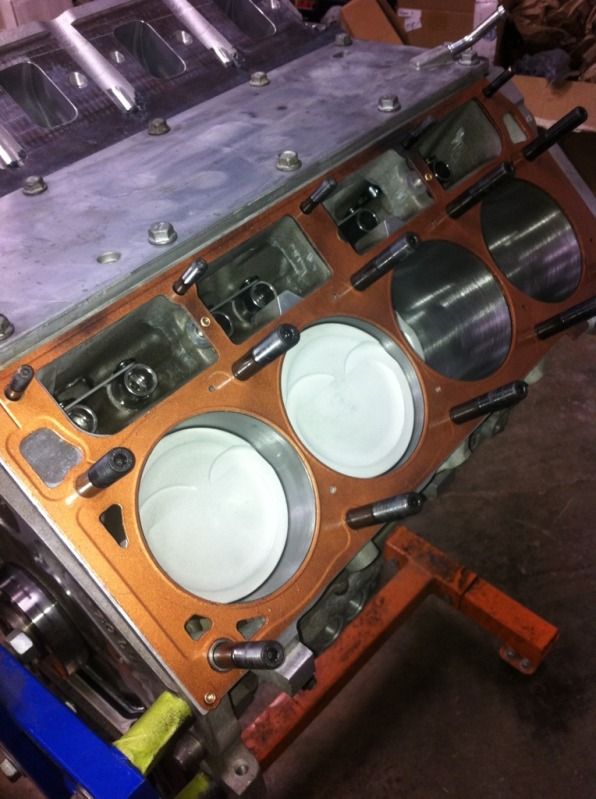
Here you can see the thicker sleeves that the ERL Superdeck 1 has, and machined for 1/2" head studs
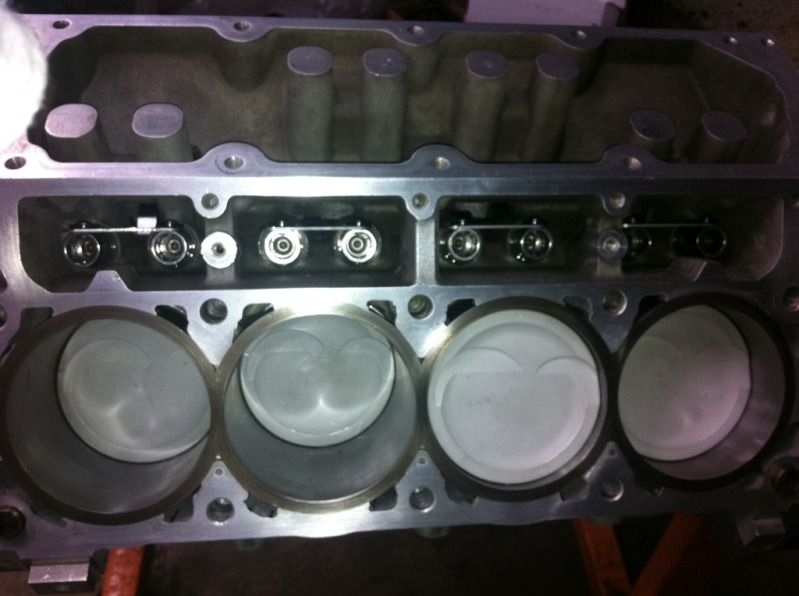
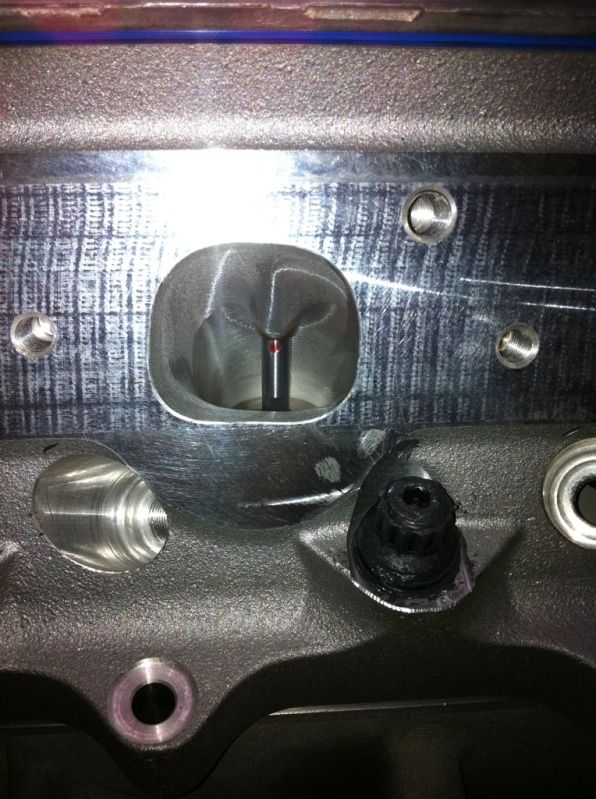
I am running Texas Speed's new PRC LS7x 285cc 6 bolt head. They are fully CNC'd with a thicker deck, 2.250" Titanium intake valves, and flow over 400 cfm! Always a great product and very helpful over there at TSP.

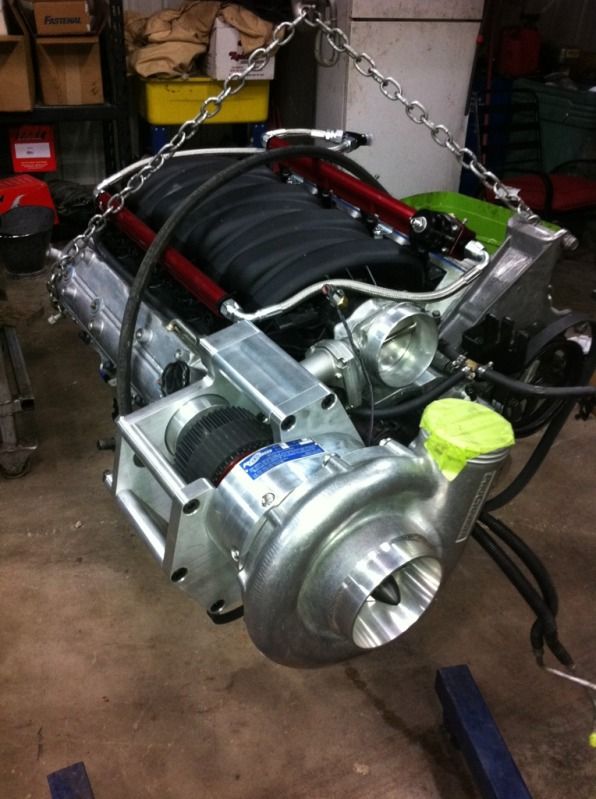
Everything Mocked up, clearanced, belt lengths figured out.
I'm running the Aeromotive Eliminator in-tank pump, but I didnt get any pics of the install...It was a late night.
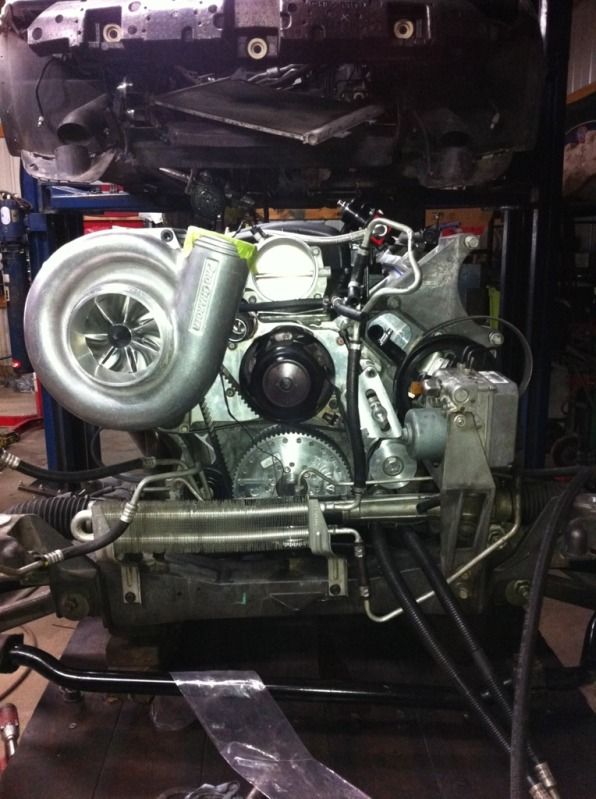
Here is a little video of it running before I loaded it up on the trailer to get it to the fab shop for a custom Air to water intercooler with an ice/water chest in back.
https://www.youtube.com/watch?v=YiIf...1&feature=plcp
I'll update soon with some pics of that process
Bent my rod too
Since I was starting from scratch, I wanted to go lower compression and do a supercharger build. Procharger's new F1x fit my needs perfectly. The F1x is supposed to have similar output to an F2 with over 2000 CFM, but easier to turn than the F1r.
I didn't want to deal with any belt slip issues, and I wanted to keep all my accessories so I got with House of Boost to test their Cog drive for the F1x. I also went with the sprag (turns one way, free spins the other) blower pulley so it will be a little easier on belts and my crank snout.
For the rotating assembly, I went with the callies 4.125" stroker crank, custom Wiseco boost pistons, Oliver billet rods, and my ERL superdeck 1 sleeved LS7 block.
I decided to try lunati's Hi RPM linkbar hydraulic lifters this time around also.
Here you can see the thicker sleeves that the ERL Superdeck 1 has, and machined for 1/2" head studs
I am running Texas Speed's new PRC LS7x 285cc 6 bolt head. They are fully CNC'd with a thicker deck, 2.250" Titanium intake valves, and flow over 400 cfm! Always a great product and very helpful over there at TSP.
Everything Mocked up, clearanced, belt lengths figured out.
I'm running the Aeromotive Eliminator in-tank pump, but I didnt get any pics of the install...It was a late night.
Here is a little video of it running before I loaded it up on the trailer to get it to the fab shop for a custom Air to water intercooler with an ice/water chest in back.
https://www.youtube.com/watch?v=YiIf...1&feature=plcp
I'll update soon with some pics of that process


Trending Topics
 08-13-2012, 04:04 AM
#13
On The Tree
Thread Starter
iTrader: (4)
Join Date: Jul 2003
Location: Hillsboro, MO
Posts: 199
Likes: 0
Received 0 Likes
on
0 Posts
Thanks guys. I don't think anyone really knows for sure what max HP the blower makes. I've heard everything from 1200 rwhp and Ive heard some of the big boys making over 1500 rwhp. Since I went with the sprag pulley on the supercharger, I had 3 choices of pulley combos...18, 25, and max 30 psi. I didn't want to run around the street with everything maxxed out so I went with the 25 psi pullies. I'm not sure what it will make, But I am guessing around 1200 RWHP. I am running ID 1000 injectors, and plan to be pump gas and meth up to 1000 RWHP, and race gas when I start to lean on it 1000 +
08-13-2012, 06:57 AM
#14

Very nice build, this is going to be interesting! Bob
__________________
ATI ProCharger and Moser Sales 260 672-2076
PM's disabled, please e-mail me
E-mail: brutespeed@gmail.comob@brutespeed.com
https://brutespeed.com/ Link to website

ATI ProCharger and Moser Sales 260 672-2076
PM's disabled, please e-mail me
E-mail: brutespeed@gmail.comob@brutespeed.com
https://brutespeed.com/ Link to website


 08-13-2012, 09:17 AM
#19
TECH Regular
iTrader: (21)

Join Date: Apr 2005
Location: WISCONSIN
Posts: 492
Likes: 0
Received 0 Likes
on
0 Posts
wow badass. question though, Is it clocked right. I dont know how you are going to get any hose on the outlet and still able to close the hood. It might not be as close as it looks in the video. To me something doesn't look right.
08-13-2012, 09:42 AM
#20
On The Tree
Thread Starter
iTrader: (4)
Join Date: Jul 2003
Location: Hillsboro, MO
Posts: 199
Likes: 0
Received 0 Likes
on
0 Posts
It wont let me multi-quote for some reason.
chuntington--this is HOB new bracket design for the F1x. I'm going to try my hardest to find any weak links
ERL--No 21 raceway yet, I'm sure you'll see the marks next time you are out this way!
Venom--I think it will make around 1050-1100 rwhp at 18 psi on pump gas and meth. I have a product that will allow me to have full boost adjustability, so anything over 18 psi I plan to run race gas and meth. More on how I'm going to do that later on.
Josepy--the supercharger is not exactly clocked right, but it will be in that location. I have the custom Dewitts radiator made for big superchargers with the top two rows taken out....It is a VERY nice piece BTW. I plan to come off th supercharger with a 120 degree rubber elbow and go over the radiator with 3.5' pipe down to the air to water intercooler that will be where the front crashbar is now...It will be taken out, and a tubular crashbar will be made in its place. Then come out of the intercooler, over the radiator and a couple 90's to put a "dog leg" in the charge pipe to clear the SC outlet and into the throttle body. It will be a custom OS speed density tune with no MAF or O2's. My reason for going over the radiator instead of the conventional "down and around" way is because I didn't want to reduce down any of the charge piping and I didn't want to smash any pipe or junctions or get rid of my front swaybar where the charge pipe would have to go between the subframe and swaybar. Much less pipe this way and it boost should be almost instantaneous.
Last edited by lifted99GMC; 08-13-2012 at 09:50 AM.