
LS1 Engine Upgrades in 68 camaro
 09-24-2012, 12:39 PM
#1

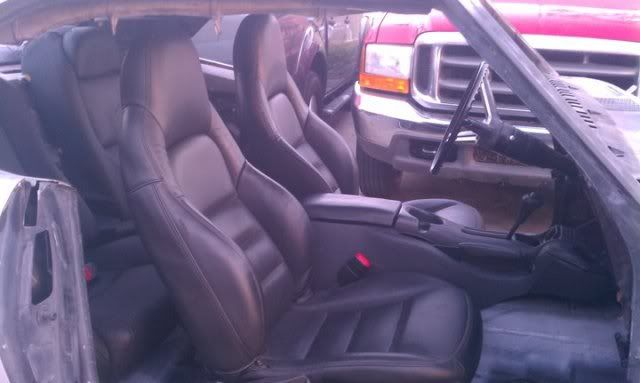
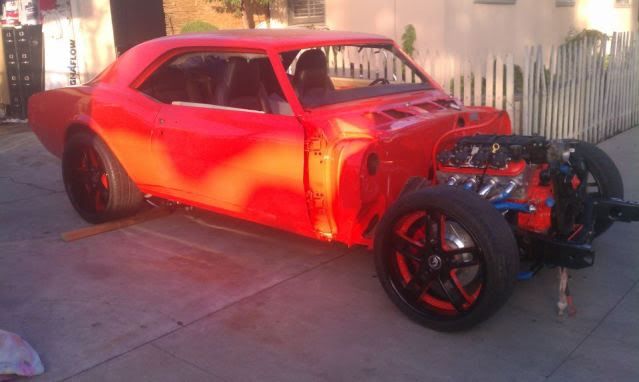
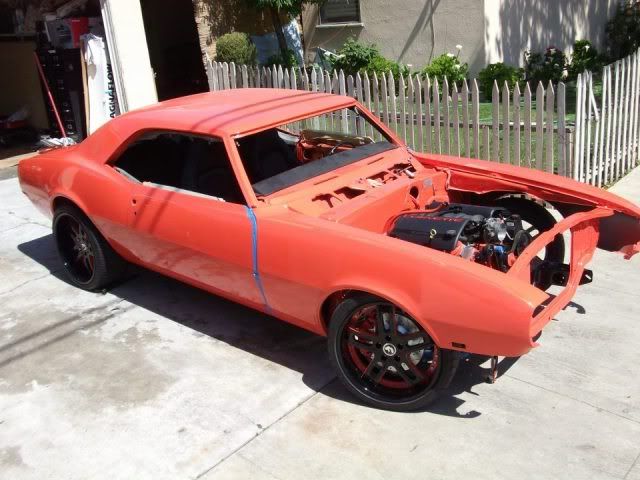
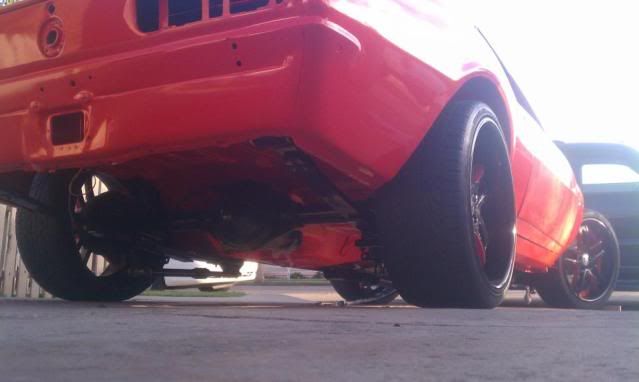
I have been building this 68 Camaro for over 2yrs Pro touring style but more curiser and hit the autocross and roadcorss maybe 2-3times yr and im at the point where i decided to upgrade my LS1 why not rite!
The LS1 is still stock but i have been buying parts for a few months so far this is what i already have.
Engine/Trans - 1999 Camaro SS LS1/4L60E 80k miles
Rear end - 1974 Nova 10 bolt 8.5 posi w/ 3.73 gears
BRP Muscle Rods - Full length headers
MagnaFlow - Full 2.5" Staineless Steel w/X-pipe
Marathon - Radiator
LS6 Intake
243 Heads (stock)
TSP 228R Cam (110 LSA), TSP 7.400 Rods, Pac 1218 springs
LS6 Oil pump (stock)
ProGear Adj. Timing chain/gear set
TCI - SSF 3500 Stall Converter
MSD 8.5 spark plug wires
Things I still need -
Engine Tune (Frost or Dyno)
Trans Cooler IDK what size
Hydro boost brake unit
ALL the gaskets and new belt
DRIVE SHAFT
Under Drive pully (Not sure on this yet)
MAF Sensor
Harness
Fuel lines 3/8"
O2 sensor
Other random ****
I think i have everything covered let me know what you guys think i should add and how much RWHP this combo will be putting down.
Last edited by Stilo; 09-24-2012 at 12:50 PM.
 09-24-2012, 01:17 PM
#2
Sounds like a good solid combo and your car is beautiful. Not sure how you plan to wire it, but I used the how to guide on lt1swap.com...gives you all the pinouts and color codes to make a stock harness into a standalone system.
09-25-2012, 07:00 PM
#6
You should be close with that setup....if I were you I'd clay the heads to check your piston to valve clearance and then mill the heads down to bump your compression up a little while not taking too much off to where you run your ptv clearance too tight....also I like the .040" mls gaskets to keep the quench nice and tight.
If you know what your doing you can also go in and do some porting on the heads to get them flowing better.
If you know what your doing you can also go in and do some porting on the heads to get them flowing better.
09-26-2012, 10:40 AM
#7
TECH Apprentice
iTrader: (1)
Join Date: Aug 2008
Location: Va Beach
Posts: 304
Likes: 0
Received 0 Likes
on
0 Posts

Fwiw, I mounted my ECU in the area were the dash speaker was above the vent controls. I ran the harness through the tunnel just behind the firewall and it all worked out fine. Nice car BTW! I plan to RR and AutoX mine, I went with a Fluid Damper 10% UD pulley.
Trending Topics
09-26-2012, 11:05 AM
#8
Cool so i think i should have enough slack to mount it somewhere under my dash, How did you like the 10% UD pully im still debating on getting one not sure if a 10% or 25% was it an easy upgrade can i just do it later or should i do it all at once?
09-26-2012, 11:06 AM
#9
You should be close with that setup....if I were you I'd clay the heads to check your piston to valve clearance and then mill the heads down to bump your compression up a little while not taking too much off to where you run your ptv clearance too tight....also I like the .040" mls gaskets to keep the quench nice and tight.
If you know what your doing you can also go in and do some porting on the heads to get them flowing better.
If you know what your doing you can also go in and do some porting on the heads to get them flowing better.
09-26-2012, 12:48 PM
#10
12-12-2017, 02:40 PM
#12
 12-12-2017, 03:03 PM
#13
TECH Fanatic
iTrader: (1)

Join Date: Jul 2006
Location: MPLS MN
Posts: 1,215
Likes: 0
Received 0 Likes
on
0 Posts
your 243 heads are good but i'd send them in for a stage 1 or stage 2 valve porting job. ls2 timing chain (50% better than ls1). imo i'd go with an ls1 tech sponsor stall over tci. just my one cent.
12-13-2017, 11:45 AM
#15
Unfortunately i had all those parts installed yrs ago and now i just want keep moving forward and get it on the road, the heads where resurfaced and had a multi angel valve job, its just going to be a good cruiser i can beat on from time to time.


 12-26-2017, 03:13 PM
#18
TECH Senior Member

Joey, there is no blocking plate on the water pump for the heater core. I see two open holes.
