
1967 Pontiac Tempest (A body) LS1 Swap UPDATED W/VIDEO
 12-12-2012, 07:56 PM
#1
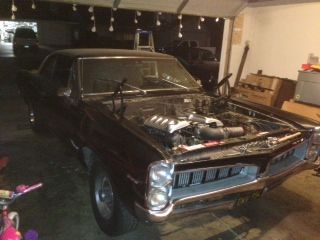
So I have been lurking around here for a while learning a TON about what is necessary to swap an LS1 into my 67' Tempest. I am nearly done with my swap so I thought I'd throw it up here and talk about some of the ups and downs of this build. My car is a 67' Tempest Custom that was originally built with a 326ci motor. When I bought this car it had a 400ci motor with a bottom end knock. After about 2 months of fun with the car the harmonic balancer destroyed itsef along with the timing chain. Upon tear down I discovered spun rod bearings and a few other issues that gave me a great excuse to do this swap.
Through some friends I was able to secure an LS1 that already had an LS6 intake, MS4 cam, uprgraded valve springs, and dynatech LS1 headers (for a Nova - for sale BTW...). This came out of a 1970 Nova that was running low 12's in the 1/4 mile, and after taking a drive in that car I was blown away and ready to take on this swap. That was 3 months ago.
After getting some pointers from my friend Hector, I had some idea of what I needed to do for this swap, so I first ordered up a high stall torque converter and the flexplate adapter to work with the TH350 I had pulled out of my Tempest. I've also installed truck accessories with a Dirty Dingo idler relocation bracket and a Dirty Dingo smaller power steering pulley to clear my steering box (big issue with these A-body swaps). This is all installed I will add pics of that later tonight....
(UPDATE: I put together a complete parts list for this swap here https://ls1tech.com/forums/conversio...arts-list.html)
Flexplate with adapter
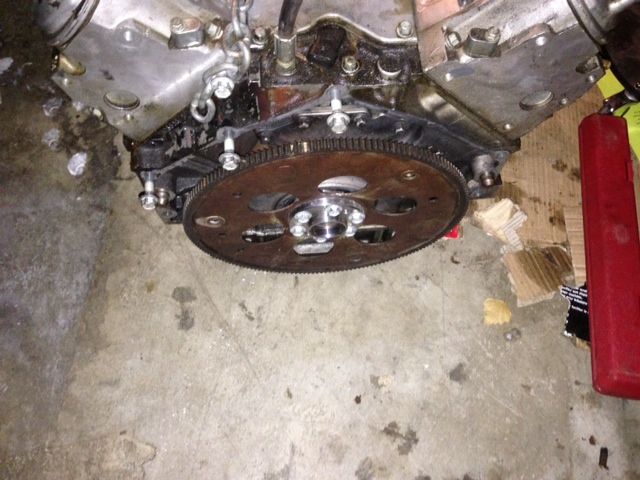
3500 Stall converter

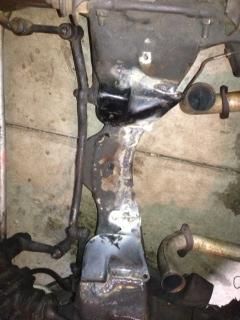
Then I test fit the motor and the pan hit the cross member (I knew this was going to happen), so I decided to notch the cross member and move the motor mounts back about 1/2" so the transmission would line up in the stock location.
Notched Crossmember

My buddy Tim TIG welding the motor mounts and bracing the notched section
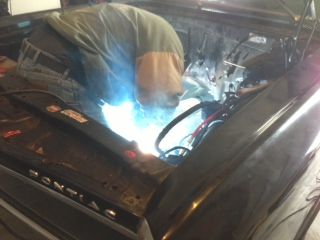
After welding, this thing isn't going anywhere
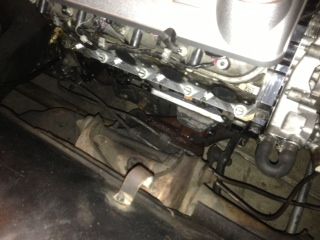
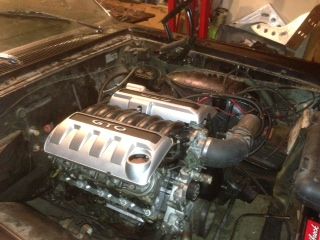
Here is the motor on the mounts after cleaning things up with a grinder
Installed with GTO Covers

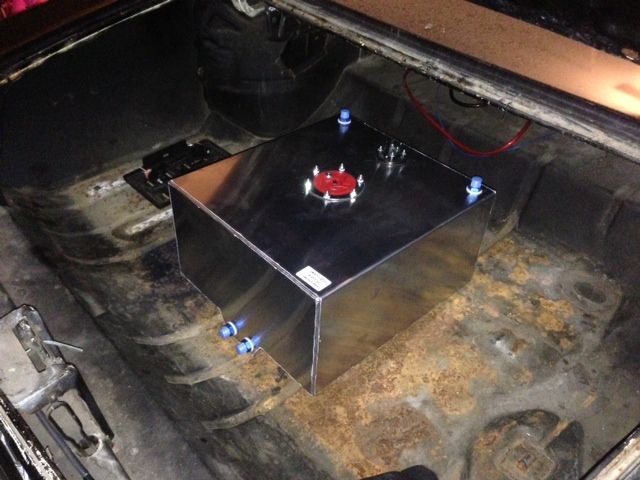
I have a fuel cell installed in the trunk - this is before I strapped it down
Lastly I am running a Bosch 044 pump and a Corvette Filter/regulator with stainless braided fuel line (pics to come after I take them tonight). I also got a radiator/fan assembly out of a 2000 camaro, I have modified my core support to fit it in (just barely!!!!). I also got my computer tuned by Texas Speed to go with all the modifications the motor has, hopefully it will come out good!!!
At this point the only thing I have left to do at this point is put the wiring harness in (already modified it) and set up some relays. If I get enough time I may have it running this weekend!!! Any tips on first time firing this bad boy up the first time????
UPDATE 02/18/2013. Finally got the car driving, had some trans issues and had to swap it out. Also had to change the crank pulley to a truck unit to be compatible with my truck accessories.
Through some friends I was able to secure an LS1 that already had an LS6 intake, MS4 cam, uprgraded valve springs, and dynatech LS1 headers (for a Nova - for sale BTW...). This came out of a 1970 Nova that was running low 12's in the 1/4 mile, and after taking a drive in that car I was blown away and ready to take on this swap. That was 3 months ago.
After getting some pointers from my friend Hector, I had some idea of what I needed to do for this swap, so I first ordered up a high stall torque converter and the flexplate adapter to work with the TH350 I had pulled out of my Tempest. I've also installed truck accessories with a Dirty Dingo idler relocation bracket and a Dirty Dingo smaller power steering pulley to clear my steering box (big issue with these A-body swaps). This is all installed I will add pics of that later tonight....
(UPDATE: I put together a complete parts list for this swap here https://ls1tech.com/forums/conversio...arts-list.html)
Flexplate with adapter
3500 Stall converter
Then I test fit the motor and the pan hit the cross member (I knew this was going to happen), so I decided to notch the cross member and move the motor mounts back about 1/2" so the transmission would line up in the stock location.
Notched Crossmember
My buddy Tim TIG welding the motor mounts and bracing the notched section
After welding, this thing isn't going anywhere
Here is the motor on the mounts after cleaning things up with a grinder
Installed with GTO Covers
I have a fuel cell installed in the trunk - this is before I strapped it down
Lastly I am running a Bosch 044 pump and a Corvette Filter/regulator with stainless braided fuel line (pics to come after I take them tonight). I also got a radiator/fan assembly out of a 2000 camaro, I have modified my core support to fit it in (just barely!!!!). I also got my computer tuned by Texas Speed to go with all the modifications the motor has, hopefully it will come out good!!!
At this point the only thing I have left to do at this point is put the wiring harness in (already modified it) and set up some relays. If I get enough time I may have it running this weekend!!! Any tips on first time firing this bad boy up the first time????
UPDATE 02/18/2013. Finally got the car driving, had some trans issues and had to swap it out. Also had to change the crank pulley to a truck unit to be compatible with my truck accessories.
Last edited by Chiropaul; 03-10-2013 at 12:12 PM. Reason: Added video, car completed
 12-12-2012, 08:51 PM
#2


"I also got my computer tuned by Texas Speed to go with all the modifications the motor has, hopefully it will come out good!!!"
I just did the same thing. I mailed my E38 ECM off to TSP yesterday. I have their VVT-3 camshaft and PRC heads so my motor should be real close to a modded 2010+ L99 Camaro. Their tune should be pretty close. At least good enough to start up and drive around with minimal problems.
I just did the same thing. I mailed my E38 ECM off to TSP yesterday. I have their VVT-3 camshaft and PRC heads so my motor should be real close to a modded 2010+ L99 Camaro. Their tune should be pretty close. At least good enough to start up and drive around with minimal problems.
 12-13-2012, 12:42 AM
#4
I just did the same thing. I mailed my E38 ECM off to TSP yesterday. I have their VVT-3 camshaft and PRC heads so my motor should be real close to a modded 2010+ L99 Camaro. Their tune should be pretty close. At least good enough to start up and drive around with minimal problems.
12-13-2012, 10:41 AM
#6
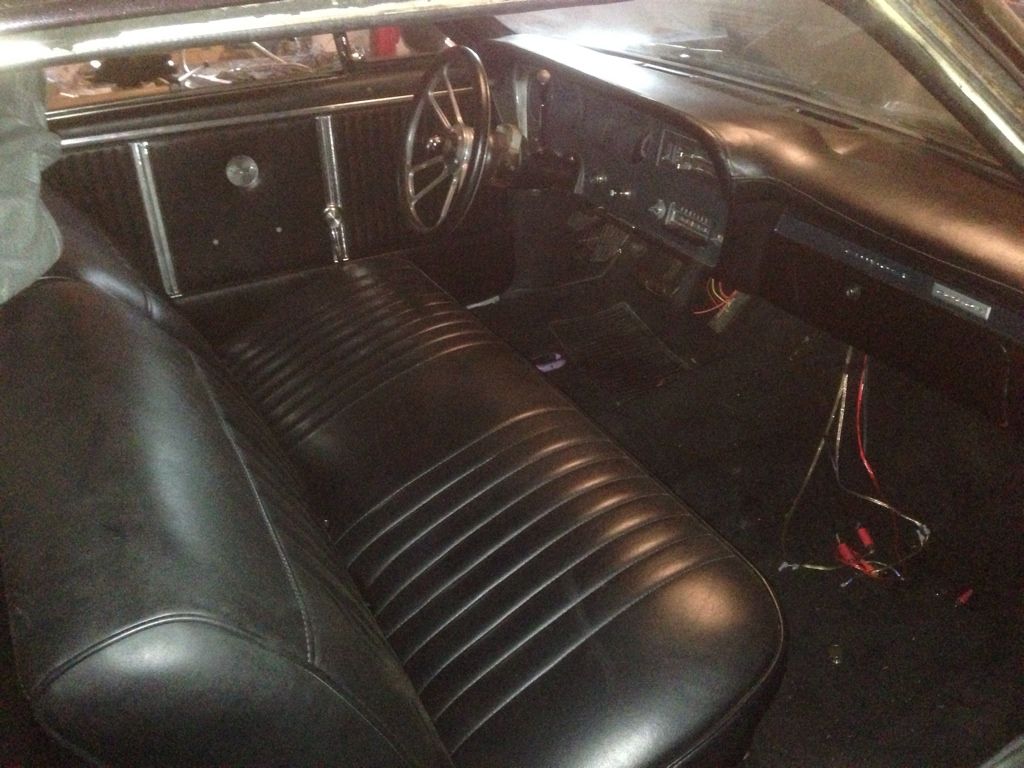
Yes the plan is for this to be my dd. I have a front disc conversion and new springs shocks sway bars and all new boxed front/rear control arms with poly bushings. When all said and done it should be a pretty nice ride. Interior is damn near brand new
12-13-2012, 12:08 PM
#7
whatcha doing for the Gauges also what Frame mounts are those out of? I can never seem to find any like that. I have a 67 LeMans that I was building and got frustrated with it. I think I bit off more than I could chew at first, so I picked up a 93 Mustang Coupe and put the Lemans on the back burner.
Trending Topics
12-13-2012, 12:26 PM
#8
whatcha doing for the Gauges also what Frame mounts are those out of? I can never seem to find any like that. I have a 67 LeMans that I was building and got frustrated with it. I think I bit off more than I could chew at first, so I picked up a 93 Mustang Coupe and put the Lemans on the back burner.
As for gauges, right now I am sticking with the stock ones. I am running a Dakota digital pulse generator that will still let me retain my stock speedo (http://www.dakotadigital.com/index.c...109/prd109.htm). Eventually I would like to get some custom gauges in there, I was liking the look of this http://www.classicdash.com/shopping/...r-Gauges..html
Do you have something you are trying to get rid of???

 12-13-2012, 01:42 PM
#10
12-13-2012, 02:10 PM
#11
After trying a couple different pulleys I ended up using one that is 96" long
Had to overpress the pulley on which was a BITCH with the lame tool I rented from Autozone. My arms are still sore from that lol
12-13-2012, 03:08 PM
#13
The pulley size was reduced from stock 6.5" to a 5.0" http://dirtydingo.com/store/product_...oducts_id=1389
After trying a couple different pulleys I ended up using one that is 96" long
Had to overpress the pulley on which was a BITCH with the lame tool I rented from Autozone. My arms are still sore from that lol
After trying a couple different pulleys I ended up using one that is 96" long
Had to overpress the pulley on which was a BITCH with the lame tool I rented from Autozone. My arms are still sore from that lol
I am also running A/C with the Kwik relocation kit but that will make the belt quite long. So I'm just doing what I can to shorten the belt up a bit.
12-13-2012, 03:43 PM
#14
On The Tree
iTrader: (1)

Join Date: Aug 2011
Location: Sacramento ca
Posts: 145
Likes: 0
Received 0 Likes
on
0 Posts
Why did you have to use the idler relocation? was it because you left the ac compressor off? I have a 67 chevelle I am starting this swap in and plan on keeping my ac so I am just curious. Like the GTO valve covers btw.
12-13-2012, 05:51 PM
#15
The engine came without AC when I got it so that A/c delete was already there. I had to use the idler relocation bracket on my truck accessories is because the stock idler location hits the LS1/LS6 intake. So I used the speedy cut to take the stock bracket off and then cleaned it up with a grinder. The dirty dingo relocation bracket takes about 2 min to install.
12-14-2012, 12:46 AM
#16
Thanks, as I also have the Dirty Dingo relocation idler pulley bracket. Also the 5" power stearing pulley from Dirty Dingo but I am wondering about putting it on with the stock dampner. Just wondering how fast the pump will turn. I am seriously considering the ATI 25% underdrive pulley.
I am also running A/C with the Kwik relocation kit but that will make the belt quite long. So I'm just doing what I can to shorten the belt up a bit.
I am also running A/C with the Kwik relocation kit but that will make the belt quite long. So I'm just doing what I can to shorten the belt up a bit.
12-14-2012, 12:14 PM
#17