
The New HID/LMC Housing Write-up **Updated**
 01-20-2013, 09:18 PM
#1

Hello there! I’ve decided that since so many questions have popped up here recently about HID’s and LMC truck housing swaps, that I would put together an all-inclusive write up for everyone to reference. I know Evilws6 has made one, however I believe a lot of his pics are broken and this would be a good refresh. So let’s get started.
This will be done in two phases since my HID’s did not get shipped quickly enough and they won’t be here till next weekend.
Here is the standard light output with fairly new sealed beams
Low/Fogs on
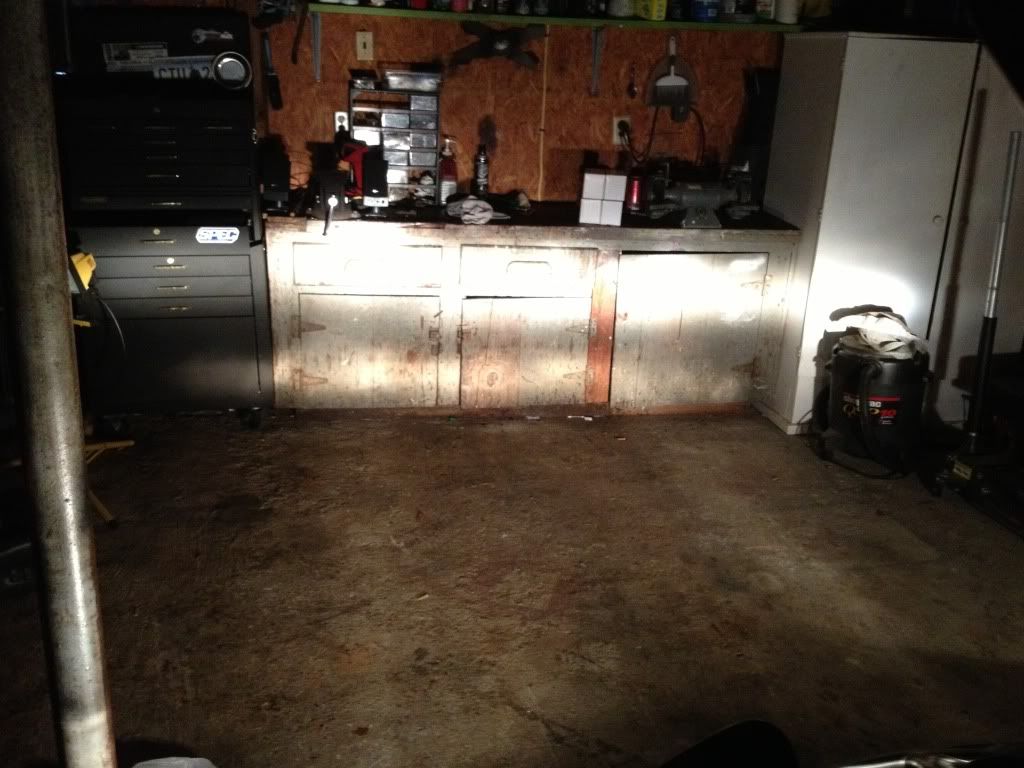
Just Low beam on

Just Fog light on
To convert from sealed beams to LMC housings you will need the following parts.
2 LMC light housing for Low beam (Part# 36-0302)
2 LMC light housings for High beam(Part# 36-0303) [You don’t need to do this if you don’t want to upgrade your high beams]
Everything else I did is optional!
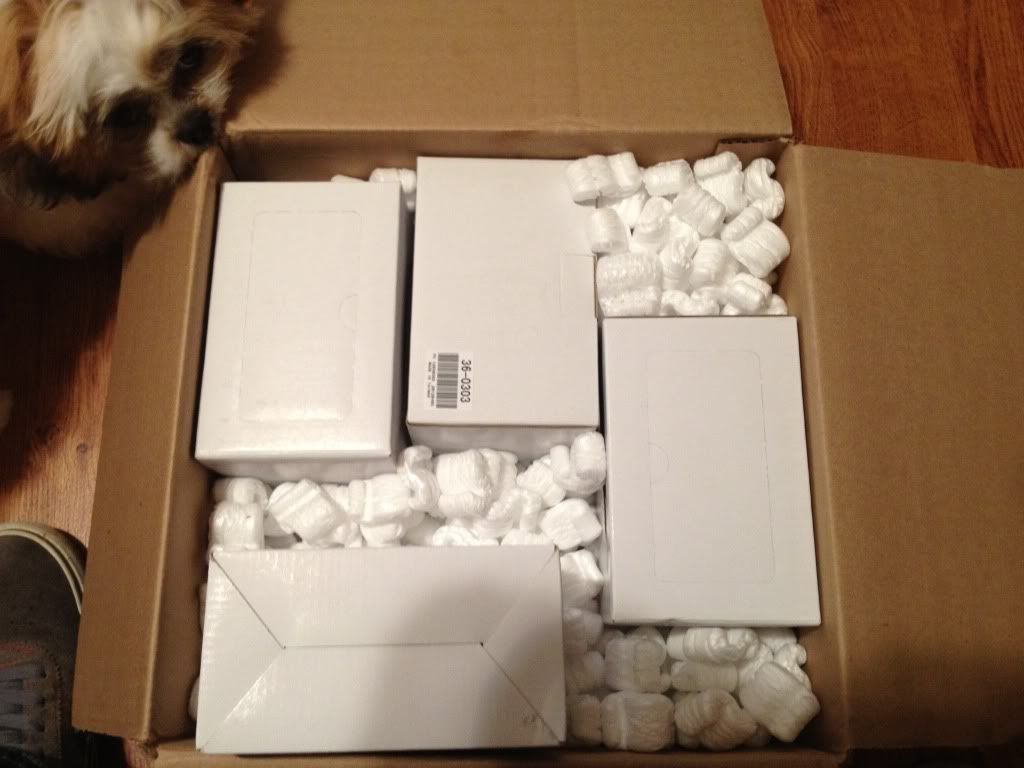
Here is when they arrived at my house
Each one comes with a harness with a weatherpack connection on one side
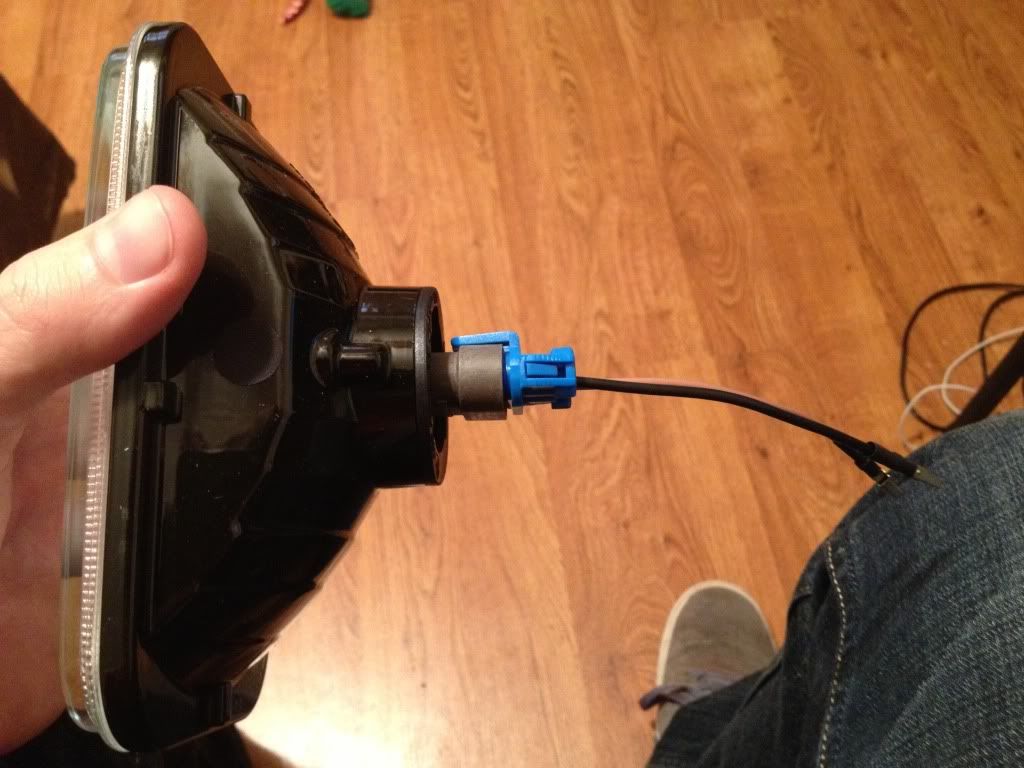
And these little things on the other
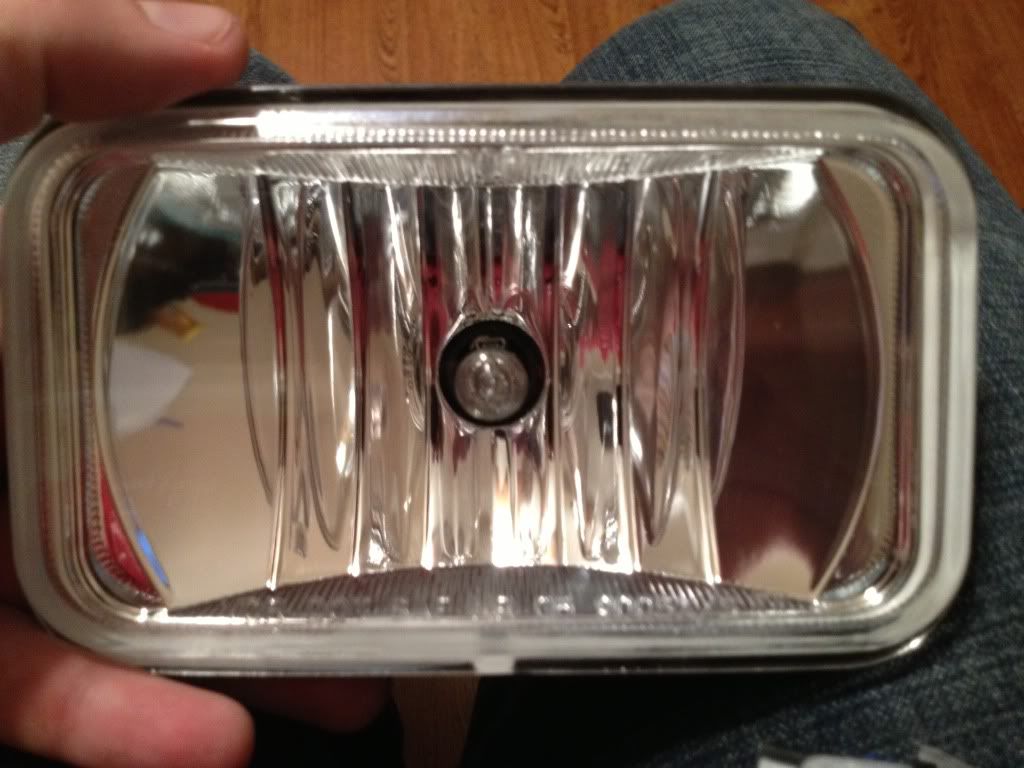
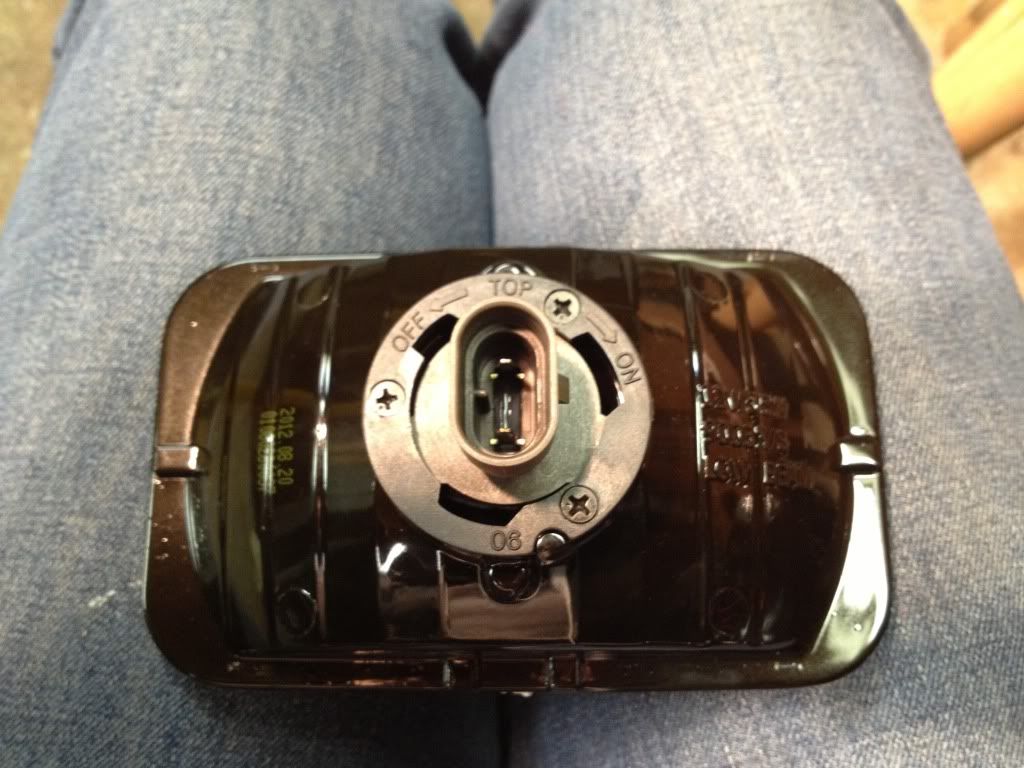
Here is the low beam housing
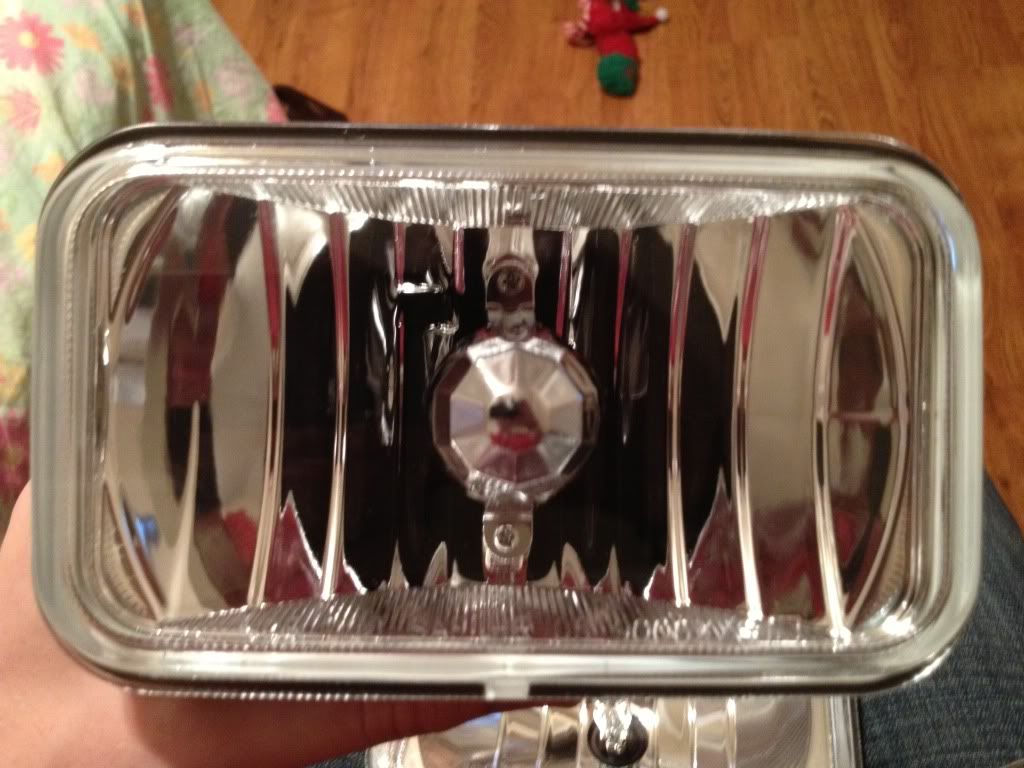
Here is the high beam housing (no shield)
Now on to the install
First I turned my headlights on to make them pop up
Then disconnected the negative battery cable so they would stay up and not mess anything up
After that you need to remove the three screws holding on the headlight bezel, once they are out, wiggle it free
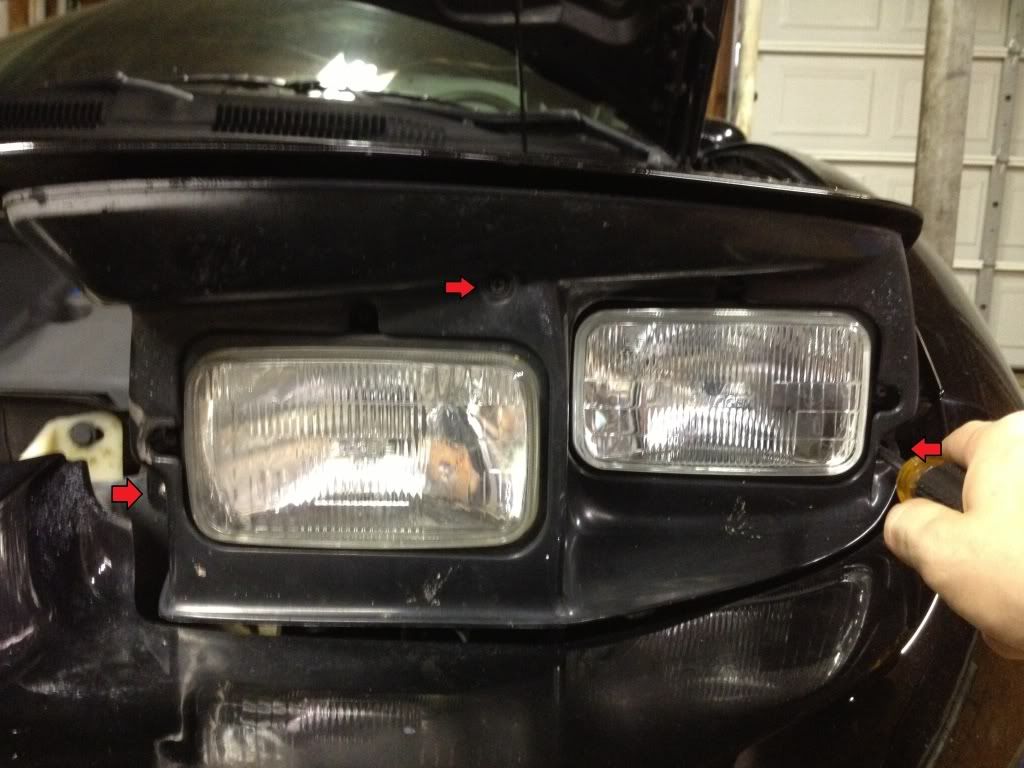
Once those are out you can clearly see the headlight, I took out the top two screws and just loosened the bottom so that you can wiggle the metal bracket holding it in(These are a T15 torx bit)
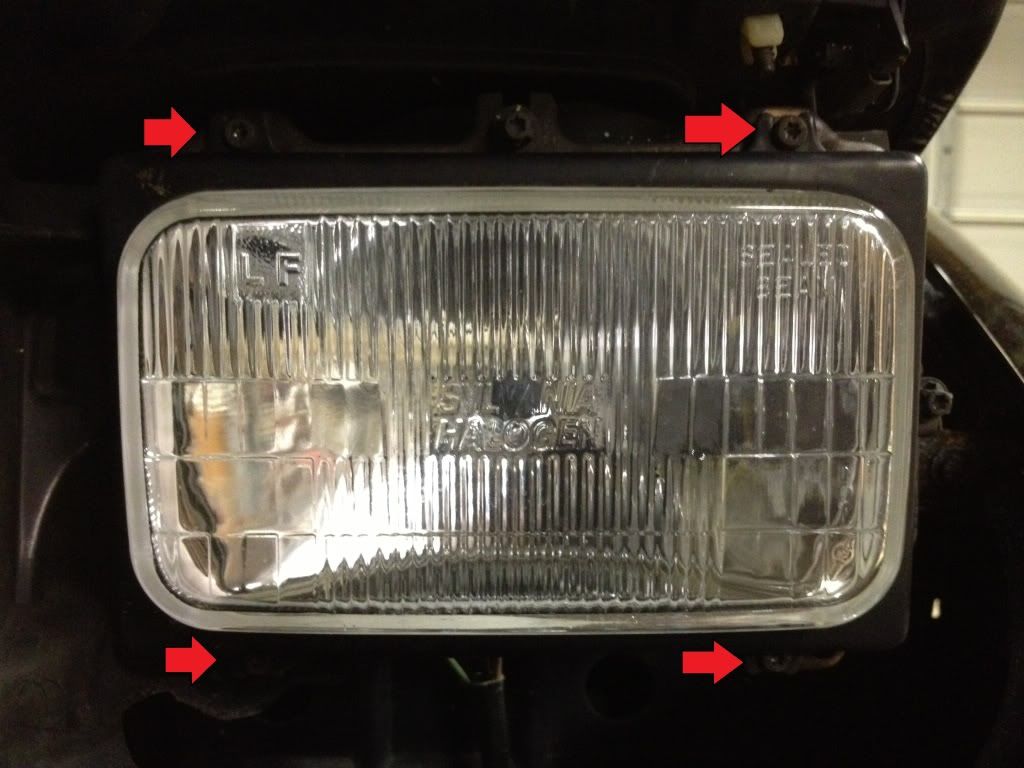
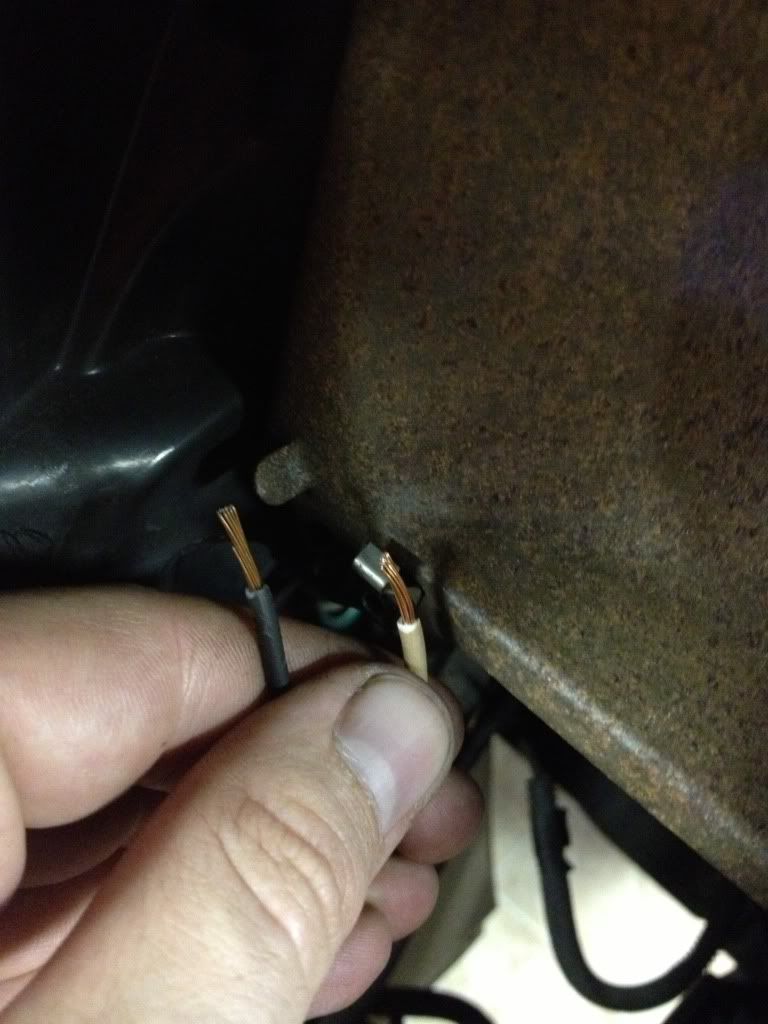
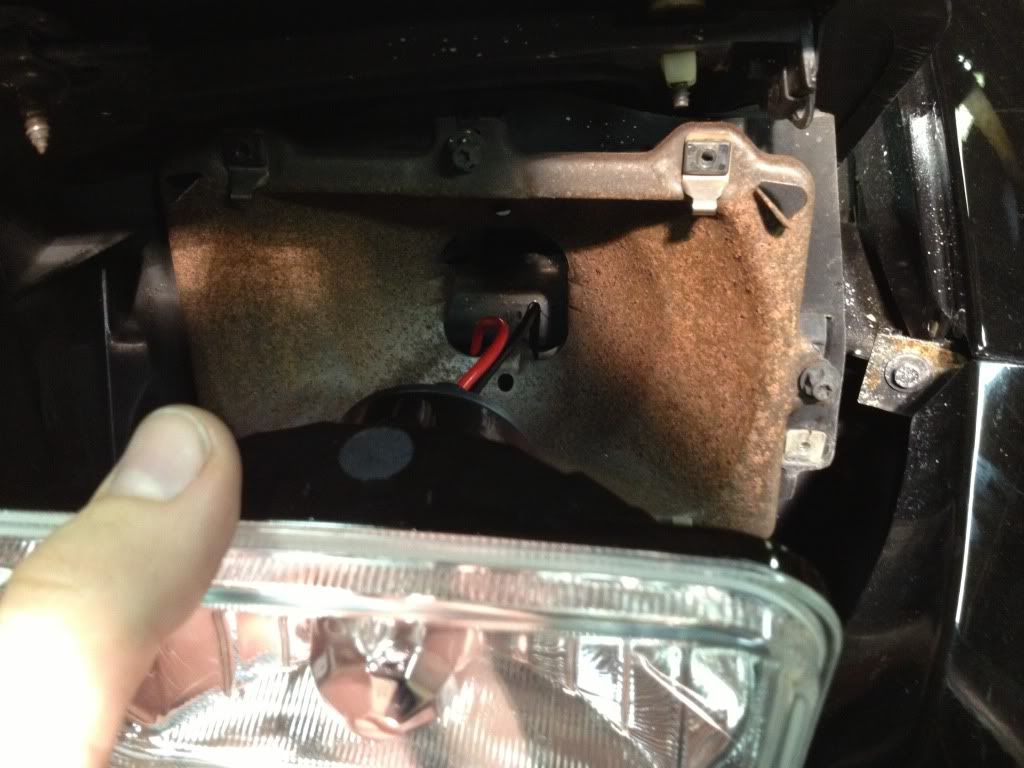
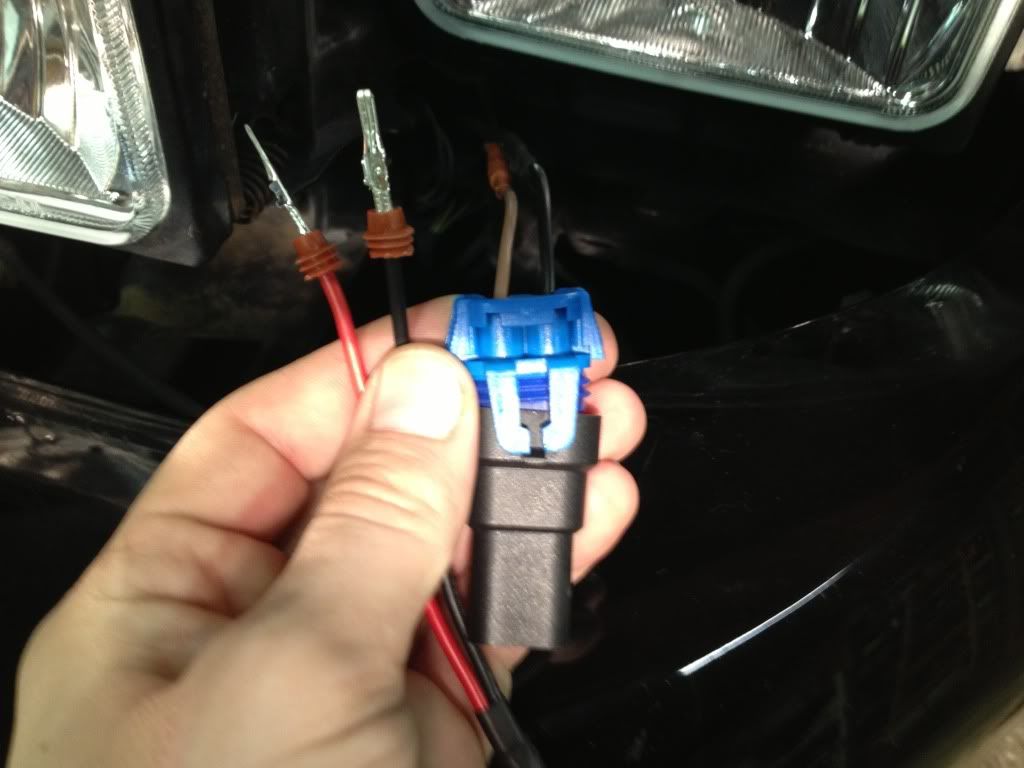
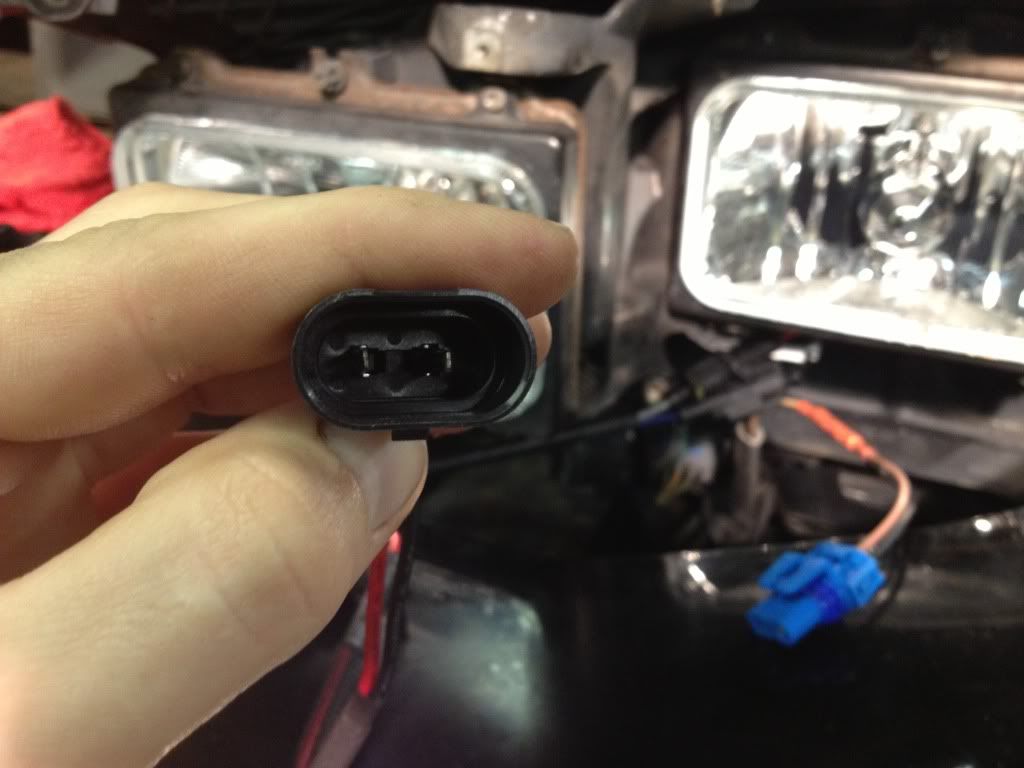
Now here is where I changed my plan of action a bit. When you get the headlight out, you should have this in front of you
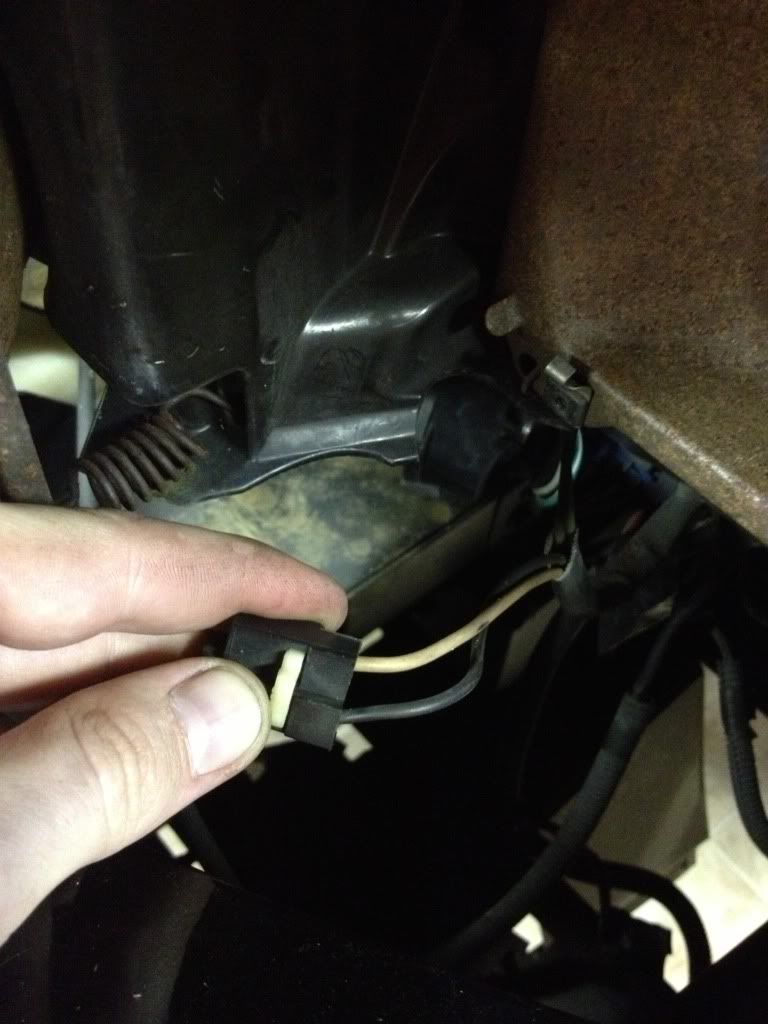
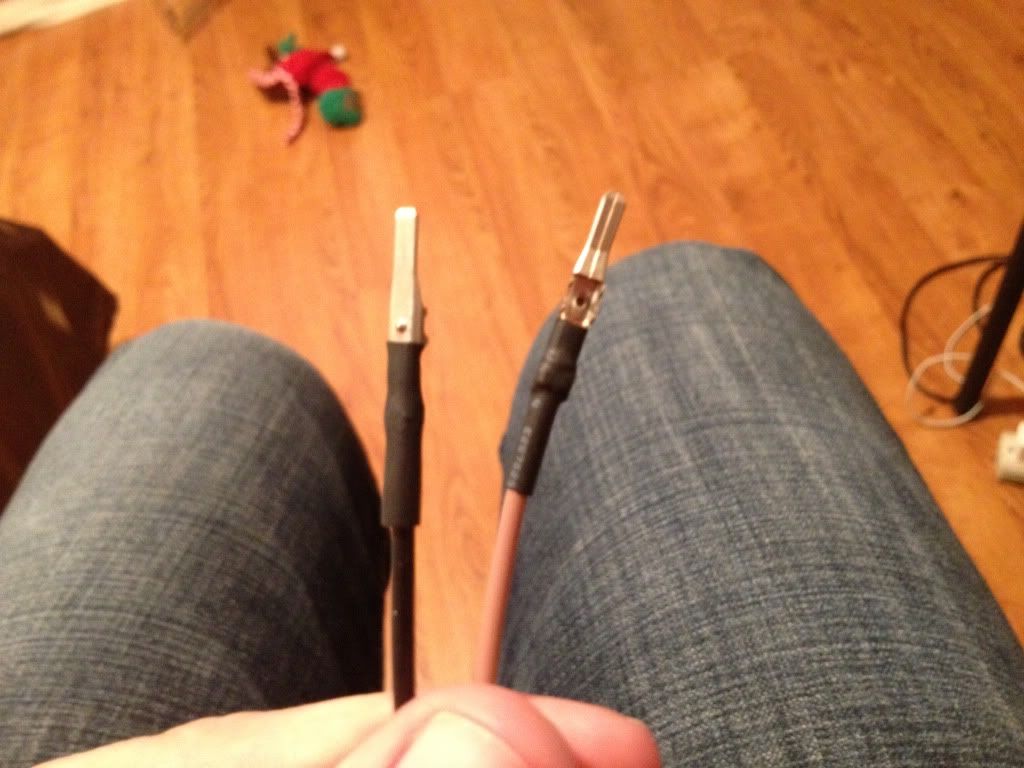
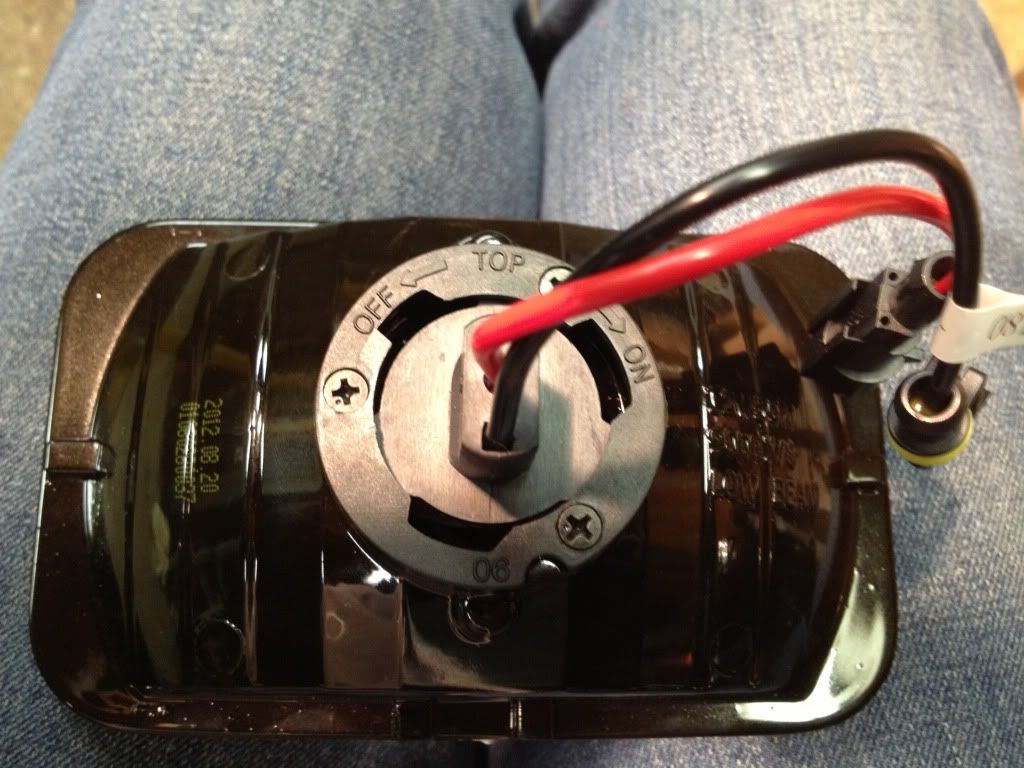
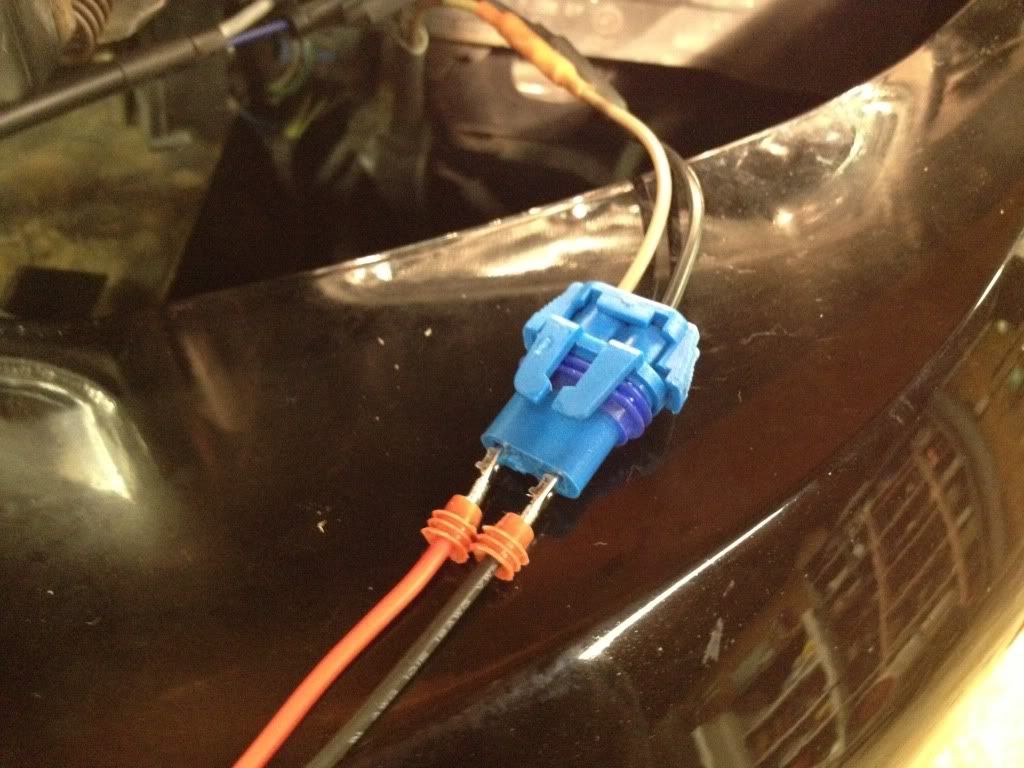
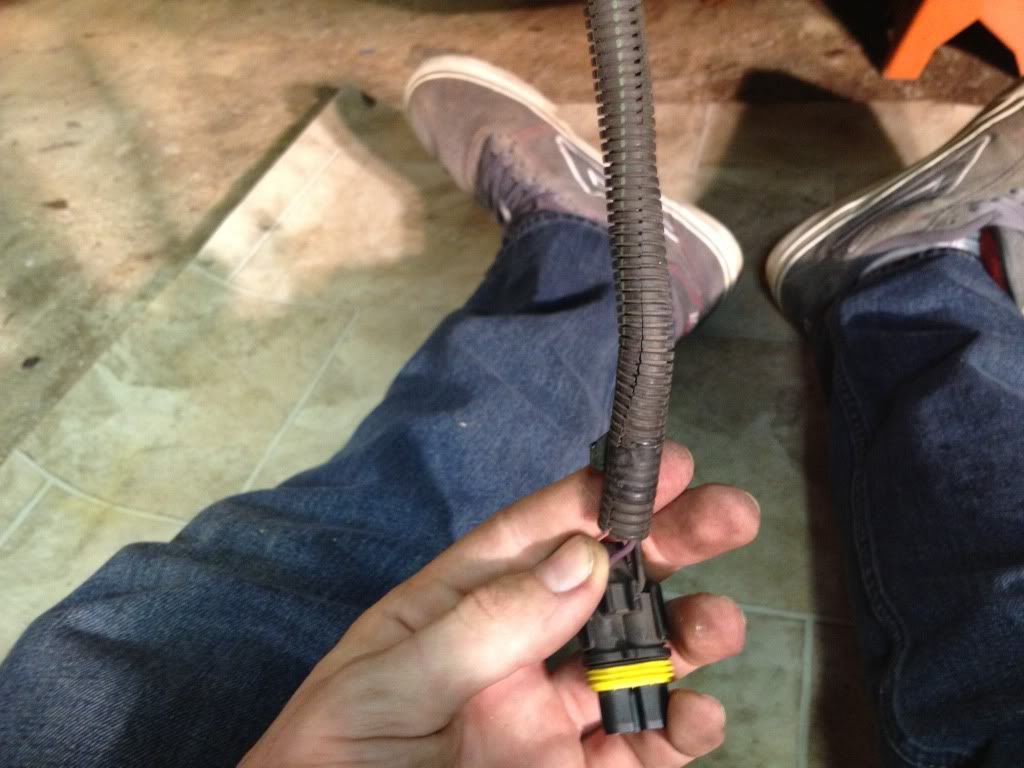
And you could just plug in the connectors off the LMC harness and call it a day, they are even color matched so you can’t get it wrong
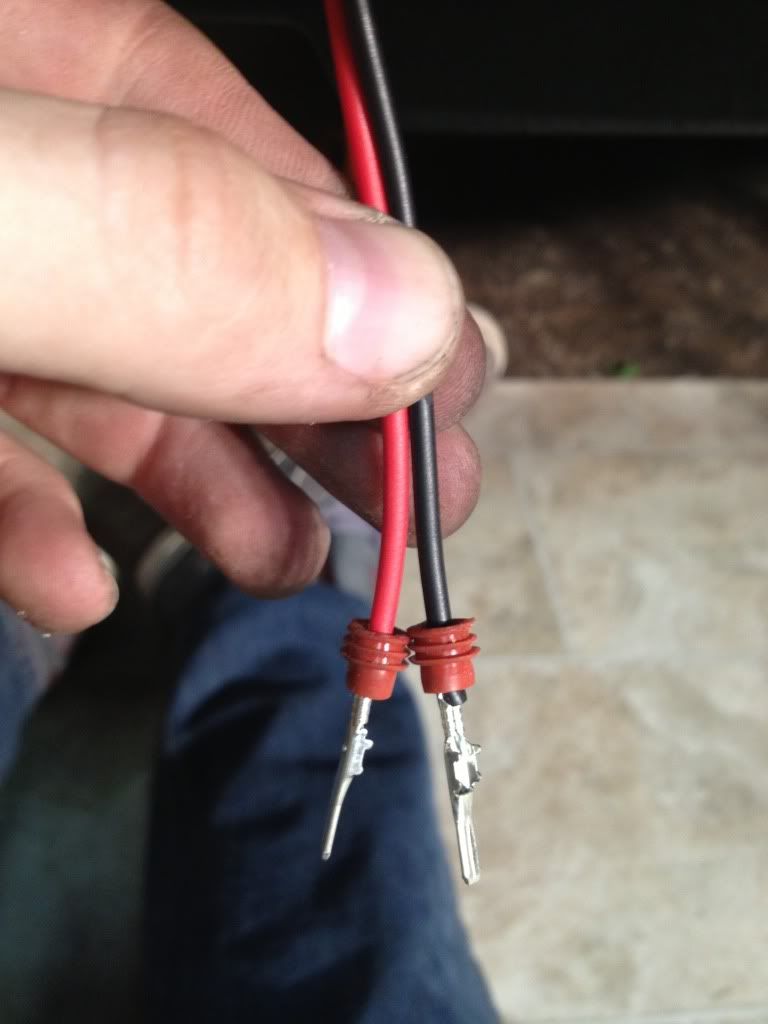
I felt like that would lead to corrosion so I wanted something with a little more protection. I was originally going to solder then heatshrink it…. But I quickly discovered I’m terrible at soldering. So I decided to do butt connectors and heat shrink those!
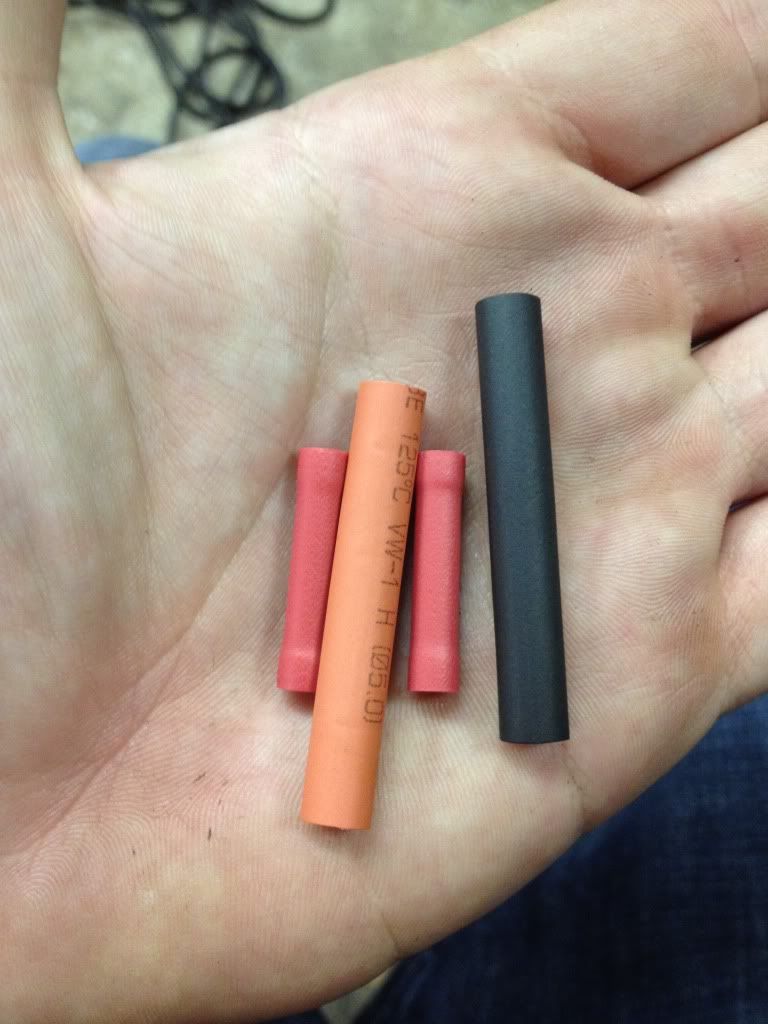
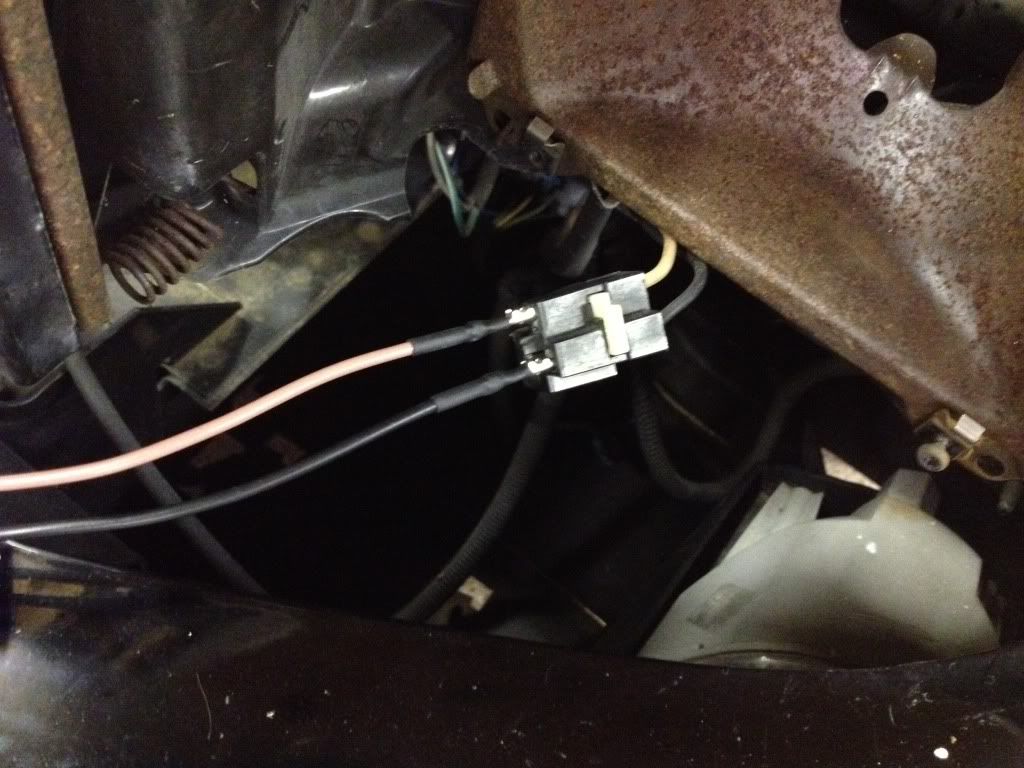
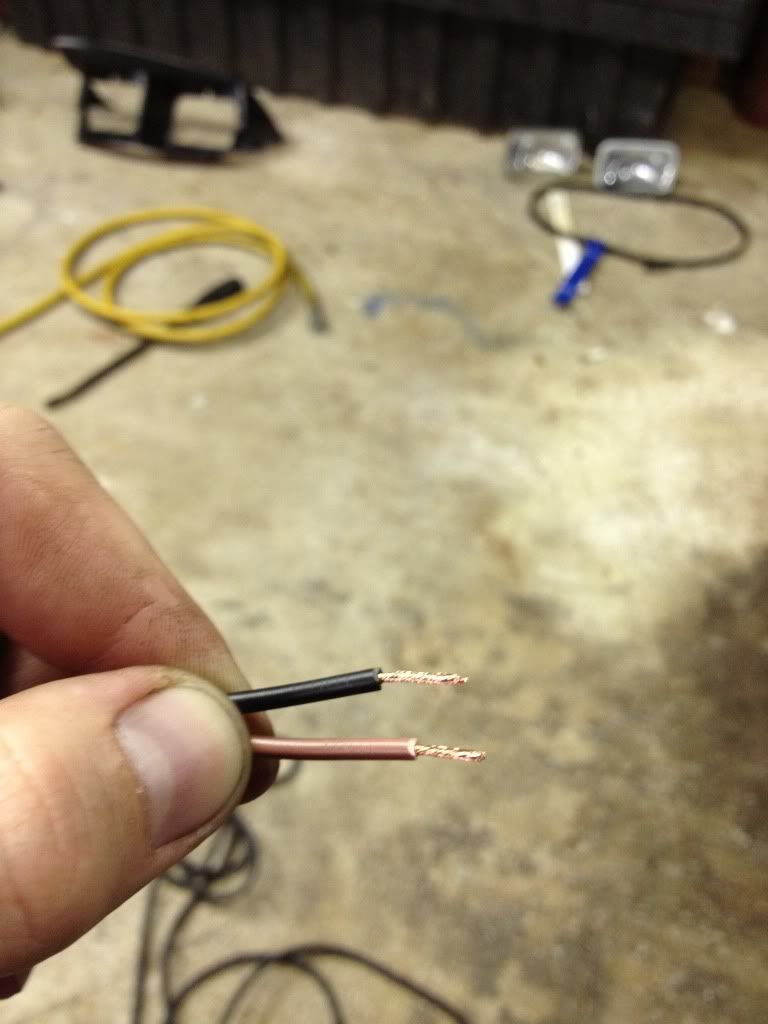
First I clipped the connector off the harness and stripped the wire
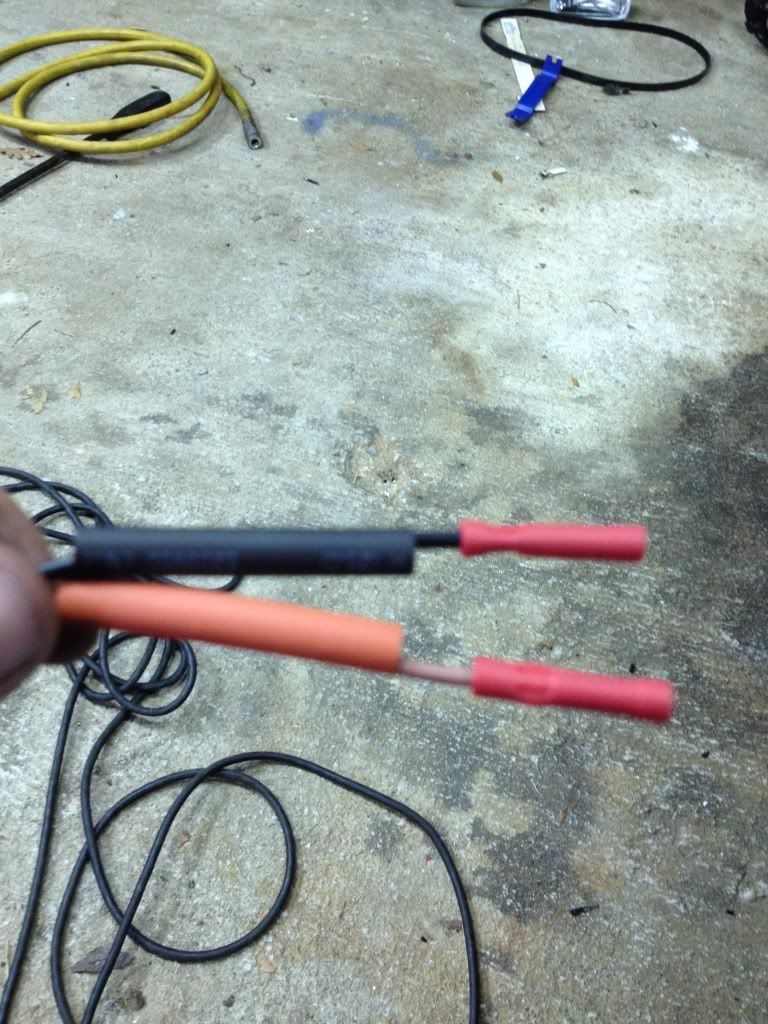
Then I slid on the heat shrink and crimped the butt connector onto it
After that I clipped the original connector off and stripped the wire and then crimped the butt connector onto it
After that I slid the heat shrink over and took a lighter to it. It think it looks pretty solid!
The installing of the LMC housing is the exact opposite of the removal of the original.
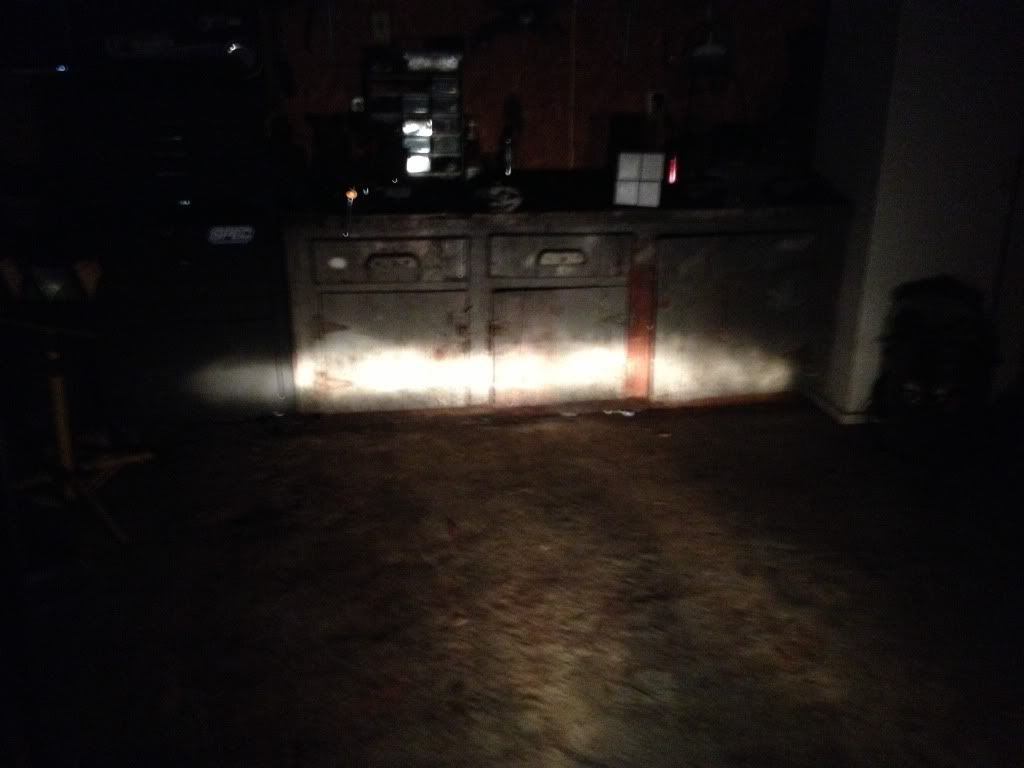
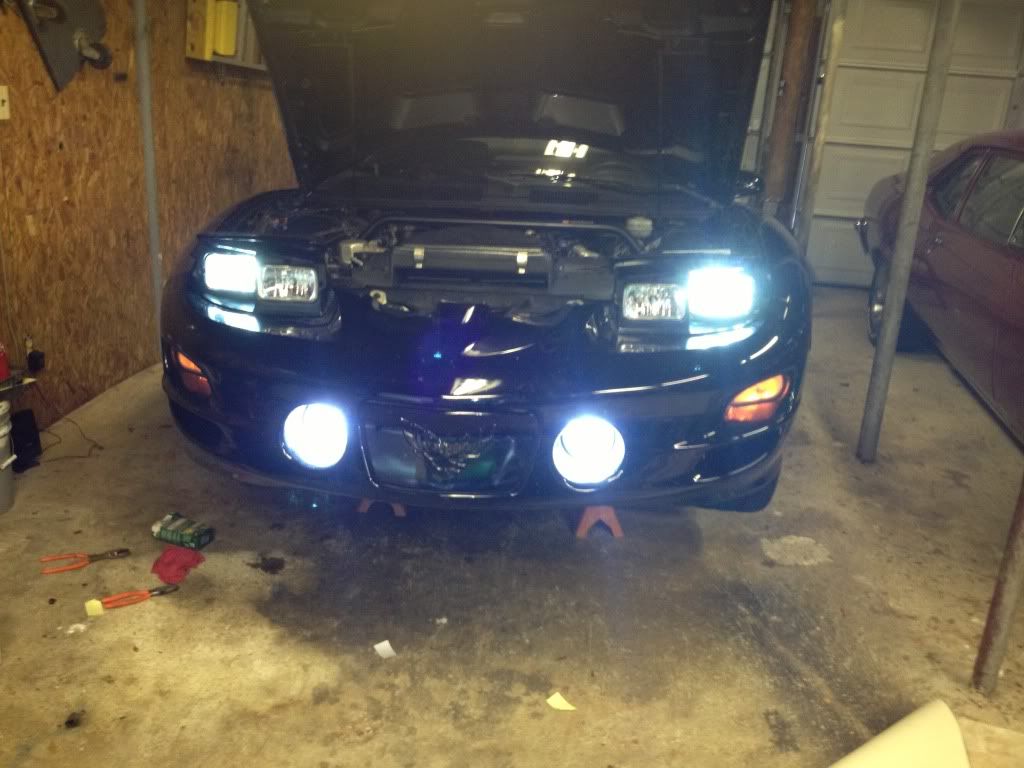
Here is the after with the LMC housing and the bulbs that were included
High/low on
Just Low
Next weekend I’ll update the guide with the HID portion.
This will be done in two phases since my HID’s did not get shipped quickly enough and they won’t be here till next weekend.
Here is the standard light output with fairly new sealed beams
Low/Fogs on
Just Low beam on
Just Fog light on
To convert from sealed beams to LMC housings you will need the following parts.
2 LMC light housing for Low beam (Part# 36-0302)
2 LMC light housings for High beam(Part# 36-0303) [You don’t need to do this if you don’t want to upgrade your high beams]
Everything else I did is optional!
Here is when they arrived at my house
Each one comes with a harness with a weatherpack connection on one side
And these little things on the other
Here is the low beam housing
Here is the high beam housing (no shield)
Now on to the install
First I turned my headlights on to make them pop up
Then disconnected the negative battery cable so they would stay up and not mess anything up
After that you need to remove the three screws holding on the headlight bezel, once they are out, wiggle it free
Once those are out you can clearly see the headlight, I took out the top two screws and just loosened the bottom so that you can wiggle the metal bracket holding it in(These are a T15 torx bit)
Now here is where I changed my plan of action a bit. When you get the headlight out, you should have this in front of you
And you could just plug in the connectors off the LMC harness and call it a day, they are even color matched so you can’t get it wrong
I felt like that would lead to corrosion so I wanted something with a little more protection. I was originally going to solder then heatshrink it…. But I quickly discovered I’m terrible at soldering. So I decided to do butt connectors and heat shrink those!
First I clipped the connector off the harness and stripped the wire
Then I slid on the heat shrink and crimped the butt connector onto it
After that I clipped the original connector off and stripped the wire and then crimped the butt connector onto it
After that I slid the heat shrink over and took a lighter to it. It think it looks pretty solid!
The installing of the LMC housing is the exact opposite of the removal of the original.
Here is the after with the LMC housing and the bulbs that were included
High/low on
Just Low
Next weekend I’ll update the guide with the HID portion.
Last edited by jbridwelltransam; 01-25-2013 at 09:35 PM.
 01-20-2013, 09:19 PM
#2
Okay so you got your sealed beam conversion done and you want to roll with the bright boys and have some HID’s? This what you’ll need to convert from the standard bulbs in your LMC housings and you might as well get the fogs done too!
There is no real reason to do the high beams, as HIDs do not like to be flashed and you will probably no longer need your highs after this upgrade.
Where you get your HIDs is up to you. Obviously a lot of people go to DDM tuning, I bought a set from there for my jeep and I didn’t have any complaints from them. This time around, I went with the slim HID kit from Supervtec off of ebay (Thank you evilws6). (After having them mis shipped and then them arriving with no connectors in the 880 kit, I would suggest going to ddm tuning)
If you want to find him just google Ebay seller supervtec
Now for the low beam conversion you will need to order your HID’s like this
1 35W slim kit with bulb size 9006 and color temperature 6000k (color is up to you, you will see a chart describing the difference on the ebay listing)
For the fog lights you will need to order.
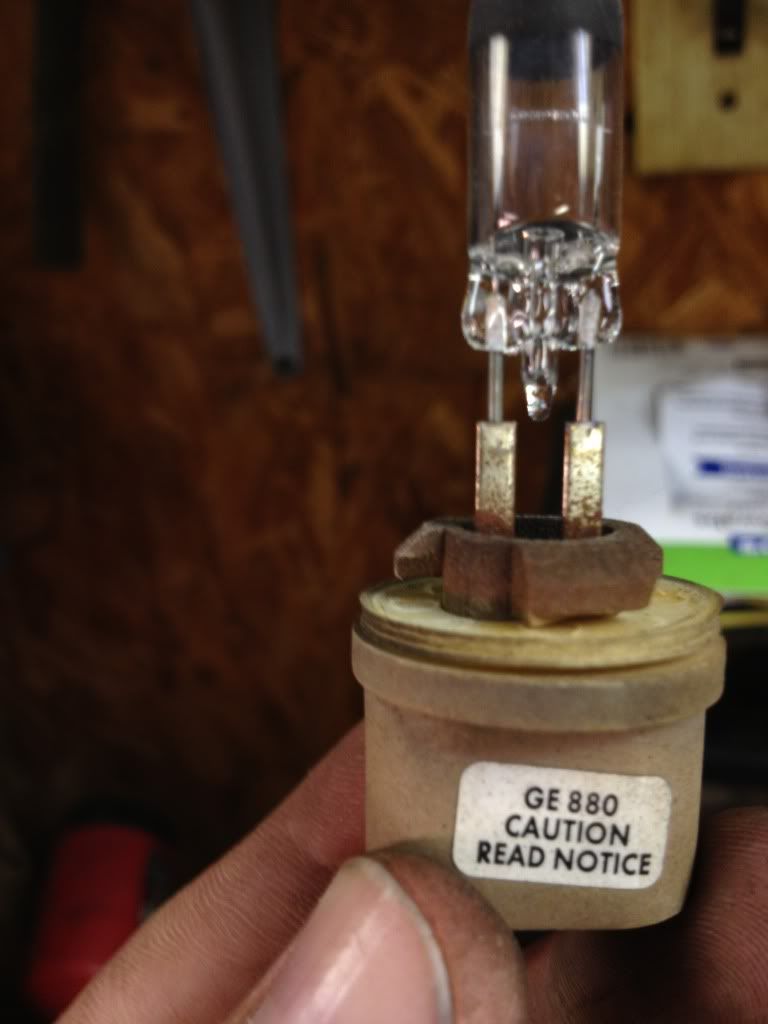
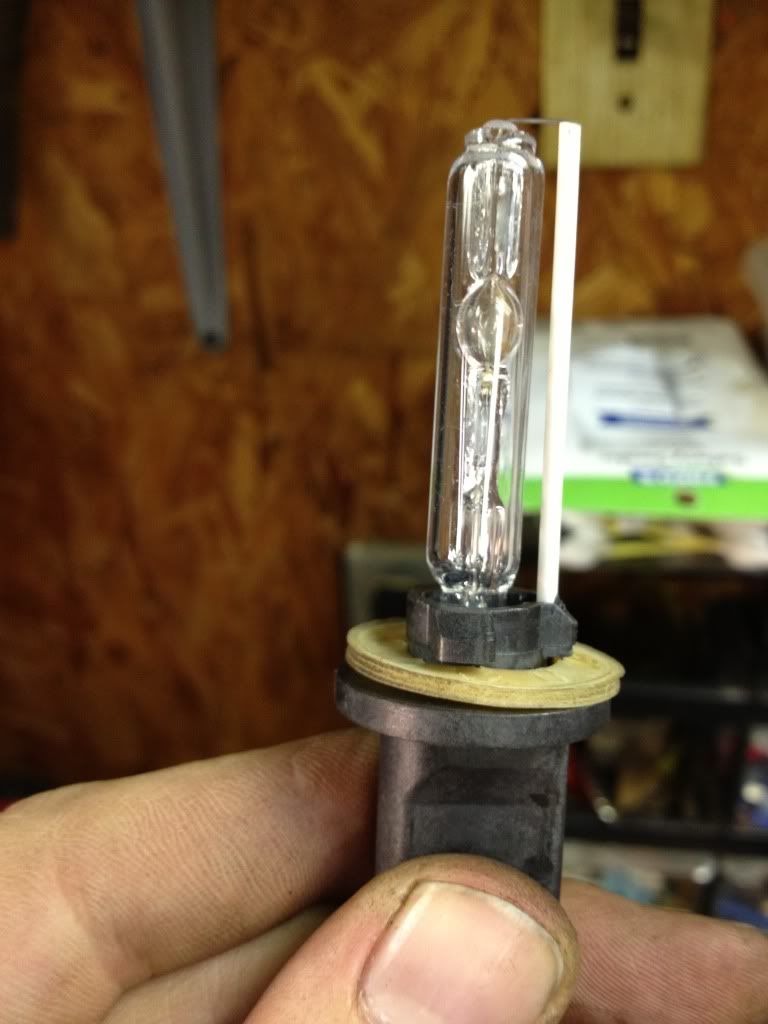
1 35w slim kit with bulb size 880 and color temperature 6000k
So I will get started with the Low beams.
Your kit will come with two ballasts, two bulbs, two wiring harnesses and some kind of connector end.
So follow the steps to get the lmc housing back out and then get to the back of it
The back has instructions for removing the bulb, so remove it and replace it with the HID bulb (DON’T TOUCH THE HID BULB) your hand grease can mess it up.
Feed the wires back through the headlight bucket and you can go ahead and tighten it back down because you’re done with that part.
The wires coming out of the HID bulb plug into the wires from the ballast, they can only go one way so you can’t mess that part up.

You will see that the wiring harness comes with a connection to go into the ballast and the other end has these little prongs on it
These prongs plug into the 9006 connector you put on with the lmc housings. At this point I did a test to make sure everything worked
Now the 9006 kit came with connectors that made it look factory
All you have to do is push the prongs into there, they only go one way but you can still put the wrong wires in the wrong hole. Use this pic for a reference.

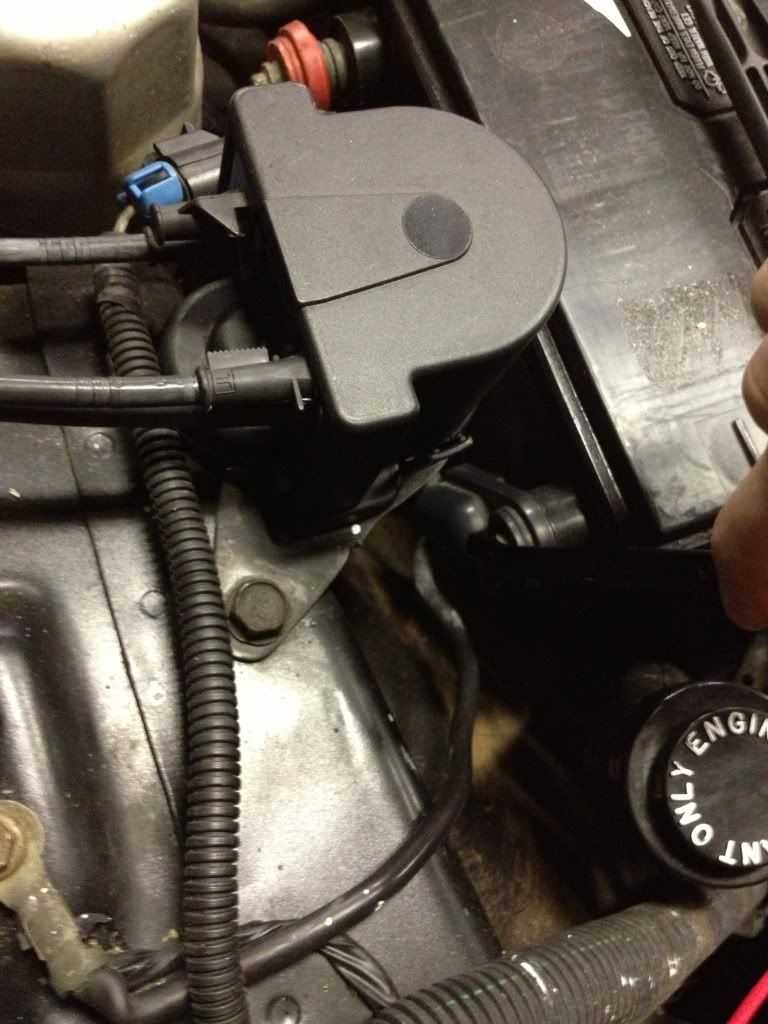
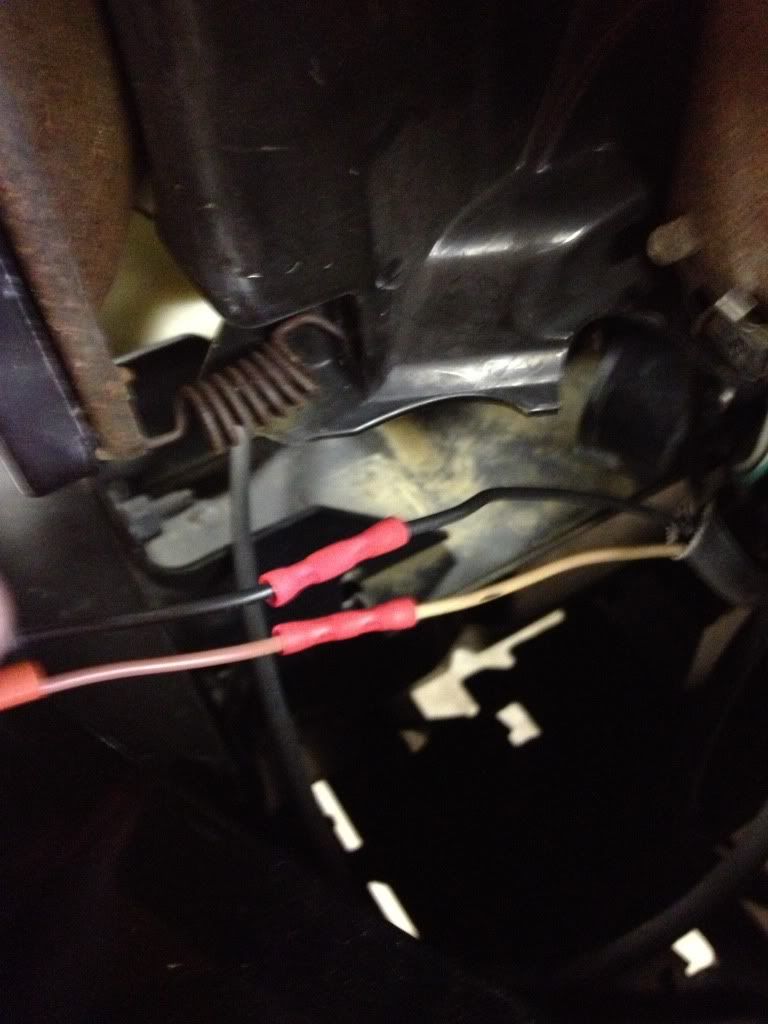
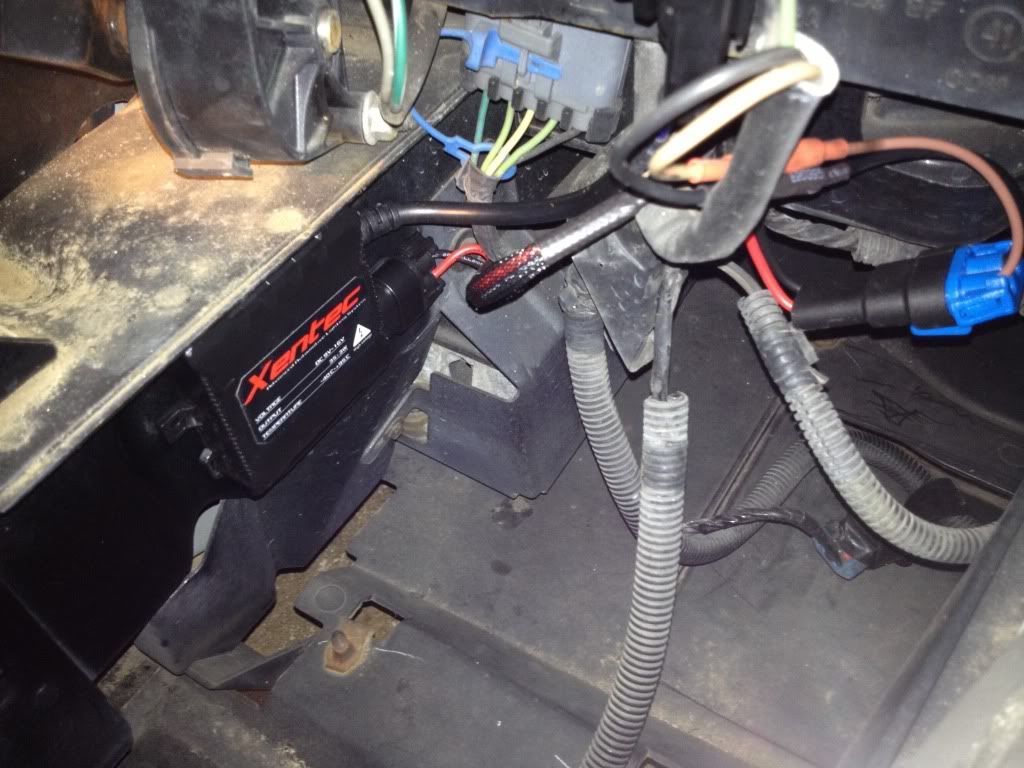
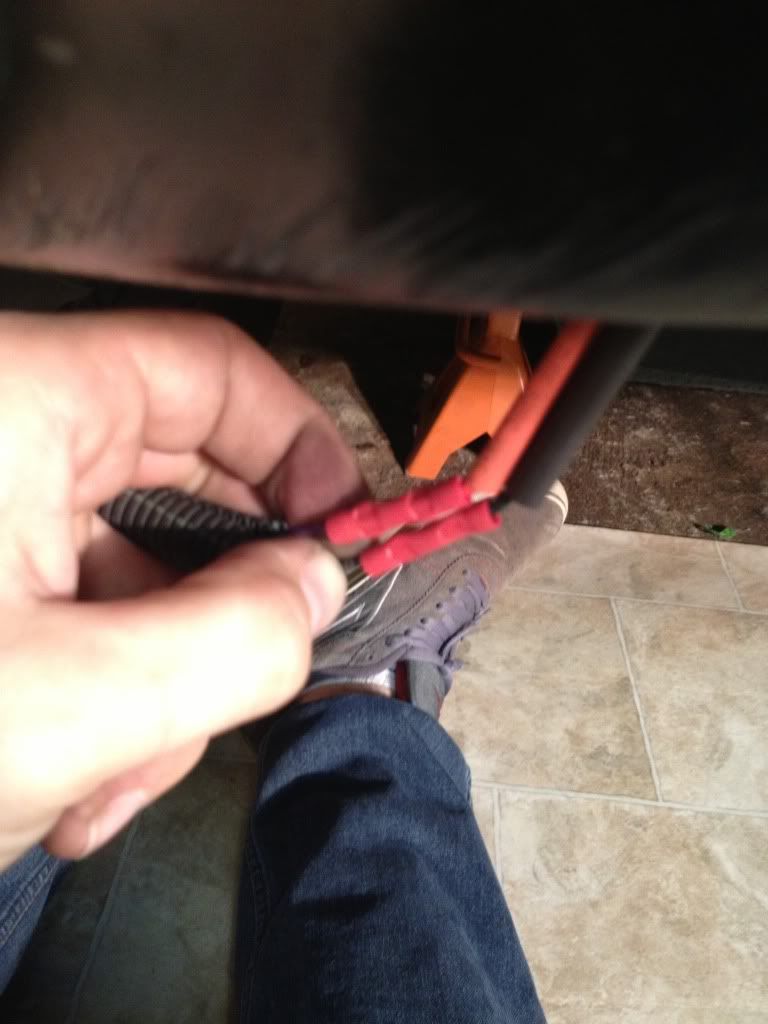
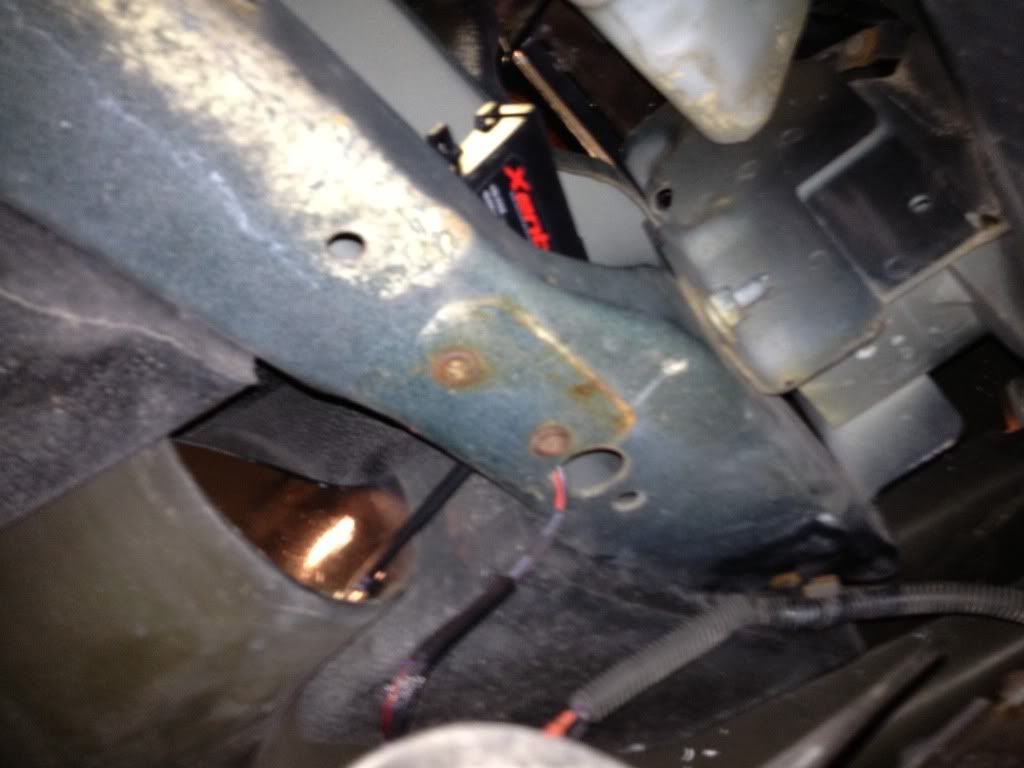
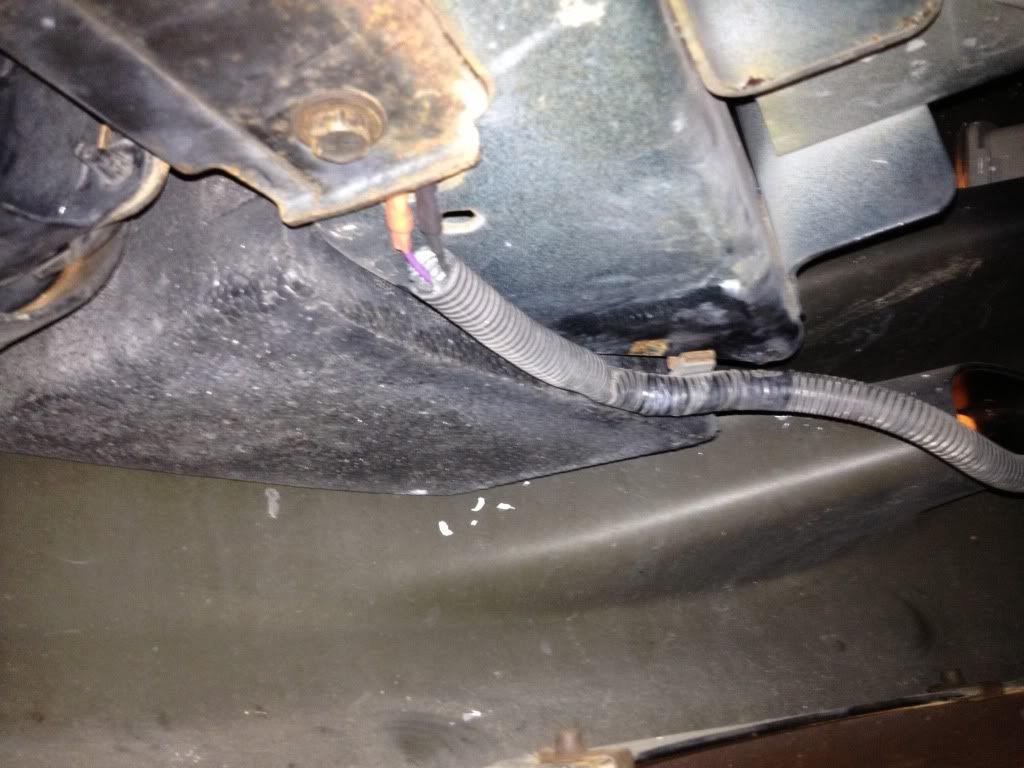
The headlights are that simple, now for mounting the ballast, I picked the framerail. I cleaned the spots with alcohol to make sure they were all clean for the double sided tape to stick.
This is the passenger side.
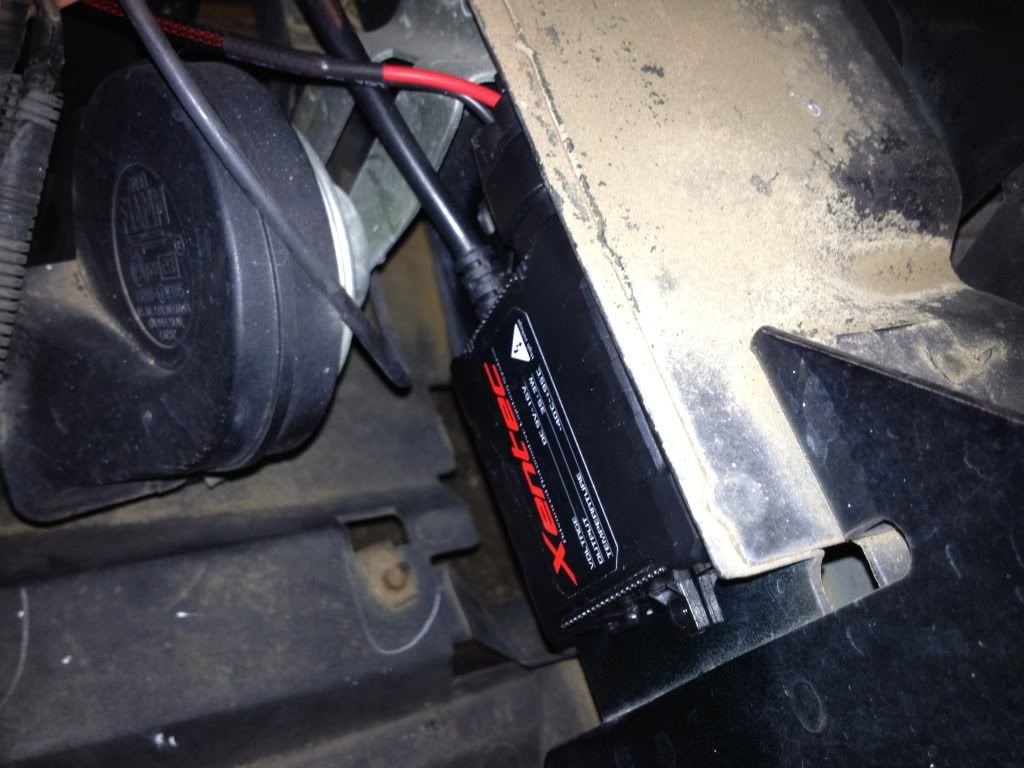
This is the driver’s side
Now onto the fog lights. Now I had two difficulties with mine. One main problem was that the 880 kit I got did not have the cool factory looking connectors that the 9006 kit had ( I think they were just left out of the box)
So after a lot of thought I decided to cut off the factory connector and splice it in, I left enough wire on the factory connector so if I need to put it back on I can.
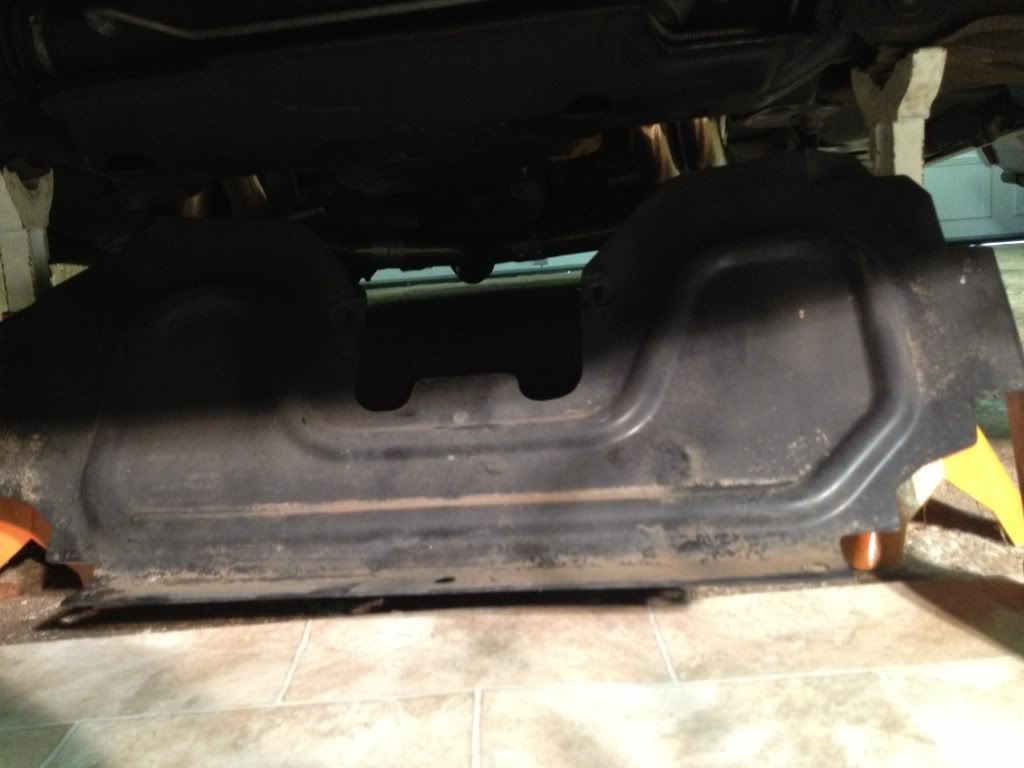
You have to remove the 3 pull pins that hold the front bumper cover on the underside
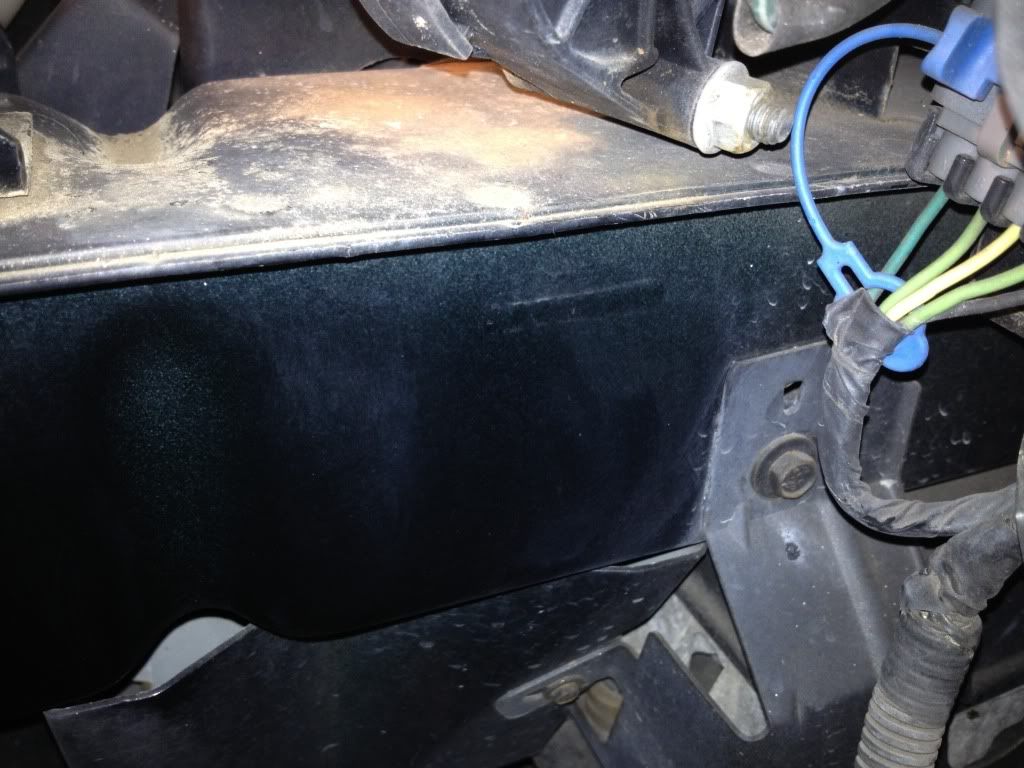
I also removed almost all the 10mm bolts down there so I could move things around much easier.
First I had to do a little maneuvering to pull the fog light wiring out of the lower bumper so I had plenty to work with.
I took this out to get more room to play, which made things a whole lot easier.
The other problem was that the seal that came with the HID bulb was too big and making it very difficult to put the bulb into the fog light housing
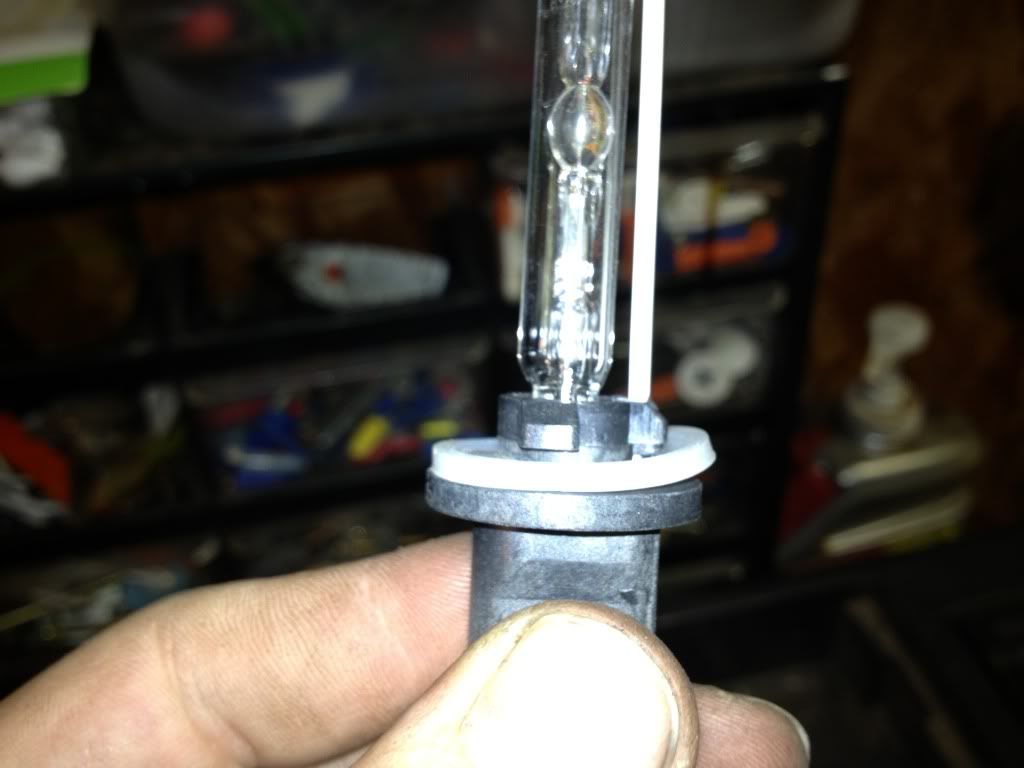
Luckily enough I kept the old fog light bulbs and used the seal off them
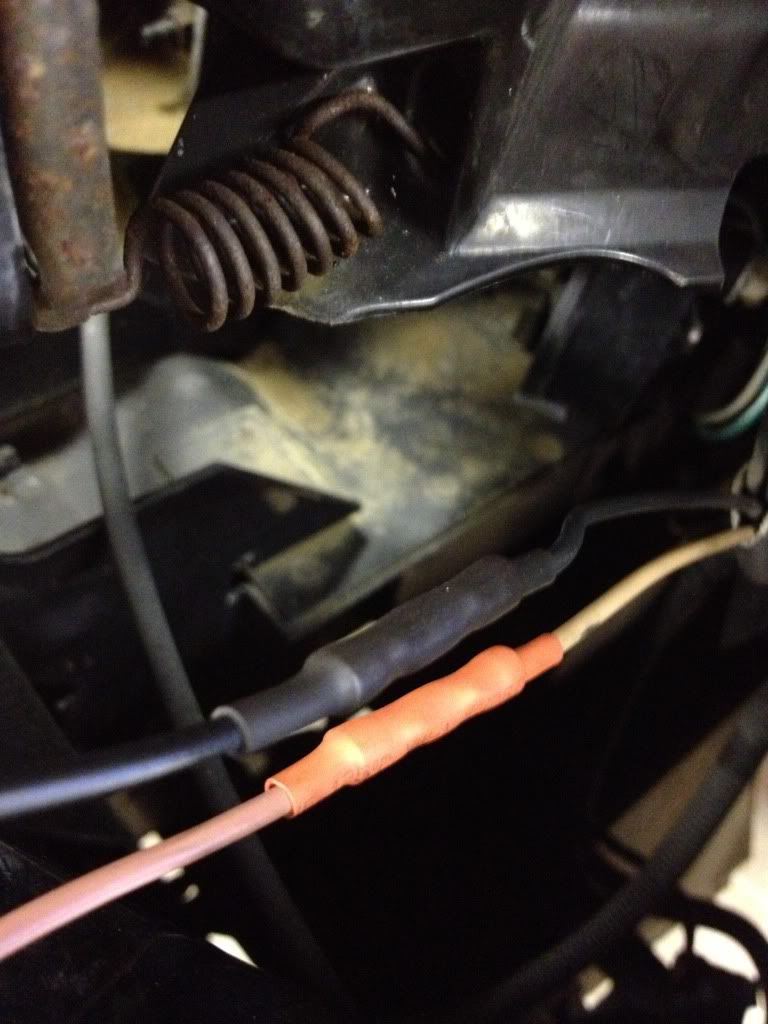
Now I tried to keep the finished wiring as tucked as possible to make it look decent.
Everything hooks up the same as the headlights did, I ran the Hid bulb wires into the hole behind the fog light spot.
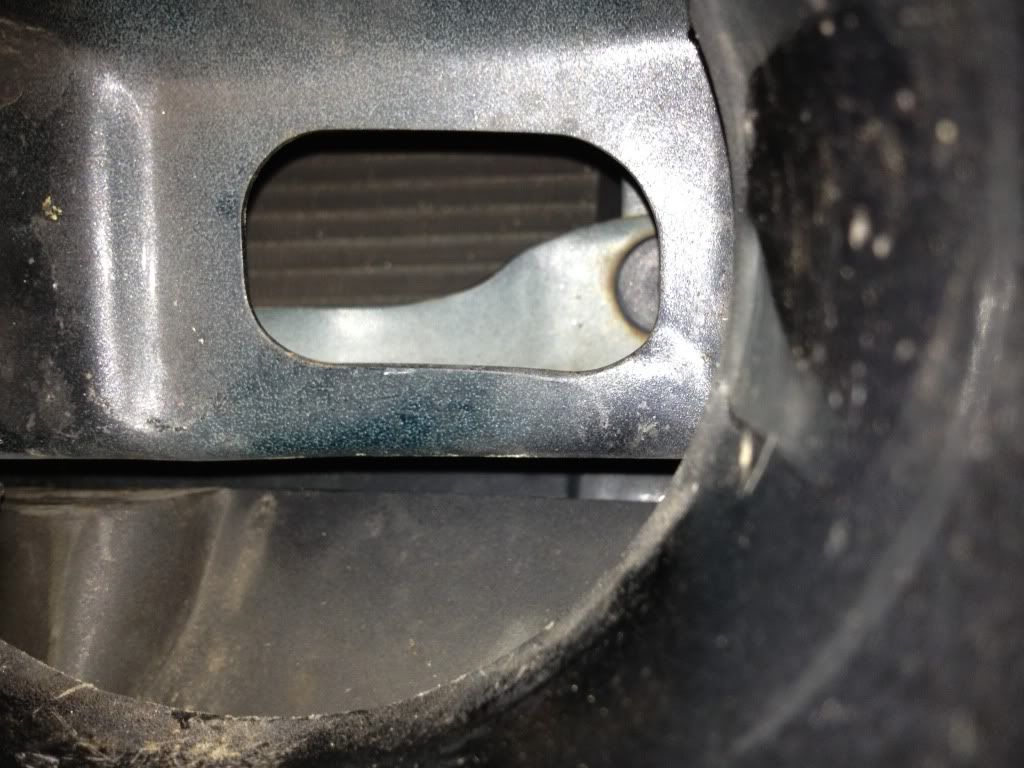
Here you can kinda see where I mounted the ballasts, they are both near the center of the front bumper support
And here you can see my wiring run on the driver’s side, that rusty part is the fog light bracket(for reference)

And here is the passenger side
Here she is all lit up
Will get some of the same type light cut off pics when I get it back on the ground
There is no real reason to do the high beams, as HIDs do not like to be flashed and you will probably no longer need your highs after this upgrade.
Where you get your HIDs is up to you. Obviously a lot of people go to DDM tuning, I bought a set from there for my jeep and I didn’t have any complaints from them. This time around, I went with the slim HID kit from Supervtec off of ebay (Thank you evilws6). (After having them mis shipped and then them arriving with no connectors in the 880 kit, I would suggest going to ddm tuning)
If you want to find him just google Ebay seller supervtec
Now for the low beam conversion you will need to order your HID’s like this
1 35W slim kit with bulb size 9006 and color temperature 6000k (color is up to you, you will see a chart describing the difference on the ebay listing)
For the fog lights you will need to order.
1 35w slim kit with bulb size 880 and color temperature 6000k
So I will get started with the Low beams.
Your kit will come with two ballasts, two bulbs, two wiring harnesses and some kind of connector end.
So follow the steps to get the lmc housing back out and then get to the back of it
The back has instructions for removing the bulb, so remove it and replace it with the HID bulb (DON’T TOUCH THE HID BULB) your hand grease can mess it up.
Feed the wires back through the headlight bucket and you can go ahead and tighten it back down because you’re done with that part.
The wires coming out of the HID bulb plug into the wires from the ballast, they can only go one way so you can’t mess that part up.
You will see that the wiring harness comes with a connection to go into the ballast and the other end has these little prongs on it
These prongs plug into the 9006 connector you put on with the lmc housings. At this point I did a test to make sure everything worked
Now the 9006 kit came with connectors that made it look factory
All you have to do is push the prongs into there, they only go one way but you can still put the wrong wires in the wrong hole. Use this pic for a reference.
The headlights are that simple, now for mounting the ballast, I picked the framerail. I cleaned the spots with alcohol to make sure they were all clean for the double sided tape to stick.
This is the passenger side.
This is the driver’s side
Now onto the fog lights. Now I had two difficulties with mine. One main problem was that the 880 kit I got did not have the cool factory looking connectors that the 9006 kit had ( I think they were just left out of the box)
So after a lot of thought I decided to cut off the factory connector and splice it in, I left enough wire on the factory connector so if I need to put it back on I can.
You have to remove the 3 pull pins that hold the front bumper cover on the underside
I also removed almost all the 10mm bolts down there so I could move things around much easier.
First I had to do a little maneuvering to pull the fog light wiring out of the lower bumper so I had plenty to work with.
I took this out to get more room to play, which made things a whole lot easier.
The other problem was that the seal that came with the HID bulb was too big and making it very difficult to put the bulb into the fog light housing
Luckily enough I kept the old fog light bulbs and used the seal off them
Now I tried to keep the finished wiring as tucked as possible to make it look decent.
Everything hooks up the same as the headlights did, I ran the Hid bulb wires into the hole behind the fog light spot.
Here you can kinda see where I mounted the ballasts, they are both near the center of the front bumper support
And here you can see my wiring run on the driver’s side, that rusty part is the fog light bracket(for reference)
And here is the passenger side
Here she is all lit up
Will get some of the same type light cut off pics when I get it back on the ground
Last edited by jbridwelltransam; 01-25-2013 at 09:32 PM.
01-21-2013, 02:40 PM
#4
TECH Apprentice
Must Sticky !!
i'm on the edge of ordering those and i was so concerned if i had to cut anything or not and this write has totally cleared my doubts about how worthy these housings are.
i'm on the edge of ordering those and i was so concerned if i had to cut anything or not and this write has totally cleared my doubts about how worthy these housings are.
The following users liked this post:
k3000 (03-24-2021)
Trending Topics
01-21-2013, 04:11 PM
#9
Everything in the pictures came in the box, no extra money and no extra ordering. The cool part is that you only have to do the highs if you want to. You could have a working set of HID low beams for less than 100 bucks shipped to your door

 01-22-2013, 09:57 PM
#11
If you are consider HIDs, please do it the proper way with projectors.
It isn't that much extra to do it properly, you get twice the usable light and you don't blind other drivers.
Why would you not do projectors VS halogen housings when going to HIDs?
It isn't that much extra to do it properly, you get twice the usable light and you don't blind other drivers.
Why would you not do projectors VS halogen housings when going to HIDs?
01-23-2013, 05:29 AM
#12

Good job! I would have took pictures of mine, but it was cold as ****. and I didnt it in the driveway in the dark. As for your Hids, theyre gunna plug right in. I made sure to run everything under the bezel to where the horn is, and zip tied the wires and ballast out of the way of the headlight when its closed.
how much are projectors? cause this is all basically plug and play and its like 80 bucks for lights and housings, if you only do low beams.
mine are aimed low, and my car is low, I hope its minimal blinding.
I was driving the other day and an older man in an acura was behind me. hes stock headlights where blinding. New cars have some seriously bright lights.
mine are aimed low, and my car is low, I hope its minimal blinding.
I was driving the other day and an older man in an acura was behind me. hes stock headlights where blinding. New cars have some seriously bright lights.
The following users liked this post:
blsnelling (04-09-2020)
01-23-2013, 12:37 PM
#15
how much are projectors? cause this is all basically plug and play and its like 80 bucks for lights and housings, if you only do low beams.
mine are aimed low, and my car is low, I hope its minimal blinding.
I was driving the other day and an older man in an acura was behind me. hes stock headlights where blinding. New cars have some seriously bright lights.
mine are aimed low, and my car is low, I hope its minimal blinding.
I was driving the other day and an older man in an acura was behind me. hes stock headlights where blinding. New cars have some seriously bright lights.
I'll pay an extra 100$ for a good cutoff, more usable light, not blinding drivers, etc etc any day.
I originally went with a conversion housing and HIDs... I quickly found out that no matter what, it was a PITA to other drivers. I sold those and am moving to a HELLA projector, still not "Correct" but it is leaps and bounds better than a halogen housing with an HID in it.
Again... I'm not just saying this for other drivers, why not get everything you pay for and get to use all the light you are adding?
01-23-2013, 12:49 PM
#16
Staging Lane
iTrader: (1)
Join Date: Sep 2010
Location: Arlington, WA
Posts: 78
Likes: 0
Received 0 Likes
on
0 Posts
Where can I get the projector set-up for $200? I've only seen the Blackbird lighting kit which I believe is $400+, I'd love to do projectors if it's around $200 
01-23-2013, 01:38 PM
#17
Buy the Hellas iirc its the 60mm.. Several options to mount them from free-60$. Buy your hid kit.. Done.
10X a better setup than a halogen housing.. And imo projectors look a little more aggressive. Tram had some good pictures of his setup and is what i copied with mine.
10X a better setup than a halogen housing.. And imo projectors look a little more aggressive. Tram had some good pictures of his setup and is what i copied with mine.
01-23-2013, 01:45 PM
#18
I turn on my headlights and I can see. That's all I need.
It's cheap, and from what I can see, isn't too high that it's blinding people.
200, 300, 400 plus dollars can be spent else where wisely.
It's cheap, and from what I can see, isn't too high that it's blinding people.
200, 300, 400 plus dollars can be spent else where wisely.
01-27-2013, 01:57 AM
#20
Staging Lane
iTrader: (1)
Join Date: Sep 2010
Location: Arlington, WA
Posts: 78
Likes: 0
Received 0 Likes
on
0 Posts
Did some research and found Hella 60mm's for $80 a pair, grabbed an HID kit for $40 shipped with a relay harness, and decided against fabbing my own adapter plates and just bought Tram's plates from eBay for $60, all together cost me about $180 shipped to my door. $80 extra to do it right the first time, I call that a win, thanks lemons! 