Accel DFI tuning help - won't idle
 03-11-2013, 03:19 PM
#1
Registered User
Thread Starter

Join Date: Mar 2013
Posts: 2
Likes: 0
Received 0 Likes
on
0 Posts
Hello folks, running a pre-LS engine here but my usual forum haunts lack the EFI tuning knowledge necessary for the problem at hand. If anyone can suggest other forums where I might have more luck, please let me know!
What I've got:
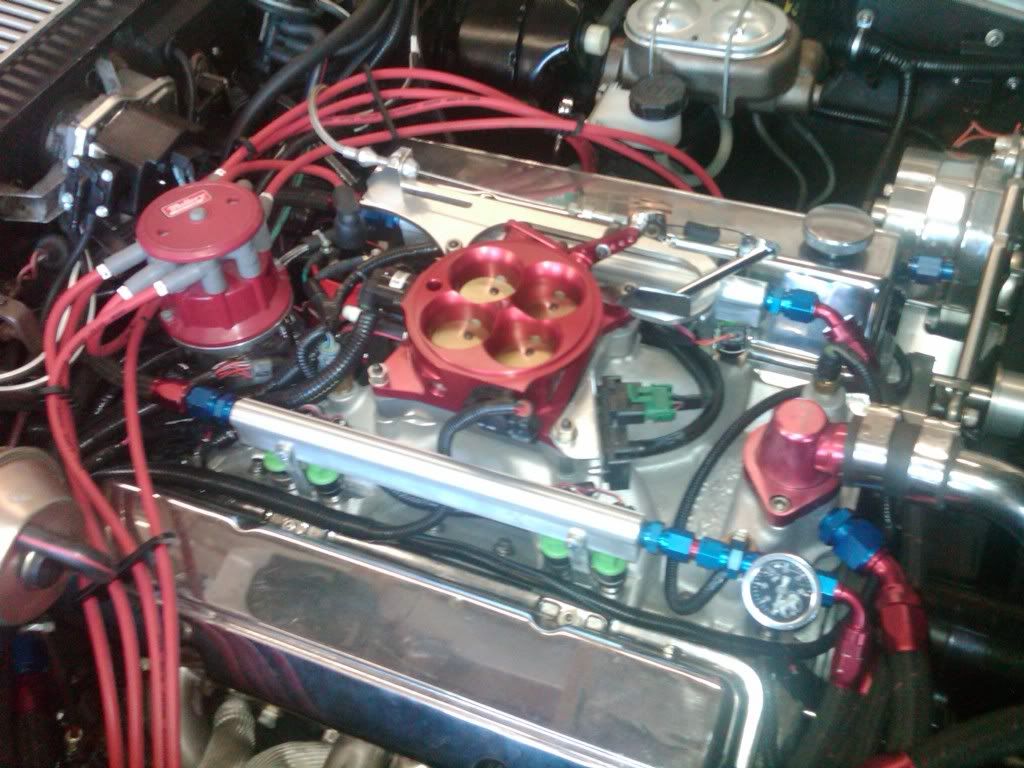
Gen I, 383ci stroker, ~11:1CR, 286XR solid roller, ~550HP
Accel DFI v7.0, multiport sequential, four barrel throttle body
Crank trigger (four magnets on a wheel) and dual-sync distributor
The history:
The block of the original build of this engine cracked and after sitting partially diassembled for about a year in my garage I recently rebuilt it exactly to its original specs, largely to avoid any tuning issues. Prior to the rebuild it ran great, started fine (maybe taking 2-3 tries when dead cold), great street manners considering its max power.
The problem:
Since rebuilding it has not wanted to start and will not idle below ~1500RPM. Watching CalMap on the laptop, the AFR drops off the lean end like a cliff below 1500RPM. The closed-loop correction seems to try to compensate to no avail. Above 1500-1700 it has all of the insane power I remember from before the rebuild. The idle and poor starting are just killing any ability to drive more than around the block. Pre-rebuild the "target idle" was 930RPM. During starting it feels like it is kicking back and there is occasional backfiring. It was never like that before.
Fixes tried:
Most recently we tried moving the hall-effect sensor closer to the magnet wheel, down to ~.030 from ~.060. I believe the prescribed range is .050-.080. This seemed to maybe buy a hundred or two lower RPM but not an obvious difference.
Searched for vac leaks by spraying starter fluid around likely leak spots, vac ports, etc. Also capped off all non-essential vac hoses. No effect.
Changing the tuning shouldn't be necessary as no part of the engine changed, down to the same exact head gasket. I have been messing with the idle control setup only, and I have the pre-rebuild baseline and return to it from time to time as a sanity check. No dice.
Checked timing with light and monitored it on the laptop. Both seem to be in agreement. Hard to see with the light when it's constantly changing since idle wouldn't stabilize at 900, should recheck now that I've stabilized it at 1500.
Suspicions:
Sticky fuel injectors from sitting exposed in the garage and getting saw dust on them? Looking into rigging up a home cleaning setup.
Crank trigger not perfectly aligned with TDC?
Distributor rotation shouldn't matter (within some tolerance) for timing but maybe try rotating to see if spark timing is falling off the edge of the contact at low RPM?
Any other sensors could have gone bad from sitting? O2? Has to be something that would only matter at idle as higher RPM tuning feels excellent.
First battery was bad from sitting but bought a new one which didn't seem to help. Maybe alternator is bad, starving the whole system for electrons? New Optima yellow-top coming tomorrow but don't want to put it in until I know I won't kill it. $$$
Really feels like overly advanced timing to me the way it kicks back but don't know what could be wrong as the numbers seem fine and the crank trigger was moved block to block but never adjusted so I don't know how it could be out more than a couple degrees. Don't know how that would explain it dropping off the lean end at low RPM either.
EFI is new to me, suddenly carbs are feeling easy! But hoping to learn and figure this out without paying for tuning time! I do have a tuning-competent friend assisting me but he is stumped also. Any help will be greatly appreciated!
What I've got:
Gen I, 383ci stroker, ~11:1CR, 286XR solid roller, ~550HP
Accel DFI v7.0, multiport sequential, four barrel throttle body
Crank trigger (four magnets on a wheel) and dual-sync distributor
The history:
The block of the original build of this engine cracked and after sitting partially diassembled for about a year in my garage I recently rebuilt it exactly to its original specs, largely to avoid any tuning issues. Prior to the rebuild it ran great, started fine (maybe taking 2-3 tries when dead cold), great street manners considering its max power.
The problem:
Since rebuilding it has not wanted to start and will not idle below ~1500RPM. Watching CalMap on the laptop, the AFR drops off the lean end like a cliff below 1500RPM. The closed-loop correction seems to try to compensate to no avail. Above 1500-1700 it has all of the insane power I remember from before the rebuild. The idle and poor starting are just killing any ability to drive more than around the block. Pre-rebuild the "target idle" was 930RPM. During starting it feels like it is kicking back and there is occasional backfiring. It was never like that before.
Fixes tried:
Most recently we tried moving the hall-effect sensor closer to the magnet wheel, down to ~.030 from ~.060. I believe the prescribed range is .050-.080. This seemed to maybe buy a hundred or two lower RPM but not an obvious difference.
Searched for vac leaks by spraying starter fluid around likely leak spots, vac ports, etc. Also capped off all non-essential vac hoses. No effect.
Changing the tuning shouldn't be necessary as no part of the engine changed, down to the same exact head gasket. I have been messing with the idle control setup only, and I have the pre-rebuild baseline and return to it from time to time as a sanity check. No dice.
Checked timing with light and monitored it on the laptop. Both seem to be in agreement. Hard to see with the light when it's constantly changing since idle wouldn't stabilize at 900, should recheck now that I've stabilized it at 1500.
Suspicions:
Sticky fuel injectors from sitting exposed in the garage and getting saw dust on them? Looking into rigging up a home cleaning setup.
Crank trigger not perfectly aligned with TDC?
Distributor rotation shouldn't matter (within some tolerance) for timing but maybe try rotating to see if spark timing is falling off the edge of the contact at low RPM?
Any other sensors could have gone bad from sitting? O2? Has to be something that would only matter at idle as higher RPM tuning feels excellent.
First battery was bad from sitting but bought a new one which didn't seem to help. Maybe alternator is bad, starving the whole system for electrons? New Optima yellow-top coming tomorrow but don't want to put it in until I know I won't kill it. $$$
Really feels like overly advanced timing to me the way it kicks back but don't know what could be wrong as the numbers seem fine and the crank trigger was moved block to block but never adjusted so I don't know how it could be out more than a couple degrees. Don't know how that would explain it dropping off the lean end at low RPM either.
EFI is new to me, suddenly carbs are feeling easy! But hoping to learn and figure this out without paying for tuning time! I do have a tuning-competent friend assisting me but he is stumped also. Any help will be greatly appreciated!
 03-11-2013, 08:22 PM
#3

Sounds to me like a sync or timing issue.
Physically verify engine TDC on #1 with a piston stop and a degree wheel, then set your trigger and distributor based on that.
When you are watching your timing with a light and the laptop, you are only verifying that the timing mark and the trigger coincide, which it should, being as it's the same wheel. You need to make sure that 0 TDC on the balancer/trigger wheel/timing mark is indeed 0 TDC inside the engine.
03-13-2013, 01:37 AM
#4
Registered User
Thread Starter
Join Date: Mar 2013
Posts: 2
Likes: 0
Received 0 Likes
on
0 Posts
Worth mentioning that I didn't build it the first time so while I'm intimate with the internals the EFI setup is new to me. I'm going to recheck the distributor sync setup as I did not go through the LED process. I did mark the distributor (rotor-to-body and body to intake) and realigned in upon reassembly but I should set it up the right way. Also, not sure if I mentioned in my original post that I tried to align one of the four magnets on the trigger wheel as close as possible to #1 firing TDC, might that not be right? It has 6 possible orientations in bolting to the crank and that's one thing I didn't mark or photograph well when disassembling. I will get back as soon as I've checked these out. Running in batch will be interesting and will check for true TDC as well to verify but I remember checking it visually while setting the valves so it can't be too far off. Thanks so far!
In the meantime, here's the beast:
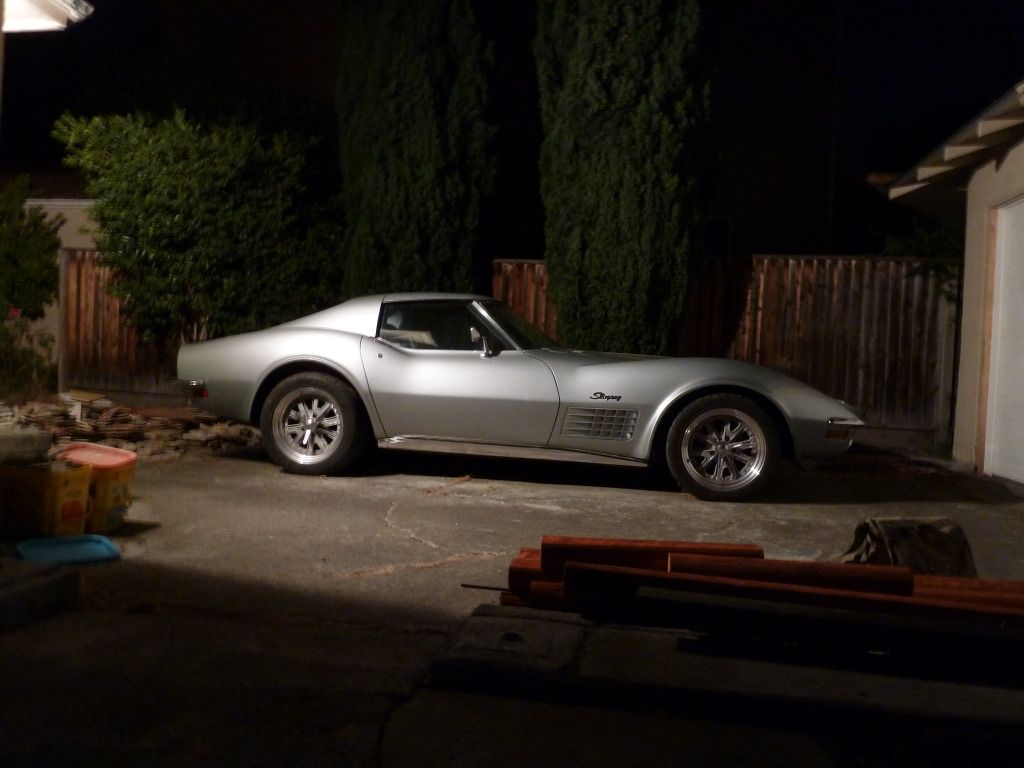
In the meantime, here's the beast:
03-13-2013, 04:56 AM
#5
Here's the documentation for that system.
http://www.project33.com/media/dfi_g...structions.pdf
Specifically, in sequential mode it's looking for half the crank triggers in the wheel and half in the distributor, which only adds to the possible errors and confusion.
Although not mentioned in the quoted text below, in the pdf they are indeed looking for the falling edge of the crank trigger (at the balancer) to be at 0 TDC.
Accel/DFI Dual Sync Distributor Installation Instructions
1. Make a mark on the distributor housing to indicate the location of the wire for cylinder
#1, and remove the cap from the distributor.
2. Rotate the engine to Top Dead Center of cylinder #1, and make a note of which
direction the rotor is turns (either clockwise, or counter-clockwise). Verify that the rotor
is now pointing at the sparkplug wire for cylinder #1.
3. If replacing another distributor, disconnect the distributor wires and remove the
distributor from the engine.
4. Before installing the distributor, attach the Dual Sync Distributor adapter wire harness
to the DFI Gen 7 main wire harness, ensuring that the ground leads are also
connected to an appropriate grounding point on the engine. Be sure to connect the
Dark Blue wire (Pin H of 8-Pin Ignition Connector) to your ignition enhancer box (if
applicable). Note that an ignition enhancer box must be used with this Distributor!
5. Turn the ignition to the Key-On, Engine-Off position, and launch the DFI CalMap
Engine Management Software program.36
6. Select the �Online from ECM� data source, and go to the Engine Configuration screen
by pressing the CTRL-S key combination, or selecting the System menu item from the
Configuration menu.
7. From the Injection Type drop-down list, select Sequential for your fuel injection
control strategy. Press the F10 key on your keyboard to send this change directly to
the DFI Gen 7 Engine Control Module.
8. Change the Crank Trigger Edge switch to the Falling position. Press F10 to send the
data to the ECM.
9. Change the Cam Trigger Edge switch to Falling and press F10.
10.Change the Output Trigger Edge switch to Rising, and press F10.
11.Change the Crank Signal Input Type to Hall Effect and press F10.
12.Change the Cam Signal Input Type to Hall Effect and press F10.
13.Change the Output Signal Type to Sink, Points, and press F10.
14.Verify that the Fuel Injector Firing Order is set to the desired firing order, and press
F10.
15.If no error messages were observed, exit the CalMap program using the File->Exit
menu command, by pressing the CTRL-X key combination, or by clicking on the Gen 7
DFI icon on the lower right portion of the screen. If any error messages were present,
repeat steps 5-14.
16.Position the Dual Sync Distributor so that you can see both the Red (Crank) and Blue
(Cam) LEDs. Verify that the ignition is still in the Key-On, Engine-Off position.
17.Rotate the distributor in the same direction as noted earlier (either clockwise or
counter-clockwise). Continue rotating until blue LED shuts off completely. This
indicates the falling edge of the cam trigger position.
18.Continue to slowly rotate the distributor until the Red LED shuts off. Stop at this
point. This indicates the falling edge of the crank trigger position. Your distributor is
now set to Top Dead Center of cylinder #1.
19.While taking care not to rotate the distributor, install it on your engine. The oil pump
drive shaft may have to be rotated somewhat to get the distributor seated properly.
20.Verify that neither of the cam or crank LEDs are lit. If this is not the case, repeat steps
14-17 until neither LED is lit, and the distributor is installed in the engine. Lock down37
the distributor, and turn the ignition key to the Off position. The key must remain in the
Off position for at least 30 seconds for the programming changes to be implemented
by the ECM.
21.Rotate the engine backward to 25-35 degrees BTDC. Make a small mark on the
outside of the distributor, adjacent to where the rotor is pointing.
22.Install the distributor cap, and make a second mark at the terminal closest to the first
mark. This is the terminal for cylinder #1.
23.Remove the distributor cap, and adjust the rotor so it is pointed at the center of the
cylinder #1 terminal, using the two small Philips-head screws.
24.Install the distributor cap and spark plug wires. Double check that the spark plug wires
match the firing order previously set in the ECM.
25.Your Dual Sync Distributor is now correctly mounted, phased, and ready to run
Sequential Fuel Injection.


