
TSP 1 7/8 stanless steel install
 04-07-2013, 01:22 PM
#1
Teching In
Thread Starter

Join Date: Jul 2010
Posts: 8
Likes: 0
Received 0 Likes
on
0 Posts

I purchased these headers recently and was able to put the passenger side header in with no problems but the drivers side header, that's a whole other story. I read some other posts that said i needed to pull the motor mount out in order to get the header in place. So i did just that, i pulled the motor mount out as one whole piece. after putting the head loosely in place i was able to put the motor mount back in place with out much trouble , except when i got to the last bolt that holds the motor mount to the block.i spent hours just on this one bolt trying to put this on bolt in. i have tried wiggling the motor around and rocking the motor around but no luck. All the bolts are in the k member and the block side of the motor mount. One of the problems i am having to getting my figures even in there to get the bolt started by hand nor can i get any tools in there to potentially ad in getting this one bolt in.
Should i pull the header back out and take apart the motor mount to bolt the block side of the mount to the block itself? Then put the header back in, then bolt the k member half of the motor mount back in.
Has anyone tried grinding down the flange or lip on the k member to make
the header fit?
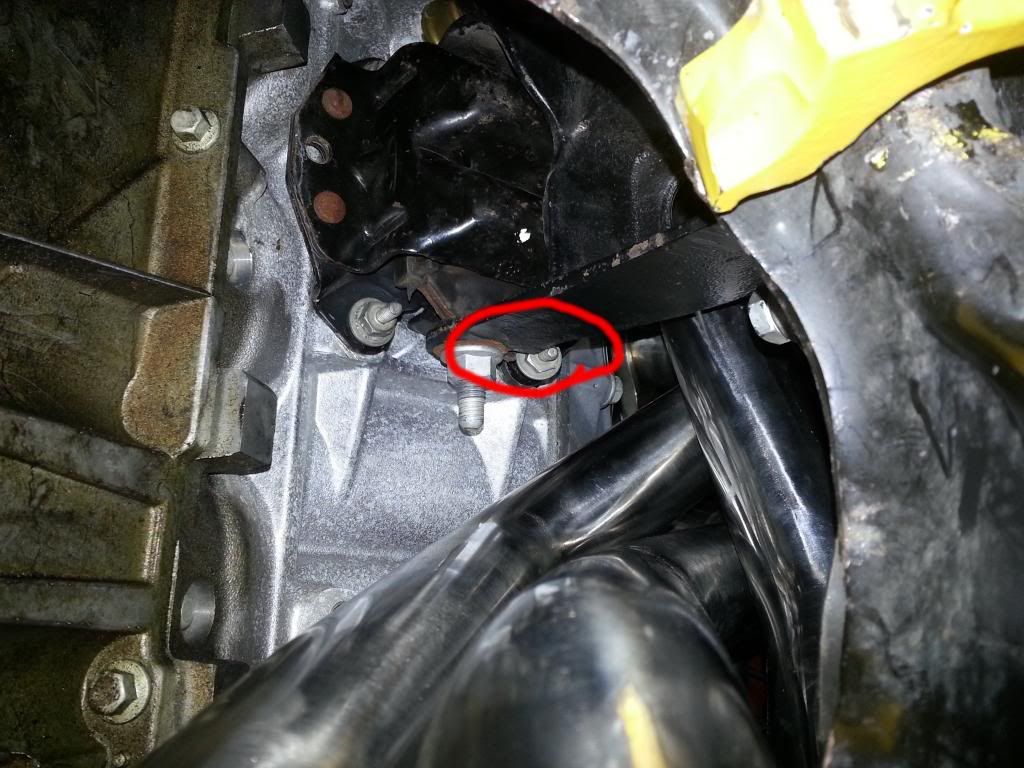
Should i pull the header back out and take apart the motor mount to bolt the block side of the mount to the block itself? Then put the header back in, then bolt the k member half of the motor mount back in.
Has anyone tried grinding down the flange or lip on the k member to make
the header fit?
 04-07-2013, 04:23 PM
#2
TECH Fanatic
iTrader: (5)
That's when it's time to stop and have a beer. Some times drilling out the bolt holes to the next drill size allows just enough movement to get that one stubborn bolt started. Never tighten any bolts or nuts until all are started straight. Don't put any weight on what ever it is your working on. Have fun with that.
04-07-2013, 08:57 PM
#4
On The Tree
iTrader: (15)

Join Date: Sep 2011
Location: Wausau, WI
Posts: 136
Likes: 0
Received 0 Likes
on
0 Posts
Try loosening up the three other bolts of the clamshell that is attached to the block, and loosen up the four bolts of the pedestal that are attached to the k-member. Just loosen them; don't take them completely out. By having all the bolts semi-loose; it gives you a little wiggle room to get every bolt started.
I found it easiest to bolt the clamshell to the block first, and then the pedestal to the k-member.
I found it easiest to bolt the clamshell to the block first, and then the pedestal to the k-member.
04-07-2013, 10:02 PM
#5
Try loosening up the three other bolts of the clamshell that is attached to the block, and loosen up the four bolts of the pedestal that are attached to the k-member. Just loosen them; don't take them completely out. By having all the bolts semi-loose; it gives you a little wiggle room to get every bolt started.
I found it easiest to bolt the clamshell to the block first, and then the pedestal to the k-member.
I found it easiest to bolt the clamshell to the block first, and then the pedestal to the k-member.
 04-07-2013, 10:56 PM
#6

Get the car up a but higher. Slide the headers in straight up rather than at a slanted angle.
I ran into the same problem with those headers. The driver side was a pain for sure. My buddy was underneath. That's what he did. Slide the headers straight up to where it forms an L. Should clear easily.
I ran into the same problem with those headers. The driver side was a pain for sure. My buddy was underneath. That's what he did. Slide the headers straight up to where it forms an L. Should clear easily.
Trending Topics
04-08-2013, 10:02 AM
#9
TECH Fanatic
iTrader: (4)

Join Date: Jun 2009
Location: Maine
Posts: 1,256
Likes: 0
Received 0 Likes
on
0 Posts
Yeah man, those headers will hit and bang around with a Y pipe....get some new motor mounts.
It sucks....bad....but loosen all the bolts and get the difficult one in there. best of luck, it will be worth it!
It sucks....bad....but loosen all the bolts and get the difficult one in there. best of luck, it will be worth it!
04-08-2013, 10:30 AM
#10
Staging Lane
Join Date: May 2012
Location: Hugo, MN
Posts: 83
Likes: 0
Received 0 Likes
on
0 Posts
I just did my TSP long tubes and like mentioned above... you can get the header in if you get the car up high enough and put them in going straight up as opposed to trying to put them in at an angle. I had to take the oil pan plug and oil filter out and after that I had no issues and pretty much slid in like butter. take the header back out and get your motor mount installed again. I did poly motor mounts but loosen the 4 bolts for the pedestal bolted to the K member and loosely put the bolt in the clamshell to the block and while moving both the pedestal the clamshell you should be able to line up the hole for the long bolt and get that in and then tighten all the bolts but dont put any weight on the bolts until they are all tight. As you are tightening them adjust the level of your jack accordingly. I tried doing this 100 different ways and loosening the k member bolts was the ticket. After you get the mount all bolted back up then take the header and slide it straight up and not at an angle. But of course the car has to be in the air really high.
04-08-2013, 05:27 PM
#11
Teching In
Thread Starter
Join Date: Jul 2010
Posts: 8
Likes: 0
Received 0 Likes
on
0 Posts
Thanks for everyone's input, it is much appreciated!
i did not plan on taking the motor mount out. Had i planned on removing the motor mount i would have bought new ones. Having said that i think i can get away with reusing the original one because the car only has 14000 miles on it.
So it sounds like step 1 is to take the motor mount back out, step 2 take the header back out, step 3 put motor mount back in, step 4 jack the car much higher step 4 reinstall header "straight up" this time. Did i leave anything out?
04-08-2013, 05:31 PM
#12
Launching!
iTrader: (2)

Join Date: Dec 2007
Location: Bucksport, maine
Posts: 243
Likes: 0
Received 0 Likes
on
0 Posts
I have tsp 1 7/8 headers too, damn don't they sit low to the ground. I'm going to put in my new poly motor mounts when i drop my k-member to do my H/C/I install. i'm guessing thats why they are sitting soo low ? worn out motor mounts.
04-09-2013, 10:28 AM
#16
I was able to get all the block bolts in with a few extensions, a 13mm swivel socket and impact. All I did was grind off the stupid threaded on the top of the bolts. Made it a snap! Keep all the other bolts lose including the big mount through-bolt... yours is tight not giving you any wiggle room.
04-28-2013, 04:53 PM
#17
Teching In
Thread Starter
Join Date: Jul 2010
Posts: 8
Likes: 0
Received 0 Likes
on
0 Posts
THANK YOU TO EVERYONE REPLY'S!
I ended up buy 6 ton jack stands, fully extended at 23 1/2 tall. This aloud me to put the header in "straight up".
i have one more question about the TSP catted y pipe. After we installed it we noticed that it is hanging really low on the drive's side. Can i rotate the this so it is angled up toward the car more? The TSP y pipe came in 3 pieces so i was thinking about trying that.
[IMG]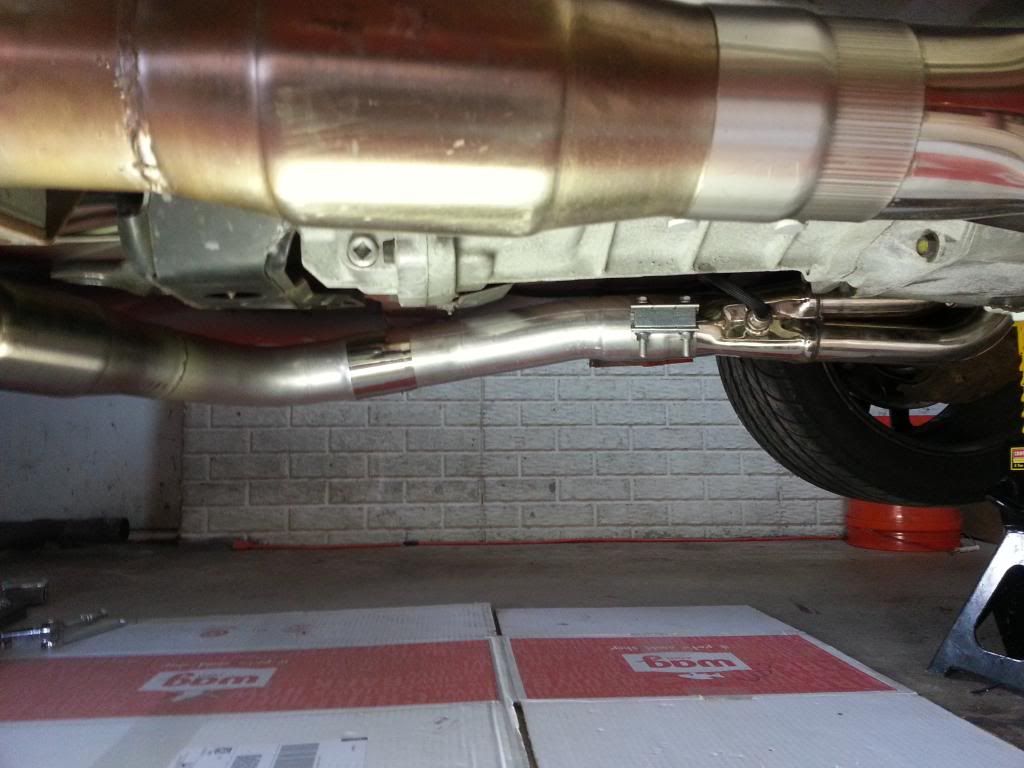 [/IMG]
I ended up buy 6 ton jack stands, fully extended at 23 1/2 tall. This aloud me to put the header in "straight up".
i have one more question about the TSP catted y pipe. After we installed it we noticed that it is hanging really low on the drive's side. Can i rotate the this so it is angled up toward the car more? The TSP y pipe came in 3 pieces so i was thinking about trying that.
[IMG]
 [/IMG]