
My homemade Ram Air Box- pics inside
 06-09-2013, 03:44 PM
#1

I have been looking at buying a SSRA or a "chris1313" Ram Air setup for a while. They seem to be a pretty good mod from some of the results I've seen posted. But, then I got to thinking, maybe I'll just try and make one myself. I know that these projects can sometimes turn out to be a pain in the ***, and you just wish you would have gone ahead and paid the money and been done with it!
Lucky for me, I work at a shop and run a Mitsubishi 4000 watt CNC Laser and have access to all kinds of sheetmetal and sheet aluminum material. I decided to take some measurements after viewing some pics of the SSRA & Chris1313 setups here on the forum.
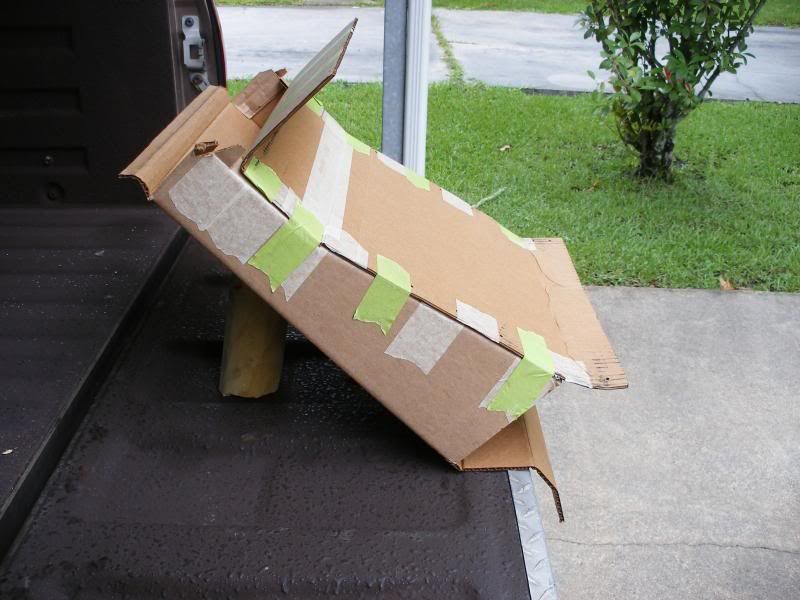
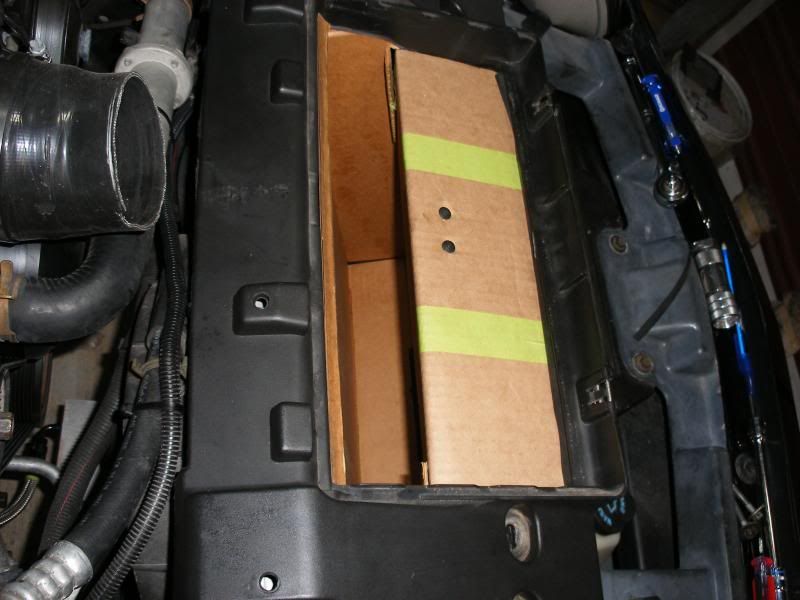
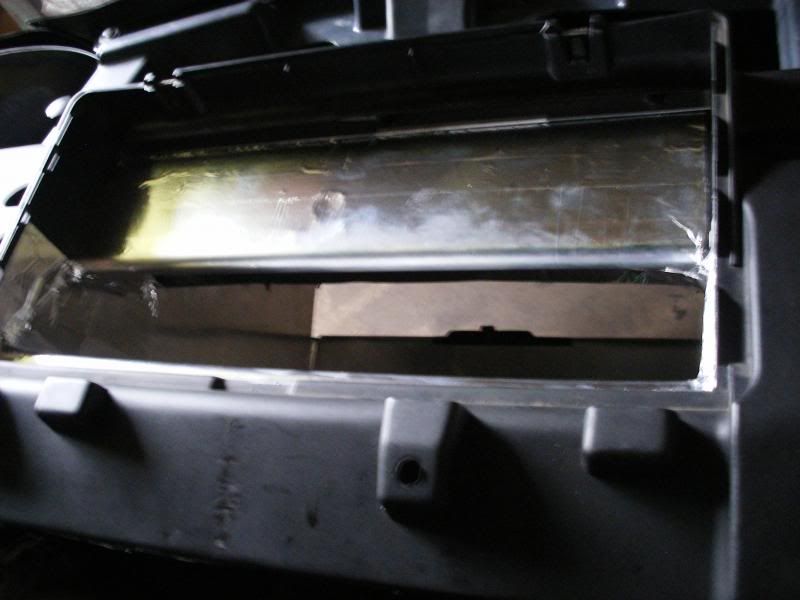
I made a rough cardboard template first and bent it up into the basic shape that I thought might fit. Had to make a couple of small revisions to the 1st model to make sure I could get it into place and still have clearance between it and the radiator. Once I was satisfied with the fitment, I went ahead and cut the real deal out of some .040" thick 5052 aluminum material. We have a small sheet metal brake in the shop, so I used it to make the bends I needed.
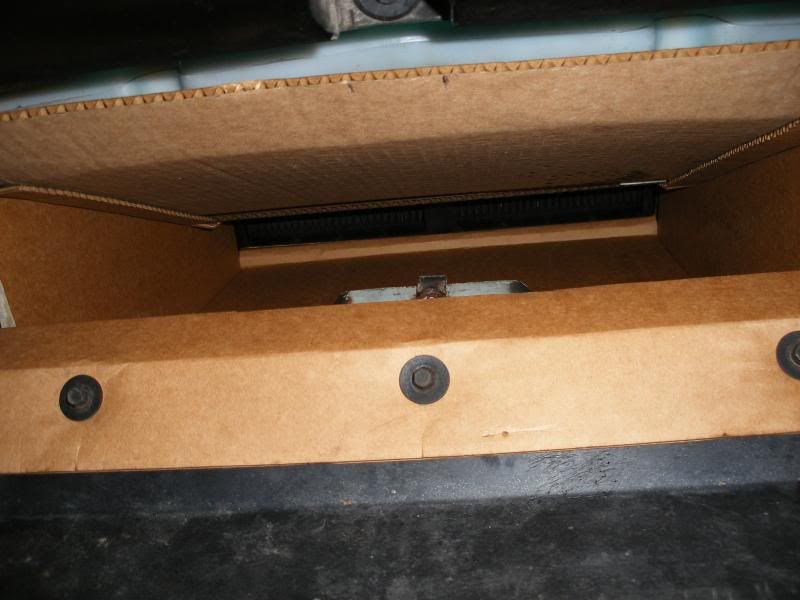
Brought everything home with me Friday evening after work. Used 1/8th aluminum rivets to mount a small brace I made to attach the lower opening to the lower front bumpercover push-pin location, and bolted the lower bent flange to the black air dam. I used 1/4" plastic push-pins to connect the two halves of the ram air box together once I had everything fitted into place. I had to cut the bracing off of the hood latch support that everybody talks about, no big deal as its still supported by four other bolts.
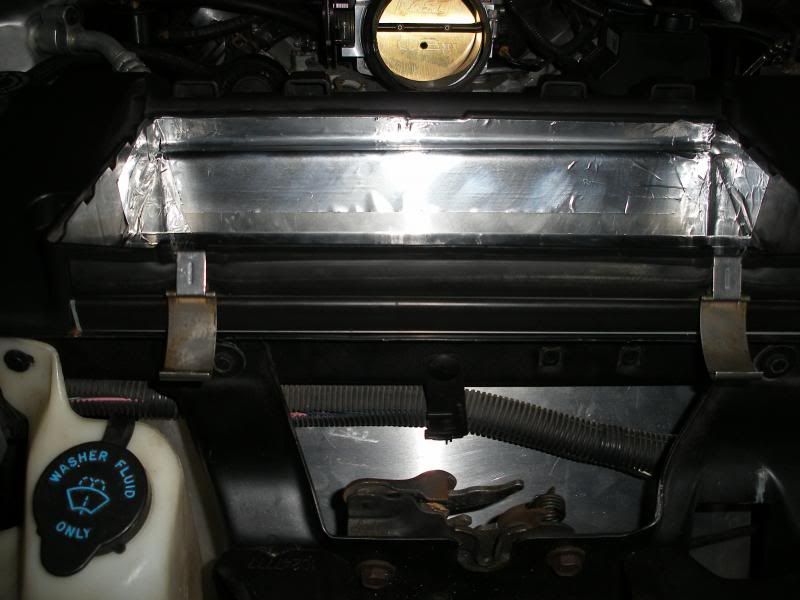
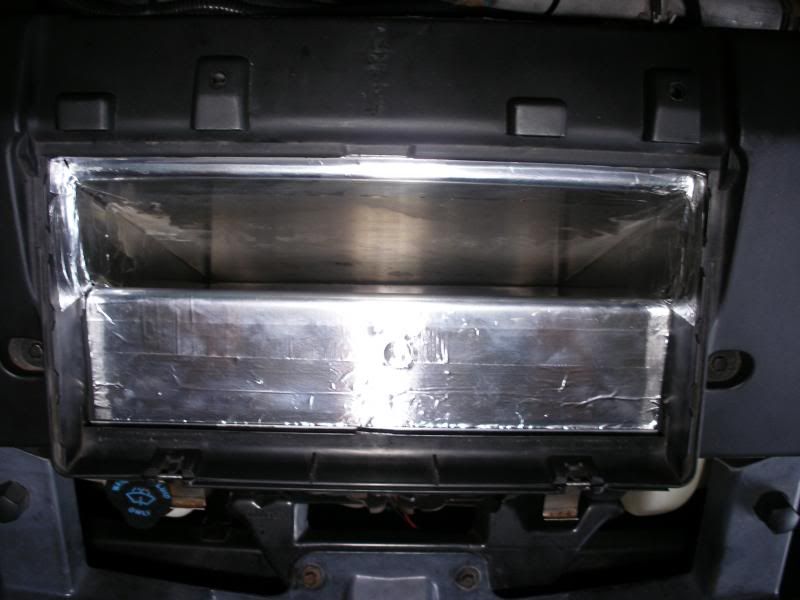
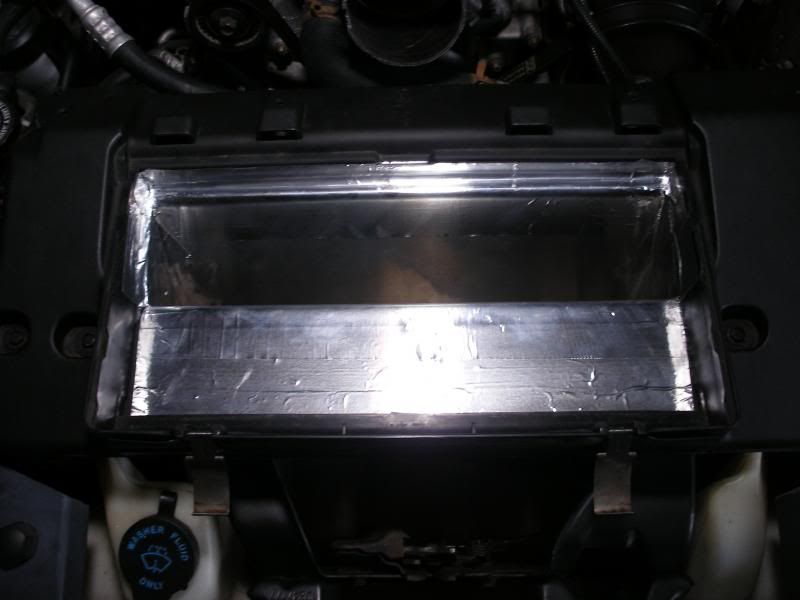
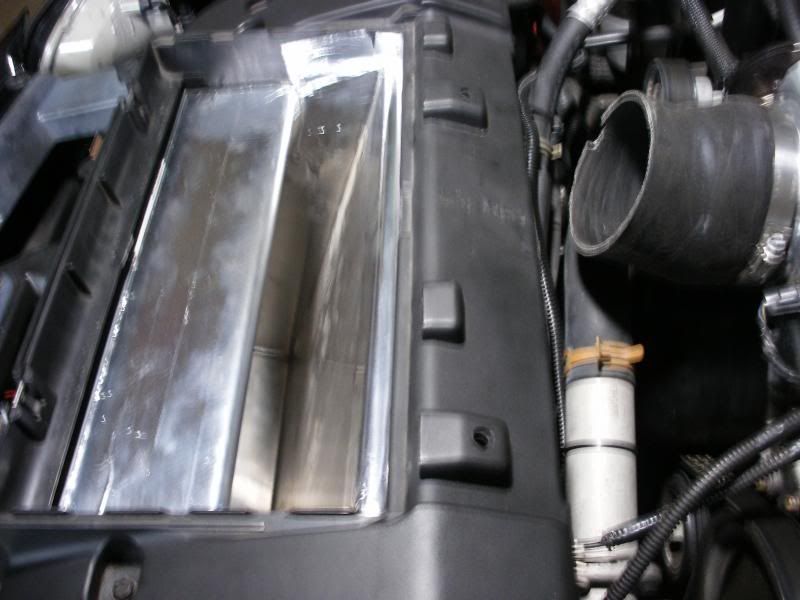
I sealed up where the upper parts of the ram air box protrudes up into the lower part of the factory airlid base. I used some aluminum tape that is used for A/C duct work and it matches the aluminum finish as well and is easy to work with. I used a piece 3/4" aluminum angle and the small weatherstrip piece that was on front of the core support just below the airlid base to seal up the opening where the factory airlid draws in air for the SS & Ws6 hoods.
I have attached a few pics to show my cardboard template test fits, and several showing the actual finished product installed in place.
I did go to a local track Friday night after the install. Unfortunantly I cant give any exact numbers for how well it worked because I had a few other factors involved that allowed my car to improve by 1/2 a second and a solid 3.5 mph and almost a full 1/10th quicker in the 60 ft time.
But, I will say that I don't see how it could not have been a decent part of the overall gains. It has to help, especially with a 121 mph trap speed it has to be capturing some air and forcing it up into the intake tract.
Here are some pics to look at of the project.

Lucky for me, I work at a shop and run a Mitsubishi 4000 watt CNC Laser and have access to all kinds of sheetmetal and sheet aluminum material. I decided to take some measurements after viewing some pics of the SSRA & Chris1313 setups here on the forum.
I made a rough cardboard template first and bent it up into the basic shape that I thought might fit. Had to make a couple of small revisions to the 1st model to make sure I could get it into place and still have clearance between it and the radiator. Once I was satisfied with the fitment, I went ahead and cut the real deal out of some .040" thick 5052 aluminum material. We have a small sheet metal brake in the shop, so I used it to make the bends I needed.
Brought everything home with me Friday evening after work. Used 1/8th aluminum rivets to mount a small brace I made to attach the lower opening to the lower front bumpercover push-pin location, and bolted the lower bent flange to the black air dam. I used 1/4" plastic push-pins to connect the two halves of the ram air box together once I had everything fitted into place. I had to cut the bracing off of the hood latch support that everybody talks about, no big deal as its still supported by four other bolts.
I sealed up where the upper parts of the ram air box protrudes up into the lower part of the factory airlid base. I used some aluminum tape that is used for A/C duct work and it matches the aluminum finish as well and is easy to work with. I used a piece 3/4" aluminum angle and the small weatherstrip piece that was on front of the core support just below the airlid base to seal up the opening where the factory airlid draws in air for the SS & Ws6 hoods.
I have attached a few pics to show my cardboard template test fits, and several showing the actual finished product installed in place.
I did go to a local track Friday night after the install. Unfortunantly I cant give any exact numbers for how well it worked because I had a few other factors involved that allowed my car to improve by 1/2 a second and a solid 3.5 mph and almost a full 1/10th quicker in the 60 ft time.
But, I will say that I don't see how it could not have been a decent part of the overall gains. It has to help, especially with a 121 mph trap speed it has to be capturing some air and forcing it up into the intake tract.
Here are some pics to look at of the project.


Last edited by floman; 06-09-2013 at 03:54 PM.


Trending Topics
06-10-2013, 05:11 PM
#9
Thanks guy's. Yeah, I am fortunate that my boss will let me use the Laser to cut out some material from time to time for my personal projects. Once I got the final dimensions I needed , we programmed it up and at the end of my shift I cut it out of the .040" aluminum, only took 2-3 minutes. That Mitsubishi Laser is badass for stuff like that.


 06-12-2013, 03:43 AM
#13
Had cooler weather by about 12 degrees from last track outing, also corrected some shift points on my new 4L85E install, and then got the Ram Air box installed at the same time.
Overall gains were great, went from a previous run three weeks ago for the first time on the new 4L85E and ran 11.71 @ 117.9 on a 1.71 60 ft. Then, with my tranny shift point adjustments, Ram Air box, 12 deg cooler temps I did a new best of 11.27 @ 121.17 on a 1.63 60ft. Not too bad for my heavy *** raceweight and tightish nitrous spec converter, raceweight was 3775 lbs. Drove the car over 75 miles round trip to the track, made three passes and drove back home. Was pretty cool, the first two times to the track with the car since I bought it back in Nov 2012.
Its coming along in small steps. Ready to see what it will do on the 150 shot of juice. Hoping it might run some low 10s at 128-130 mph ??
The following users liked this post:
rob_mcarthur (10-10-2019)
 06-14-2013, 01:38 PM
#16
Launching!
Join Date: May 2012
Location: Pearland TX
Posts: 261
Likes: 0
Received 0 Likes
on
0 Posts
Wouldn't that plastic political sign material been a better choice?
http://www.signsus.com/allproduct/co..._info_page.php
http://www.signsus.com/allproduct/co..._info_page.php
06-14-2013, 02:32 PM
#17
Wouldn't that plastic political sign material been a better choice?
http://www.signsus.com/allproduct/co..._info_page.php
http://www.signsus.com/allproduct/co..._info_page.php
Keep in mind that the finished product is made from .040" sheet aluminum, so once it is cut and bent it becomes very rigid. The cardboard is flexible and easy to work with while doing trial fittings until you get the final dimensions and proper fit.
06-14-2013, 03:02 PM
#18
Launching!
Join Date: May 2012
Location: Pearland TX
Posts: 261
Likes: 0
Received 0 Likes
on
0 Posts
I actually bought something similar to that at Home-Depot, its fairly strong material. For template purposes, the cardboard seems to hold its bent shape better.
Keep in mind that the finished product is made from .040" sheet aluminum, so once it is cut and bent it becomes very rigid. The cardboard is flexible and easy to work with while doing trial fittings until you get the final dimensions and proper fit.
Keep in mind that the finished product is made from .040" sheet aluminum, so once it is cut and bent it becomes very rigid. The cardboard is flexible and easy to work with while doing trial fittings until you get the final dimensions and proper fit.
06-16-2013, 09:02 PM
#20
Thanks. Yeah, it was some work involved with all of the trial fitting to get the final dimensions. I like the end product, seems to fit pretty well and has to feed the intake tract much better than the stock set-up with the "FRA" mod. I will get some better pics soon that shows the actual finished product better. You can see much more detail from the bottom side when the car is jacked up on stands.