
1966 Malibu LSX376/T56 PT attempt...
 08-10-2013, 10:17 PM
#1
Staging Lane
Thread Starter

Join Date: Apr 2013
Posts: 71
Likes: 0
Received 0 Likes
on
0 Posts
I've been reading here and on protouring.com for quite a while. Sold my 2009 Z06 to get my dream car and now it's time to get this thing moving!
Car is original V8 Malibu. Somewhere along the line a 305 was put in and it runs fine but has no power at all. Especially compared to my old Z06.
Here's what I have / have ordered so far:
SC&C AFX performance package with almost all the upgrades possible - all parts now in, just waiting on the shocks.
Kore3 C6 front brake kit
Power brake booster/master
JGC steering box already installed
GMPP LSX376, corvette accessory drive/intake/coils
Hooker SuperComp ceramic long tube headers 2289-1HKR
DirtyDingo Double-D mounts
T-56 Magnum - "Street" wide ratio
Monster stage 2 clutch
Quicktime 8020 bellhousing
Griffin 8-00009-LS radiator
Corvette fuel filter/regulator
Next things on the order list:
Hydraulic clutch kit - I think the Keisler kit is about as good as it gets, saw tommycomfort used it on his 66 and was happy with it.
Fuel tank/pump - planned to use Tanks Inc pump and modify my tank but they just added 66 Chevelle EFI tanks to their site so I'm going to go with that. I am going to call them to find out if it's possible to modify the filler neck to accept one of the new "fill through" caps so I don't have to crawl on my knees to fill this thing up. A bonus is the new tank is 1" deeper so it should have a higher capacity too.
I'm sure I'll need a rear end replacement soon. I was about ready to order a Currie fab9 but I will have to wait a month or two before I order that. I'm waiting to do the rear brakes until I decide which rear end I'm using.
The things I'm not sure on as of now:
The radiator I ordered has in/out both on passenger side and I don't know which hoses I'll need.
Radiator fans - I'm thinking about the two speed Volvo, but may just get the setup Griffin makes for the radiator I ordered. Not sure. I am glad that my engine controller can control the relays so I don't have to make that up myself.
I'm sure I have forgotten something along the way. I know I'll have to get a custom / modified driveshaft. I am also planning to modify the original trans crossmember if possible - but I sure wish someone made an adjustable crossmember for the 66s.
Any advice/opinions? I'm expecting 450HP (maybe more with tuning) from my LSX as is. I do plan to add a supercharger in the future, but I want to iron out the rest before I jump into that.
Was planning to do the interior and repaint this fall as well, but the LS/T56 swap is getting pretty expensive so I will wait a while on that.
I'll have to upload some pictures soon.

 08-16-2013, 08:16 AM
#3
Staging Lane
Thread Starter
Join Date: Apr 2013
Posts: 71
Likes: 0
Received 0 Likes
on
0 Posts
Made great progress - considering it's just me working alone.
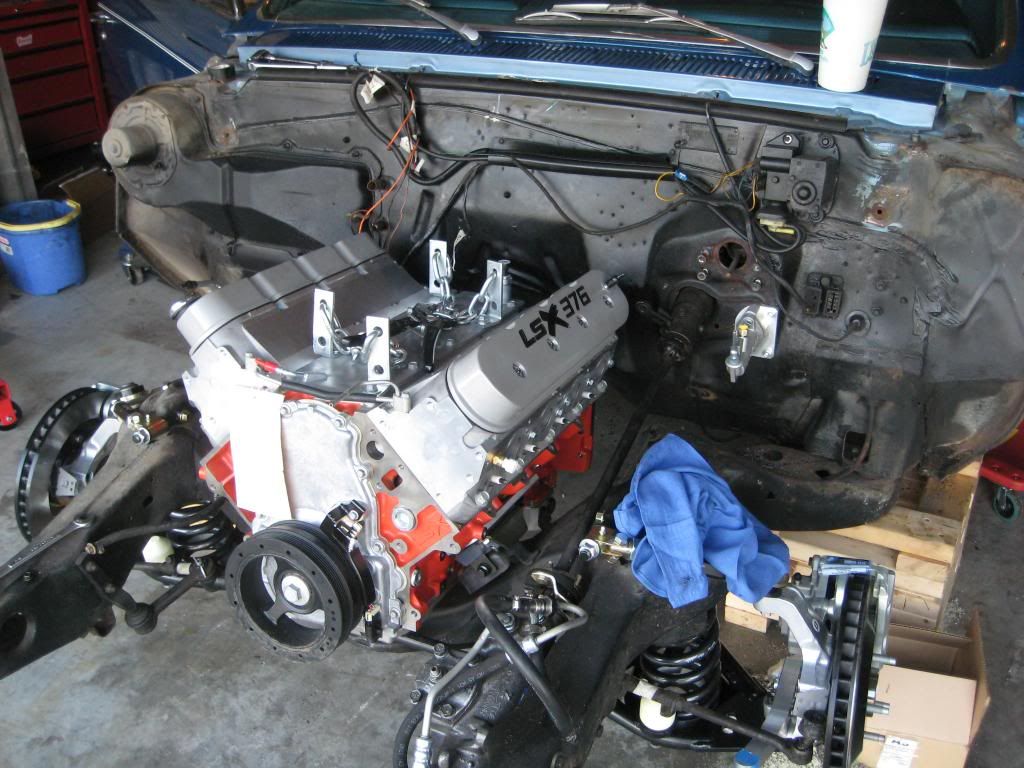
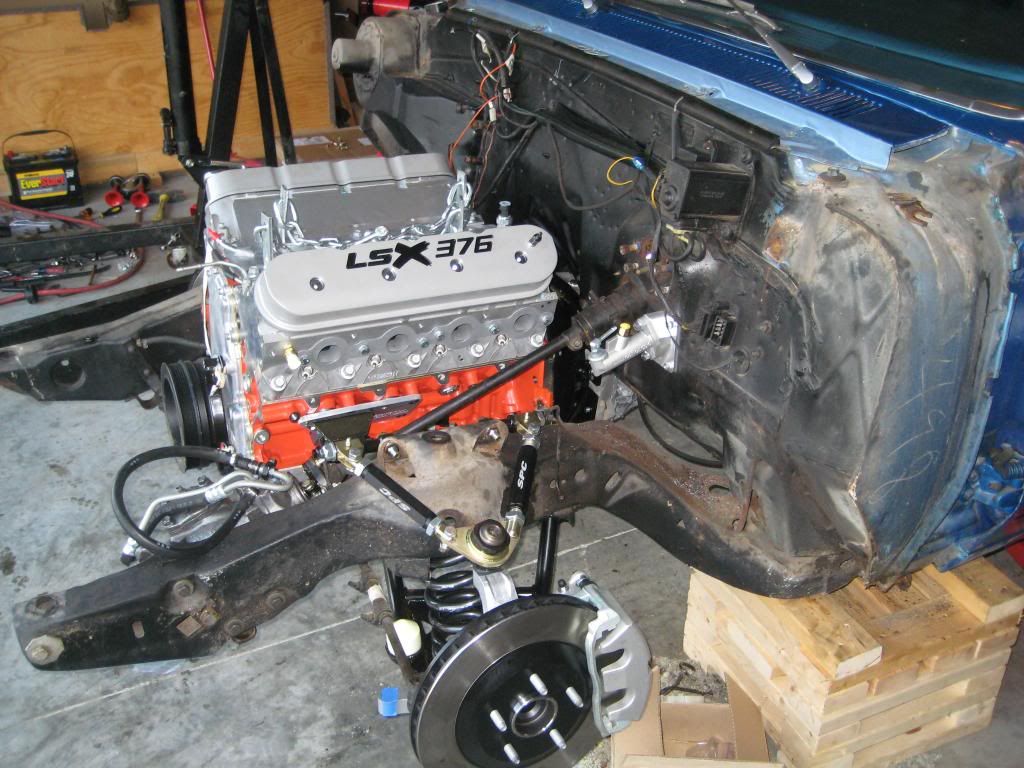
Got the oil pan gasket installed, can't figure out how the dipstick tube is supposed to go, I guess I'll do that after the headers are on. Here's the first test fit of LSX alone:
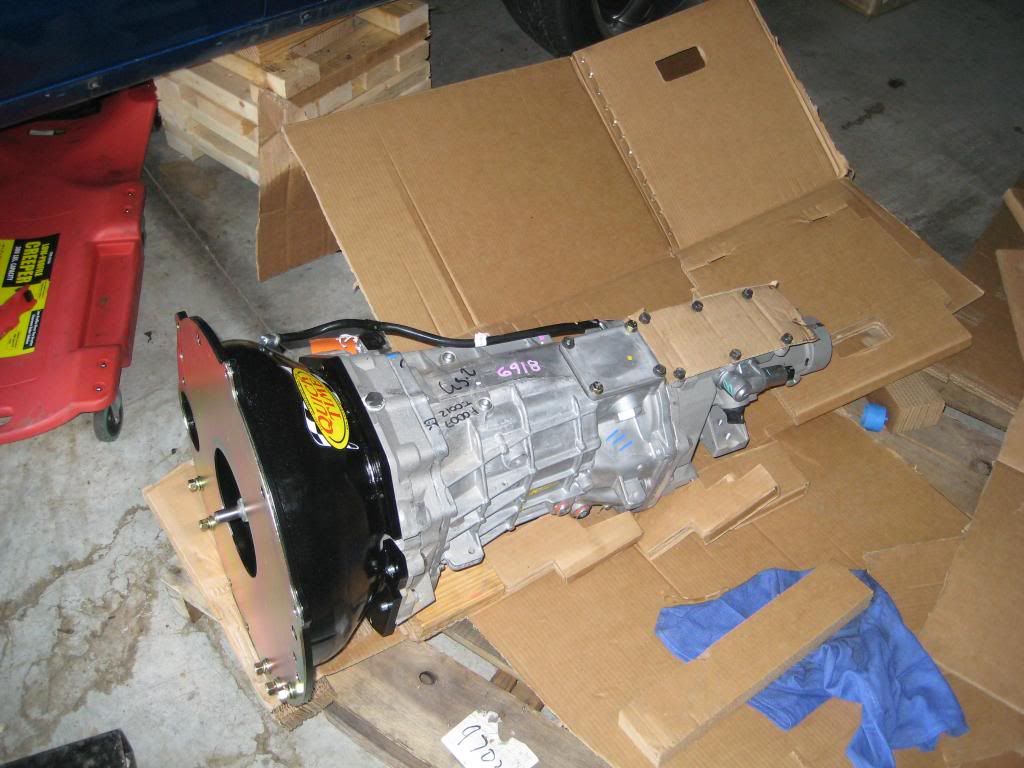
T56 Magnum showed up today and the RM8020 QuickTime bellhousing was a perfect match. Got it mounted after a test fit of just the motor. I am considering applying for a patent for that sweet shifter hole cover I invented:
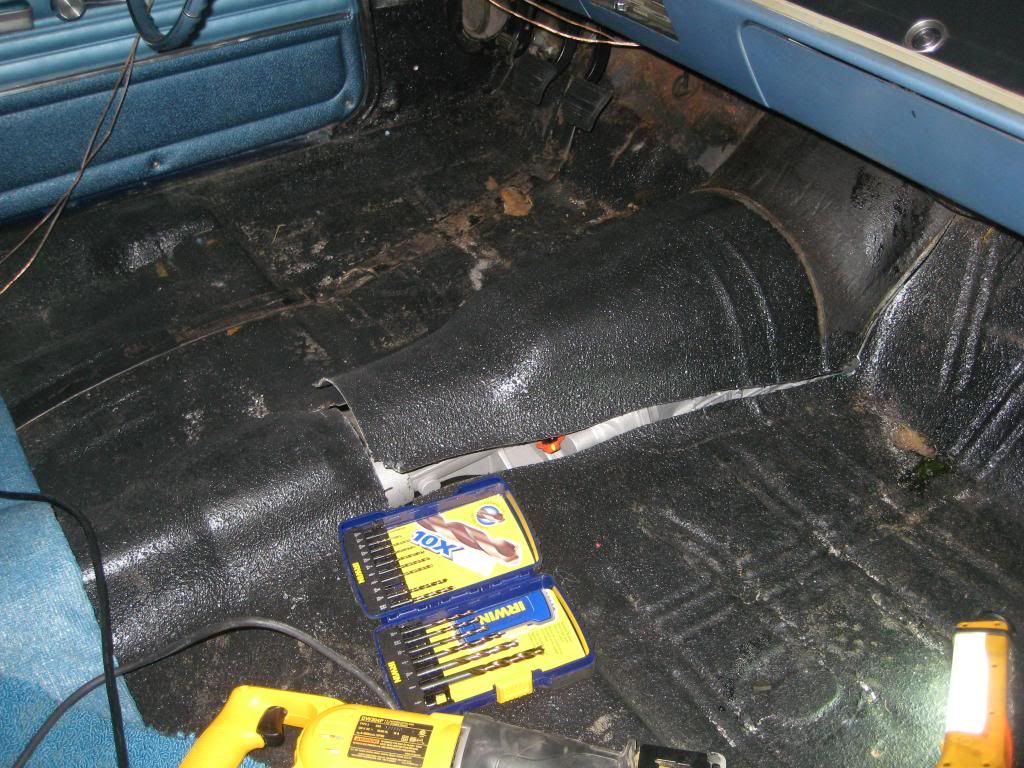
Cut the floor mildly, I left the front attached and let it hinge open to fit the trans.
I ended up getting the motor/trans in as a unit and it's sitting there now. I still have to test-fit the headers before I see what I can do about a trans crossmember.
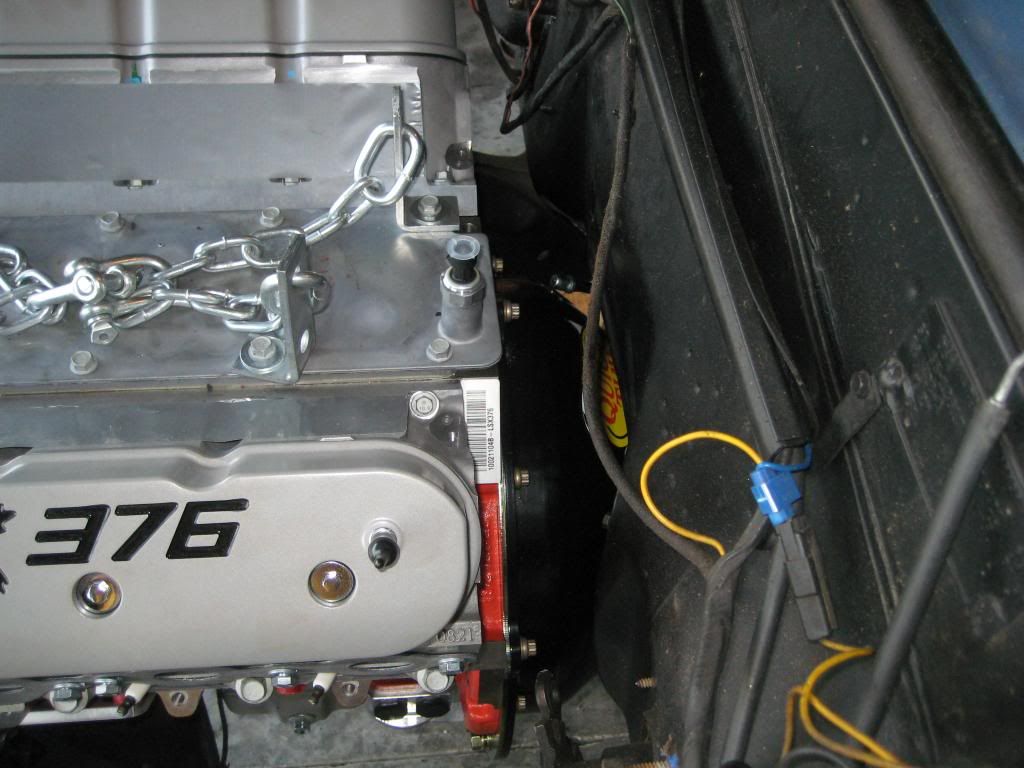
Firewall clearance
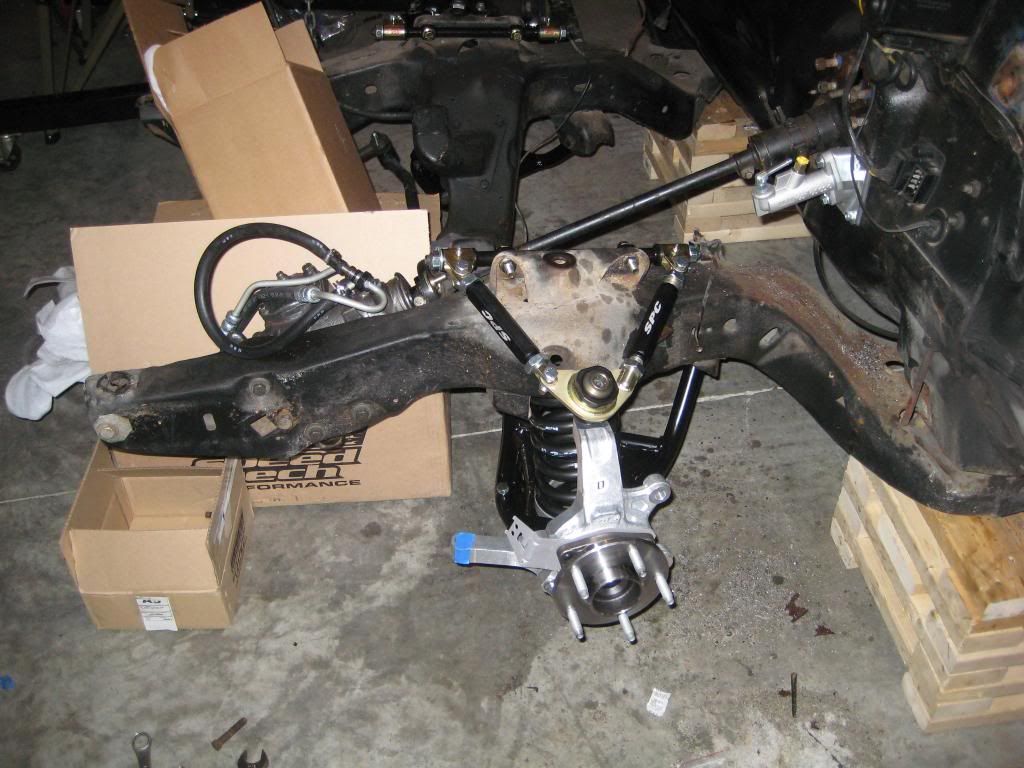
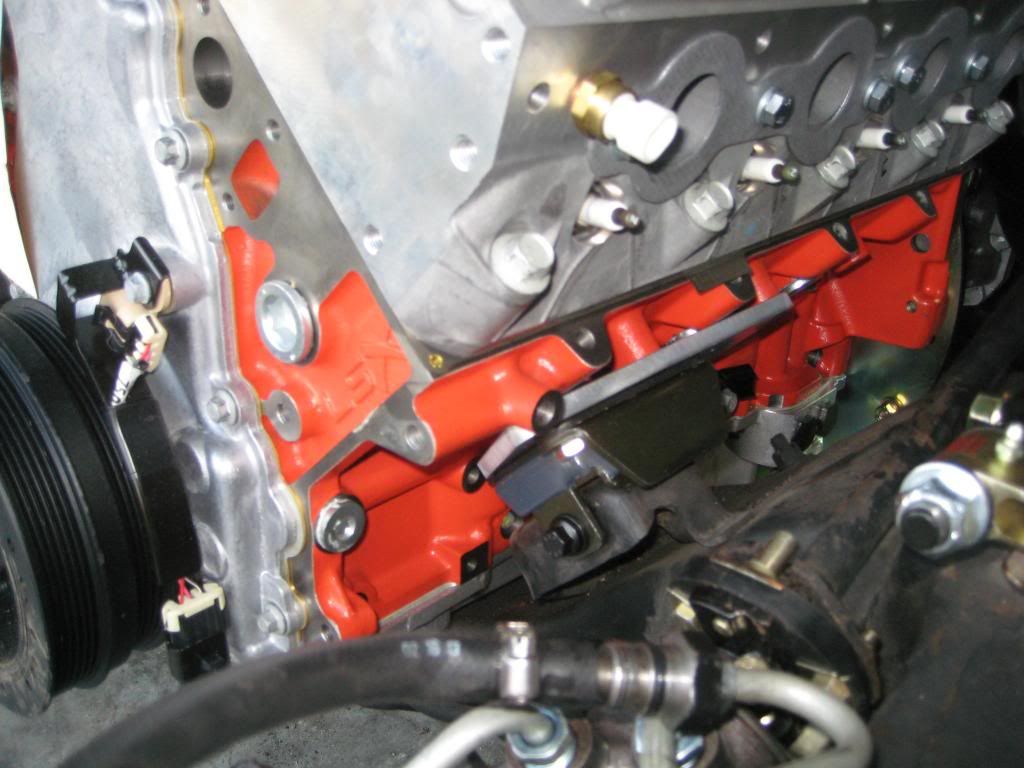
Picture of engine mount with Double-D Dirty Dingo mount - set at neutral now. I will put it at 1" back if needed for the headers. I hope I can keep it as is since I'd have easy access to the bellhousing bolts and just might be able to fit the coils on the firewall too.
Got the oil pan gasket installed, can't figure out how the dipstick tube is supposed to go, I guess I'll do that after the headers are on. Here's the first test fit of LSX alone:
T56 Magnum showed up today and the RM8020 QuickTime bellhousing was a perfect match. Got it mounted after a test fit of just the motor. I am considering applying for a patent for that sweet shifter hole cover I invented:
Cut the floor mildly, I left the front attached and let it hinge open to fit the trans.
I ended up getting the motor/trans in as a unit and it's sitting there now. I still have to test-fit the headers before I see what I can do about a trans crossmember.
Firewall clearance
Picture of engine mount with Double-D Dirty Dingo mount - set at neutral now. I will put it at 1" back if needed for the headers. I hope I can keep it as is since I'd have easy access to the bellhousing bolts and just might be able to fit the coils on the firewall too.


 08-16-2013, 09:08 PM
#6
Teching In

Join Date: Apr 2013
Posts: 43
Likes: 0
Received 0 Likes
on
0 Posts
What oil pan is that? Surprised it fit so easily with the motor mounted forward.
Carb....right? (HP850DP)
BTW: Personally, I would have looking into 1.875 headers (unless you are staying with stock cam)
Carb....right? (HP850DP)
BTW: Personally, I would have looking into 1.875 headers (unless you are staying with stock cam)
08-17-2013, 11:44 AM
#7
Staging Lane
Thread Starter
Join Date: Apr 2013
Posts: 71
Likes: 0
Received 0 Likes
on
0 Posts
No carb, I'm going EFI. I'm using the c6 LS3 intake for now. I'm planning eventually to put a TVS2300 supercharger system on it.
I may upgrade headers later but these are 1.75" - I'm not planning to go past 600ish HP total so I hope they work.
Trending Topics
08-17-2013, 11:45 AM
#8
Staging Lane
Thread Starter
Join Date: Apr 2013
Posts: 71
Likes: 0
Received 0 Likes
on
0 Posts
Test fit the headers - motor has to go to the rearmost position on the Double-D mounts. I did get them both on, but the passenger side just touches the frame and the starter area of the QT bellhousing front plate.
I got a moroso motor mount shim kit just in case, and I think I'm going to go ahead and raise it a bit for the next trial fit too to ensure I clear my steering. It's pretty close right now.
I am having a hard time picturing how I'm going to get the DBW vette pedal mounted. If anyone has pictures of one mounted I'd appreciate it. I am thinking of using hex standoffs to space it from the firewall. I'm also wondering if using all-thread and jam nuts to set the height would work?
Kind of stuck waiting on parts right now. Hopefully by Monday I'll have enough deliveries to get going again.
08-17-2013, 03:51 PM
#9
Staging Lane
Thread Starter
Join Date: Apr 2013
Posts: 71
Likes: 0
Received 0 Likes
on
0 Posts
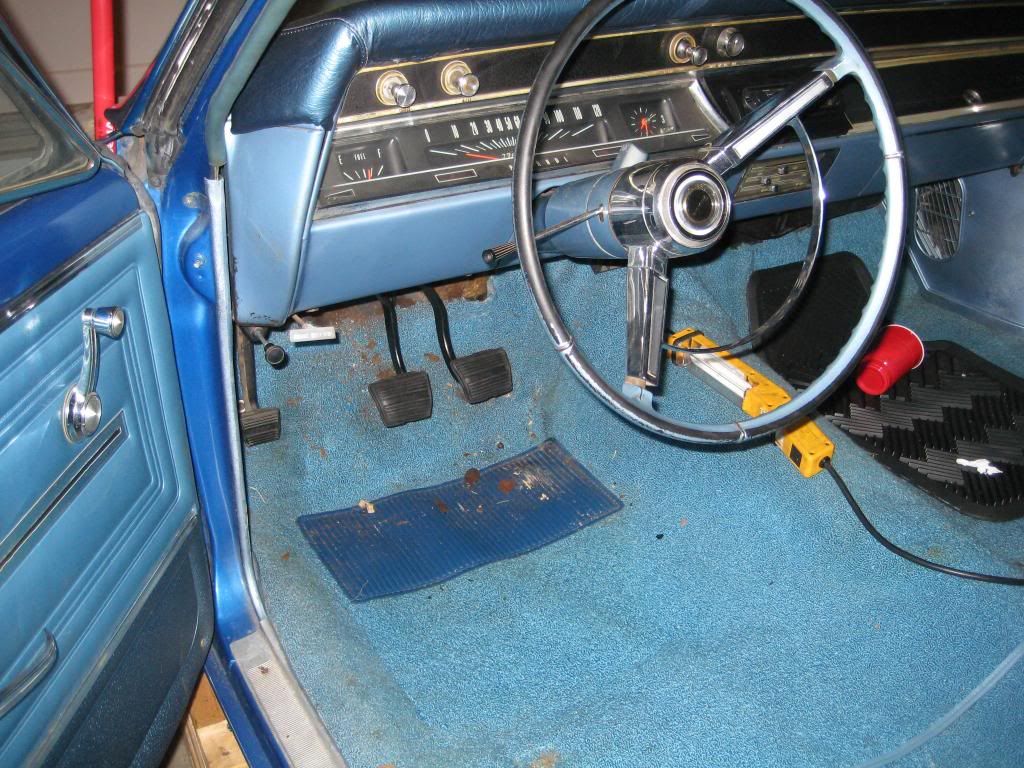
Little background: I've always loved 66 Chevelles above all other cars. 70s are a close second. When wife got pregnant we decided the Z06 just wouldn't work since we couldn't all ride in it - and the only place I go alone is usually work.
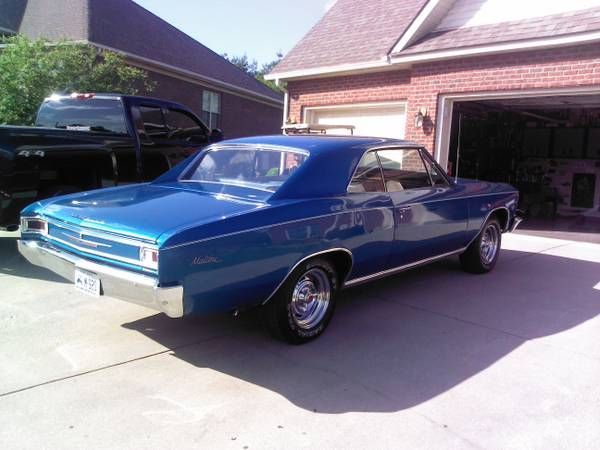
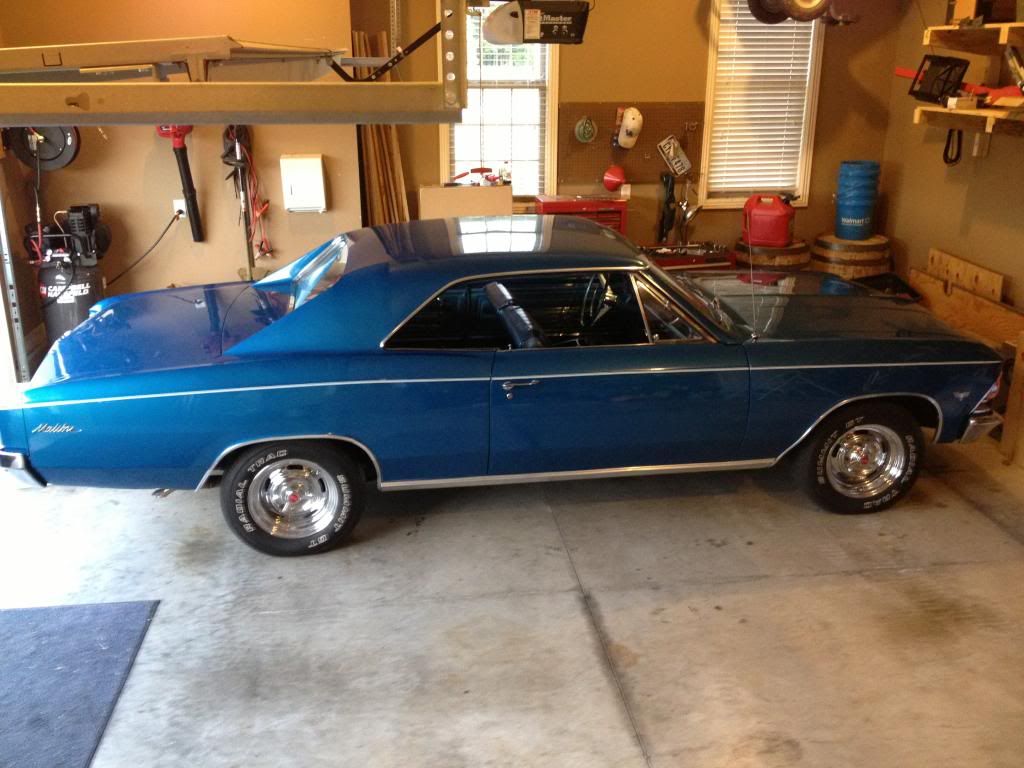
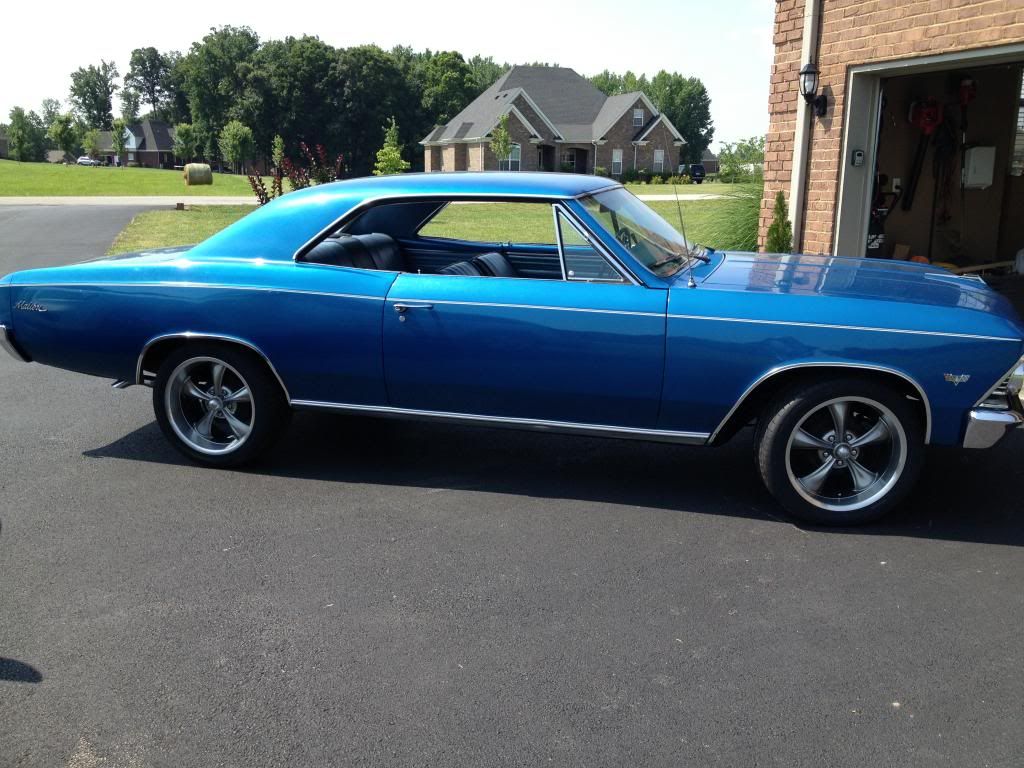
We picked the car up like this a few months ago:
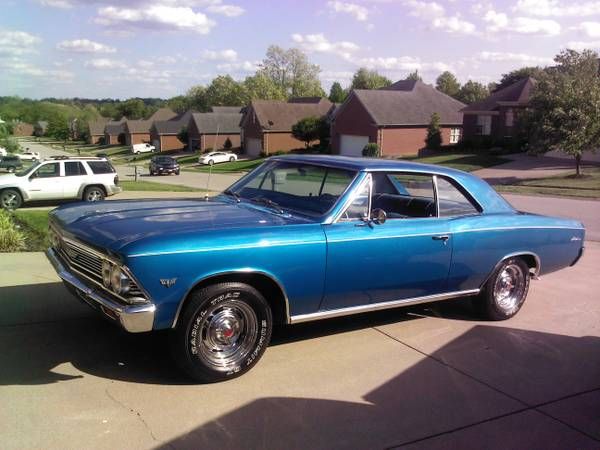
It's a 136 car, Malibu, very bare bones. No power anything. I added power steering quickly and that helped. Next was getting better wheels/tires. I went with Ridler 695s and Hankook Ventus V12s.
Here it is when I looked at it to buy:
Loaded on the truck:

Home:
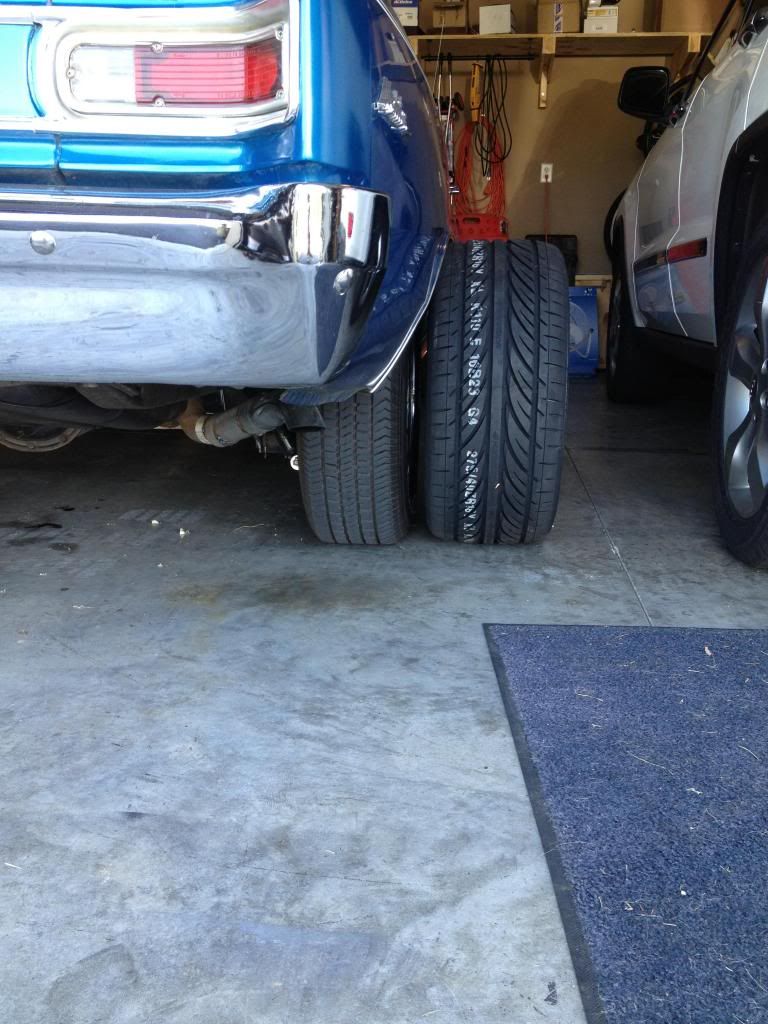
New rear tires vs old tires:
Ridlers and Hankook tires on:
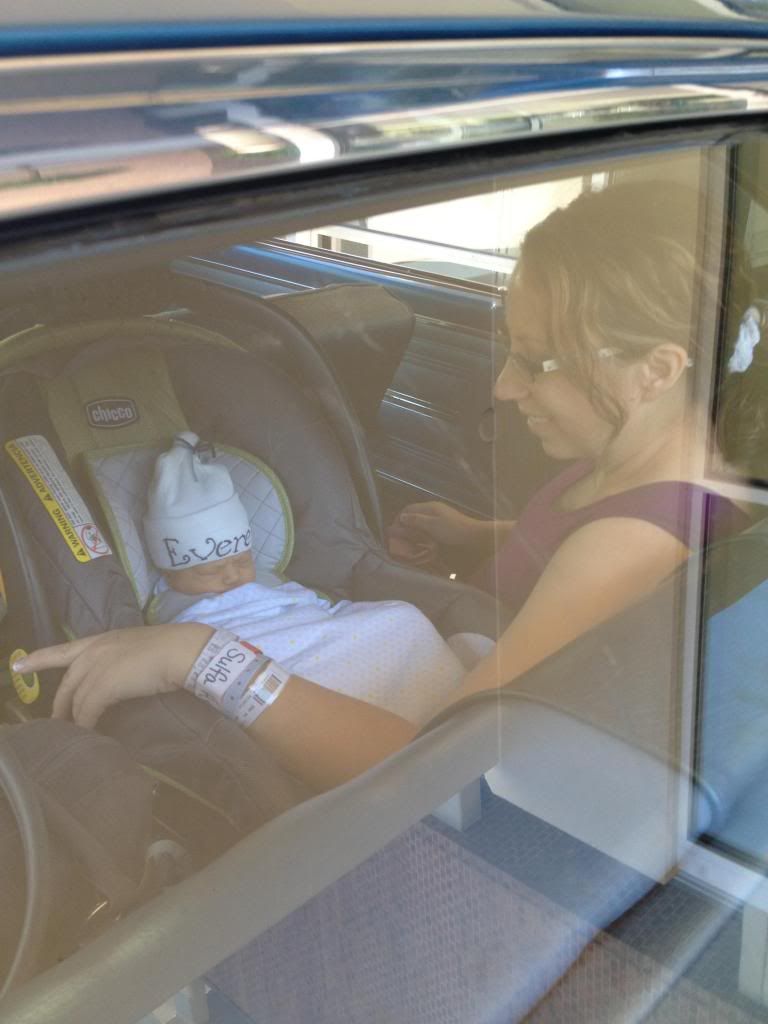
My son's first car ride - had to bring him home in the Chevelle!
We picked the car up like this a few months ago:
It's a 136 car, Malibu, very bare bones. No power anything. I added power steering quickly and that helped. Next was getting better wheels/tires. I went with Ridler 695s and Hankook Ventus V12s.
Here it is when I looked at it to buy:
Loaded on the truck:
Home:
New rear tires vs old tires:
Ridlers and Hankook tires on:
My son's first car ride - had to bring him home in the Chevelle!
08-19-2013, 03:06 PM
#13
congrats on the new born!!
i love those old chevelles and have had a few through the years. i wana kick myself for getn rid of all mine everytime i see another one........especially when they are upgraded to todays standards!! haha very nice project and cant wait to see the results
i love those old chevelles and have had a few through the years. i wana kick myself for getn rid of all mine everytime i see another one........especially when they are upgraded to todays standards!! haha very nice project and cant wait to see the results
08-19-2013, 10:10 PM
#14
Staging Lane
Thread Starter
Join Date: Apr 2013
Posts: 71
Likes: 0
Received 0 Likes
on
0 Posts
Thanks for the kind words. We have been trying for years for this baby and could not be happier.
As for the car, it was "restored" about 8-10 years ago. There were a few pics of the process glued to a piece of foam insulation board in the trunk (I guess it was a display piece for local cruise ins? - it was about up to the standards they did on the rest of the paint). They did the interior pieces apparently and repainted with the darker blue. Pretty horrible and dirty paint job up close. They didn't remove anything when they painted. Lots of overspray on the trim, and original color still visible in the door jambs/underhood/trunk areas. Overall it was very solid though. Floors/trunk/package tray all very nice and solid.
My plan it to do all the mechanicals now, LSX, T56, Currie 9+ Sportsman rear, complete suspension / brake replacement. I will be doing a new Tanks, Inc EFI tank in a few months when they are available. Just using a holley external pump to get things going for now.
Not a lot of progress today. Pulled motor/trans today to move motor mounts forward and add spacers to lift a tad. The tie rod ends looked to be close to touching with the motor forward and I'm sure they'd hit with it moved back so I'll go ahead and raise it.
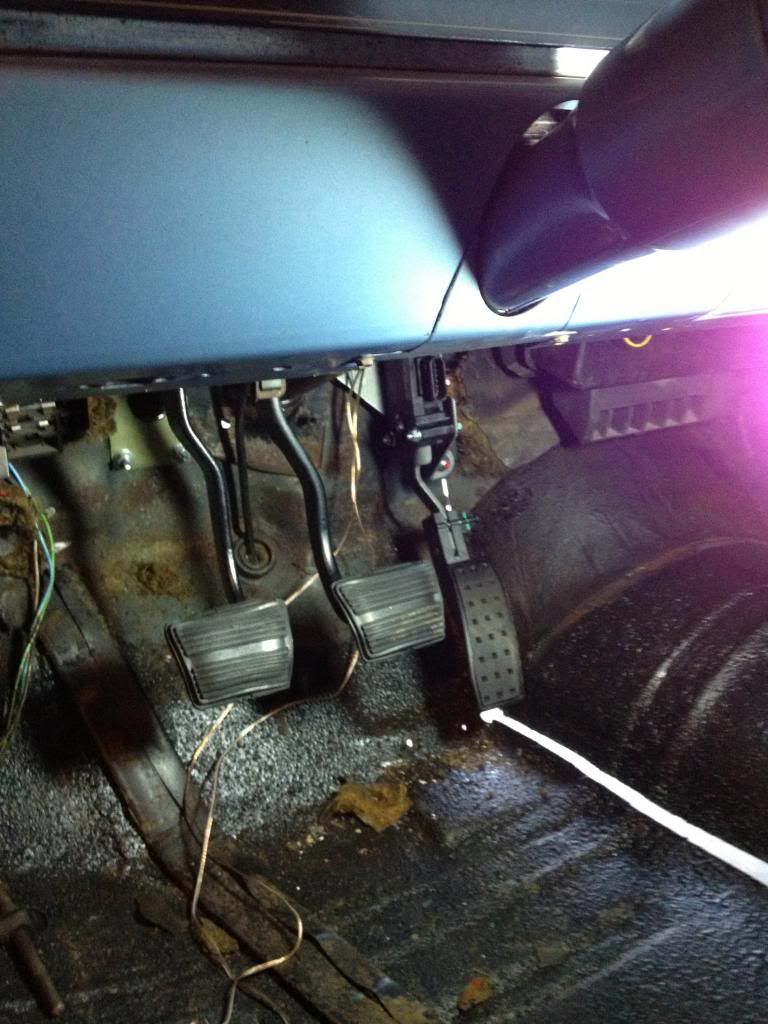
Finally found a way to securely mount the Corvette DBW pedal. I'm pretty happy with it and it's just about exactly how GM recommends in the instructions.
Tomorrow I should get my new tie rod ends/sleeves, clutch/flywheel, and a few other misc. parts so I can put the motor in for the last time (I hope).
My main confusion right now is how to connect my Keisler master to my GM replacement throwout bearing/slave assembly. I did get a remote bleeder, but I know Keisler's high pressure hose won't match to the GM master. If I can't find a suitable adapter I guess I'll have to get a hose made or order a custom one. If anyone has any guidance on that I'd appreciate any help.
As for the car, it was "restored" about 8-10 years ago. There were a few pics of the process glued to a piece of foam insulation board in the trunk (I guess it was a display piece for local cruise ins? - it was about up to the standards they did on the rest of the paint). They did the interior pieces apparently and repainted with the darker blue. Pretty horrible and dirty paint job up close. They didn't remove anything when they painted. Lots of overspray on the trim, and original color still visible in the door jambs/underhood/trunk areas. Overall it was very solid though. Floors/trunk/package tray all very nice and solid.
My plan it to do all the mechanicals now, LSX, T56, Currie 9+ Sportsman rear, complete suspension / brake replacement. I will be doing a new Tanks, Inc EFI tank in a few months when they are available. Just using a holley external pump to get things going for now.
Not a lot of progress today. Pulled motor/trans today to move motor mounts forward and add spacers to lift a tad. The tie rod ends looked to be close to touching with the motor forward and I'm sure they'd hit with it moved back so I'll go ahead and raise it.
Finally found a way to securely mount the Corvette DBW pedal. I'm pretty happy with it and it's just about exactly how GM recommends in the instructions.
Tomorrow I should get my new tie rod ends/sleeves, clutch/flywheel, and a few other misc. parts so I can put the motor in for the last time (I hope).
My main confusion right now is how to connect my Keisler master to my GM replacement throwout bearing/slave assembly. I did get a remote bleeder, but I know Keisler's high pressure hose won't match to the GM master. If I can't find a suitable adapter I guess I'll have to get a hose made or order a custom one. If anyone has any guidance on that I'd appreciate any help.
Last edited by jamier2; 08-19-2013 at 10:15 PM.


 08-20-2013, 09:57 PM
#16
Staging Lane
Thread Starter
Join Date: Apr 2013
Posts: 71
Likes: 0
Received 0 Likes
on
0 Posts
Slow progress (this is not helping my motivation, but I gave myself 4 weeks so I am still nearly on schedule).
The pilot bearing that came with my LS7 clutch/flywheel kit DOES NOT work with the T56 Magnum. I have to pull that back out and get a LS1 style smaller pilot. That took up a lot of time and aggravation today. I should be able to get one locally so no big deal.
I have discovered that using the OEM T56 throwout bearing is nice, but finding lines that fit that but convert to the type on my wilwood master is apparently impossible. So today I ordered these:
Russell 640281 - converts quick connect to -3 AN
Allstar ALL46332-48 - 48" braided high pressure hose with -3 on one end and 3/8-24 90 on the other. Should work pretty well. It won't have the nice upper bleed point like the Keisler line does, but it will allow me to get connected. I already have a bleeder connection so I should be set as far as clutch hydraulics once these parts come in.
Tomorrow I'm shifting my focus to the brakes. Hoping to make some progress for a change. Can't get the motor/trans back in until Monday when those parts arrive so I might as well work on brakes and maybe fuel pump / filter/regulator / lines.
08-20-2013, 09:59 PM
#17
Staging Lane
Thread Starter
Join Date: Apr 2013
Posts: 71
Likes: 0
Received 0 Likes
on
0 Posts
I feel your pain. It seems like every time I think I have everything I find something missing that puts the brakes on. Right now I am waiting for the hydraulic line I just figured out. Last of the suspension parts should be here tomorrow so I plan to work on that and brakes / fuel for a few days.
08-22-2013, 11:13 PM
#18
Staging Lane
Thread Starter
Join Date: Apr 2013
Posts: 71
Likes: 0
Received 0 Likes
on
0 Posts
Thanks to extra fast delivery by Amazon I got my parts today. The quick connect was tough only because I didn't have a straight punch and had to improvise to get the rolled pin out.
Got trans fully assembled and mounted to motor. Engine/trans are in now and headers fit (tight fit but not hard to get on or off alone.) the steering clears without any trimming. I did use the Moroso motor mount spacers. I know lots of people try to avoid lifting the motor up, but I doubt that 3/8" will be a game changer. I used Proforged tie rods from Summit - not sure if that matters. One thing I notice compared to pics I've seen of other builds is my grease zerks are not on the end of the links, they're on the back (opposite of the castle nut facing rear of car), and that may help with clearance.
I'm working on suspension and brakes now. Plenty to do, but I'm having a ball.
08-24-2013, 06:19 PM
#19
Staging Lane
Thread Starter
Join Date: Apr 2013
Posts: 71
Likes: 0
Received 0 Likes
on
0 Posts
So I decided to check the crossmember fit today. Surprisingly close. I don't know if mine is original, but I think it is since it holds the E brake cable. It has the double exhaust humps.
So with it between the frame rails (further back of course) it is almost perfect. Just about 3/4" too high. I'm thinking of just bolting it on the bottom of the frame rail with a washer between the crossmember and frame. Should put it just about right.
Any reason it wouldn't be safe like this? I did use a standard polyurethane trans mount. I wonder if anyone makes a low profile mount since that would work too.
If anyone has any advice I'd appreciate it.
08-24-2013, 07:26 PM
#20
TECH Apprentice

I looked for a shorter mount a year or so back with no luck. Would sure make dropping it a lot easier if it was hanging on the bolts. The ends of my had a hump in the center so it wouldn't lay flat on th bottom of the frame rails. Another thing to think about is lowering the exhaust to fit under the humps. I just cut the center out and welded a 1/2 plate. I used a 1/4 spacer under the crossmember on each end and the two 1/4 spacers you see in the picture, along with the factory mount.