Fiberglass hood repair help needed
 03-01-2014, 07:38 PM
#1
Registered User
Thread Starter

Join Date: Feb 2014
Posts: 14
Likes: 0
Received 0 Likes
on
0 Posts
I've been looking for a OE ram air hood for the last 2 months and finally found one locally, was even black so no painting needed. The guy shows up with it today and tells me he's sorry he fell on the ice and dropped it while trying to load it. I knew being it was fiberglass someone could fix it so I offered him half the original price and he threw in a set of taillights for free so those alone are worth the $ I gave him. I tried searching to see if this was covered before but didn't have any luck. What is the best way to go about this kind of repair? Has anyone done this before?
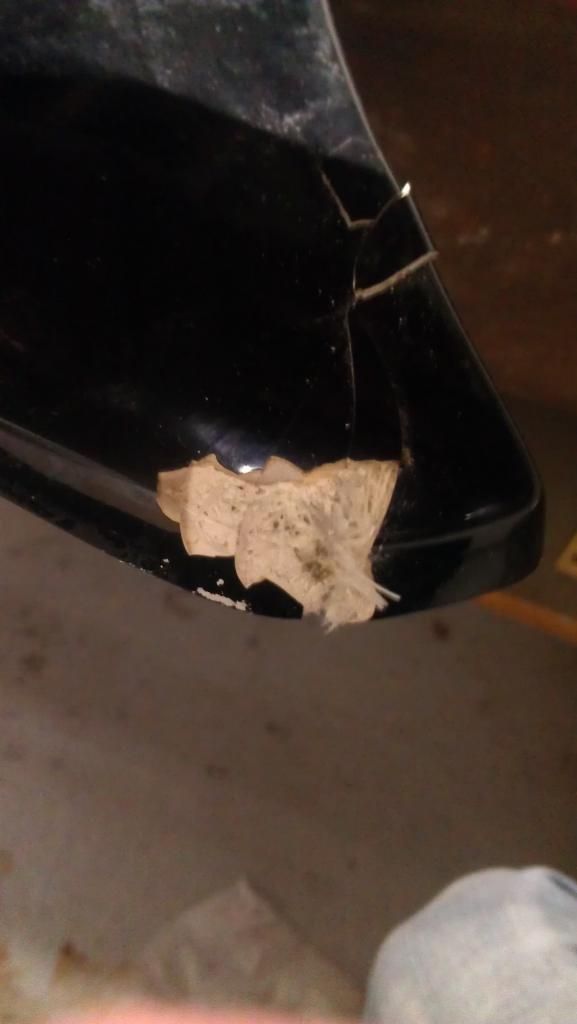
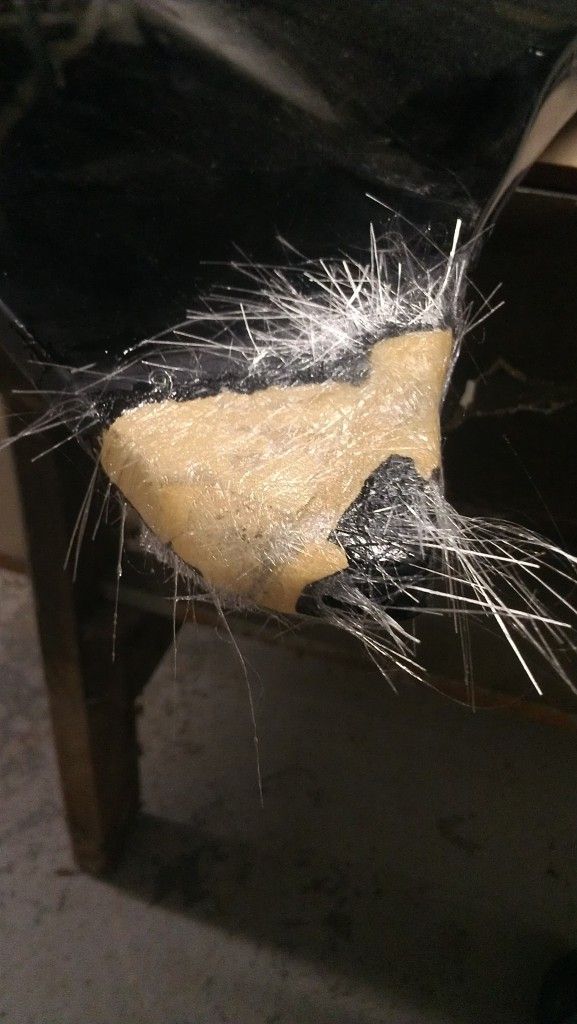
It's barely hanging on, I'm afraid of trying to sand back the paint because I don't want it falling off.
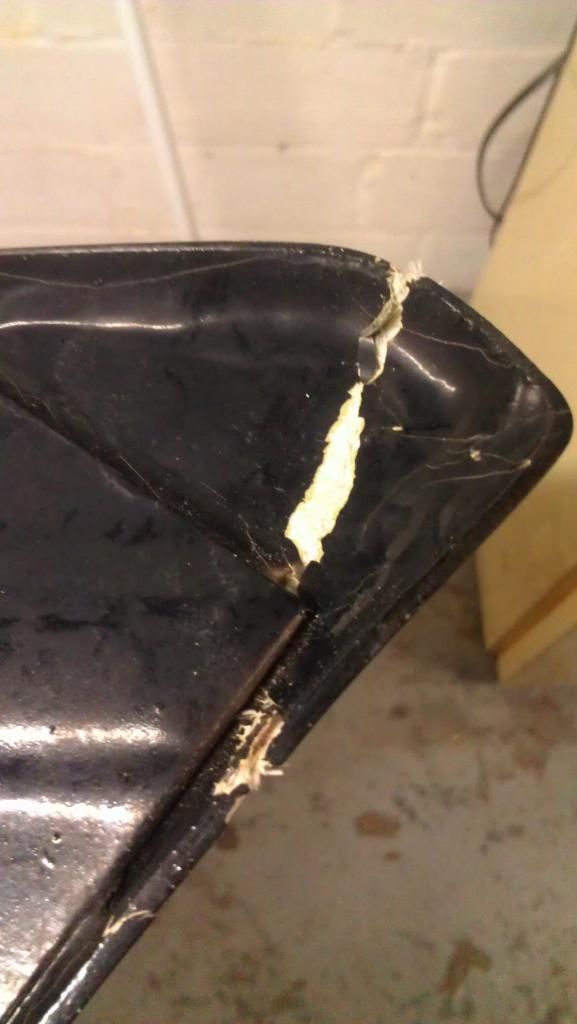
Here's the bottom view.
Also are all these cracks common? Not sure if it's the paint or the fiberglass itself but I will try and take care of these at the same time.

It's barely hanging on, I'm afraid of trying to sand back the paint because I don't want it falling off.

Here's the bottom view.

Also are all these cracks common? Not sure if it's the paint or the fiberglass itself but I will try and take care of these at the same time.
 03-02-2014, 08:17 AM
#2


Like you said its all repairable. The cracks in the paint you will have to sand out to see if it's in the fiberglass. If the cracking is in the fiberglass you can just put resin over the cracked area and then sand once it's dry. The corner piece you can repair it two different ways. One way which I think would be better would be to pull the original corner off and sand with 60 or 80 grit sand paper. Then glass in a whole new corner and cut and sand to fit.
Or you sand everything including the existing corner and if it falls off no big deal. You will just have to find a way to secure it in the proper place when you begin to lay new fiberglass and resin over the entire repair area including the separate corner. It's harder to explain than it is to do. I bought a damaged SS hood last summer and repaired it.
Or you sand everything including the existing corner and if it falls off no big deal. You will just have to find a way to secure it in the proper place when you begin to lay new fiberglass and resin over the entire repair area including the separate corner. It's harder to explain than it is to do. I bought a damaged SS hood last summer and repaired it.
03-02-2014, 06:01 PM
#3
On The Tree

Join Date: Dec 2012
Location: Troy, MO
Posts: 177
Likes: 0
Received 0 Likes
on
0 Posts
Apply some painters tape to the back side to hold the shape in case its cracked all the way through. Get some latex gloves as you won't want the fiber splinters or the resin on your hands. You will need to grind the cracks back until you get back to good glass. Make a small u shaped groove. Us a dremel tool with sander bit so you can go slow. You need all the shiney coating to be gone before you attempt the repair. Auto parts stores will have the fiberglass repair kits. I would recommend getting the mat for repairs as you can cut in small shapes. Cut the size mat you need oversize is ok as it will be sanded away later. Clean the area to be bonded then mix your resin and get the mat wet. Apply small amount of resin to part and push your mat in the area. Let it dry then sand down flush with edges. If you need to ad more material get some short stranded filler and apply. Better to keep adding small amounts of filler and sanding then to glob it on in one shot. Takes some time but a pretty easy fix.
03-02-2014, 08:20 PM
#4
Registered User
Thread Starter
Join Date: Feb 2014
Posts: 14
Likes: 0
Received 0 Likes
on
0 Posts
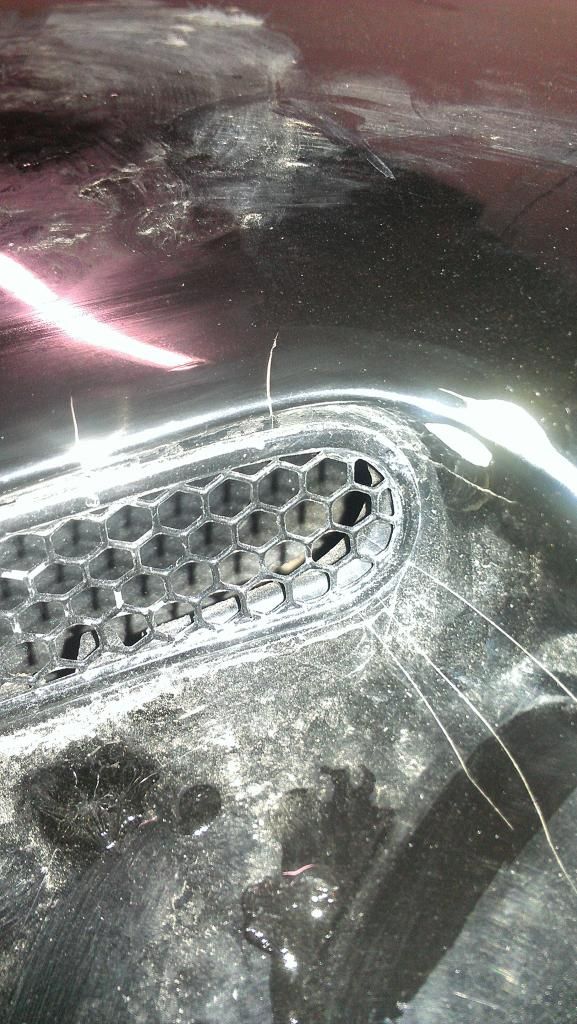
The pictures make it look like it's in a lot better shape than it actually is. Also I realize this is probably SMC and not fiberglass. Just so happens I have a jet ski with a hole in the bottom, it's SMC also so I already have a gallon of west systems epoxy resin which is some very good stuff. It's 0 degrees outside right now so I will have to drag the compressor to the basement so I can work on it there. Does anyone know how to take off the vent grilles, need to take them into work to get powdercoated. Did a search trying to found out if anyone has cut out the vents completely but I only found pics of it being done to the 98-02 hoods. It sounds like the baffles are there to catch any water but I will be keeping my K&N CAI so not really concerned with that, just looking for a little extra air flow to help with engine bay temps.
03-09-2014, 09:53 PM
#5
Registered User
Thread Starter
Join Date: Feb 2014
Posts: 14
Likes: 0
Received 0 Likes
on
0 Posts
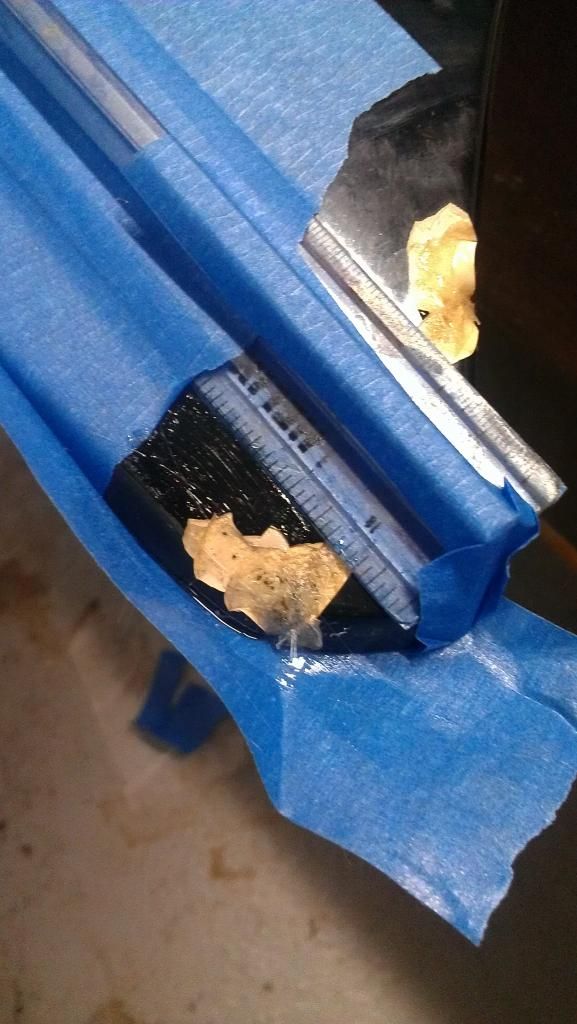
Well I decided I would try and soak the existing fiberglass with some resin to help hold everything together while I sand on it. Had to use something to hol the piece up in the correct spot while everything hardens so I used an old ruler. Looks like it's going to work out good.
 03-21-2014, 12:52 AM
#7
Registered User
Thread Starter
Join Date: Feb 2014
Posts: 14
Likes: 0
Received 0 Likes
on
0 Posts
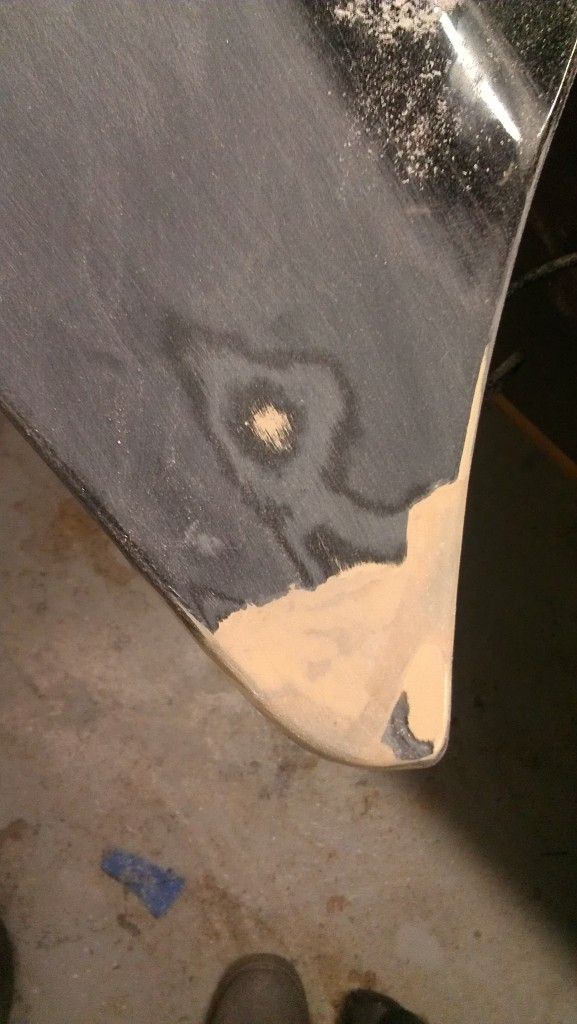
OK made it this far and pretty happy with the results so far considering I'm new to this kind of repair. Still a little more work to be done yet though. The edge of the very corner looks kind of goofy in the pic but that's just because there is some black paint left. Not sure if I want to lay some more glass or try and use some body filler for the final shape??


Last edited by SlurpJ; 03-21-2014 at 01:15 AM.
Trending Topics
03-21-2014, 01:02 AM
#8
Registered User
Thread Starter
Join Date: Feb 2014
Posts: 14
Likes: 0
Received 0 Likes
on
0 Posts
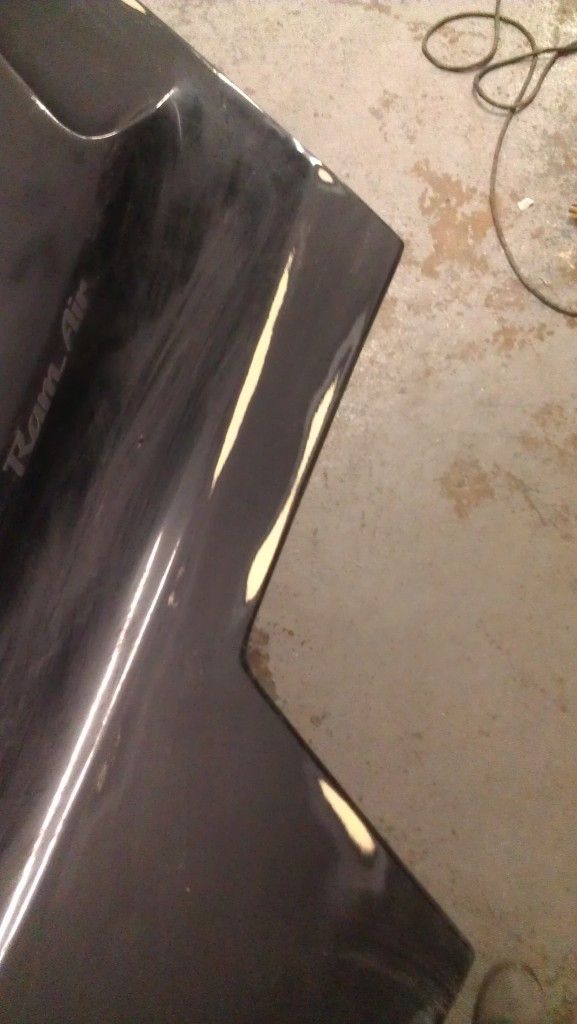
Started to block sand the hood some before priming it. Hood was pretty uneven but most of it has been worked out before getting through the paint. Since I did sand through the paint in a few places I'm thinking I should hit it with epoxy primer before I go any further?? This side was quite a bit worse than the other for some reason.
 03-21-2014, 09:59 PM
#10
On The Tree
Join Date: Dec 2012
Location: Troy, MO
Posts: 177
Likes: 0
Received 0 Likes
on
0 Posts
Looking good. Don't lay any resin or kitty hair on painted surfaces, grind the paint away. You don't want these areas to bubble up later after you repaint. Once you have the area glassed in then you can layer a coat of short strand or panel adhesive and sand to finish. Apply either of these products using a smooth putty spreader in thin coats. It will set up very quick and sand between coats until you have the desired height. Make sure any areas that are going to be repainted are scuffed up so the primer has a good area to stick. Then primer and paint.
03-23-2014, 03:42 PM
#11
TECH Enthusiast
Guess I'm a little late to the discussion, but those repair spots should have been ground down slightly before applying new resin/ mat.
Fiberglass constantly shrinks slightly it's whole life (mostly when fresh) & even the most professionally done repairs & mods have a tendency to sometimes cast a ghost shadow through the paint later on. Not feathering back the repaired edge will make this more likely to show later on.
The cracks in the gelcoat around the scoop area should be ground down & filled or they will haunt you later for sure. Different people will have slightly different methods & products for any repair like this, but get most of the repair area back near finished height & just use regular quality body filler for final smoothing. A product like evercoat g-2 primer surface can add a little surface strength to repairs & make a great final sandable filler, but a gal will run you over 80 bucks & needs a 2.2 or larger tip to spray. small spots can be brushed or rolled on though, just takes more sanding.
If you look at my custom hood in my photo link, it blew off on the highway & was nearly not worth salvaging. I put it back together &custom extended the front in 2010. Some spots are showing up now, but still looks great from picture standpoint.