
My nitrous install thread...!
 03-21-2014, 09:41 PM
#1


This will actually be the 5th setup I have owned and the 4th setup I have had on my car.
The first one in 2009 consisted of a dry shot halo bar in the stock airbox that took out the motor.
When the motor popped I pulled it out and took it to a local machine shop to be built. I am still running the same forged motor today but I swapped out the heads last year.
The second one consisted of a single nozzle wet shot totally hidden...I ran this for awhile. Details here.
http://www.ls1gto.com/forums/showthread.php?t=334563
The third one consisted of the setup above but with a 78mm plate and the bottle moved to the trunk. I never actually sprayed that setup...instead I got mad and sold it. Details here.
http://www.ls1gto.com/forums/showthr...hlight=nitrous
Then I bought it back only to puss out and sell it again. Details here.
http://www.ls1gto.com/forums/showthr...hlight=nitrous
So here we are today...once you spray once you are hooked and I have proven that 5 years later.
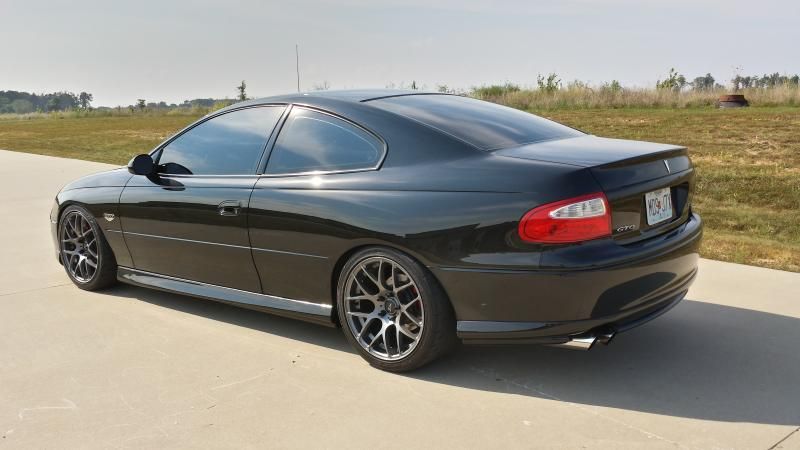
Before we get into the setup here is how my underhood looks right now.
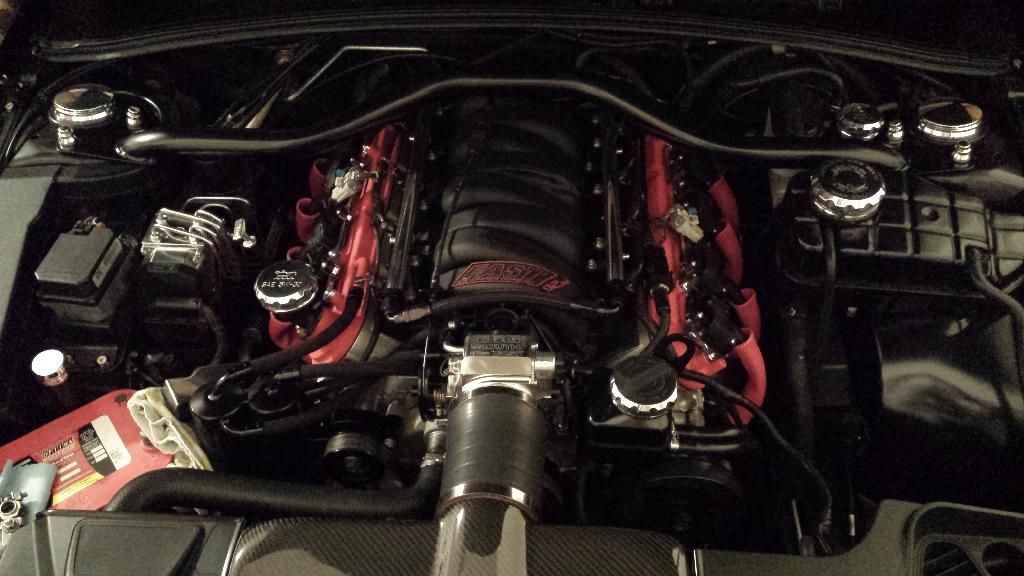
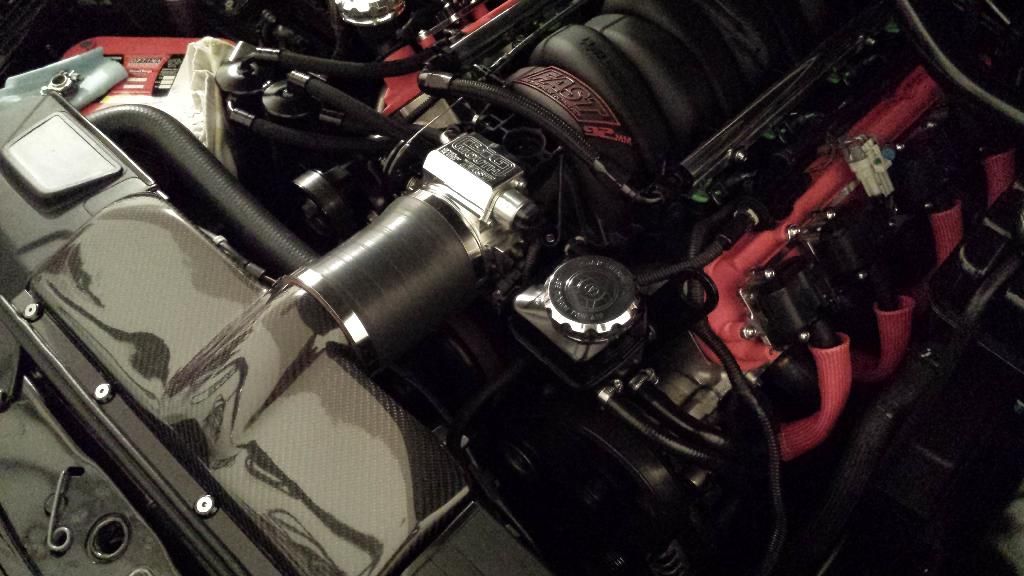
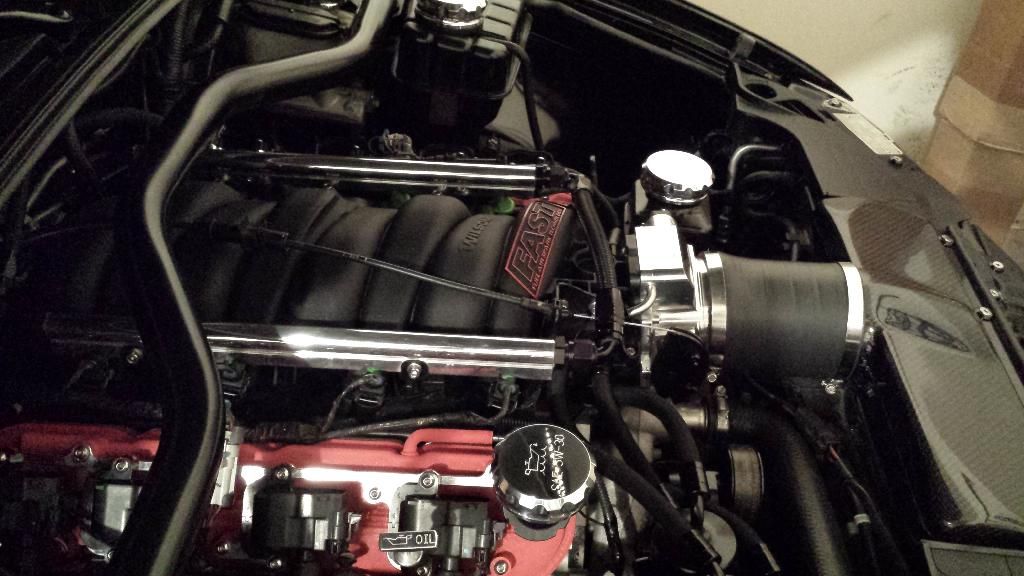
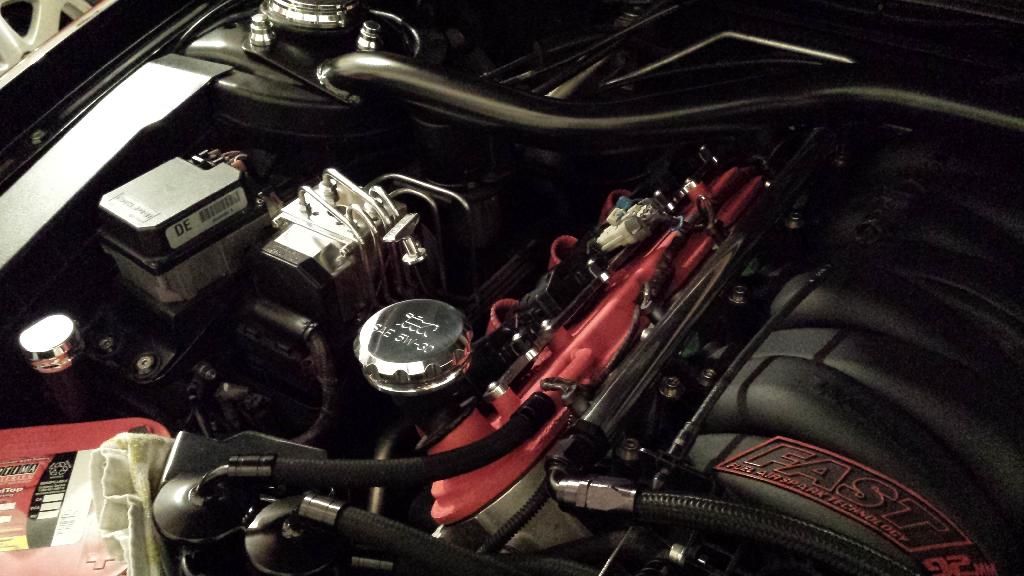
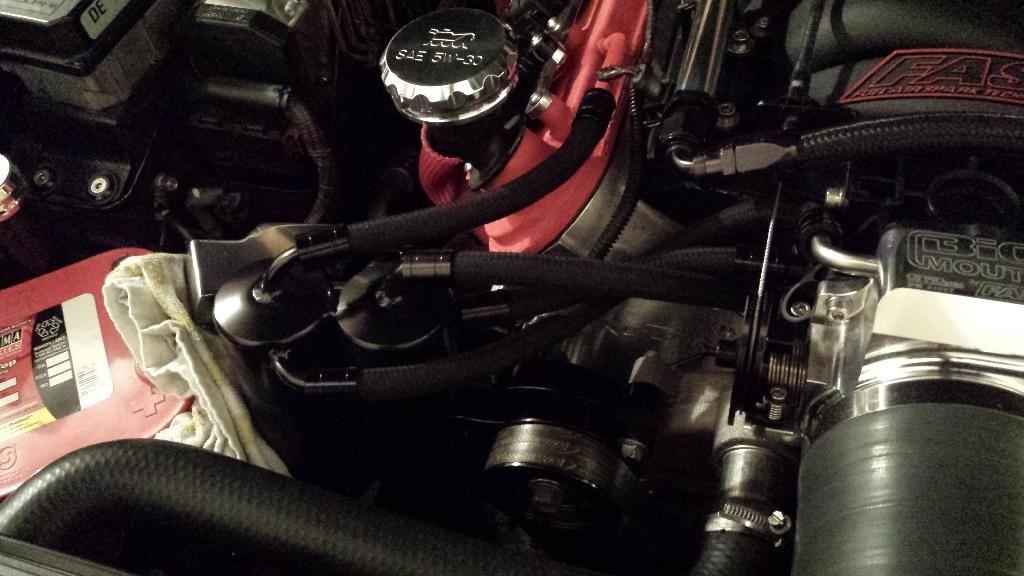
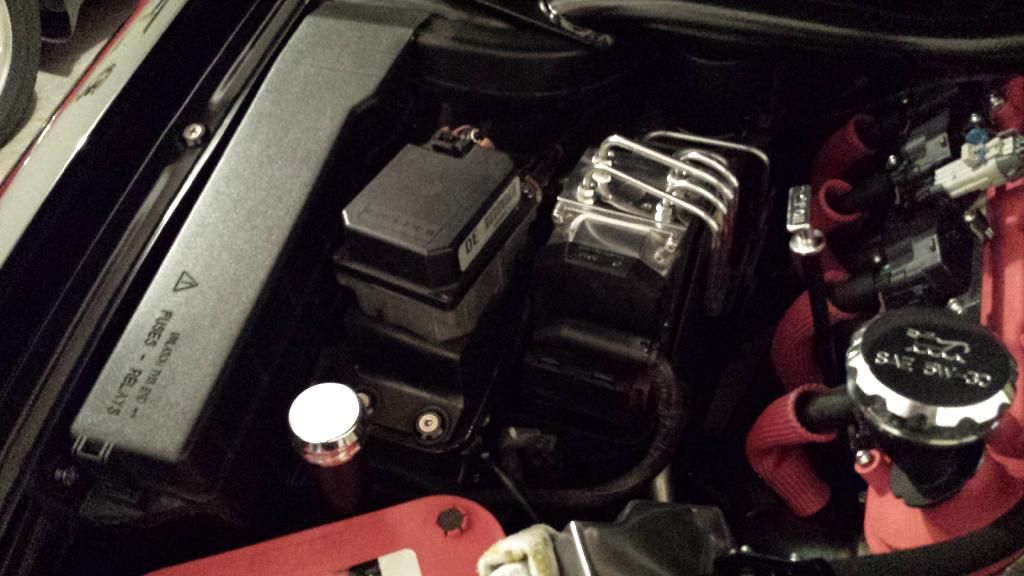
The whole idea of this install is CLEAN CLEAN CLEAN. I want to be able to proudly pop the hood anywhere and display my nosses.
Current mods.
Forged 347 SD tuned by me that I rev to 7000 rpm.
229/234 .600/.612 111+4 cam
Kooks 1 3/4" headers with catless mids and a soon to be custom single 4" exhaust
UDP
Svede intake
Trick flow as cast 220's hand ported and port matched to a fast 92mm intake by Brian tooley...topped off with a fast 92MM tb
Transmission is built by TDP
Monster level 3 clutch
The drivetrain build is currently in progress but consists of the following.
The Driveshaft shop carbon fiber driveshaft
The Driveshaft shop wheel hop axles and stubs
OEM 3.91 australian gears cryo treated
Wavetrac
Harrop rear cover
The rear is being assembled by 2qwk4u
I think this about sums it up.
To be continued...
The first one in 2009 consisted of a dry shot halo bar in the stock airbox that took out the motor.
When the motor popped I pulled it out and took it to a local machine shop to be built. I am still running the same forged motor today but I swapped out the heads last year.
The second one consisted of a single nozzle wet shot totally hidden...I ran this for awhile. Details here.
http://www.ls1gto.com/forums/showthread.php?t=334563
The third one consisted of the setup above but with a 78mm plate and the bottle moved to the trunk. I never actually sprayed that setup...instead I got mad and sold it. Details here.
http://www.ls1gto.com/forums/showthr...hlight=nitrous
Then I bought it back only to puss out and sell it again. Details here.
http://www.ls1gto.com/forums/showthr...hlight=nitrous
So here we are today...once you spray once you are hooked and I have proven that 5 years later.
Before we get into the setup here is how my underhood looks right now.


The whole idea of this install is CLEAN CLEAN CLEAN. I want to be able to proudly pop the hood anywhere and display my nosses.
Current mods.
Forged 347 SD tuned by me that I rev to 7000 rpm.
229/234 .600/.612 111+4 cam
Kooks 1 3/4" headers with catless mids and a soon to be custom single 4" exhaust
UDP
Svede intake
Trick flow as cast 220's hand ported and port matched to a fast 92mm intake by Brian tooley...topped off with a fast 92MM tb
Transmission is built by TDP
Monster level 3 clutch
The drivetrain build is currently in progress but consists of the following.
The Driveshaft shop carbon fiber driveshaft
The Driveshaft shop wheel hop axles and stubs
OEM 3.91 australian gears cryo treated
Wavetrac
Harrop rear cover
The rear is being assembled by 2qwk4u
I think this about sums it up.


To be continued...
 03-22-2014, 03:27 PM
#4
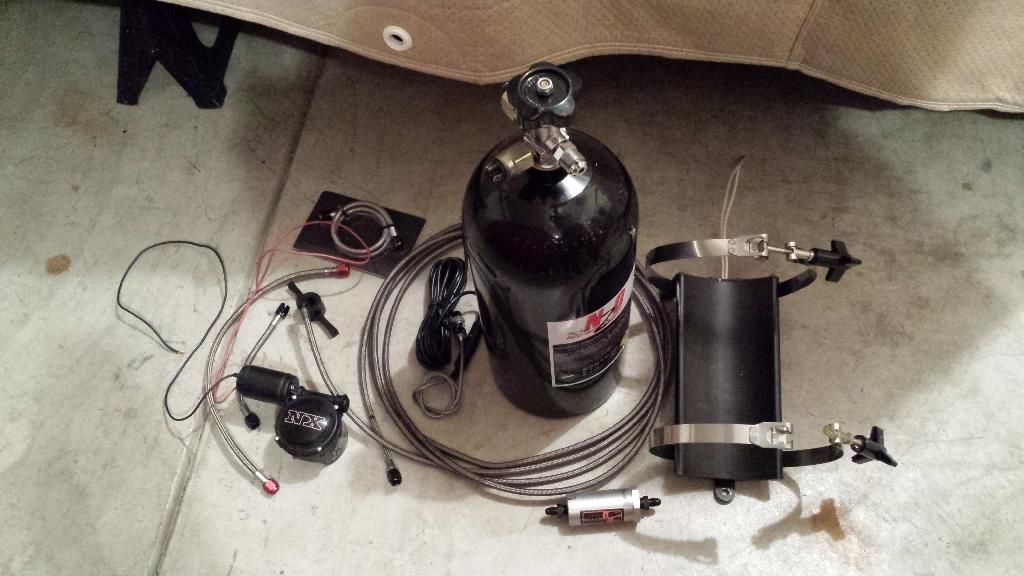
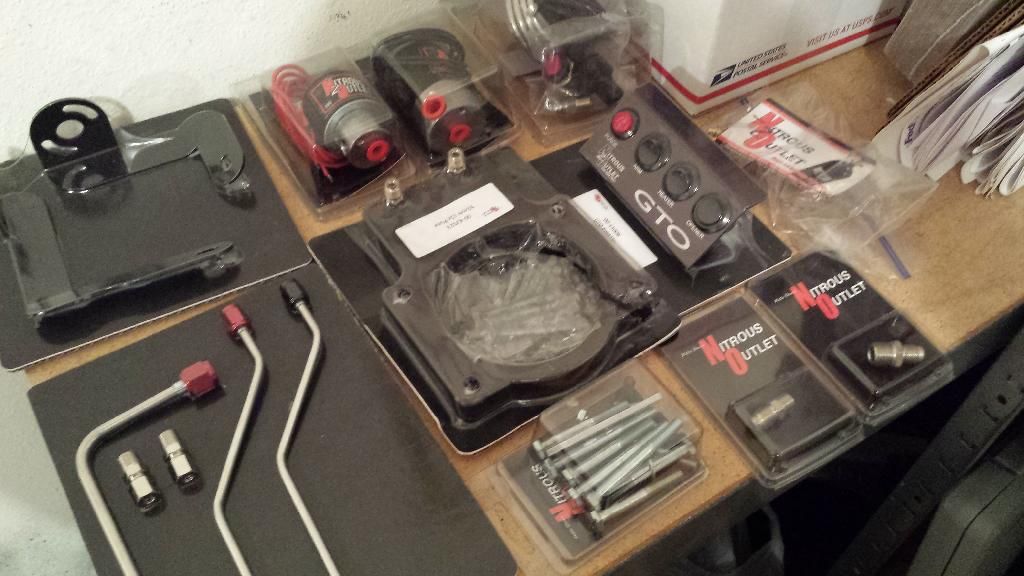
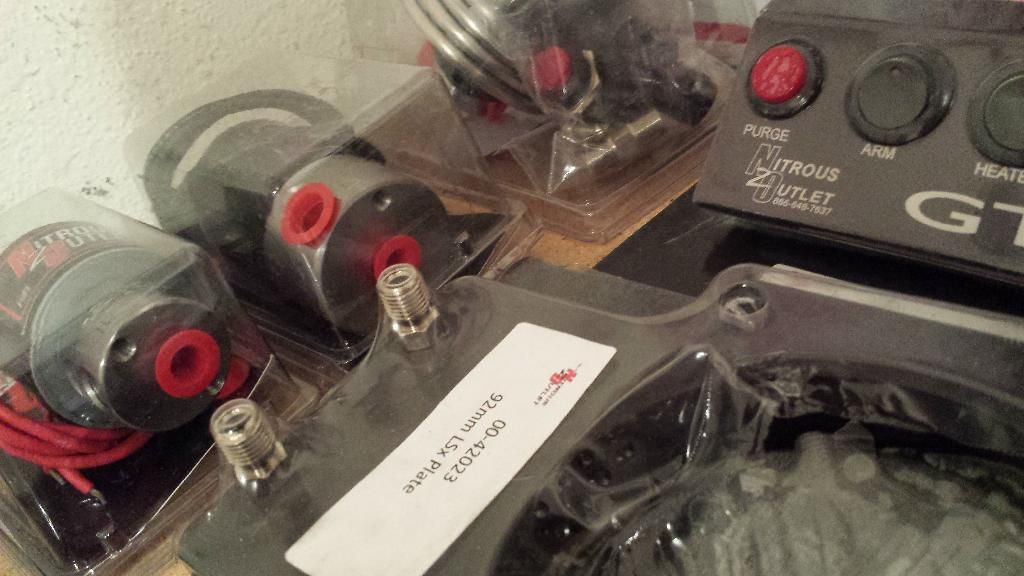
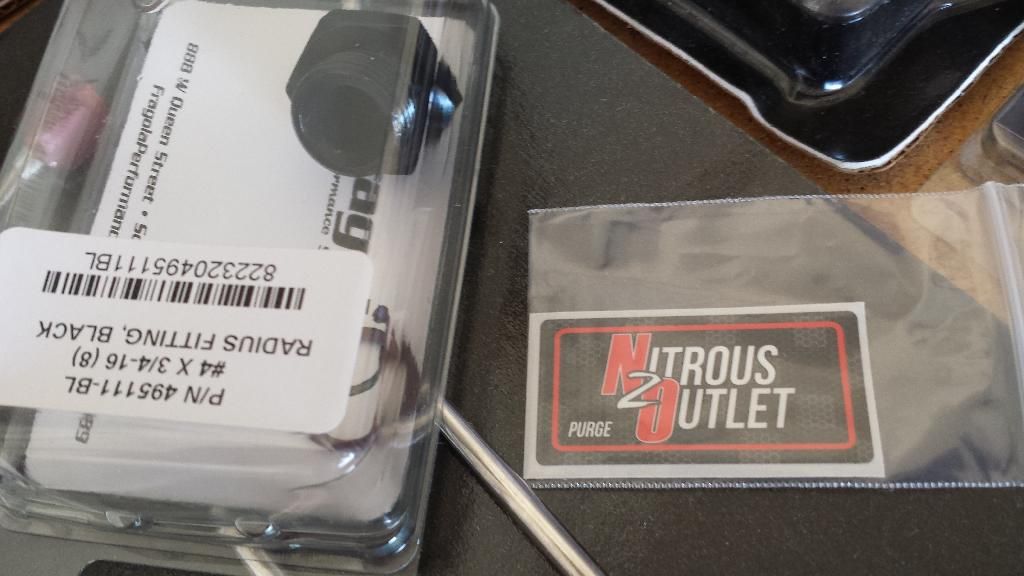
As I said earlier clean is the main focus here. In order to keep the cleanest install possible I opted to go with the nitrous outlet hardline kit and a 92mm plate. I am going to pull fuel off of the drivers side rear rail and plan to loop it up in a way where it is symmetrical to the main nitrous feed line. At this point I am unsure if I am going to hang the purge off of the nitrous solenoid or not. The kit consists of the following.
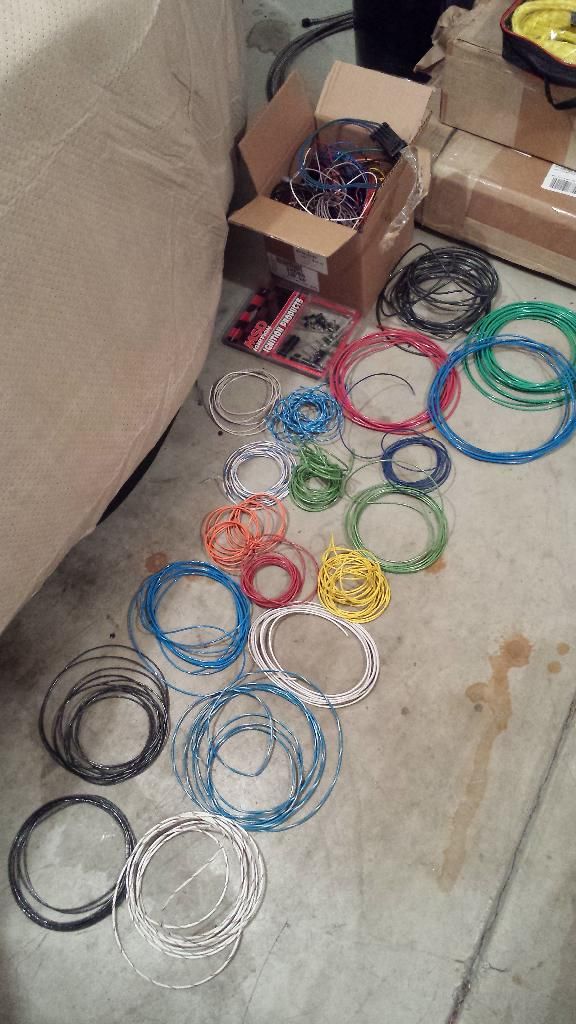
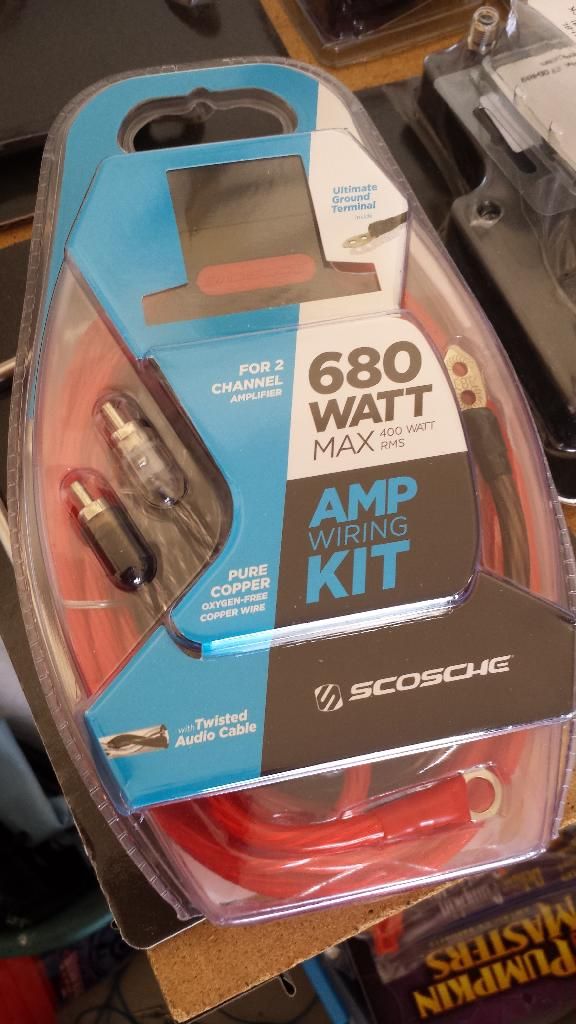
Nitrous outlet fuel, purge, and nitrous solenoids, 92mm plate kit w/ hardline kit. 860 bottle heater/ mount. Nitrous filter. Nitrous outlet bottle w/ billet wingman wingnut. Nitrous outlet fold up switch panel. NX Remote opener. Leash relay/ nitrous panel/ distribution block. HSW Microedge controller and dynotune digital nitrous gauge. A 8 ga amp wiring kit and lots of misc wires.
I have not done the wiring schematic yet...I might just do that as I build the harness.
Brandon @ nitrous outlet and Brian @ ws6 store have been a huge help so far as well as Dan @ dynotune nitrous and Randy @ leash electronice.
Nitrous outlet fuel, purge, and nitrous solenoids, 92mm plate kit w/ hardline kit. 860 bottle heater/ mount. Nitrous filter. Nitrous outlet bottle w/ billet wingman wingnut. Nitrous outlet fold up switch panel. NX Remote opener. Leash relay/ nitrous panel/ distribution block. HSW Microedge controller and dynotune digital nitrous gauge. A 8 ga amp wiring kit and lots of misc wires.
I have not done the wiring schematic yet...I might just do that as I build the harness.


Brandon @ nitrous outlet and Brian @ ws6 store have been a huge help so far as well as Dan @ dynotune nitrous and Randy @ leash electronice.
03-23-2014, 10:59 AM
#8
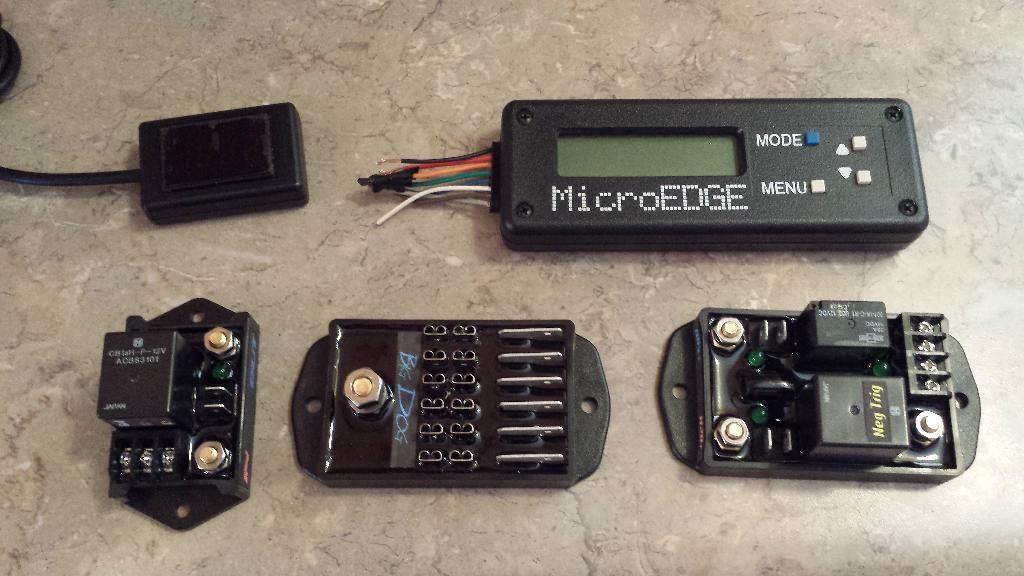
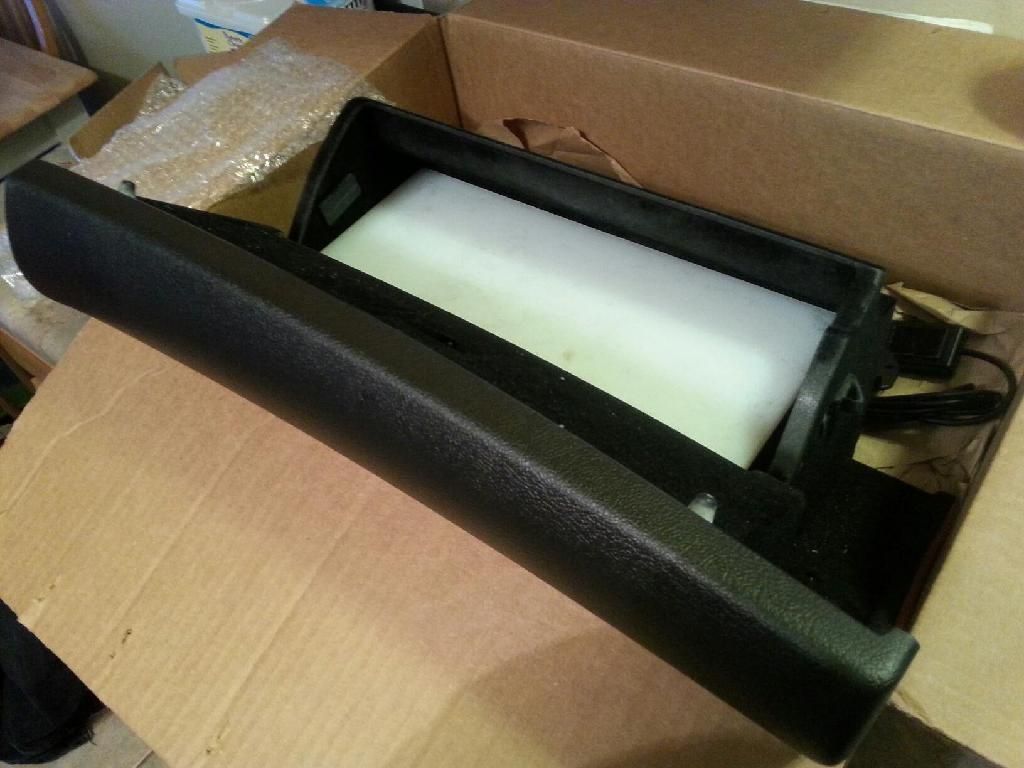
Here is the idea for the electronics. After mocking the glovebox up in the car with my panel I am going to change the layout slightly but this is the basic concept. I am actually going to be able to angle the 2 main leash boards on the left hand side.
I am going to get holes drilled so I can run the wires straight through the board then I am painting it satin black.

I am going to get holes drilled so I can run the wires straight through the board then I am painting it satin black.


 03-23-2014, 12:22 PM
#9
That is beyond clean looking. Did you take your glove box completly out to mock it up? I guess you can pull all the wires through the passenger side firewall.
So do you have just the one Leash board? Trying to figure out what else you have laid out there.
So do you have just the one Leash board? Trying to figure out what else you have laid out there.
03-23-2014, 02:10 PM
#12
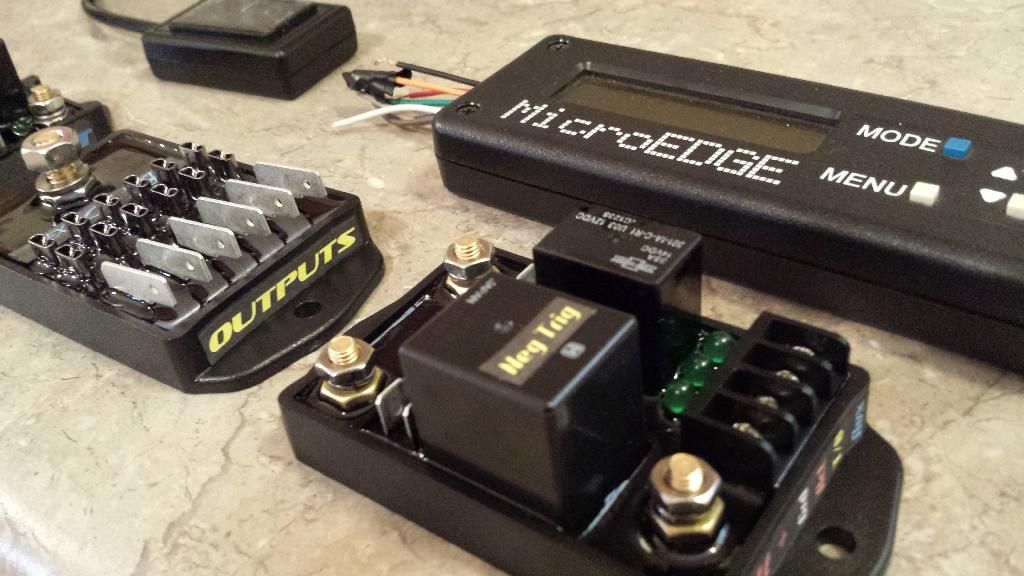
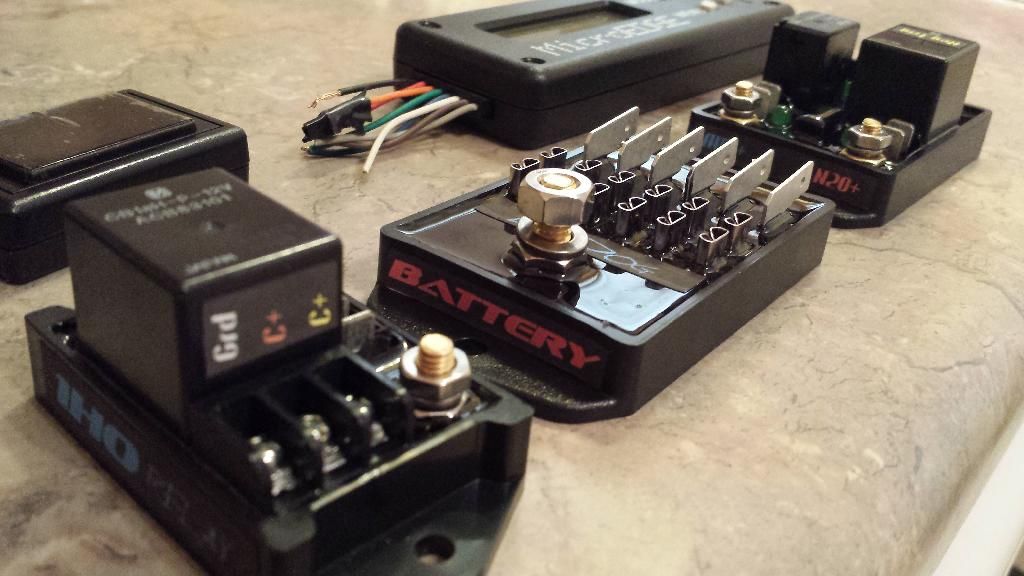
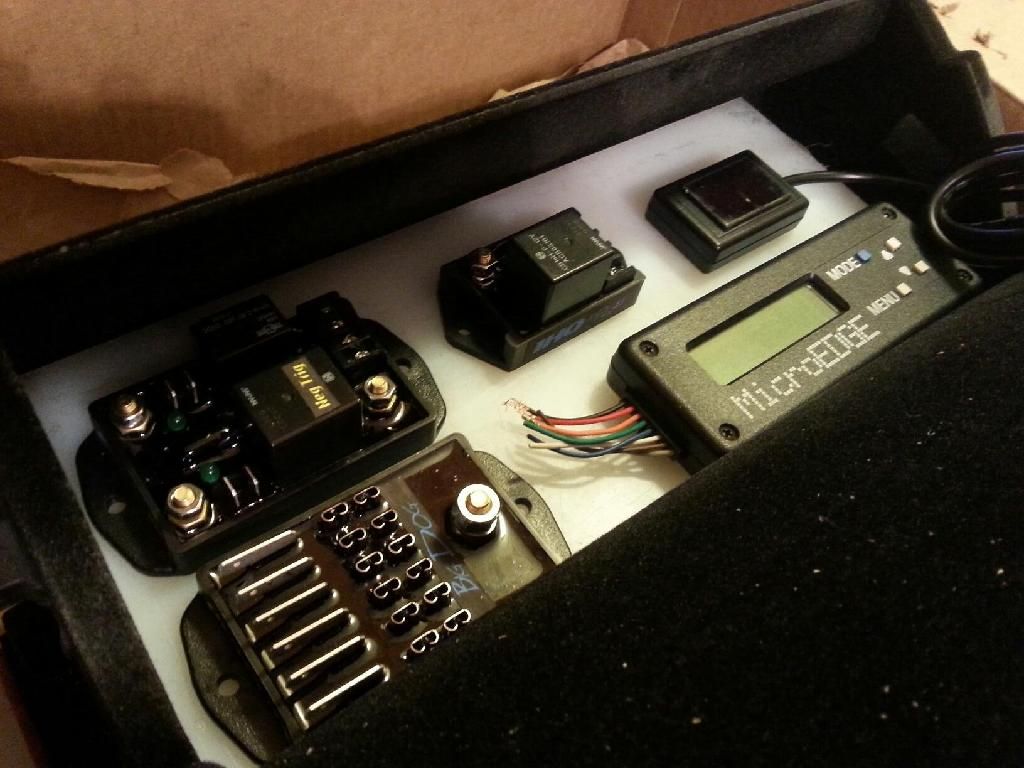
Inside the glovebox will be the leash nitrous board, leash single relay board, leash fused distribution block, microedge and the small black thing is the pressure gauge from dynotune. I also plan to mount one of these on the bottom side of the board so that I can just run one ground wire out of the glove box.
I do not think I will have room for it on top of the board.
I am actually very excited to start the wiring. I have a lot of history with car stereo wiring and see it as a challenge to come up with a clean setup. Last time I just hid everything but this time I want to show it off.
Unfortunately the car is in the air without a drivetrain so that is my first priority. Hopefully next weekend I will be able to begin soldering wires together and get the glovebox board done.
Thank you.
03-23-2014, 03:24 PM
#13
So did you order three seprate things from Leash, or are all three things included in the Leash single stage nitrous board? I know it says on their website the fuses are not included.
Keep updating the thread with progress pics.
Keep updating the thread with progress pics.
Last edited by Rise of the Phoenix; 03-23-2014 at 03:35 PM.
03-23-2014, 06:25 PM
#15
TECH Resident
iTrader: (1)
Join Date: Sep 2012
Location: San Diego, California
Posts: 782
Likes: 0
Received 0 Likes
on
0 Posts
Yes I pulled the glovebox out of the car and took it to work to cut a piece of plastic to fit in there. I am going to have to drill a hole in the side of the glovebox and route the wires out.
Inside the glovebox will be the leash nitrous board, leash single relay board, leash fused distribution block, microedge and the small black thing is the pressure gauge from dynotune. I also plan to mount one of these on the bottom side of the board so that I can just run one ground wire out of the glove box.
Video Link: http://www.amazon.com/Bussmann-BP-JB3816-2-Junction-Block/dp/B001PYN6QK/ref=lh_ni_t?ie=UTF8&psc=1&smid=ATVPDKIKX0DER
I do not think I will have room for it on top of the board.
Thank you the car has come a long ways since 2004.
I am actually very excited to start the wiring. I have a lot of history with car stereo wiring and see it as a challenge to come up with a clean setup. Last time I just hid everything but this time I want to show it off.
Unfortunately the car is in the air without a drivetrain so thato is my first priority. Hopefully next weekend I will be able to begin soldering wires together and get the glovebox board done.
Thank you.
 03-23-2014, 08:18 PM
#18
Looking really nice, very similar to what I plan to do. I'm cutting out the back of my glove box though so I can remove the glovebox anytime for ease of wiring (I'll fab up a piece of sheet aluminum to mount everything on). Then I'm taking out my passenger airbag to mount my NCC-001 nitrous controller in and I'll cut off the face of the airbag and find a way to mount it over it for that "stock" look.
03-24-2014, 08:18 AM
#19
Ok, I looked on Leash's website and I see you have the Big Dog Fuse Block, but the Single Stage Nitrous Board on their website looks different than the one you have. Did you opt for a different one? Still not sure what the third piece from Leash that you have is.


