
basement 4l60e buildup (photos)
 12-28-2006, 05:26 PM
#1
Launching!
Thread Starter
iTrader: (2)
Join Date: May 2005
Location: Rochester Mn
Posts: 285
Likes: 0
Received 0 Likes
on
0 Posts
Hey guys,
I've decided that since I have the time, space, and resources I want to learn how to rebuild my 4L60e. I'll be shooting photos and hopefully sharing some stuff I learn along the way. All the work will be done by me, a guy with minimal trans experience, and a hobbiest auto background.
My Z28, like most other H/C cars started showing signs that it was about to munch it's stock trans at the end of last summer. Christmas brought me a used 4L60e out of another '98 car - off the LS1tech classified boards. I've been reading as much as possible. I will be making some calls shortly to source my rebuild kit and upgrade parts. I'll also be purchasing the manuals and necessary specialty tools if needed. I plan to take my time and build something that will last me a while.
Whithout further ado... here are the first pictures.
The workbench

Trans, 'secured' to work area
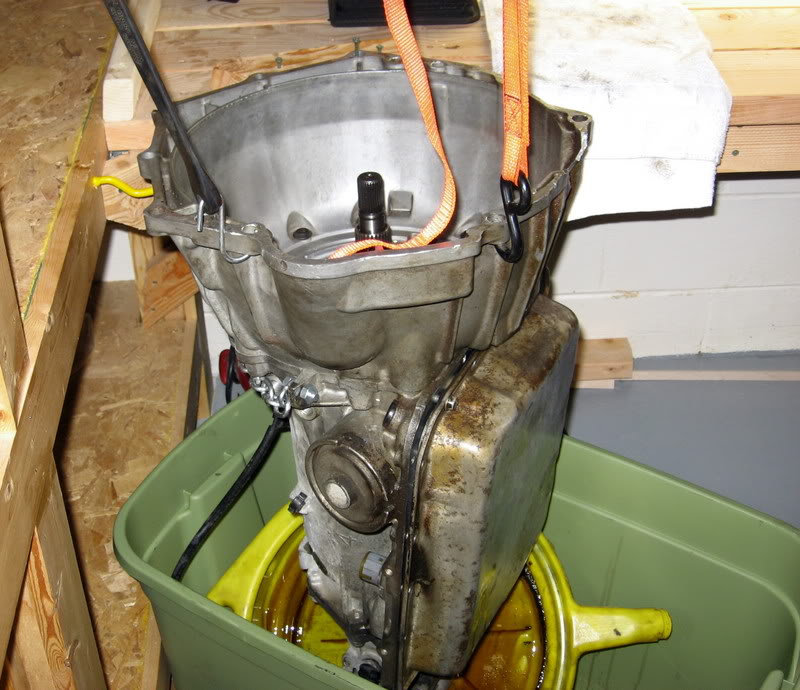
valvebody and pan
Bellhousing, which I tried to remove - but broke my damn TORX bit off in the first bolt (the one with the silver piece in it)...so I guess it stays on
Amatuer...
If anyone has any performance kits they've had really good luck with, I'm all ears!
I'll try to accomadate any questions for photos as I go along too,
Nick
I've decided that since I have the time, space, and resources I want to learn how to rebuild my 4L60e. I'll be shooting photos and hopefully sharing some stuff I learn along the way. All the work will be done by me, a guy with minimal trans experience, and a hobbiest auto background.
My Z28, like most other H/C cars started showing signs that it was about to munch it's stock trans at the end of last summer. Christmas brought me a used 4L60e out of another '98 car - off the LS1tech classified boards. I've been reading as much as possible. I will be making some calls shortly to source my rebuild kit and upgrade parts. I'll also be purchasing the manuals and necessary specialty tools if needed. I plan to take my time and build something that will last me a while.
Whithout further ado... here are the first pictures.
The workbench
Trans, 'secured' to work area
valvebody and pan
Bellhousing, which I tried to remove - but broke my damn TORX bit off in the first bolt (the one with the silver piece in it)...so I guess it stays on
Amatuer...
If anyone has any performance kits they've had really good luck with, I'm all ears!
I'll try to accomadate any questions for photos as I go along too,
Nick
Last edited by VORTECFCAR; 12-28-2006 at 05:47 PM.
 12-28-2006, 06:30 PM
#2

You need a torx plus bit made buy Sonnax (a transmission parts company), the bell housing has to come off. It can be done with the bellhousing left on but the pump o-ring will most likely leak.
If you have an engine stand you could hold the trans in it by the top three tabs. Doing these two things will make it much easier.
If you have an engine stand you could hold the trans in it by the top three tabs. Doing these two things will make it much easier.
12-28-2006, 06:47 PM
#3
I think it's a good thing that you are willing to take on a 4L60E... or any automatic for that matter. My hat is off to ya! May I provide some advice....
First of all. Get BOTH ATSG books if you do not have them. You will need them before you are finished. Do not skip this step, you'll never forgive yourself for not having the proper literature.
Second, the Torx bit you broke was not made for those bolts. The bell housing needs to come off. I will look at my bit tomorrow and get the part number off of it for you. I keep 2 or 3 laying around. Look at the heads of the bolts closely, they are not your ordinary Torx... I do not know the proper name but I'll get you the info you need.
Third, Once all of the components are removed how do you plan on replacing the rubber seals on the pistons. You will need a foot press for the Low / Reverse piston return spring in the back of the case and for the input hub return spring.. The reverse input piston can be removed if you have a press of some sort and can relieve the spring pressure.
You will need feeler gauges, dial calipers, bushing drivers, emory cloth, scotchbrite pads, multiple snap ring pliers, trans assembly lubricant, a torque wrench that will operate as low as 8 ft pounds, several types of pliers and screwdrivers and a pretty good magnet. Thats what comes to mind as far as tools and supplies goes.
g
12-28-2006, 10:58 PM
#4
Are you guys sure they're torx plus? I'm sure they're torx plus.
http://www.trannytools.com/parts/parts/77000-HBK.htm
http://www.trannytools.com/parts/parts/77000-HBK.htm
12-28-2006, 11:31 PM
#5
I'm in the process of doing my 1st 4l60e. This is the only thing that I haven't rebuilt on a car. So far so good. The more I get into it the more broken stuff I find. Make sure that you have a micrometer, feeler gauges, ATSG manual with updates, and a lot of patience. I am not in a hurry to get mine done so I have the luxury to work on it for an hour at a time when I feel like it.
You will get some mixed input on kits, I recommend that whatever you get, get ALTO red eagle clutches, kolene steels, new reverse input drum with wide carbon or red material (not kevlar). Don't forget to replace the forward sprag (basically a one way bearing) and get the heavy duty one with the double cage.....
You will get some mixed input on kits, I recommend that whatever you get, get ALTO red eagle clutches, kolene steels, new reverse input drum with wide carbon or red material (not kevlar). Don't forget to replace the forward sprag (basically a one way bearing) and get the heavy duty one with the double cage.....
12-29-2006, 07:31 AM
#6

Originally Posted by RoysTransAm
Thanks for that link. Ordering my trans from Performance here soon and would hate not having a way to get the bell off the old one.
Looks like Nick's misfortune is going to be a great little tip. I was going to start looking for an impact torx bit. But I will order this one now. Thanks.
Looks like Nick's misfortune is going to be a great little tip. I was going to start looking for an impact torx bit. But I will order this one now. Thanks.
12-30-2006, 01:20 AM
#7
Teching In

Join Date: Jul 2005
Posts: 17
Likes: 0
Received 0 Likes
on
0 Posts
Use a punch with a flat end that is the same size or larger than the bolt heads to tap SMARTLY the bolts before you try to remove them, being careful not to let the punch slide off bolt head.
Trending Topics
12-30-2006, 02:15 AM
#8
10 Second Club
iTrader: (15)

Join Date: Feb 2005
Location: fort worth, tx
Posts: 611
Likes: 0
Received 0 Likes
on
0 Posts
the factory loctite material is some pretty damn strong/tuff stuff.
simple trick (thanks frank) is to slowly heat the outside of the bolt hump with a propane torch. DONT BLAST IT FOR 5min or something like that. your not welding..hehehee
just heat it up little at a time. little on, then off, then little on again.
my factory bellhousing bolts were NOT moving. tried this and it was so easy it was stupid.
couldnt believe i fought with them for 90min...hahaha.
heating them took literally less than 10min to remove all.
FWIW,
good luck
12-30-2006, 06:31 AM
#9
Launching!
Thread Starter
iTrader: (2)
Join Date: May 2005
Location: Rochester Mn
Posts: 285
Likes: 0
Received 0 Likes
on
0 Posts
Thanks a ton for the heating trick, I'll try it tonight. If it works like you say, it certainly beats 15 bucks for the torx I'll never find!
Luckily the torx I broke off came out of the bolt head with a magnet.
I checked that site you posted choco taco. Nice kits at a fair price
Luckily the torx I broke off came out of the bolt head with a magnet.
to the OP:
try c k performance
should be EVERYTHING you need
try c k performance
should be EVERYTHING you need
Last edited by Ragtop 99; 11-23-2007 at 01:23 PM.
12-30-2006, 11:35 AM
#10

Originally Posted by performabuilt
Yes we are trying to save the customer some money assure availability of cores so we dont have to put them to the additional trouble of returning a core ,And generally we can tell the customer how to remove those bolts if its a problem with little effort ,But the majority do not have and issue with it at all , At least we don't get complaints about it bu people are very happy they don't have to return cores , In a worse scenario they could just buy the sonnax bit for 14 dollars and sell there core for 150 -200 dollars and I would say it would be well worth the effort at least I would think so if it was me
our core supplier will not accept and transmission without a bellhousing or tailhousing for more than a scrap price of $35.00 Bell and tail have a value of $175.00 alone as they are damaged often
and we have noticed that even belhousing with the same part# are not the same as they are selective fit as to case lenght, bell height and fit to the pump
We have seen bellhousing height diff of .080 in the same model
It is best to keep the parts together if possible
12-30-2006, 12:41 PM
#11
FormerVendor
iTrader: (9)
Join Date: May 2003
Location: Jacksonville, Fl
Posts: 1,573
Likes: 0
Received 0 Likes
on
0 Posts
x2 on heating the bellhousing bolts. x2 on the CK kits, they have some great hard parts. The bench holding fixture tool really does help things out. I know of a non sponsor video that is really good.
01-23-2007, 12:21 PM
#12
Launching!
Thread Starter
iTrader: (2)
Join Date: May 2005
Location: Rochester Mn
Posts: 285
Likes: 0
Received 0 Likes
on
0 Posts
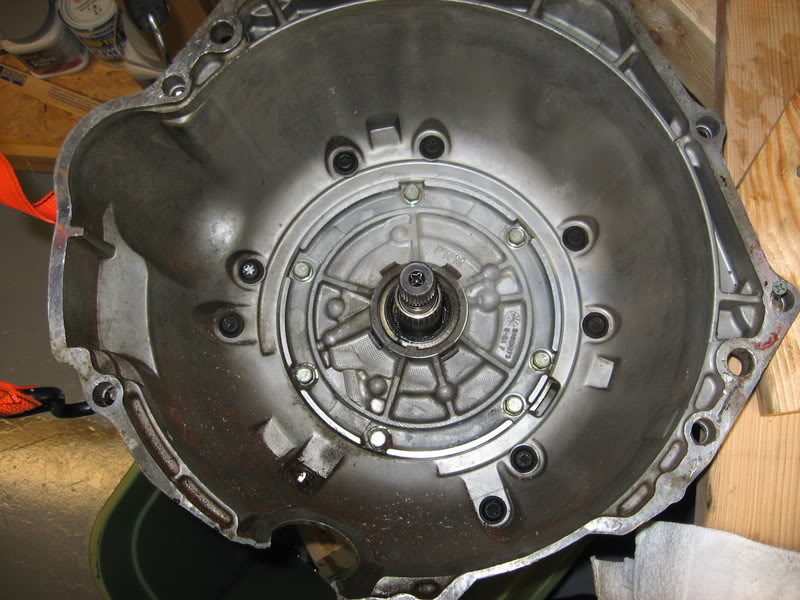
Finally got it cracked open guys. The Torx 50+ had it's hands full with me and the breaker bar. I didn't have a whole lot of luck with the heat - impact wouldn't budge it.
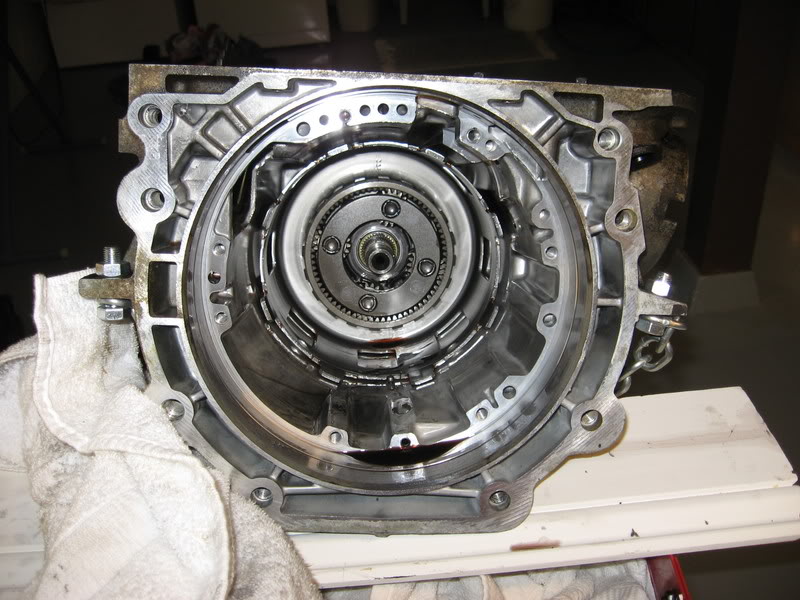
Anyway, so the bellhousing is off and and so is the tail shaft. 8 Torx 50+ and 6 15mm bolts later. Here they are sitting inside one and other.
1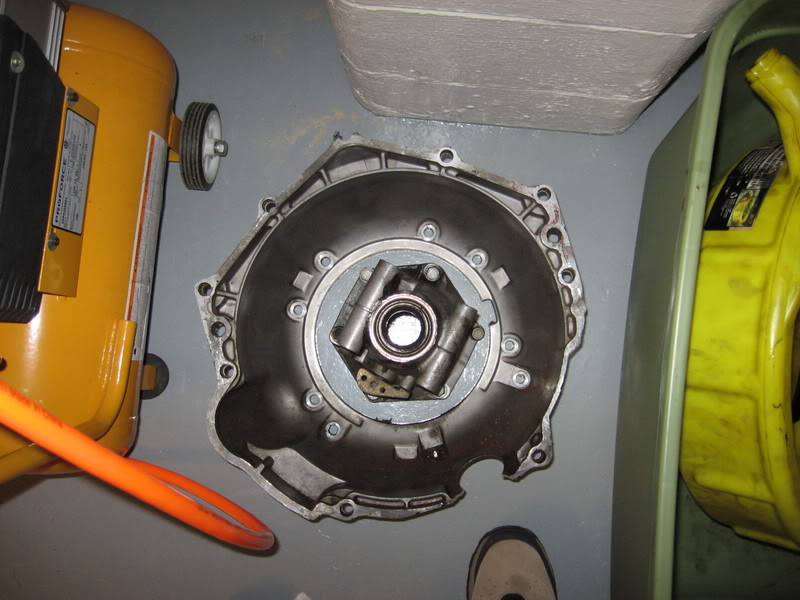
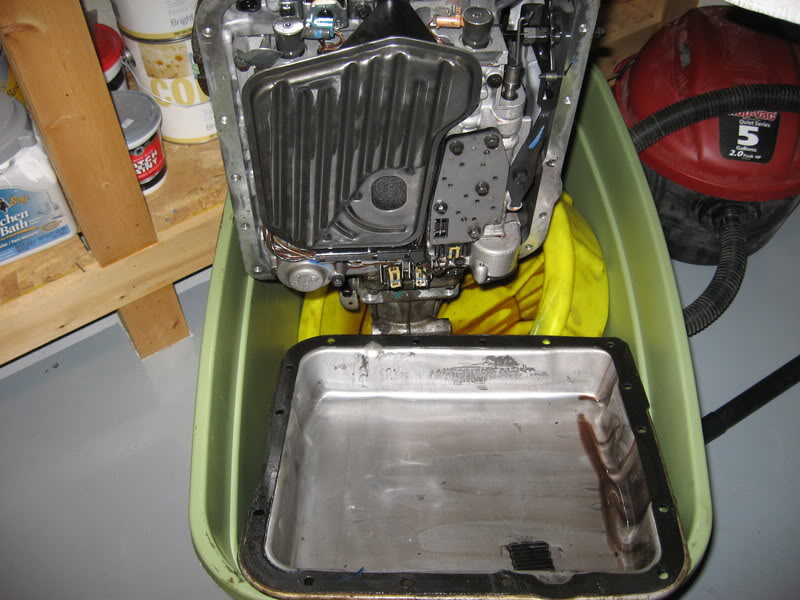
next step was to man-handle the trans onto my sears cart and pull the trans pan and filter off.
2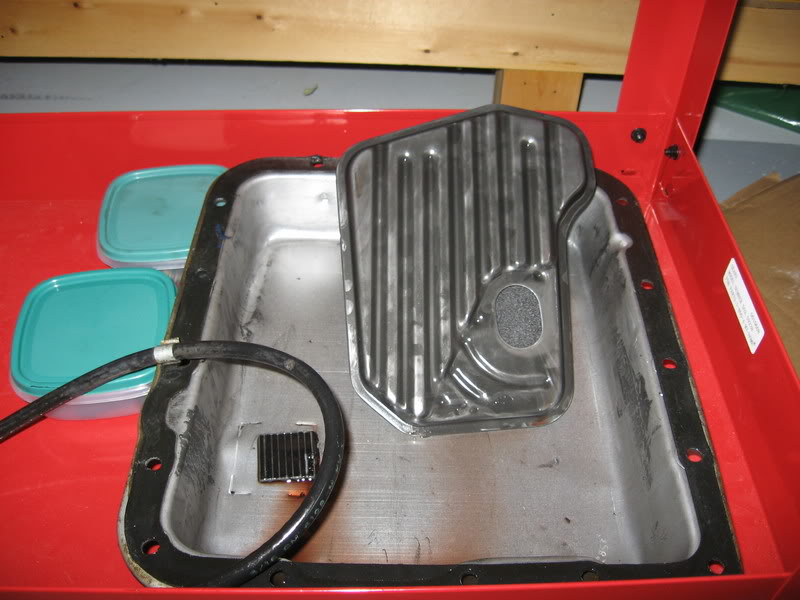
Here's a quick shot of the the dirty *** trans fluid that dripped out of the tail housing for the couple weeks it hang from my rafters.
3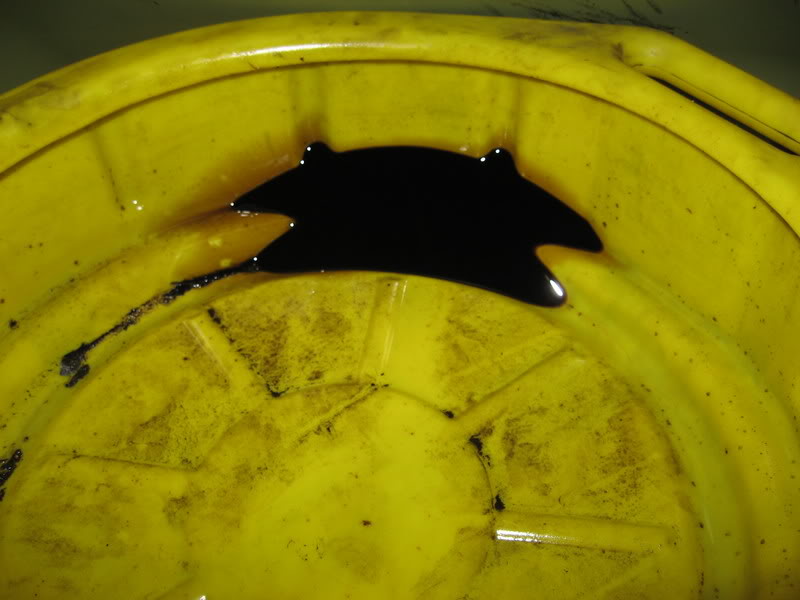
The valvebody with the filter, manifold, and wiring harness out of the way
4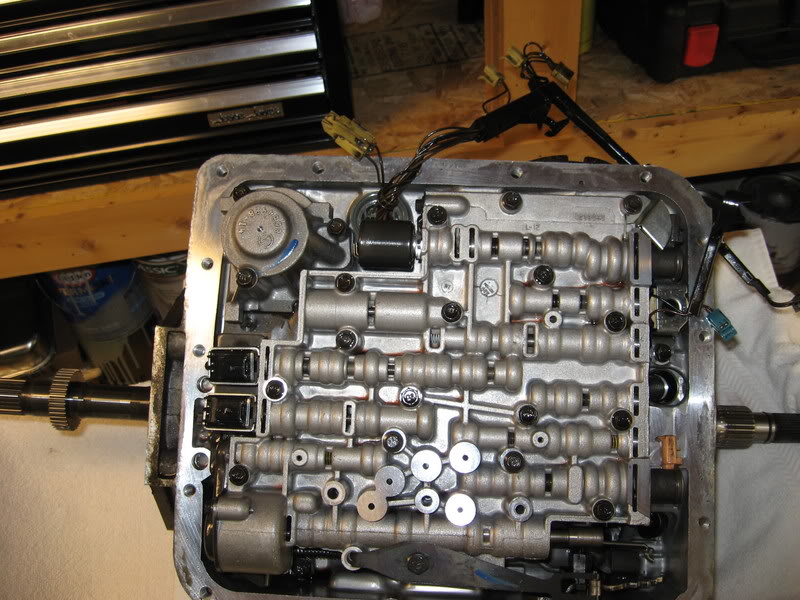
Here is a shot of the manifold after I cleaned all the crap out of it. It's held on by five 8mm bolts and was full of grey crap. The orange circles are switches that tell the computer what gear the car is in, and the resistor is your trans temp sensor.
5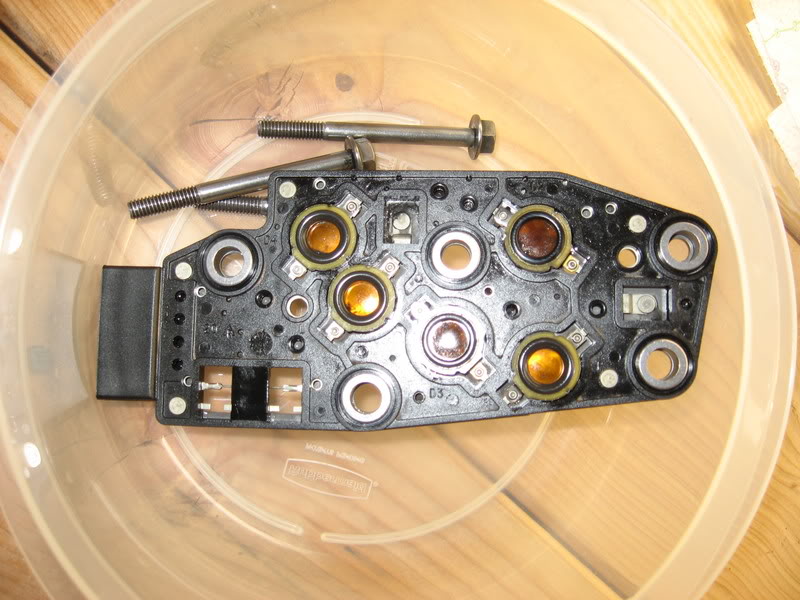
Here is a shot I took of some metal thing that wasn't in the technical video. It's right next to the TCC modulator (I beleive).
6
This is the valvebody after I removed it. Make sure you have the trans flat on it's back or you'll be chasing checkballs everywhere (ask me how I know). There are an assortment of 8 and 10mm bolts that hold this thing on. They come out easily. The parking pin comes right out after you lift the valvebody off the case.
7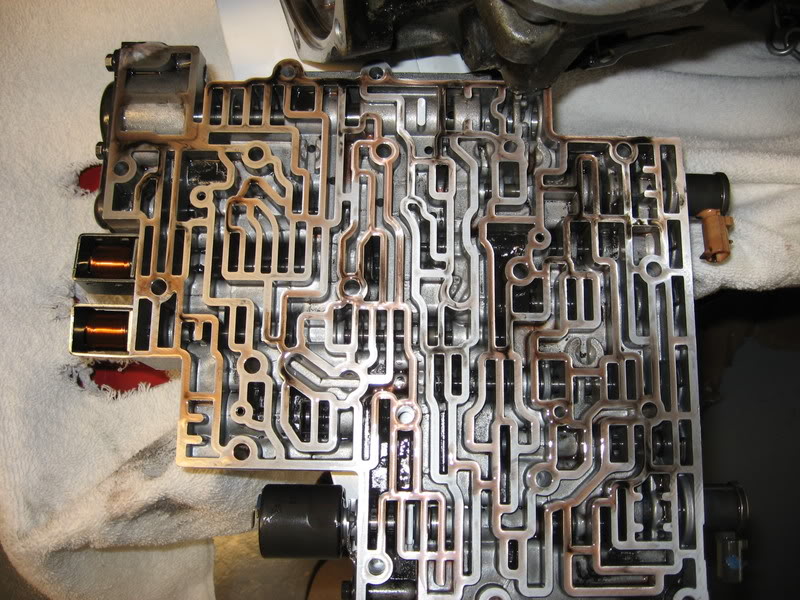
Here is the case side with the seperator plate and gasket still attached. You'll see a plate with 3 bolts that needs to be taken off to remove the plate
I don't know if it's normal, but my trans has a lot of grey fluid in it.
8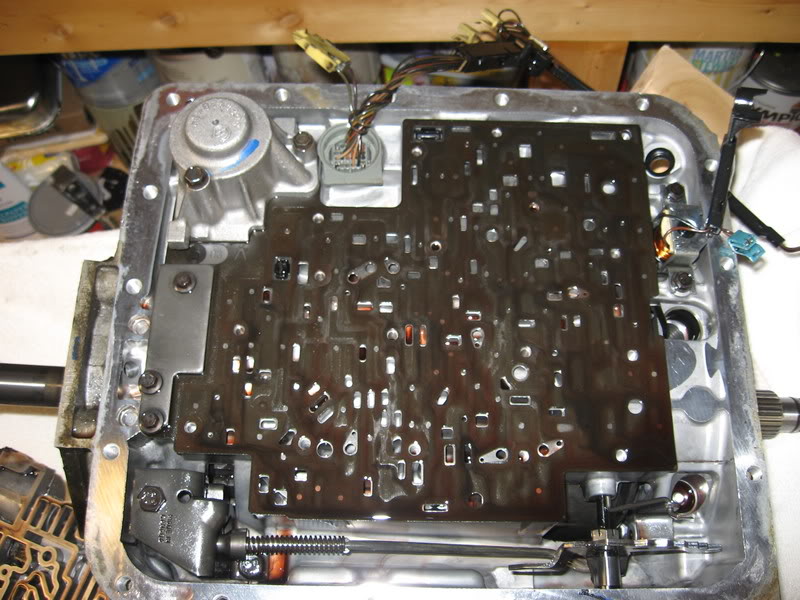
here is the assortment of bolts that hold the valvebody on
9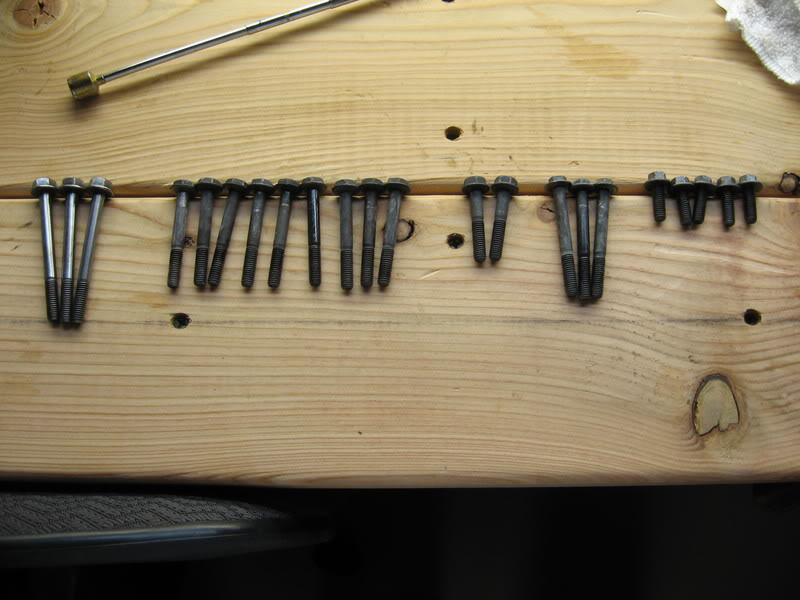
This is a shot of the TCC pressure modulator? I'll confirm this later.
The technical video said these have tendency to crack here on the early models.
10
The next couple shots are of the accumulator. It was pictured earlier on the upper left of the case. It's held in with 3 10mm bolts. If you beat it against the palm of your hand the piston will fall out and you can wash the piston, springs and shaft with parts cleaner.
11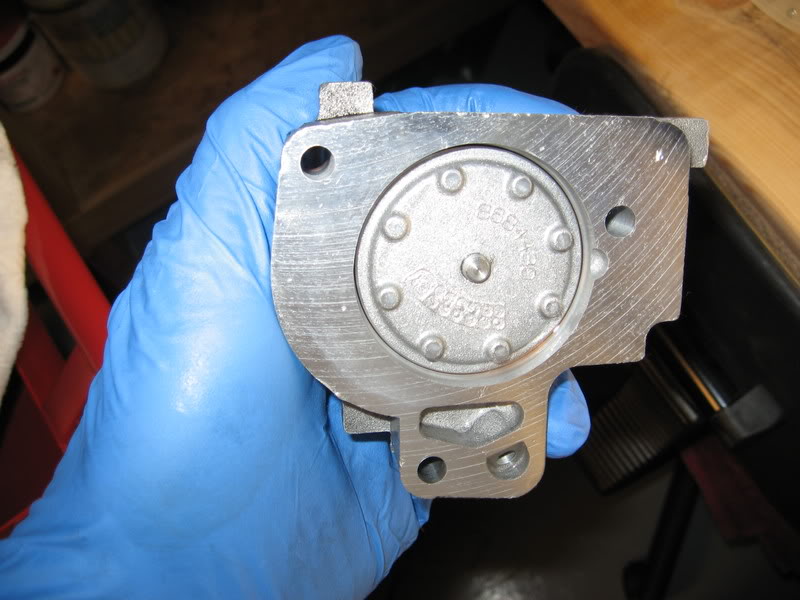
12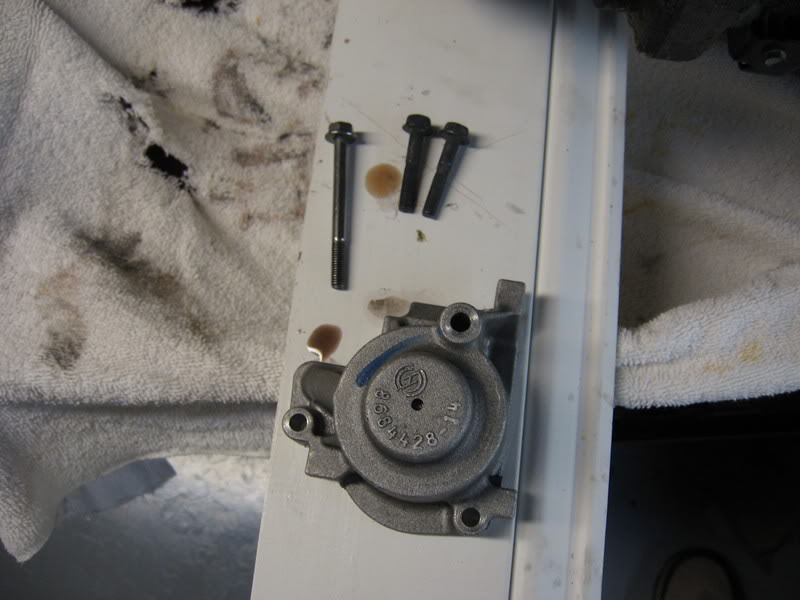
13
14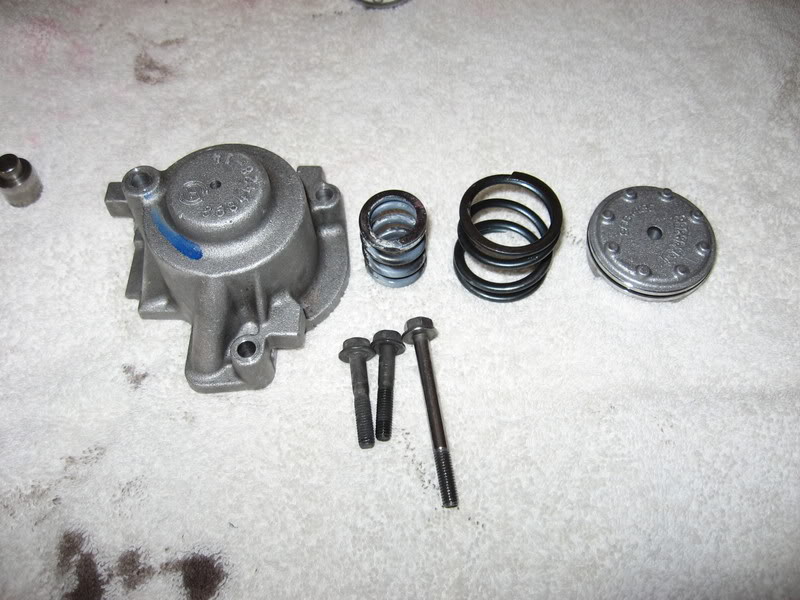
This shot of the case you can see where the accumulator sits and the other piston (nomenclature?). Also you can see the pin which pulls out of the case. Use a set of pliers to gently pull these from the case. If yours is like mine, it will be full of grey crap.
15
16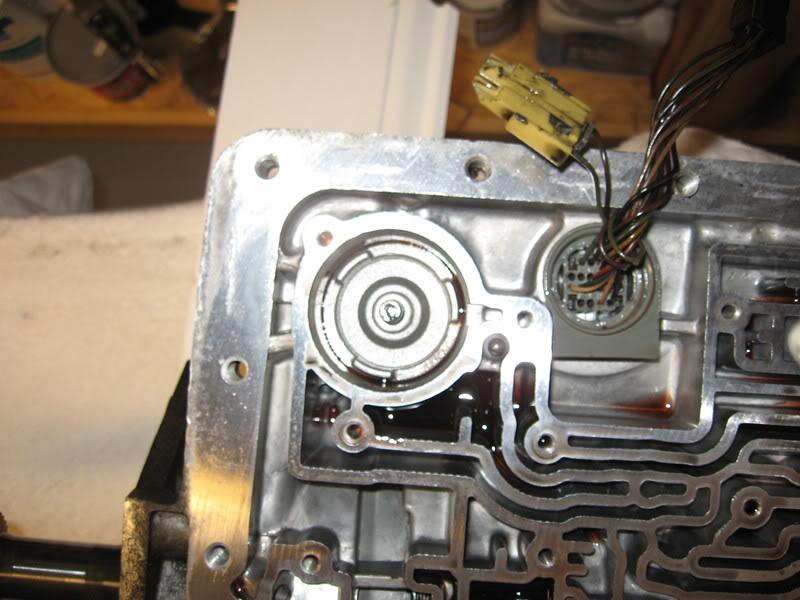
17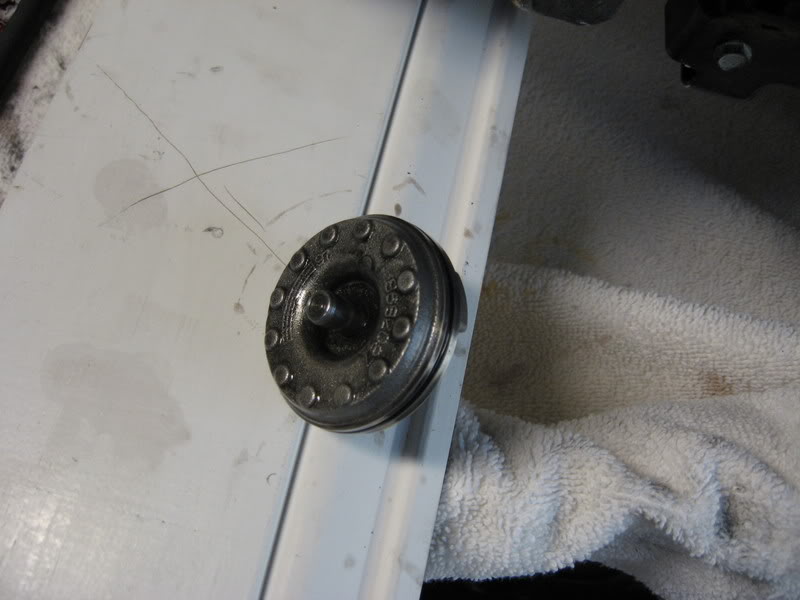
Next is the 2,4 band applier (excuse my amatuer language). Use a magnet to pull it out of the case and clean it.
18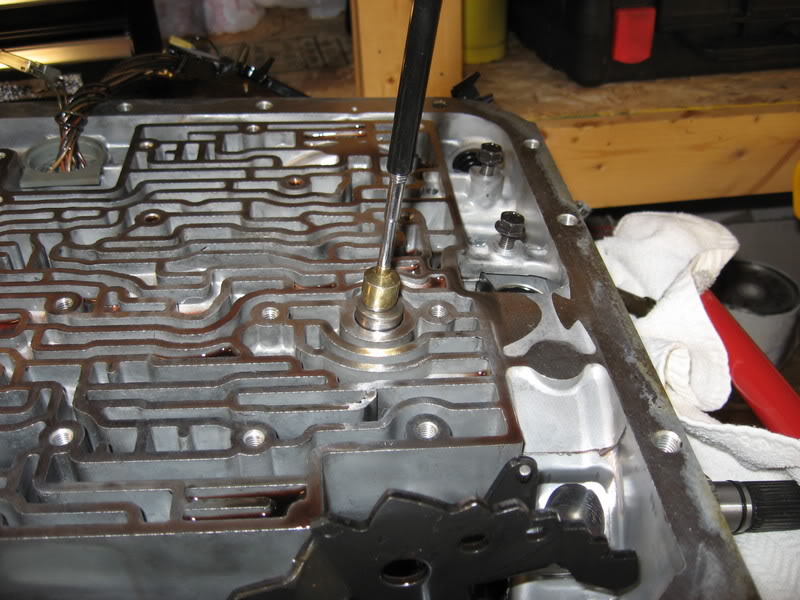
Next step is to pull the pump and tear the guts out I beleive. I don't know how much more time I'll have today. We'll see.
I would like to encourage comments on anything pictured. Please use the number of the picture to make reference and I'll go back and edit.
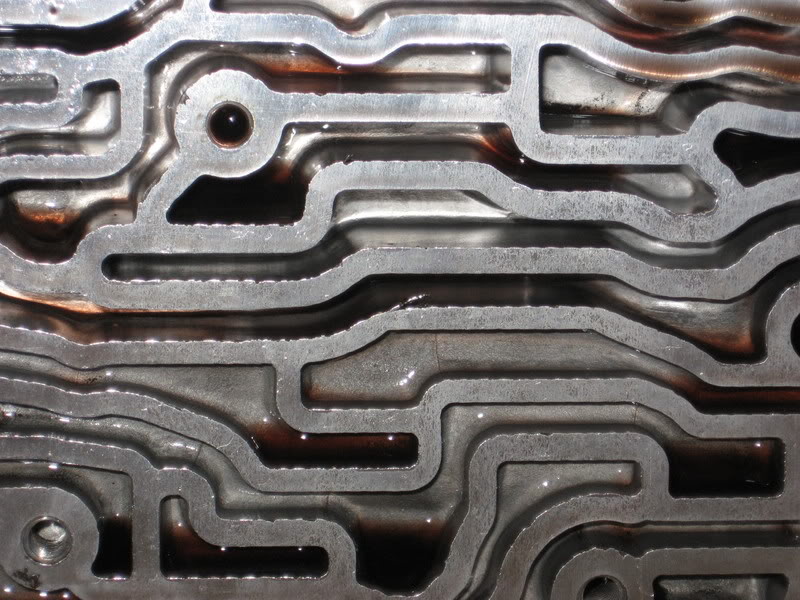
I'd also like to ask if anyone has any suggestions as for this picture. You'll see a vein in the case has a large burr. I'm not sure what to do about this?
Thanks, Nick
Anyway, so the bellhousing is off and and so is the tail shaft. 8 Torx 50+ and 6 15mm bolts later. Here they are sitting inside one and other.
1
next step was to man-handle the trans onto my sears cart and pull the trans pan and filter off.
2
Here's a quick shot of the the dirty *** trans fluid that dripped out of the tail housing for the couple weeks it hang from my rafters.
3
The valvebody with the filter, manifold, and wiring harness out of the way
4
Here is a shot of the manifold after I cleaned all the crap out of it. It's held on by five 8mm bolts and was full of grey crap. The orange circles are switches that tell the computer what gear the car is in, and the resistor is your trans temp sensor.
5
Here is a shot I took of some metal thing that wasn't in the technical video. It's right next to the TCC modulator (I beleive).
6
This is the valvebody after I removed it. Make sure you have the trans flat on it's back or you'll be chasing checkballs everywhere (ask me how I know). There are an assortment of 8 and 10mm bolts that hold this thing on. They come out easily. The parking pin comes right out after you lift the valvebody off the case.
7
Here is the case side with the seperator plate and gasket still attached. You'll see a plate with 3 bolts that needs to be taken off to remove the plate
I don't know if it's normal, but my trans has a lot of grey fluid in it.
8
here is the assortment of bolts that hold the valvebody on
9
This is a shot of the TCC pressure modulator? I'll confirm this later.
The technical video said these have tendency to crack here on the early models.
10
The next couple shots are of the accumulator. It was pictured earlier on the upper left of the case. It's held in with 3 10mm bolts. If you beat it against the palm of your hand the piston will fall out and you can wash the piston, springs and shaft with parts cleaner.
11
12
13
14
This shot of the case you can see where the accumulator sits and the other piston (nomenclature?). Also you can see the pin which pulls out of the case. Use a set of pliers to gently pull these from the case. If yours is like mine, it will be full of grey crap.
15
16
17
Next is the 2,4 band applier (excuse my amatuer language). Use a magnet to pull it out of the case and clean it.
18
Next step is to pull the pump and tear the guts out I beleive. I don't know how much more time I'll have today. We'll see.
I would like to encourage comments on anything pictured. Please use the number of the picture to make reference and I'll go back and edit.
I'd also like to ask if anyone has any suggestions as for this picture. You'll see a vein in the case has a large burr. I'm not sure what to do about this?
Thanks, Nick


 we had to heat the bolts up with a torch BTW I should have done this before breaking 3 bits
01-23-2007, 03:14 PM
we had to heat the bolts up with a torch BTW I should have done this before breaking 3 bits
01-23-2007, 03:14 PM
#15
On The Tree
iTrader: (3)
Join Date: Jan 2005
Location: Summerville, SC
Posts: 159
Likes: 0
Received 0 Likes
on
0 Posts
Originally Posted by VORTECFCAR
Yikes! sounds like I'm not the only one who had some trouble with bellhousing bolts...
I just noticed that the valve body I pulled off is stamped '97.
The guy I bought it from said it was out of a '98 car. Is this going to cause me trouble? I wouldn't be suprised if this is a '97 trans...
If it is a '97 can it still be used behind an LS1?
I just noticed that the valve body I pulled off is stamped '97.
The guy I bought it from said it was out of a '98 car. Is this going to cause me trouble? I wouldn't be suprised if this is a '97 trans...
If it is a '97 can it still be used behind an LS1?
IIRC, the 97 (lt1) 4l60e does not have a removable bellhousing. So if yours is a 360* bell housing then you should be just fine.
01-23-2007, 04:32 PM
#16
TECH Senior Member

Just make sure that the burr in the oil channel has no loose metal that will flake off later... carefully rub it with a small very flat file (and you have to wash out the case)... do not damage the surface that mates to the separator plate.
01-25-2007, 09:26 AM
#17
Launching!
Thread Starter
iTrader: (2)
Join Date: May 2005
Location: Rochester Mn
Posts: 285
Likes: 0
Received 0 Likes
on
0 Posts
Originally Posted by 02 BLK WS6
FYI
The guy that has done several trannies for me in the past told me to change the manifold pressure sensor/switch(whatever it's called). I am going to set up a full shop with a large bench in my garage to do rebuilds on the side eventually. I will eventually become a sponsor and do this to help sponsor my car addiction (I want a C6 Z06).
The guy that has done several trannies for me in the past told me to change the manifold pressure sensor/switch(whatever it's called). I am going to set up a full shop with a large bench in my garage to do rebuilds on the side eventually. I will eventually become a sponsor and do this to help sponsor my car addiction (I want a C6 Z06).
Can anyone confirm this? I was under the impression that this piece is fairly simple in it's operation. I'll have to look through the manual to see if there is a way I can test it.
01-28-2007, 06:24 PM
#19
Launching!
Thread Starter
iTrader: (2)
Join Date: May 2005
Location: Rochester Mn
Posts: 285
Likes: 0
Received 0 Likes
on
0 Posts
...had some more time to dasassemble today.
Took the servo out and pulled the rest of the innards out.
I took several pictures of the servo removal so those interested in putting a vette servo know what they're getting into (it's pretty simple acutally).
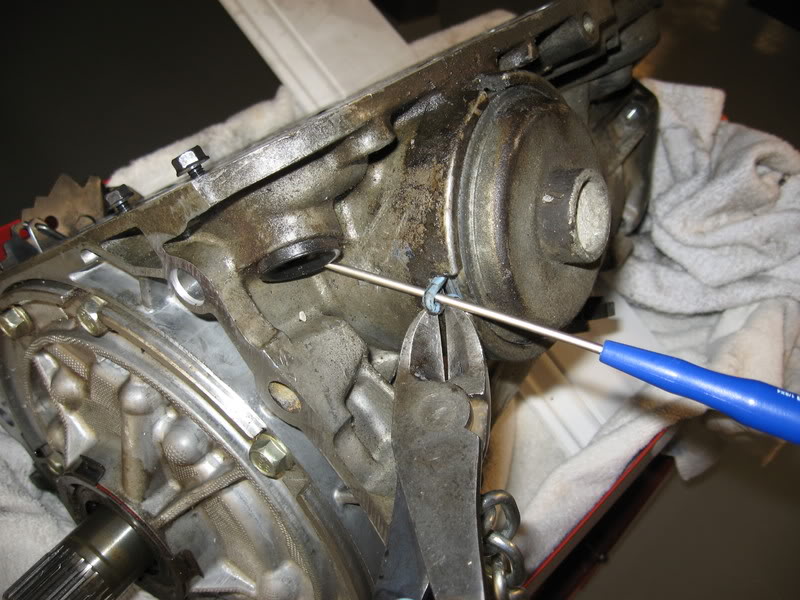
First knock the servo loose with a hammer and 2X4, then pull the snap ring with a small flat blade.

Use a channel lock to rotate the cover loose and up until it hangs up on the seal. Then grab the seal and cut it.
here's what it looks like when the cover comes off.
Then pulling goodies out.
Here are all the parts of the servo layed out after cleaning

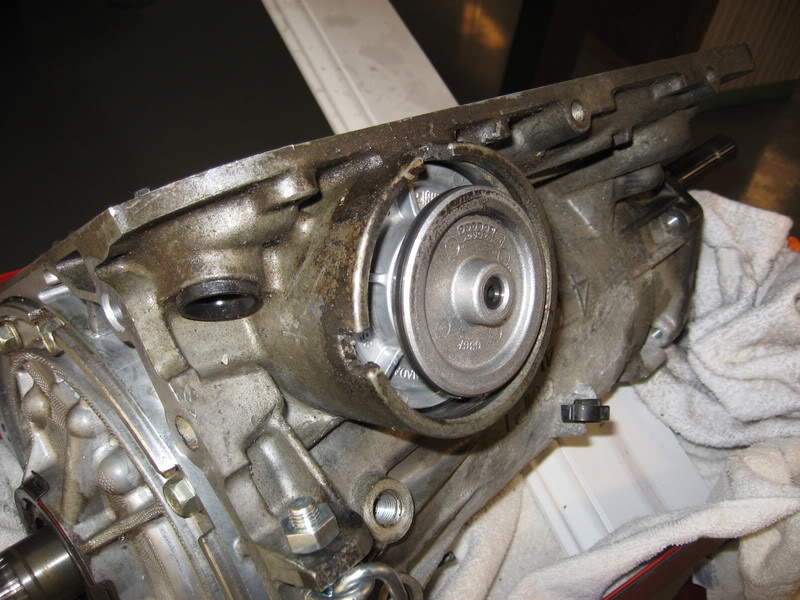
next step is the take the bolts holding the pump out and pry it out of the case. Don't forget to pull the o-ring on the end of the input shaft first or the pump will hang up.
just twist the screwdrive with wrist aciton.
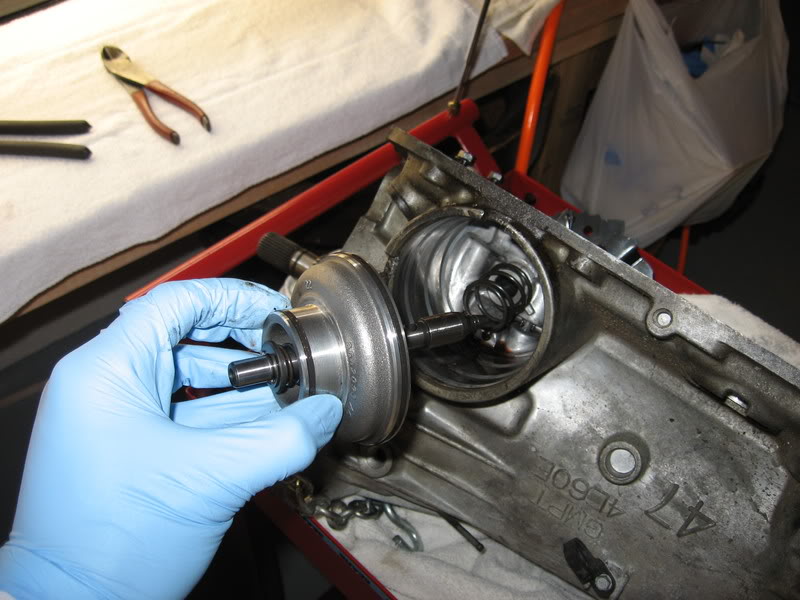
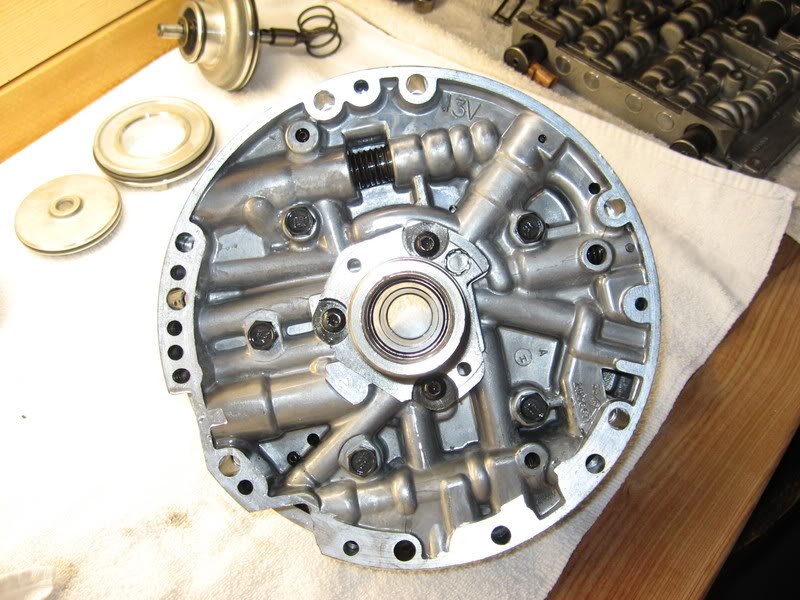
here's the pump out on the bench and cleaned up.
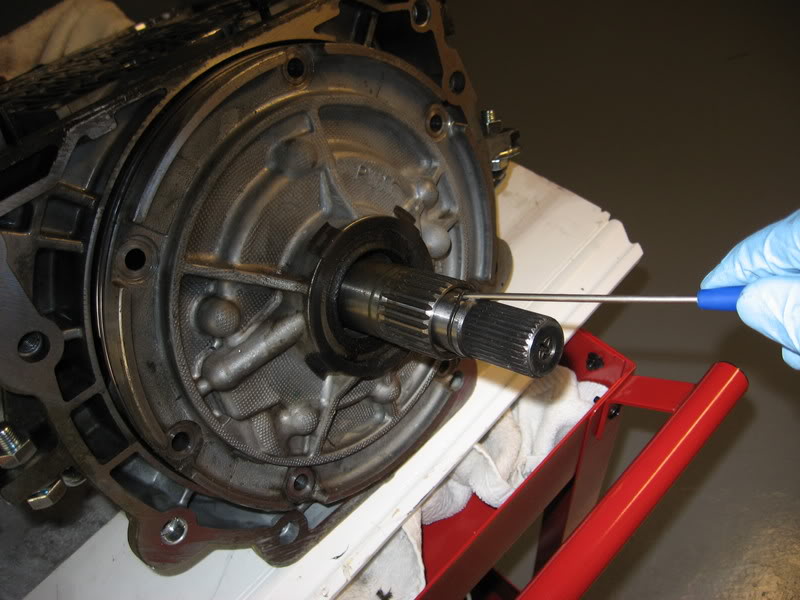
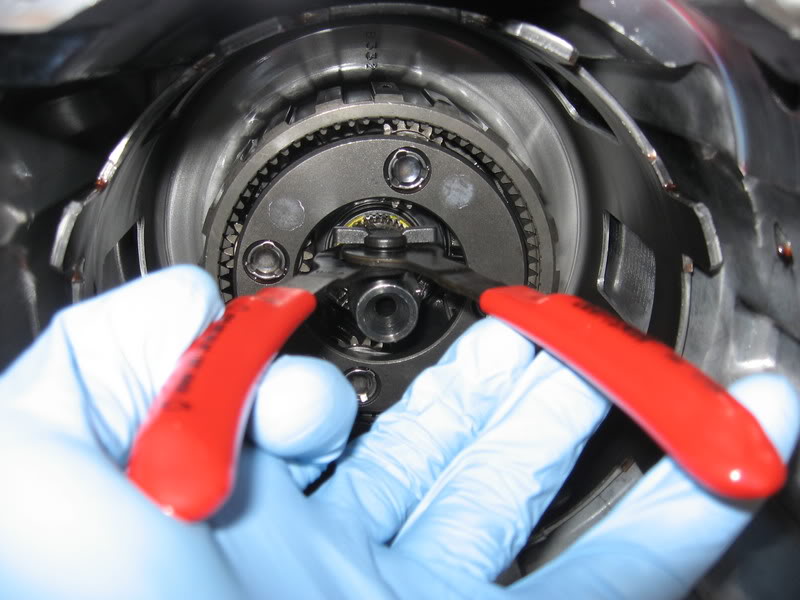
pull the input drum and 'stuff'
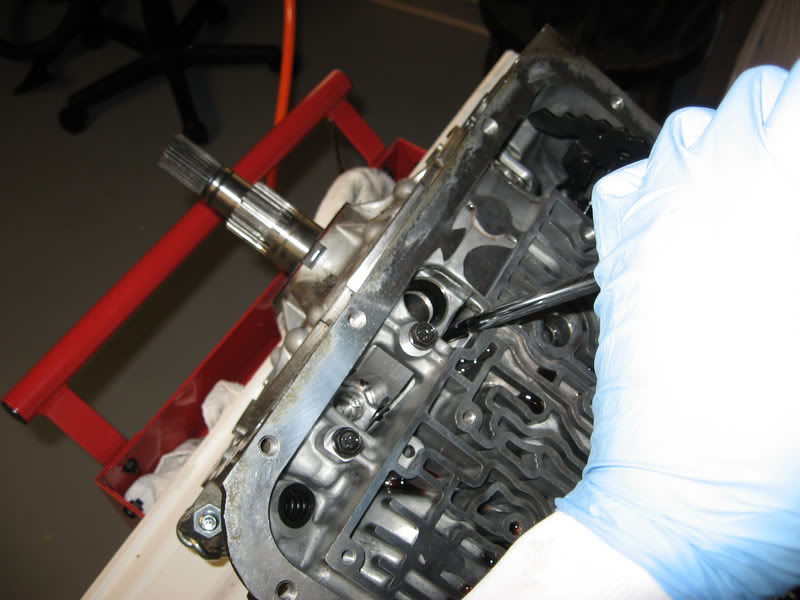
then pull the snap ring and yank some more out. Obviously you're going to want to keep track of the way everything comes out.
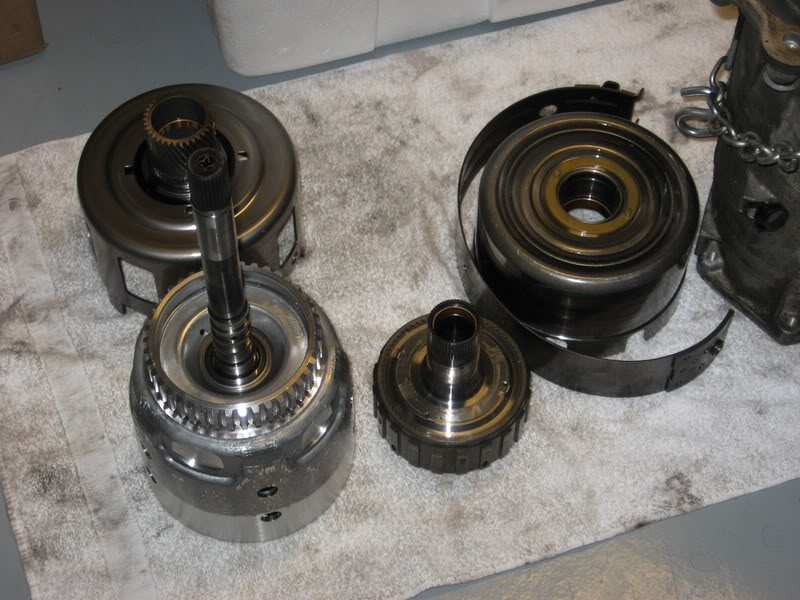
here are most of the inside goodies, not yet disassembled.
the stuff at the tail end of the case is still in, I'll get my spring compressor out next.
enjoy, Nick
Took the servo out and pulled the rest of the innards out.
I took several pictures of the servo removal so those interested in putting a vette servo know what they're getting into (it's pretty simple acutally).
First knock the servo loose with a hammer and 2X4, then pull the snap ring with a small flat blade.
Use a channel lock to rotate the cover loose and up until it hangs up on the seal. Then grab the seal and cut it.
here's what it looks like when the cover comes off.
Then pulling goodies out.
Here are all the parts of the servo layed out after cleaning
next step is the take the bolts holding the pump out and pry it out of the case. Don't forget to pull the o-ring on the end of the input shaft first or the pump will hang up.
just twist the screwdrive with wrist aciton.
here's the pump out on the bench and cleaned up.
pull the input drum and 'stuff'
then pull the snap ring and yank some more out. Obviously you're going to want to keep track of the way everything comes out.
here are most of the inside goodies, not yet disassembled.
the stuff at the tail end of the case is still in, I'll get my spring compressor out next.
enjoy, Nick
02-01-2007, 01:43 PM
#20
Launching!
Thread Starter
iTrader: (2)
Join Date: May 2005
Location: Rochester Mn
Posts: 285
Likes: 0
Received 0 Likes
on
0 Posts
Originally Posted by after dark
Any updates on this?...is the video helpful? Found any good rebuild kits?
I'm waiting to complete my parts inspection before ordering a rebuild kit, although I have one in mind.
hope this helps, Nick
Last edited by VORTECFCAR; 02-01-2007 at 01:53 PM.

