SLP grill installation with photos
 06-07-2007, 06:39 PM
#1
First off I’d like to thank those who contributed in the last thread about what to expect on this installation. It’s pretty straight forward and relatively easy to install the SLP grill although I did have the benefit of a lift and a technician that does this kind of thing for a living. My special thanks to Autohaus Ruffner in League City for their time and to Charlie for doing 99% of the work. I leave turning wrenches to the experts.
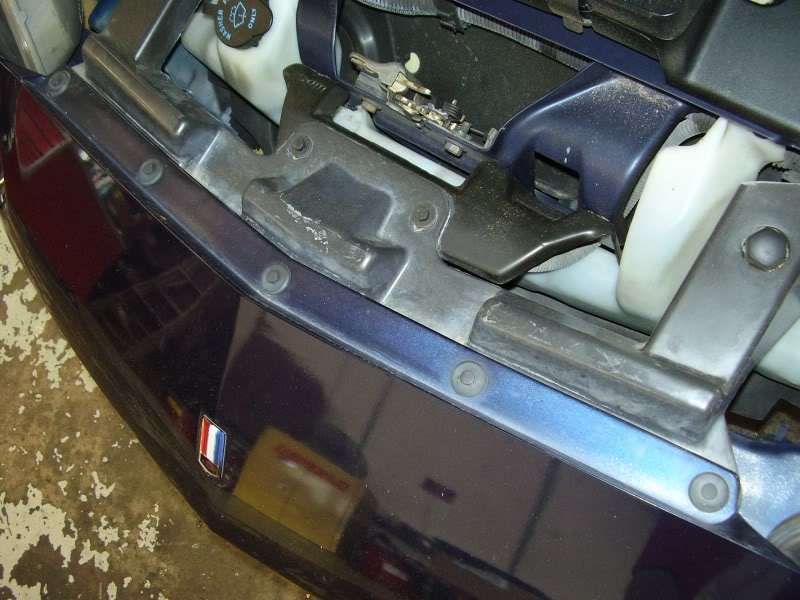
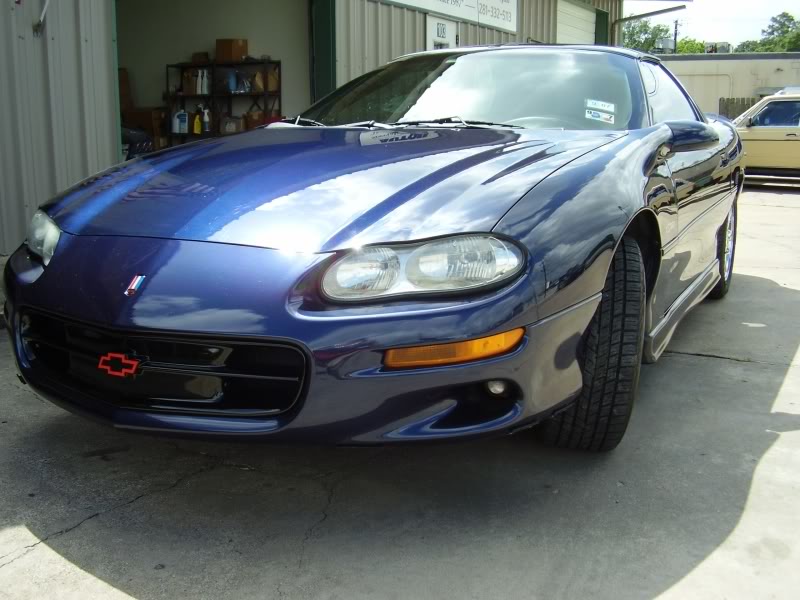
First off is the stock front grill as it looked before it was replaced

As you can see it looks pretty mundane they way Chevrolet designed it. I’m no fan of the front license plate and this was the motivating factor in replacing the stock grill with the SLP grill.
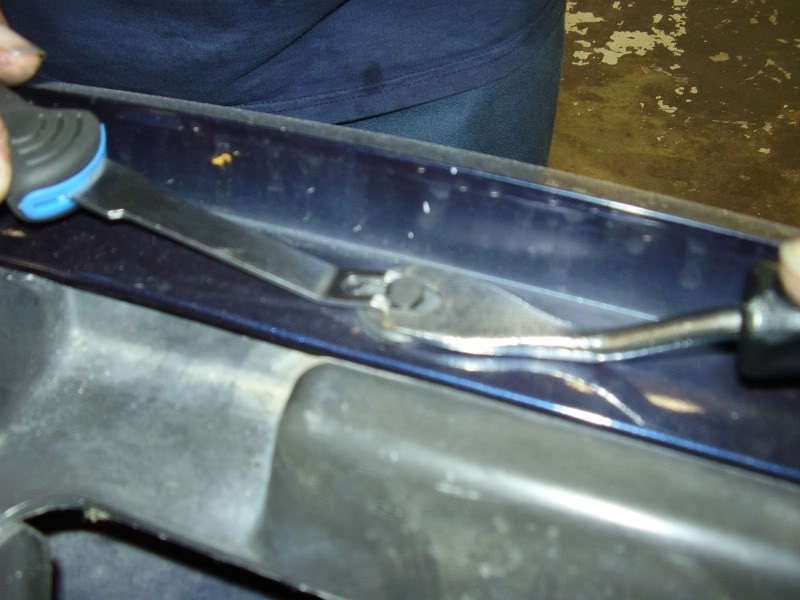
The first step was to remove the 5 fasteners from the top of the fascia in front of the washer fluid reservoir.
We removed them using 2 tools that held the fastener down while lifting the nipple up and releasing the fastener, a very quick process.
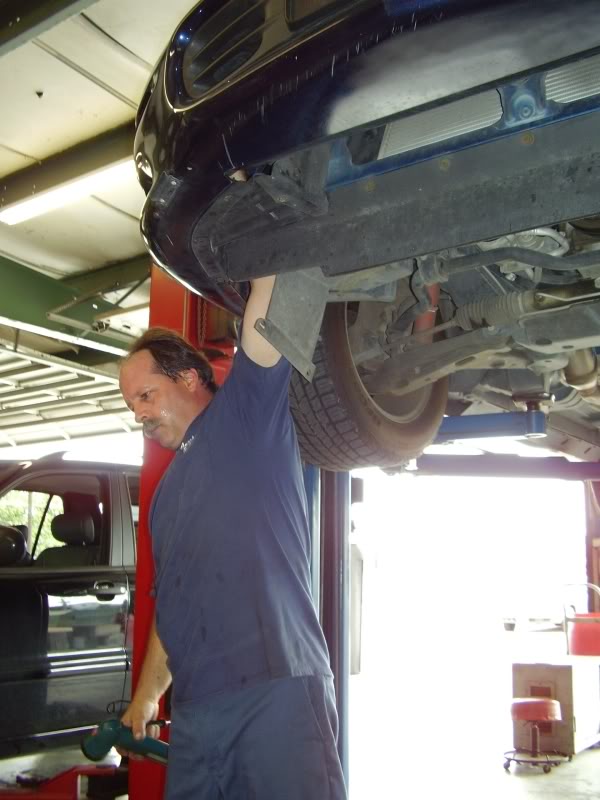
Once we had those 5 fasteners removed we lifted the car up exposing the underside fasteners that also hold in the splash panels below the fascia. A simple socket wrench removed these fasteners.
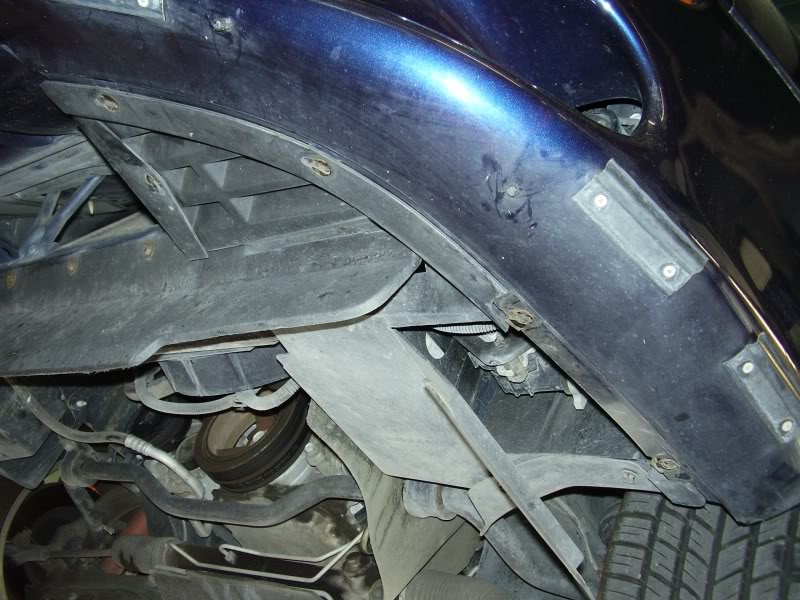
Once all of those fasteners were removed you have to open the splash panels to get to the fasteners on the inside of the fascia. You can clearly see 2 of the fasteners, the third is just visible to the left in the photo behind the fogligh mounting bracket.
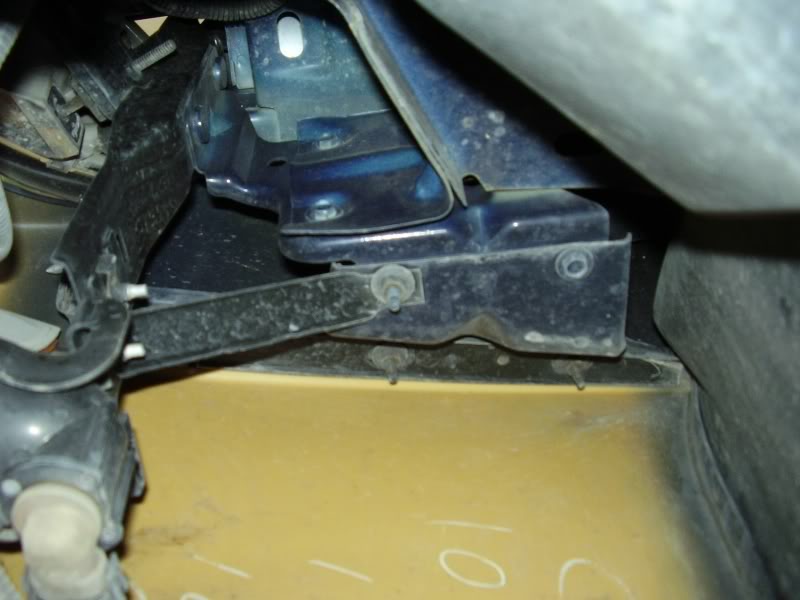
There is also a bolt that must be removed that is located on the inside of where the quarter panel and the fascia meet. It’s a metal bolt with a nut, apparently made of aluminum or some light colored metal.
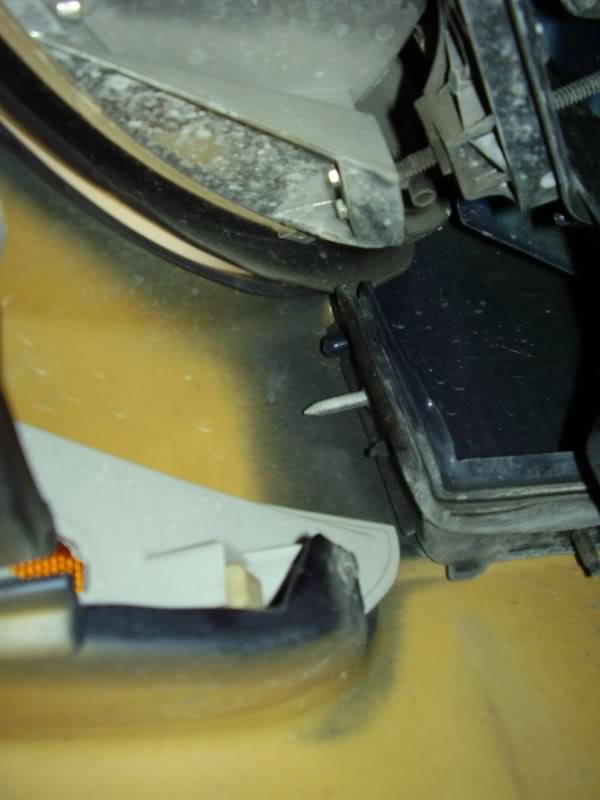
This gives you some idea of what to expect when removing these fasteners located inside the splash panels.
After the inside fasteners are removed disconnect or remove the parking lights and the turn signal bulbs from their housings. We didn’t find it necessary to disconnect the electrical connections. Just leave the bulbs hanging, they’ll be fine.
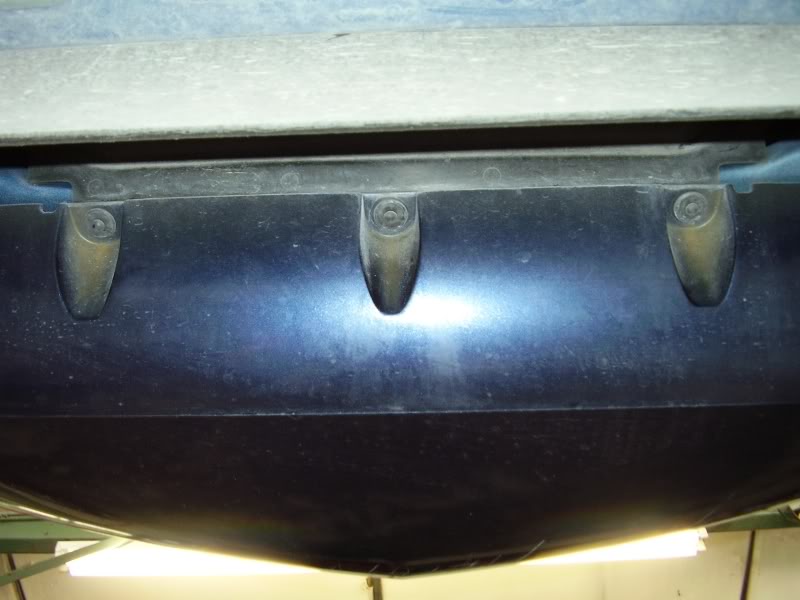
After that process, all that is left is to remove the 3 fasteners under the fascia at the radiator air intake.
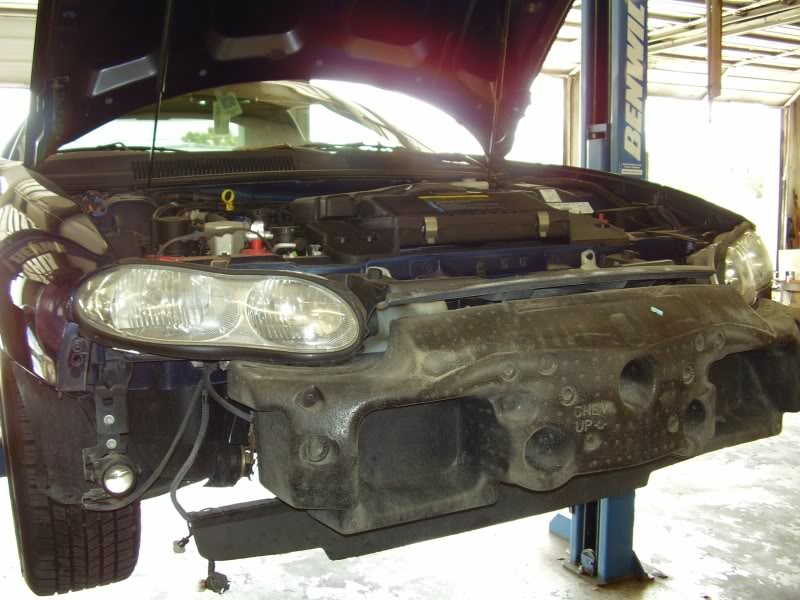
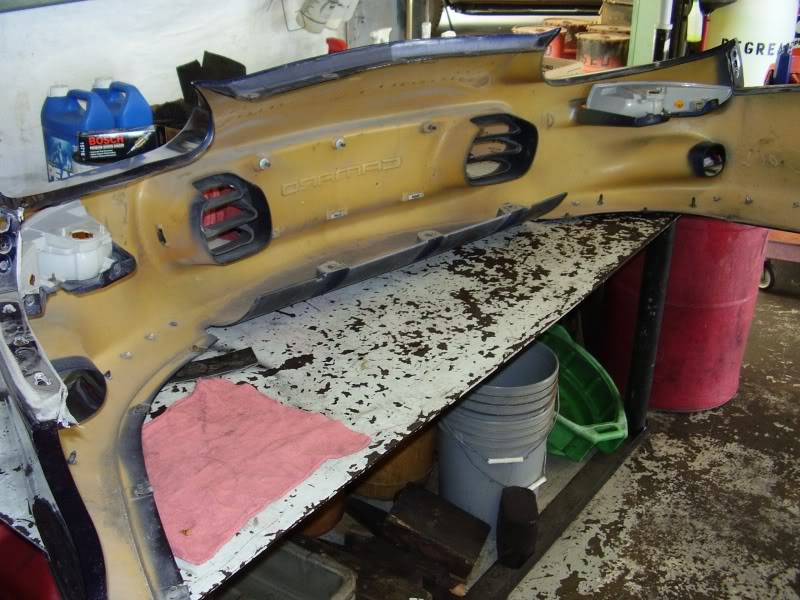
Once these are removed you can take the fascia off of the front of the car. Be careful when doing so, there are guide posts in the quarter panel mounting frames so you must do a combination of down and out when removing the fascia. Here’s the fascia removed from the Z28.
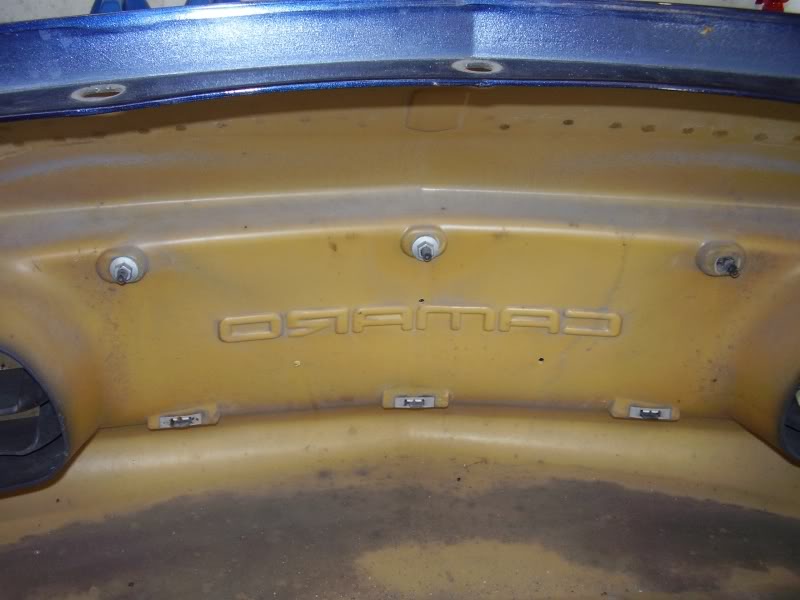
After we removed the fascia we set it on the work bench. You will see 6 retainers on the backside of the fascia that hold the grill in place. The top 3 are bolts with nuts that remove easily, the bottom 3 are clips that you must remove by pulling off. Since I am keeping my stock grill we were careful in not damaging the studs on the grill.
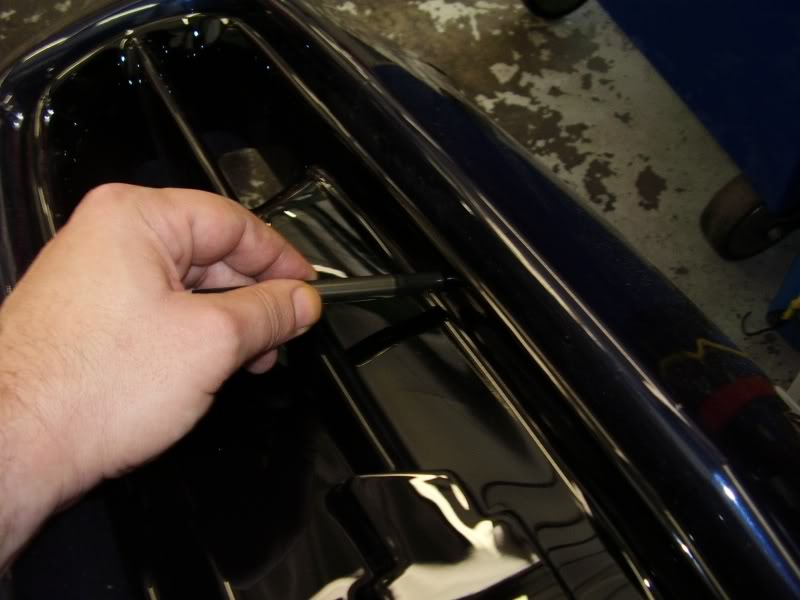
Place the SLP grill in the grill opening and move the grill into the desired position. I used a black ball point pen to mark where we were going to drill the holes. This worked ok but on the dark NBM paint the marks were a little hard to see. I’d recommend a sharpie on light colored paints.
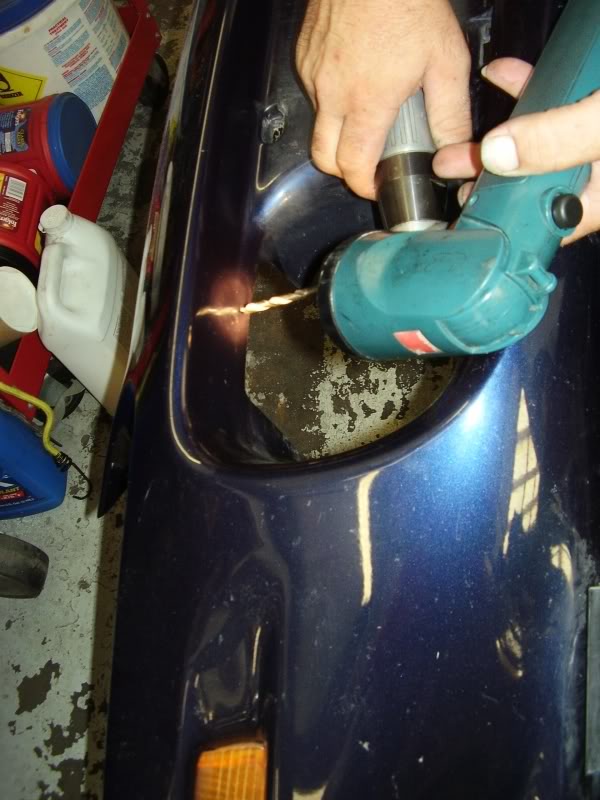
One we had the marking done it was time to drill. The instructions from SLP state that a Ľ” drill bit be used to make the holes so that’s what we used. After drilling the holes and placing the SLP grill into the slot we found that the holes were too small for the Christmas tree fasteners. We then used a 17/54” drill that is only slightly bigger than the Ľ” drill and the fasteners, while still tough to install, went in smoothly.
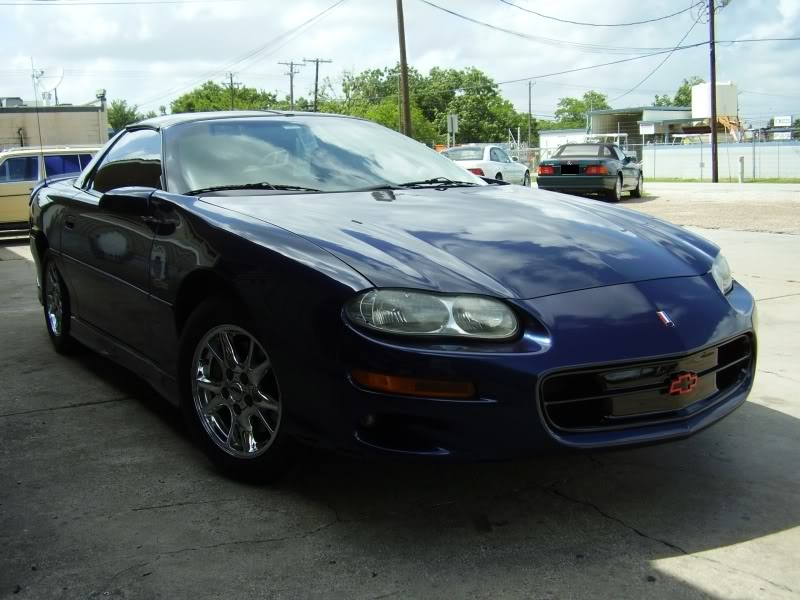
Once the SLP grill was attached to the fascia we double checked the Christmas tree fasteners and reinstalled the fascia. Going back on was actually easier than the removal. Just make sure you take care with the sides like you did removing the fascia using a combination of up and back. Once you have all of the holes lined up just replace all of the bolts and fasteners. I used mild soap and water to clean the grill and then a light spraying of window cleaner to get the bow tie surface ready for the bow tie. This is how it looked after we were finished.
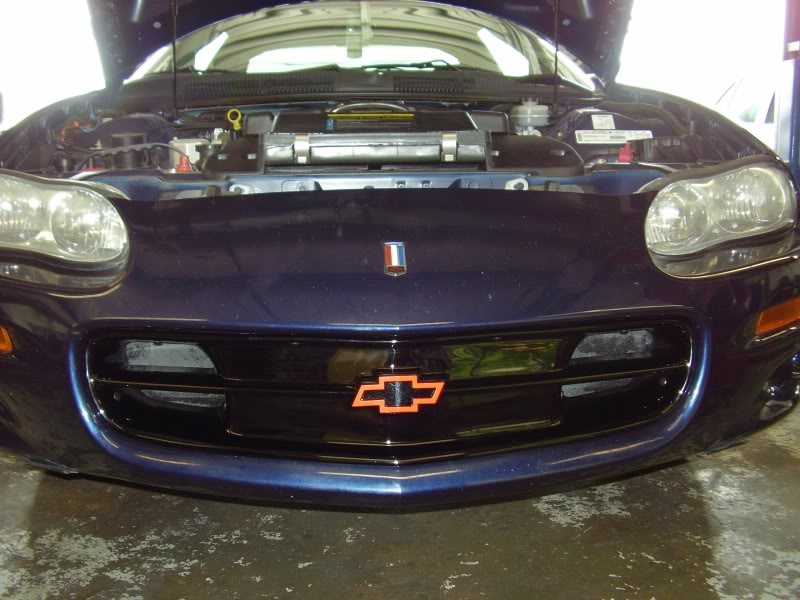
After a quick car wash and a test drive this is the final product. Total time of install was roughly 2 hours. We did take our time to make sure everything was done correctly. You may find that it takes you less time or more depending on the situation. I’d highly recommend the use of a lift if one is at your disposal. Definitely worth the time, money, and effort to give the front end a cleaner, sleeker look!
I’ve had some requests to see my custom Magnaflow tips so I’ve included some photos of them. Basically all I did was have 3.5” cut from the tips to have them look more tucked under the bumper rather than the usual truck-like appearance the stock tips have.


Thanks for your time and if you have any questions please feel free to PM me with them!
Kyle
First off is the stock front grill as it looked before it was replaced
As you can see it looks pretty mundane they way Chevrolet designed it. I’m no fan of the front license plate and this was the motivating factor in replacing the stock grill with the SLP grill.
The first step was to remove the 5 fasteners from the top of the fascia in front of the washer fluid reservoir.
We removed them using 2 tools that held the fastener down while lifting the nipple up and releasing the fastener, a very quick process.
Once we had those 5 fasteners removed we lifted the car up exposing the underside fasteners that also hold in the splash panels below the fascia. A simple socket wrench removed these fasteners.
Once all of those fasteners were removed you have to open the splash panels to get to the fasteners on the inside of the fascia. You can clearly see 2 of the fasteners, the third is just visible to the left in the photo behind the fogligh mounting bracket.
There is also a bolt that must be removed that is located on the inside of where the quarter panel and the fascia meet. It’s a metal bolt with a nut, apparently made of aluminum or some light colored metal.
This gives you some idea of what to expect when removing these fasteners located inside the splash panels.
After the inside fasteners are removed disconnect or remove the parking lights and the turn signal bulbs from their housings. We didn’t find it necessary to disconnect the electrical connections. Just leave the bulbs hanging, they’ll be fine.
After that process, all that is left is to remove the 3 fasteners under the fascia at the radiator air intake.
Once these are removed you can take the fascia off of the front of the car. Be careful when doing so, there are guide posts in the quarter panel mounting frames so you must do a combination of down and out when removing the fascia. Here’s the fascia removed from the Z28.
After we removed the fascia we set it on the work bench. You will see 6 retainers on the backside of the fascia that hold the grill in place. The top 3 are bolts with nuts that remove easily, the bottom 3 are clips that you must remove by pulling off. Since I am keeping my stock grill we were careful in not damaging the studs on the grill.
Place the SLP grill in the grill opening and move the grill into the desired position. I used a black ball point pen to mark where we were going to drill the holes. This worked ok but on the dark NBM paint the marks were a little hard to see. I’d recommend a sharpie on light colored paints.
One we had the marking done it was time to drill. The instructions from SLP state that a Ľ” drill bit be used to make the holes so that’s what we used. After drilling the holes and placing the SLP grill into the slot we found that the holes were too small for the Christmas tree fasteners. We then used a 17/54” drill that is only slightly bigger than the Ľ” drill and the fasteners, while still tough to install, went in smoothly.
Once the SLP grill was attached to the fascia we double checked the Christmas tree fasteners and reinstalled the fascia. Going back on was actually easier than the removal. Just make sure you take care with the sides like you did removing the fascia using a combination of up and back. Once you have all of the holes lined up just replace all of the bolts and fasteners. I used mild soap and water to clean the grill and then a light spraying of window cleaner to get the bow tie surface ready for the bow tie. This is how it looked after we were finished.
After a quick car wash and a test drive this is the final product. Total time of install was roughly 2 hours. We did take our time to make sure everything was done correctly. You may find that it takes you less time or more depending on the situation. I’d highly recommend the use of a lift if one is at your disposal. Definitely worth the time, money, and effort to give the front end a cleaner, sleeker look!
I’ve had some requests to see my custom Magnaflow tips so I’ve included some photos of them. Basically all I did was have 3.5” cut from the tips to have them look more tucked under the bumper rather than the usual truck-like appearance the stock tips have.
Thanks for your time and if you have any questions please feel free to PM me with them!
Kyle

The following users liked this post:
strikeone (06-03-2023)


Trending Topics
06-07-2007, 11:56 PM
#8
TECH Resident
iTrader: (4)
Join Date: Aug 2004
Location: Palm Harbor, Fl
Posts: 880
Likes: 0
Received 0 Likes
on
0 Posts
Looks good. Nice write-up. I used the pull method. If I had it to do over, I'd still use the pull method, but I'd put some tape around the grille first (the sides popped out easy, but while I was fighting the center, I scraped off a little paint on one of the sides. Once I get a right angle drill, and install my SLP grille, it will hide it, though).
06-08-2007, 12:03 AM
#9
Thanks for the compliements!
The reason I did the 'bumper off' method is that I wanted to reuse the stock grill and if you just pull it off it ruins the studs holding it in the fascia. I was also going for as professional installed look as possible. I'm a 'by the book' guy so I just followed what SLP recommended.
The reason I did the 'bumper off' method is that I wanted to reuse the stock grill and if you just pull it off it ruins the studs holding it in the fascia. I was also going for as professional installed look as possible. I'm a 'by the book' guy so I just followed what SLP recommended.
06-08-2007, 12:21 PM
#12
Thanks again!
One other thing, I had a PM asking about the front pieces to my SAP and why they weren't on the front fascia. I smashed the passenger side spoiler making a u-turn last December so I had both left and right pieces removed for repair and repainting. I don't think they'd get in your way of doing this job, i.e. removing the fasteners around the splash panels, but it's hard to say.
One other thing, I had a PM asking about the front pieces to my SAP and why they weren't on the front fascia. I smashed the passenger side spoiler making a u-turn last December so I had both left and right pieces removed for repair and repainting. I don't think they'd get in your way of doing this job, i.e. removing the fasteners around the splash panels, but it's hard to say.
06-08-2007, 08:08 PM
#14
TECH Resident
Join Date: Dec 2002
Location: Atlanta, GA
Posts: 964
Likes: 0
Received 0 Likes
on
0 Posts

You definitely took the long way around the block, but you had your reasons. Personally, I hated that stock grille so much it pleasured me to rip it off and drop kick it across my garage. Whoever at GMs idea it was to put that thing on these cars should have been shot.
06-08-2007, 08:21 PM
#15
I think it would have gone a long way had GM decided to paint the grill a gloss black rather than keep it bare plastic that fades. Especially for Z28's. I do like to keep parts that I take off the car. If for whatever reason I need them I don't have to buy new or used ones.
06-09-2007, 12:20 AM
#16
TECH Fanatic
iTrader: (1)
Join Date: Apr 2005
Location: Fort Worth, TX
Posts: 1,894
Likes: 0
Received 0 Likes
on
0 Posts
Looks great, I want one.
I did the pull method when i took my stock one off (took like 10-15 seconds) and I have re used it and it still fits perfect and snaps in. Maybe I got lucky but I do love that SLP grille.
I did the pull method when i took my stock one off (took like 10-15 seconds) and I have re used it and it still fits perfect and snaps in. Maybe I got lucky but I do love that SLP grille.
06-09-2007, 03:06 AM
#18
Sorry no, I didn't take any pictures of the christmas tree fasteners. They are about 2 inches long and aren't shaped like that of a christmas tree. They look more like 2 inch plastic bolts.
Surprised no one's pointed out the 1967 Corvette in the background.
Surprised no one's pointed out the 1967 Corvette in the background.
