Turbo build for my 89 GMC Sierra with a 5.3 Vortec
 04-13-2008, 09:25 PM
#1
I coiped alot of pics and posts from Giffinsperformance.com
Just wanted to share them here and get peoples input.
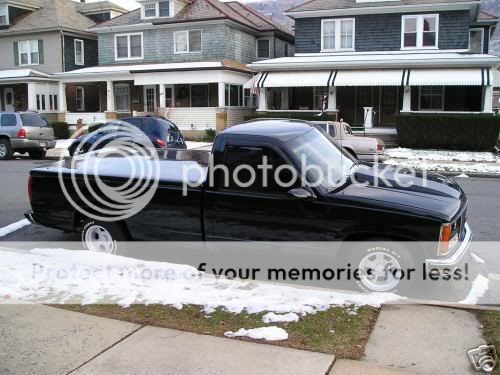
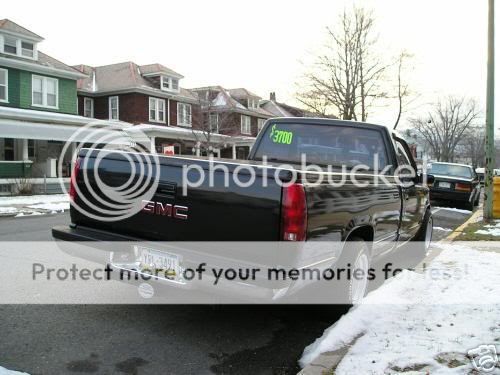
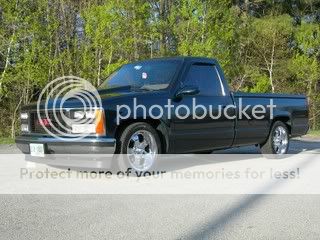
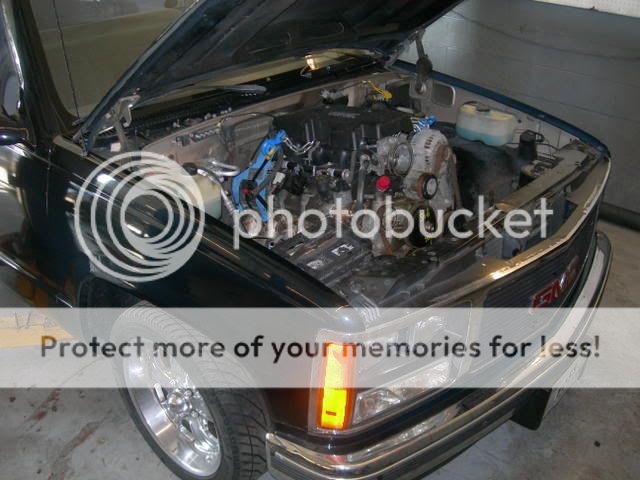
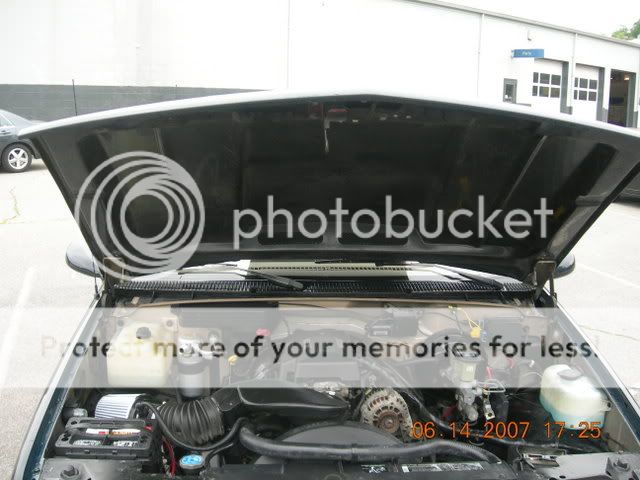
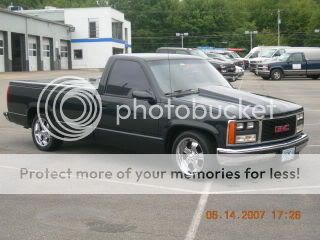
Here are pics of the 1989 GMC Sierra SLE. I bought this on EBay in Febuary of 2006 for $3500. This Truck is CLEAN!!! There is no Rust anywhere on this truck...including the frame which is just a black dusty color. I love southern winters..

 [img]
[img]


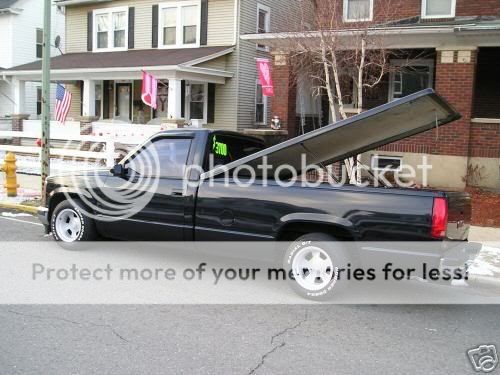
I didnt do to much to it in the first year, I put some chrome 18's on it and had the bed Rhino-lined.


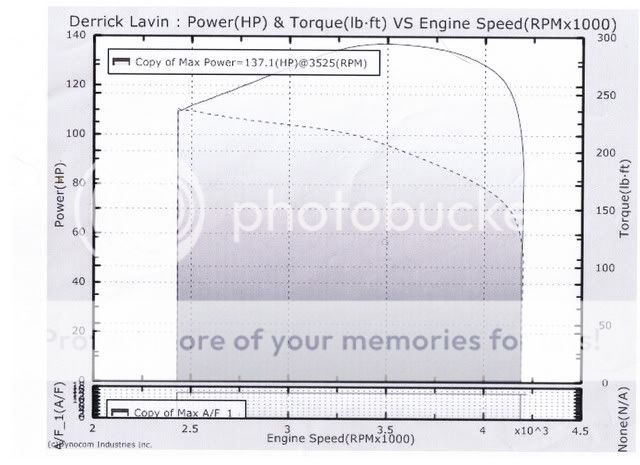
Last April I I blew a headgasket in the Stock 5.7 "K" Motor on my way to the dyno. I still ran some pulls and put down a WHOPPIN 137 HP
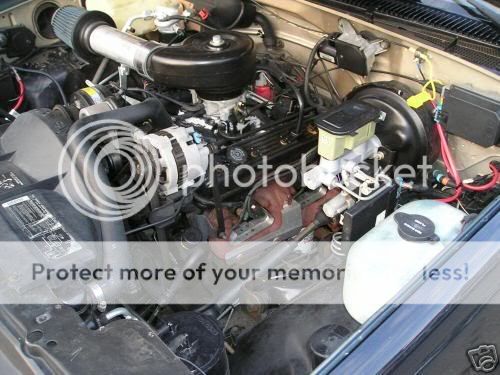
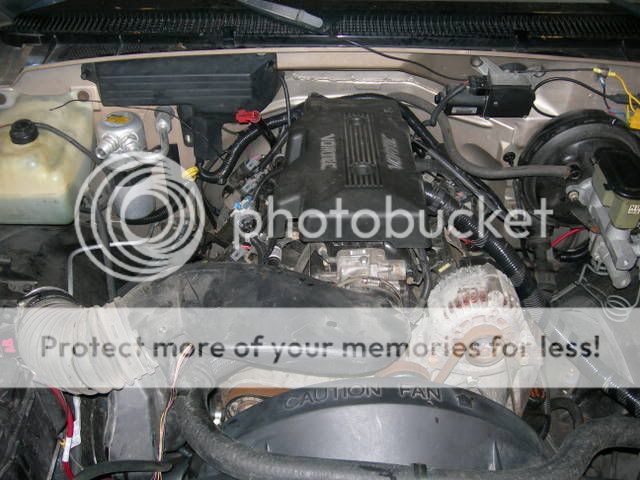
I drove it home a bought a headgasket set and bolts ready to fix it. While on vaction in florida I started pondering the idea on putting a GEN III from a newer tvehicle, knowing they were reliable as hell and never really had any major problems. They also got 20+ mpg and made at least 100hp more than my old engine. (which only got 10-15mpg) I returned the gasket set and had my parts dept at my dealer find me some prices. Most LS1 Engines at junk yards were eailer in the $2k plus range, but they had a bunch of 5.3 Engines and I scored one complete with all accessories, wiring harness, and pcm for $800 shipped to the dealer!
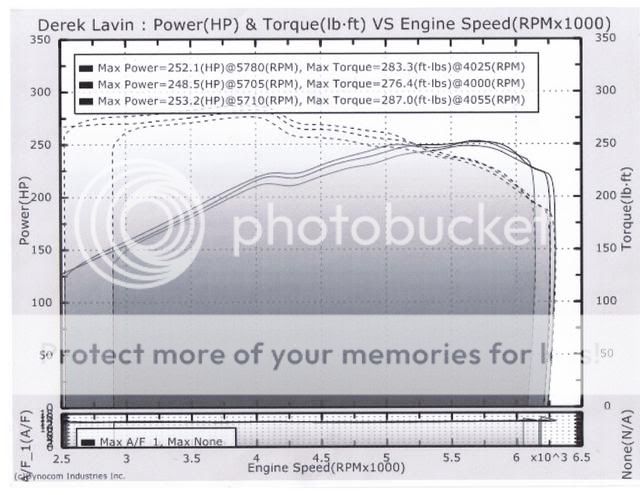
I got the engine and performed the swap. I used the stock 700R4 and wired in all my gauges and lights in the dash. Everything worked perfectly. I took it to the dyno again and made 252hp and 283 tq.

Just wanted to share them here and get peoples input.
Here are pics of the 1989 GMC Sierra SLE. I bought this on EBay in Febuary of 2006 for $3500. This Truck is CLEAN!!! There is no Rust anywhere on this truck...including the frame which is just a black dusty color. I love southern winters..
[img]I didnt do to much to it in the first year, I put some chrome 18's on it and had the bed Rhino-lined.
Last April I I blew a headgasket in the Stock 5.7 "K" Motor on my way to the dyno. I still ran some pulls and put down a WHOPPIN 137 HP
I drove it home a bought a headgasket set and bolts ready to fix it. While on vaction in florida I started pondering the idea on putting a GEN III from a newer tvehicle, knowing they were reliable as hell and never really had any major problems. They also got 20+ mpg and made at least 100hp more than my old engine. (which only got 10-15mpg) I returned the gasket set and had my parts dept at my dealer find me some prices. Most LS1 Engines at junk yards were eailer in the $2k plus range, but they had a bunch of 5.3 Engines and I scored one complete with all accessories, wiring harness, and pcm for $800 shipped to the dealer!
I got the engine and performed the swap. I used the stock 700R4 and wired in all my gauges and lights in the dash. Everything worked perfectly. I took it to the dyno again and made 252hp and 283 tq.
 04-13-2008, 09:26 PM
#2


New Engine Cover. Free =)


http://s138.photobucket.com/albums/q...andCars010.flv

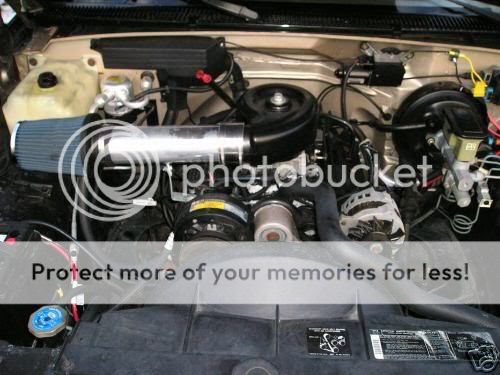
About 2k miles later I installed a 2002 LS6 (Z06) Cam and springs that i ordered from my dealer brand new for less than $350. Then performed a tune on my Jet Spectrum Tuner. (like LS1 Edit and HP Tuners) I prt\etty much copied and pasted LS1 Timing tables and Fuel Tables from my buddies camaro. Also installed 3.73 gears from the 3.08 ones that were in there.
I didnt return to the dyno again till the fall and by then I installed a NX Express kit and made only a couple runs with a 75 Shot and bottle pressure of only 750 psi. (heater was not hooked up) I made 325 hp. I was having problems with phantom knock pulling 8 degreess (max) timing from 4k rpm all the way to reline. After a little searching I found the source. Worn ujoint/caps and pinion flange...whoops...haha
I stored it for the winter and started collecting Turbo parts. The GMC is also getting Megasquirt II, MSD 6LS Ignition controller, FAST Fuel Rails, MSD 72 lb injectors, Aeromotive Fuel pump and regulator, MasterPower T70 Turbo (.96 a/r) 2 35mm Type S BOV and 60mm Wastgate.
The trans is being the replaced for a TH475 from an 1980's dump truck and installing a manual valbody/trans brake. The rearend is getting the 3.08's back as well as a posi unit from a Z71 Avalanche. (free)
Here are some shots of the turbo kit in progress. This is the header that Giffin made. Many Many more picss to come


Last edited by ForcedInduction; 12-27-2008 at 09:25 AM.
04-13-2008, 09:27 PM
#3


I will be adding pics as it contiues! Visit www.youtube.com/giffinsperformance to see all my truck vids
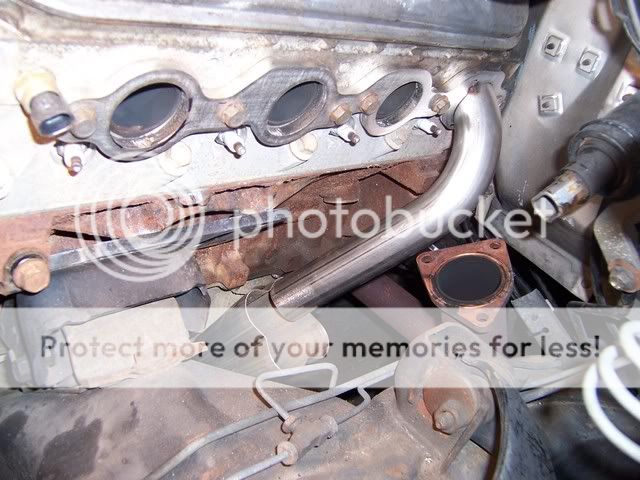
Here are some shots of the drivers side header all done. I am using my new TIG welder and it is taking some getting used to so you will have to excuse the messy welds. Practice practice practice! Now we can move on to the log for the turbo. G


here are some shots of the turbo log manifold as it comes along.

TIG welding is definatly improving! Practice practice practice! G

 04-13-2008, 09:27 PM
#4

this is the intercooler mounted. It fits like it is supposed to be there after removing the a/c condensor and trimming the hood latch bracket.
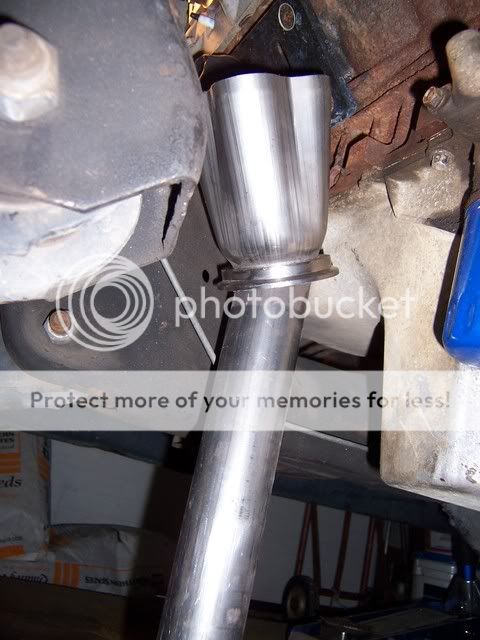
here are some shots of the cross over pipe from the drivers side header to the turbo log. If you are doing an LS1 swap in an older c truck like these there is a nice open area forward of the front cross member that allows the pipe to fit right in. Also frees up some much need space for the down pipe at the back of the motor.

finished pipe.

shot of how it fits in the front pan crossmember area.

Tucks up nice and tight for max ground clearance. Big D needs it in this truck as it sits in the weeds!

heres where the pipe comes up to hit the bottom of the log.

Another shot showing the space around the motor mount and starter.

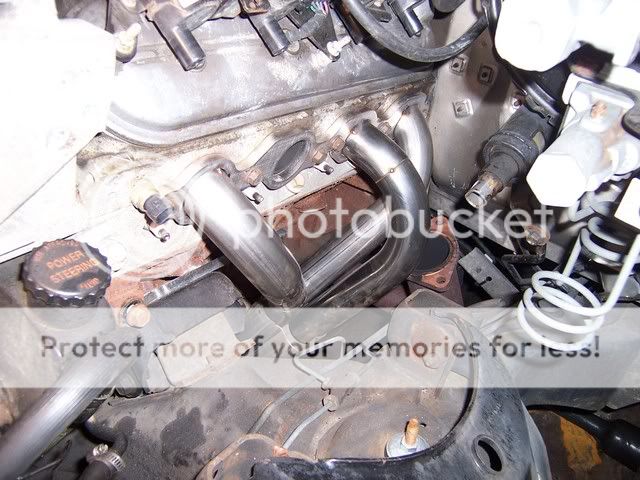
here is the start of the log from the side.

top of the log.
04-13-2008, 09:28 PM
#5

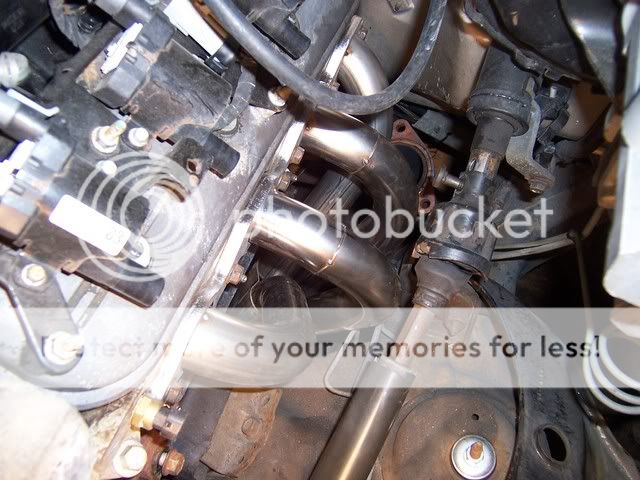
These pics show the turbo mocked up in the engine bay. The way the manifold is laying out it puts the turbo exhaust housing to close to the oil fill tube. It also makes the outlet for the compressor come down on top of the lower radiator hose.

This will be solved by taking the two halves of the log apart and moving the turbo forward 2.5".

It will make everything fit like it should. We will have to make a mount that will go to the front of the passengers side head for a little more turbo suport and resist cracking.


Looks good sitting in there! Sone we should be able to blow some **** up! I hope derek is studying his megasquirt manuals.
Here is the log manifold with 2.5" added to it. As you can see it fits much better this way. More room around the oil fill cap etc. The intercooler outlet from the turbo now clears the lower radiator hose as well.


This is the start of all of the primary tubes running into the log. These are 1 1/2" schedule 10, 304L stainless plumming elbows. They have a nominal ID of 1.61" and are very stong. They should be able to take all the heat that the motor can produce. They also have a nice smooth bend in them just like a mandrel bent pipe.

plasma cut hole for the primary tubes.


I ran out of materials today and had a couple of hours to kill so i went ahead and fabbed the radiator top mount / fan mount for the truck. The fan units are from an 03 Impala cop car. They are about 3/4" to short hieght wise and about 3/4" too wide length wise. This isn't much of a problem as they cover 95% of the radiator surface. They look like they were a factory option once they were all in. I also reused the factory 01 upper radiator hose holders by drilling a couple of holes in the mount plate.

Here is the radiator support plate and fan mounts all ready to be installed.

And the finished product.
Here is the log with 2 of the primary tubes in and the 3rd tached.

 04-13-2008, 09:29 PM
#6

Here is the last primary tube tached in place. It looks kind of funny but the shape is dictated by the fact that it has to clear the heater hoses, make room for the down pipe, be able to access the flange bolts, and leave room for the plug wires.

finish welded log.

here is the tube for the wastegate and parts. It is a 60mm unit and will mount to the front of the log.


finished welded.

wastegate mounted.
Here are some shots of everything done and in the truck. The turbo sits nice and clear of everything. The wastegate dumps out right below it.


this is a shot of the dump tube for the waste gate.


Here are some shots of the down pipe all finished.


The heater hoses will need to be lengthened and rerouted a little bit.
04-13-2008, 09:29 PM
#7

Bungs for the wide band O2 sensor and EGT sensor.
here is how it all looks back together. It is ready to go back to Dereks and get wired. Then it is time for tuning and track time. Hopefully more videos for utube. G


Last edited by ForcedInduction; 04-14-2008 at 08:06 AM.
Trending Topics


 05-27-2008, 02:01 PM
#17
TECH Enthusiast
iTrader: (14)
Join Date: Mar 2008
Location: Valley Lee, MD. Southern Maryland
Posts: 652
Likes: 0
Received 11 Likes
on
11 Posts

Be careful with that stock Z71 posi. Mine let go with only minimal mods. Now I have a TruTrac and don''t worry. It would suck to be stuck 'cause your rear grenaded. Build looks sweet though!

 05-28-2008, 05:08 PM
#20
haha you like that? That is one I kept and reused from my 1G DSM. Had it on there for about a year and it worked great. So I thought I would recycle!
Last edited by ForcedInduction; 05-28-2008 at 05:26 PM.