Fuel Rail Help For lt1 Mod
 09-07-2008, 08:21 PM
#1
Staging Lane
Thread Starter

Join Date: Aug 2005
Location: Missouri
Posts: 69
Likes: 0
Received 0 Likes
on
0 Posts
I saw an article to get better pressure through the fuelrail of an lt1 there you are pushing fuel through both sides unstead of one feeding the other. The only problem is the outlet fitting hit the end of the inkake where the huge hump for the throttle body is i thought about welding an extetion on to the rail to make a spacer for the injector but was wondering if that would work ok here is my drawing to try to help it make since
using this setup


using this setup
Last edited by Transamdrgracer04; 09-07-2008 at 08:28 PM.

 09-08-2008, 01:23 PM
#4
TECH Resident
iTrader: (12)

Join Date: Apr 2006
Location: Lantana, TX
Posts: 956
Likes: 0
Received 0 Likes
on
0 Posts

Here are a couple of ways you can run parallel lines without too much work like you are talking about. Neither of these are mine, both are from members on CamaroZ28.com.

 09-09-2008, 10:25 AM
#6
TECH Resident
iTrader: (12)
Join Date: Apr 2006
Location: Lantana, TX
Posts: 956
Likes: 0
Received 0 Likes
on
0 Posts
Sorry I never addressed the other part of your post. To run the LTx rails in parallel you have to take the hard line fitting out of the back of the feed line. You don't really need to run them in parallel unless you are pushing some serious amount of power and running in parallel effectively cuts your pressure loss between the first and last injector, assuming there is any in the first place, by half. Anyway, here is a post I made when I modified mine.
Hey guys, I wanted to set up my fuel rails for AN fittings so I could run in parallel on another project car or maybe my Camaro in the future sometime. In any case I couldn't find much info when I searched except for one thread from several months ago, so I figured I would post some pictures for others if they want to do it.
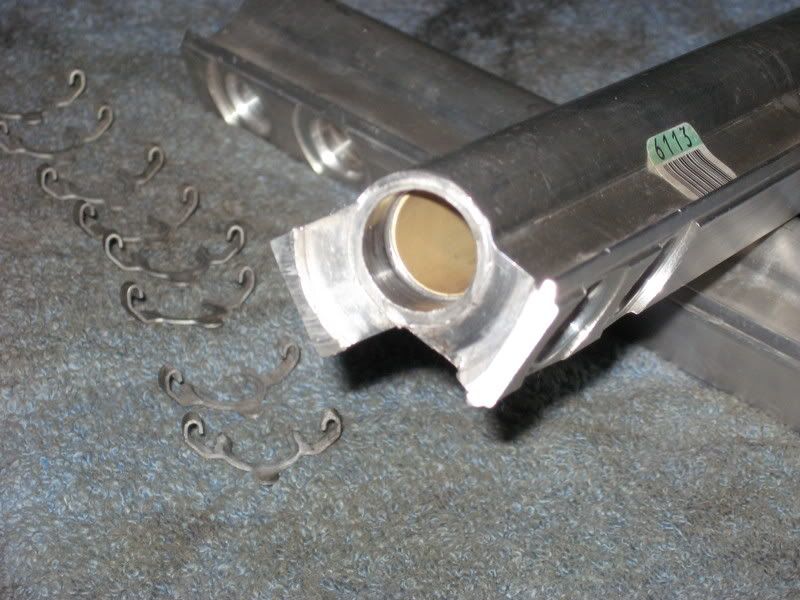
Driver's side is easy because you just pull the regulator out after you unscrew it from the bracket, but the passenger side is a little more difficult. The end of the rail has a lip on it that holds the o-ring fitting and hard line in place.
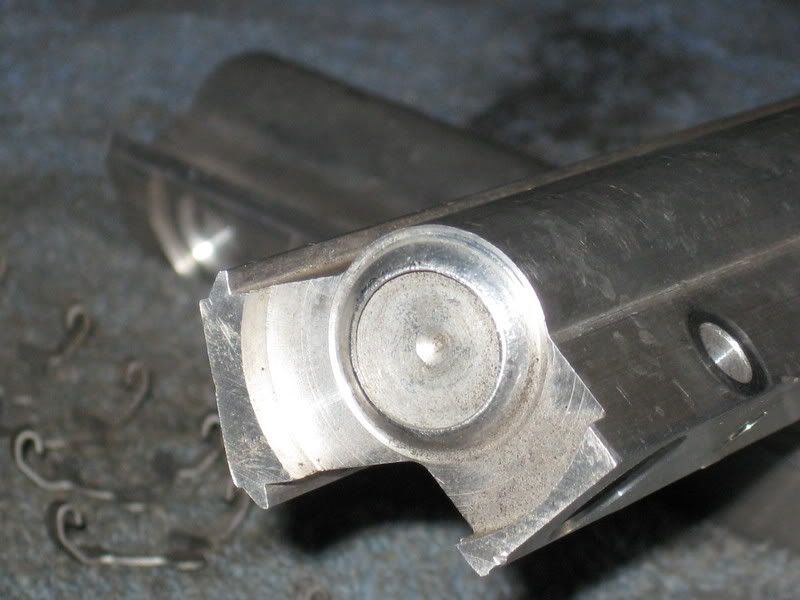
You have to cut the hard line off and then grind that lip off to pull the fitting out. After I ground the lip off the fitting still wouldn't come out so I tried to pry on it with a screw driver and a punch and it wouldn't budge, so I ended up with a 3/8 drill bit and I drilled into the fitting and the bit actually got stuck and started spinning the fitting in the rail, so I then just put it in reverse and pulled it out. The end result is this.
Now all I have to do is figure out if I'm running in parallel or series and get the correct fittings and have them welded on to the end/ends and I'll be ready to go. Of course if I run in parallel then I'll need to hook a return line to the front of the rail like Injuneer or Lethal and I'll be all set.
Driver's side is easy because you just pull the regulator out after you unscrew it from the bracket, but the passenger side is a little more difficult. The end of the rail has a lip on it that holds the o-ring fitting and hard line in place.
You have to cut the hard line off and then grind that lip off to pull the fitting out. After I ground the lip off the fitting still wouldn't come out so I tried to pry on it with a screw driver and a punch and it wouldn't budge, so I ended up with a 3/8 drill bit and I drilled into the fitting and the bit actually got stuck and started spinning the fitting in the rail, so I then just put it in reverse and pulled it out. The end result is this.
Now all I have to do is figure out if I'm running in parallel or series and get the correct fittings and have them welded on to the end/ends and I'll be ready to go. Of course if I run in parallel then I'll need to hook a return line to the front of the rail like Injuneer or Lethal and I'll be all set.
09-10-2008, 02:17 PM
#7
TECH Fanatic
iTrader: (3)

Join Date: Feb 2005
Location: Naples, FL
Posts: 1,118
Likes: 0
Received 0 Likes
on
0 Posts
When you weld the fittings to the top front of each rail... The factory plugs will have to be removed. This is because they are sealed with an o-ring that will promptly melt with the heat of welding. I just used a chop saw and cut off only the swaged part that holds the plugs in place. Then I removed the orings and had the plugs welded back in.
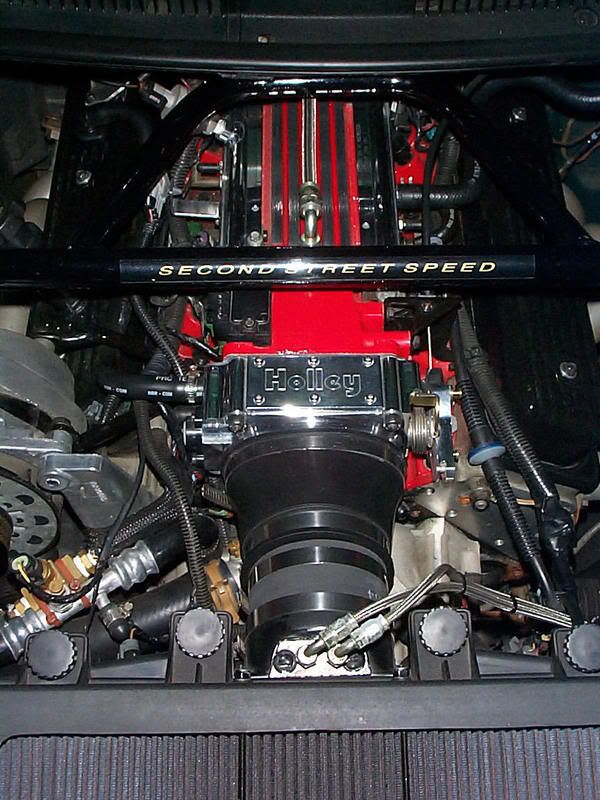
As far as the top fittings... I made a set of 3/8"NPT bungs to fit the contour of the rail and welded them over a hole that I drilled in the rail. That way, when the AN fittings wear out (which they all do eventually) I can just unscrew them from the rail and replace them.
I mounted my Y-block on top of the intake feeding into the rear of the rails, and my regulator on a bracket I made to attach to the drivers side valve covers.
I'll go take some pics in a few minutes and add them tonight.
Trending Topics
09-11-2008, 01:18 PM
#9
TECH Fanatic
iTrader: (3)
Join Date: Feb 2005
Location: Naples, FL
Posts: 1,118
Likes: 0
Received 0 Likes
on
0 Posts
Then cut the fronts off, have the holes plugged and welded.... Then weld NPT bungs or AN fittings to the top front side of each rail.
Other than that your stuck because the intake cannot be clearanced to fit AN fittings on the front of the rails.
If you want, check TAcreationsusa.com for another set of rails cheap so you can start over.
Other than that your stuck because the intake cannot be clearanced to fit AN fittings on the front of the rails.
If you want, check TAcreationsusa.com for another set of rails cheap so you can start over.
09-12-2008, 10:46 AM
#10
TECH Enthusiast
Join Date: Sep 2003
Location: bethel PA
Posts: 501
Likes: 0
Received 0 Likes
on
0 Posts
mines a 93 so mine is a little diffrent since it dont have the cross over pipe in the front, theres one pic of mine posted above theres a pic thats zoomed in a little further, you can see on the front of my rails I took the plugs out and welded plates on there. over all tho its works out good since i mounted the regulator right on top the intake then.

