G8 DOD valley cover
 03-03-2014, 04:40 PM
#1

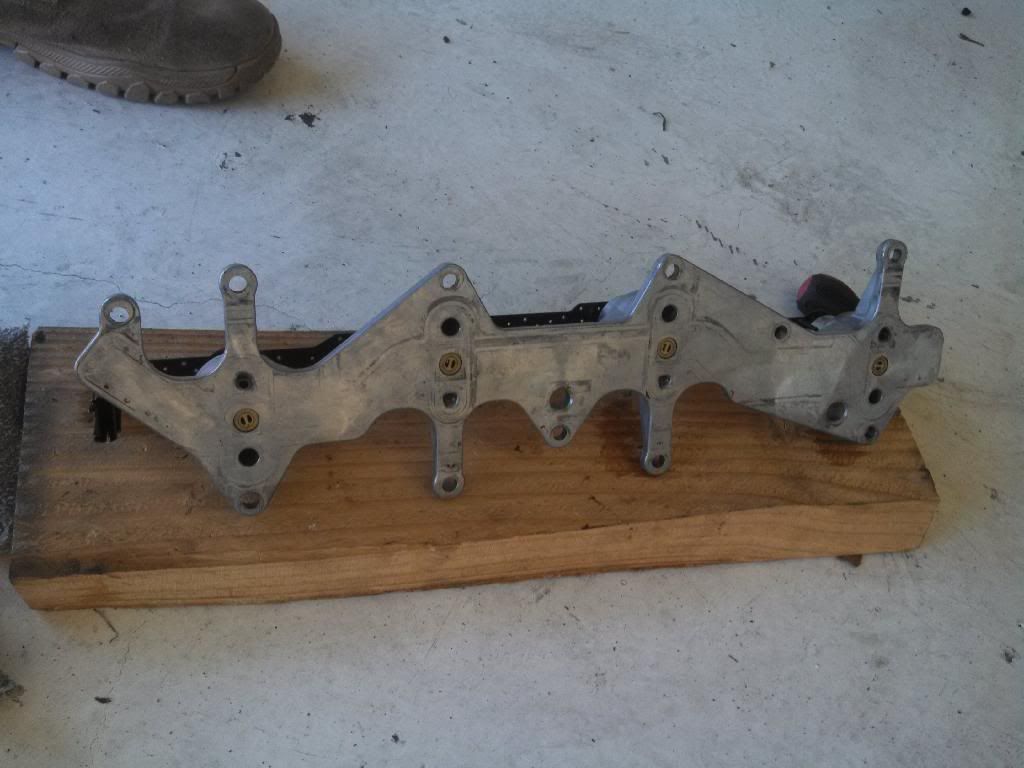
Just wanted to save yall some time if you decide to go with this cover instead of the truck dod vlom. Its built alot better than the truck version, and is more low profile, the oil passages are alot better as well. You only need basic hand tools to take it apart and do what you need. (angle grinder, drill, etc...)
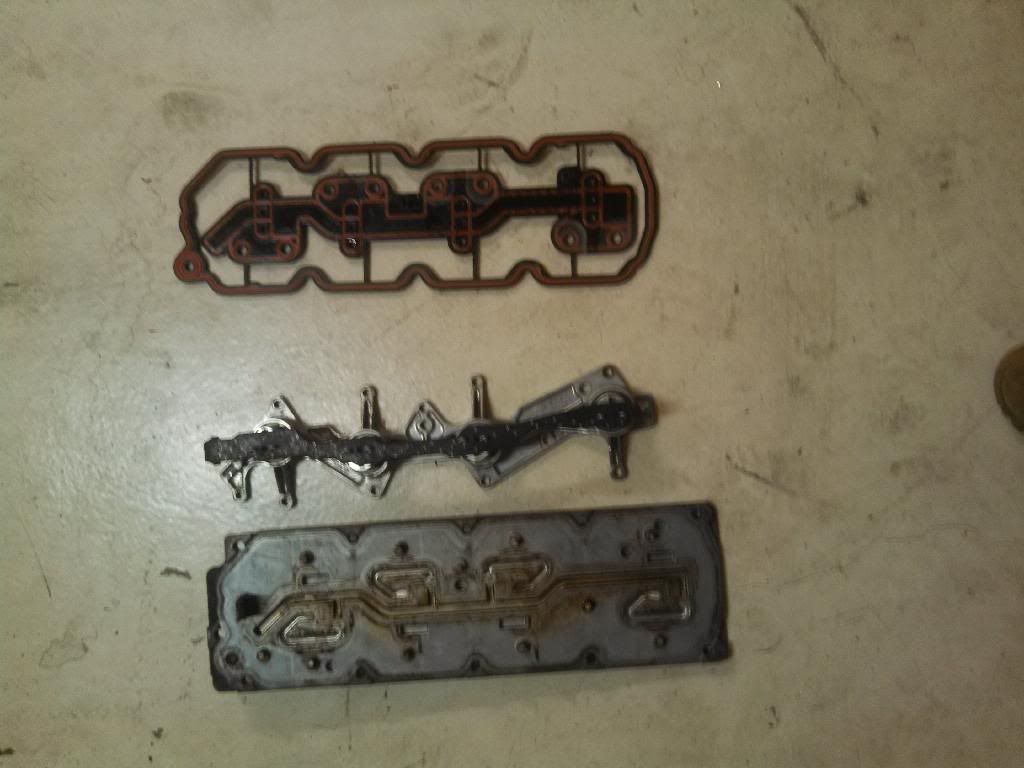
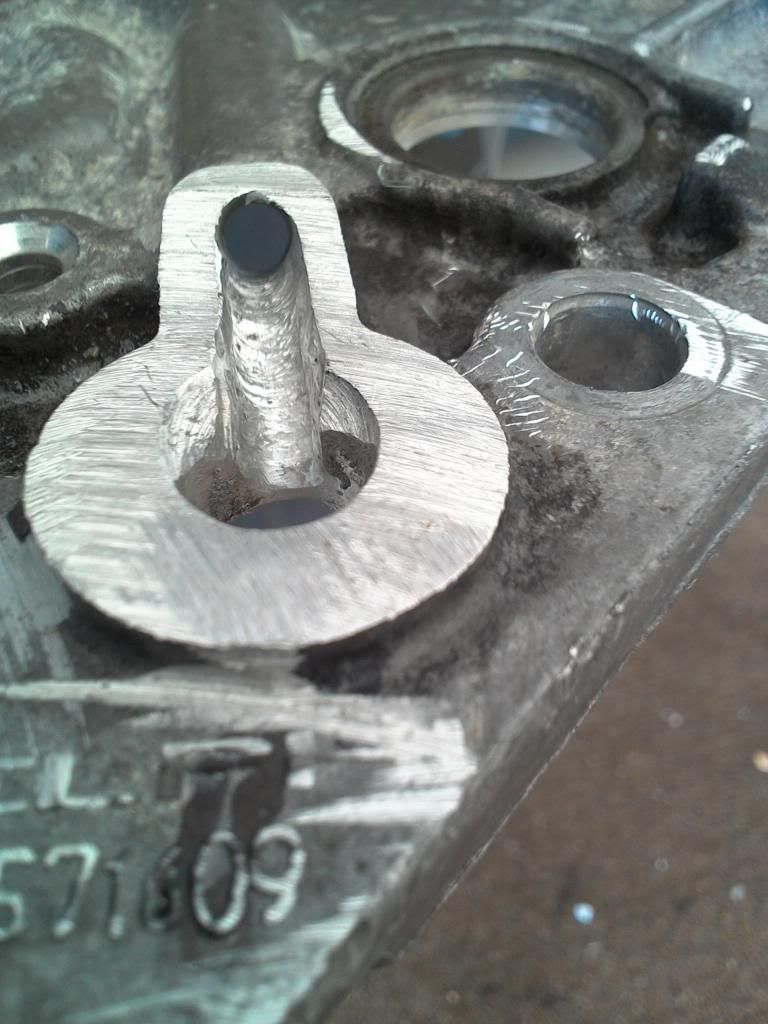
some things that are diffrent are the DOD connector and tray assembly,
shown here

Anyways heres how you dissasemble it.
start by cutting the rivets off on the tray assembly.
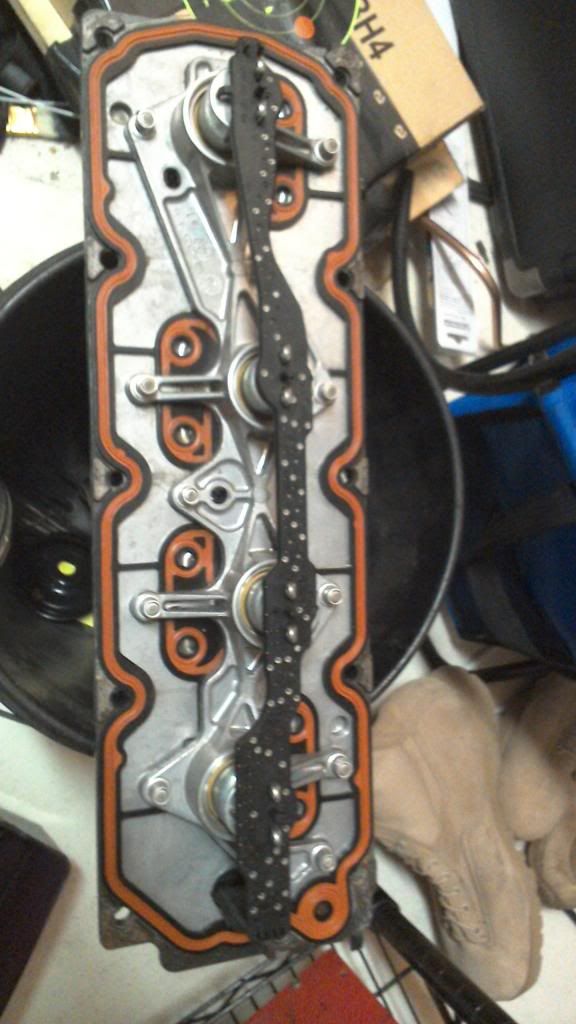

like so..
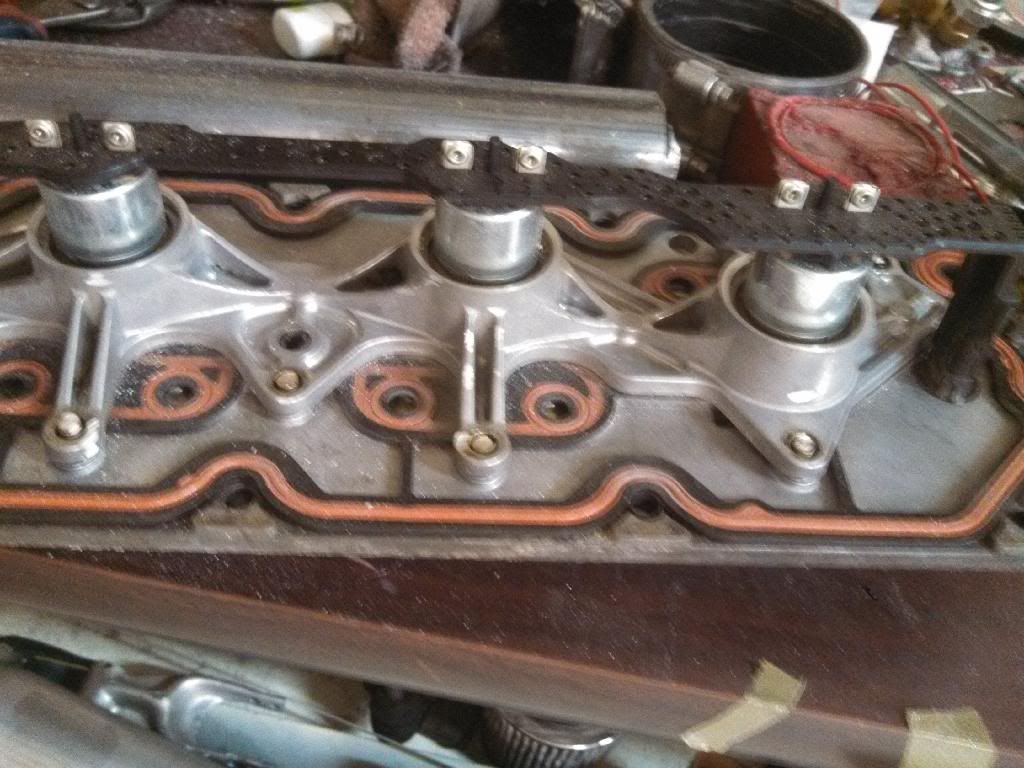
You can now seperate the assembly, (do not pull by the solenoid tray)
Hit the ends of the rivets with a hammer lightly and they will pop out
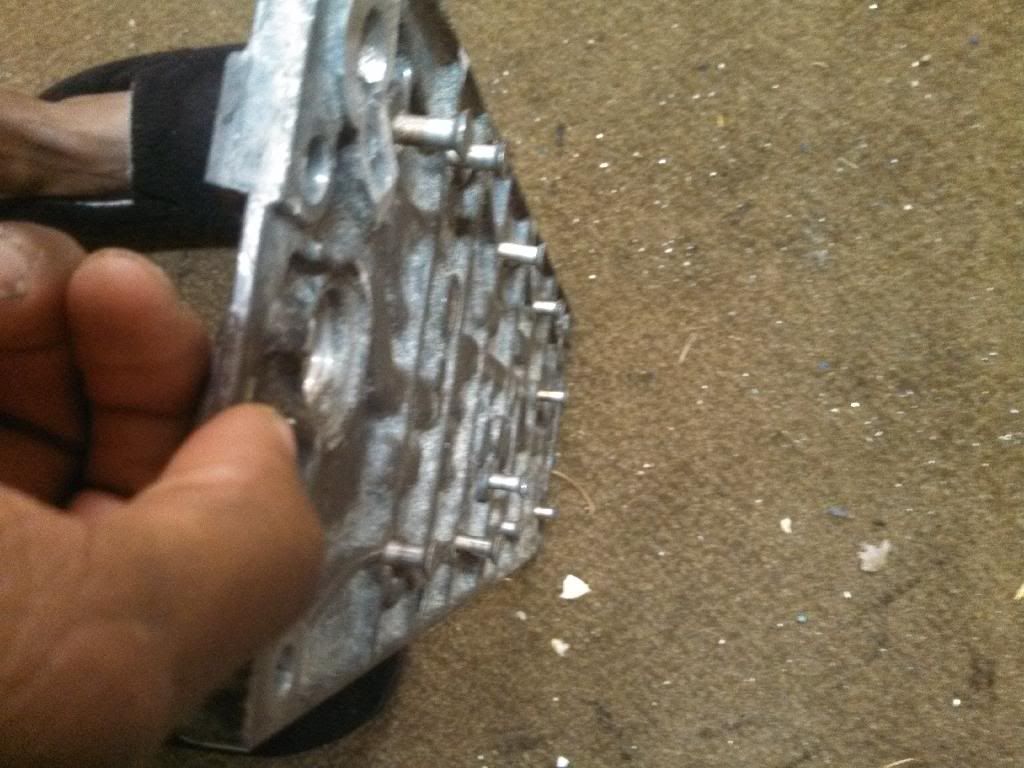
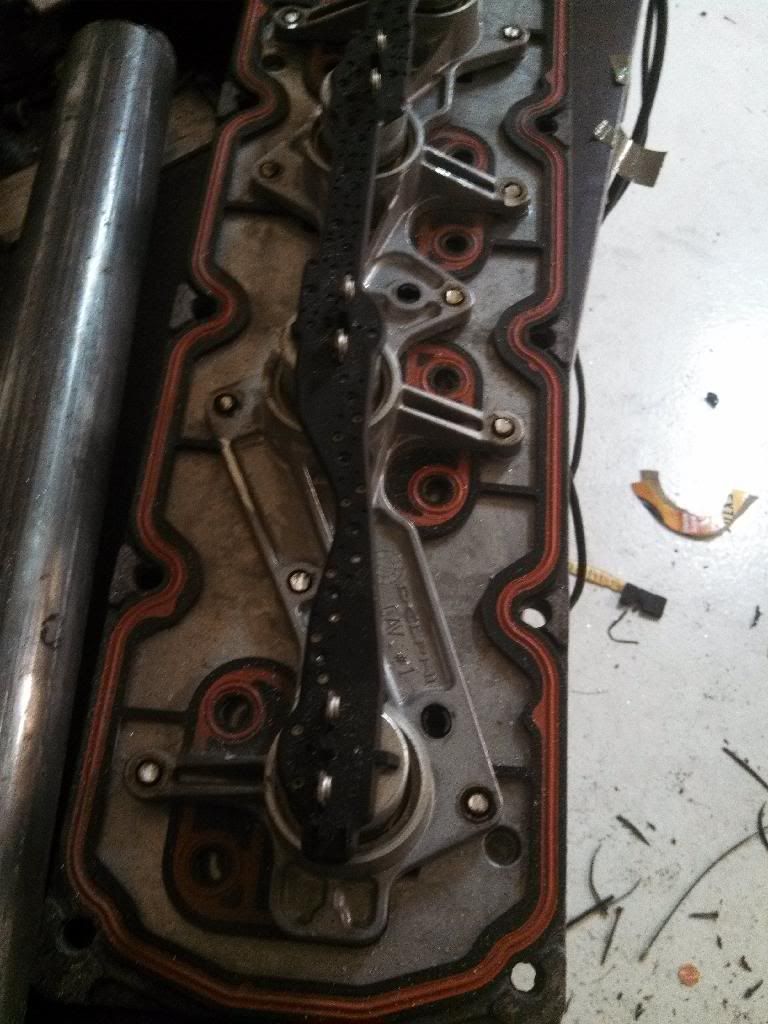
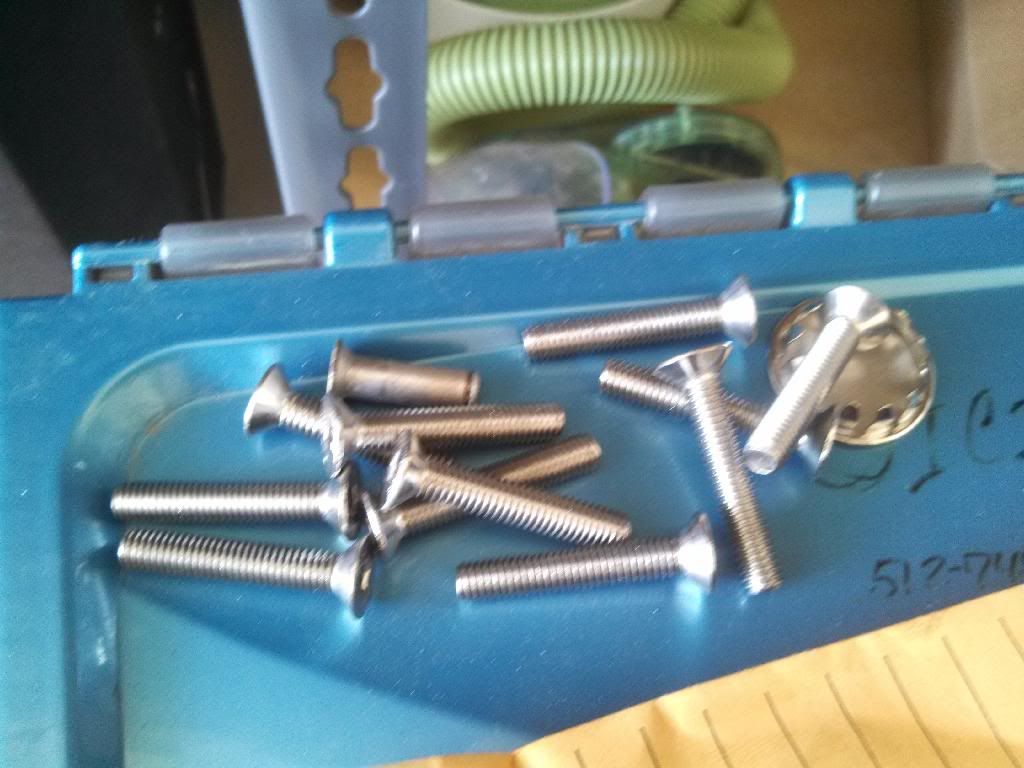
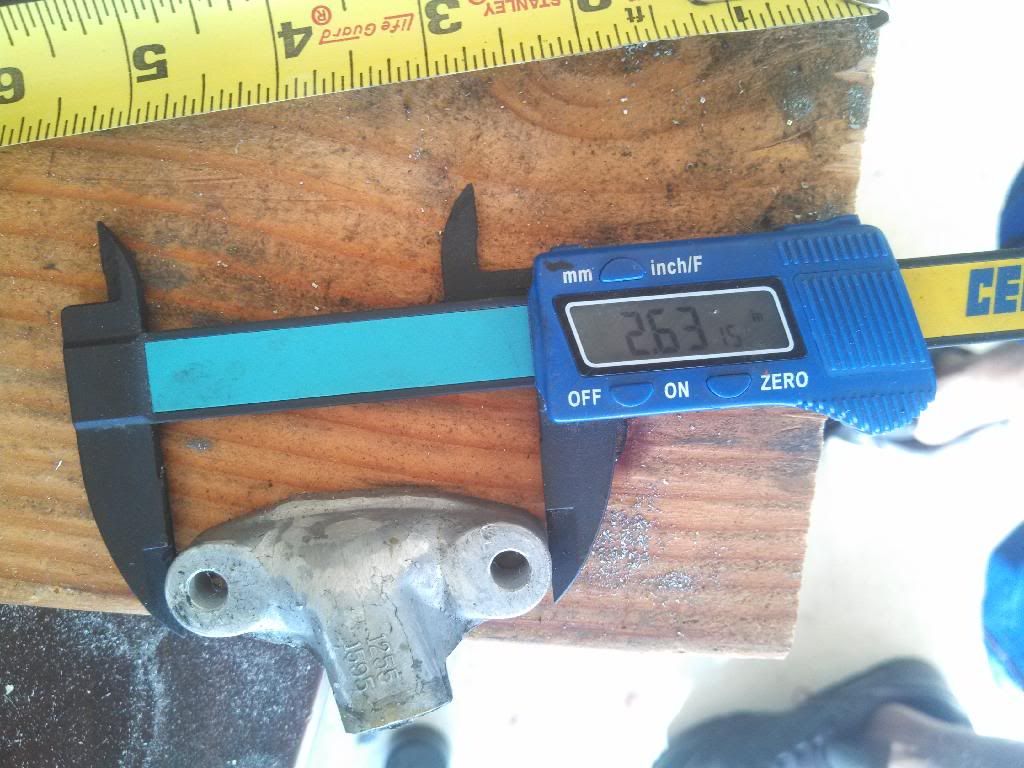
I used M6 1.00x35MM from ace hard ware its a perfect fit and there low profile youll need 11
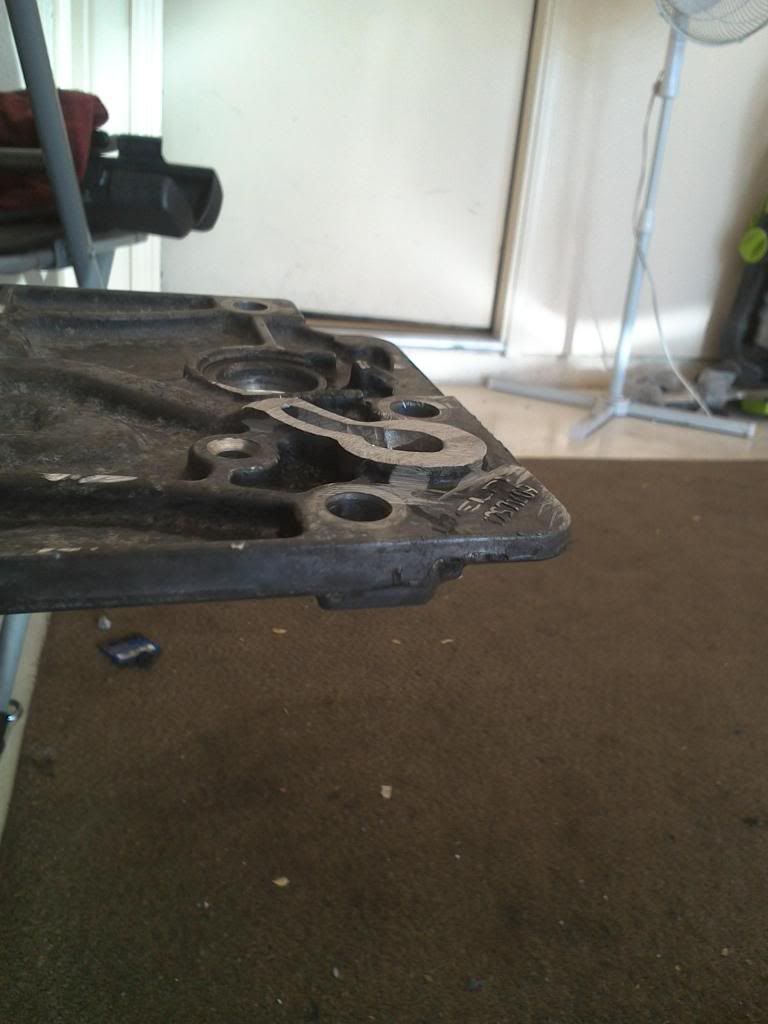
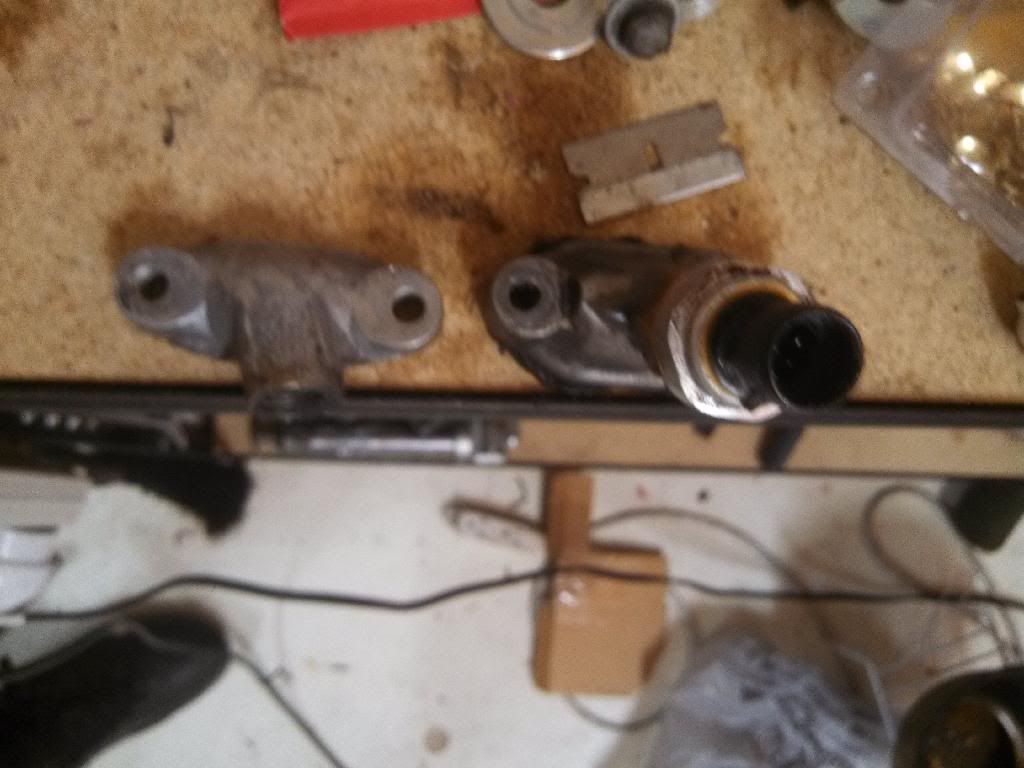
If your using this VLOM with a LS2 or FAST Youll need to chop it down and re work the oil passage into the DOD tray. I did it with a hand held drill and a drill bit, nothing fancy just take your time, and remember its aluminum.
Started with this
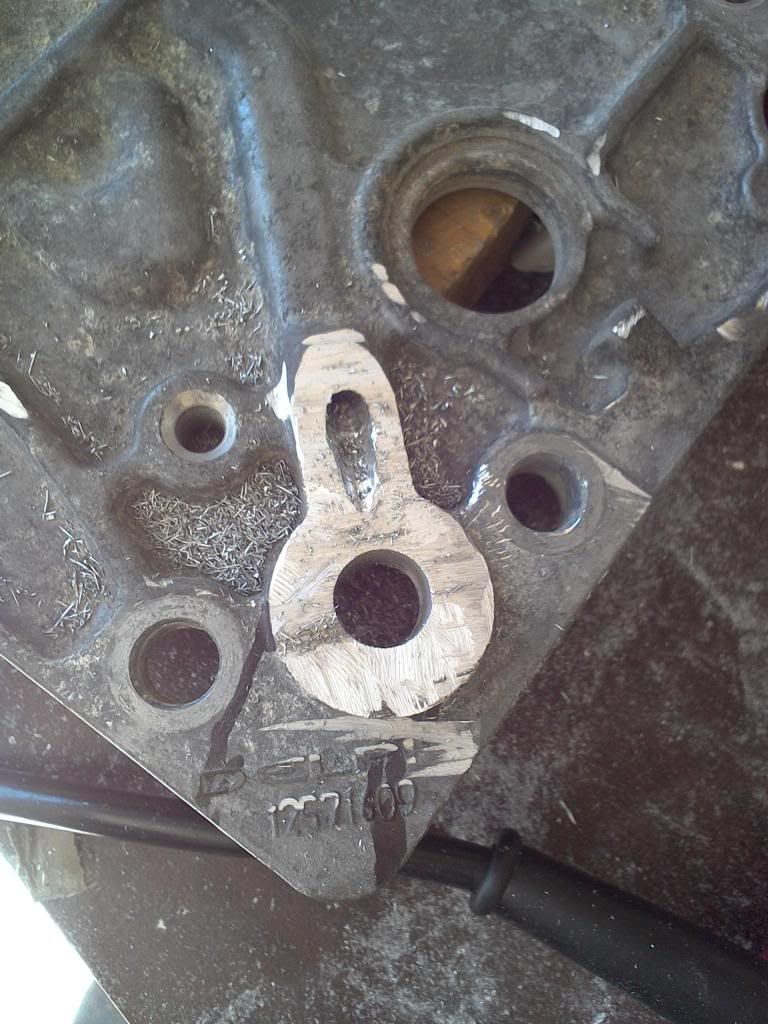
Ended with this
some things that are diffrent are the DOD connector and tray assembly,
shown here


Anyways heres how you dissasemble it.
start by cutting the rivets off on the tray assembly.


like so..


You can now seperate the assembly, (do not pull by the solenoid tray)

Hit the ends of the rivets with a hammer lightly and they will pop out

I used M6 1.00x35MM from ace hard ware its a perfect fit and there low profile youll need 11

If your using this VLOM with a LS2 or FAST Youll need to chop it down and re work the oil passage into the DOD tray. I did it with a hand held drill and a drill bit, nothing fancy just take your time, and remember its aluminum.
Started with this

Ended with this


 03-03-2014, 11:17 PM
#4
TECH Fanatic
iTrader: (3)
Join Date: Aug 2009
Location: Orlando, FL
Posts: 1,392
Likes: 0
Received 0 Likes
on
0 Posts
Please elaborate further on where and how you used the OPSU sensor with this. Since it's shaved down so far and based on how fieroguru put his together, I have a feeling it needs to be relocated somewhere. But where? Is there no room to have it angled? 30� or even less?
Also, did you use any nuts with those bolts/screws? Or do those screws thread into the aluminum?
Also, did you use any nuts with those bolts/screws? Or do those screws thread into the aluminum?
03-04-2014, 12:50 AM
#5
Thanks man. I'll post the finished pics after I get off work.
Refer to this for the relocation , if you don't wana go that route you could try and reweld but I don't like the way it would have to be done.
https://ls1tech.com/forums/ls4-performance/1699784-glowshift-oil-sandwhich-plate-installed.html
I'll post some pics tommorow of it all done.
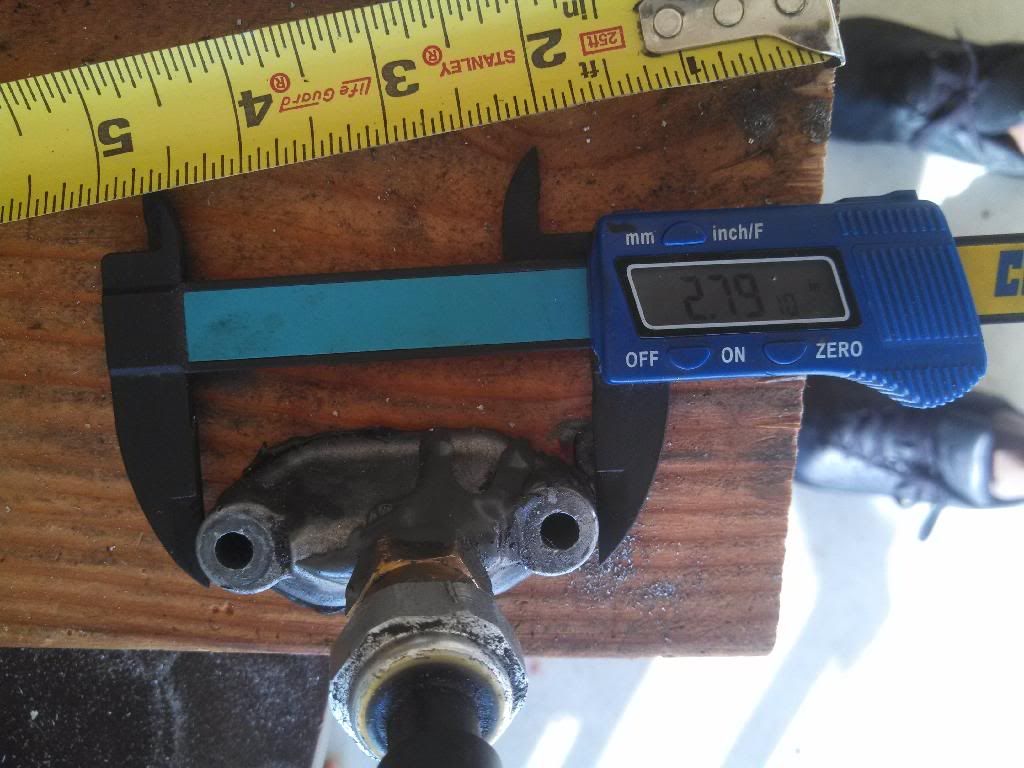
Those are bolts BTW m6 x 1.00 x 35mm.
Please elaborate further on where and how you used the OPSU sensor with this. Since it's shaved down so far and based on how fieroguru put his together, I have a feeling it needs to be relocated somewhere. But where? Is there no room to have it angled? 30� or even less?
Also, did you use any nuts with those bolts/screws? Or do those screws thread into the aluminum?
Also, did you use any nuts with those bolts/screws? Or do those screws thread into the aluminum?
https://ls1tech.com/forums/ls4-performance/1699784-glowshift-oil-sandwhich-plate-installed.html
I'll post some pics tommorow of it all done.
Those are bolts BTW m6 x 1.00 x 35mm.


 03-04-2014, 09:21 AM
#7
TECH Fanatic
iTrader: (3)
Join Date: Aug 2009
Location: Orlando, FL
Posts: 1,392
Likes: 0
Received 0 Likes
on
0 Posts
Oh so that's why you bought that Glowshift plate. Does the OPSU harness make it down by the oil filter or did you have to extend it?
I guess I'd use some nyloc nuts.
I just have to get the DoD connector extended and flattened and get an adapter for my throttle body harness.
I guess I'd use some nyloc nuts.
I just have to get the DoD connector extended and flattened and get an adapter for my throttle body harness.
Trending Topics
03-04-2014, 12:09 PM
#8
Oh so that's why you bought that Glowshift plate. Does the OPSU harness make it down by the oil filter or did you have to extend it?
I guess I'd use some nyloc nuts.
I just have to get the DoD connector extended and flattened and get an adapter for my throttle body harness.
I guess I'd use some nyloc nuts.
I just have to get the DoD connector extended and flattened and get an adapter for my throttle body harness.


 03-07-2014, 02:19 PM
#13
TECH Fanatic
iTrader: (3)
Join Date: Aug 2009
Location: Orlando, FL
Posts: 1,392
Likes: 0
Received 0 Likes
on
0 Posts
What head gaskets is everyone using? The LS2 (P/N 89017585) gaskets or the LS4 (P/N 89017769) ones?
I'm specifically talking about the manifold to cylinder head gaskets.
I'm specifically talking about the manifold to cylinder head gaskets.
 03-07-2014, 04:31 PM
#17
TECH Fanatic
iTrader: (3)
Join Date: Aug 2009
Location: Orlando, FL
Posts: 1,392
Likes: 0
Received 0 Likes
on
0 Posts
Thanks man. I'll post the finished pics after I get off work.
Refer to this for the relocation , if you don't wana go that route you could try and reweld but I don't like the way it would have to be done.
https://ls1tech.com/forums/showthread.php?t=1699784
I'll post some pics tommorow of it all done.
Those are bolts BTW m6 x 1.00 x 35mm.
Refer to this for the relocation , if you don't wana go that route you could try and reweld but I don't like the way it would have to be done.
https://ls1tech.com/forums/showthread.php?t=1699784
I'll post some pics tommorow of it all done.
Those are bolts BTW m6 x 1.00 x 35mm.
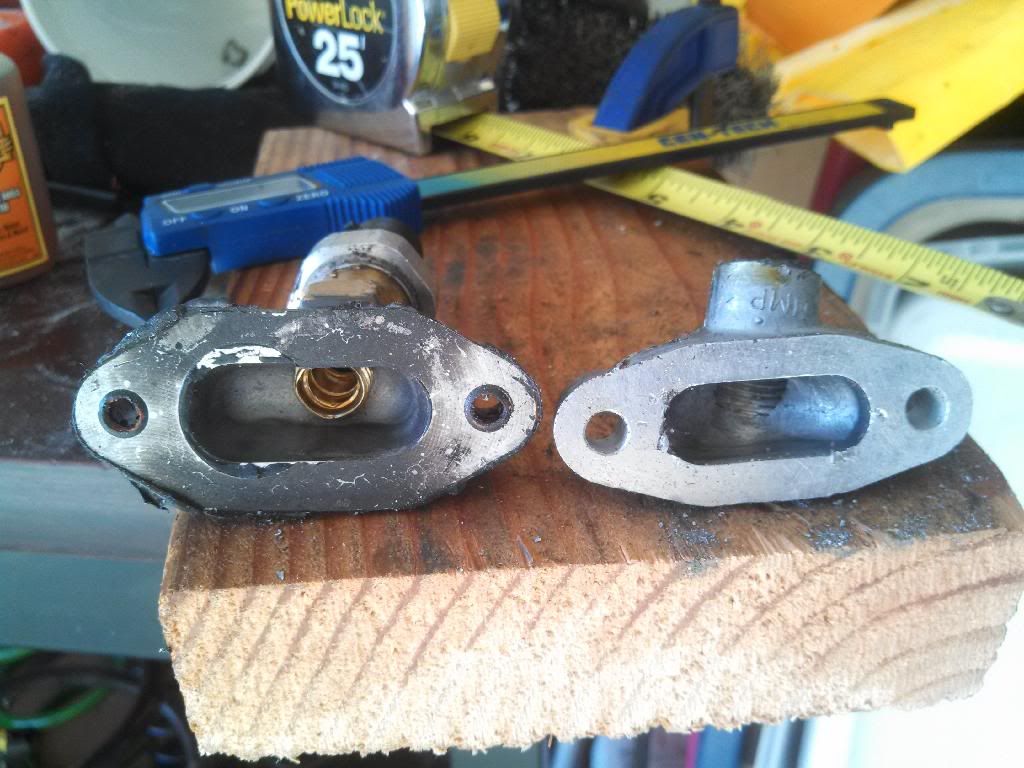
Why didn't you go this route (far left) instead?


It comes pre-drilled and pre-threaded; all of our sensors are the same and this attaches the oil pan. In fact, it's visible in one of your pictures.
P/N 12551587
Last edited by GXP25; 03-07-2014 at 04:38 PM. Reason: Added some more info.
03-07-2014, 06:06 PM
#19
The rest of the LS family has different entry shapes and overall size off the opsu housing. I already went this route after ordering a ls1 and 2 block off plate and either the bolts won't line up or the port doesn't line up. Hence why I went with the glwshift adapter.
No drilling tapping nothing.
I still have the corvette opsu and here's a side by side. The ls4 housing still has the adapter plus opsu in it.
Side by side
No drilling tapping nothing.
I still have the corvette opsu and here's a side by side. The ls4 housing still has the adapter plus opsu in it.
Side by side


