will a 99 ss spoiler fit on my 96 z28?


 08-24-2009, 12:26 PM
#5
Staging Lane
iTrader: (2)
Join Date: May 2006
Location: Oshkosh, WI
Posts: 79
Likes: 0
Received 0 Likes
on
0 Posts

Direct bolt in. You'll need a relay to get the rear lights to work and not throw the ABS light. The ss uses LED lights.
Courtesy of shoebox:
http://shbox.com/1/relay_for_ss_spoiler.jpg
Courtesy of shoebox:
http://shbox.com/1/relay_for_ss_spoiler.jpg
08-24-2009, 12:53 PM
#6

Direct bolt in. You'll need a relay to get the rear lights to work and not throw the ABS light. The ss uses LED lights.
Courtesy of shoebox:
http://shbox.com/1/relay_for_ss_spoiler.jpg
Courtesy of shoebox:
http://shbox.com/1/relay_for_ss_spoiler.jpg
Trending Topics
08-24-2009, 06:21 PM
#8
TECH Enthusiast
Thread Starter
iTrader: (2)
Join Date: Oct 2008
Location: Fresno, CA
Posts: 691
Likes: 0
Received 0 Likes
on
0 Posts
Direct bolt in. You'll need a relay to get the rear lights to work and not throw the ABS light. The ss uses LED lights.
Courtesy of shoebox:
http://shbox.com/1/relay_for_ss_spoiler.jpg
Courtesy of shoebox:
http://shbox.com/1/relay_for_ss_spoiler.jpg
a guy want to sell me one for 160...im assuming its flawless...
what would u guys pay?
08-24-2009, 06:56 PM
#9
Staging Lane
iTrader: (2)
Join Date: May 2006
Location: Oshkosh, WI
Posts: 79
Likes: 0
Received 0 Likes
on
0 Posts
I'll snap a pic for you when I get enough juice on the battery. Real simple.... You can get it all at Radio Shack for around $7, if you should need it. I did.....
08-24-2009, 09:12 PM
#11
Staging Lane
iTrader: (2)
Join Date: May 2006
Location: Oshkosh, WI
Posts: 79
Likes: 0
Received 0 Likes
on
0 Posts
Here is the photo:
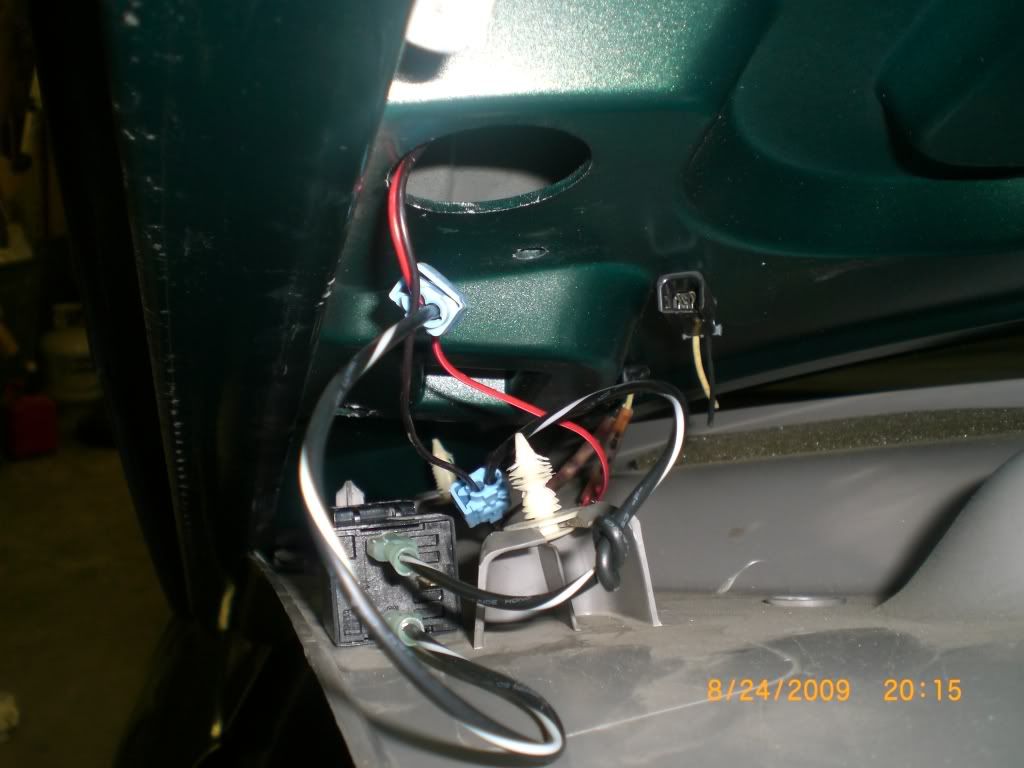
You'll want an automotive 12 volt 30 amp relay. Here is a link :http://www.radioshack.com/product/in...ductId=2062477
Get some crimp on spade connectors for the relay and some wire: http://www.radioshack.com/product/in...ductId=2104018
I used inline splice connectors:http://www.radioshack.com/product/in...ductId=2104093
The cost is a little more than $7, but I think I paid even less. My folks own a Radio Shack........
The relay is in the lower left corner of the pic. It has the 2 black wires coming out of it. To the upper right hand corner is the connector for your current light. It has 2 wires in it, a black and white. The black is your ground wire. You will run a spade connector with wire crimped to it from number 85 on the relay, (It is numbered on the relay, you can't get it wrong!) Using the inline tap , splice the wire to the black wire.
Run another spade connector with wire crimped to it from number 86 on the relay. Using the inline tap, splice the wire to the white wire. DONE!
I used some duck tape and stuck the relay to it. I wasn't sure if there was room in there for the relay but there is. Here is a photo of the tape. It is in the upper left hand portion of the pic:
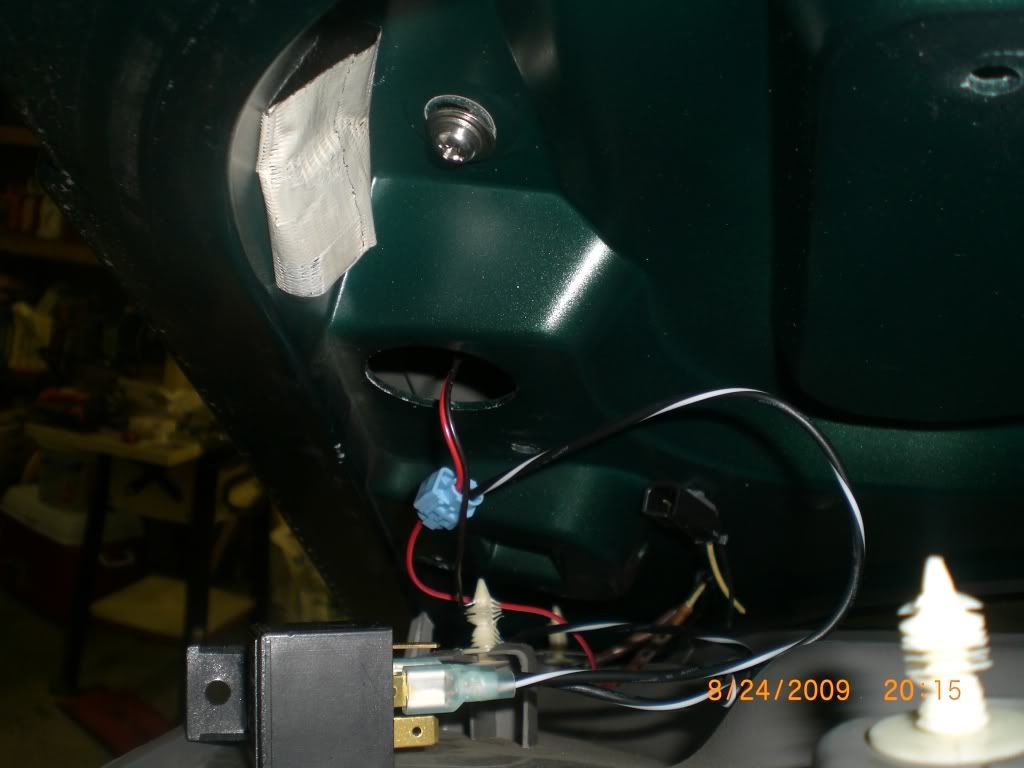
Ignore my wires in the photo that are black and red. Before I found the diagram I had a friend"help". You will be able to splice directly into the white and black wires.
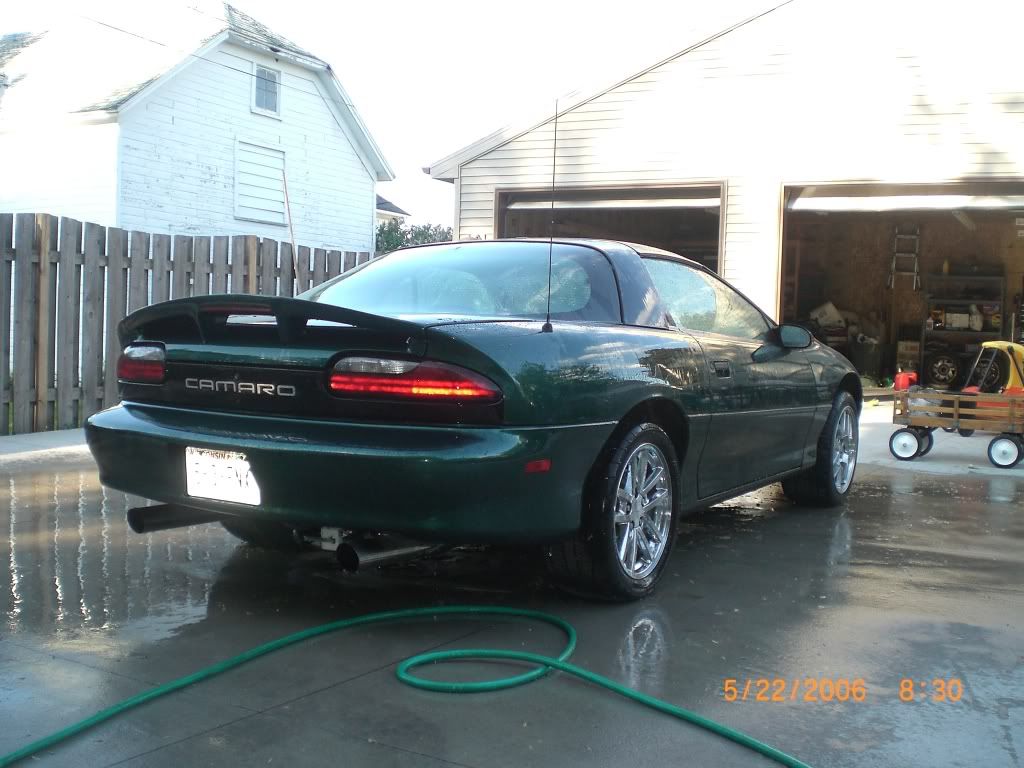
Here is a photo of the spoiler installed:
You'll want an automotive 12 volt 30 amp relay. Here is a link :http://www.radioshack.com/product/in...ductId=2062477
Get some crimp on spade connectors for the relay and some wire: http://www.radioshack.com/product/in...ductId=2104018
I used inline splice connectors:http://www.radioshack.com/product/in...ductId=2104093
The cost is a little more than $7, but I think I paid even less. My folks own a Radio Shack........
The relay is in the lower left corner of the pic. It has the 2 black wires coming out of it. To the upper right hand corner is the connector for your current light. It has 2 wires in it, a black and white. The black is your ground wire. You will run a spade connector with wire crimped to it from number 85 on the relay, (It is numbered on the relay, you can't get it wrong!) Using the inline tap , splice the wire to the black wire.
Run another spade connector with wire crimped to it from number 86 on the relay. Using the inline tap, splice the wire to the white wire. DONE!
I used some duck tape and stuck the relay to it. I wasn't sure if there was room in there for the relay but there is. Here is a photo of the tape. It is in the upper left hand portion of the pic:
Ignore my wires in the photo that are black and red. Before I found the diagram I had a friend"help". You will be able to splice directly into the white and black wires.
Here is a photo of the spoiler installed: