The story of my 94 Z
 09-02-2012, 08:51 PM
#21
On The Tree
Thread Starter
iTrader: (2)

Join Date: Dec 2008
Location: Edwardsville, IL
Posts: 181
Likes: 0
Received 0 Likes
on
0 Posts

The hood I found for sale on a different forum, it was located up near Chicago. It is actually from one of that site's founding member's SS  . He replaced it with a 3" SS hood.. man what a sexy car that was!
How is the paint on your rear holding up 1badzee? Post up a pic of it if you have one, I'd like to see how the hammered paint came out. I'm still undecided on if I want to brush on paint, or spray it.... Leaning towards gloss black spray paint, since it would be easiest.
. He replaced it with a 3" SS hood.. man what a sexy car that was!How is the paint on your rear holding up 1badzee? Post up a pic of it if you have one, I'd like to see how the hammered paint came out. I'm still undecided on if I want to brush on paint, or spray it.... Leaning towards gloss black spray paint, since it would be easiest.
 09-08-2012, 07:47 PM
#23
On The Tree
Thread Starter
iTrader: (2)
Join Date: Dec 2008
Location: Edwardsville, IL
Posts: 181
Likes: 0
Received 0 Likes
on
0 Posts
Alright guys, here's a little update.
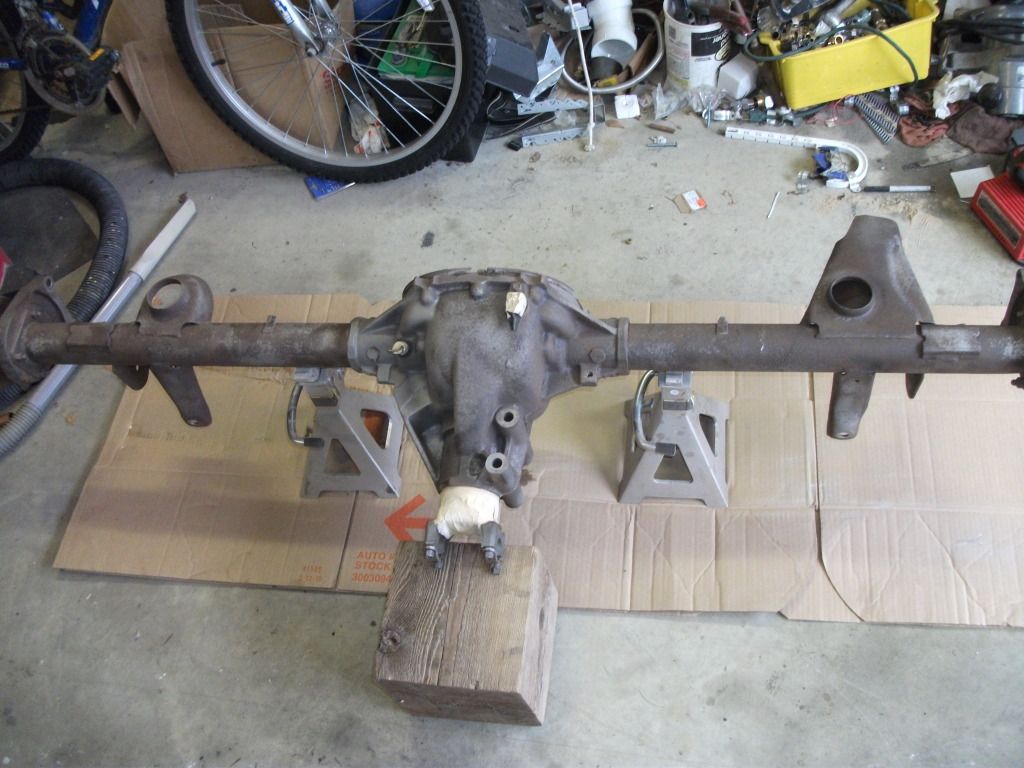
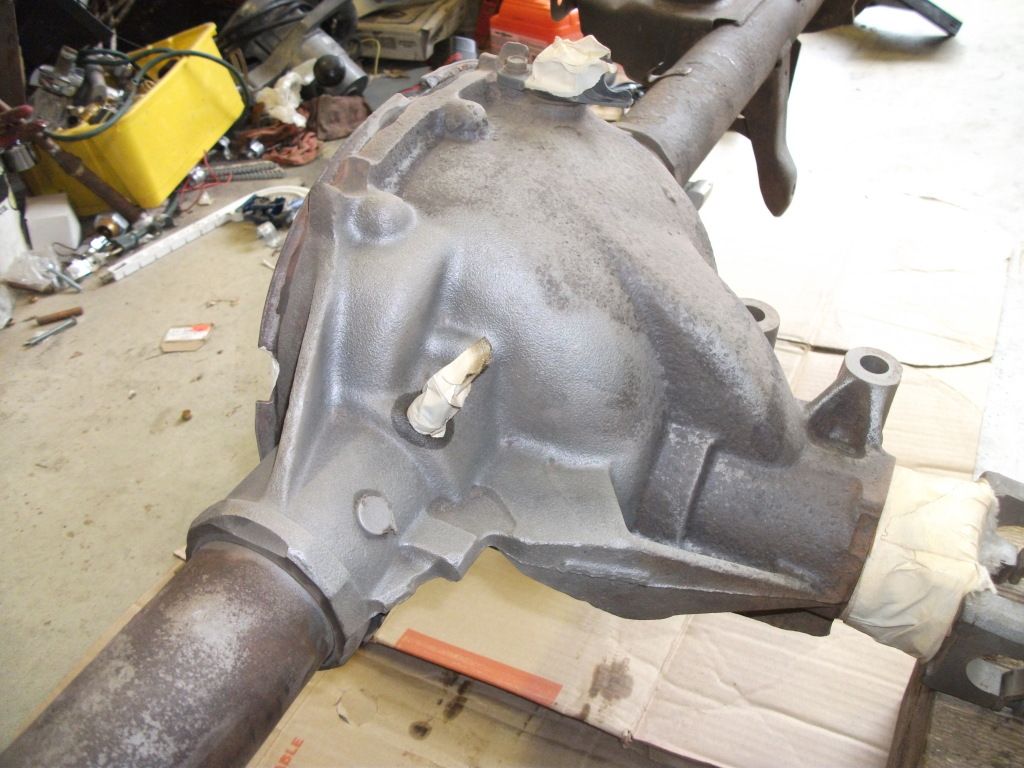
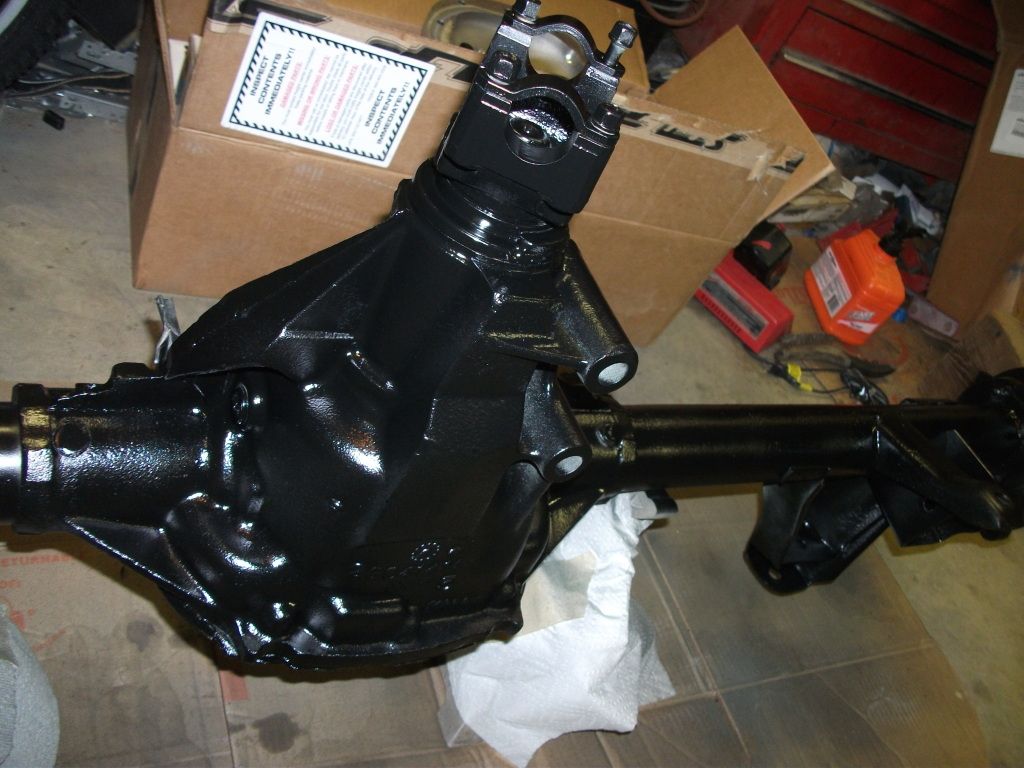
Thursday I finally got the rear end sand blasted:
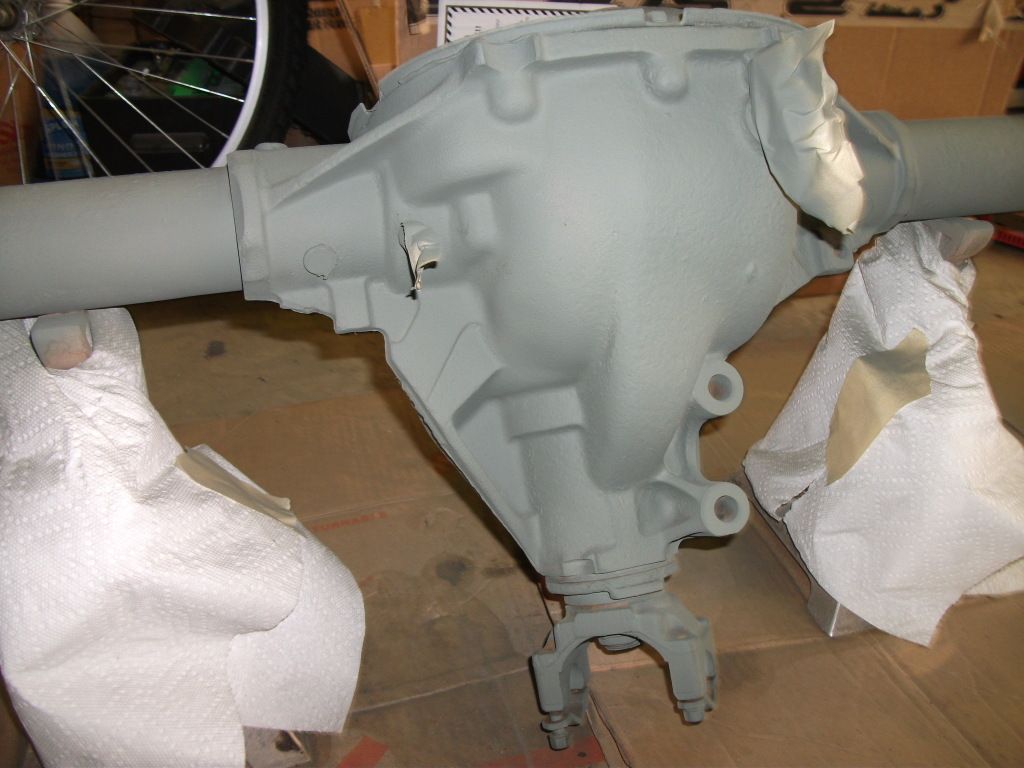
Then primed:
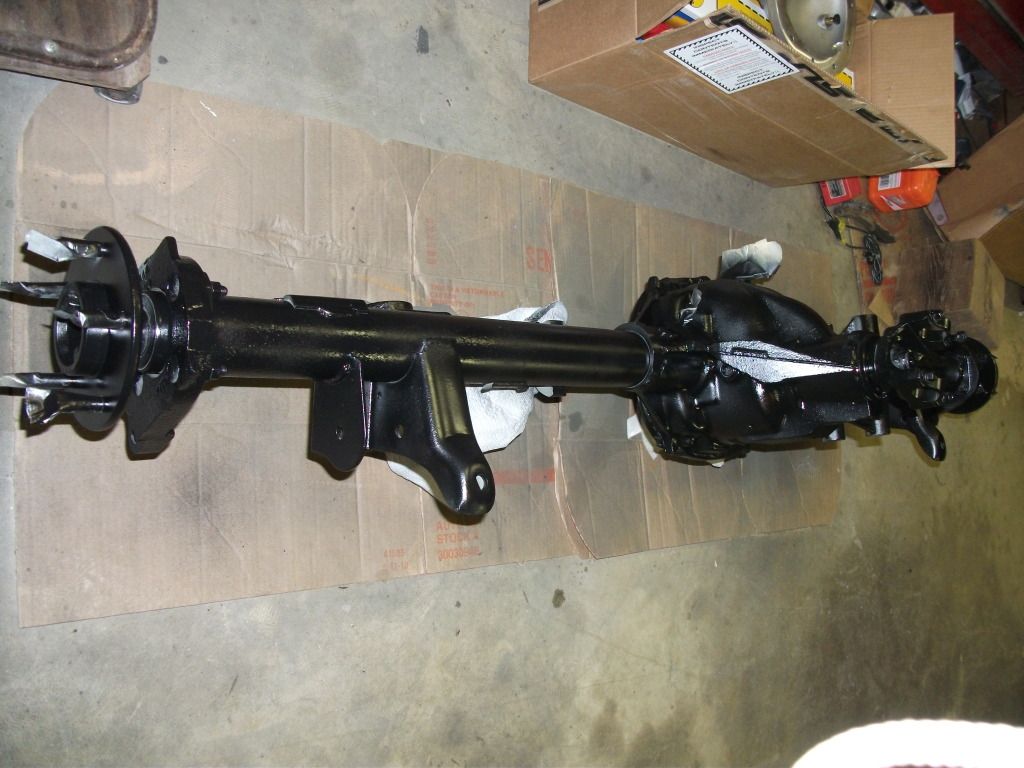
Then a single coat of semi-gloss black rustoleum. I'll eventually get 2 or 3 coats on there before I install it.
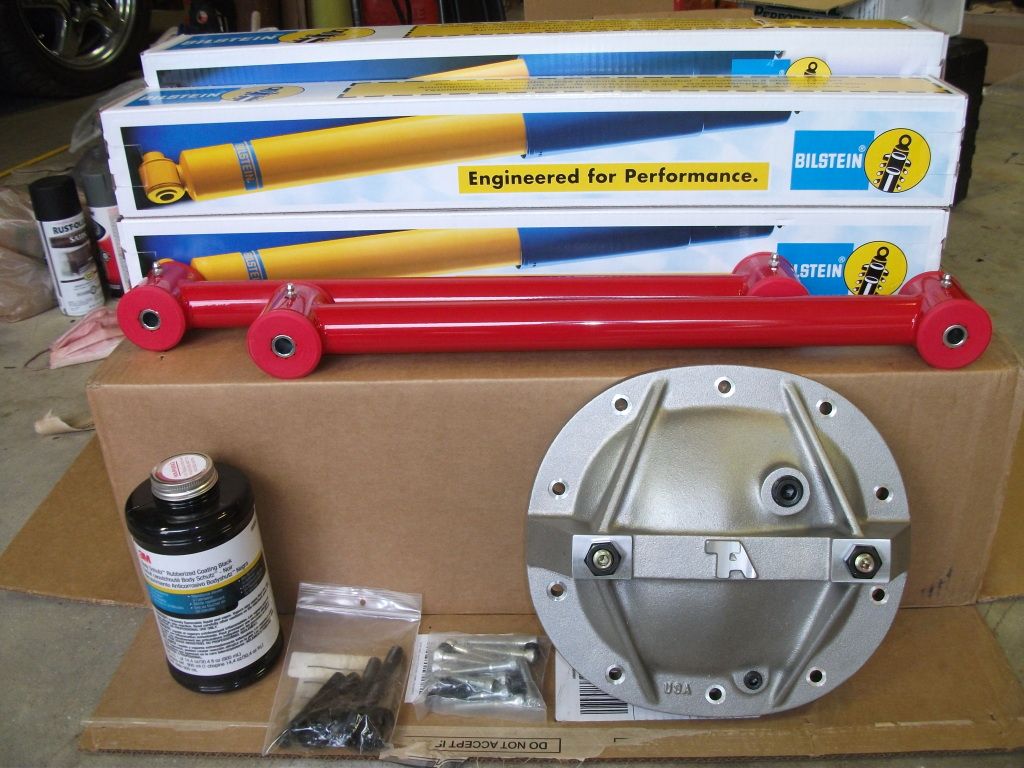
And all of my parts showed up just in time for my birthday!
The TA cover is a present from my wonderful girlfriend..
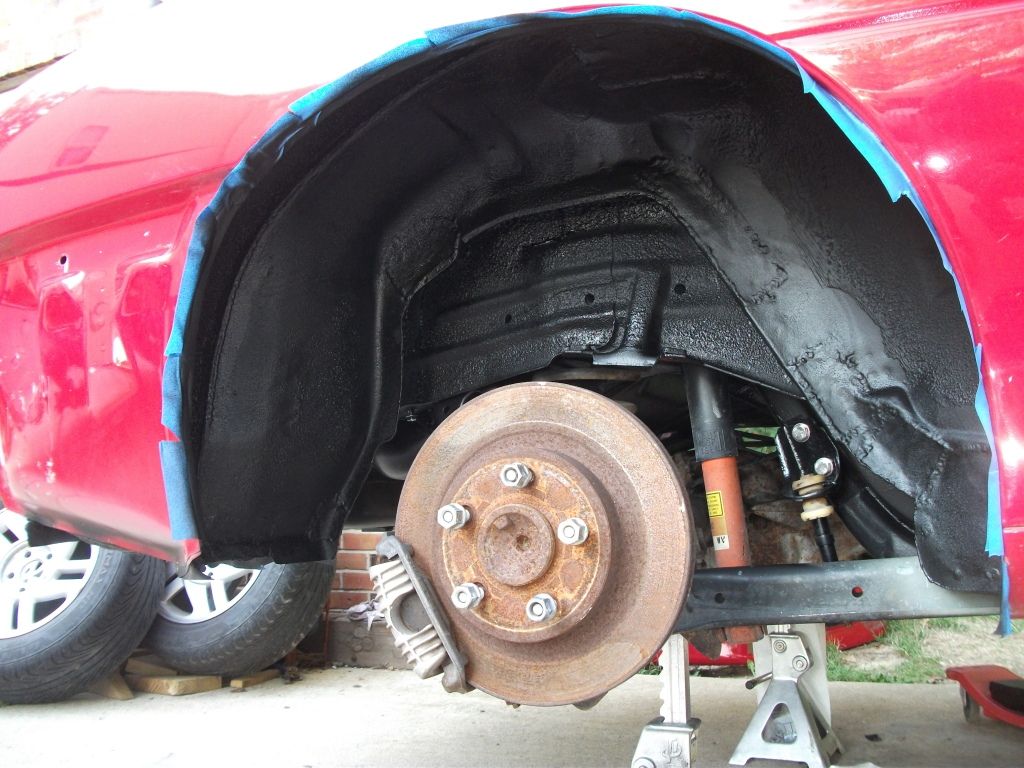
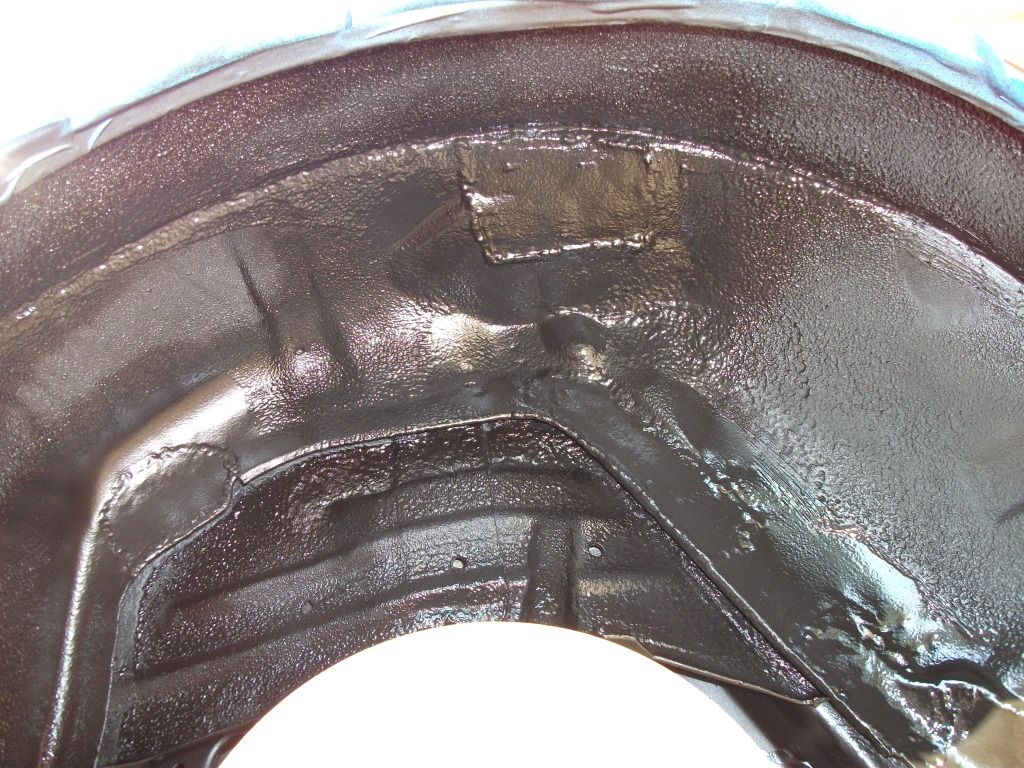
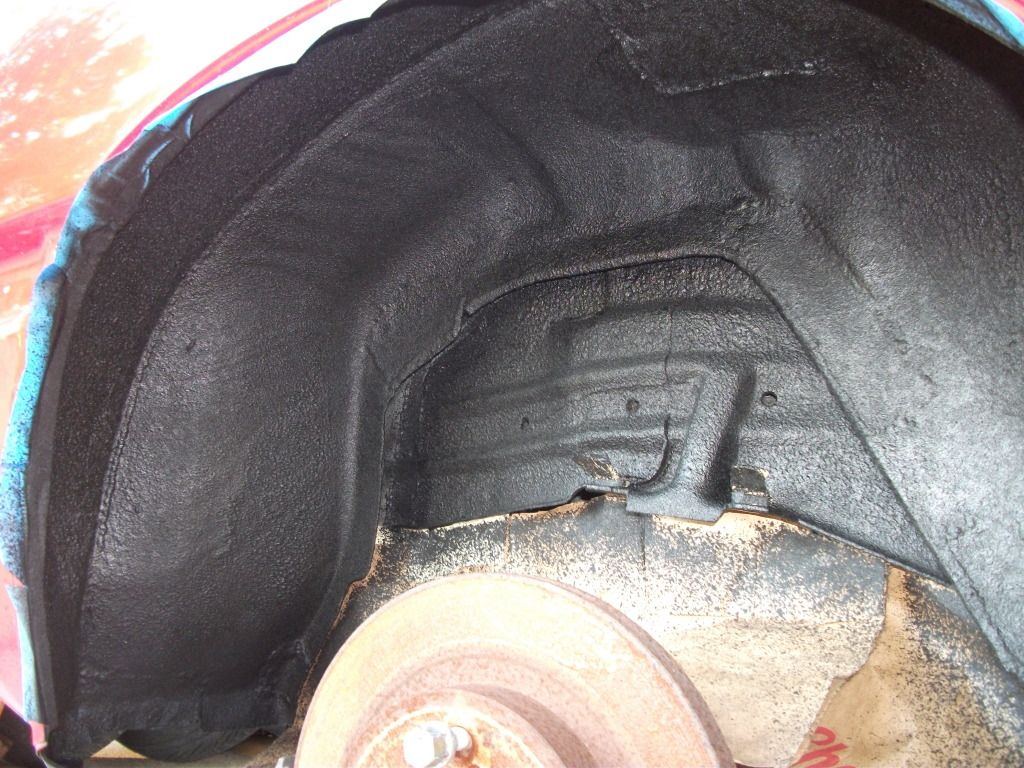
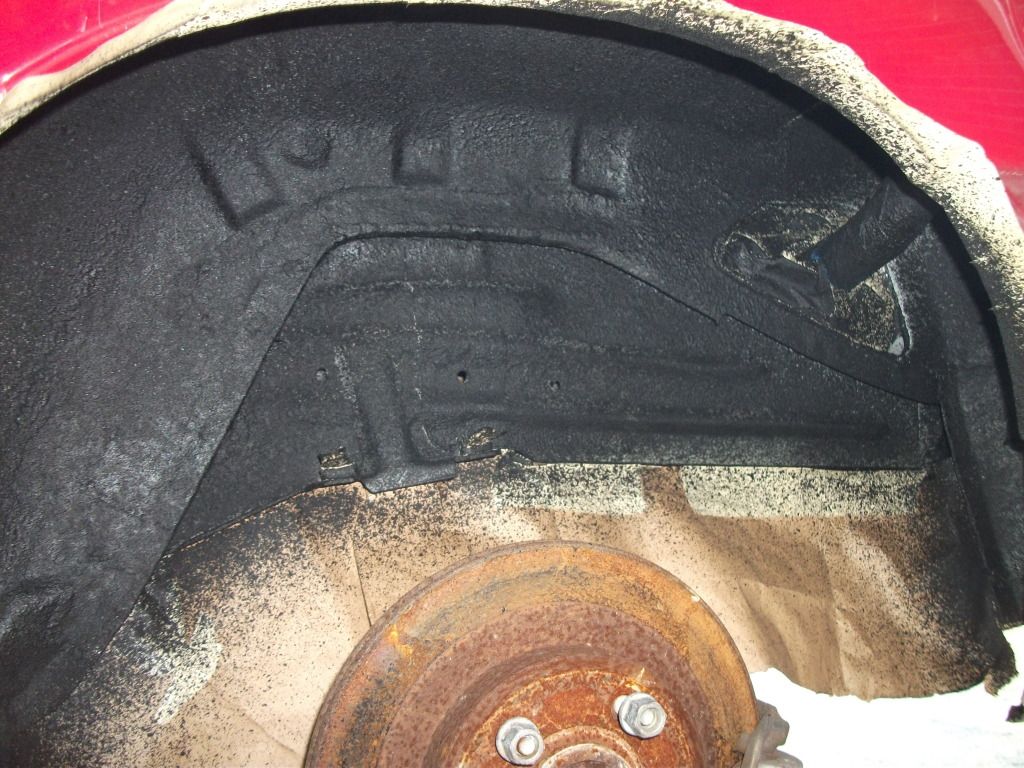
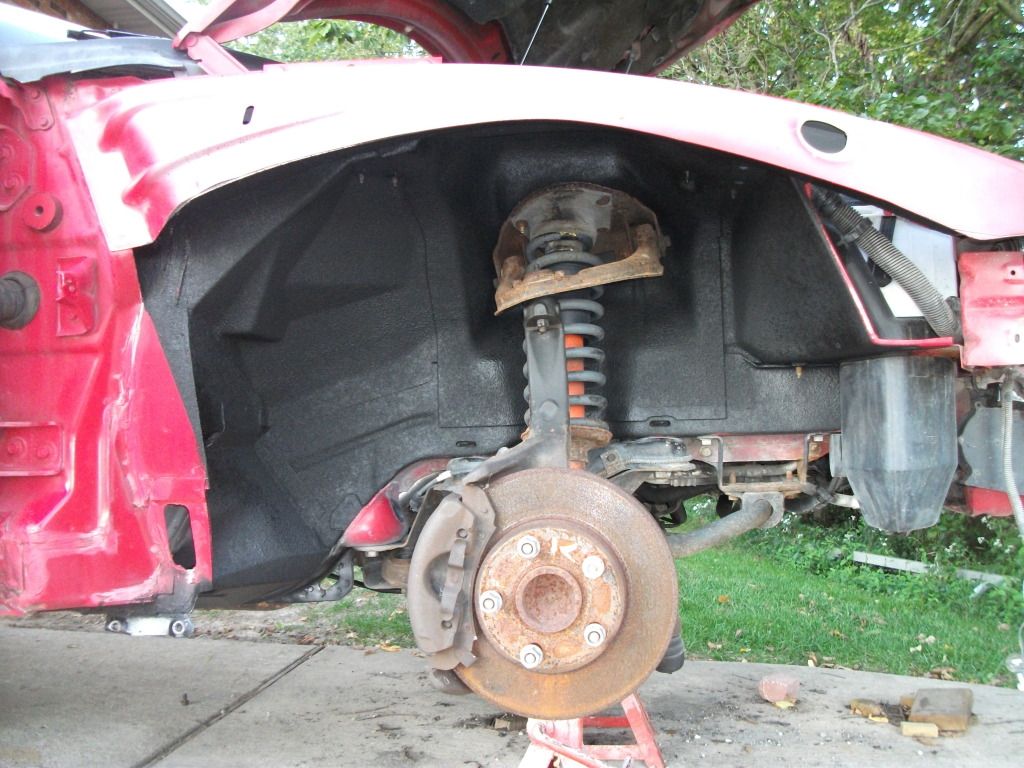
Also, here are a few pictures of the undercoating I did in the passenger side wheel well. This is with the rustoleum brand undercoating. I was disappointed in how thin it came out, but I guess I should have expected that out of a spray can. The idea is to cover up everything so it looks like factory. Hopefully the 3M Body Schutz I got will work out a little better.
Thursday I finally got the rear end sand blasted:
Then primed:
Then a single coat of semi-gloss black rustoleum. I'll eventually get 2 or 3 coats on there before I install it.
And all of my parts showed up just in time for my birthday!
The TA cover is a present from my wonderful girlfriend..
Also, here are a few pictures of the undercoating I did in the passenger side wheel well. This is with the rustoleum brand undercoating. I was disappointed in how thin it came out, but I guess I should have expected that out of a spray can. The idea is to cover up everything so it looks like factory. Hopefully the 3M Body Schutz I got will work out a little better.
09-13-2012, 09:36 PM
#26
On The Tree
Thread Starter
iTrader: (2)
Join Date: Dec 2008
Location: Edwardsville, IL
Posts: 181
Likes: 0
Received 0 Likes
on
0 Posts
Update:
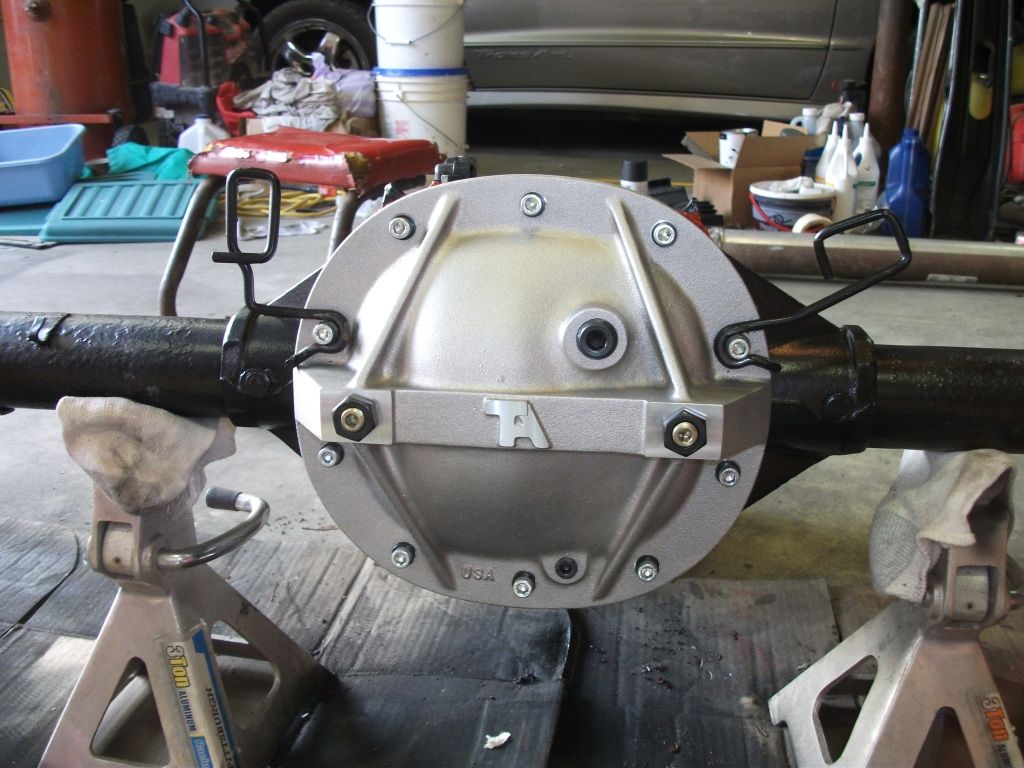
I installed my TA cover today! It went on with no real problems. I took the stock cover off, drained the fluid, cleaned all the old rtv off, and chased all the threads in the housing to clean out all the crap. Then I installed the bearing cap stud kit, and used some red high temp rtv to make the new gasket. Put the new cover on, torqued all the housing bolts down, then finally torqued the load bolts to 5 ft/lbs & snugged up the jamb nuts. The only thing left to swap out the rear ends, fill it with fluid, and take it for a test drive.. up and down the driveway.. lol.
And here are some pictures of stuff I did earlier this week.
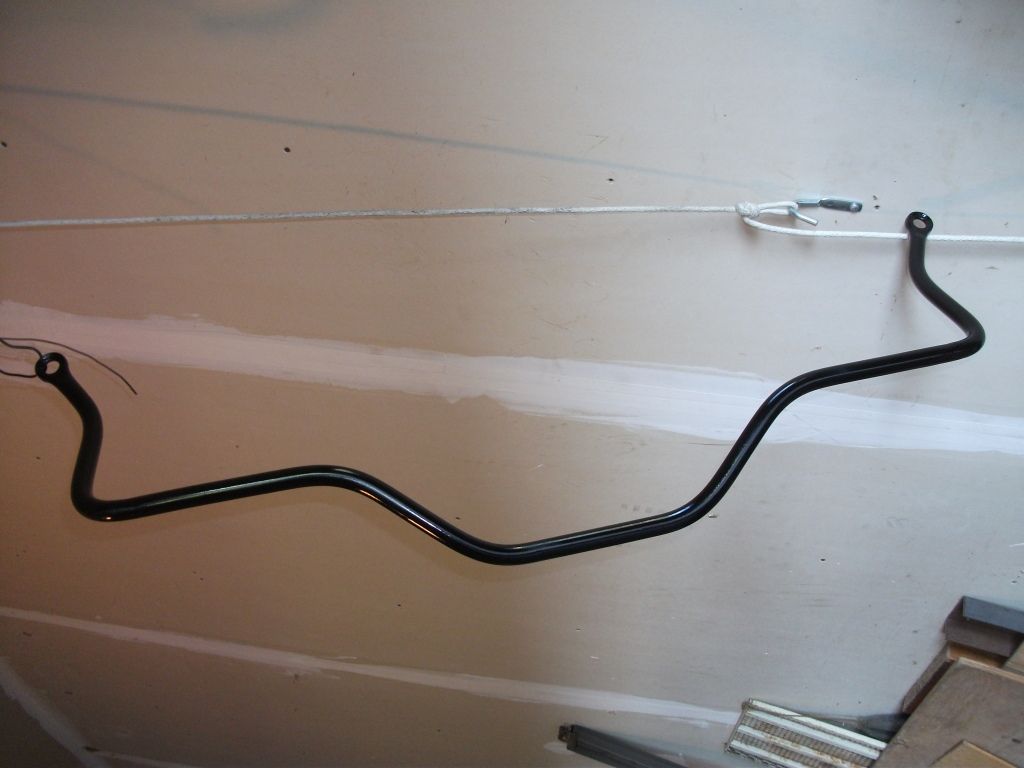
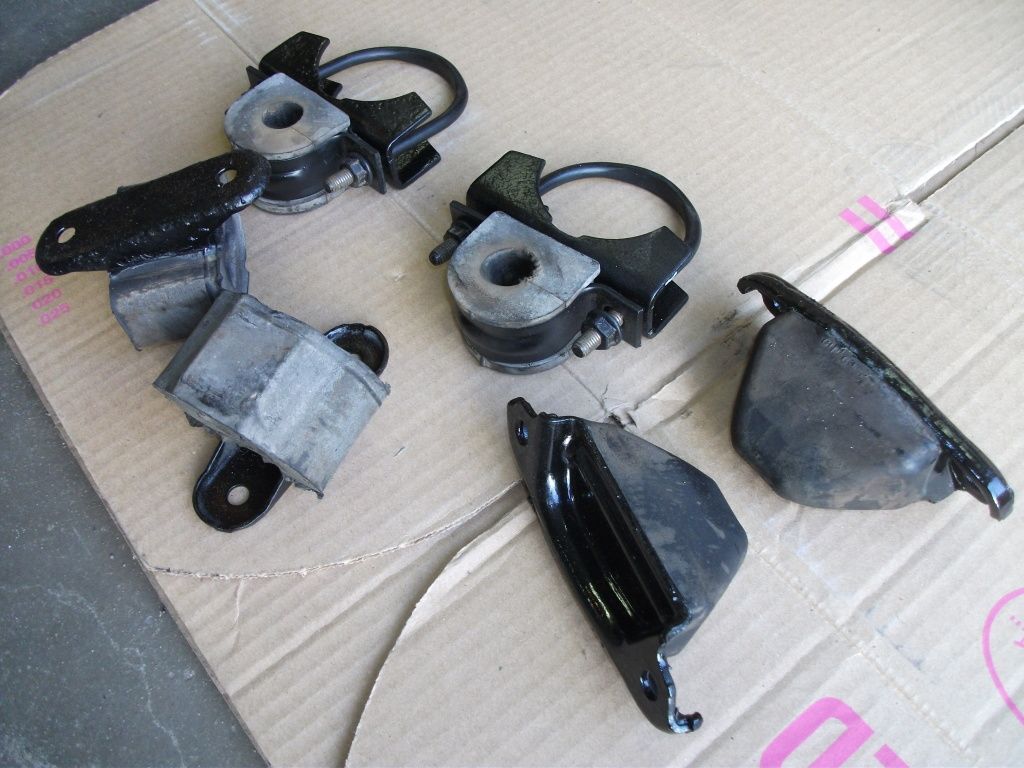
Painted the rear sway bar
Painted the bumpstops, exhaust hanger brackets, and sway bar mounting brackets. And I also chased the threads to get them good and clean.
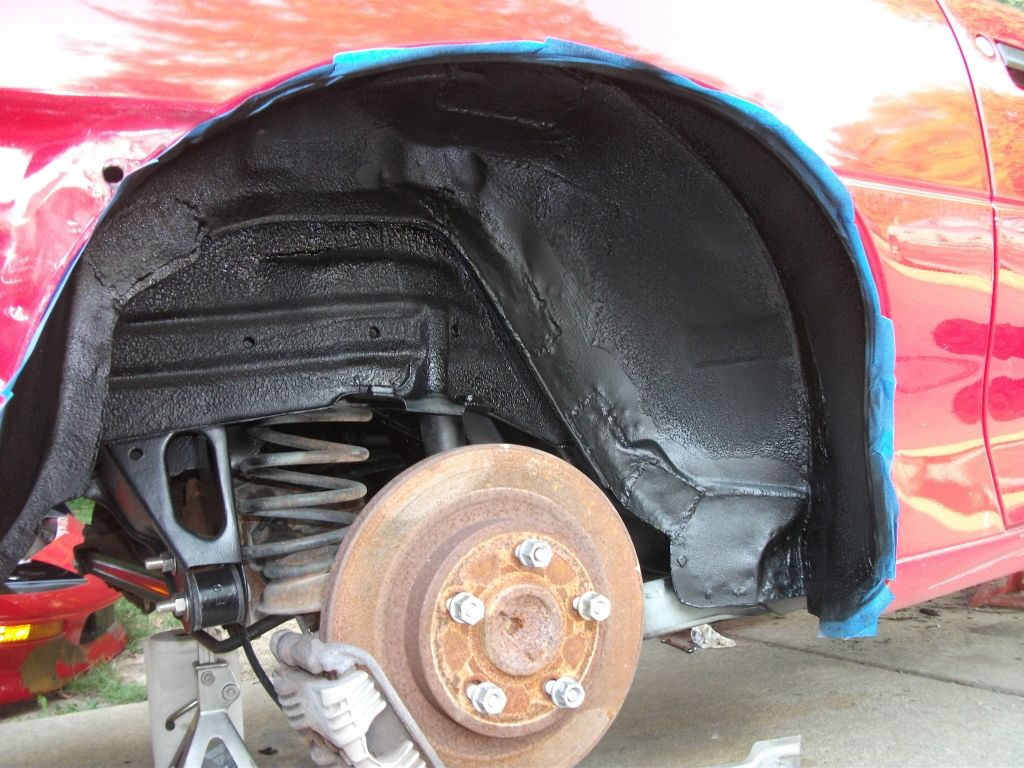
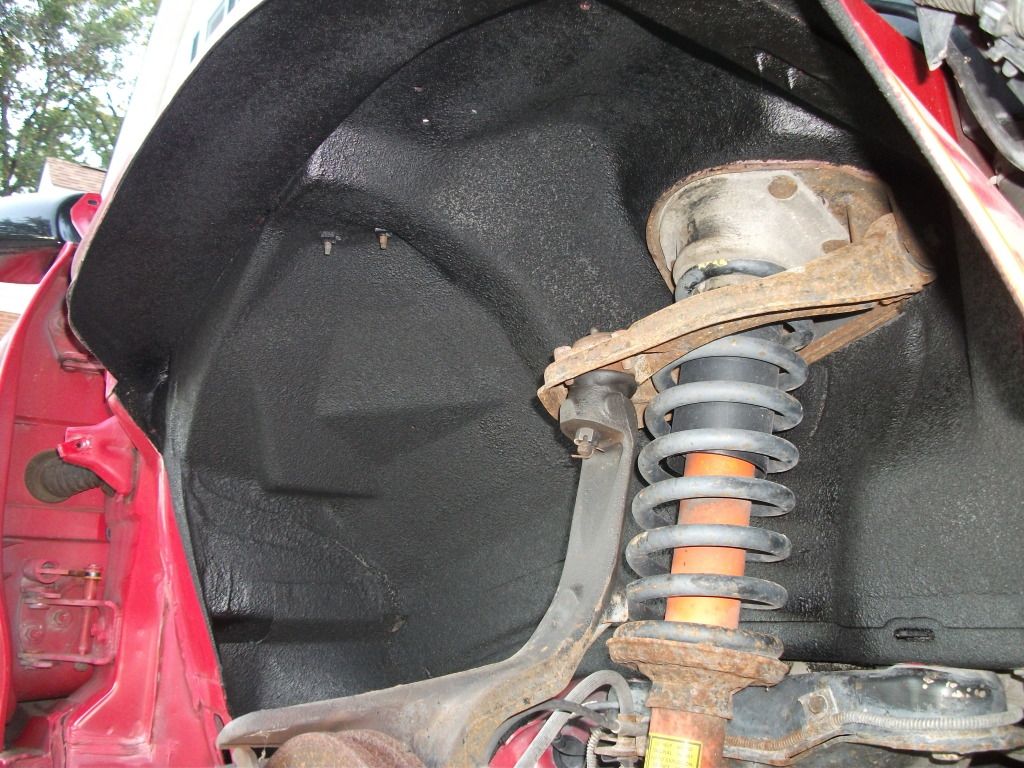
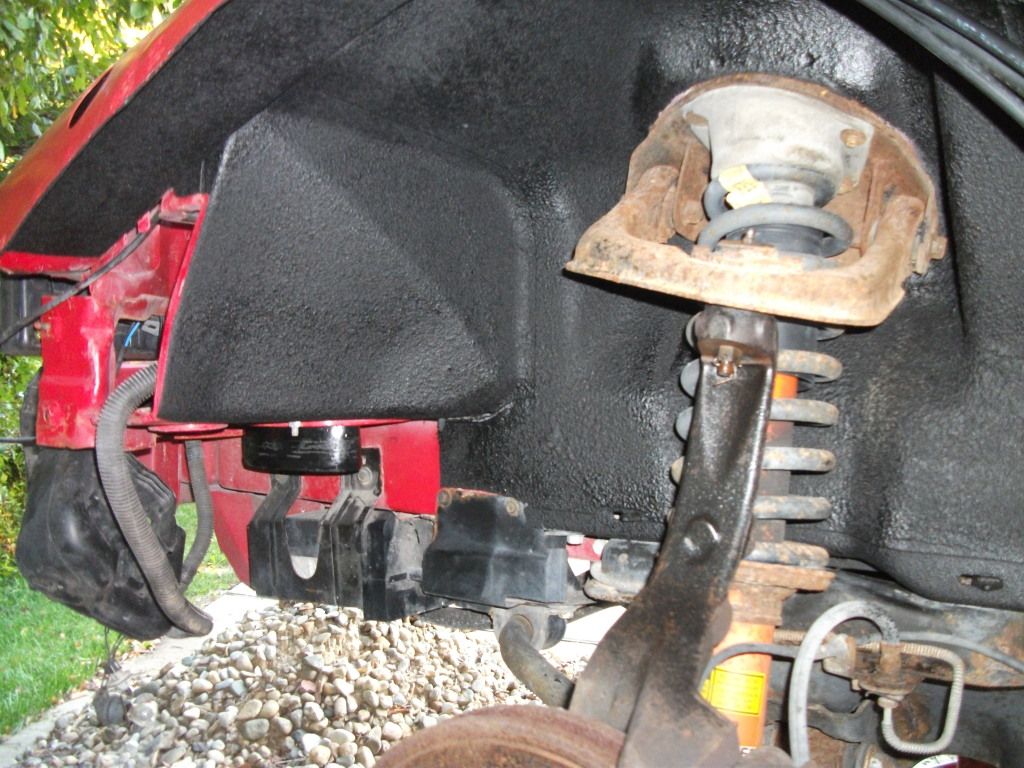
Here's a few pics of the 3M Body Schutz undercoating I was talking about a few posts ago. This is only 1 coat in the rear wells and it covered pretty good. It will get another coat or two to really cover up the patches. Two more quarts of this stuff arrived today, so I am looking forward to spraying it. Unfortunately, I'll be out of town all weekend so I won't get to work on the car at all until next week sometime..

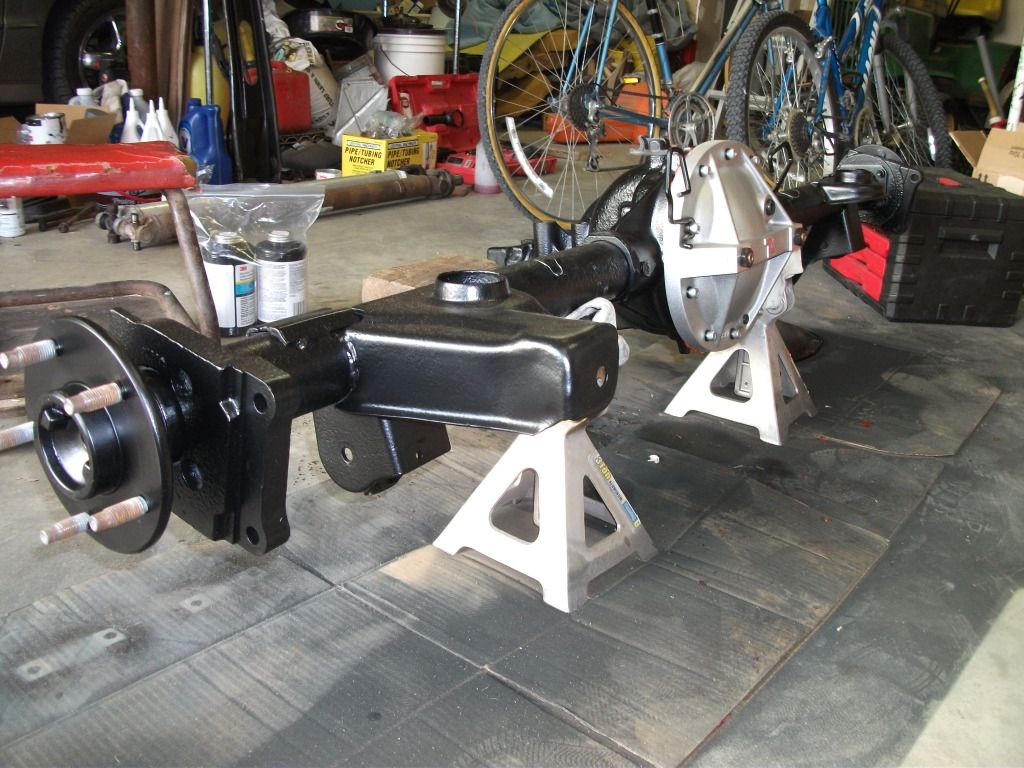
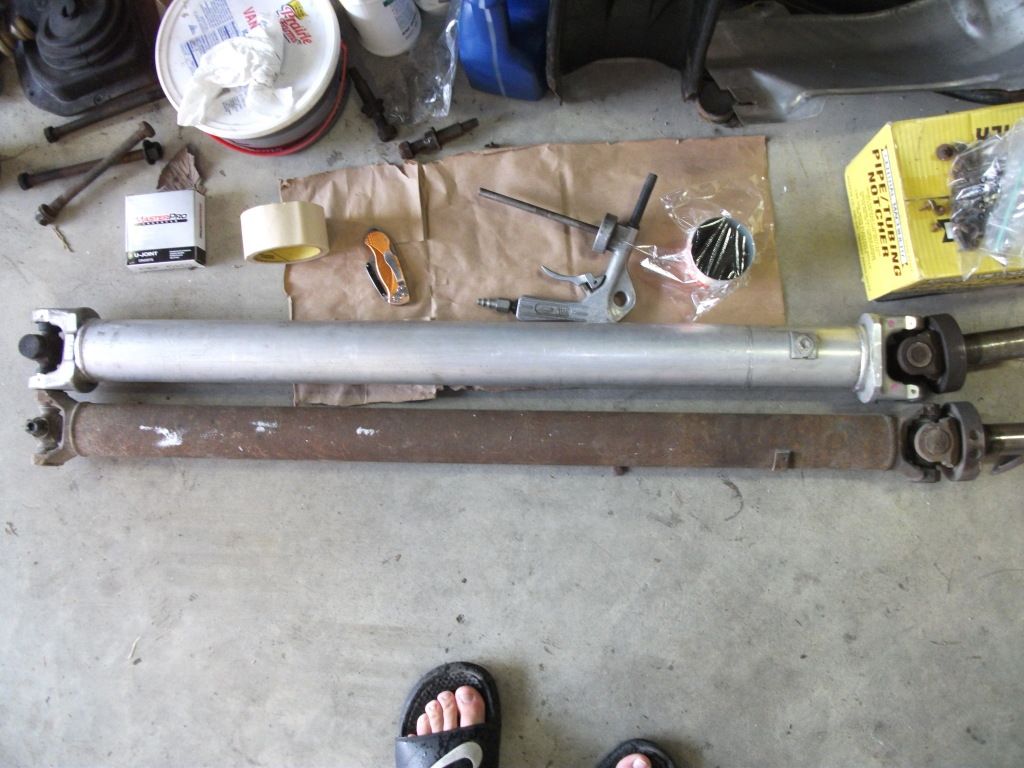
Finally here's a better picture of the ls1 driveshaft, and comparing it to the stock steel one. The aluminum shaft was missing two of its U-joint caps when I bought it... so I picked up a new U-joint from O'Rielly's, $11, not too bad. Not really looking forward to replacing that, it sounds like a pain in the ***. Right now I just stuck the caps from my stock U-joint on there. It would probably work just fine like that... but it just doesn't seem like the right way to go about things to me.
I installed my TA cover today! It went on with no real problems. I took the stock cover off, drained the fluid, cleaned all the old rtv off, and chased all the threads in the housing to clean out all the crap. Then I installed the bearing cap stud kit, and used some red high temp rtv to make the new gasket. Put the new cover on, torqued all the housing bolts down, then finally torqued the load bolts to 5 ft/lbs & snugged up the jamb nuts. The only thing left to swap out the rear ends, fill it with fluid, and take it for a test drive.. up and down the driveway.. lol.
And here are some pictures of stuff I did earlier this week.
Painted the rear sway bar
Painted the bumpstops, exhaust hanger brackets, and sway bar mounting brackets. And I also chased the threads to get them good and clean.
Here's a few pics of the 3M Body Schutz undercoating I was talking about a few posts ago. This is only 1 coat in the rear wells and it covered pretty good. It will get another coat or two to really cover up the patches. Two more quarts of this stuff arrived today, so I am looking forward to spraying it. Unfortunately, I'll be out of town all weekend so I won't get to work on the car at all until next week sometime..
Finally here's a better picture of the ls1 driveshaft, and comparing it to the stock steel one. The aluminum shaft was missing two of its U-joint caps when I bought it... so I picked up a new U-joint from O'Rielly's, $11, not too bad. Not really looking forward to replacing that, it sounds like a pain in the ***. Right now I just stuck the caps from my stock U-joint on there. It would probably work just fine like that... but it just doesn't seem like the right way to go about things to me.
09-13-2012, 10:42 PM
#29
On The Tree
Thread Starter
iTrader: (2)
Join Date: Dec 2008
Location: Edwardsville, IL
Posts: 181
Likes: 0
Received 0 Likes
on
0 Posts
lt11994:
I would rate the T56 swap as pretty hard for a do-it-yourselfer. It all really depends on what tools you have, what skills you've got, and what you are comfortable doing. I could have never done it on my own a few years ago.. and it's probably still not something I would want to tackle on my own right now. However, there are plenty of threads on the swap, and some good writeups to follow, so if you think you can do it.. Go for it! It's a great feeling when you're done
69gto96z:
Absolutely! That's what I'll be working on after I get it back from paint. For right now I will probably be going with raamat products, and probably some mass loaded vinyl from here: http://www.sounddeadenershowdown.com/cgi-bin/index.cgi Lots of good info on this site as well
09-18-2012, 08:52 PM
#30
On The Tree
Thread Starter
iTrader: (2)
Join Date: Dec 2008
Location: Edwardsville, IL
Posts: 181
Likes: 0
Received 0 Likes
on
0 Posts
Update for today..
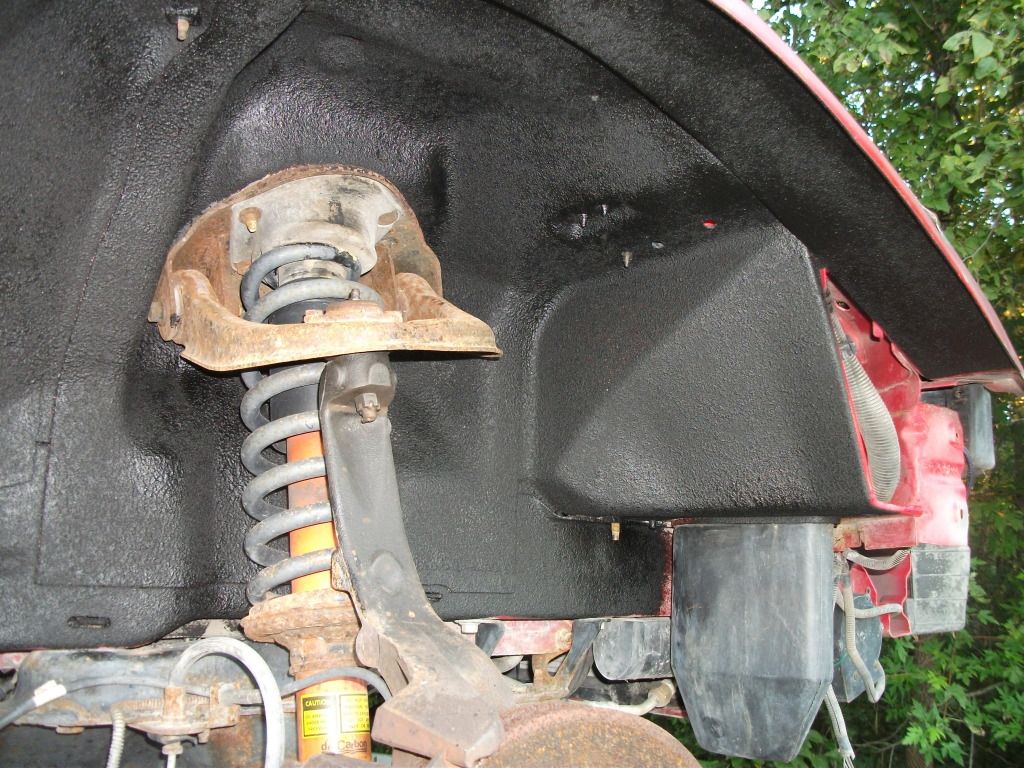
I used up the other 2 quarts of undercoating that I bought. I went through about a quart and a half on the front wheel wells, then did a little more in the rear... I am thinking 2 more quarts should be enough to get everything covered & built up just how I want it. That will have to wait until I get it back from the painter however, because I should be bringing the car up to him either tomorrow or thursday!
Right side:
Left side:
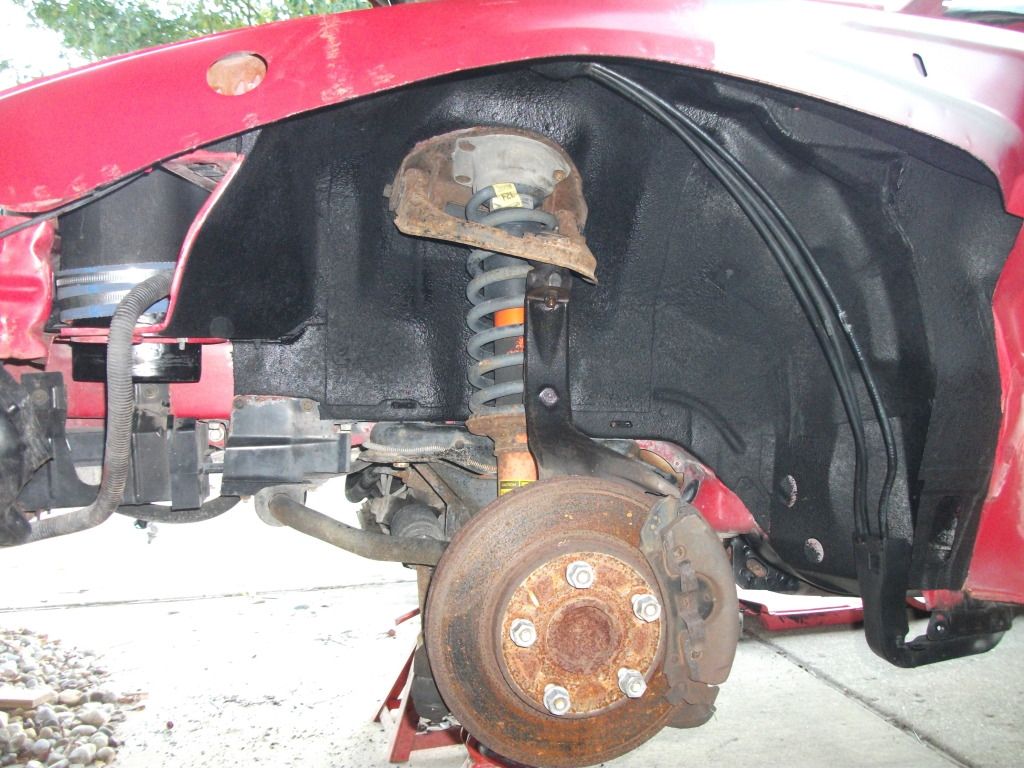
09-26-2012, 03:56 PM
#31
On The Tree
Thread Starter
iTrader: (2)
Join Date: Dec 2008
Location: Edwardsville, IL
Posts: 181
Likes: 0
Received 0 Likes
on
0 Posts
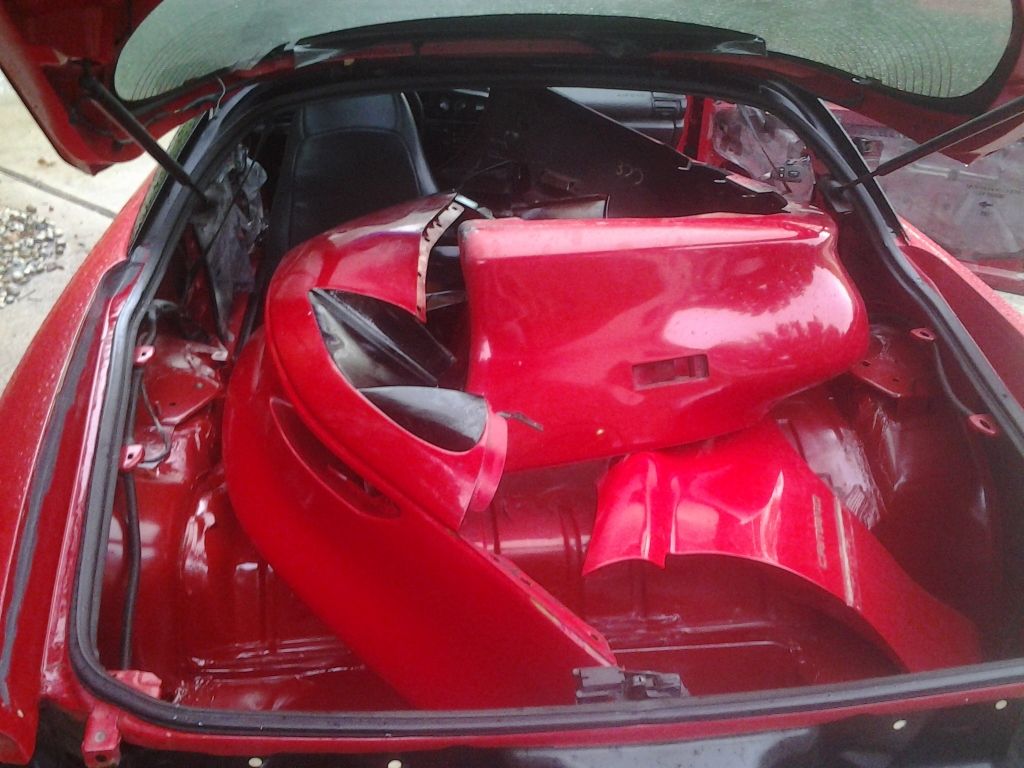
Yesterday: Car is all loaded up and ready to go! We fought the storms and I got the car loaded up with all of its body parts, and put on the car dolly. We put the SS hood in the back of the truck, and off we went to the painter's house! He is only about 15 minutes from my parent's, so it was an easy drive. Once there, we had to wait out some more rain but finally got the car into the shop.. I should have the car back sometime next month. Until then I might go up there to get some progress pictures every once and awhile.
I should have had the car there last Thursday, but I got everything put back together to take it for a spin down the driveway... and it wouldn't start.
After a couple attempts it started up, but the idle quality was terrible. My first thought was: "hey, someone stuck a cam in here while I wasn't looking! "
"
It started smelling of gas and smoking a little bit so I shut it down. I looked around underneath the car, and noticed that the heat shield on the passengers side was wet. It smelled like gas.. Dad suggested I check some of the spark plugs, so I went back out to jack up the car, now a stream of gas poured out the driver's side header!? I pulled all the plugs, and a couple on the left side were wet, the rest looked ok. Initially I was thinking an injector was stuck open... It had been about a month since the last time it ran.
I turned the engine over by hand, and a good amount of fuel came out of cylinder #5, and the rest were dry. I cycled the key to 'on' to prime the pump a couple times, and turned it over a few more times. Now I had gas coming out both sides of the engine! Time to pull the fuel rail & injectors... I got all of the injectors out of their holes, and put paper towels under them. Then I had my brother turn the key on so the fuel pump would run. We did this a few times for good measure, and no gas would ever come out of the injectors. I turned the engine over again, and got lots of fuel out of the cylinders. What is going on?? I was lost on how fuel was getting into the engine with no injectors installed....
Just for kicks, I pulled off the intake elbow, held open the throttle body and looked inside of the intake with a flashlight while he primed the pump again. A stream of gas shot out from the right side of the intake! Surprised the hell out of me lol. So now I know where it's coming from, but why? I found the vacuum hose it was coming from, and followed it around the back of the intake to the fuel pressure regulator. Apparently the regulator crapped out in the past month of sitting. Not a big deal since we have a disassembled LT1 down in the basement.. I took the fuel rail off my car, and swapped out the regulator with the spare one. Hooked the fuel lines back up and did a test run to make sure it was good before putting everything back together. I didn't get gas shooting out all over the place, so we're good to go! I got everything put back together, and changed the oil and filter since I know there had to be some gas in the oil now.. and it started up and idled perfect, on the first try! That's always a good feeling
FINALLY, it was time to go for a test drive down the driveway (1/2 mile). I tried to sit on a bucket, but I was either too far from the pedals, or way too close, so I gave in and went downstairs to grab a seat to bolt in. Man did it feel great to drive it again! The clutch is nice and smooth, just the way I wanted. I wished I could have drove it around on the road for awhile, but with no bumper covers or fenders, I didn't think that was a very good idea, plus it was starting to get dark. This was on Monday evening, and I called the painter to let him know I'd be there the next day. Now all that is left to do is wait, and tie up a few loose ends while the car is away.
I should have had the car there last Thursday, but I got everything put back together to take it for a spin down the driveway... and it wouldn't start.
After a couple attempts it started up, but the idle quality was terrible. My first thought was: "hey, someone stuck a cam in here while I wasn't looking!
"It started smelling of gas and smoking a little bit so I shut it down. I looked around underneath the car, and noticed that the heat shield on the passengers side was wet. It smelled like gas.. Dad suggested I check some of the spark plugs, so I went back out to jack up the car, now a stream of gas poured out the driver's side header!? I pulled all the plugs, and a couple on the left side were wet, the rest looked ok. Initially I was thinking an injector was stuck open... It had been about a month since the last time it ran.
I turned the engine over by hand, and a good amount of fuel came out of cylinder #5, and the rest were dry. I cycled the key to 'on' to prime the pump a couple times, and turned it over a few more times. Now I had gas coming out both sides of the engine! Time to pull the fuel rail & injectors... I got all of the injectors out of their holes, and put paper towels under them. Then I had my brother turn the key on so the fuel pump would run. We did this a few times for good measure, and no gas would ever come out of the injectors. I turned the engine over again, and got lots of fuel out of the cylinders. What is going on??
Just for kicks, I pulled off the intake elbow, held open the throttle body and looked inside of the intake with a flashlight while he primed the pump again. A stream of gas shot out from the right side of the intake! Surprised the hell out of me lol. So now I know where it's coming from, but why? I found the vacuum hose it was coming from, and followed it around the back of the intake to the fuel pressure regulator. Apparently the regulator crapped out in the past month of sitting. Not a big deal since we have a disassembled LT1 down in the basement.. I took the fuel rail off my car, and swapped out the regulator with the spare one. Hooked the fuel lines back up and did a test run to make sure it was good before putting everything back together. I didn't get gas shooting out all over the place, so we're good to go! I got everything put back together, and changed the oil and filter since I know there had to be some gas in the oil now.. and it started up and idled perfect, on the first try! That's always a good feeling
FINALLY, it was time to go for a test drive down the driveway (1/2 mile). I tried to sit on a bucket, but I was either too far from the pedals, or way too close, so I gave in and went downstairs to grab a seat to bolt in. Man did it feel great to drive it again! The clutch is nice and smooth, just the way I wanted. I wished I could have drove it around on the road for awhile, but with no bumper covers or fenders, I didn't think that was a very good idea, plus it was starting to get dark. This was on Monday evening, and I called the painter to let him know I'd be there the next day. Now all that is left to do is wait, and tie up a few loose ends while the car is away.
09-30-2012, 07:14 PM
#32
Staging Lane
iTrader: (5)

Join Date: Jul 2006
Location: Edwardsville, IL
Posts: 85
Likes: 0
Received 0 Likes
on
0 Posts
As far as the trans swap it was not all that bad. Like anything just take your time and don't rush through it. We were lucky and got most everything we needed from one seller and did not have to find every piece for the swap. I can tell you that Josh fell in love with the car all over again once the t56 was in.
10-06-2012, 07:28 PM
#37
On The Tree
Thread Starter
iTrader: (2)
Join Date: Dec 2008
Location: Edwardsville, IL
Posts: 181
Likes: 0
Received 0 Likes
on
0 Posts
UPDATE
Paid a visit to the painter today. I wanted to take some progress pics, and write him a check for materials.
No work on the actual car just yet, but he's been working on getting the panels sanded down. There is a lot of stripping to do on the areas where the clear coat was coming off.
On with the pictures..
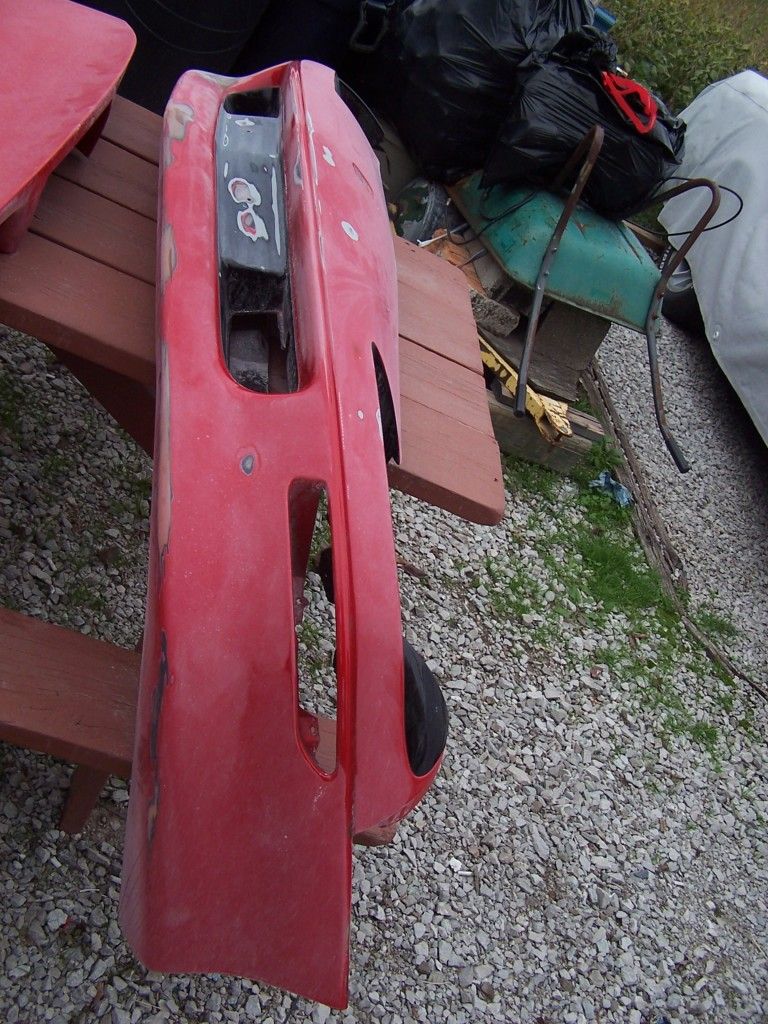
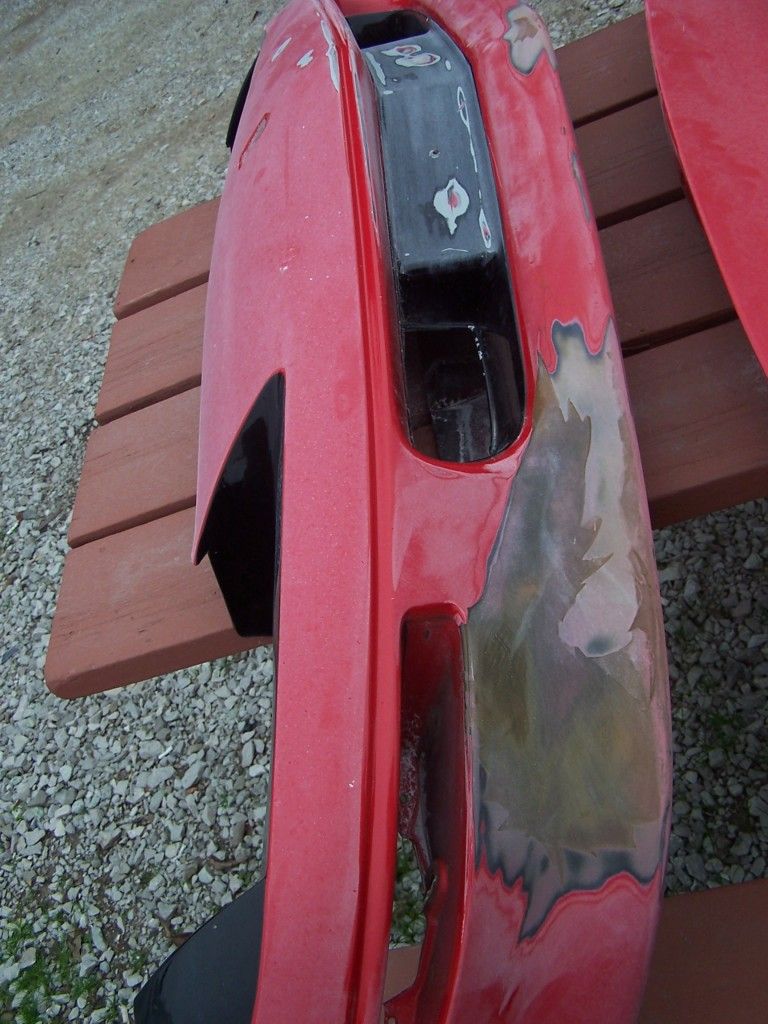
Front Bumper still has a little more work to be done. Some more sanding, and the two screw holes filled in for the license plate bracket.
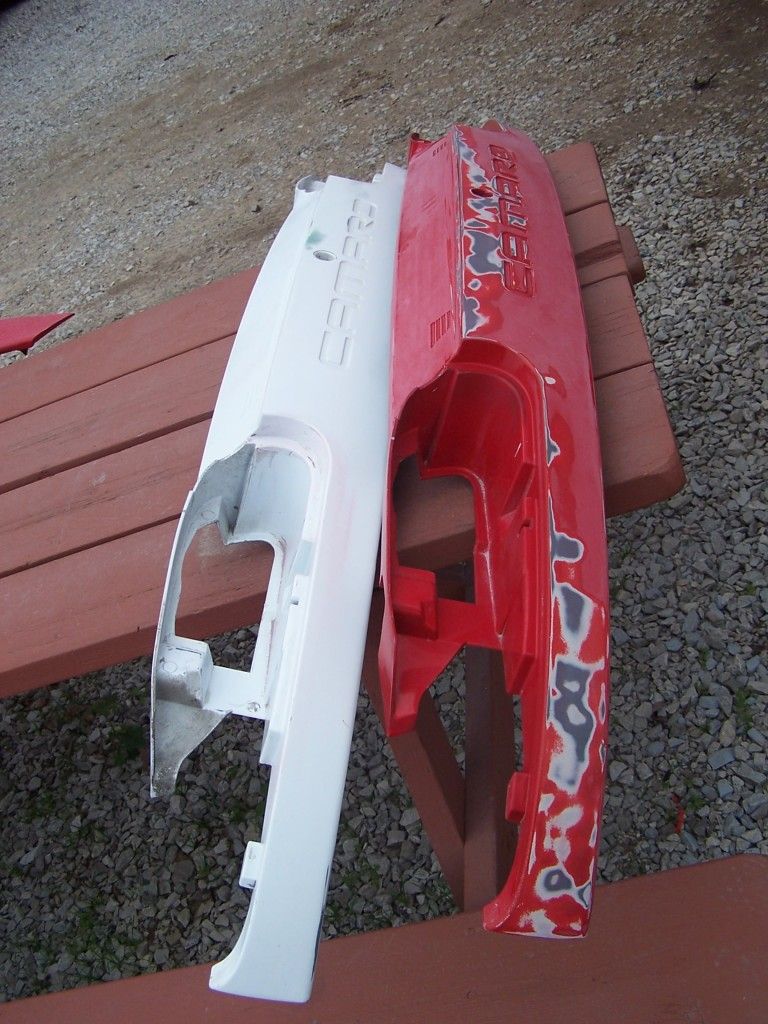
The two tail panels, the red one had clear coat issues to deal with. The white one will be painted black.
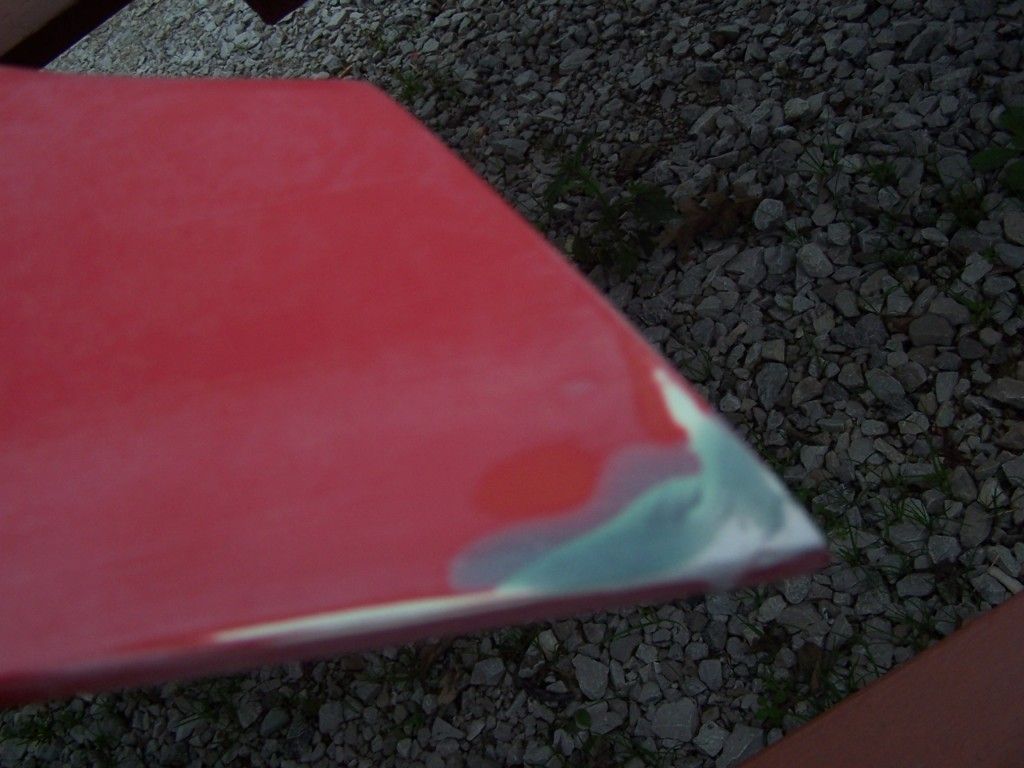
The camera didn't focus very well, but this is the corner of my spoiler that was damaged.
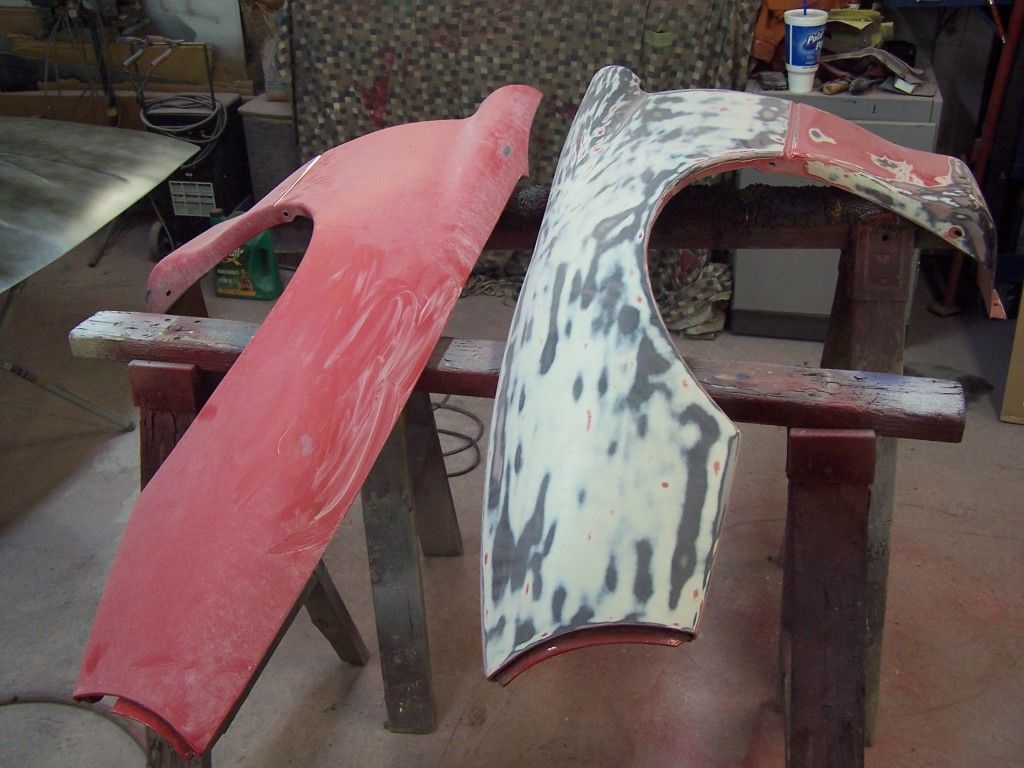
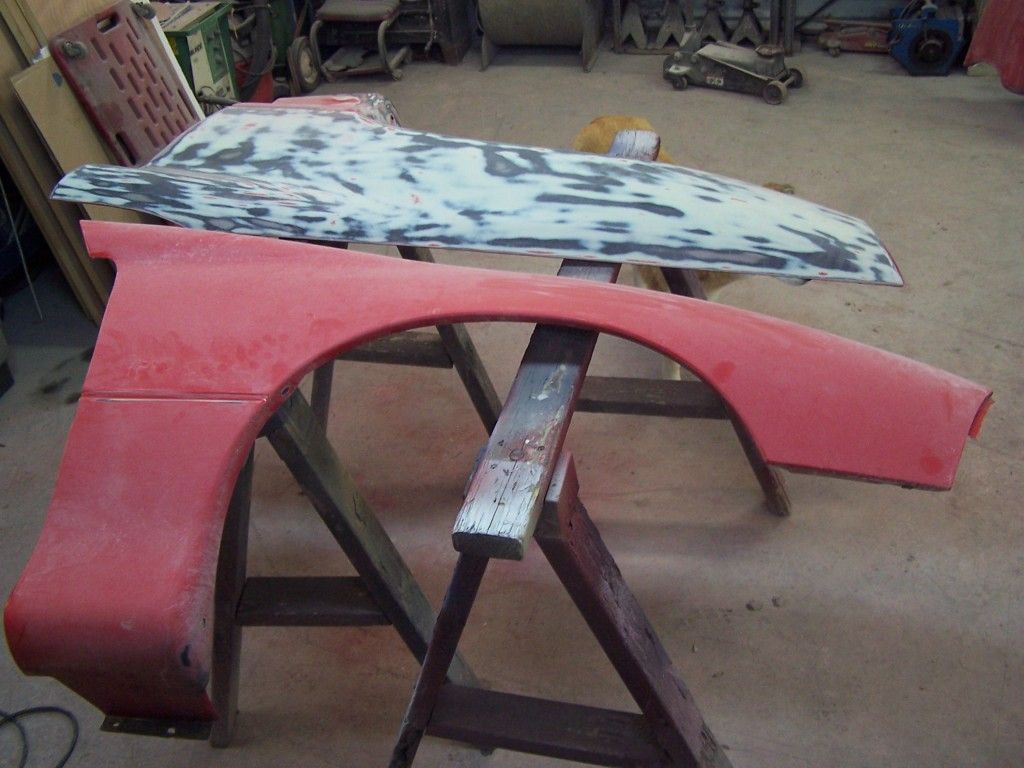
Driver's side fender has had almost everything stripped off it, the passenger's side was in better shape.
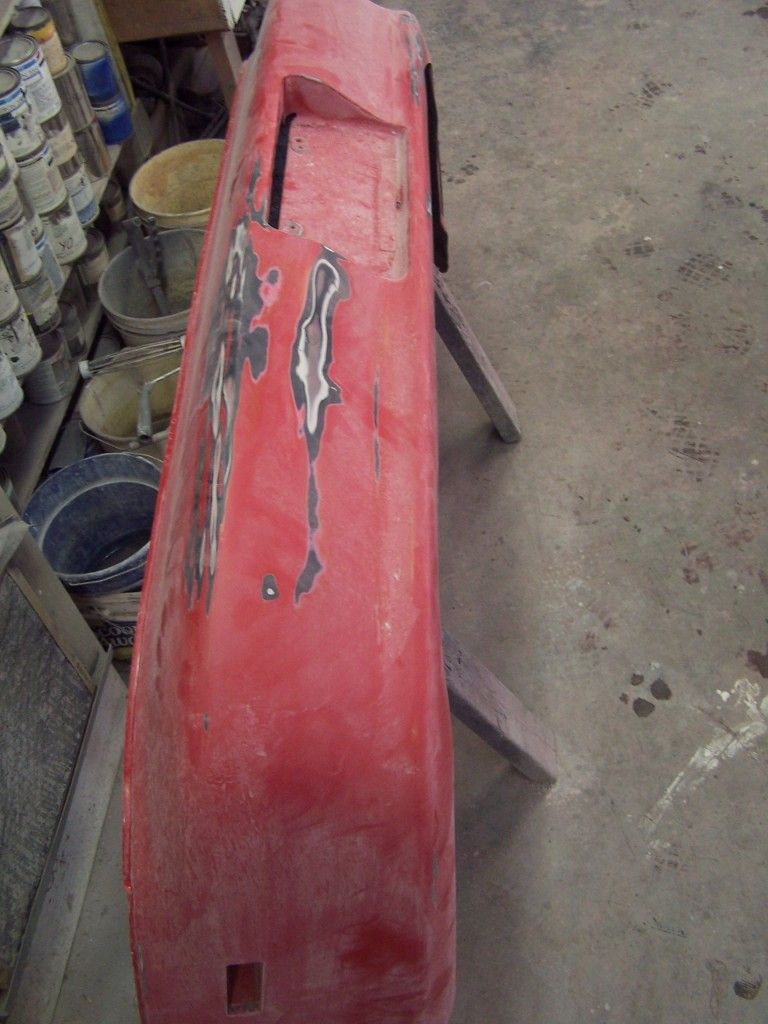
Here's the rear bumper cover, it had a little bit of damage to it.
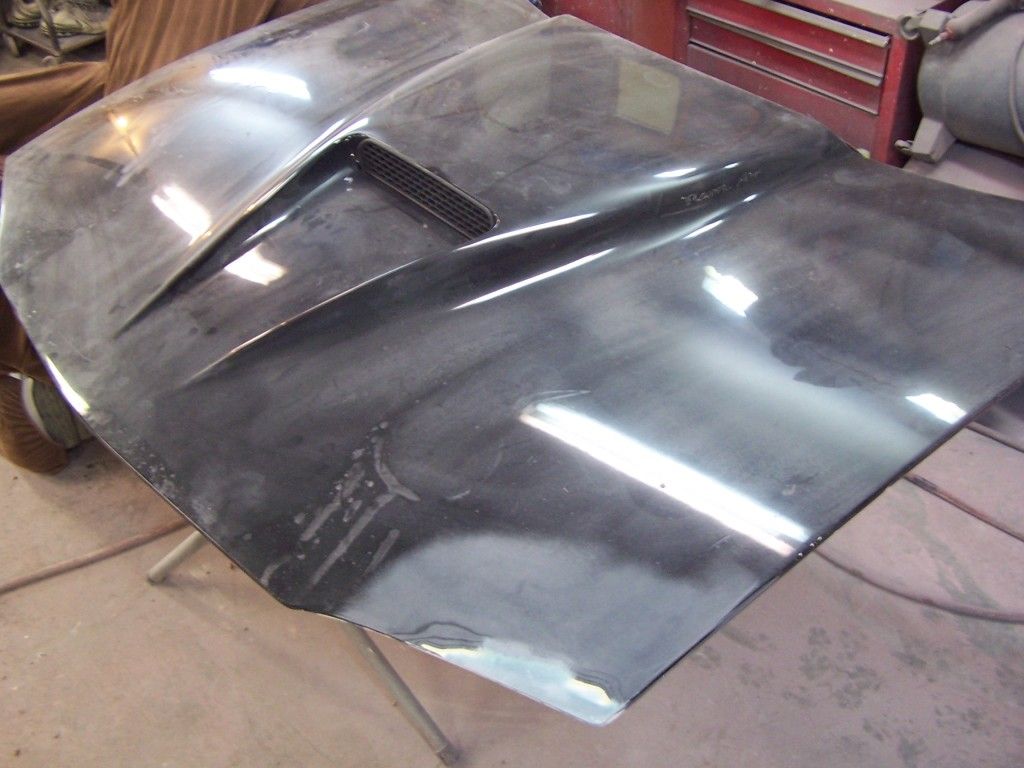
Last but not least is the new hood. The damage to the corner has been fixed most of the way, it just needs a little more work underneath to make it perfect. The rest of the hood is in pretty good shape, just needs to be sanded the rest of the way.
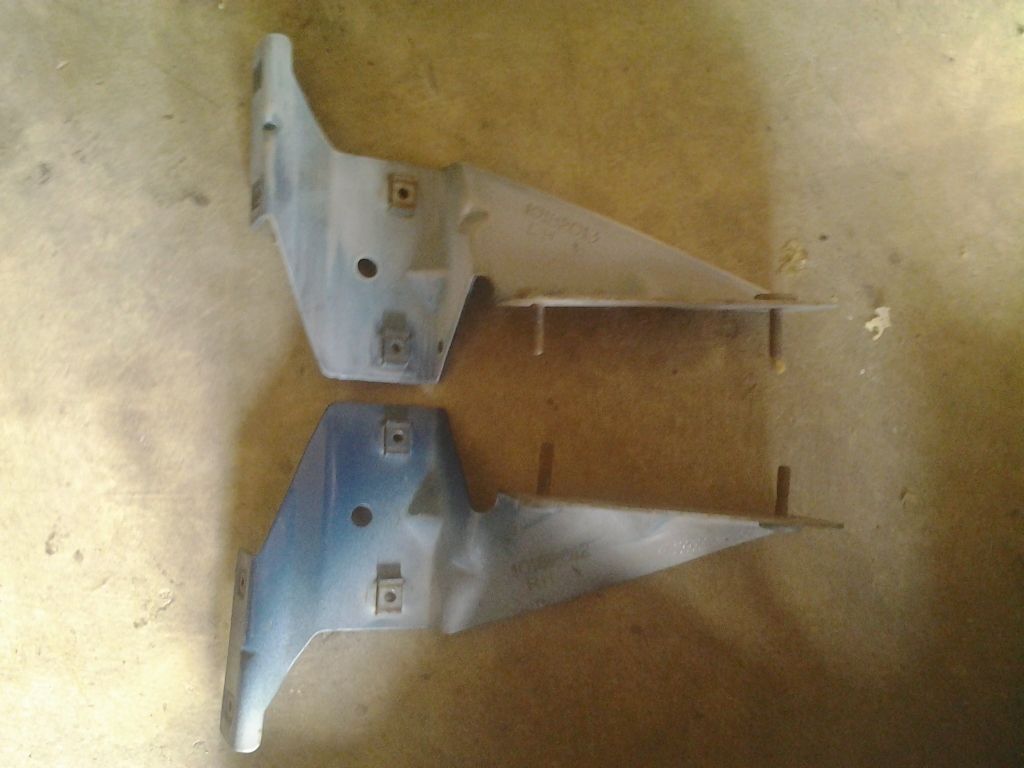
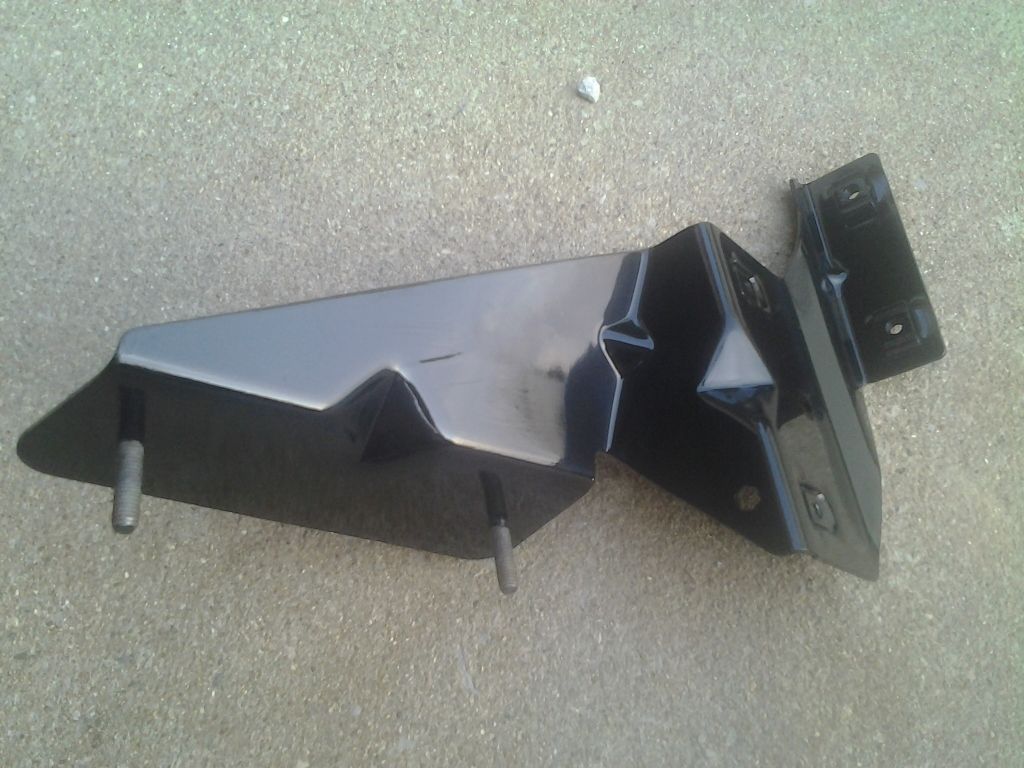
Side note: Here's a before and after of a couple brackets I pulled out of the junk yard. Mine originals were junk.. I originally got a couple off a firebird, but it wasn't until I compared them side by side that I realized they were different. So if anyone needs them, PM me. They are the brackets that hold the fender & front bumper cover together.
Sanded:
Painted & threads cleaned up:
It was nice to see some progress on the car now that it is out of my hands. I've been waiting a long time for this, and it's finally getting done! He is hoping to shoot some primer soon, and have a coat of red down by next weekend, when I will stop by again for some more pictures..
Paid a visit to the painter today. I wanted to take some progress pics, and write him a check for materials.
No work on the actual car just yet, but he's been working on getting the panels sanded down. There is a lot of stripping to do on the areas where the clear coat was coming off.
On with the pictures..
Front Bumper still has a little more work to be done. Some more sanding, and the two screw holes filled in for the license plate bracket.
The two tail panels, the red one had clear coat issues to deal with. The white one will be painted black.
The camera didn't focus very well, but this is the corner of my spoiler that was damaged.
Driver's side fender has had almost everything stripped off it, the passenger's side was in better shape.
Here's the rear bumper cover, it had a little bit of damage to it.
Last but not least is the new hood. The damage to the corner has been fixed most of the way, it just needs a little more work underneath to make it perfect. The rest of the hood is in pretty good shape, just needs to be sanded the rest of the way.
Side note: Here's a before and after of a couple brackets I pulled out of the junk yard. Mine originals were junk.. I originally got a couple off a firebird, but it wasn't until I compared them side by side that I realized they were different. So if anyone needs them, PM me. They are the brackets that hold the fender & front bumper cover together.
Sanded:
Painted & threads cleaned up:
It was nice to see some progress on the car now that it is out of my hands. I've been waiting a long time for this, and it's finally getting done!
He is hoping to shoot some primer soon, and have a coat of red down by next weekend, when I will stop by again for some more pictures..
10-17-2012, 03:52 PM
#39
On The Tree
Thread Starter
iTrader: (2)
Join Date: Dec 2008
Location: Edwardsville, IL
Posts: 181
Likes: 0
Received 0 Likes
on
0 Posts
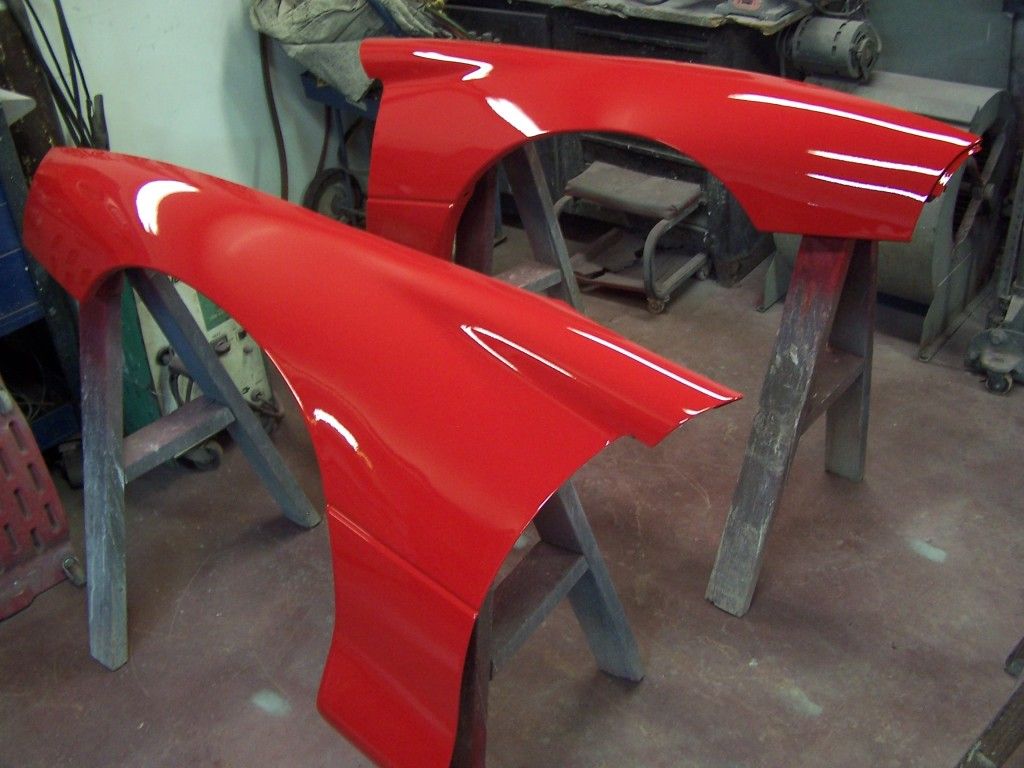
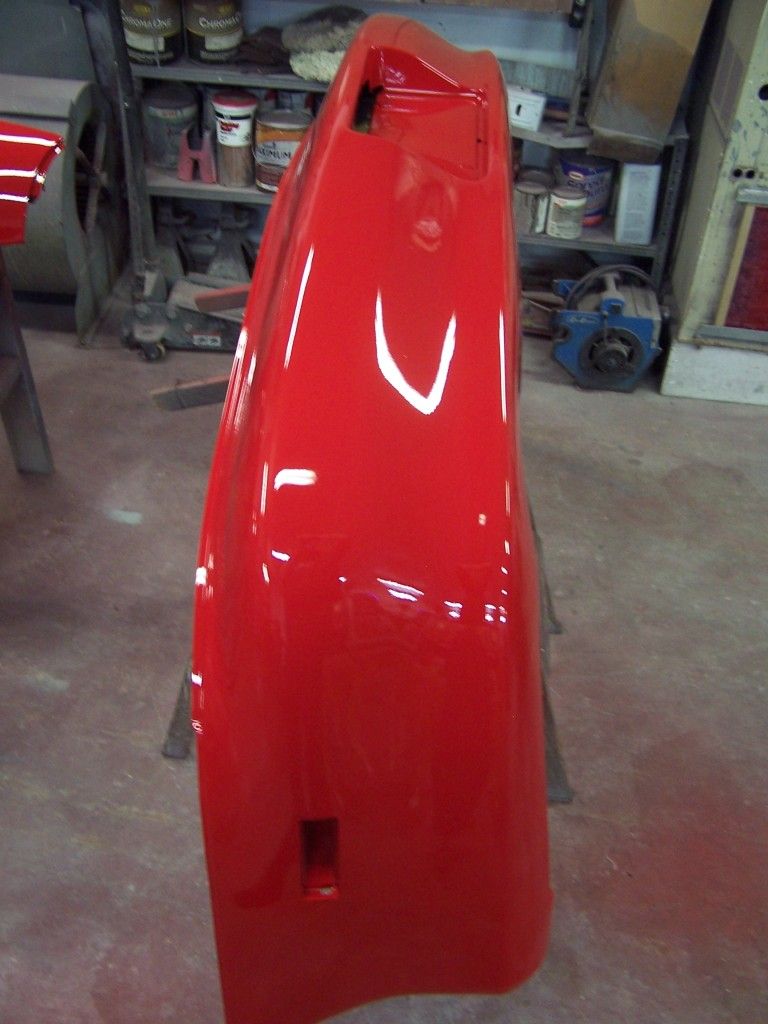
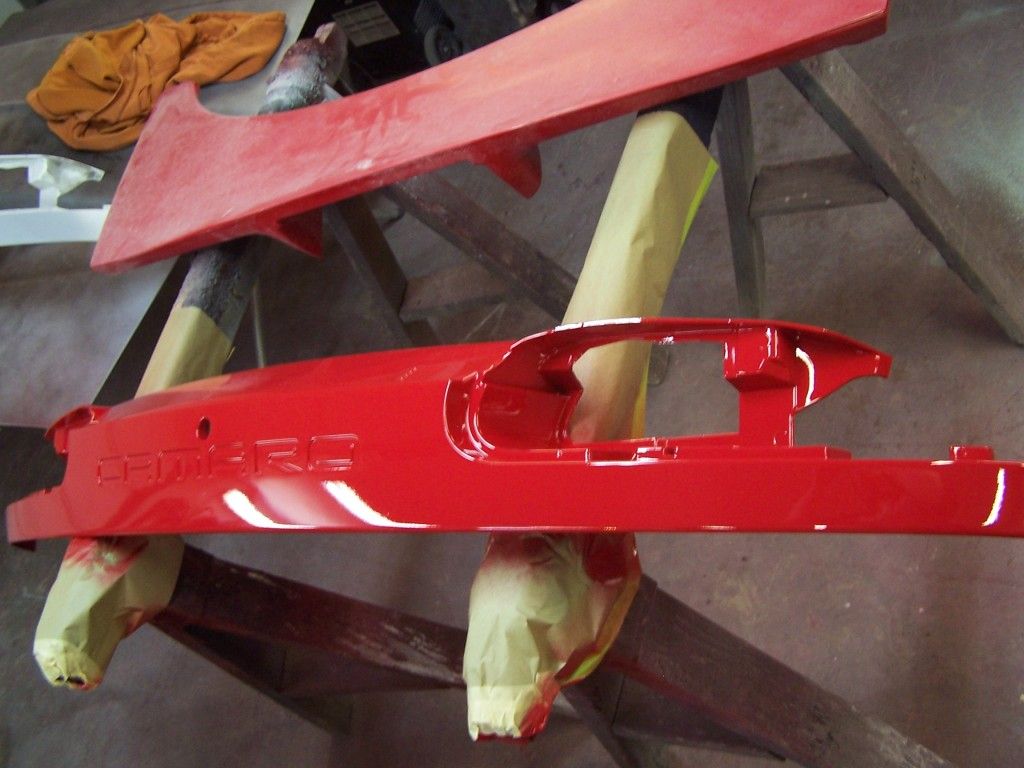
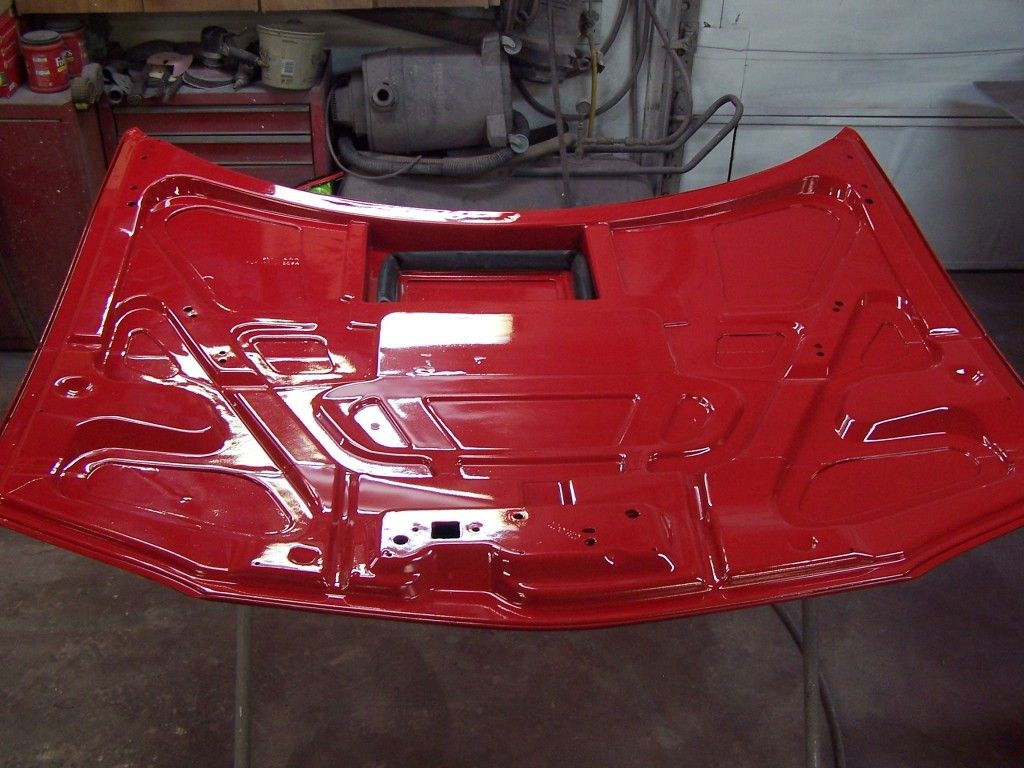
Ran out to visit the car on monday, here's a few progress pics:
Both fenders painted
Rear bumper painted
Red tail panel painted
Underside of hood painted
He was filling in the license plate holes in the front bumper when I was there, he's still got a little more work to do on it and the spoiler before shooting them with some primer. The extra tail panel is also in primer and ready to go, it'll get painted black whenever he sprays the black on the front bumper. Once everything is painted, all the body parts will get moved to the other garage so he can get started on the body of the car.. The long dent in the rocker panel needs pulled out, and there are a few small dents on one quarter panel that need a little love. Other than that, the rest of the car is pretty straight. ETA on completion is still about 2 more weeks... CAN'T WAIT!