Doing cam swap, need pointers
 02-08-2017, 06:53 PM
#1
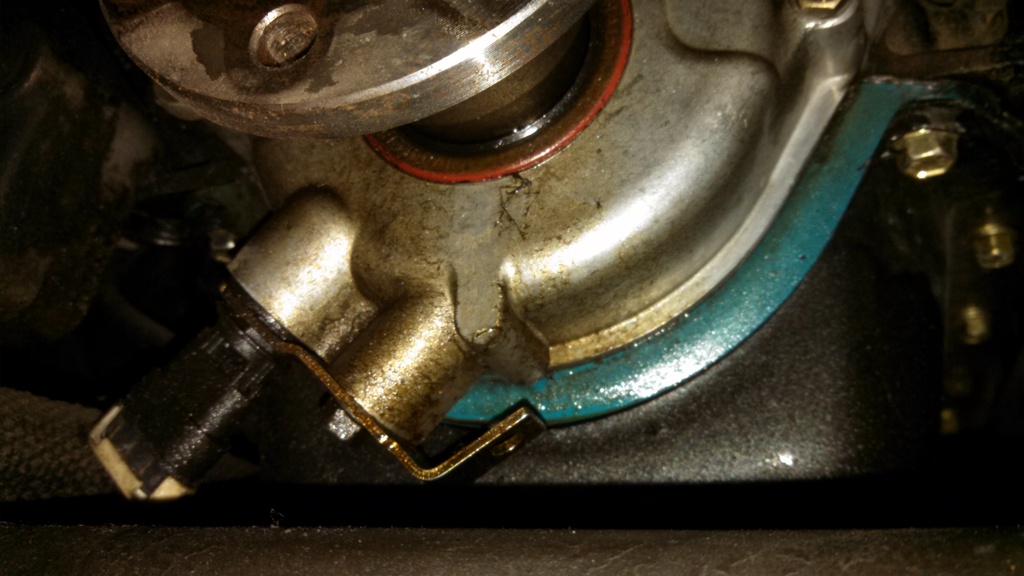
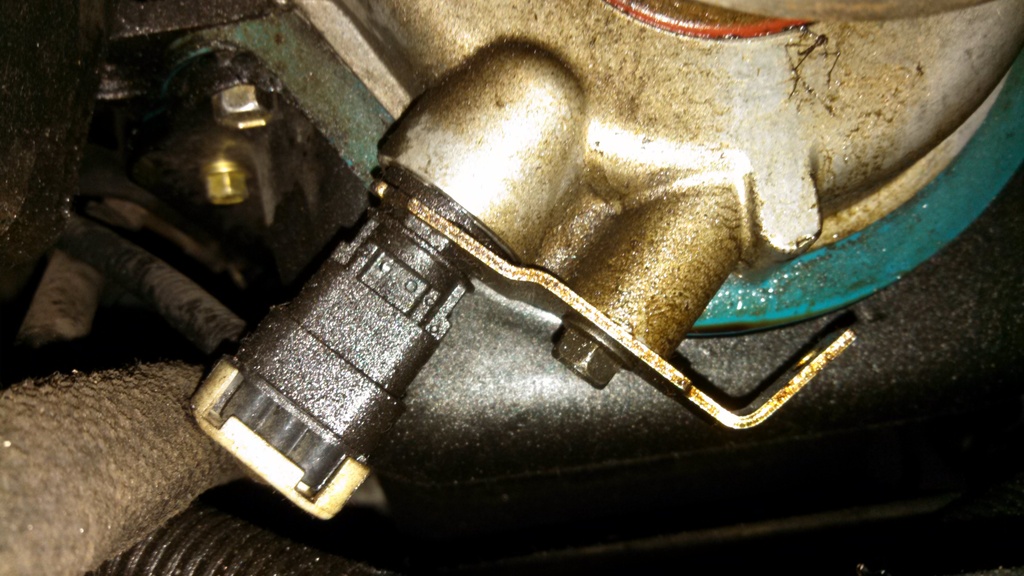
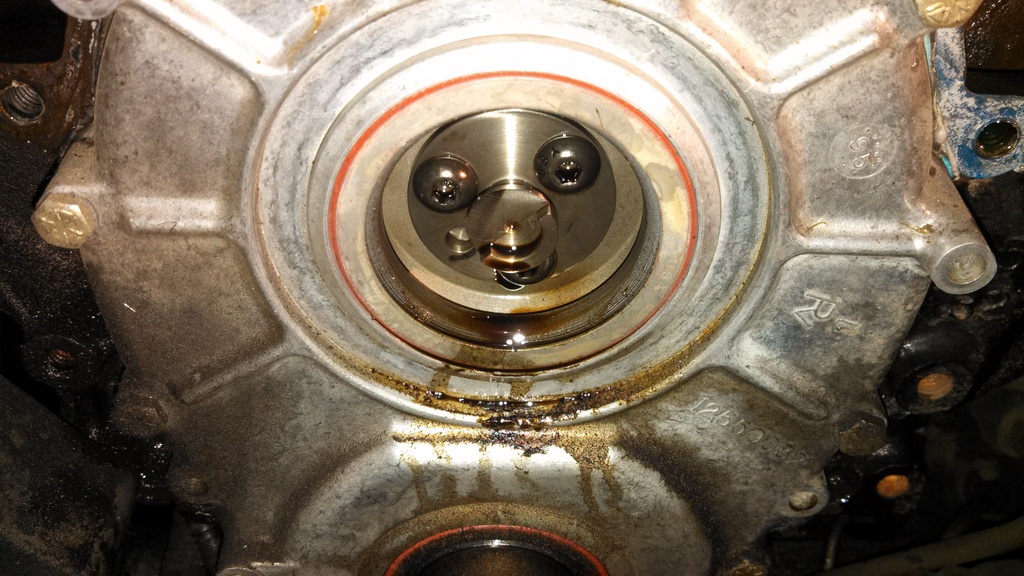
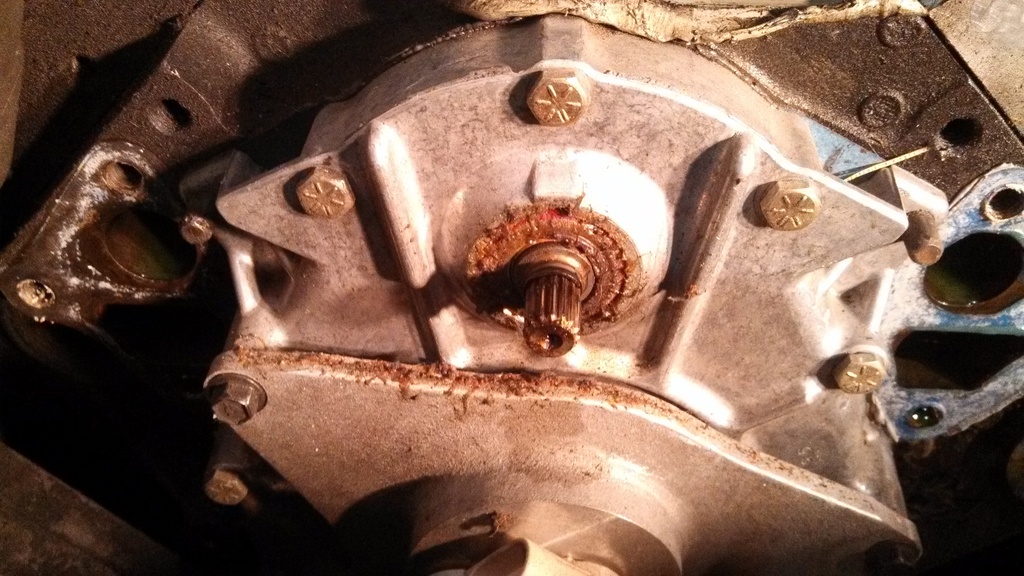
I'm following shoebox's guide which has been good so far but I'm sure I'll have questions as things move along. For now I just want to know what I screwed up during my 24x install a few years ago to cause this leaky timing cover. It looks like it's leaking from everywhere it could possibly leak from. When I installed the seals, I installed them dry on the outside with oil on the inner rings of the cam and crank seals. They all went in straight, didn't get all crooked at any point. I don't remember exactly but I think I used black RTV along the bottom of the timing cover for the oil pan. Now I'm gonna remove the pan and gasket and scrape it clean. I'm pretty sure all the gunk up by the water pump seal is grease. I read you should put grease in the coupler but it looks like that may have been bad info since it barfed it all back out. Also looks like the crank sensor is leaking.
Then when I install the new cam, Lloyd said cam lube isn't necessary for a hydraulic roller and engine oil is fine. My plan was to use brake cleaner on the cam then douse it with oil before installing. This is my first cam swap so everything's pretty new.
Then when I install the new cam, Lloyd said cam lube isn't necessary for a hydraulic roller and engine oil is fine. My plan was to use brake cleaner on the cam then douse it with oil before installing. This is my first cam swap so everything's pretty new.


 02-08-2017, 11:16 PM
#3

OP
The WP drive and Opti seal install "dry" (no oil on inner seal lip). These seals are PTFE,
The crank seal you can grease or oil
When swapping a cam in a motor I just use engine oil as Lloyd suggested. New motor builds I use assembly lube
I use acetone to wipe cam down before oiling and all motor surfaces I seal with gasket and or RTV (Permatex Black "Ultra")
02-09-2017, 05:53 AM
#4
OP
The WP drive and Opti seal install "dry" (no oil on inner seal lip). These seals are PTFE,
The crank seal you can grease or oil
When swapping a cam in a motor I just use engine oil as Lloyd suggested. New motor builds I use assembly lube
I use acetone to wipe cam down before oiling and all motor surfaces I seal with gasket and or RTV (Permatex Black "Ultra")
The WP drive and Opti seal install "dry" (no oil on inner seal lip). These seals are PTFE,
The crank seal you can grease or oil
When swapping a cam in a motor I just use engine oil as Lloyd suggested. New motor builds I use assembly lube
I use acetone to wipe cam down before oiling and all motor surfaces I seal with gasket and or RTV (Permatex Black "Ultra")
02-09-2017, 10:55 AM
#5
02-15-2017, 06:01 AM
#6
Got the new cam in and the front of the engine back on. That oil pan gasket was the worst. I don't have a hoist but I do have a tubular k-member so that afforded a little extra space. After reading about what a PITA removing/replacing the dipstick is, I said screw it and cut the inner part of the gasket to get it around the dipstick. We'll see how it holds up.
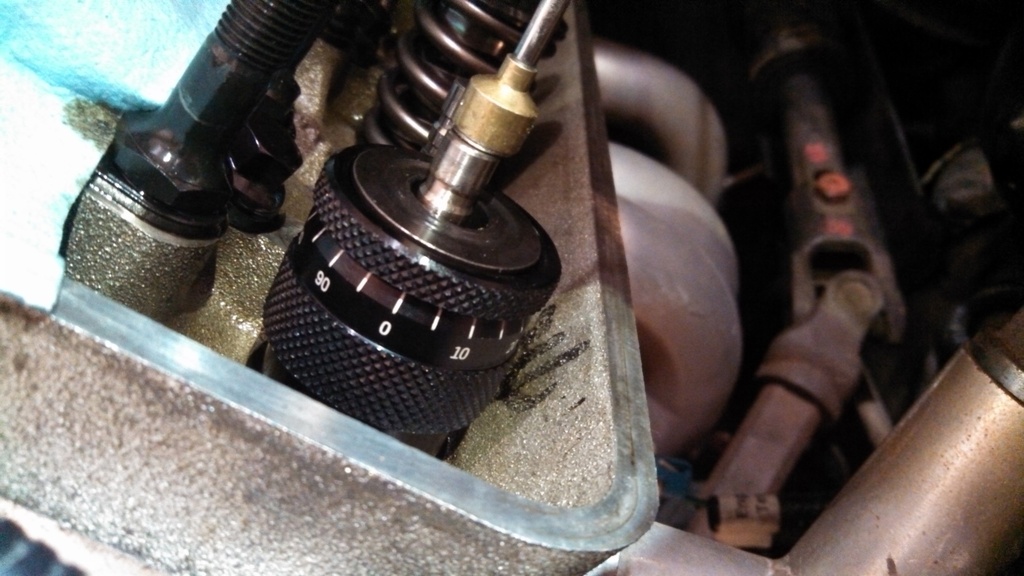
Now I've hit another hurdle. I'm attempting to change out valve springs but both of my specialty tools aren't working like I'd hoped. I called Lunati before starting all this and asked what height mic to use and I ordered the part number they gave. Now I try to use it and I can't get the locks in there. The valve stem doesn't come up high enough.
The other thing is the first valve stem seal I put on. I oiled it up, pressed it on by hand, then used a 12mm socket to hammer it the rest of the way. But now the little spring look like this:
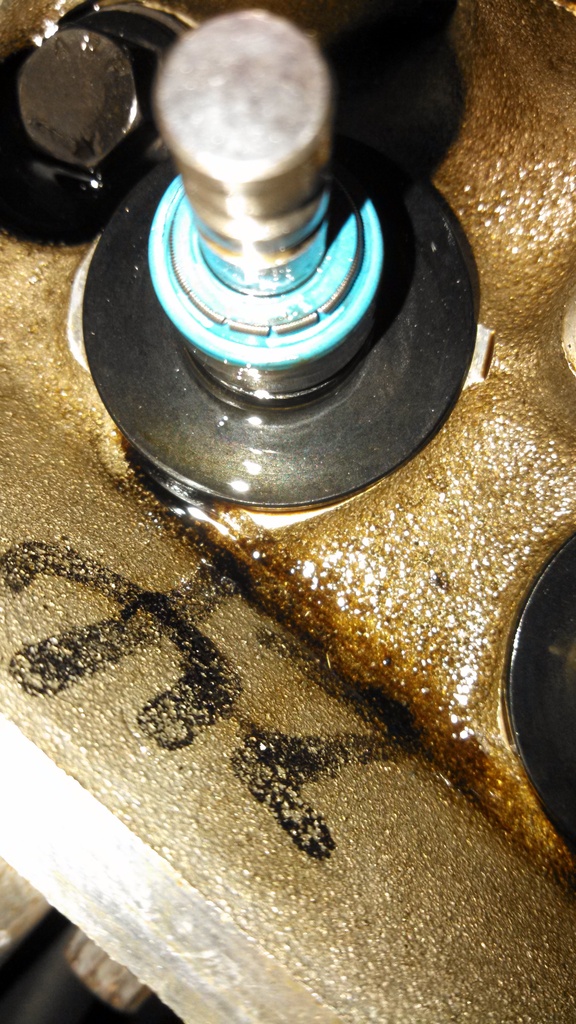
Is that one toast?
Then while using my Crane Cams spring compressor, the springs must be squished against the valve stem or something because just like the height mic, I can't get the locks in there. This time it's because the valve is stuck, it won't move when the springs are fully compressed so I can't pull it up.
To make matters worse, when I was trying to remove the tool, the nut must've stripped or something because now it's stuck on the stud!
Now I've hit another hurdle. I'm attempting to change out valve springs but both of my specialty tools aren't working like I'd hoped. I called Lunati before starting all this and asked what height mic to use and I ordered the part number they gave. Now I try to use it and I can't get the locks in there. The valve stem doesn't come up high enough.

The other thing is the first valve stem seal I put on. I oiled it up, pressed it on by hand, then used a 12mm socket to hammer it the rest of the way. But now the little spring look like this:

Is that one toast?
Then while using my Crane Cams spring compressor, the springs must be squished against the valve stem or something because just like the height mic, I can't get the locks in there. This time it's because the valve is stuck, it won't move when the springs are fully compressed so I can't pull it up.
To make matters worse, when I was trying to remove the tool, the nut must've stripped or something because now it's stuck on the stud!
Last edited by AdsoYo; 02-15-2017 at 10:05 AM.
02-15-2017, 10:54 AM
#7
IDK what spring height tool you used but it should "adjust" down enough to allow you to put locks on valve stem then tighten it up by hand to see what the height is. If it is .xxx over the desired installed height you add shims under the spring locator = whatever .xxx was as close as possible. Example: if the measure tool says 1.825" and you want 1.800" you use two .010 and one .005 shims under the locator (or any combination of shim thickness that gets you .025). You use the tool without the valve stem seal as you will need to remove the locator to get the shims under it. Then you use a deep socket that lands on the outside edge of seal so it is not hitting that spring. Then just "tap" it in with a small hammer to set it all the way.
On the one with the broken spring around the seal...its toast. After pushing a seal on by hand (first oil inside of it and outside of valve stem guide) use the correct size deep socket to gently tap it in all the way. Most auto part stores have FelPro valve stem seals if you need to buy more
Can't help you on striping the crane tool bolt but obviously you will need to FIO to get it off. I have used my Crane valve spring compressor several times and it works great. I did drill out the stock 3/8" hole to 7/16" as I have the larger RR studs
You also need to pull the valve stem "up" by hand as it does drop about 1/4" if you are using the bring the piston up to TDC method. If using air it will be held up all the way
A small pencil magnet is very helpful in pulling the valve stem tip up with the height tool on it. stuff rags or paper towels in every crevice around the heads. You don't want to drop a lock down into the engine...
Trending Topics
02-16-2017, 10:24 AM
#8
IDK what spring height tool you used but it should "adjust" down enough to allow you to put locks on valve stem then tighten it up by hand to see what the height is. If it is .xxx over the desired installed height you add shims under the spring locator = whatever .xxx was as close as possible. Example: if the measure tool says 1.825" and you want 1.800" you use two .010 and one .005 shims under the locator (or any combination of shim thickness that gets you .025). You use the tool without the valve stem seal as you will need to remove the locator to get the shims under it. Then you use a deep socket that lands on the outside edge of seal so it is not hitting that spring. Then just "tap" it in with a small hammer to set it all the way.
https://www.summitracing.com/parts/pow-pow101200
I do pull up on the valve with a magnet but there still isn't enough room to get the locks in. With the springs, I had to compress them as far as the tool would allow to barely get the locks on. The other valve was stuck and I couldn't pull it up with the magnet to get the locks in so I had to bail. Once I released the tool, the valves would move again.
02-16-2017, 12:14 PM
#9
that valve spring height tool goes down to 1.6"....should EASILY allow enough room to put locks in then adjust up to see what the height is. If more than the intended installed height of spring you then just put in that difference in shims under the spring locator then put locator back on then valve stem seal then spring then retainer then locks.
IDK what is going on with how you are using this spring height tool but it should easily work in getting your spring heights measured
On the spring compressor tool, IDK why you are getting some kind of spring bind against the valve stem not allowing it to come up high enough. I have used my crane tool on several spring types (bee hive, single & double springs)
02-17-2017, 08:48 AM
#10
Success! I went to the hardware store and got a new threaded rod and grade 8 nuts and that did the trick. Also did some more grinding on the rocker stud holes so the tool fits more easily since it was still kind of tight after my first round with the dremel, mine are 7/16 as well.
I don't know what I was doing wrong before with the height mic but it's working great now too. These springs call for an installed height of 1.780 and I'm getting mostly 1.775. The farthest out has been 1.762. Is that far enough off to require attention? What would I even do for that?
I don't know what I was doing wrong before with the height mic but it's working great now too. These springs call for an installed height of 1.780 and I'm getting mostly 1.775. The farthest out has been 1.762. Is that far enough off to require attention? What would I even do for that?
02-17-2017, 10:14 AM
#11
02-19-2017, 11:30 AM
#12
Cool thanks. I've almost got everything back together. When I finished up the springs I got a new low number of 1.755, still ok?
Also have a question about zero lash and preload. I got the impression after reading various guides and threads that finding zero lash is super important because of the consequences of having the rockers too tight or too loose. I used the method involving twisting the push rod while tightening the rocker nut. The point of zero lash seems like it's basically when the nut itself hits resistance. I do feel the push rod hit resistance before that point, but it's maybe 1/16 of a turn. And people talk about setting preload with everything from 1/8th-1 turn. Just seems like in reality finding zero lash and setting preload is far from an exact science. Like you'd really have to jack this process up bad to fall outside the acceptable preload range. I went 1/4 turn after zero lash and the nut seemed to get fairly tight. People who go half to 1 full turn must really crank it down.
Also have a question about zero lash and preload. I got the impression after reading various guides and threads that finding zero lash is super important because of the consequences of having the rockers too tight or too loose. I used the method involving twisting the push rod while tightening the rocker nut. The point of zero lash seems like it's basically when the nut itself hits resistance. I do feel the push rod hit resistance before that point, but it's maybe 1/16 of a turn. And people talk about setting preload with everything from 1/8th-1 turn. Just seems like in reality finding zero lash and setting preload is far from an exact science. Like you'd really have to jack this process up bad to fall outside the acceptable preload range. I went 1/4 turn after zero lash and the nut seemed to get fairly tight. People who go half to 1 full turn must really crank it down.
02-19-2017, 02:31 PM
#13
I prefer the "no more up/down movement of push rod" vs the "spin until you feel resistance" method
basically just using your fingers on the poly lock tighten until there is no more up/down movement of PR. Then turn 1/2 to 3/4 of a turn pre-load.
The RR will feel tight....but after a few minutes and rotating motor to do other valves that lifter will bleed off some and the RR feel lose. Don't touch it. The lifter will pump up once you start the motor
You want to rotate the motor by hand until the valve you are adjusting is on the base circle of the cam then set zero lash, then pre-load.
the 1.755 height is not a problem. You are not building a $100k race motor
02-21-2017, 02:17 PM
#14
Today was the first start and it fired right up! Thank you ****** for all the help, much appreciated.
Now that it's running I have a problem. The car just couldn't cooperate, oh no.
My wideband is pegged as lean as it will go: 16 afr. The exhaust burned my throat and eyes. The narrowbands show about 200mv each. Fuel pressure at 58 psi where I want it. Injector pulse is 4ms which is about right. Has me thinking an injector is stuck after not being run for 4 months. I was able to get the afr down but that involved adding a ton of fuel using the open loop table, maf curve, and injector tables. Also thought it could be a vacuum leak but I double checked everything and it's all hooked up. The car isn't shaking like it has a miss. Any ideas?
Last edited by AdsoYo; 02-21-2017 at 03:29 PM.


 02-22-2017, 08:09 AM
#16
On The Tree

Join Date: Apr 2013
Location: Utica, IL
Posts: 179
Likes: 0
Received 0 Likes
on
0 Posts

I'm not an expert on tuning, but it seems weird that it is running lean but the exhaust is burning your eyes. Do you have all of your sensors hooked up, especially the coolant temp? I know when I first fired mine a couple rebuilds ago I did not have the coolant temp at the water pump hooked up and the exhaust would burn my eyes.
Also, I know nothing about HP tuners, but are you sure your wideband O2 is setup correctly in there? I know with the older datamaster program you have to have the offset setup right or your readings will be off. Just an idea.
Also, I know nothing about HP tuners, but are you sure your wideband O2 is setup correctly in there? I know with the older datamaster program you have to have the offset setup right or your readings will be off. Just an idea.
02-22-2017, 10:35 AM
#17
All sensors are hooked up and working as far as I can tell. I'll recalibrate the wideband but the narrowbands are backing it up by also reading lean. I went over the engine again and don't see any open vacuum ports. I tested the injectors and they all click like they're supposed to. Also cleaned the MAF just in case. I'm going to load up an old tune that had the car running slightly rich before and just let it warm up to operating temp, lean or not. Am I taking a risk by letting it idle this lean for a few minutes?
EDIT: Idled it up to operating temp and it stayed lean the whole time. I opened VCM controls to manually fatten the mixture while the car was idling. I lowered it down to 10 before the narrowbands finally got to +/- 500mv, wideband still read 15.80. I still need to calibrate it. At that point the fumes started burning my throat again so I set it back to 14.7. It looked like raw fuel may have been sputtering out the tailpipes. Something funky is going on.
EDIT: Idled it up to operating temp and it stayed lean the whole time. I opened VCM controls to manually fatten the mixture while the car was idling. I lowered it down to 10 before the narrowbands finally got to +/- 500mv, wideband still read 15.80. I still need to calibrate it. At that point the fumes started burning my throat again so I set it back to 14.7. It looked like raw fuel may have been sputtering out the tailpipes. Something funky is going on.
Last edited by AdsoYo; 02-22-2017 at 12:06 PM.
02-23-2017, 03:37 PM
#18
Well I increased the MAF curve by 25% and enable closed loop. Car was a little rich warming up and once closed loop kicked in, the O2's were able to keep things in line. Car drives great! Thanks again ******, you were a huge factor in this project's success.

