QuickTime Bellhousing/Scatter Shield Install w/ Pics
 06-03-2009, 09:35 PM
#1
11 Second Club
Thread Starter
iTrader: (7)
Join Date: Jul 2002
Location: MA
Posts: 999
Likes: 0
Received 0 Likes
on
0 Posts
Well the time has come to install a new clutch on my 2004 GTO with 20,653 miles on it. This is the second aftermarket clutch but the first Brand New clutch that I am installing. The latest was a seven year old Spec 3, six puck with steel flywheel... it got me 22-23K+ miles of severe abuse between my 2000 Trans Am and my 2004 GTO. Anyhow.. time to move on, Monster Stage 3 with Steel Flywheel, TickShift remote speedbleeder and QUICKTIME Bellhousing to be installed.
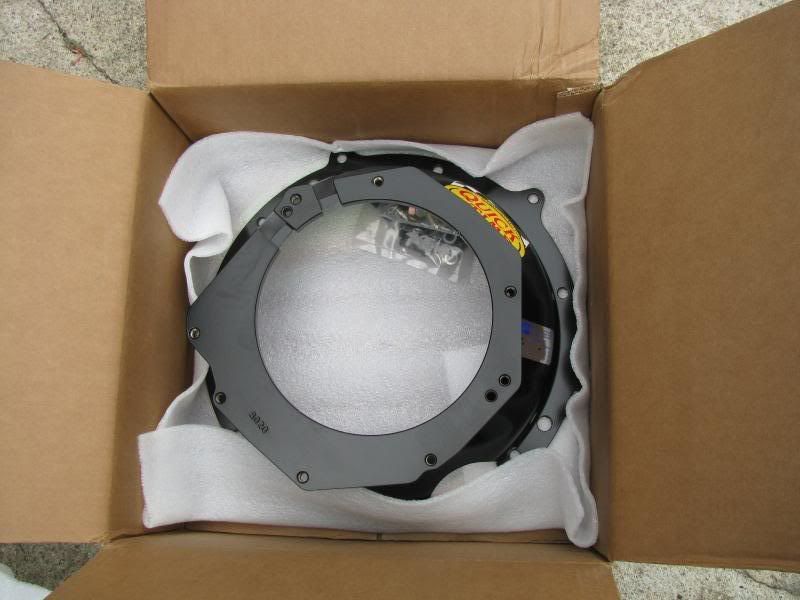
Got the parts today and started fitting my QuickTime bellhousing (part #RM-8020, LS1 to T56)
Pulled it from the box to inspect:
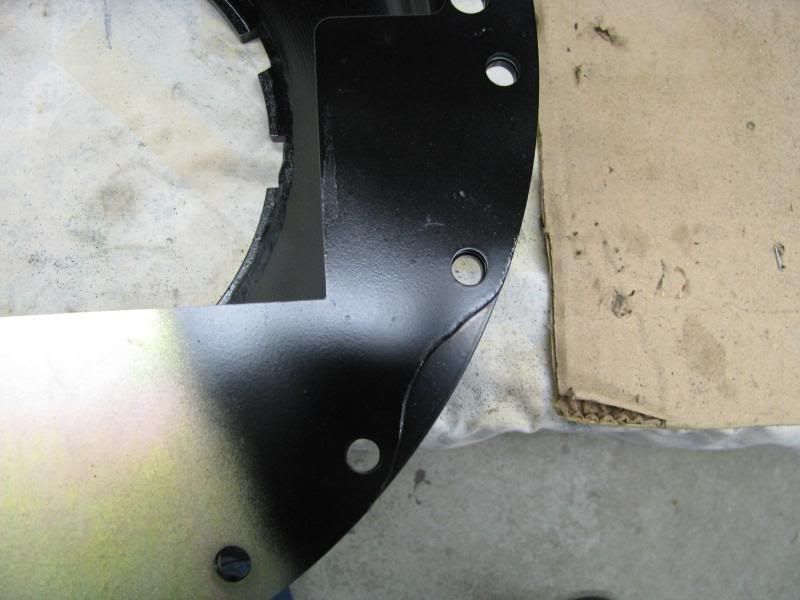
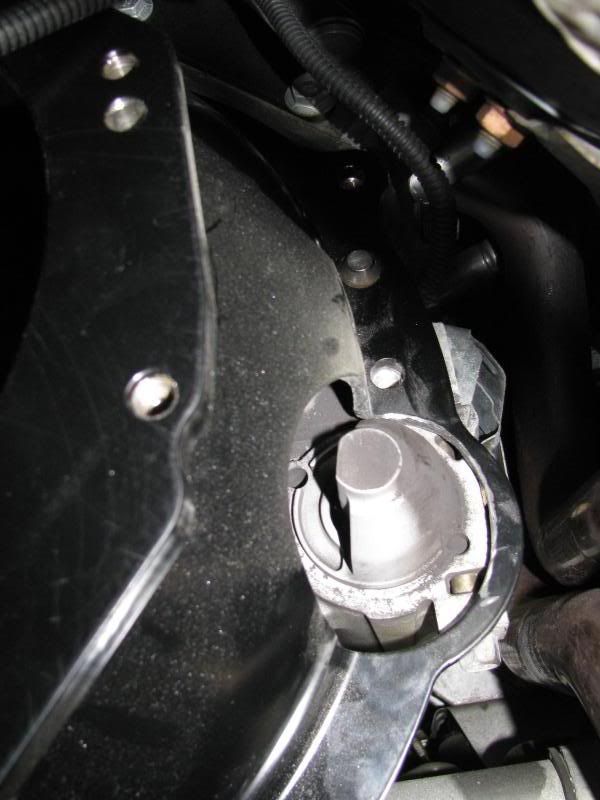
Then got right to work, first with the block plate: holding it up to the block, on the aligning dowels and marking with a Sharpie a rough area of where I had to grind for clearance of the Driver's side header and around the starter.
This was really easy using a 4" angle grinder with a used grinding wheel about 2.5-2.75" diameter, a new 4" wheel would be fine as well but I could get in the starter hole better with the smaller wheel. I then finish ground it with a dremel tool and painted the bare metal with black Rustoleum. I just kept checking for good clearance and fitment while grinding a little bit at a time so it would not be sloppy, I left probably 1/4-3/8" of clearance near the header for exhaust movement and no chance of rubbing vibration.
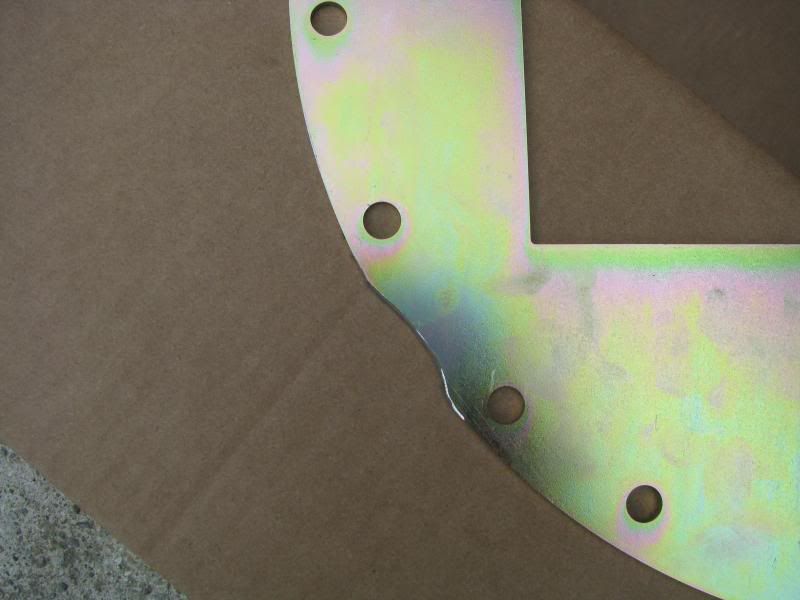
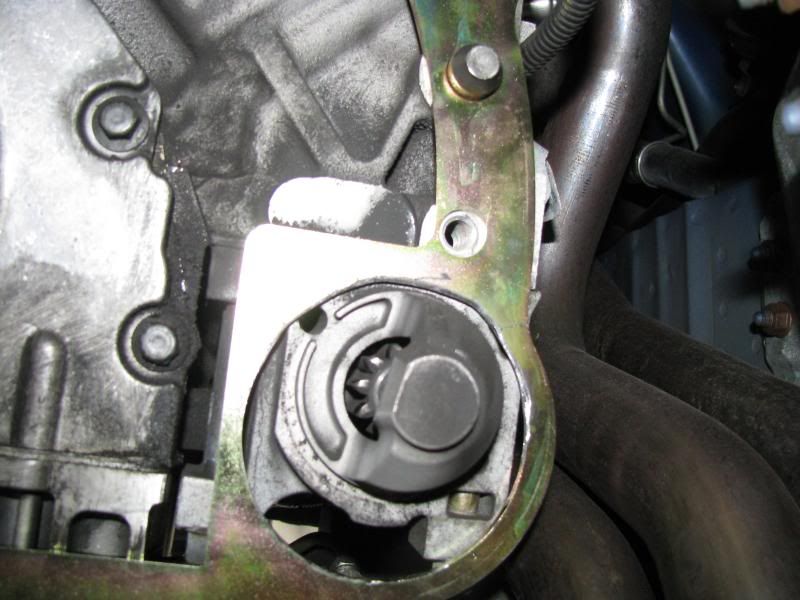
You can obviously see where the block plate needed to be notched for the header and then clearanced for fitment on the top of the starter.
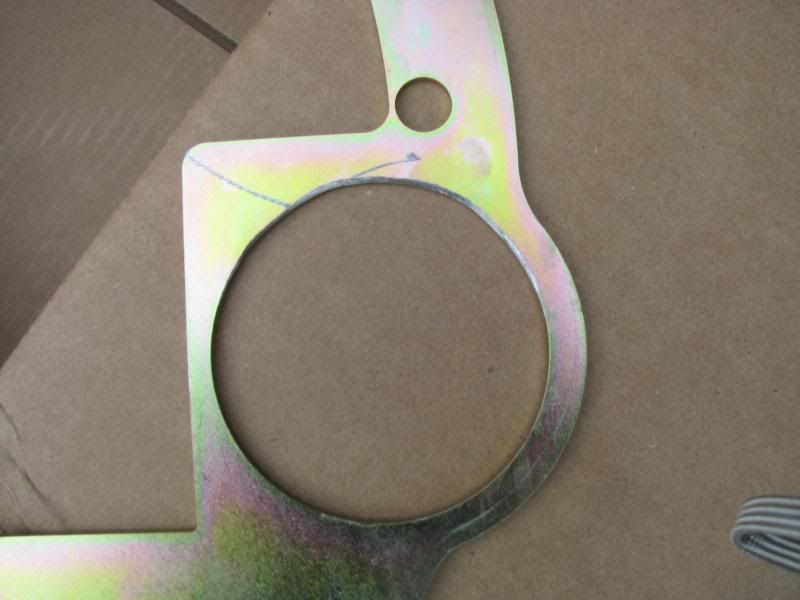
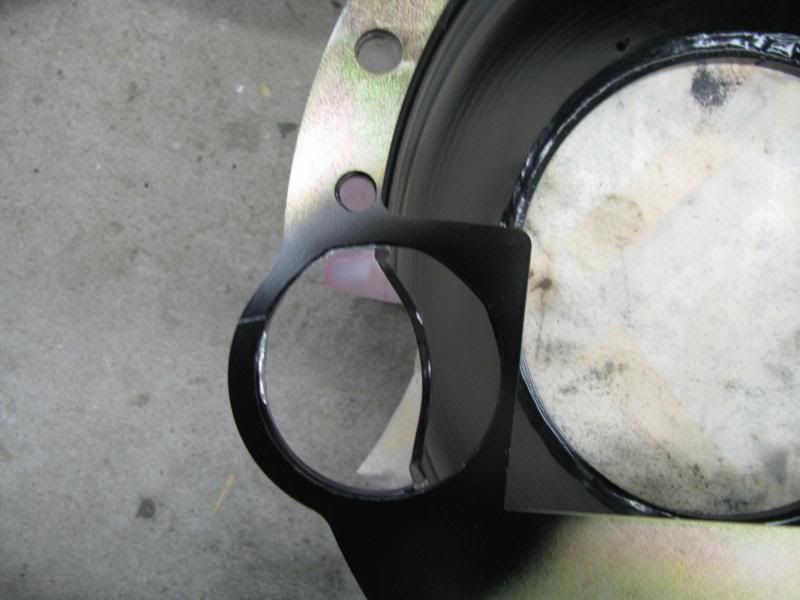
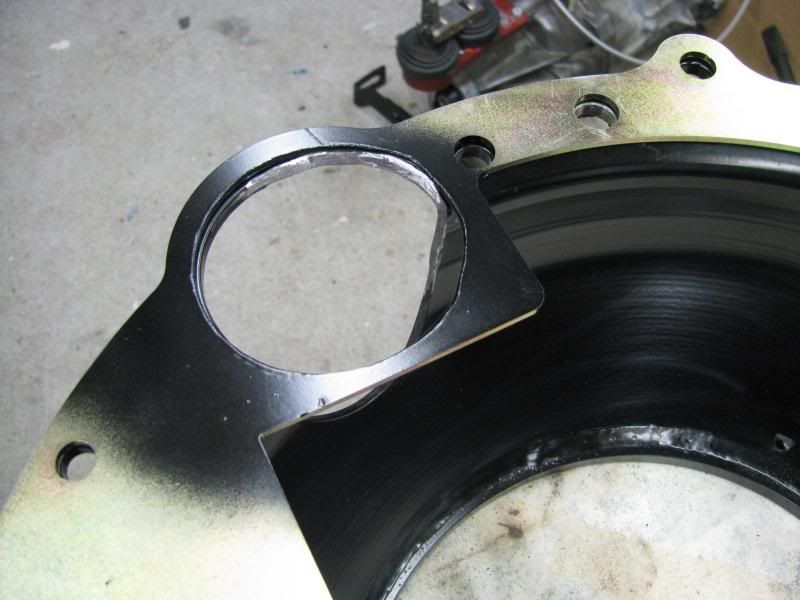
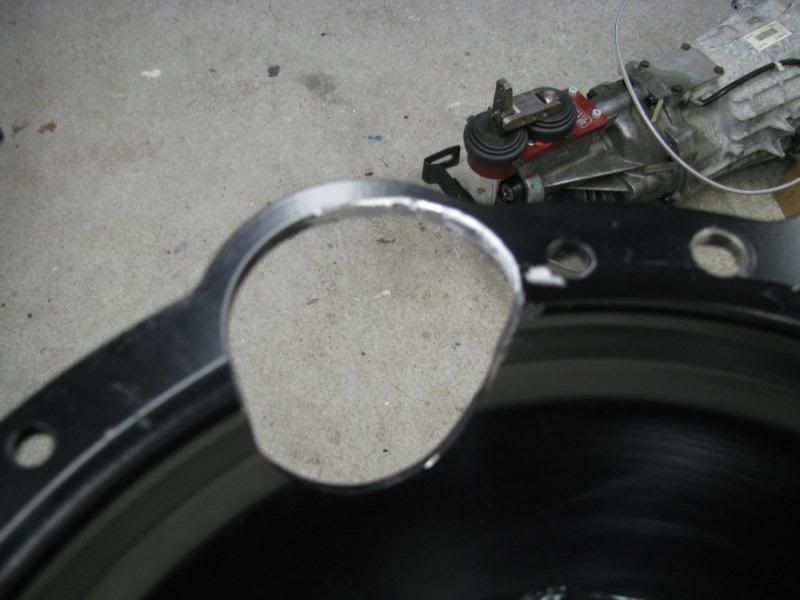
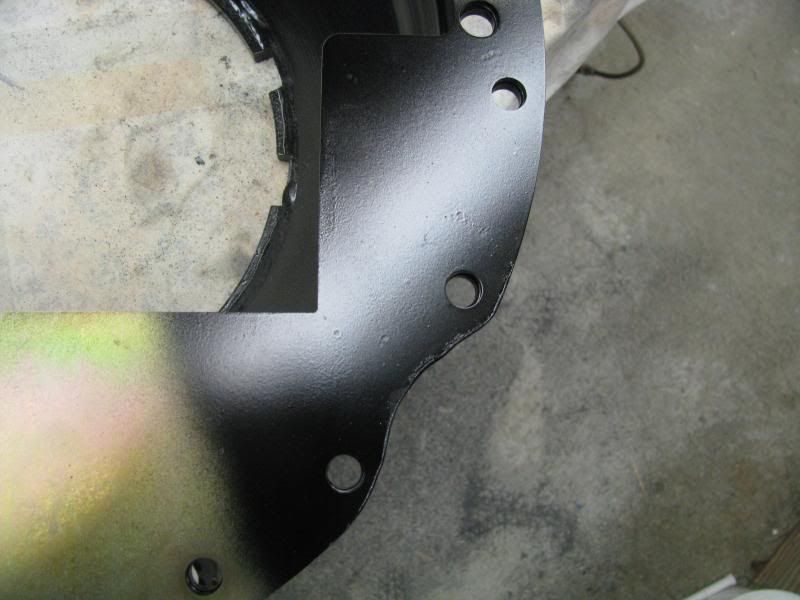
Once I got it to a fit I was satisfied with, I used the block plate as a "template" to mark the areas to be ground, on the bellhousing. Using the marker again I drew lines for guidance, then had at it with the grinder:
With the block plate, holes aligned on top of the bellhousing I could make the marks (at this point I had already painted the bare metal on the block plate but you can see the shape difference).
Got the parts today and started fitting my QuickTime bellhousing (part #RM-8020, LS1 to T56)
Pulled it from the box to inspect:
Then got right to work, first with the block plate: holding it up to the block, on the aligning dowels and marking with a Sharpie a rough area of where I had to grind for clearance of the Driver's side header and around the starter.
This was really easy using a 4" angle grinder with a used grinding wheel about 2.5-2.75" diameter, a new 4" wheel would be fine as well but I could get in the starter hole better with the smaller wheel. I then finish ground it with a dremel tool and painted the bare metal with black Rustoleum. I just kept checking for good clearance and fitment while grinding a little bit at a time so it would not be sloppy, I left probably 1/4-3/8" of clearance near the header for exhaust movement and no chance of rubbing vibration.
You can obviously see where the block plate needed to be notched for the header and then clearanced for fitment on the top of the starter.
Once I got it to a fit I was satisfied with, I used the block plate as a "template" to mark the areas to be ground, on the bellhousing. Using the marker again I drew lines for guidance, then had at it with the grinder:
With the block plate, holes aligned on top of the bellhousing I could make the marks (at this point I had already painted the bare metal on the block plate but you can see the shape difference).
 06-03-2009, 09:36 PM
#2
11 Second Club
Thread Starter
iTrader: (7)
Join Date: Jul 2002
Location: MA
Posts: 999
Likes: 0
Received 0 Likes
on
0 Posts
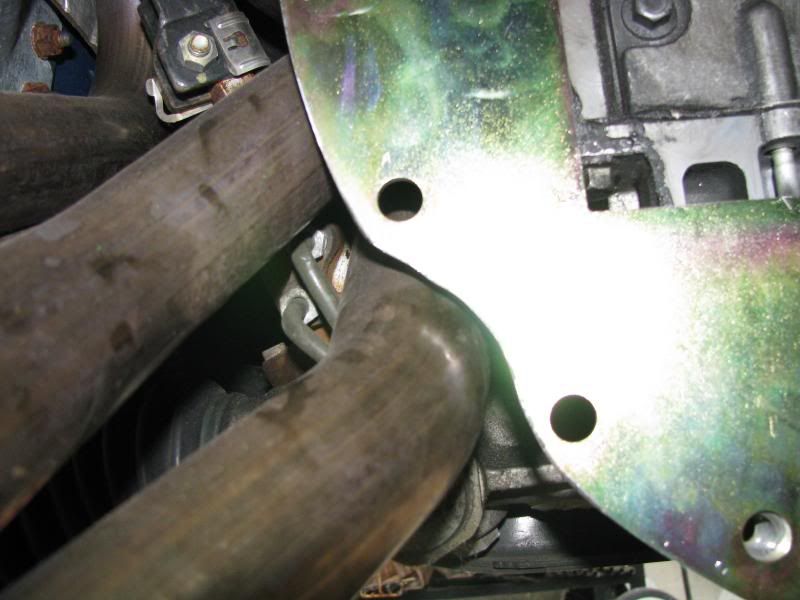
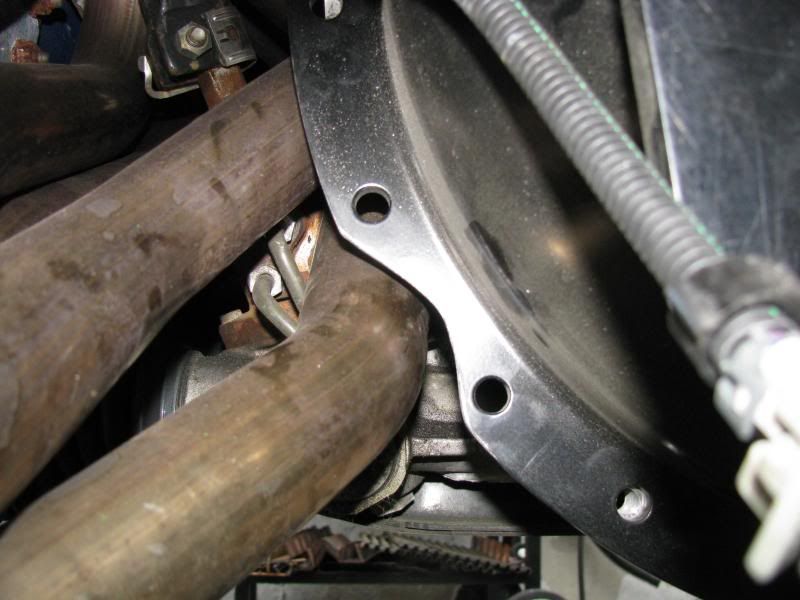
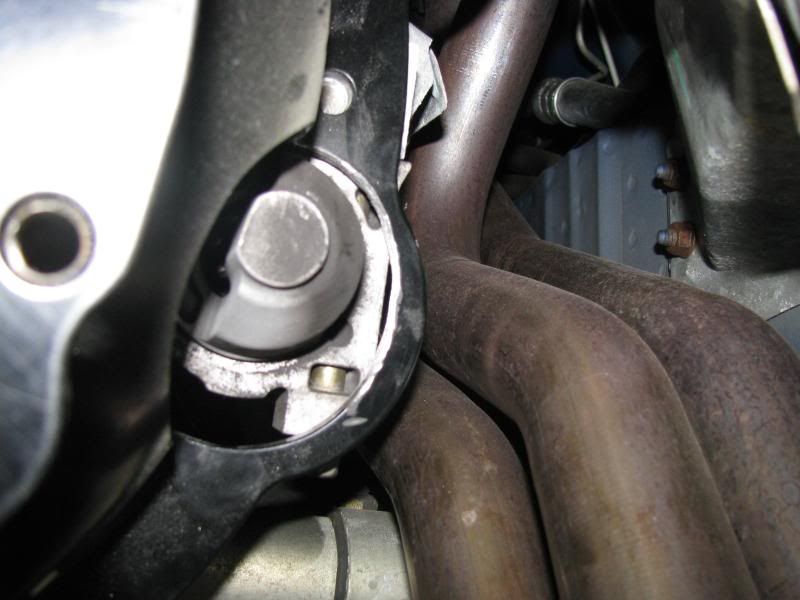
Fitment check on the car until satisfied:
Then of course I sprayed the bare metal on the bellhousing and it's drying over night, until tomorrow or Friday when the weather is good enough to get back outside and finish the install.
I will post pictures of the final product with everything installed...
Hope this helps clear things up for those on the fence about buying a SFI approved Bellhousing/Scatter shield.
Todd


