
2000 Durango SLT 4x4 LS Swap-Build thread
 09-21-2015, 08:57 AM
#1


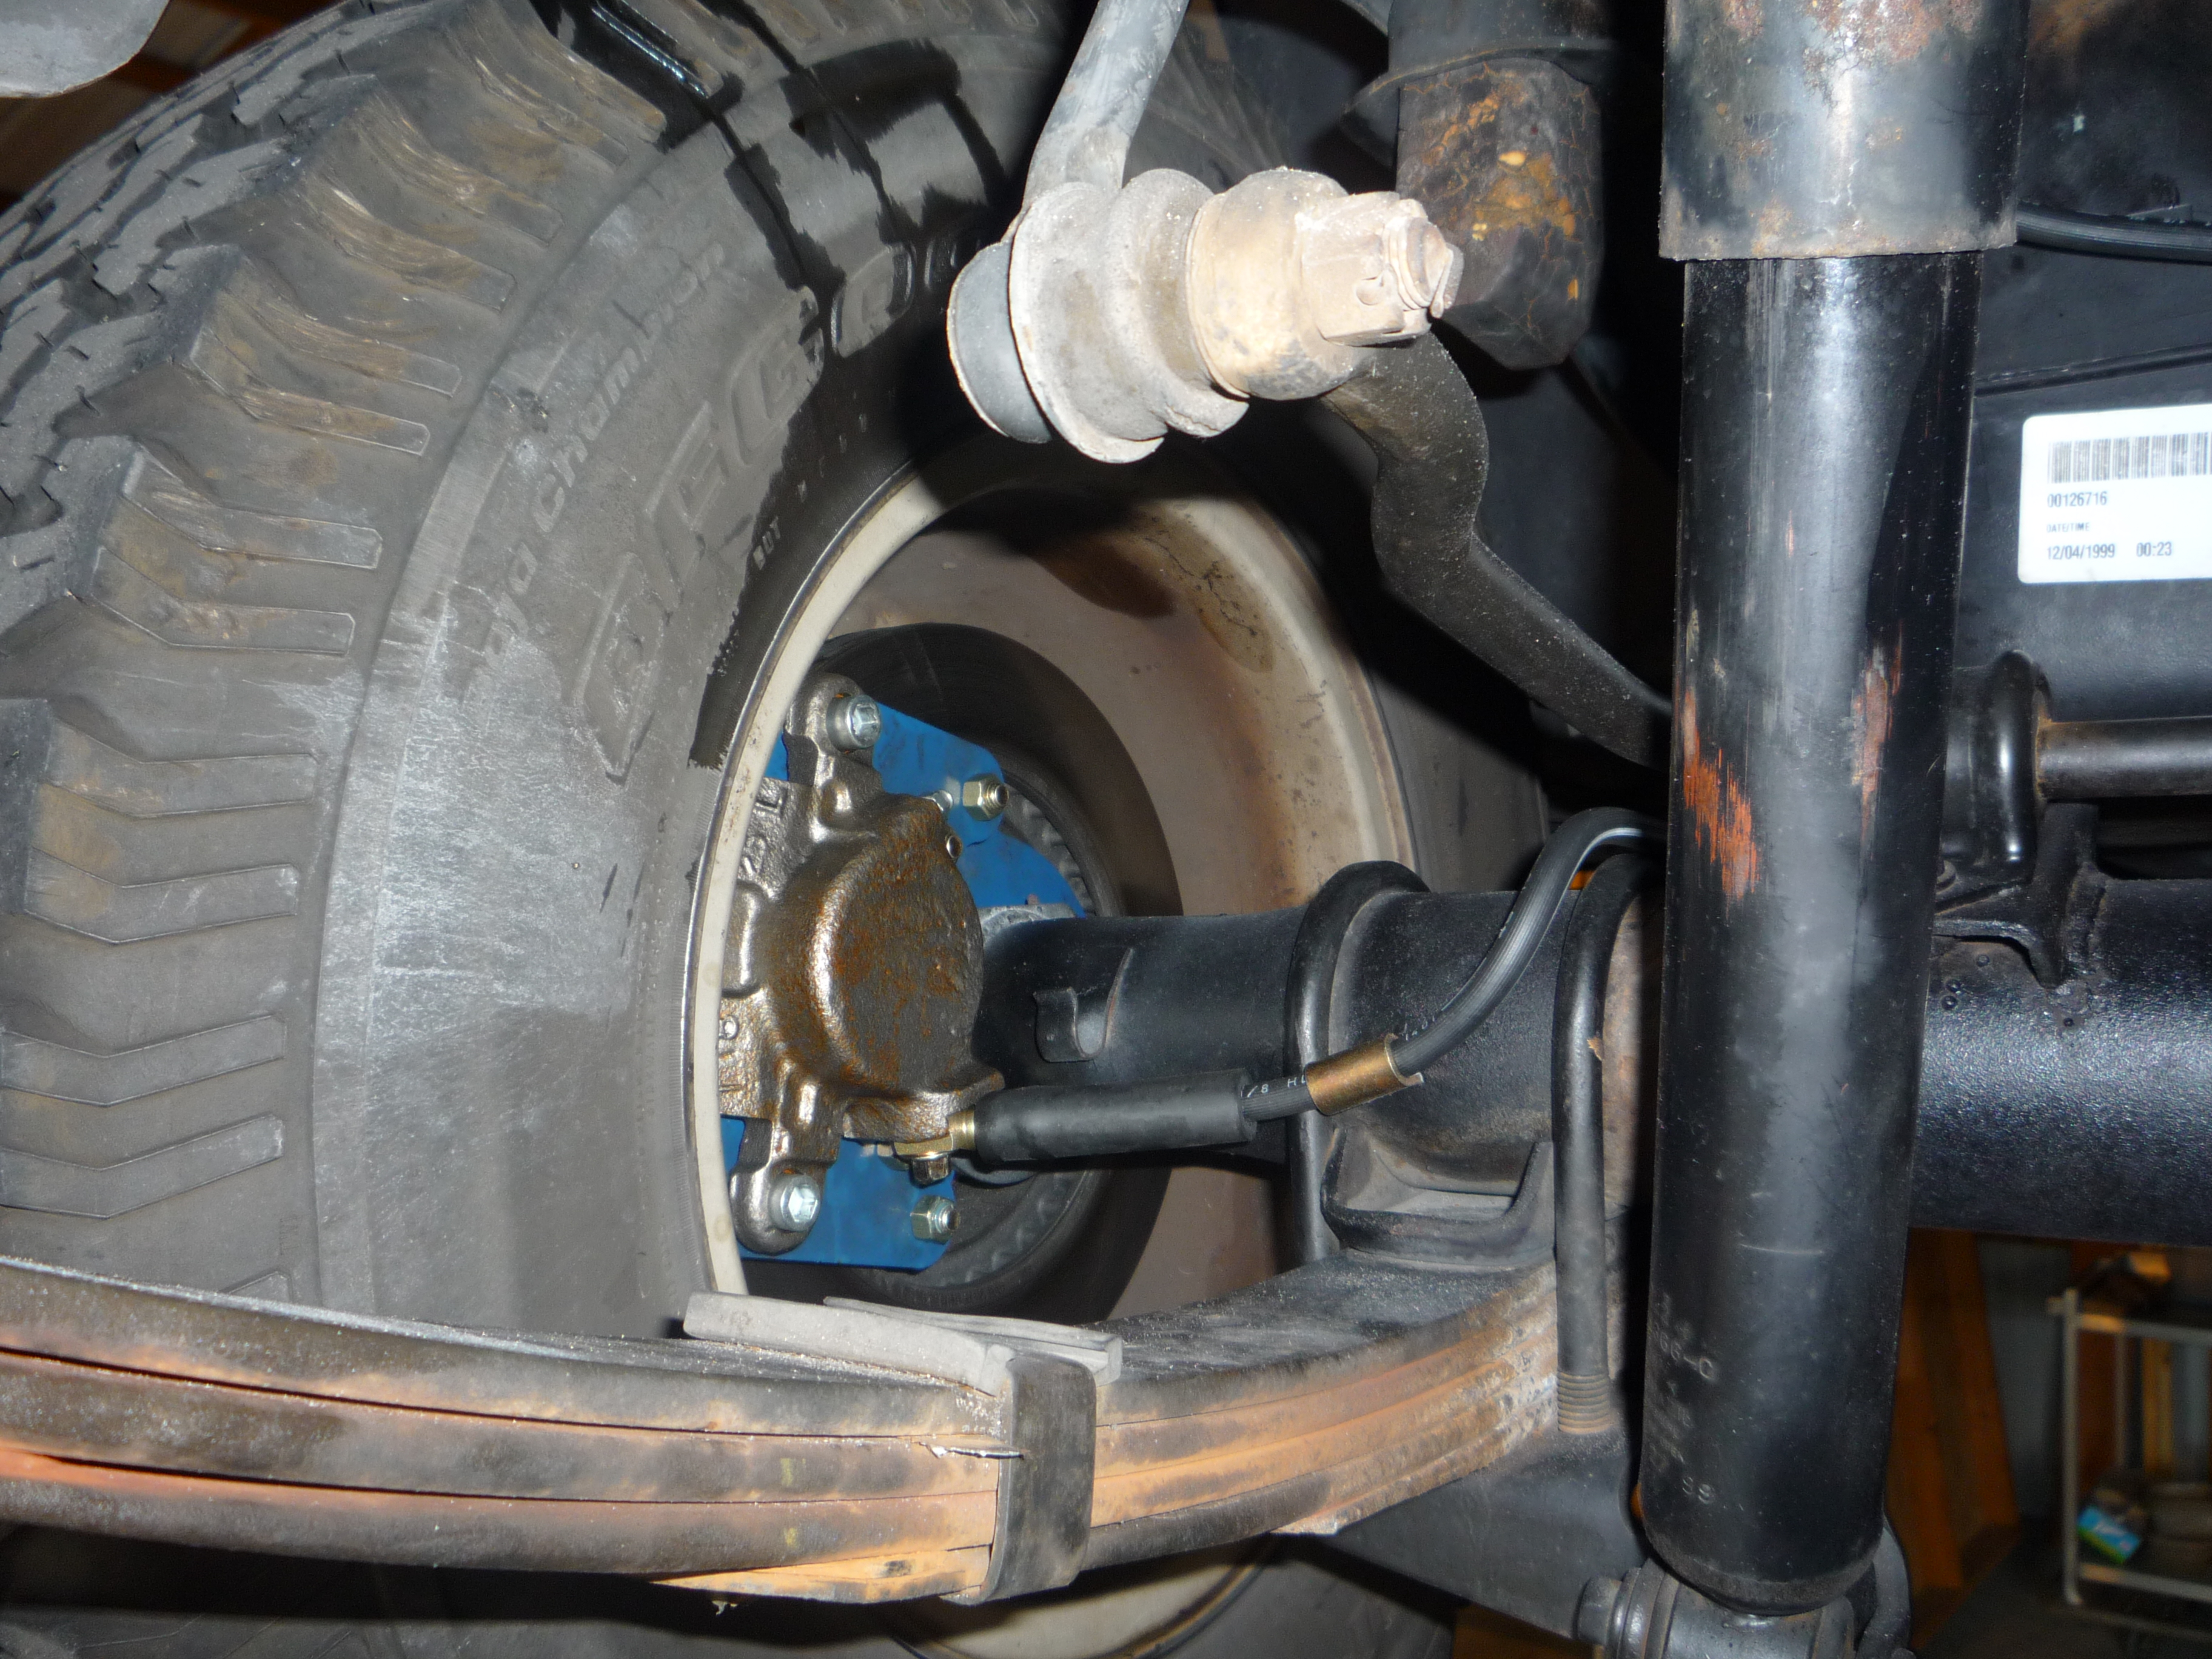
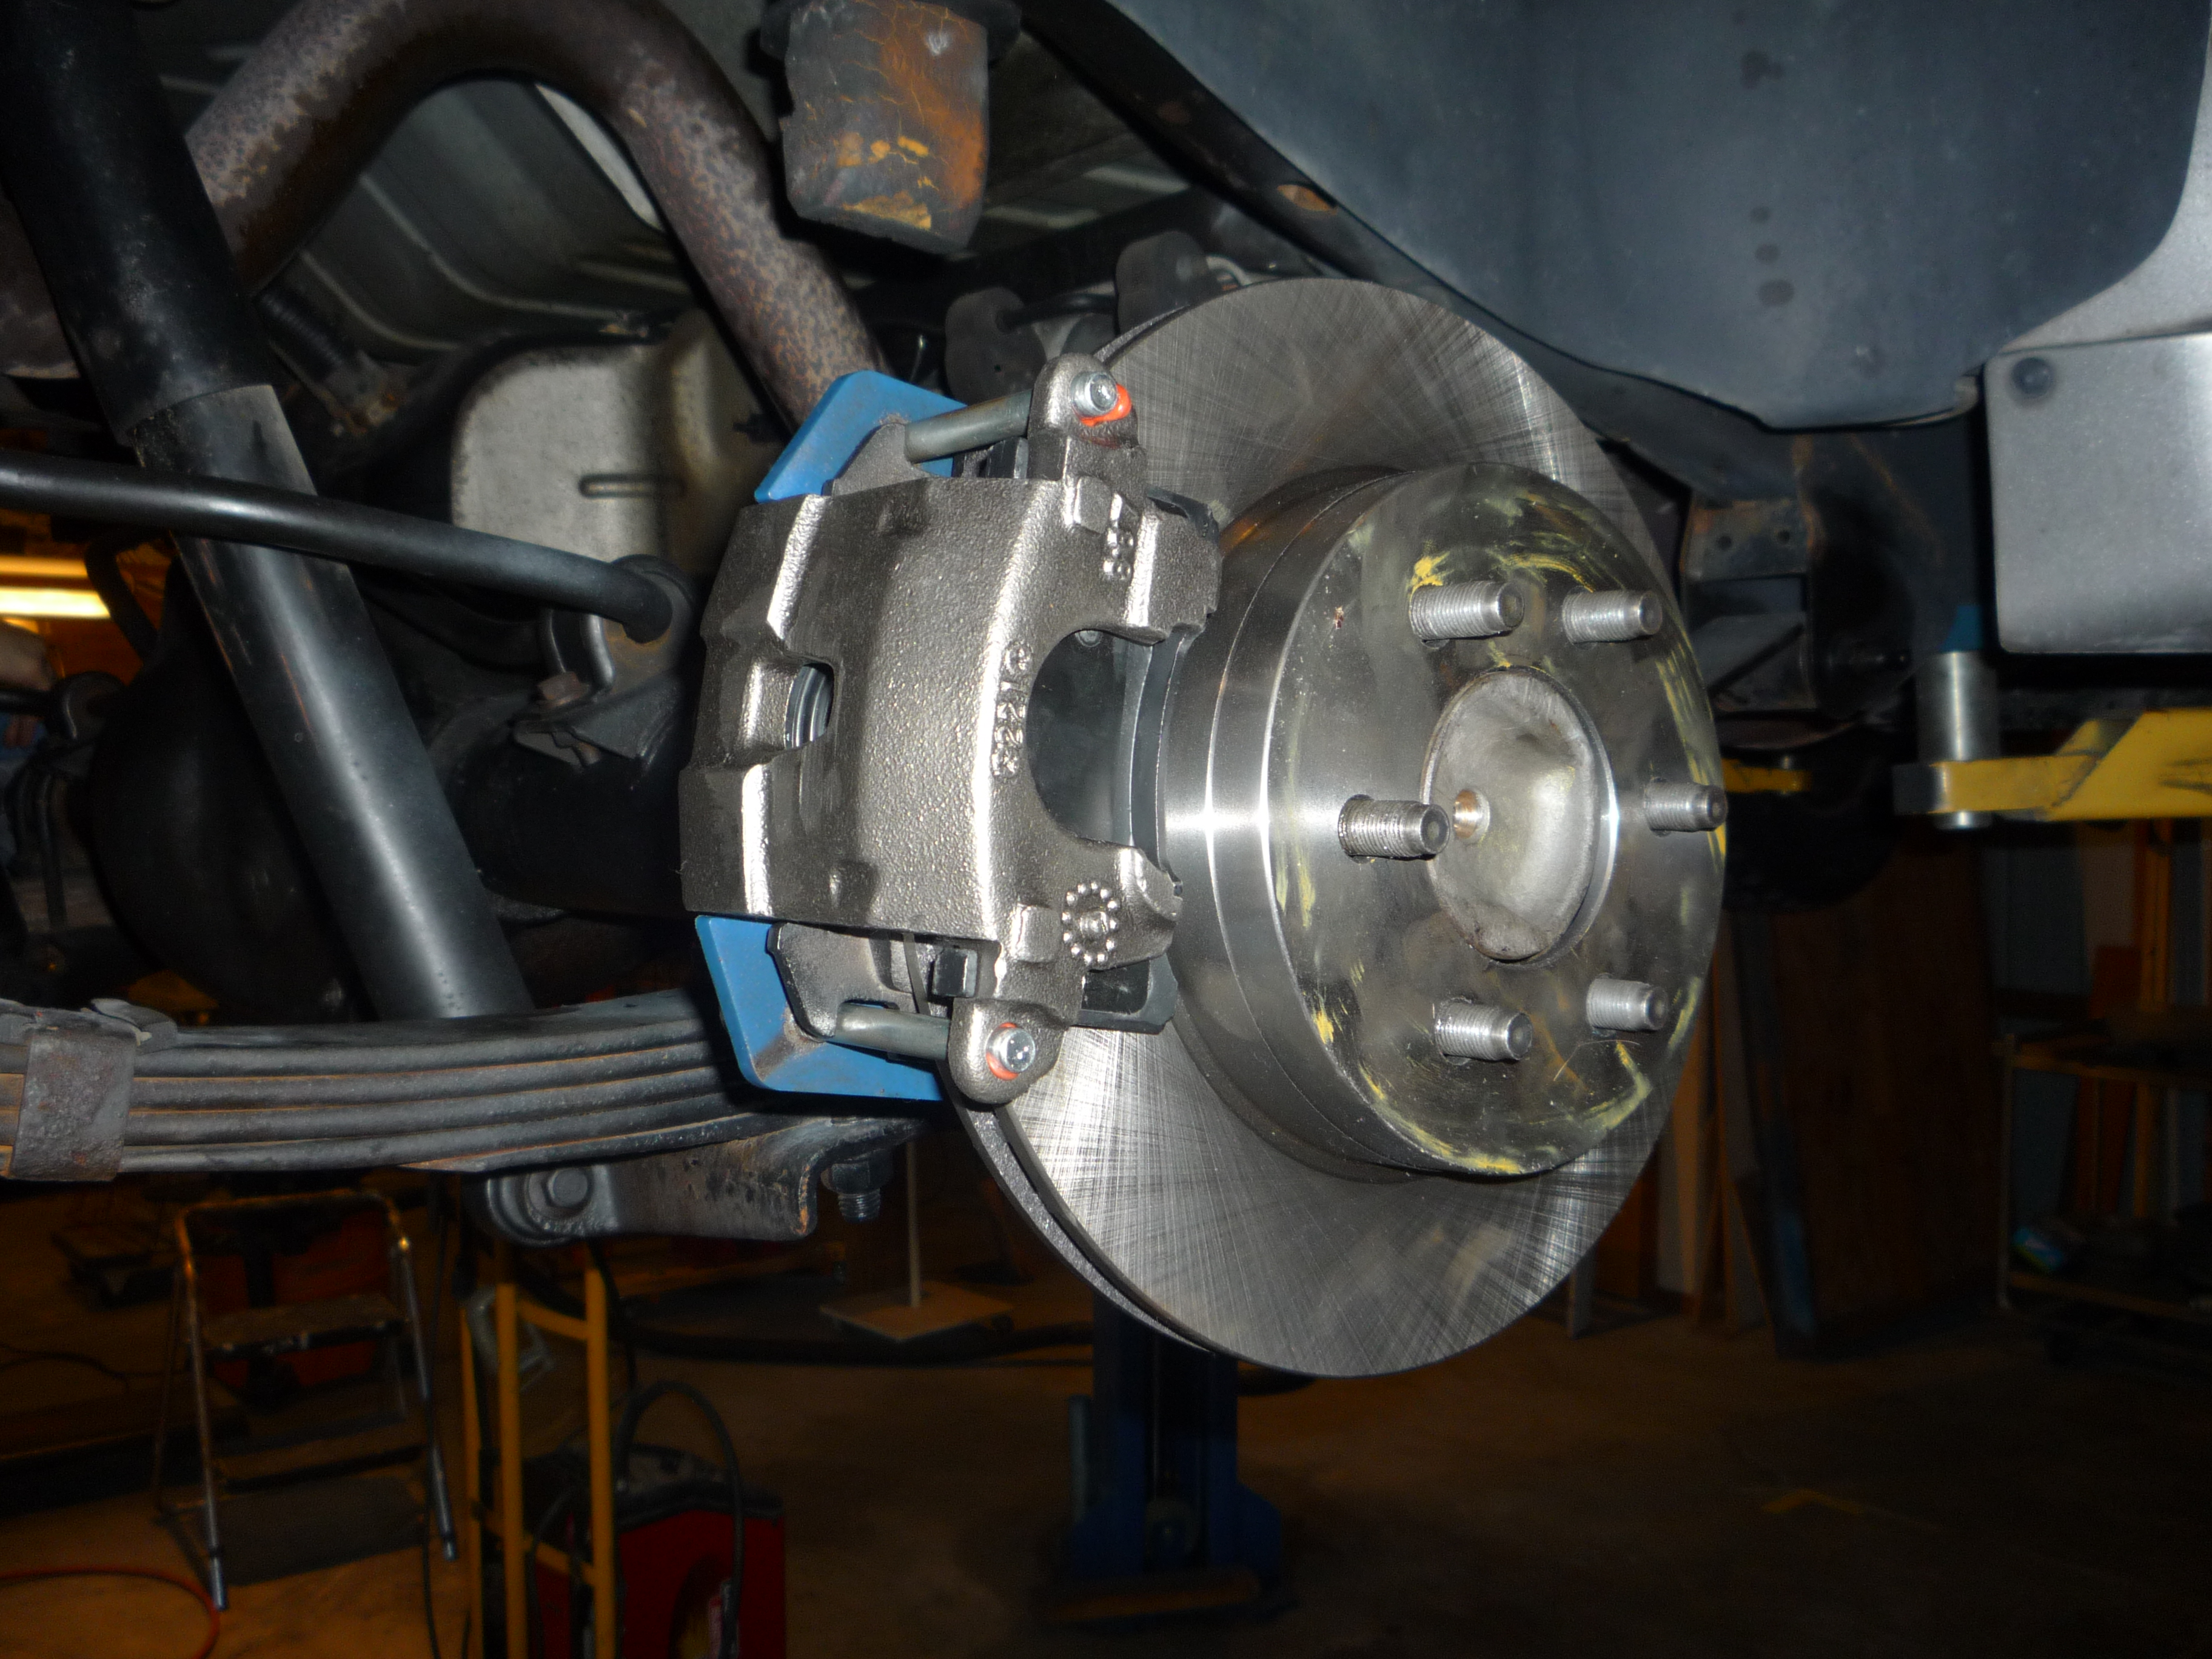
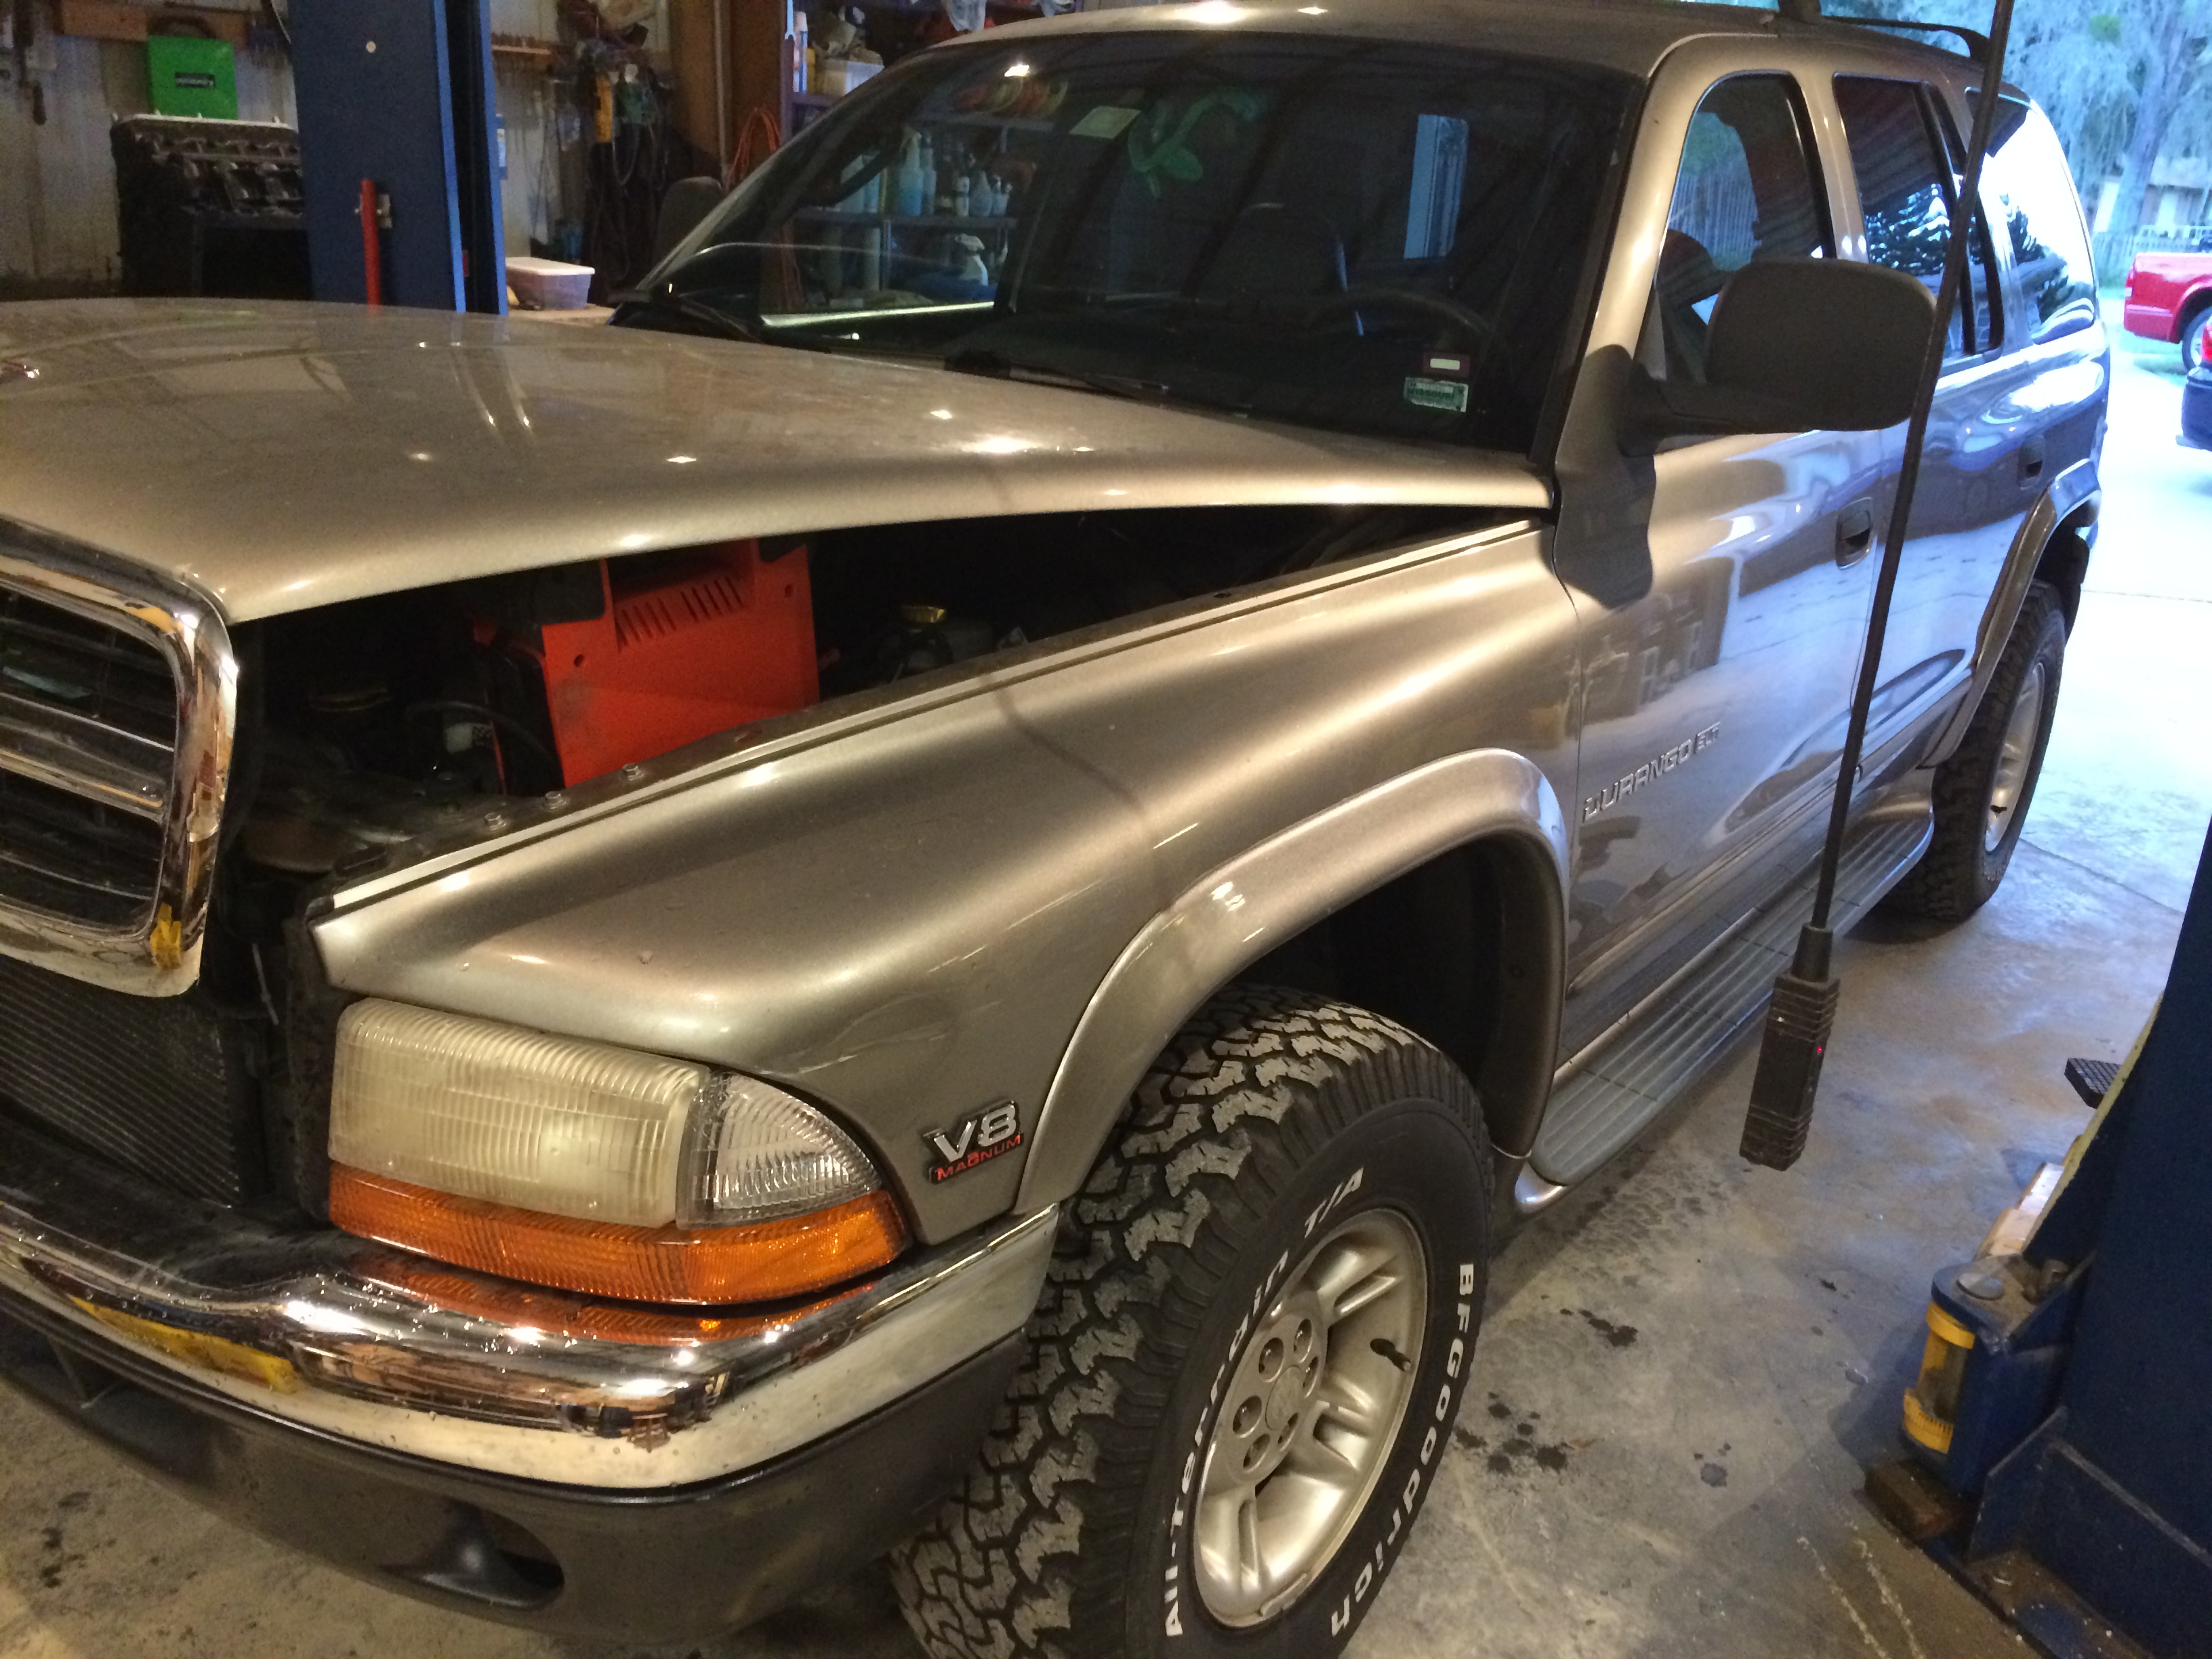
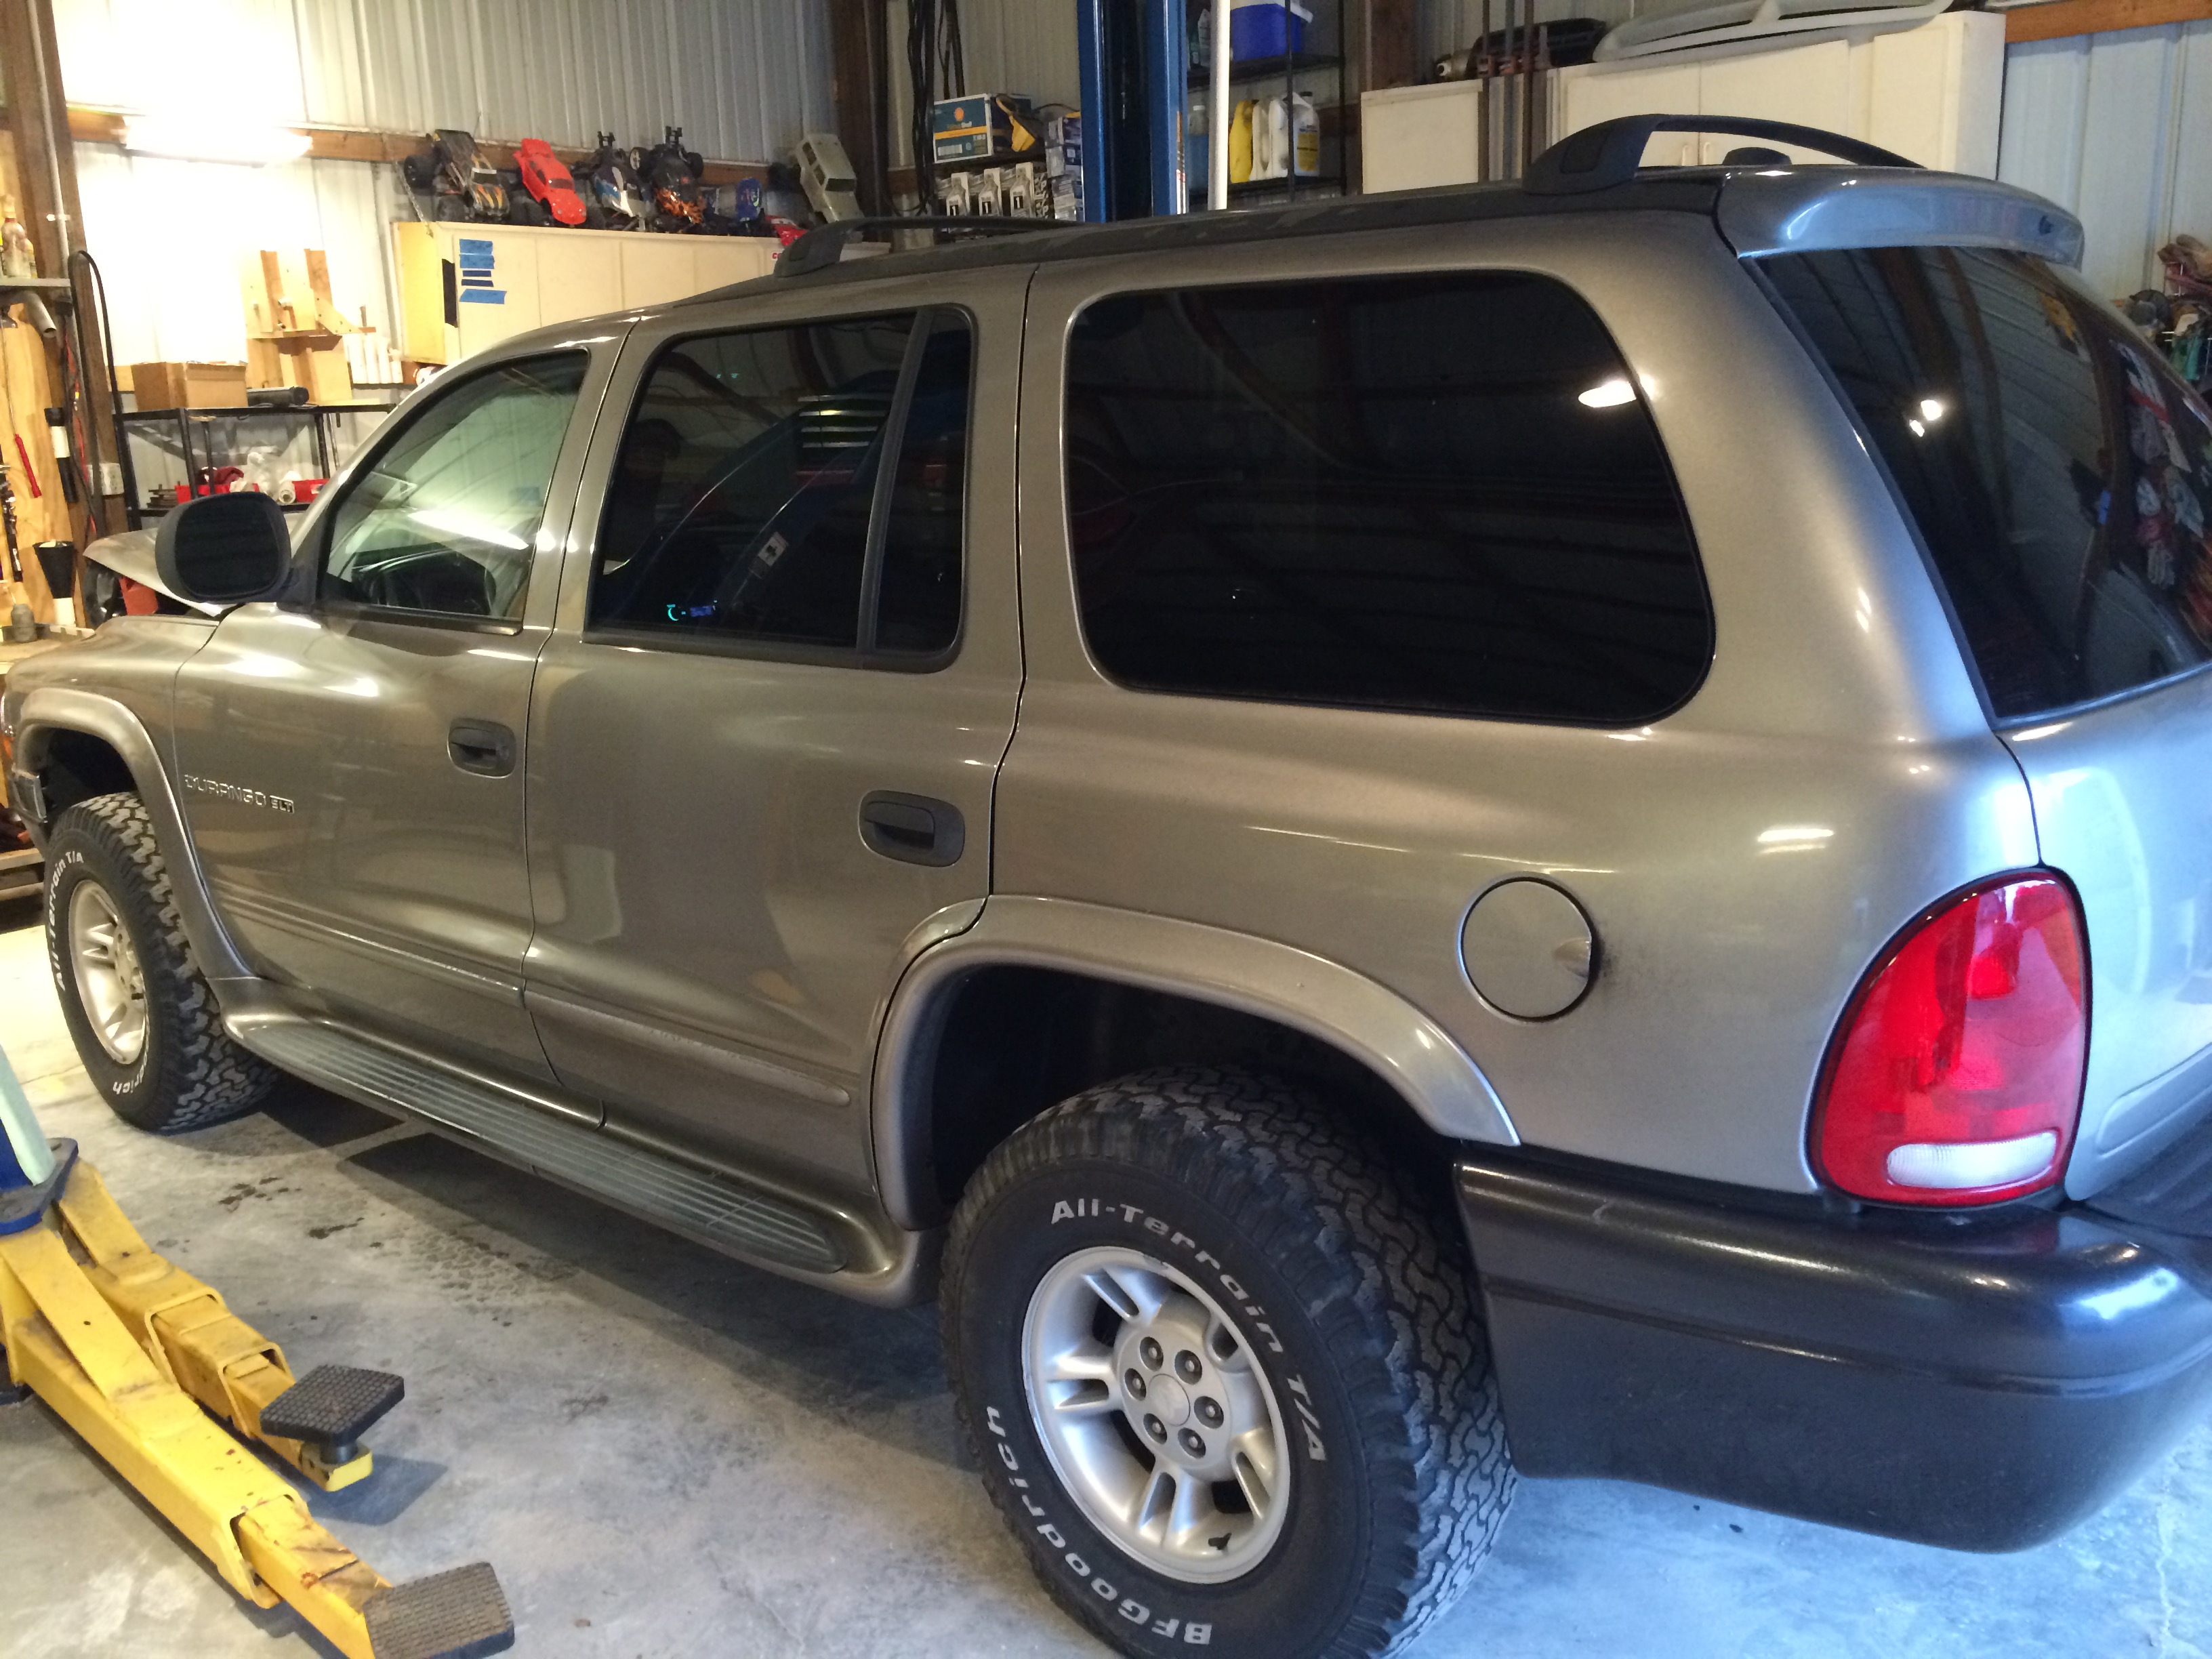
We purchased this Durango in 2001, and always liked the feel of it. Leather interior, handles well, and is a pretty competent 4x4. We took great care of it, even giving it a rear disc conversion and Detroit Trutrac rearend.
But the motor finally gave out at 172,000 miles. Started eating coolant, steaming out the tailpipe, and running like crap. No doubt a head gasket failure.
Not that it was a really great motor to begin with. From new, it used about a quart of oil every 1,000 miles, and got a stellar 13 mpg over it's lifetime, making a whopping 180 hp at the wheels.
Times have changed.
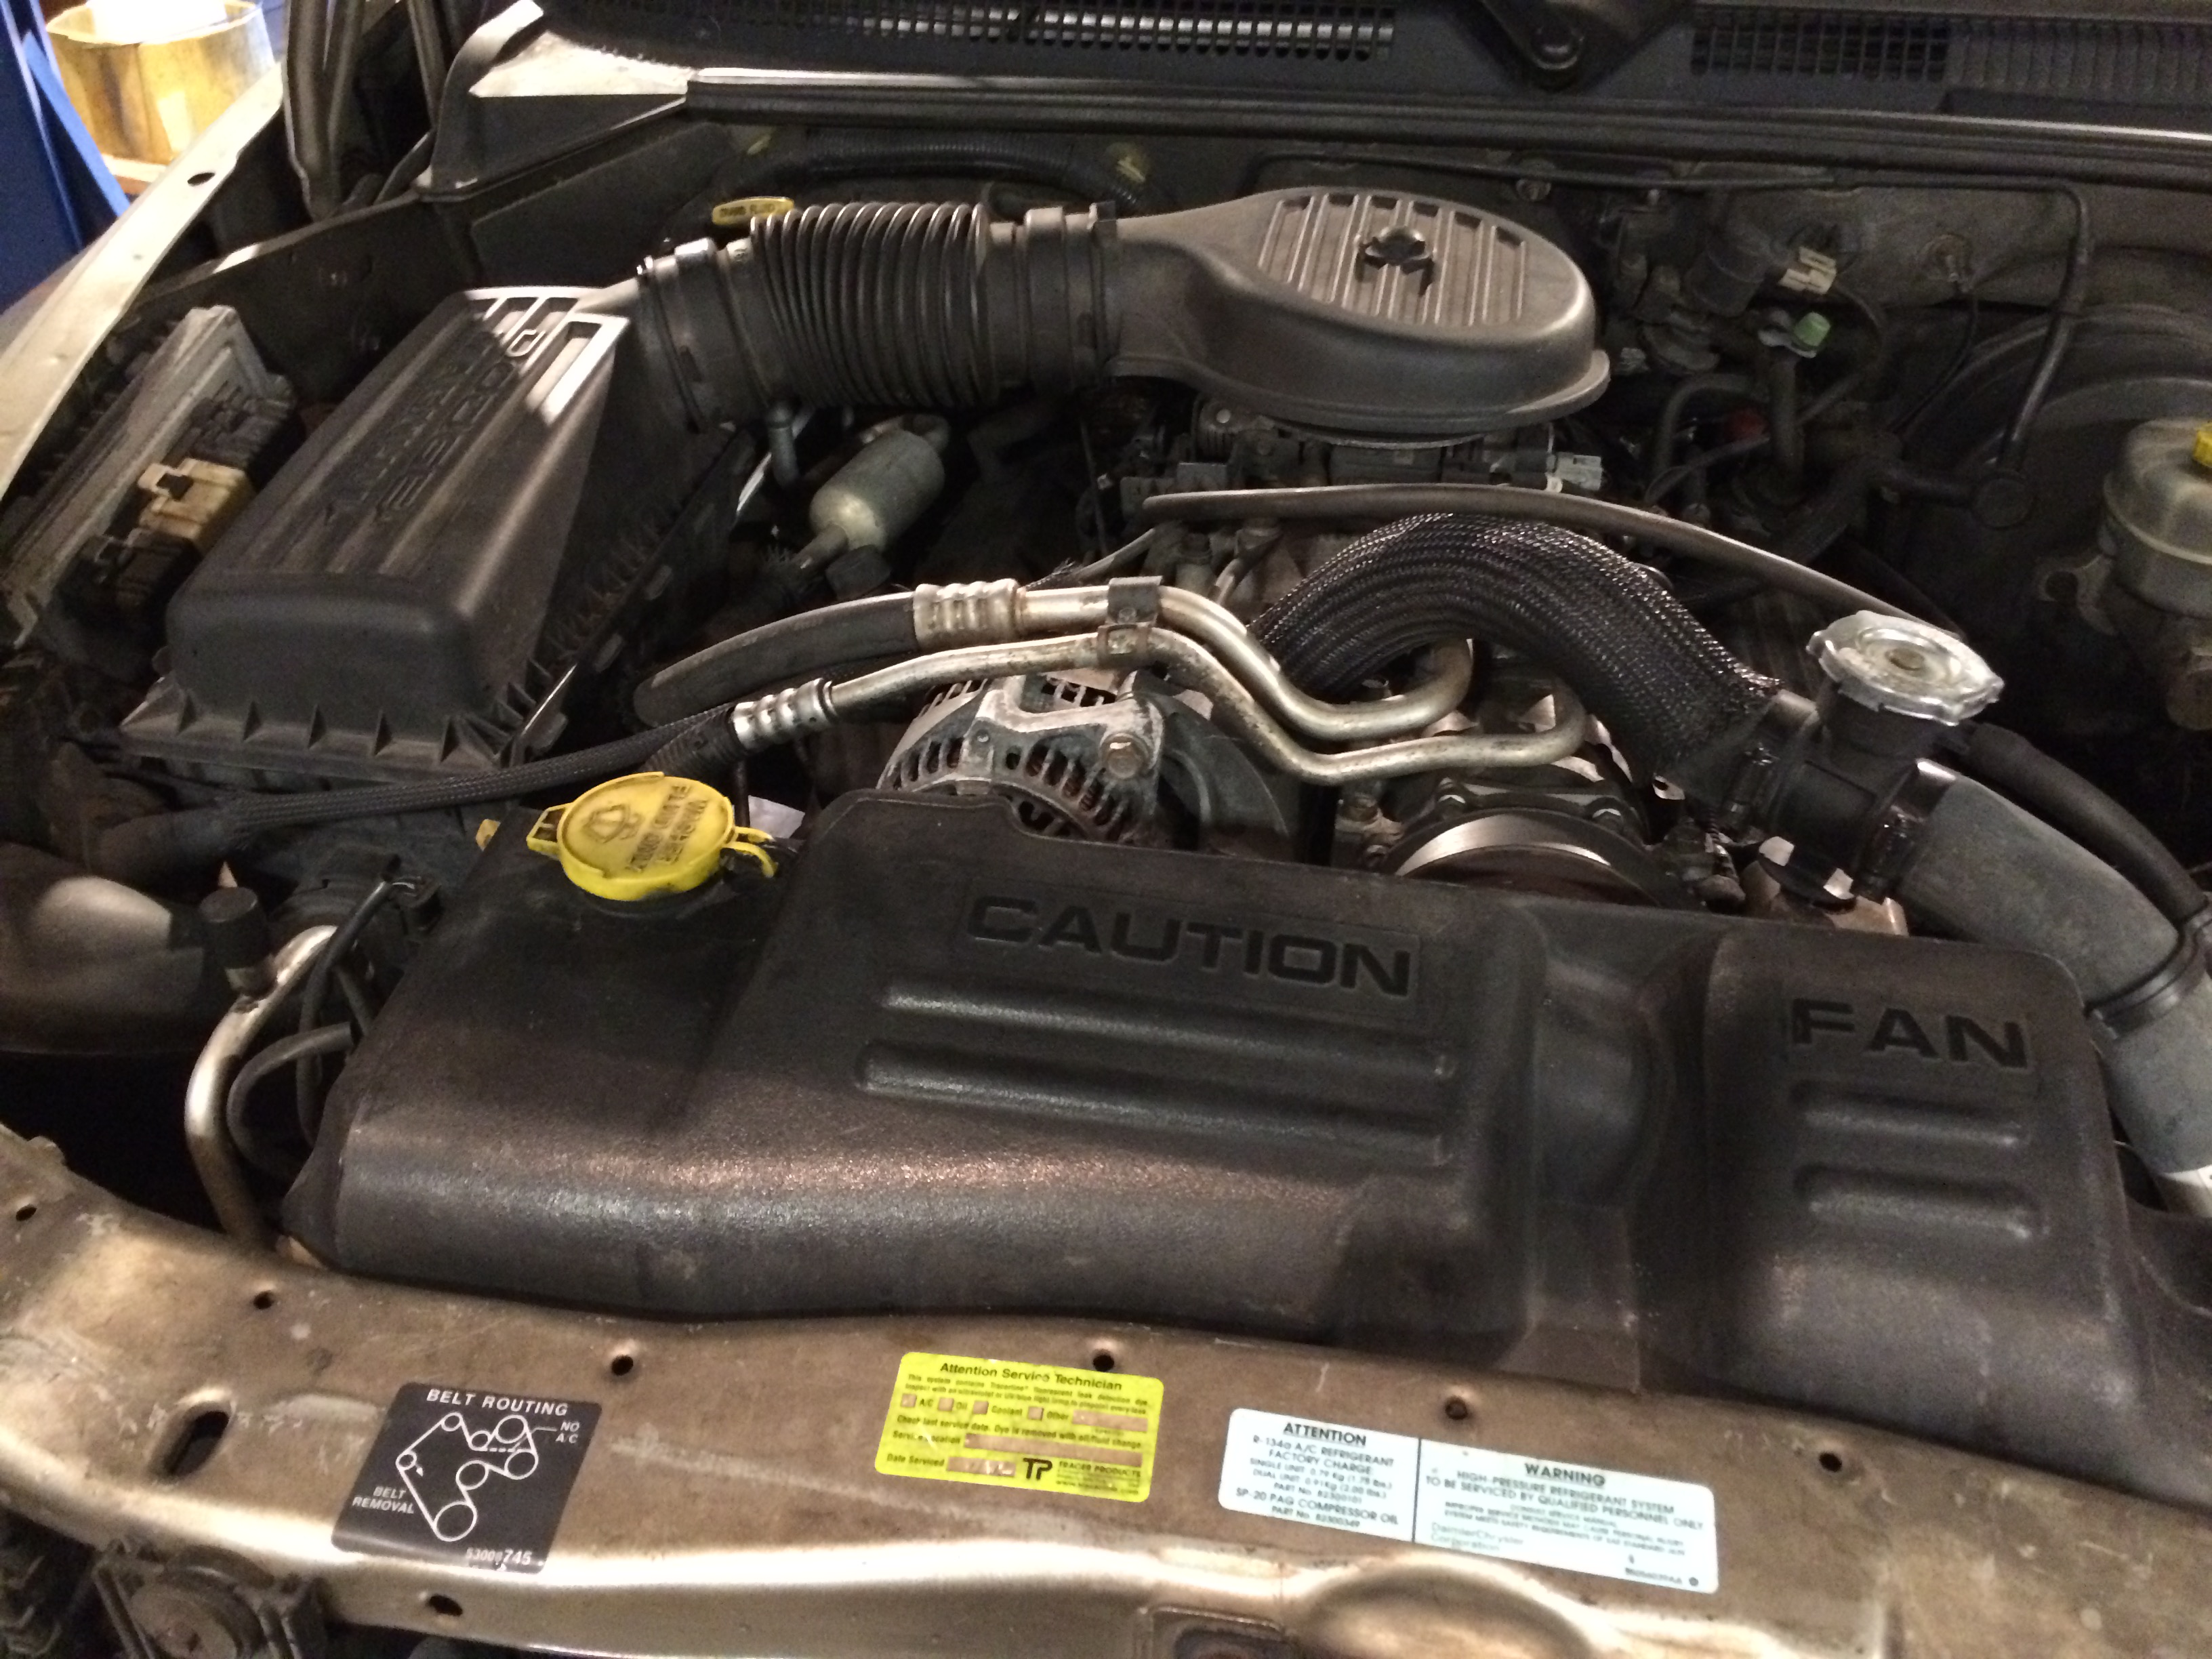
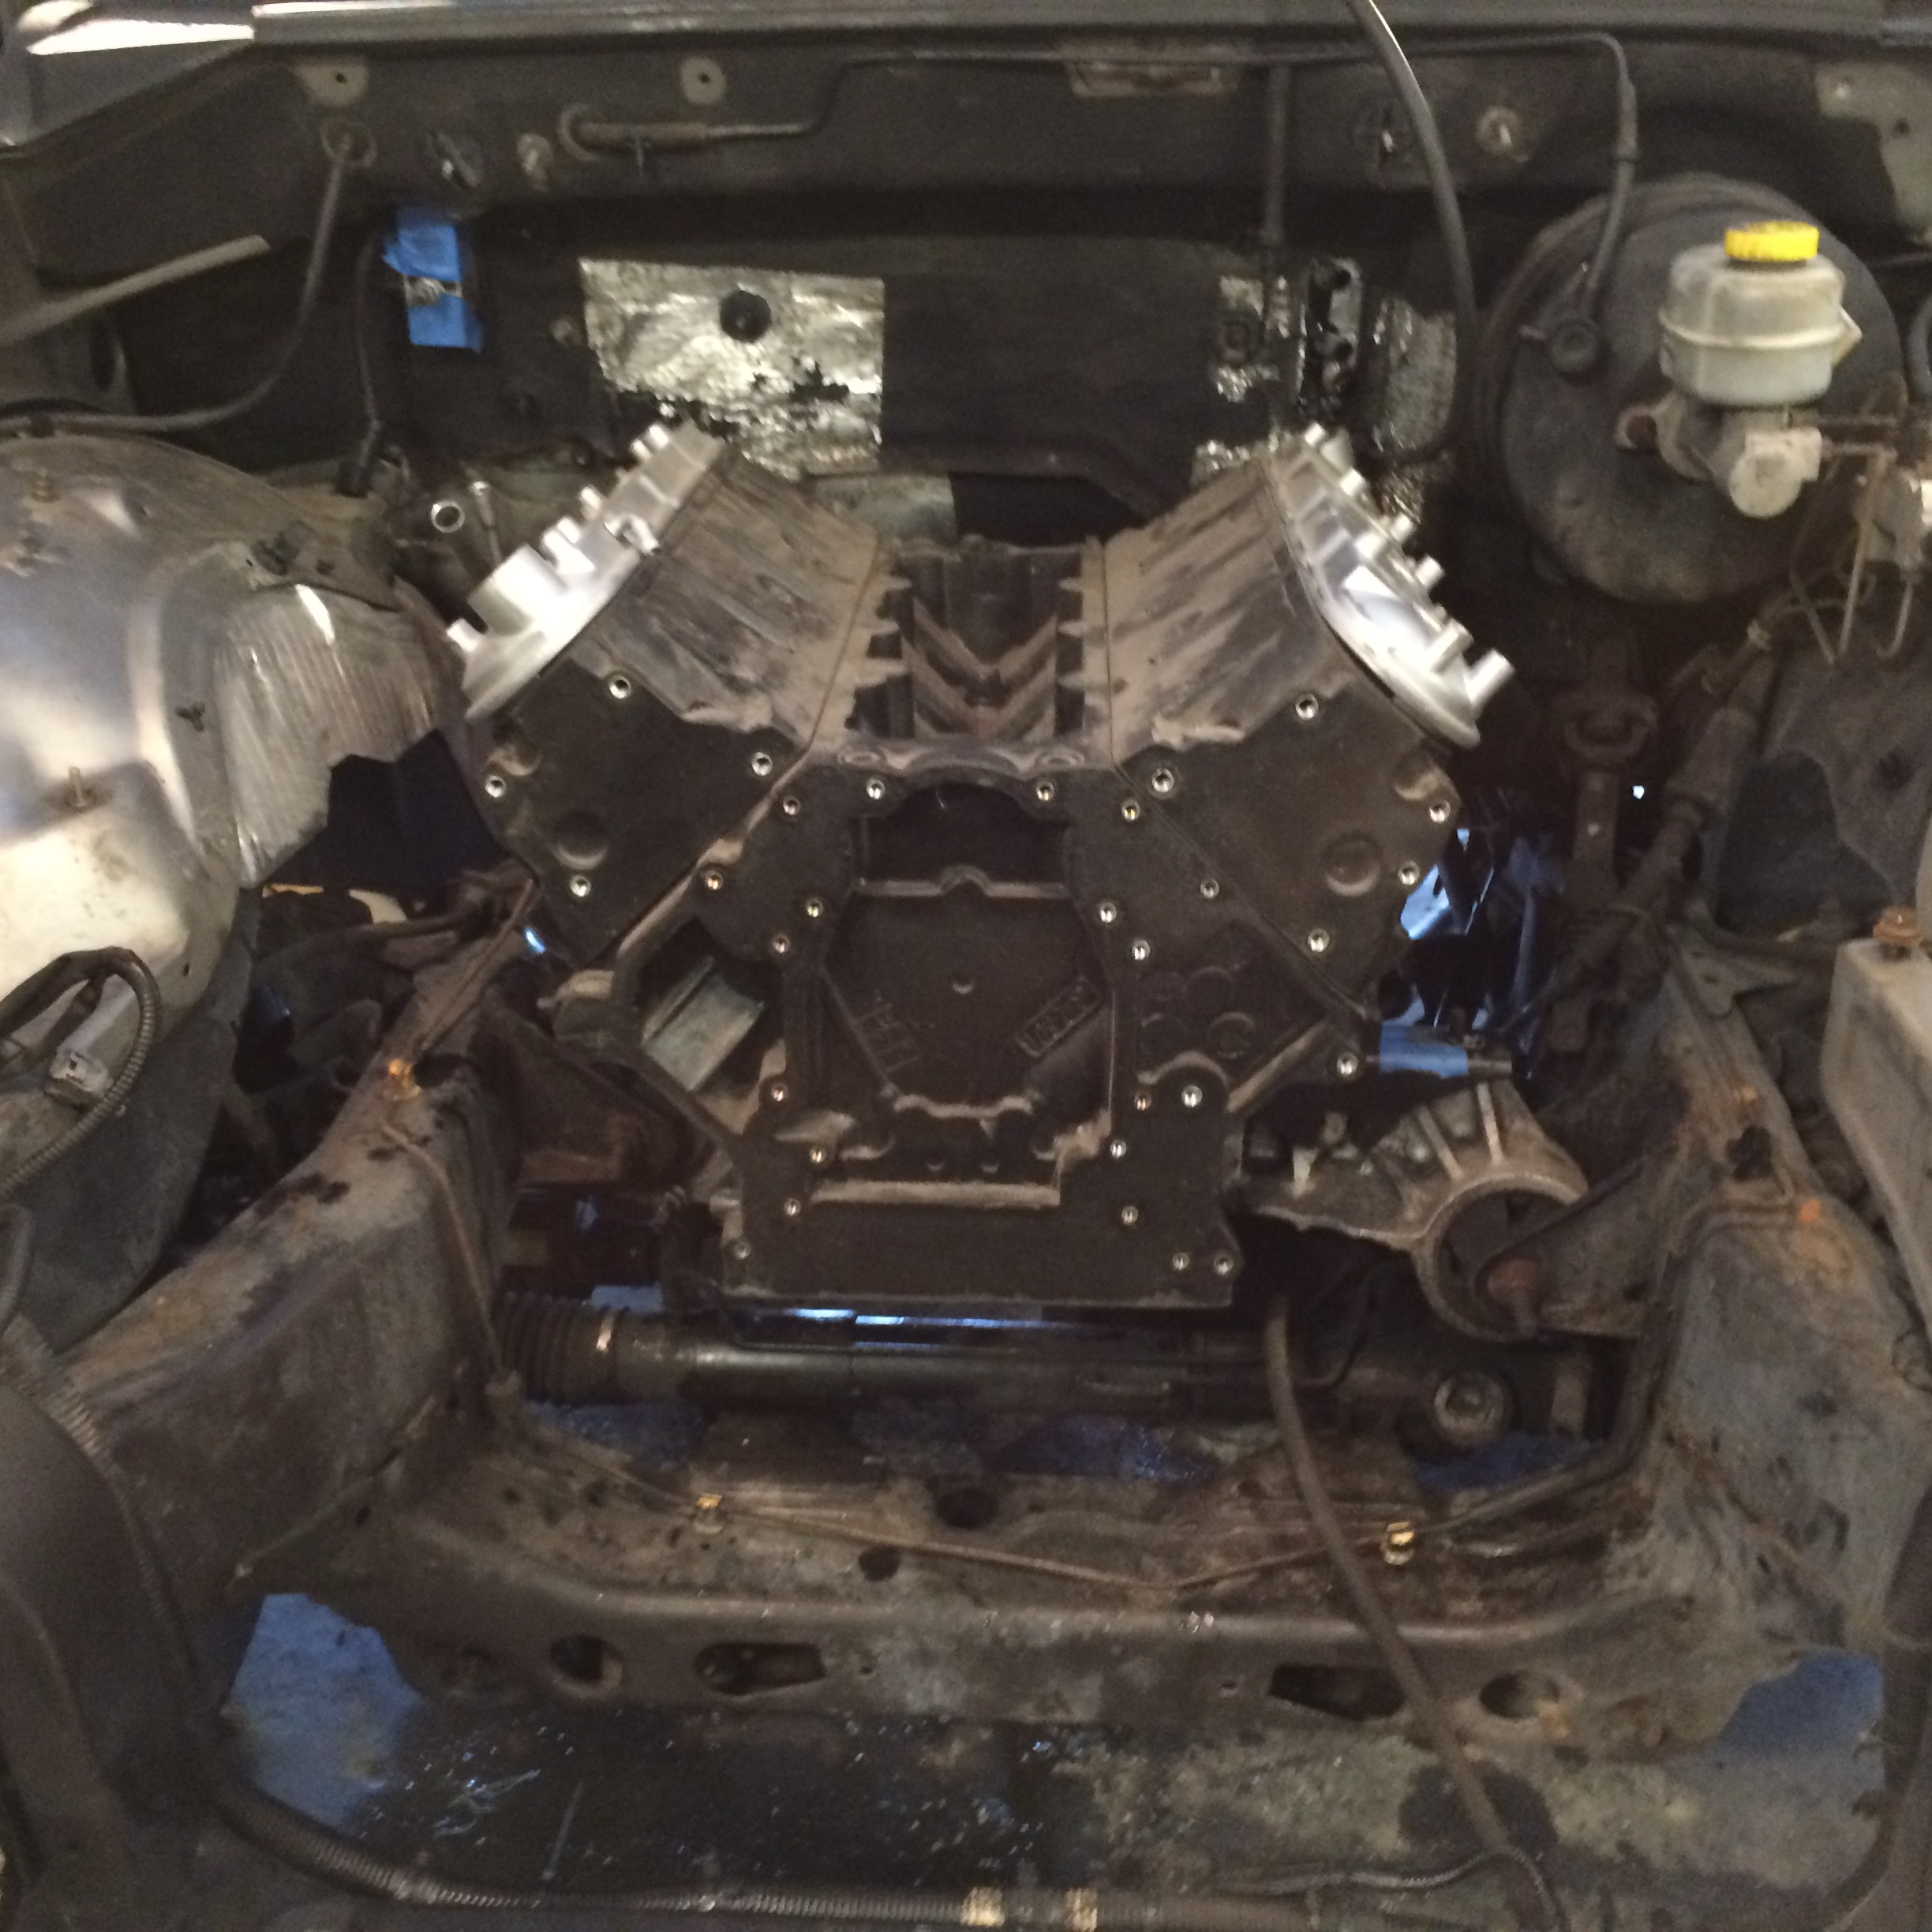
Motor is out.
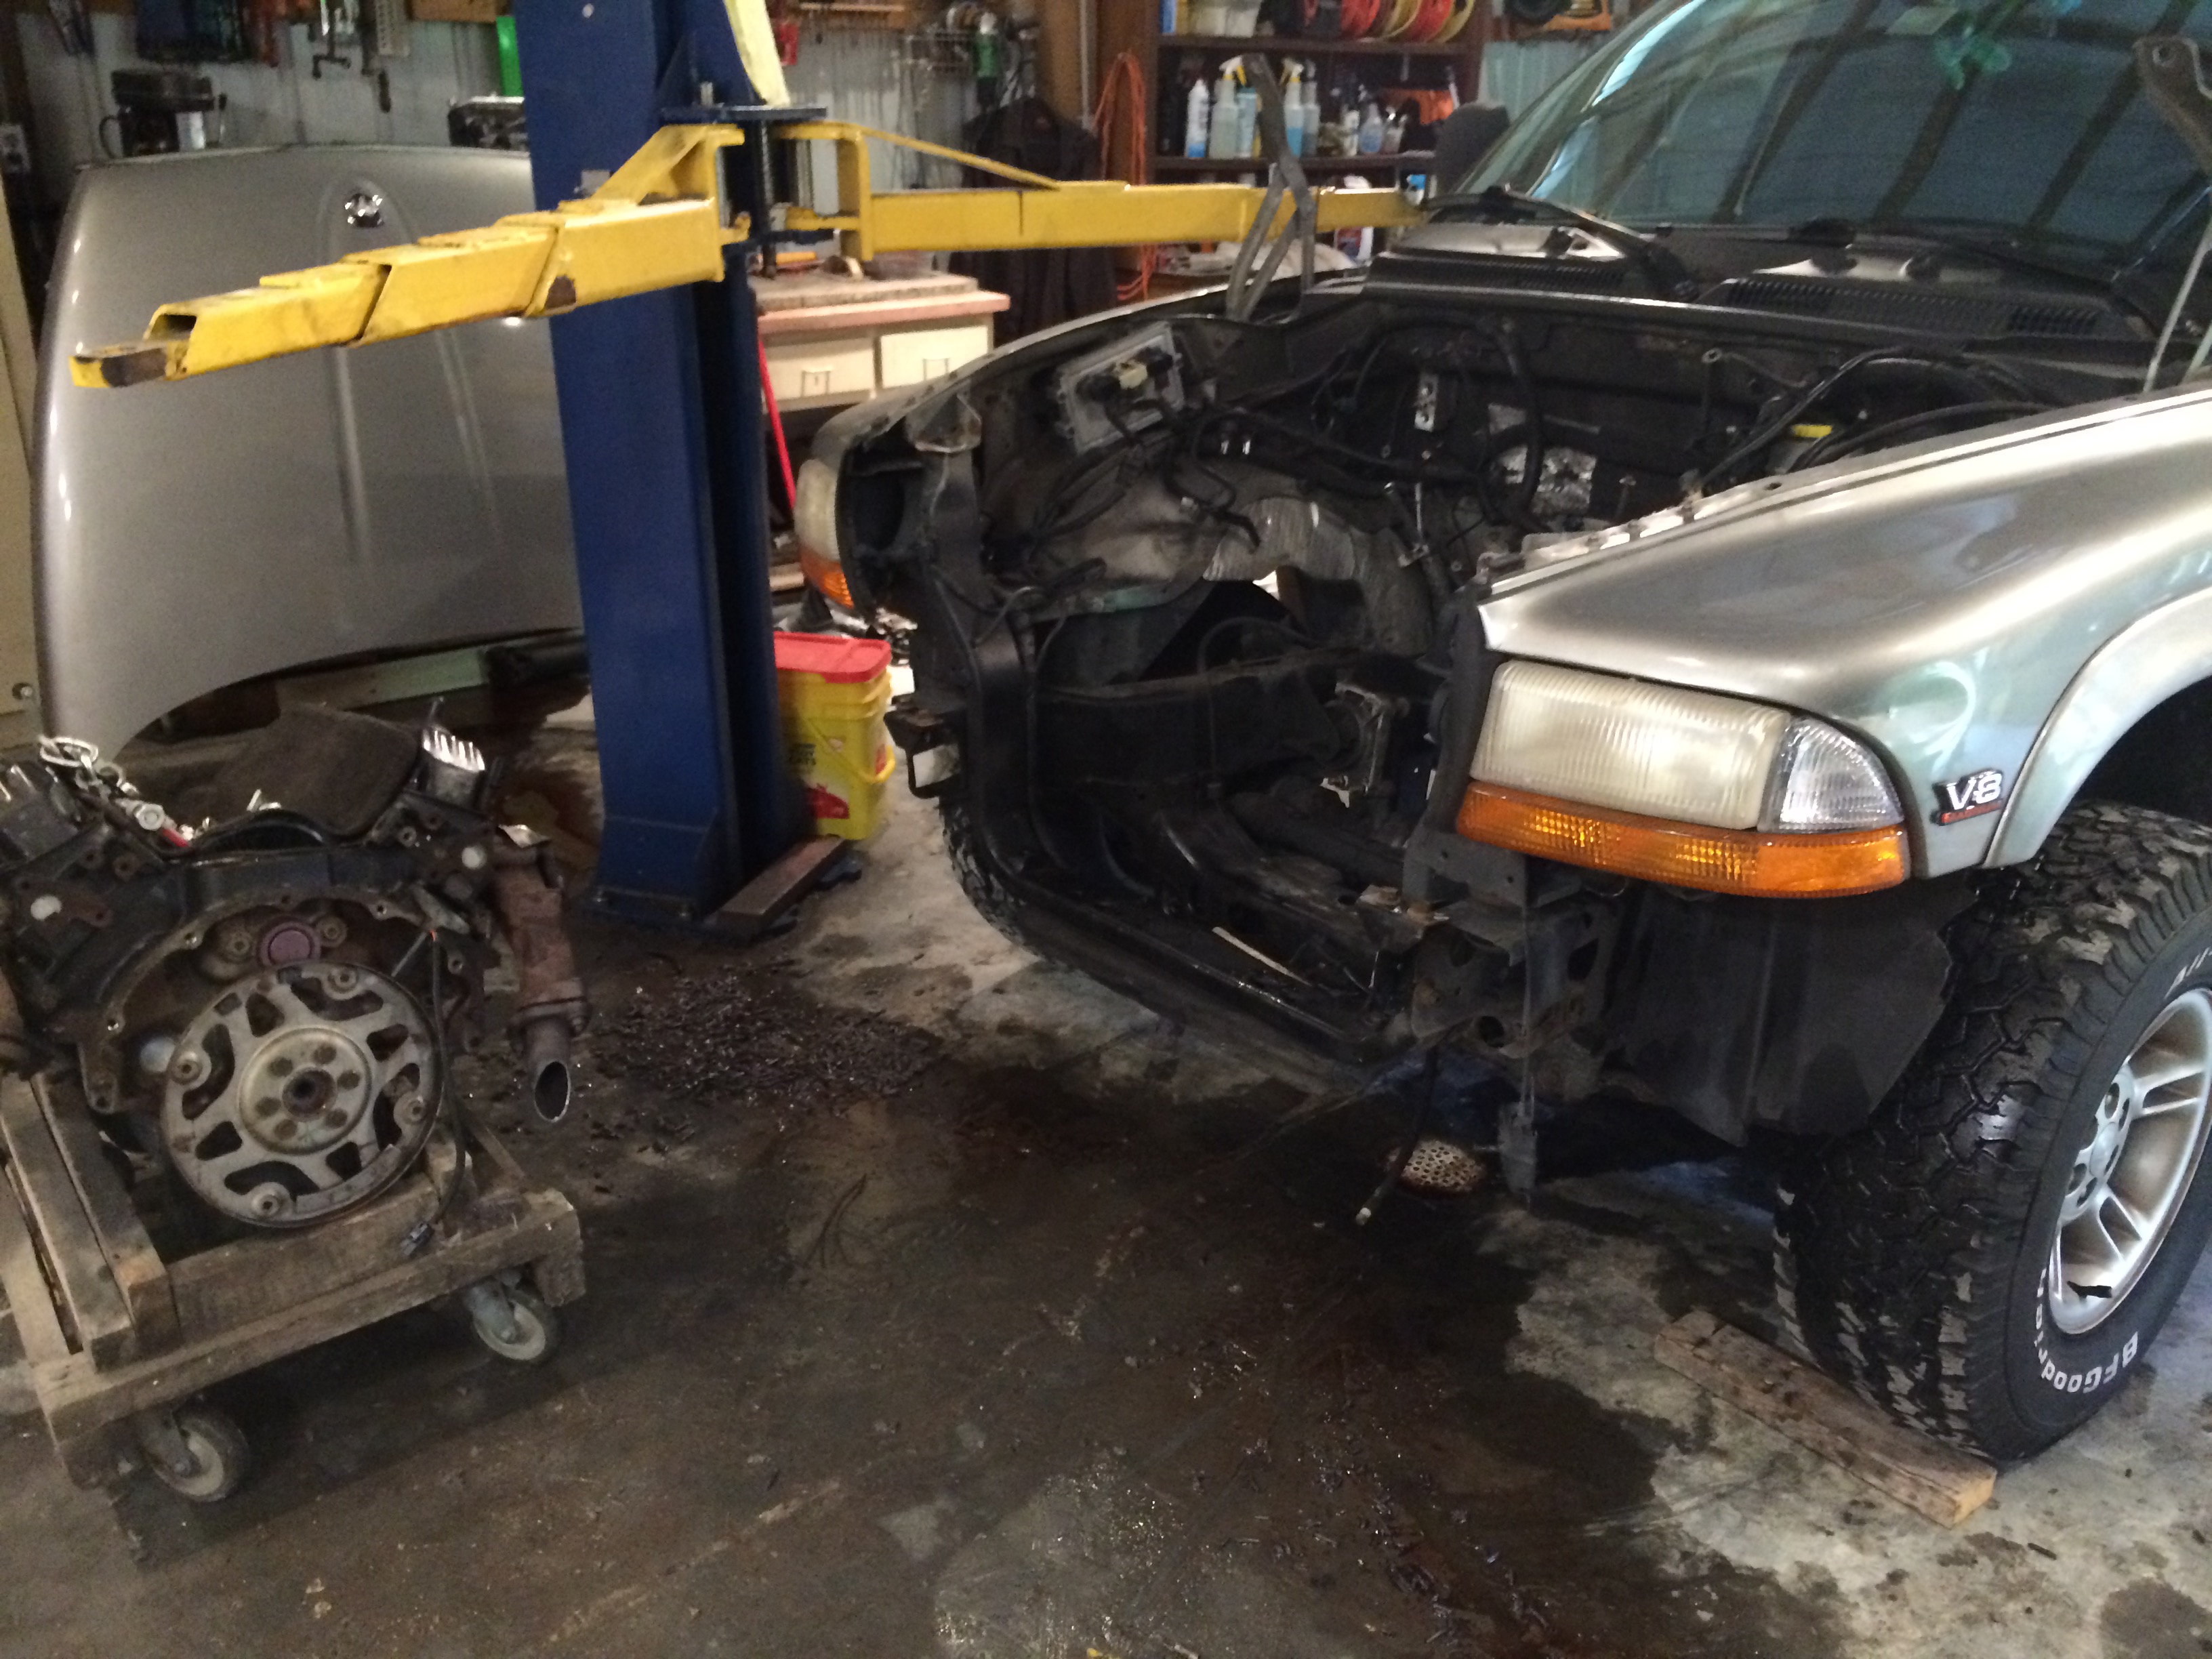
Using adapter plates, I attached the stock motor mounts to the LS block.

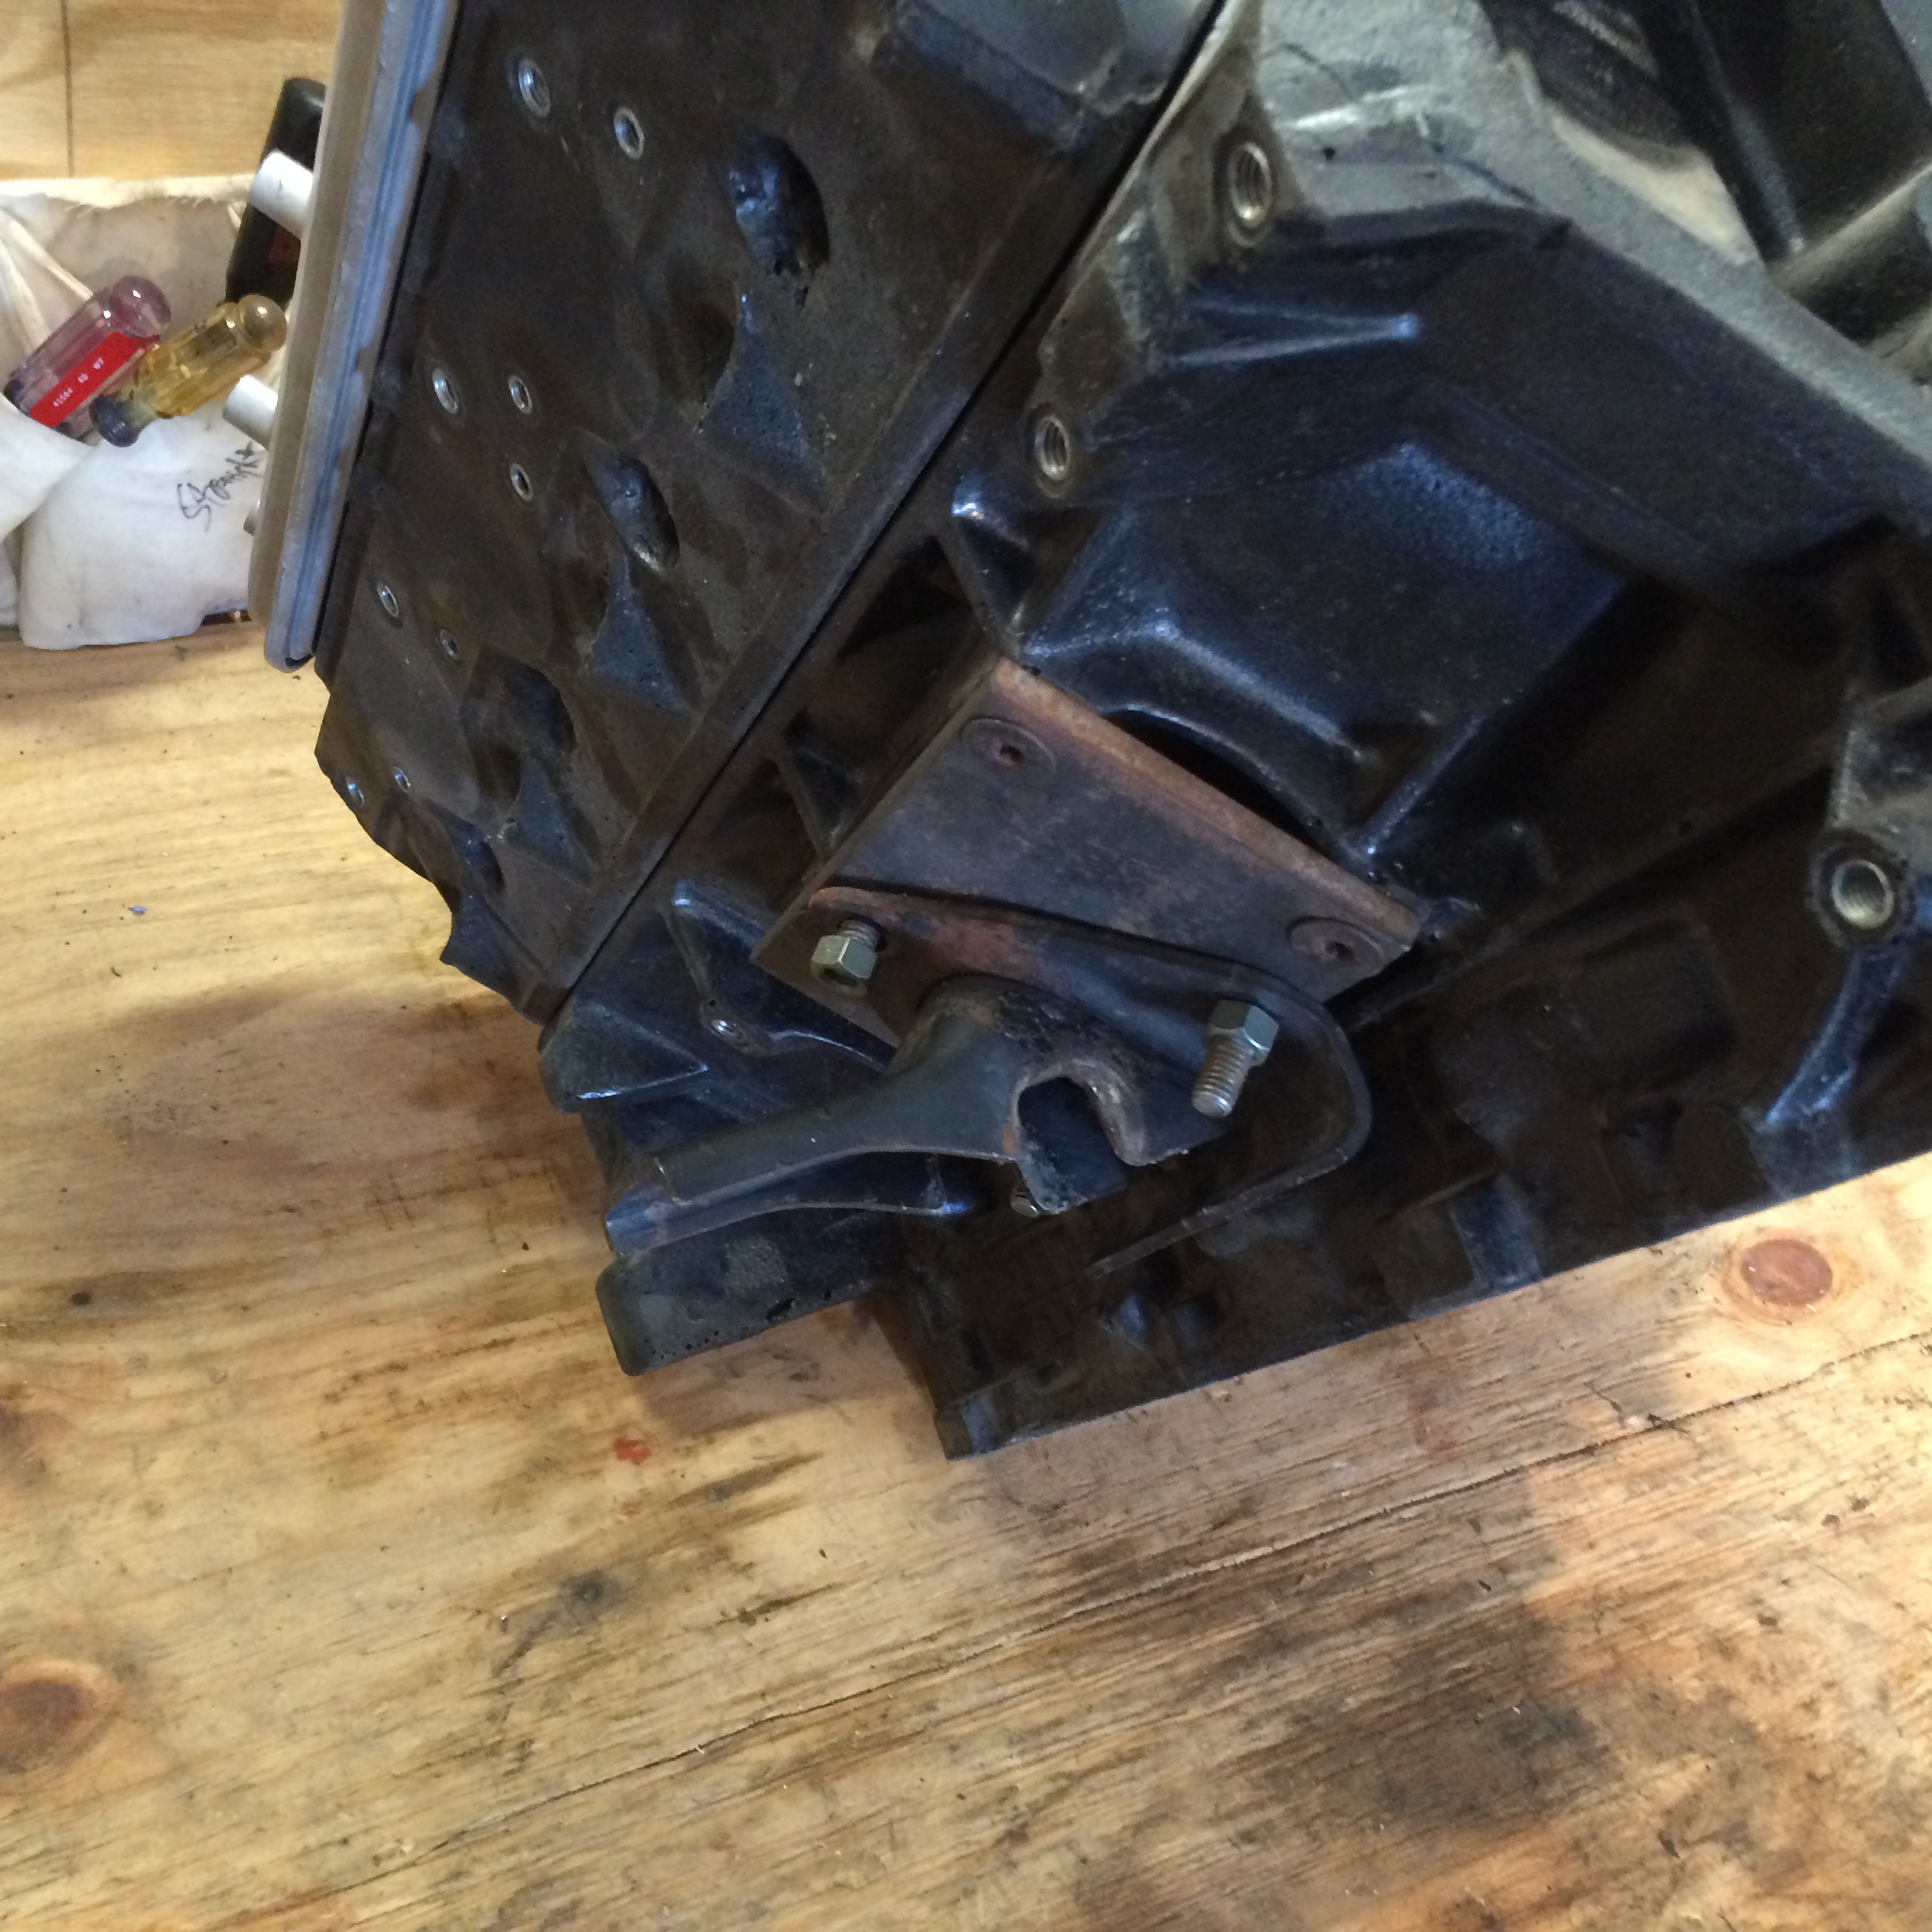
Dropped it in, and had to make one small modification. The driver side motor mount had to be notched about 3/4 inch.
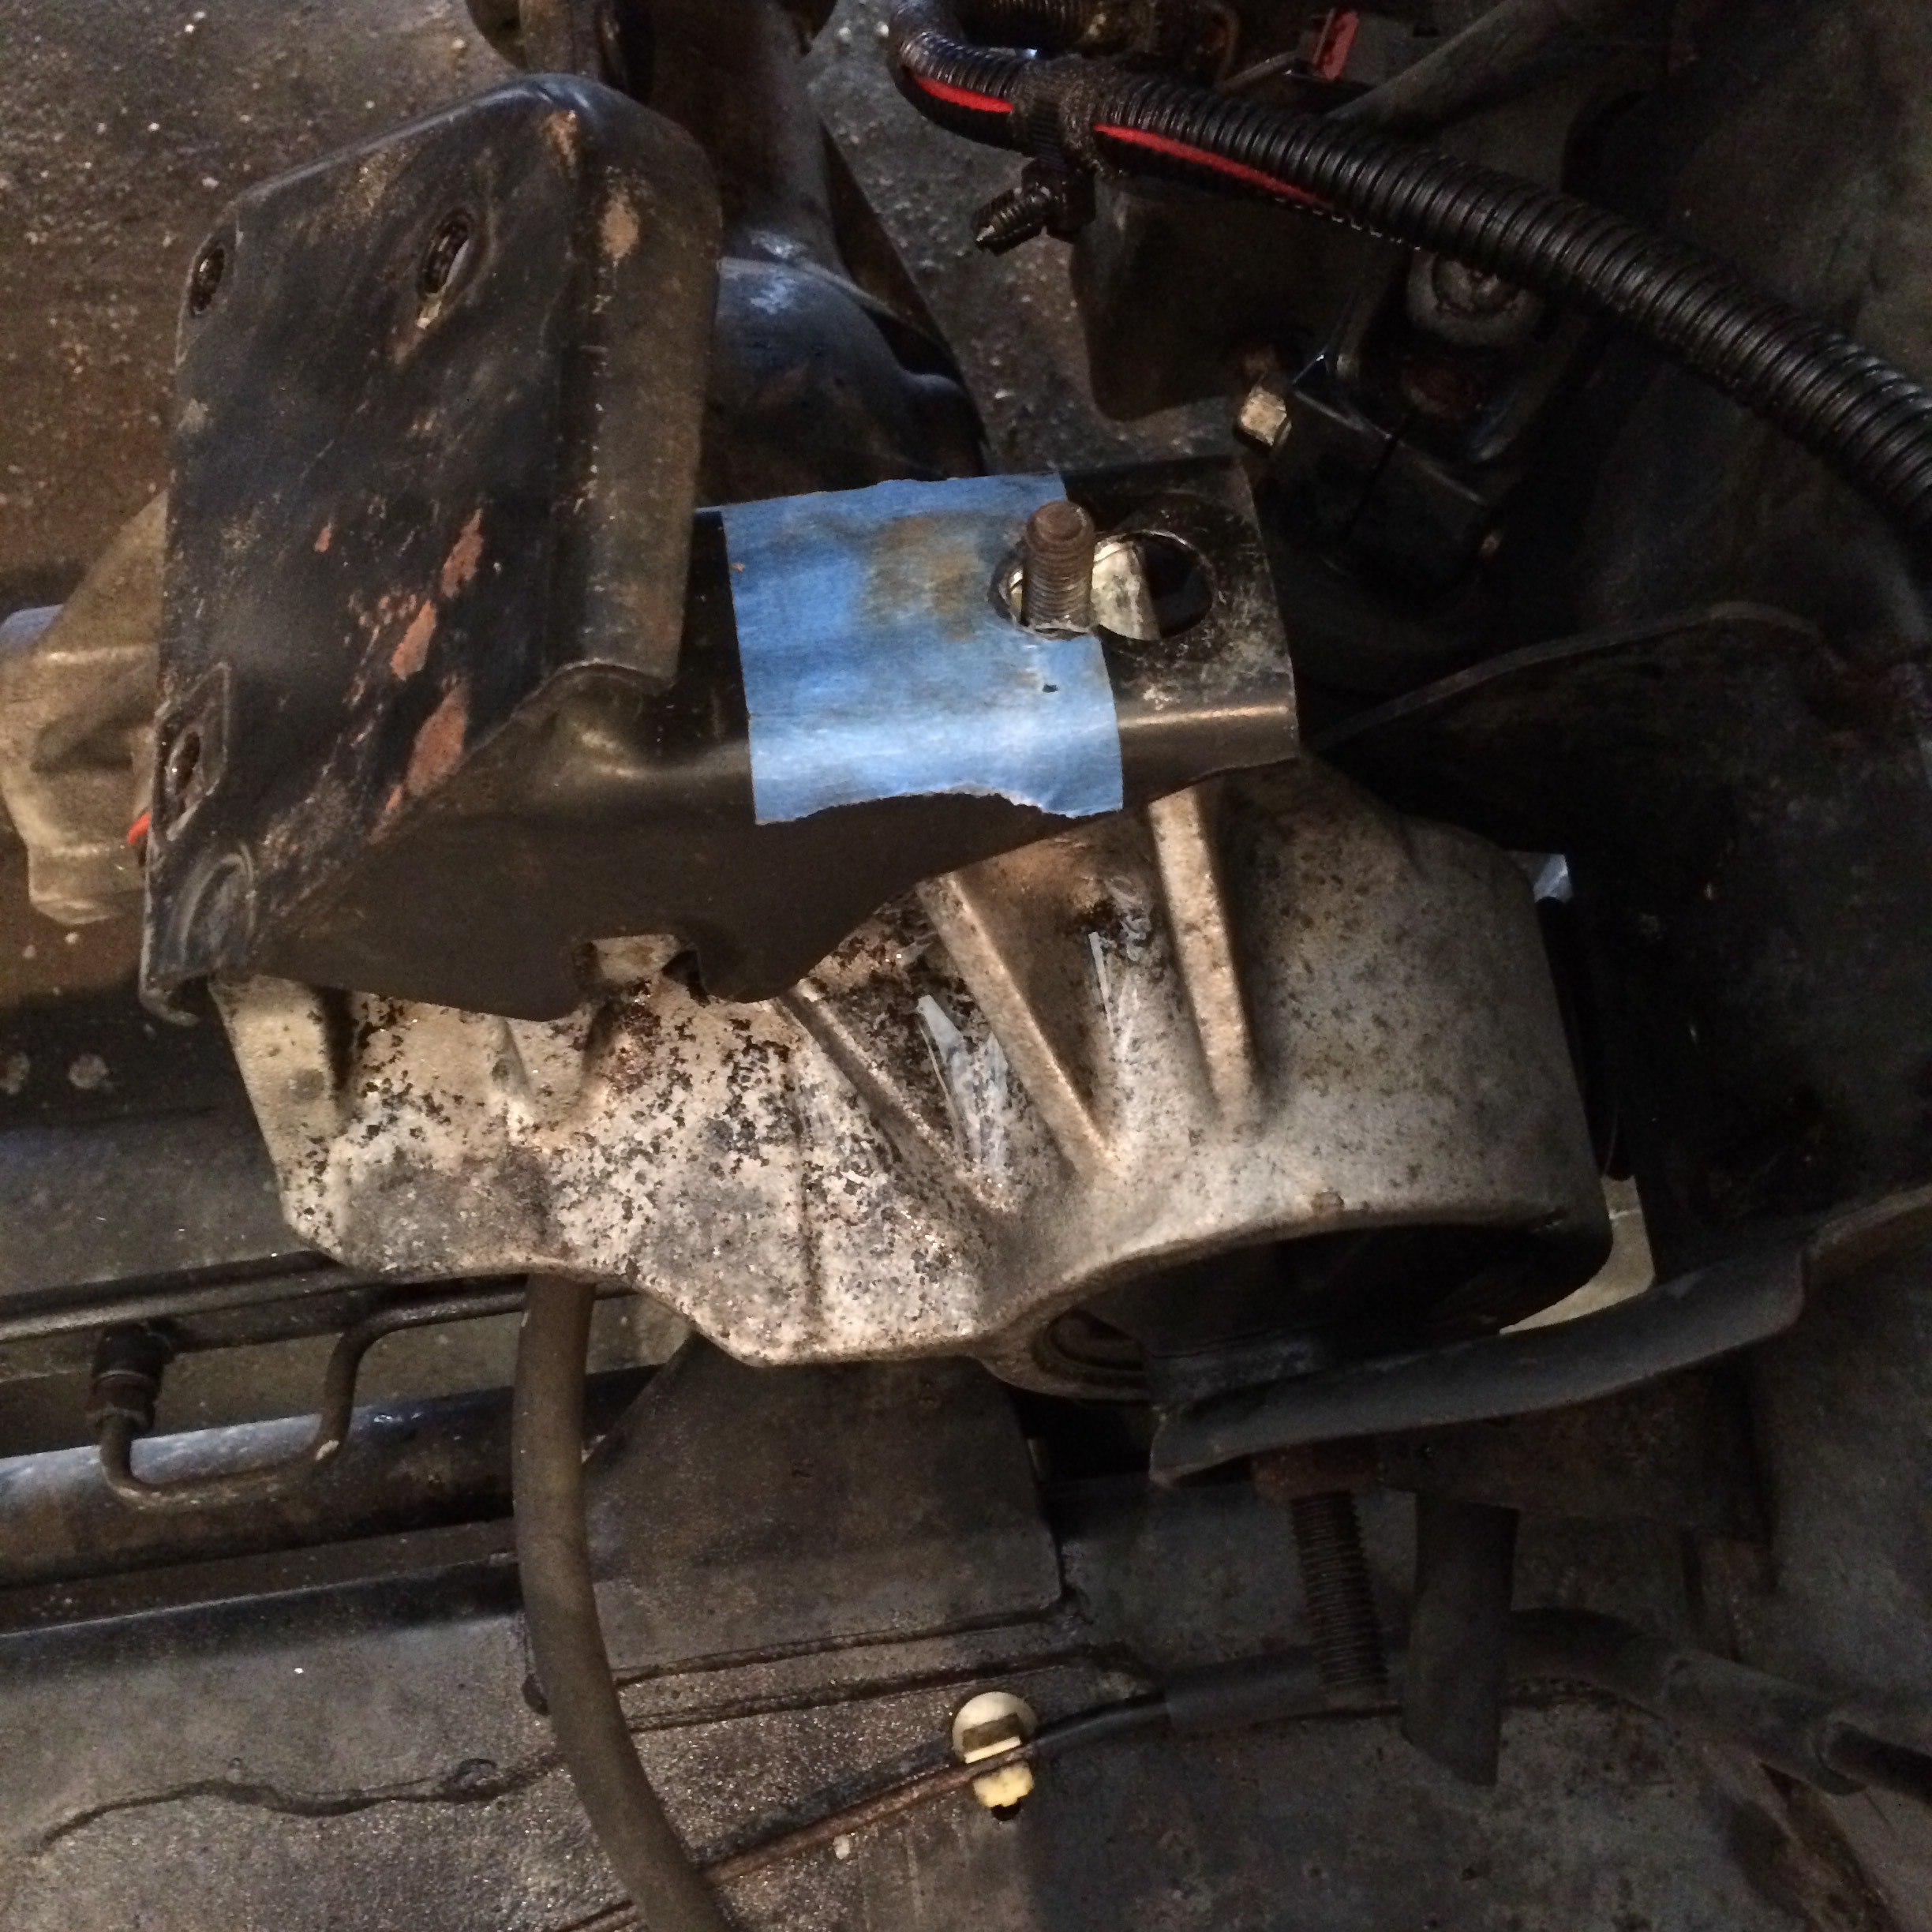
This retains the stock isolators, and keeps the engine and front axle in the stock location
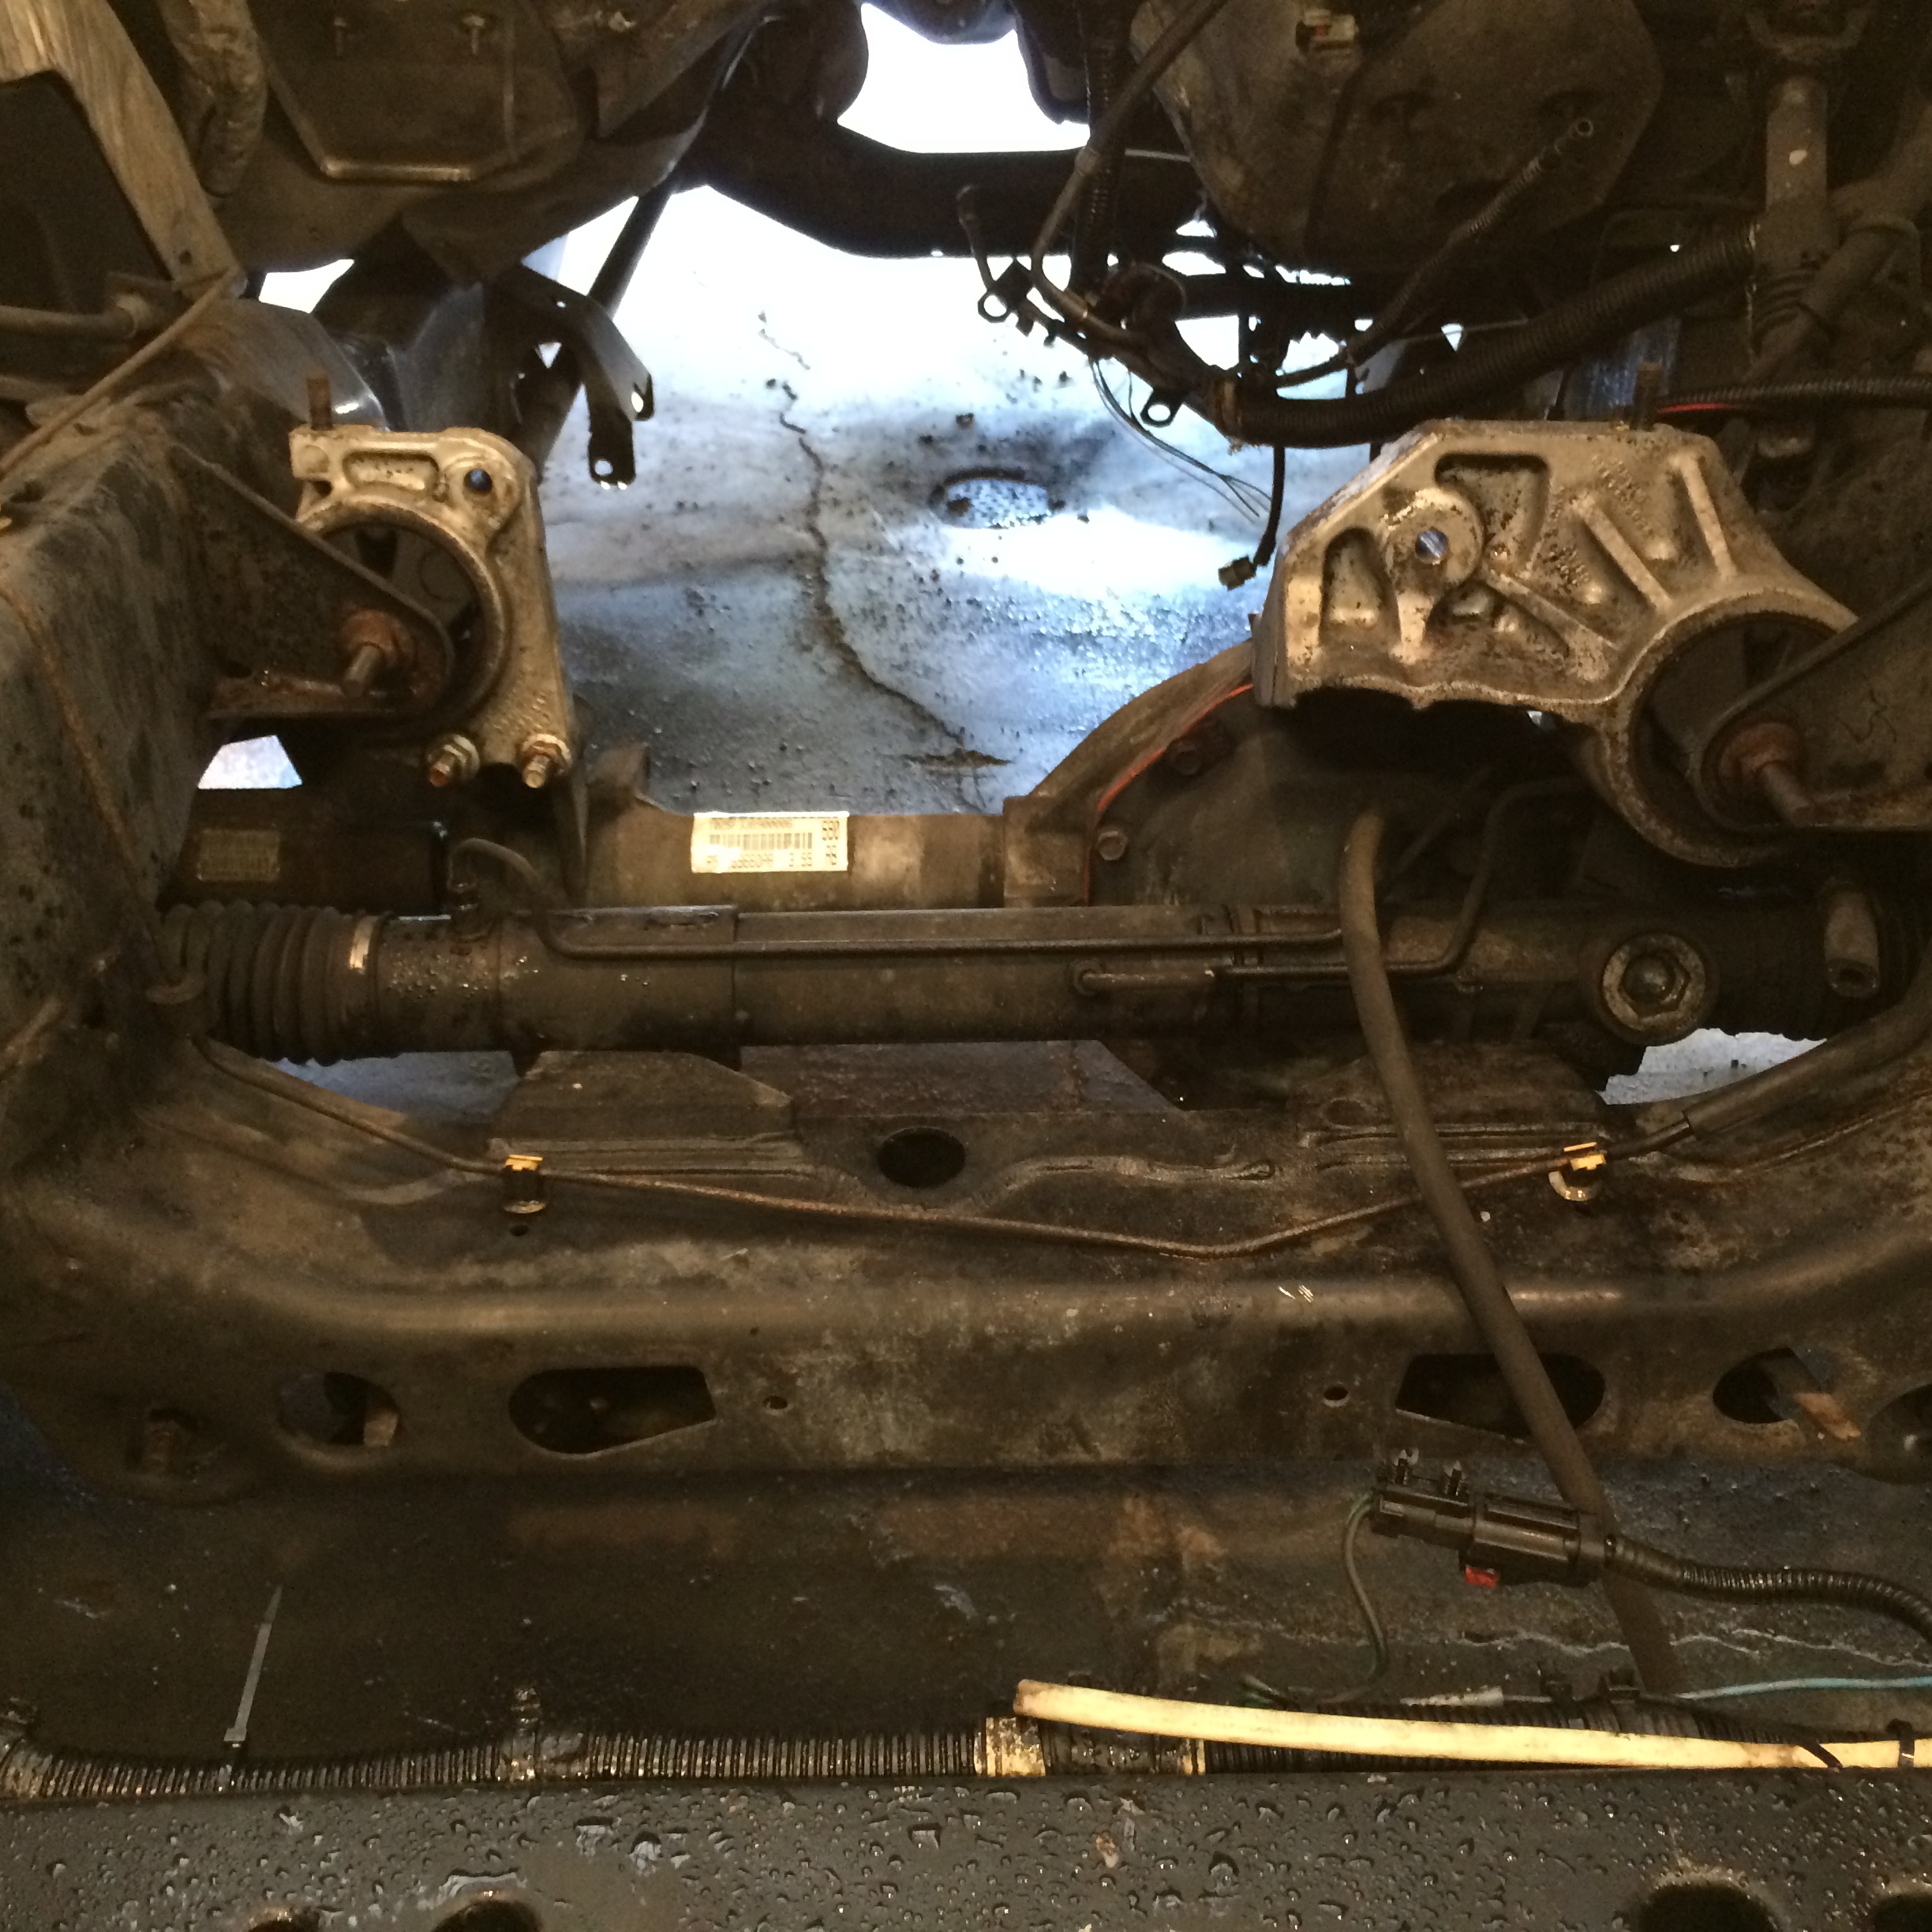
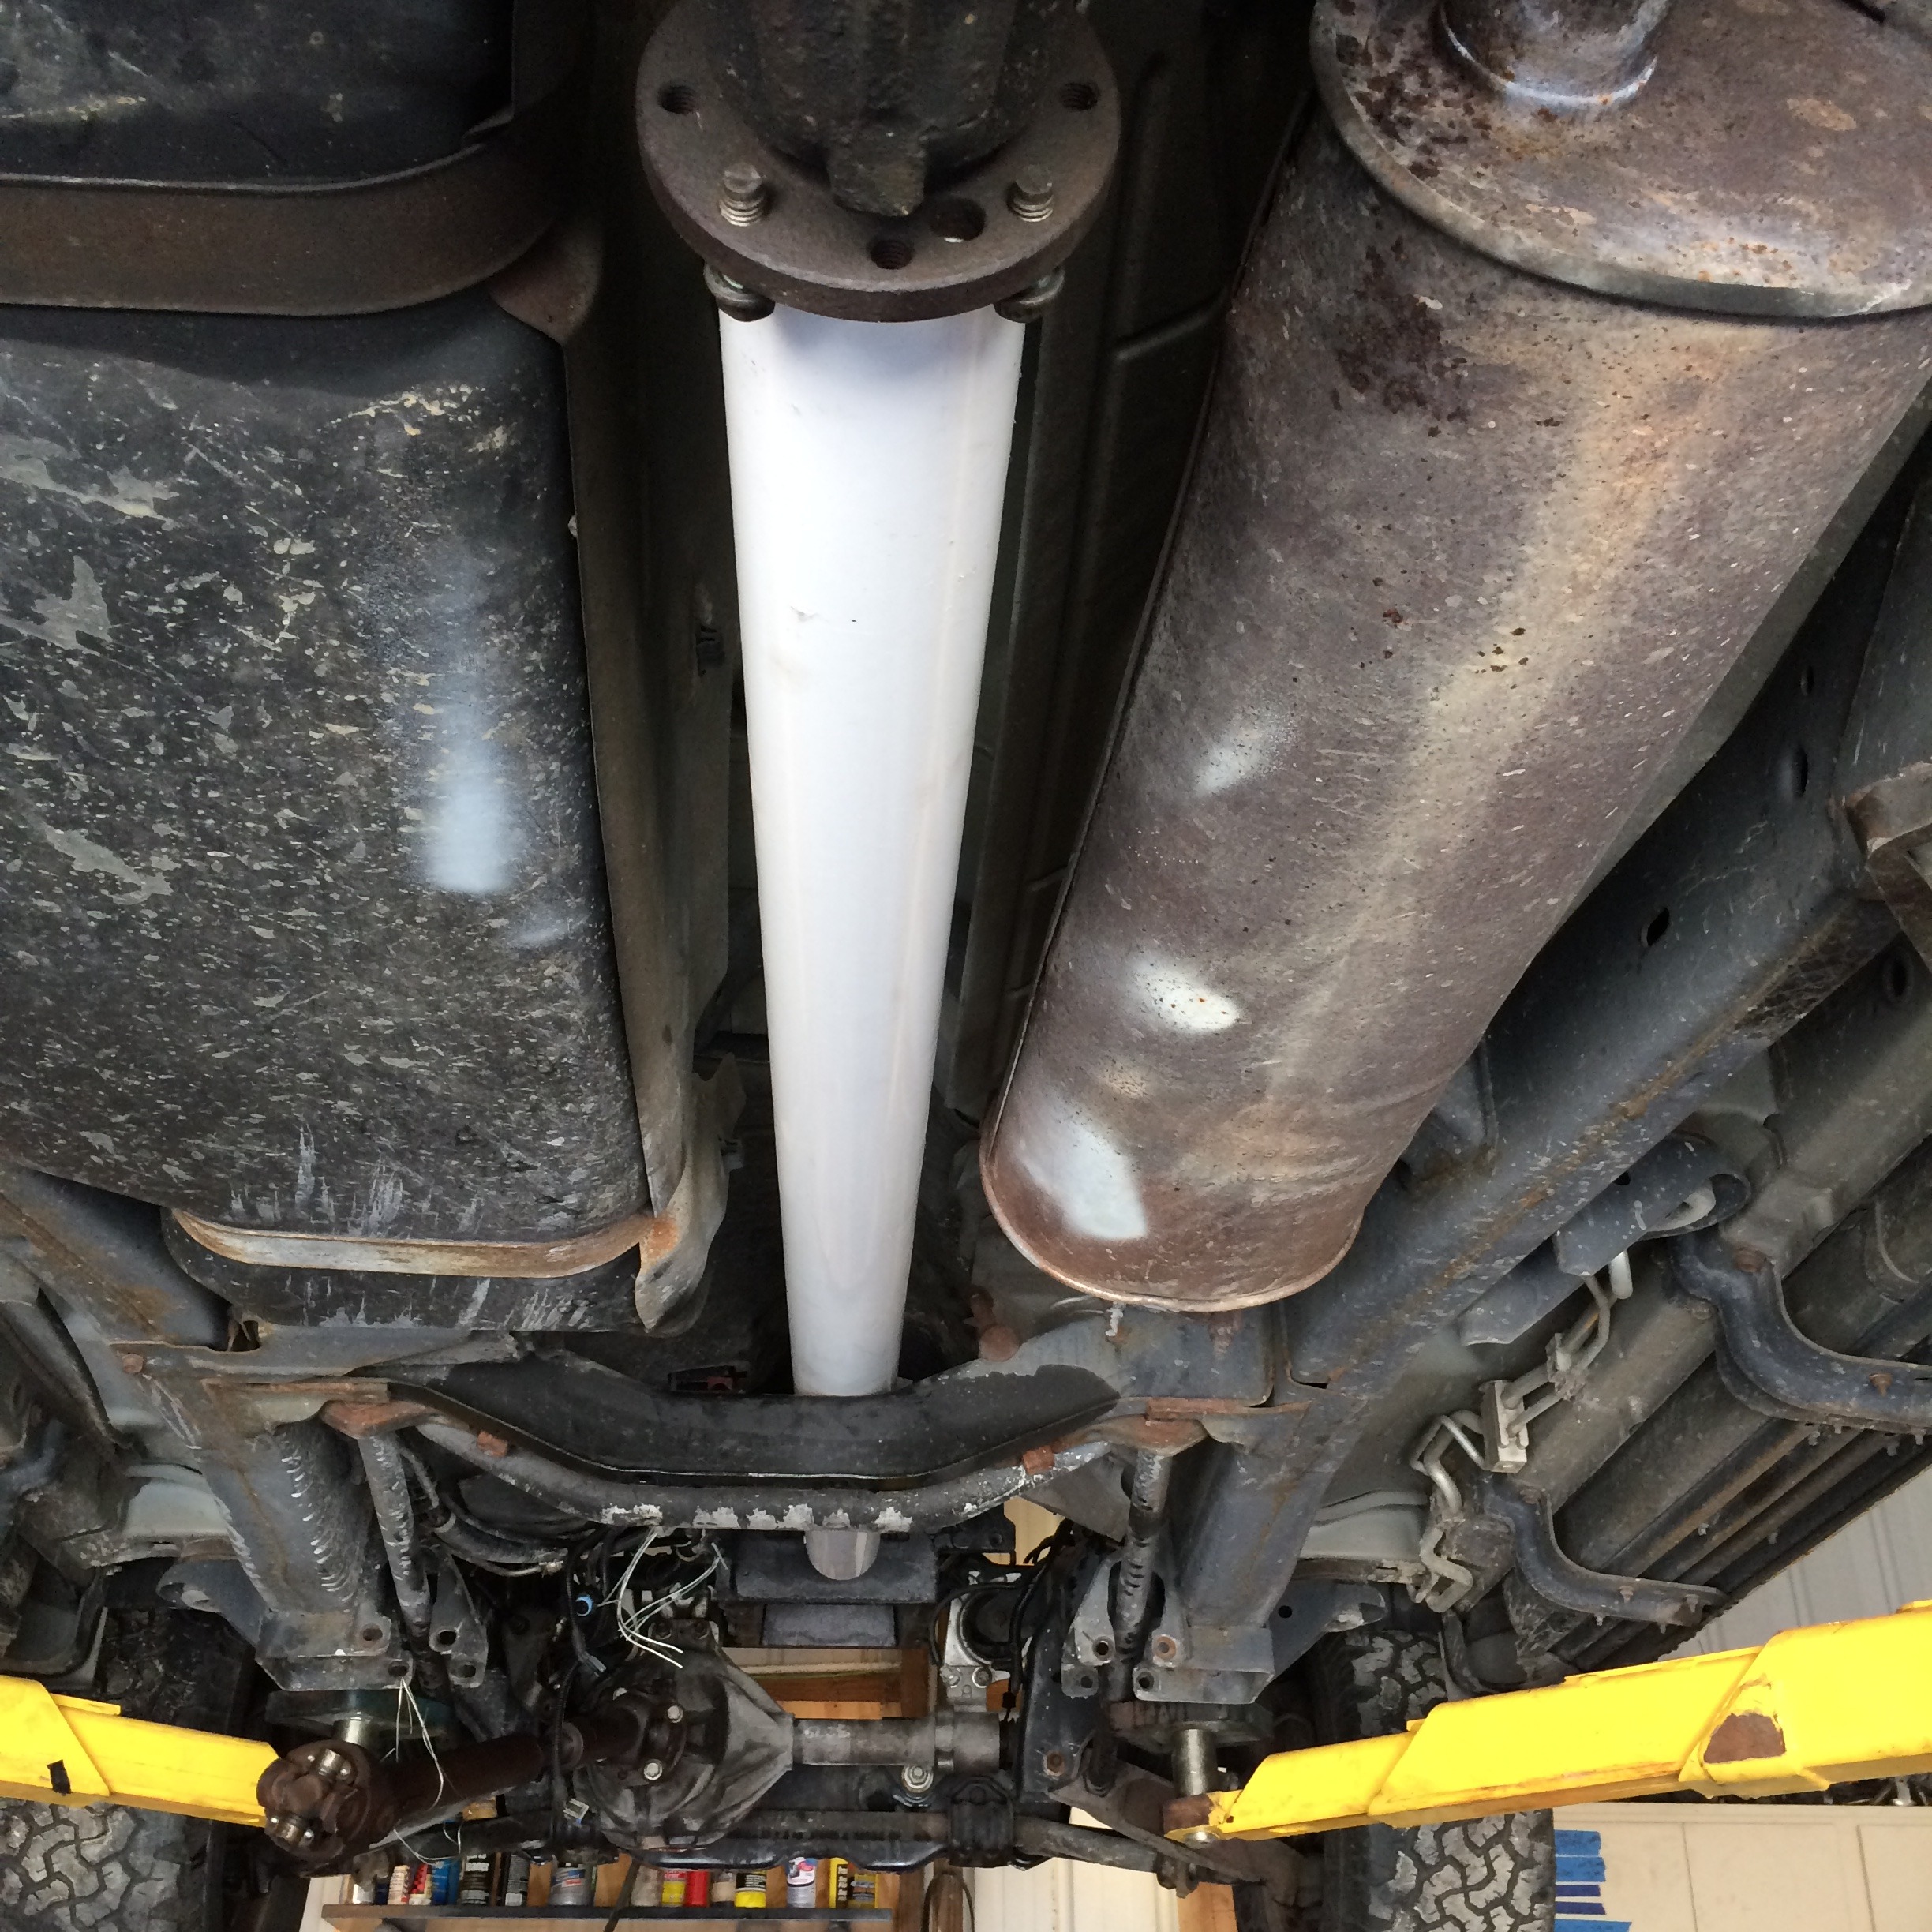
And keeps the driveline angle correct. Represented here by a PVC pipe.
Now, it's time for a drivetrain, fuel system upgrade, and wiring.


But the motor finally gave out at 172,000 miles. Started eating coolant, steaming out the tailpipe, and running like crap. No doubt a head gasket failure.
Not that it was a really great motor to begin with. From new, it used about a quart of oil every 1,000 miles, and got a stellar 13 mpg over it's lifetime, making a whopping 180 hp at the wheels.
Times have changed.


Motor is out.

Using adapter plates, I attached the stock motor mounts to the LS block.


Dropped it in, and had to make one small modification. The driver side motor mount had to be notched about 3/4 inch.

This retains the stock isolators, and keeps the engine and front axle in the stock location


And keeps the driveline angle correct. Represented here by a PVC pipe.

Now, it's time for a drivetrain, fuel system upgrade, and wiring.

 09-27-2015, 10:44 AM
#3
So, continuing on with the build in real time. When I did the Dakota R/T build, I had more full days off, and didn't really concentrate on some of the details. This time, I am going to post projects as they happen.
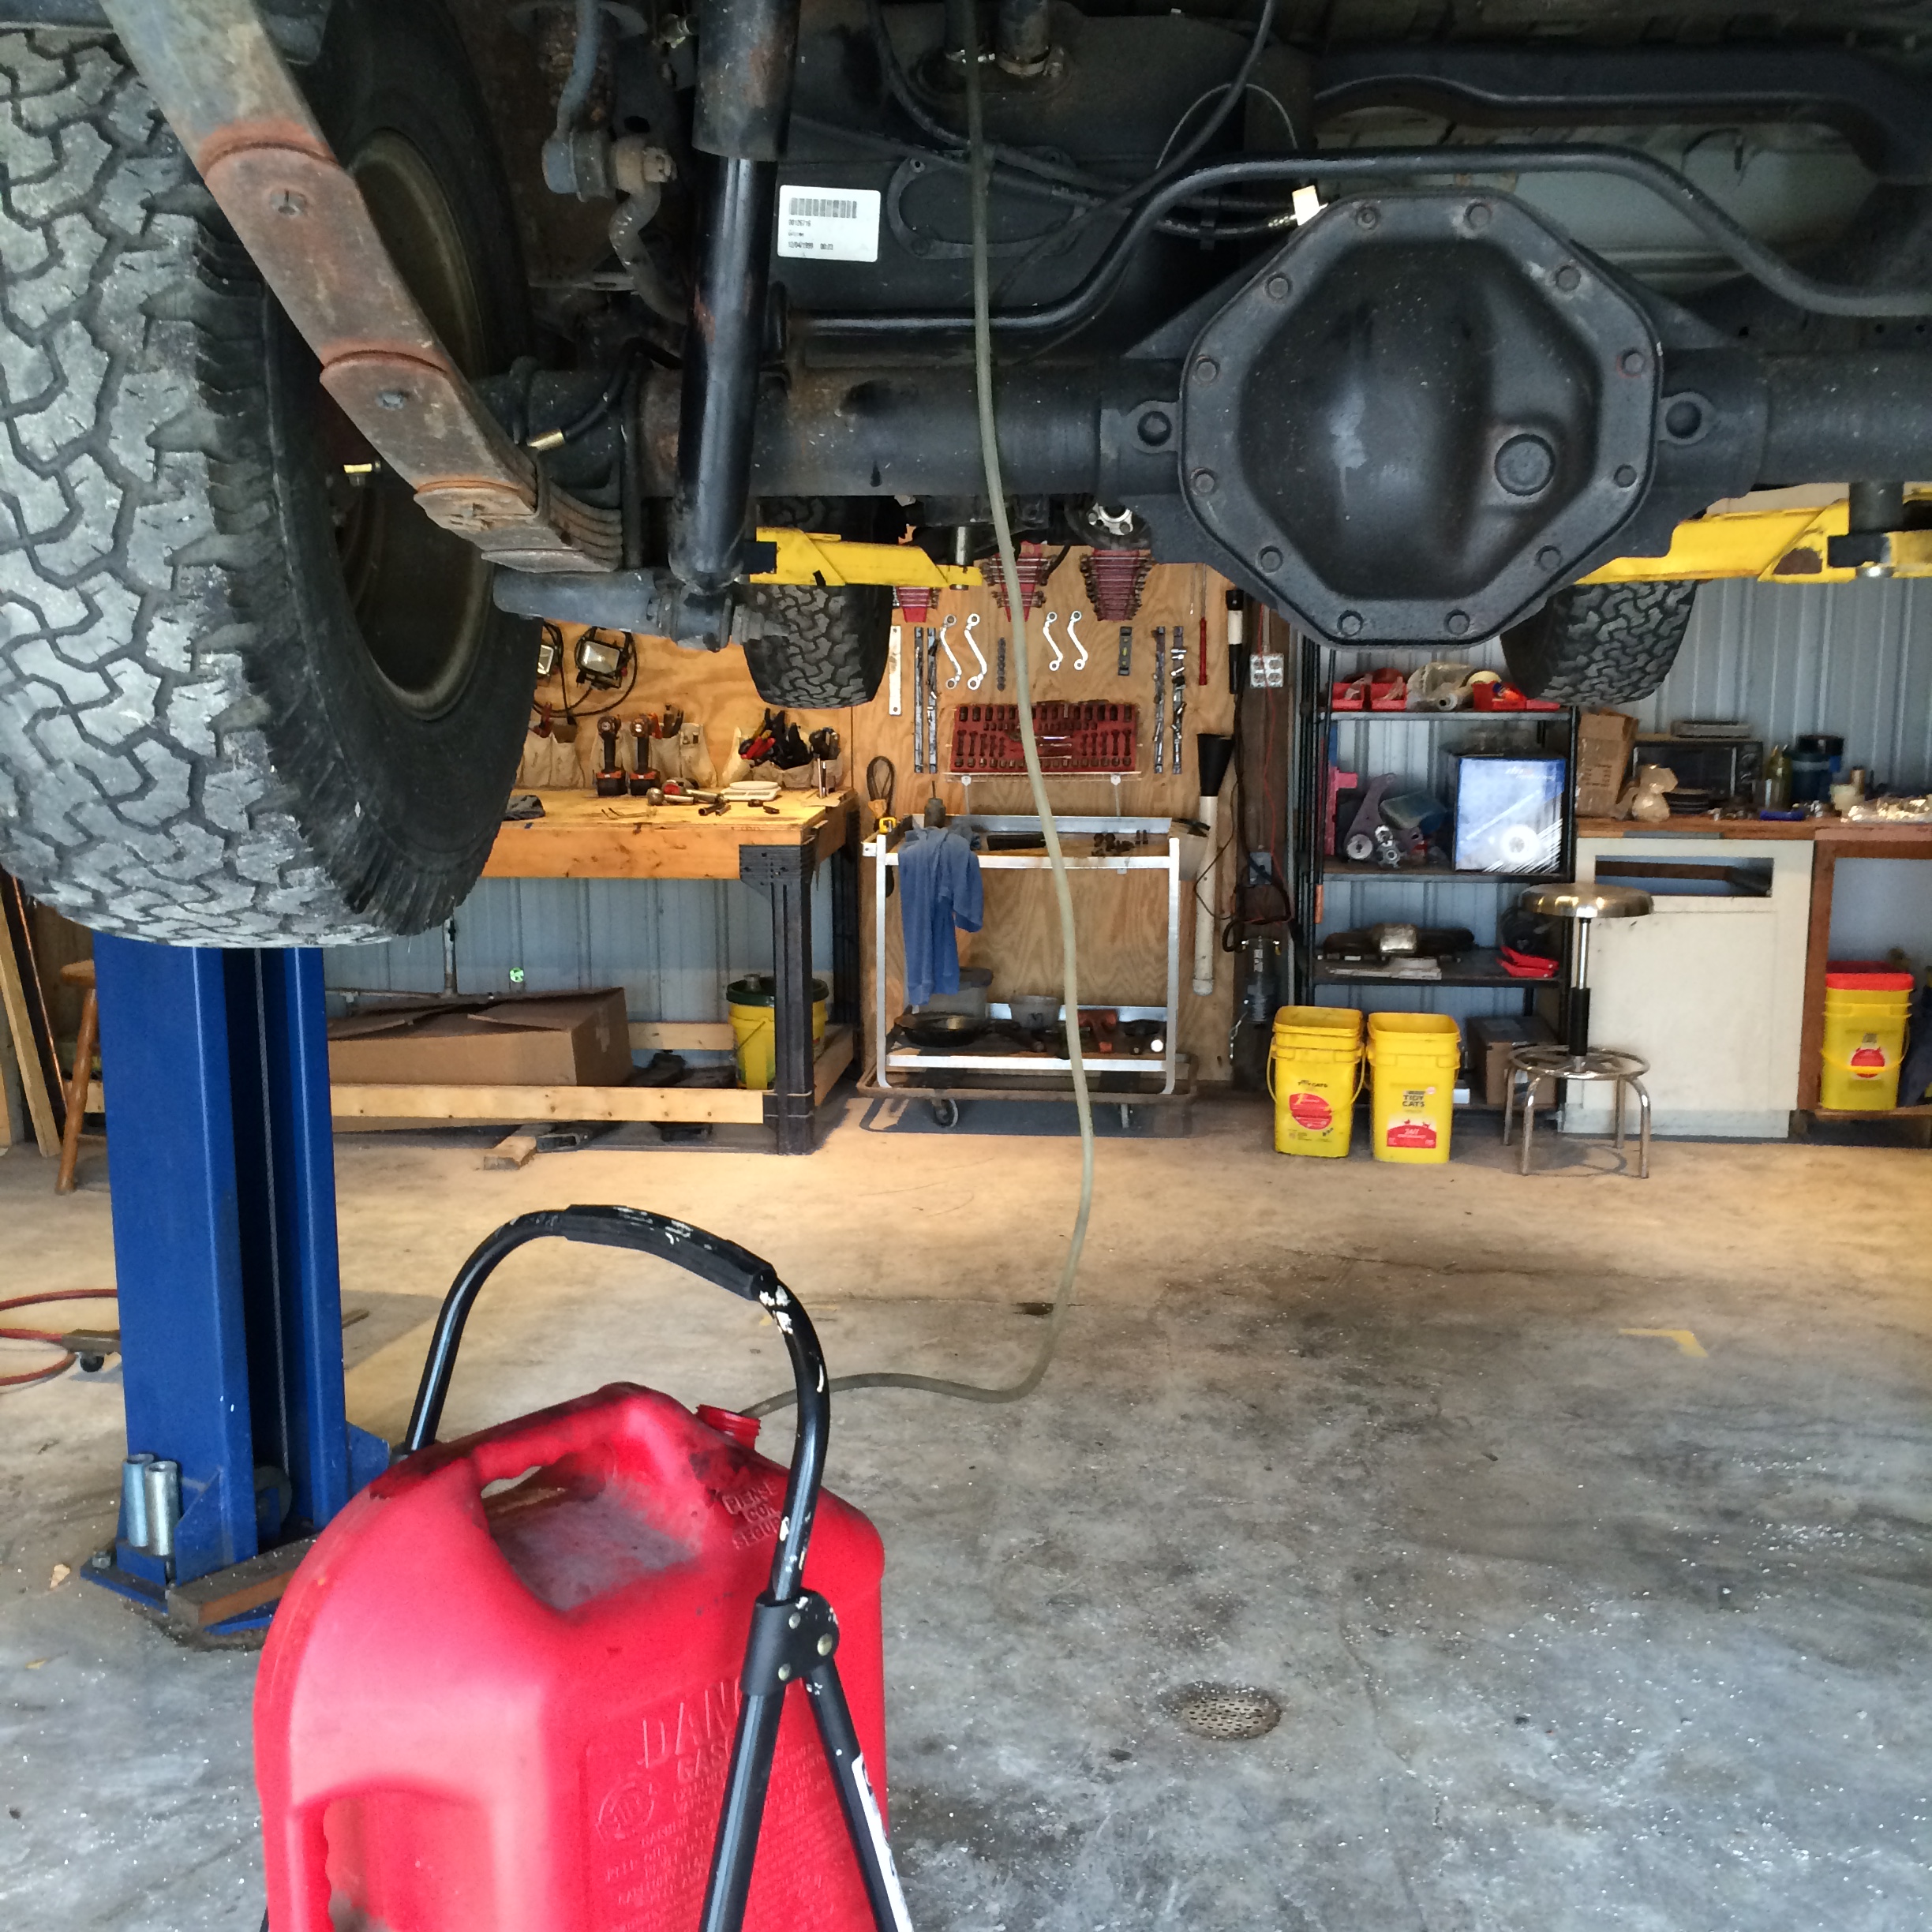
Fuel system teardown - one hour
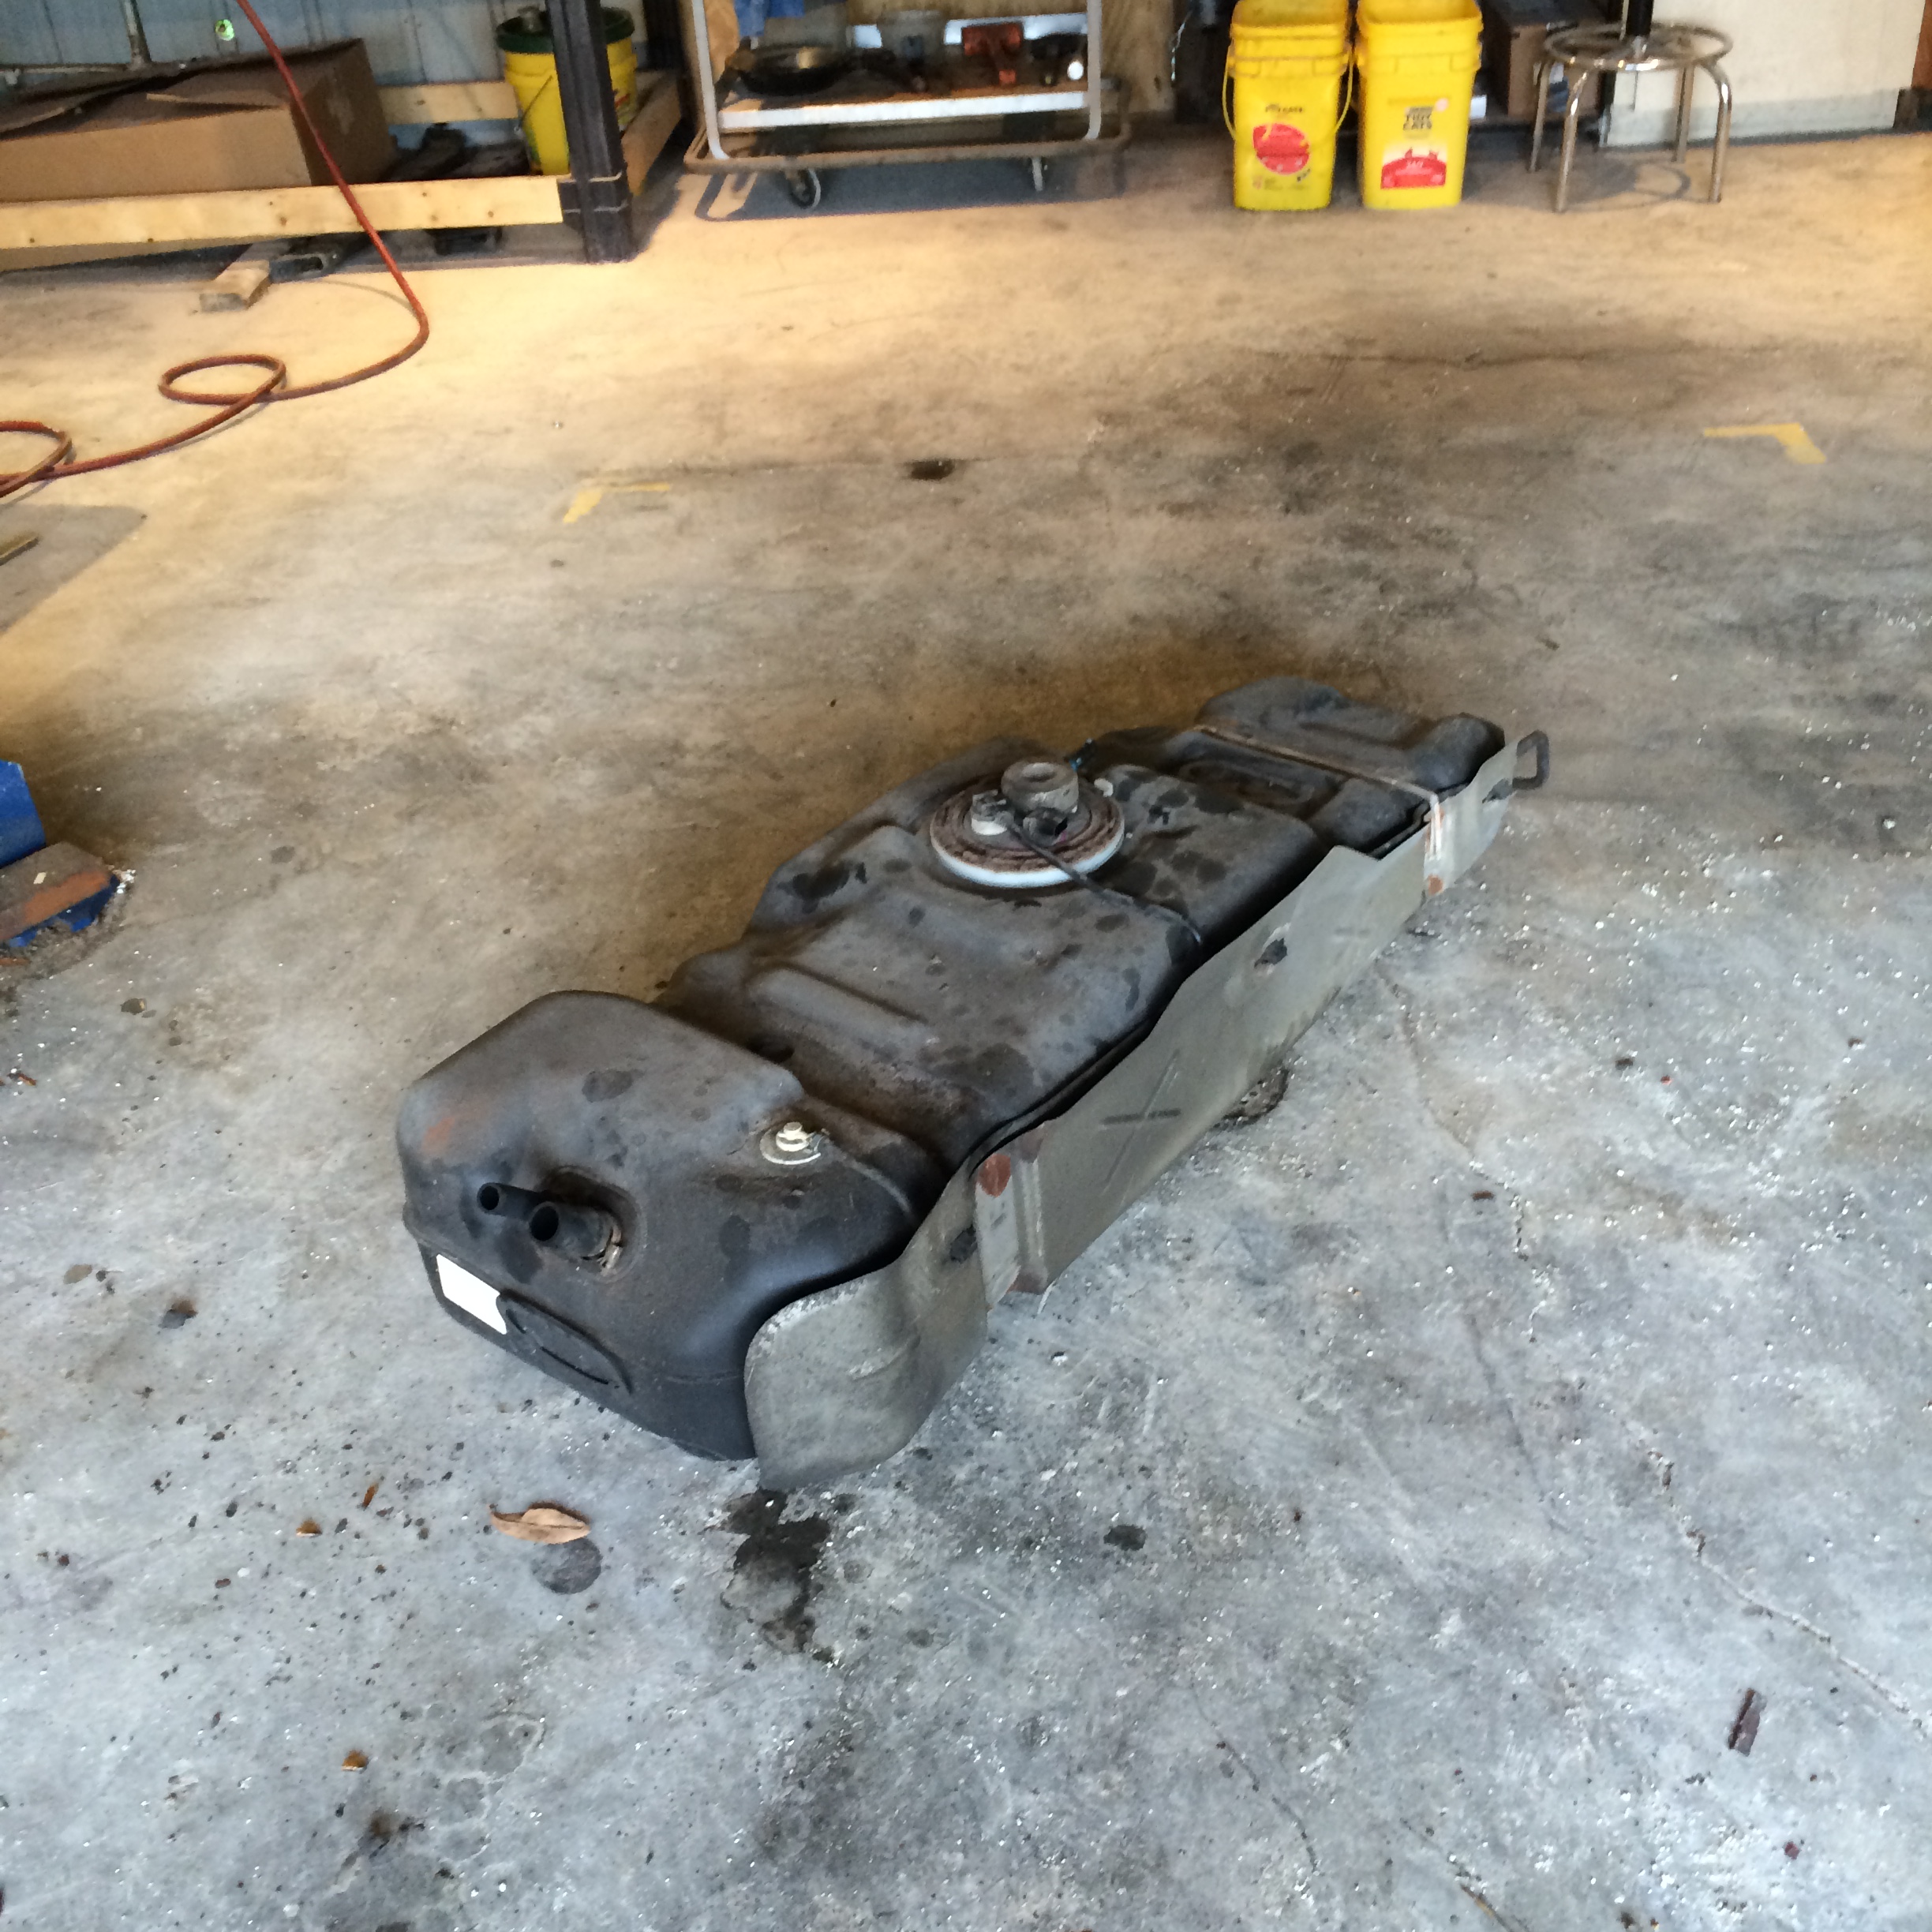
The Durango has the vent and fill lines on the back of the tank, and uses straps, just like the Dakota. Cut the vent and fill lines (they are soft garbage at this point anyway), and soak the nuts on the straps with PB blaster).
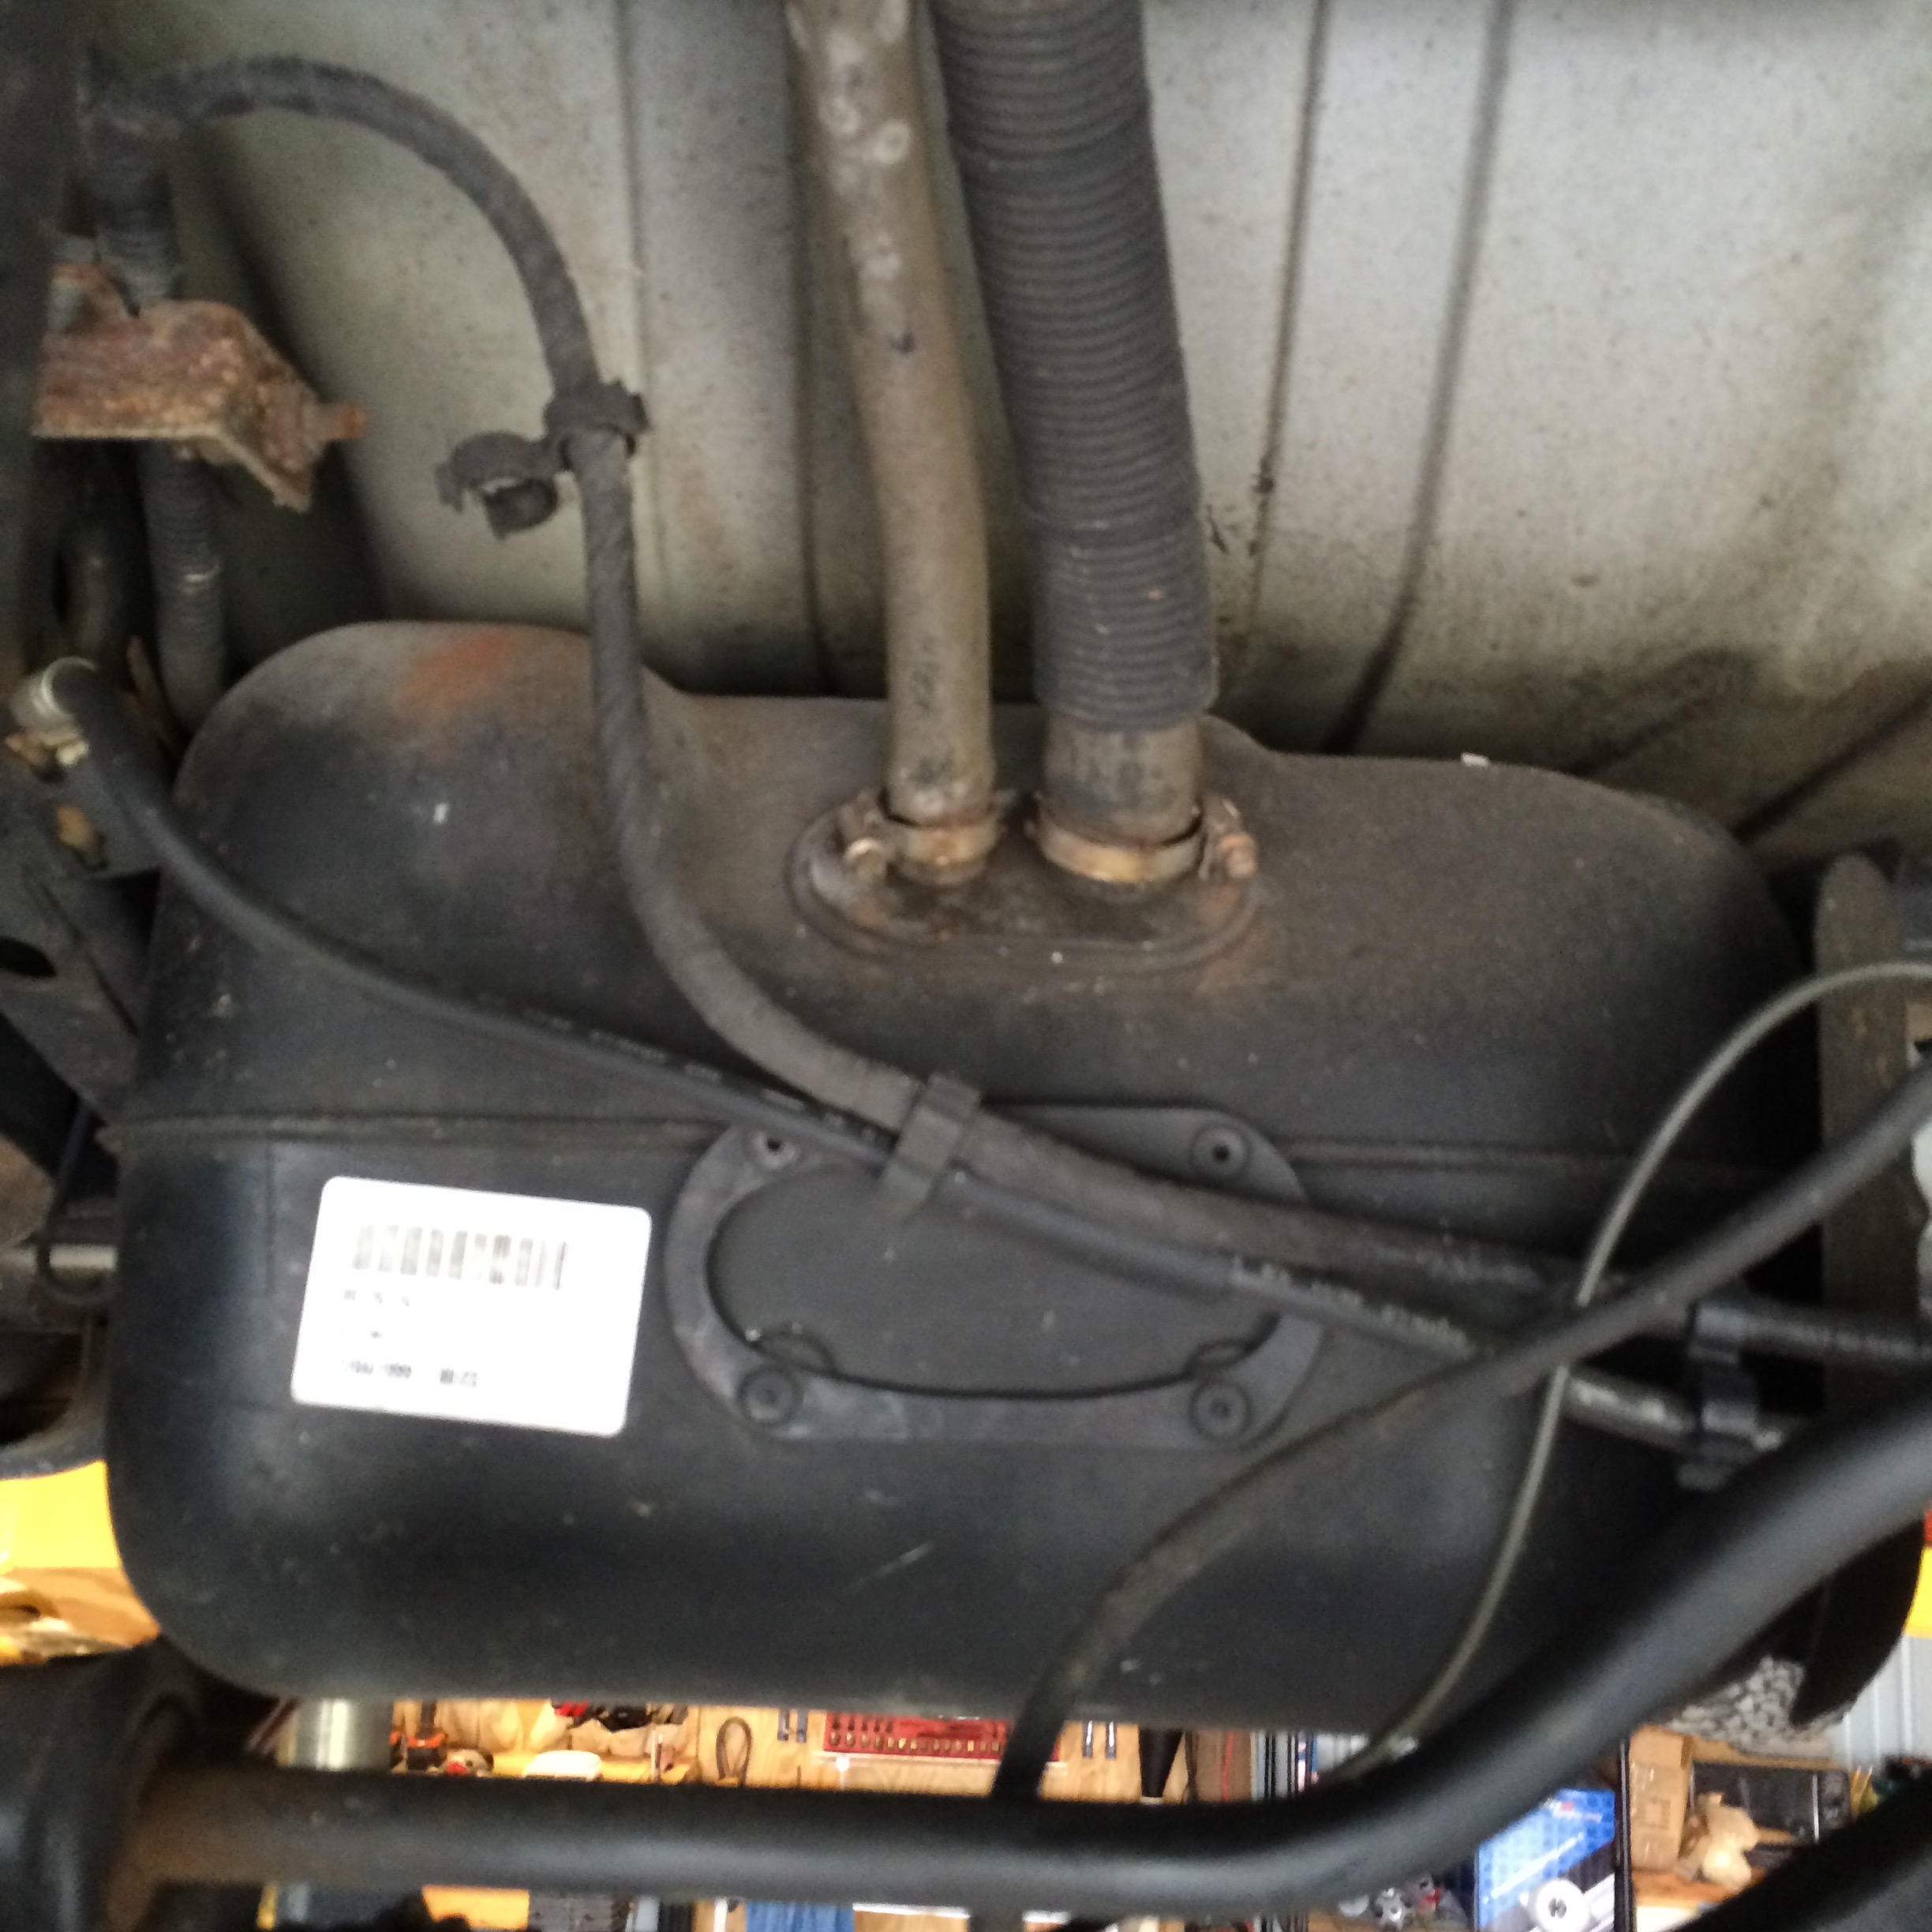
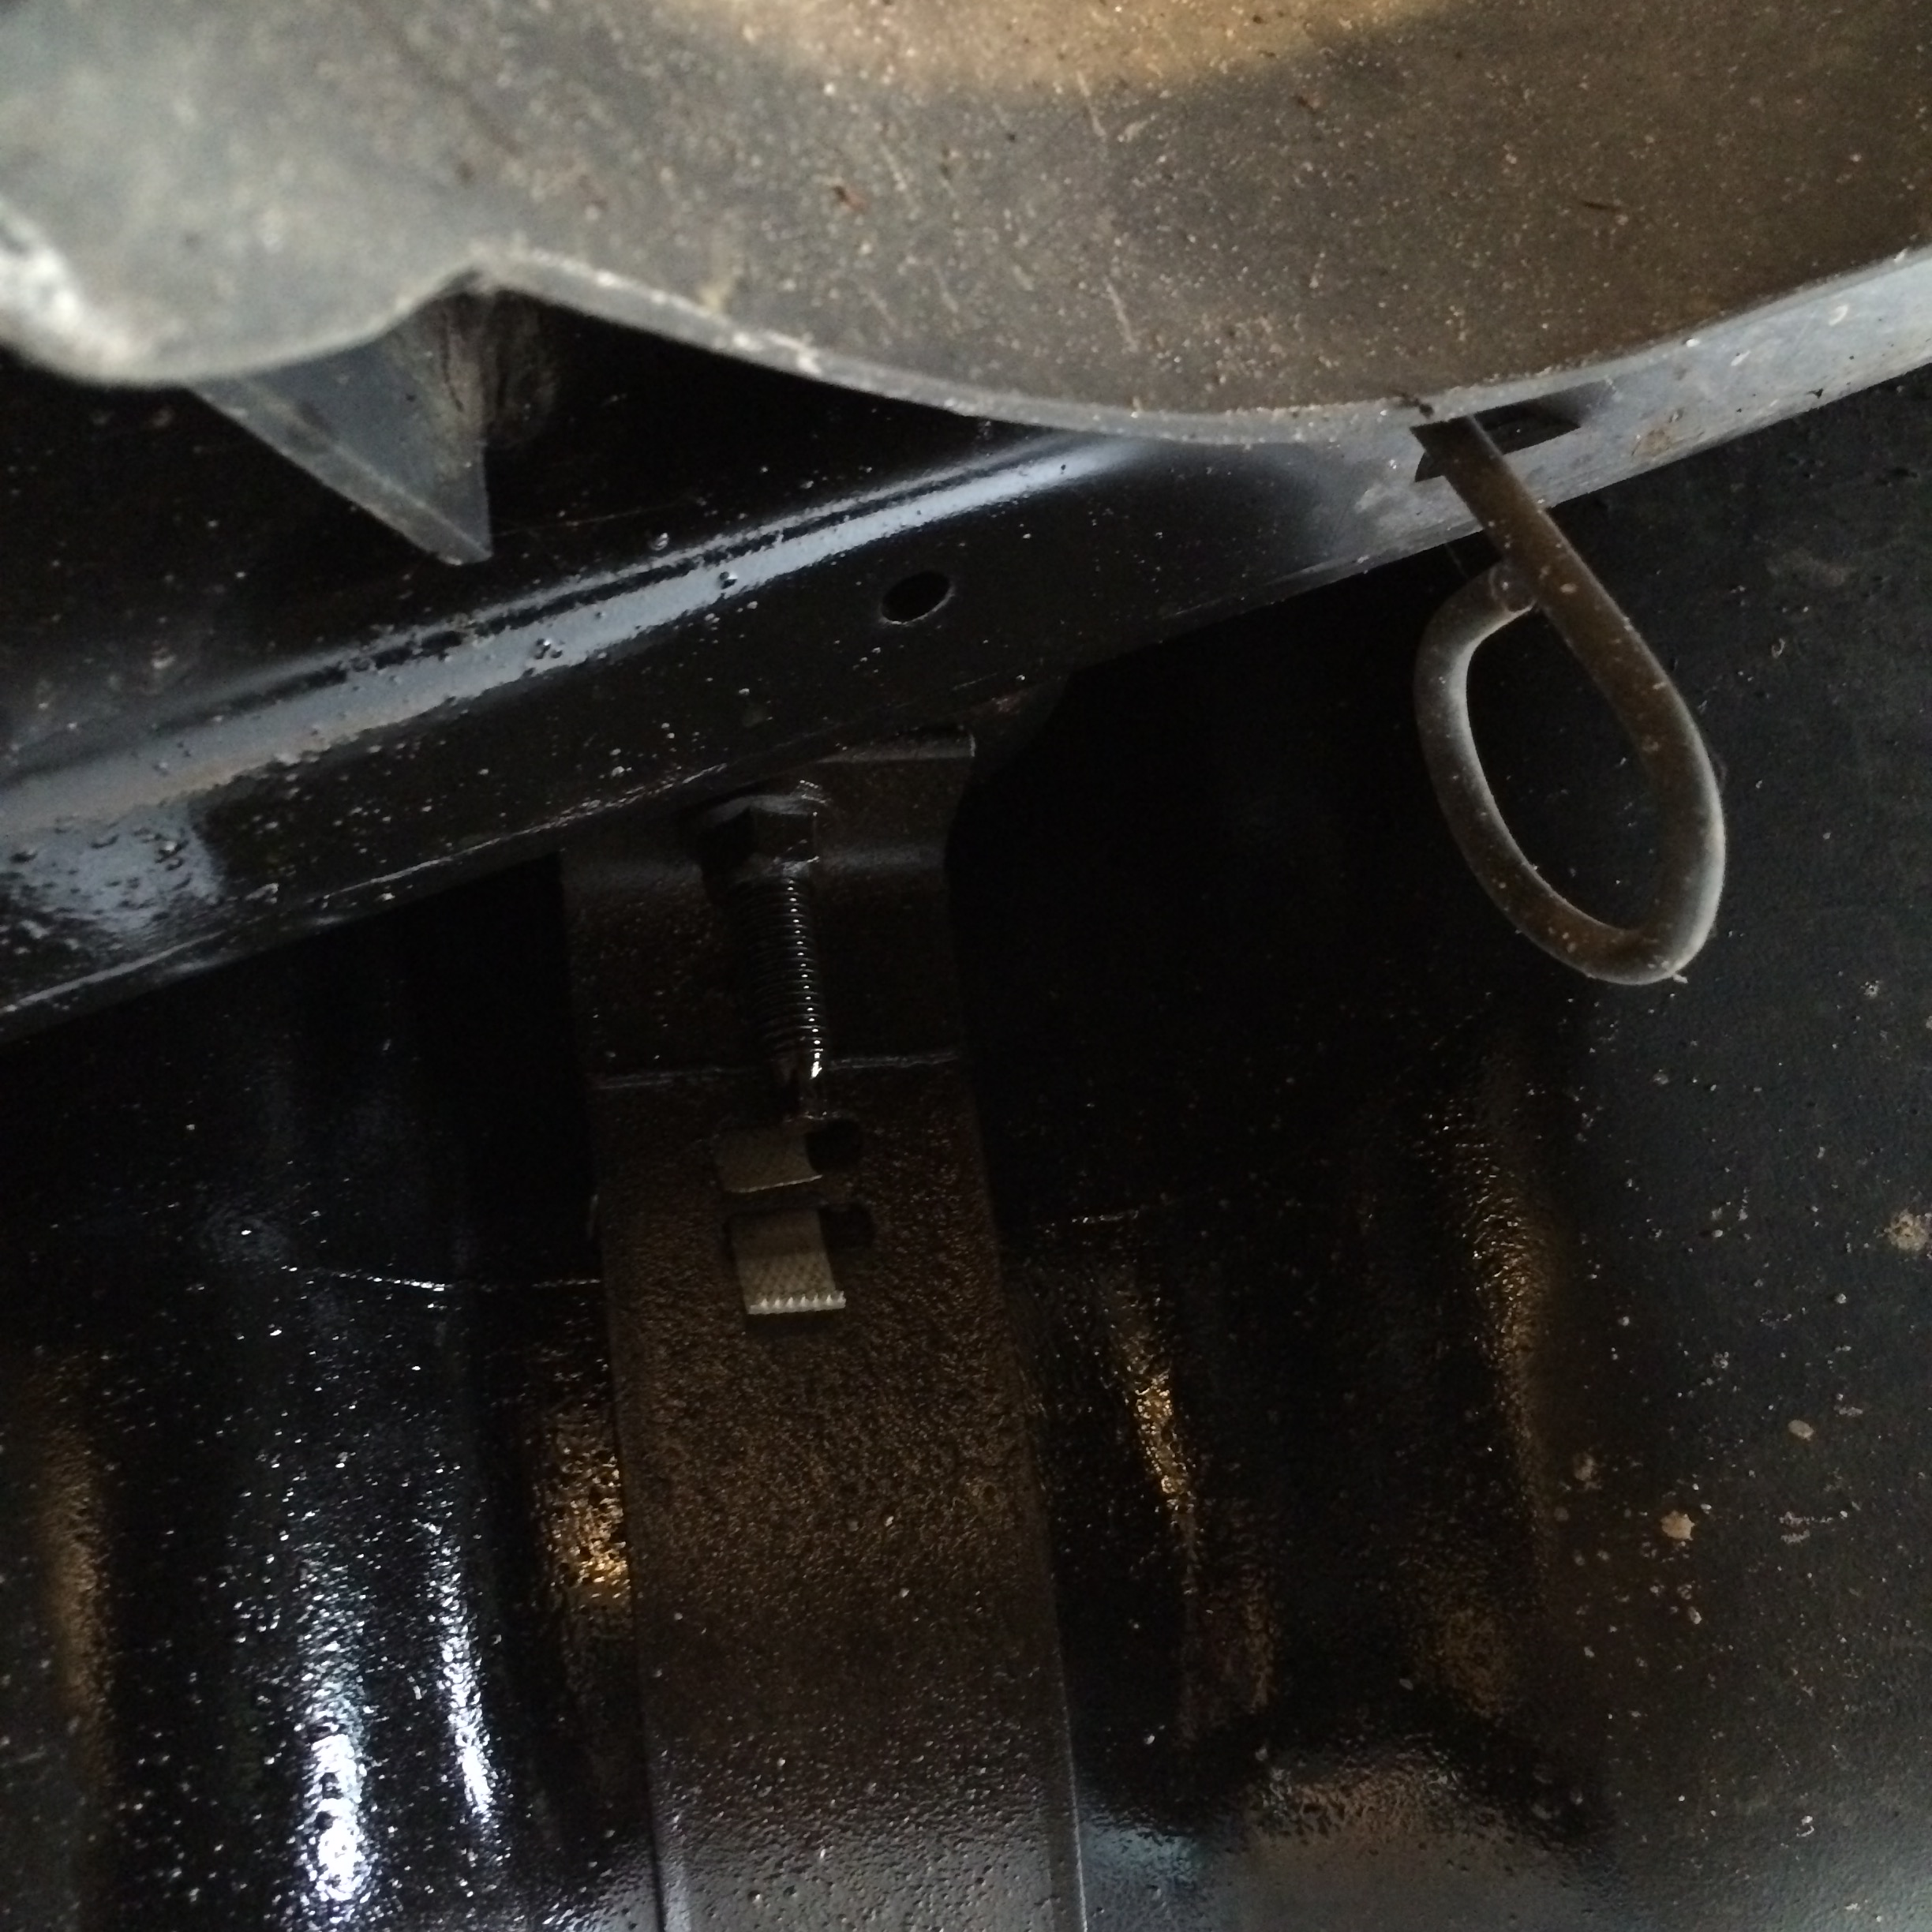
Siphon the tank through the vent line. The fill line has a grid across it to prevent siphoning.
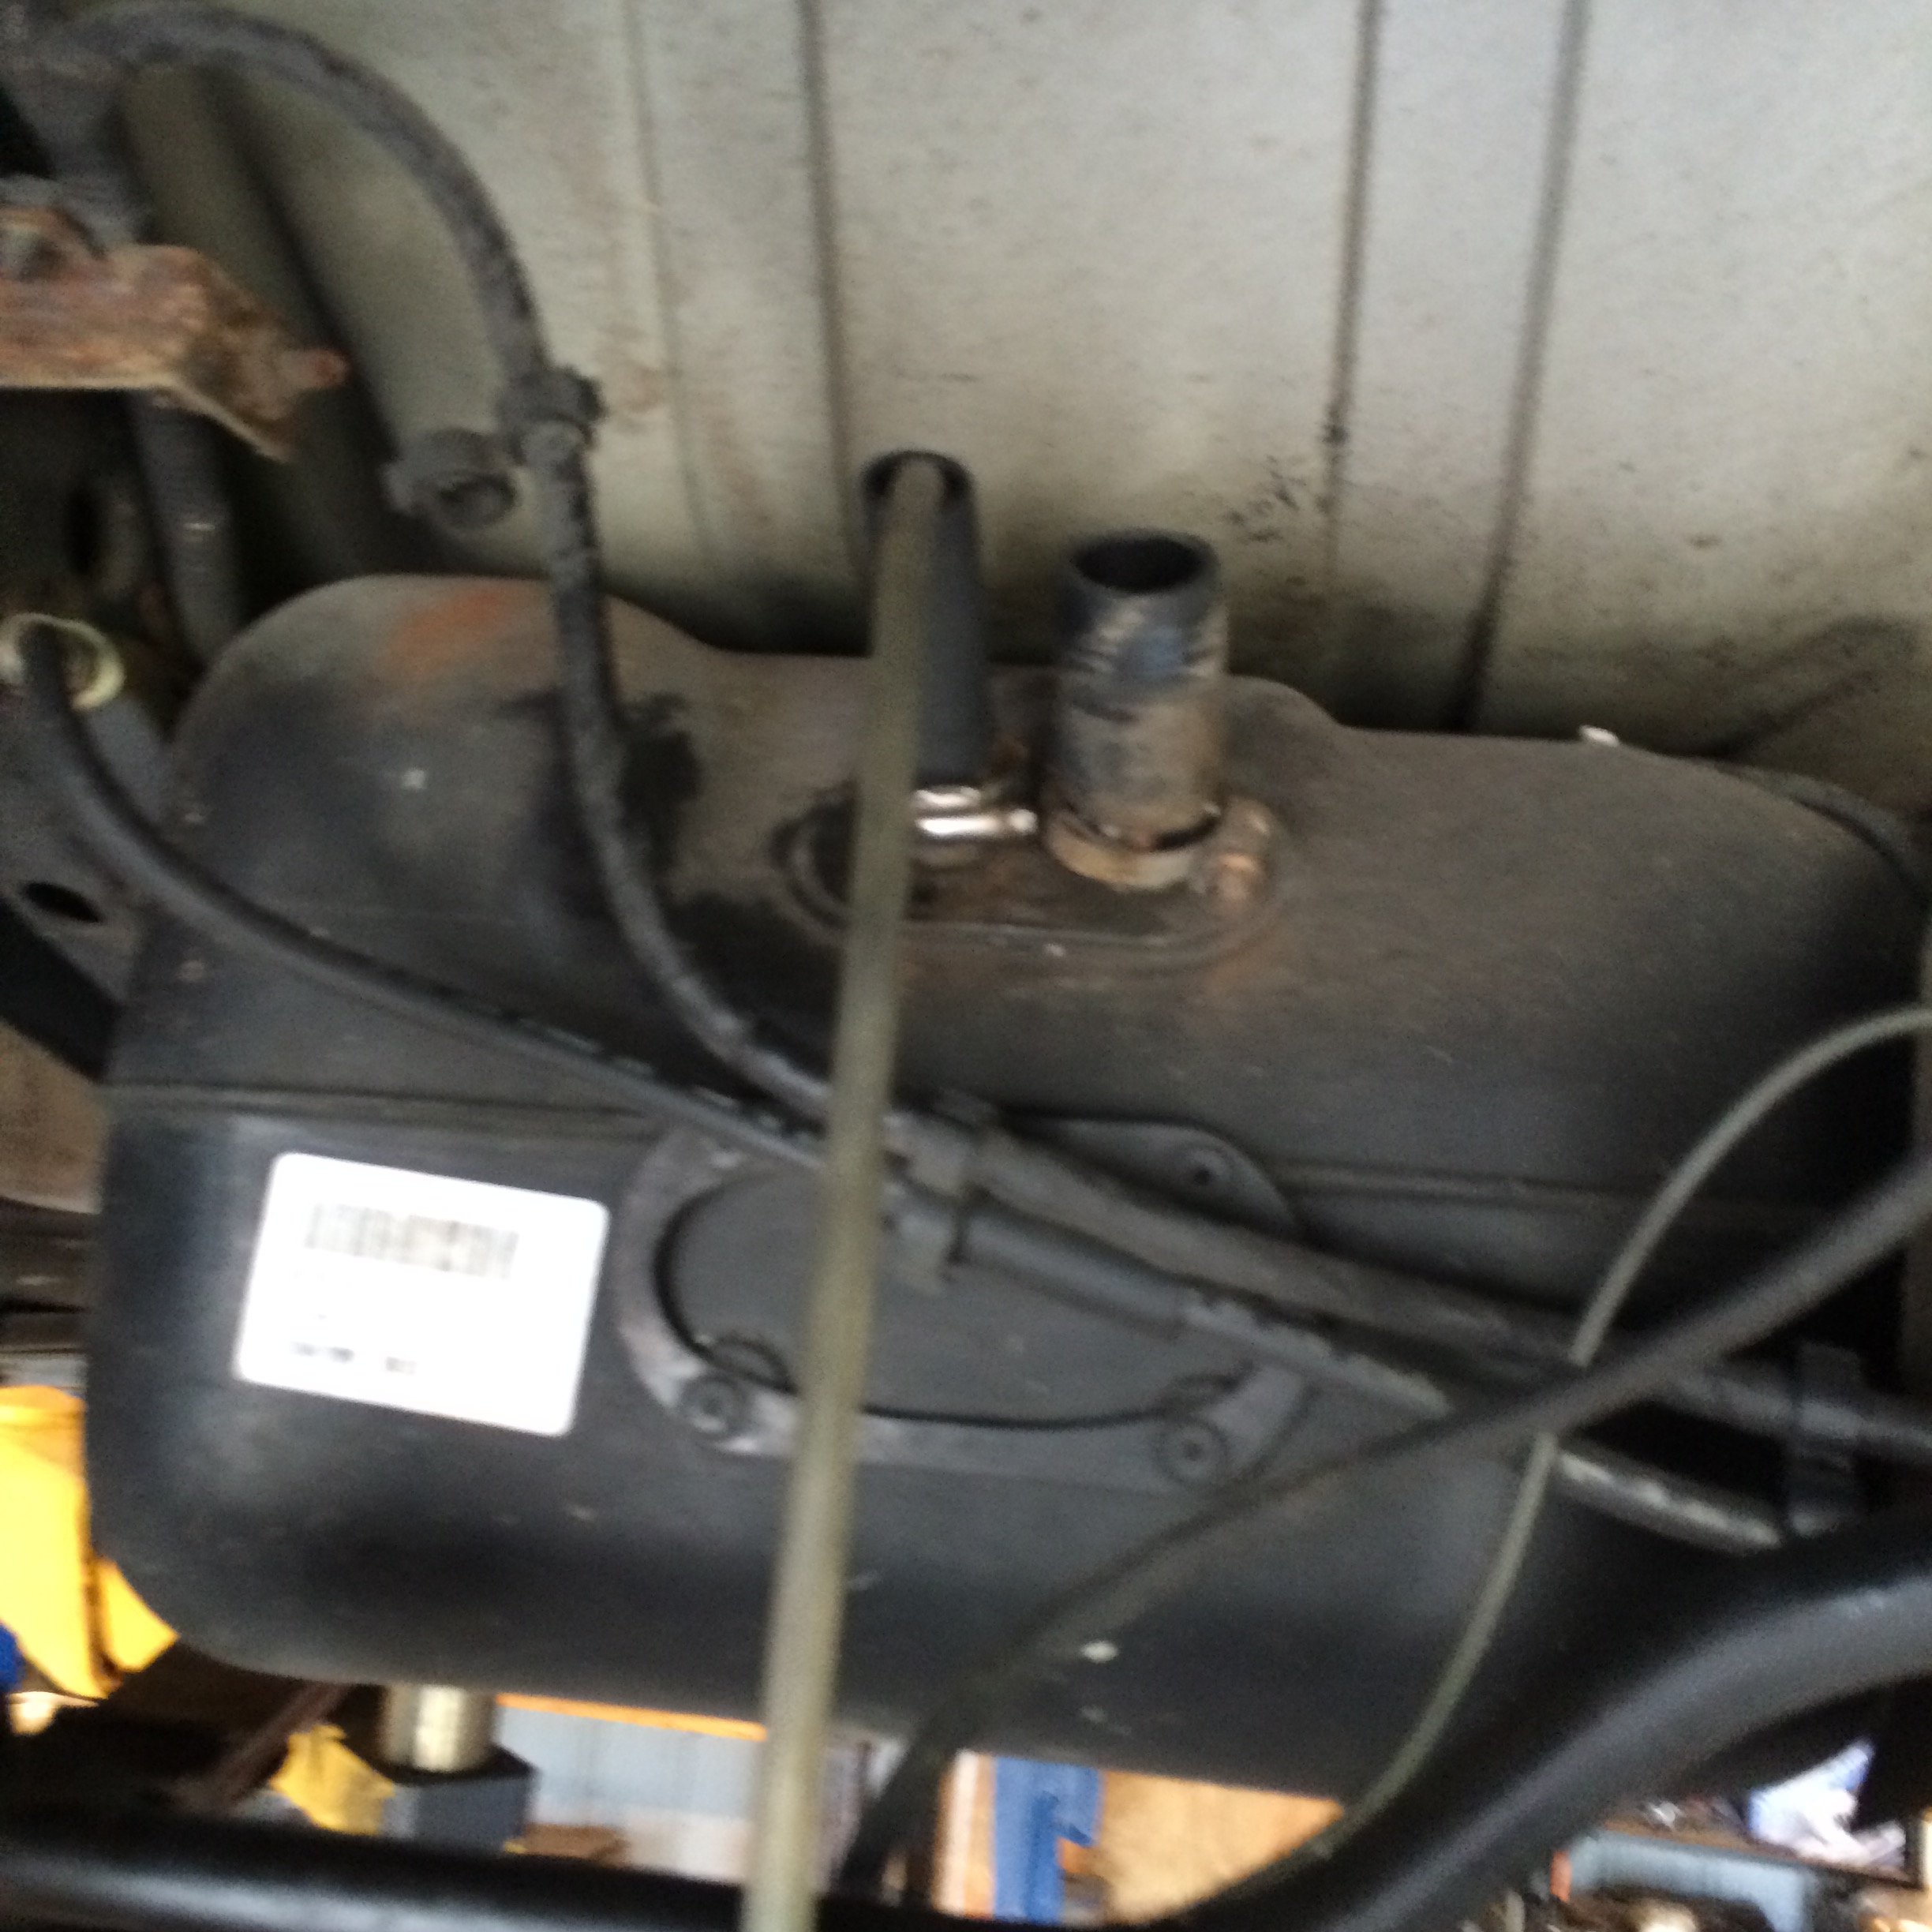
I was able to get the nuts backed out with an impact, without cutting.
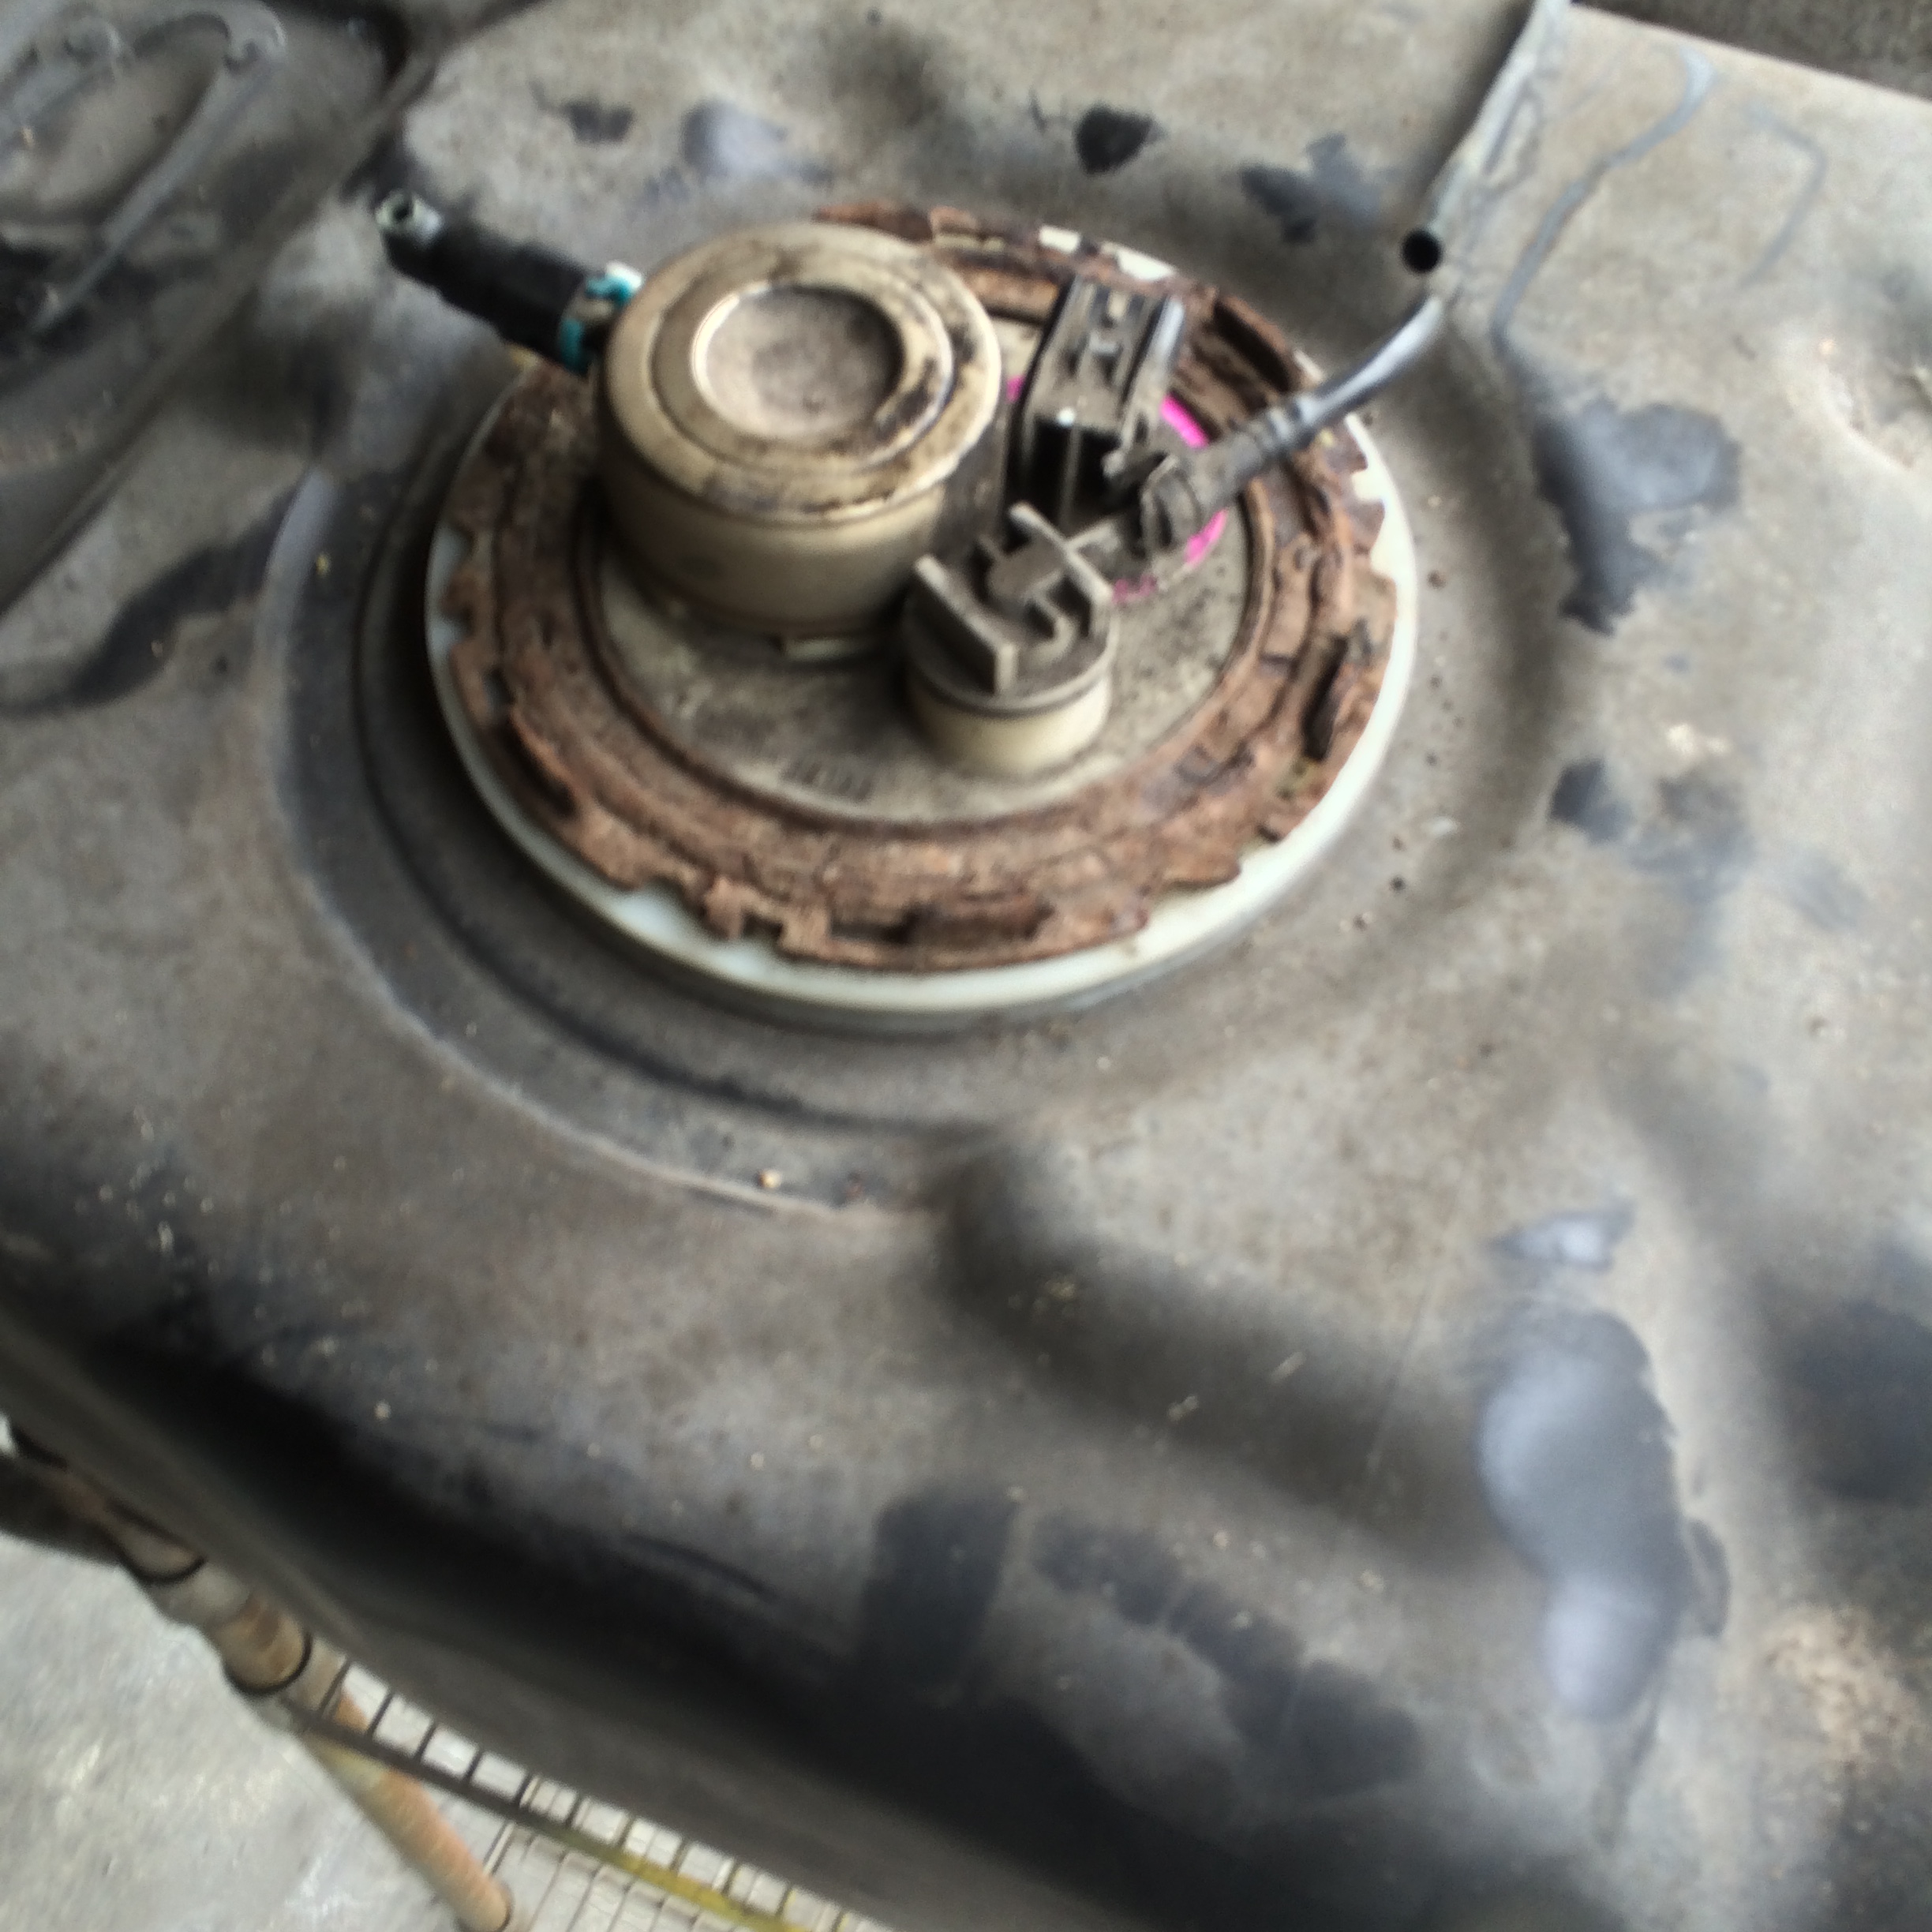
Get that rusted ring off. I am not sure why chrysler uses such junk in places like this. You couldn't give us a stainless ring, aluminum ring, or plastic ring. ********!
Fuel system teardown - one hour
The Durango has the vent and fill lines on the back of the tank, and uses straps, just like the Dakota. Cut the vent and fill lines (they are soft garbage at this point anyway), and soak the nuts on the straps with PB blaster).


Siphon the tank through the vent line. The fill line has a grid across it to prevent siphoning.


I was able to get the nuts backed out with an impact, without cutting.

Get that rusted ring off. I am not sure why chrysler uses such junk in places like this. You couldn't give us a stainless ring, aluminum ring, or plastic ring. ********!
 10-05-2015, 06:31 AM
#4
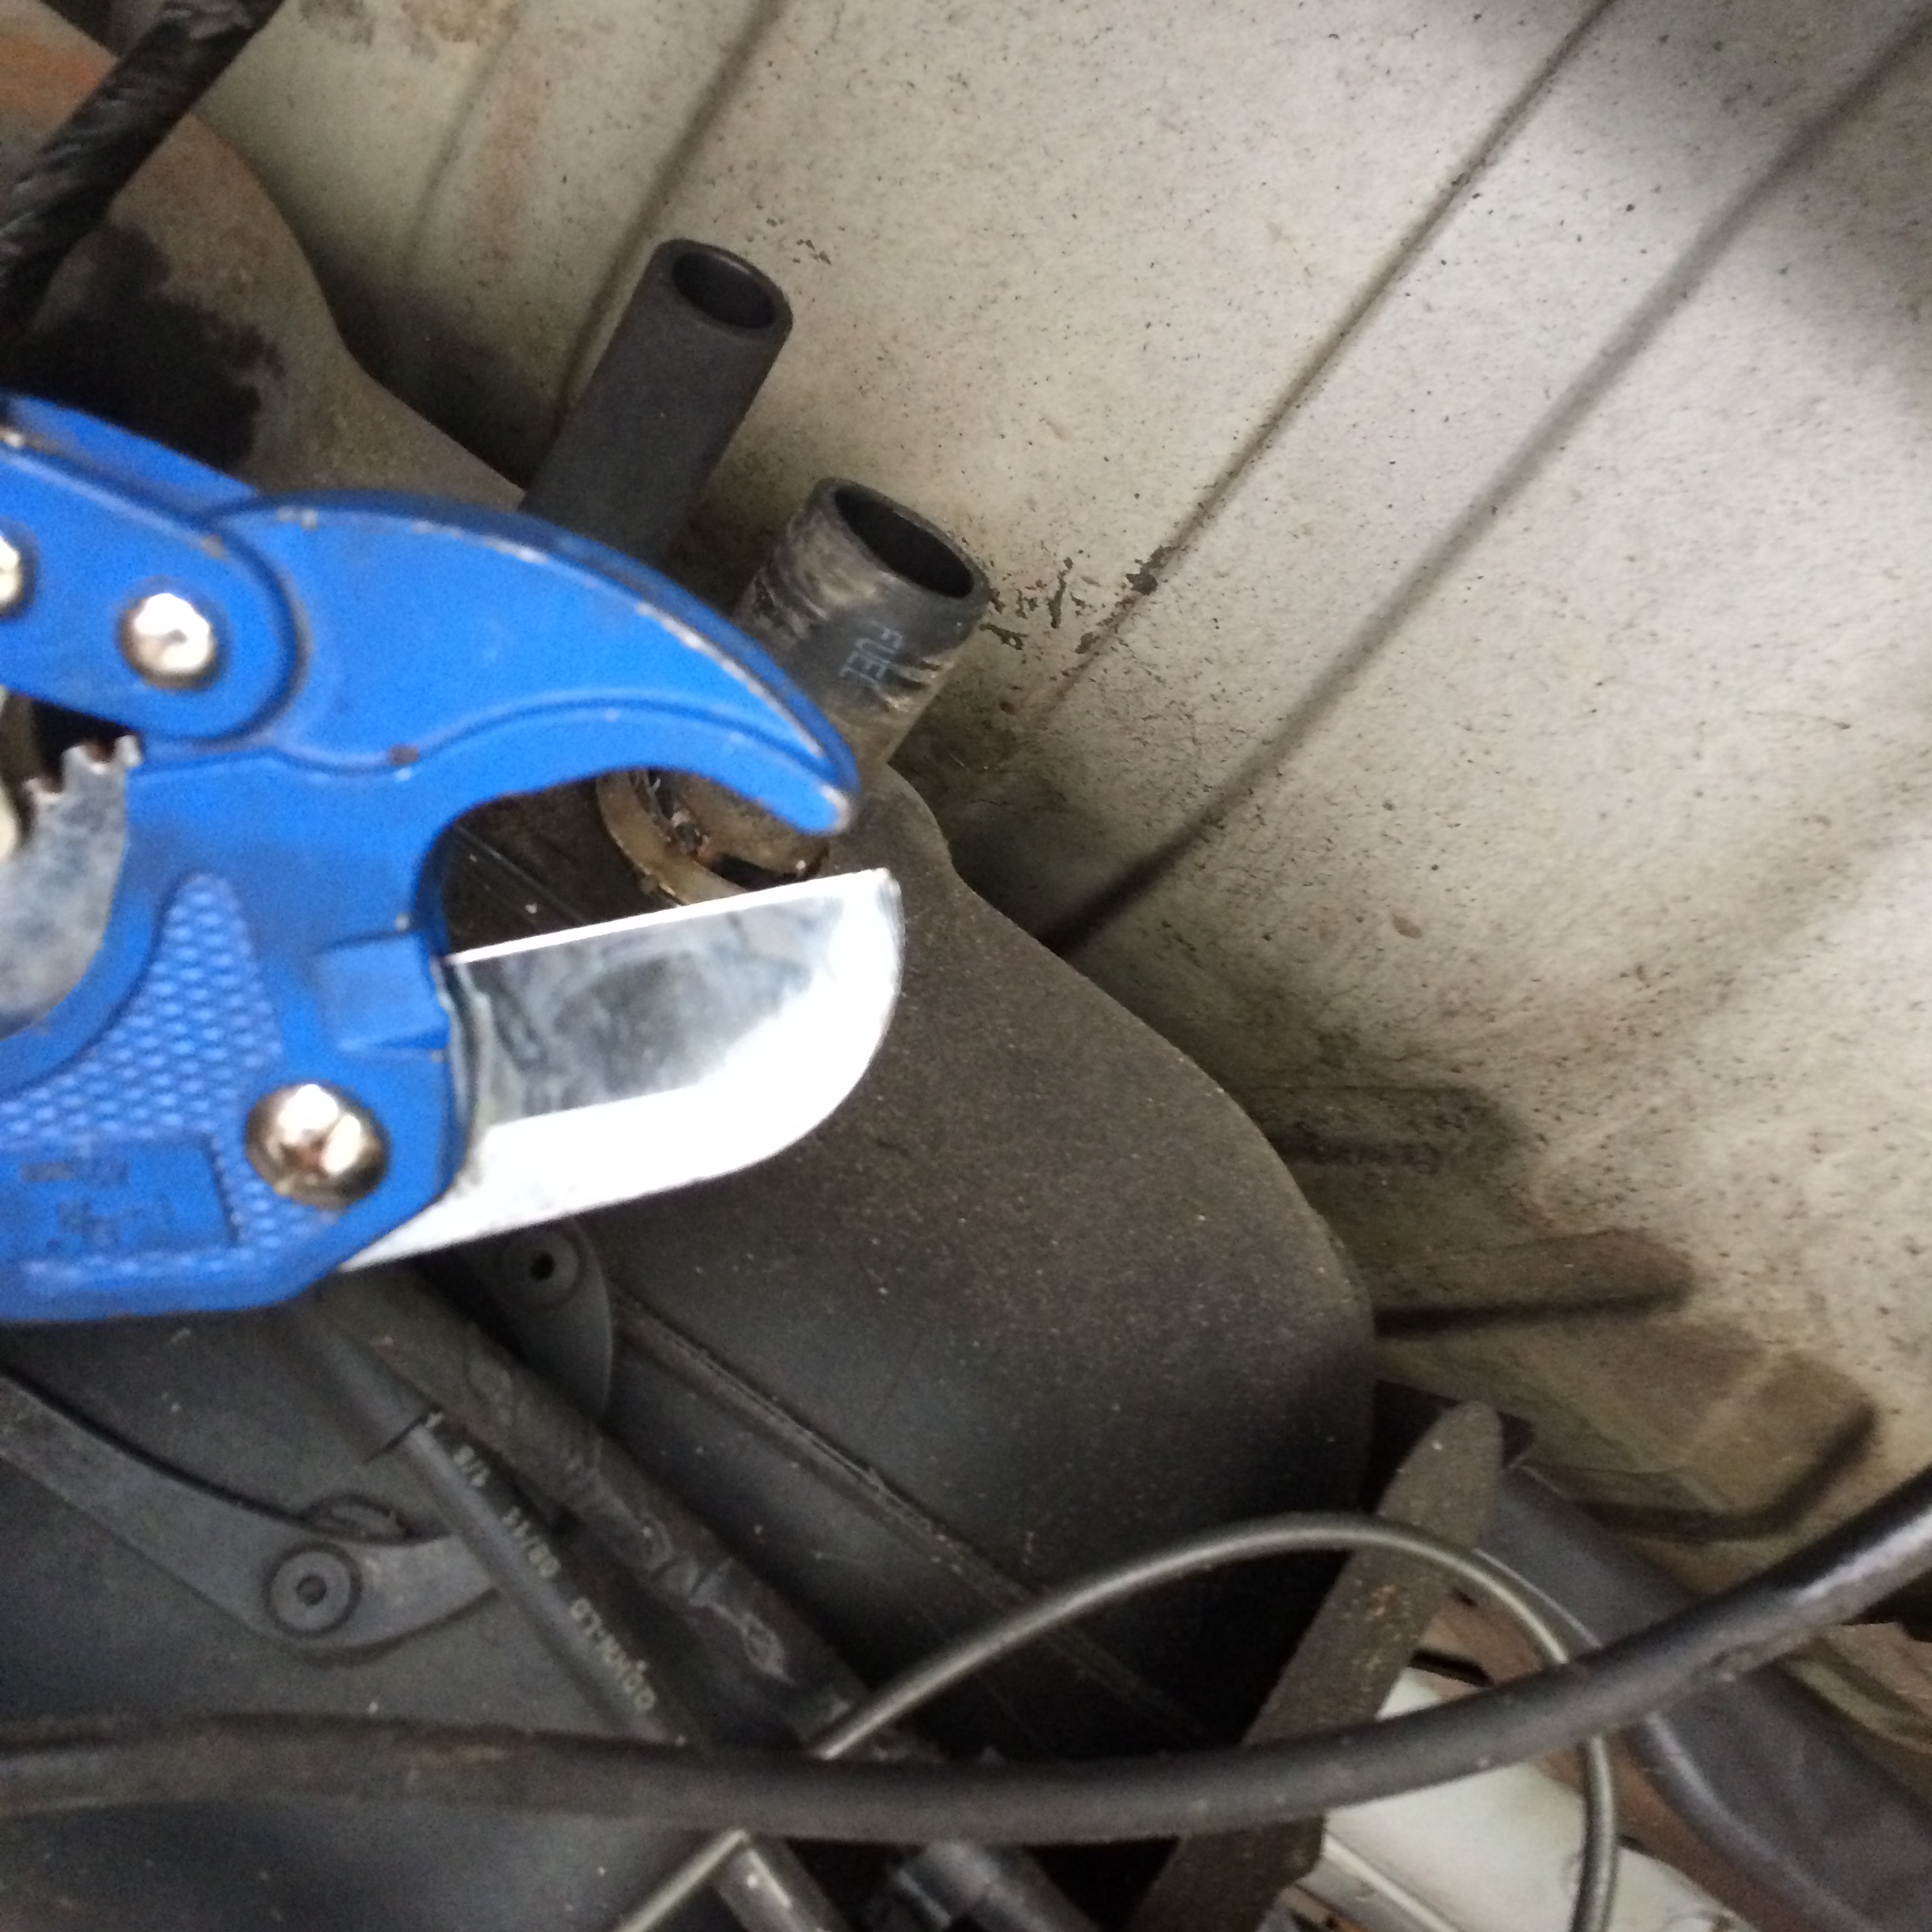
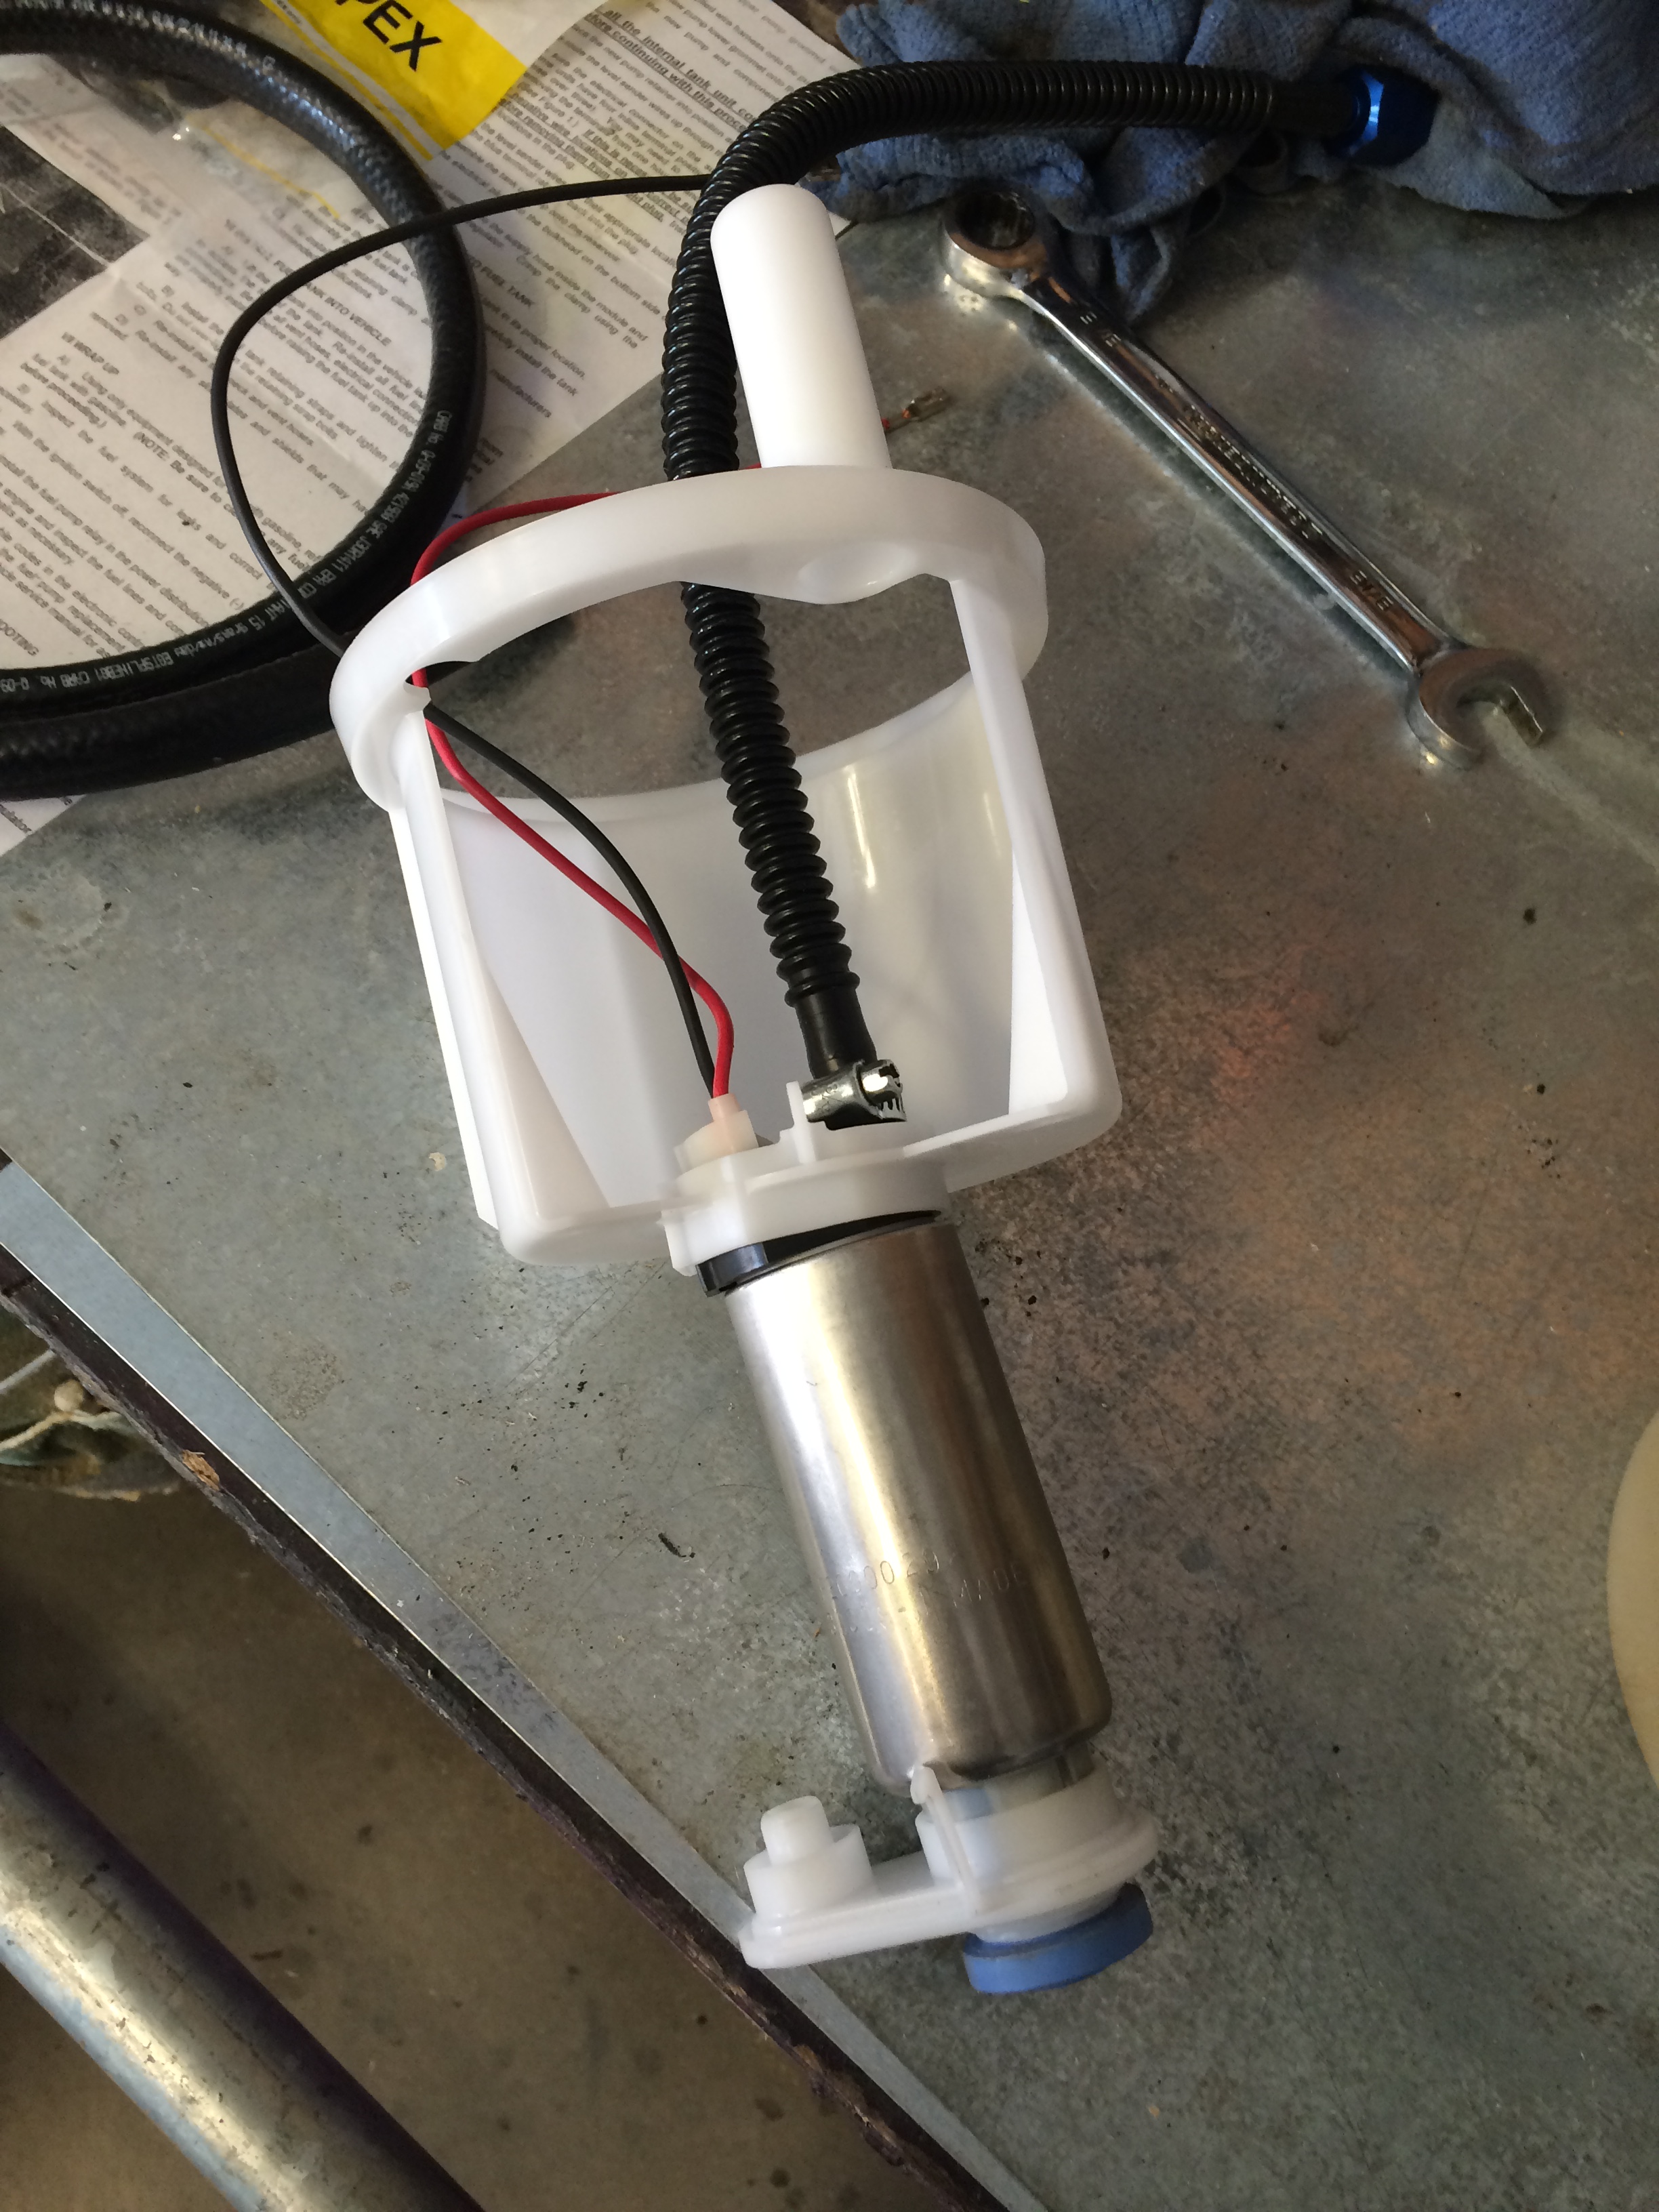
Continuing the fuel system, I pulled the basket out and replaced the pump with a Walbro 255, and converted the outlet to AN6 for 3/8 hard line. I used brass fittings and Gates Barricade methanol-resistant fuel injection line for the return.
The only trouble I ran into was trying to remove the old regulator. Usually they are pressed into a rubber grommet, and pull right out. This one was snapped into the basket with really stiff nylon clips. Trying to remove it would have destroyed the basket. So I capped it and abandoned it.
I pulled out a one-way vent valve, and put the AN6 bulkhead fitting through that hole.
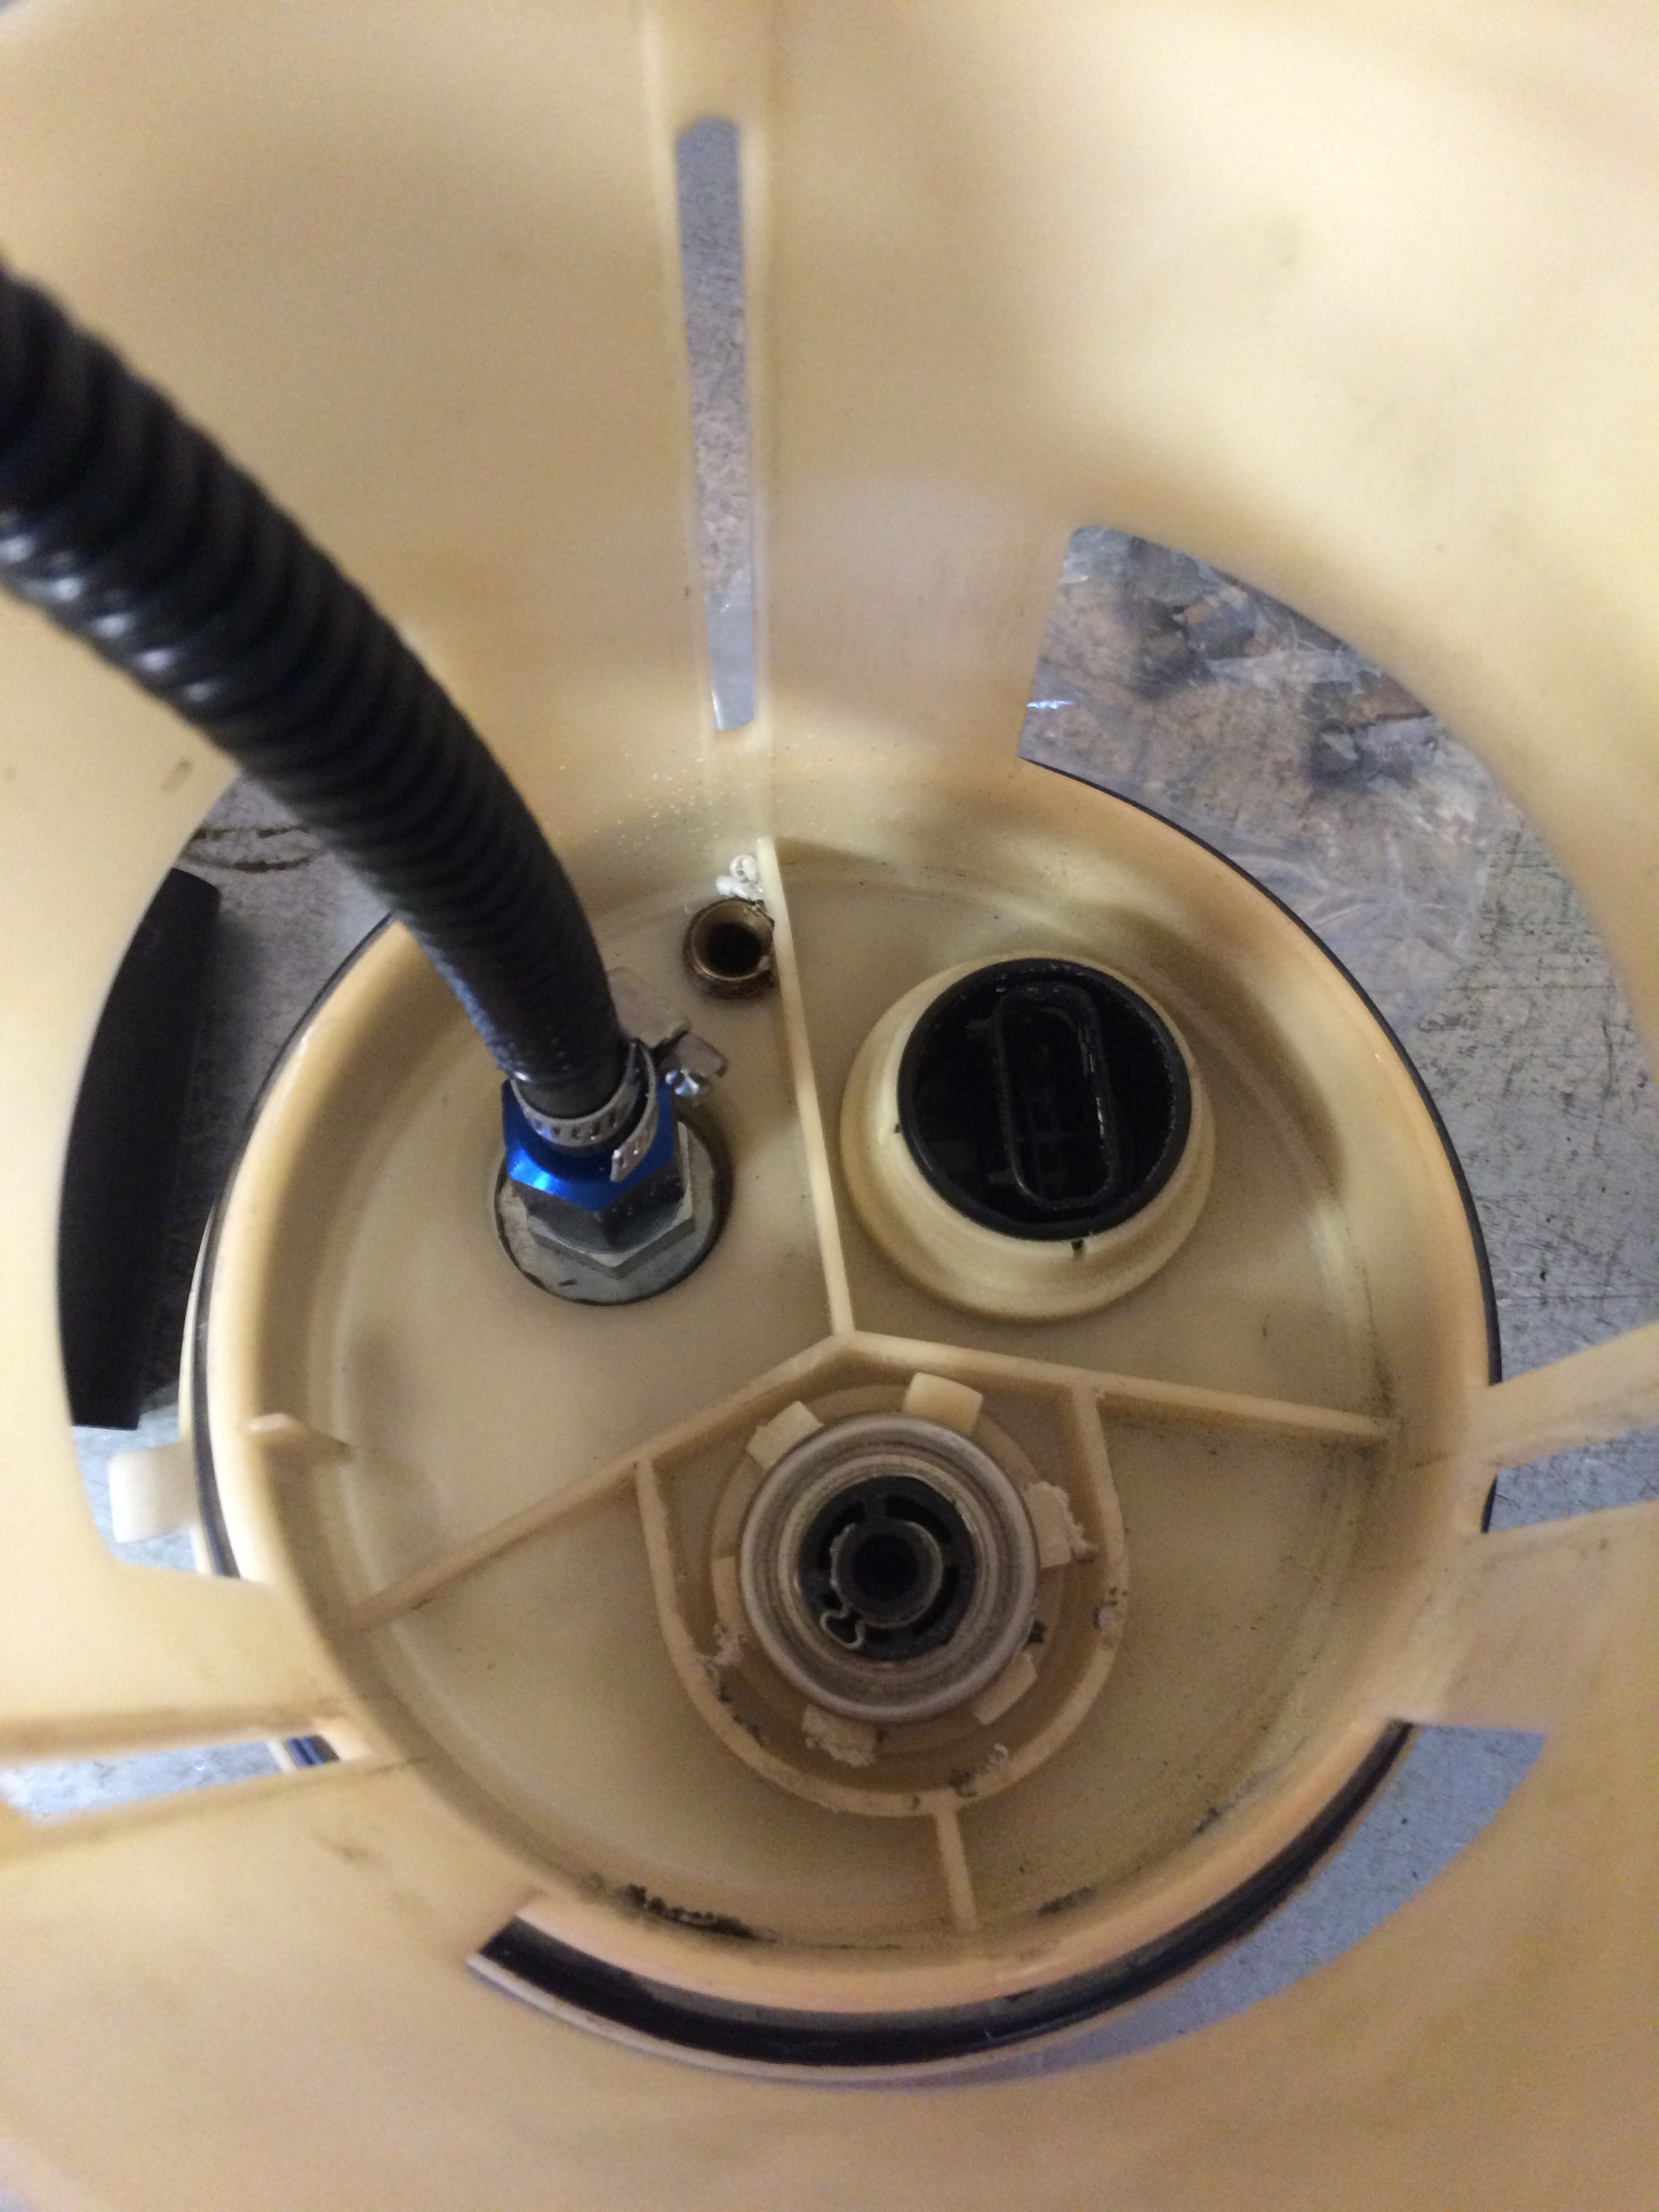
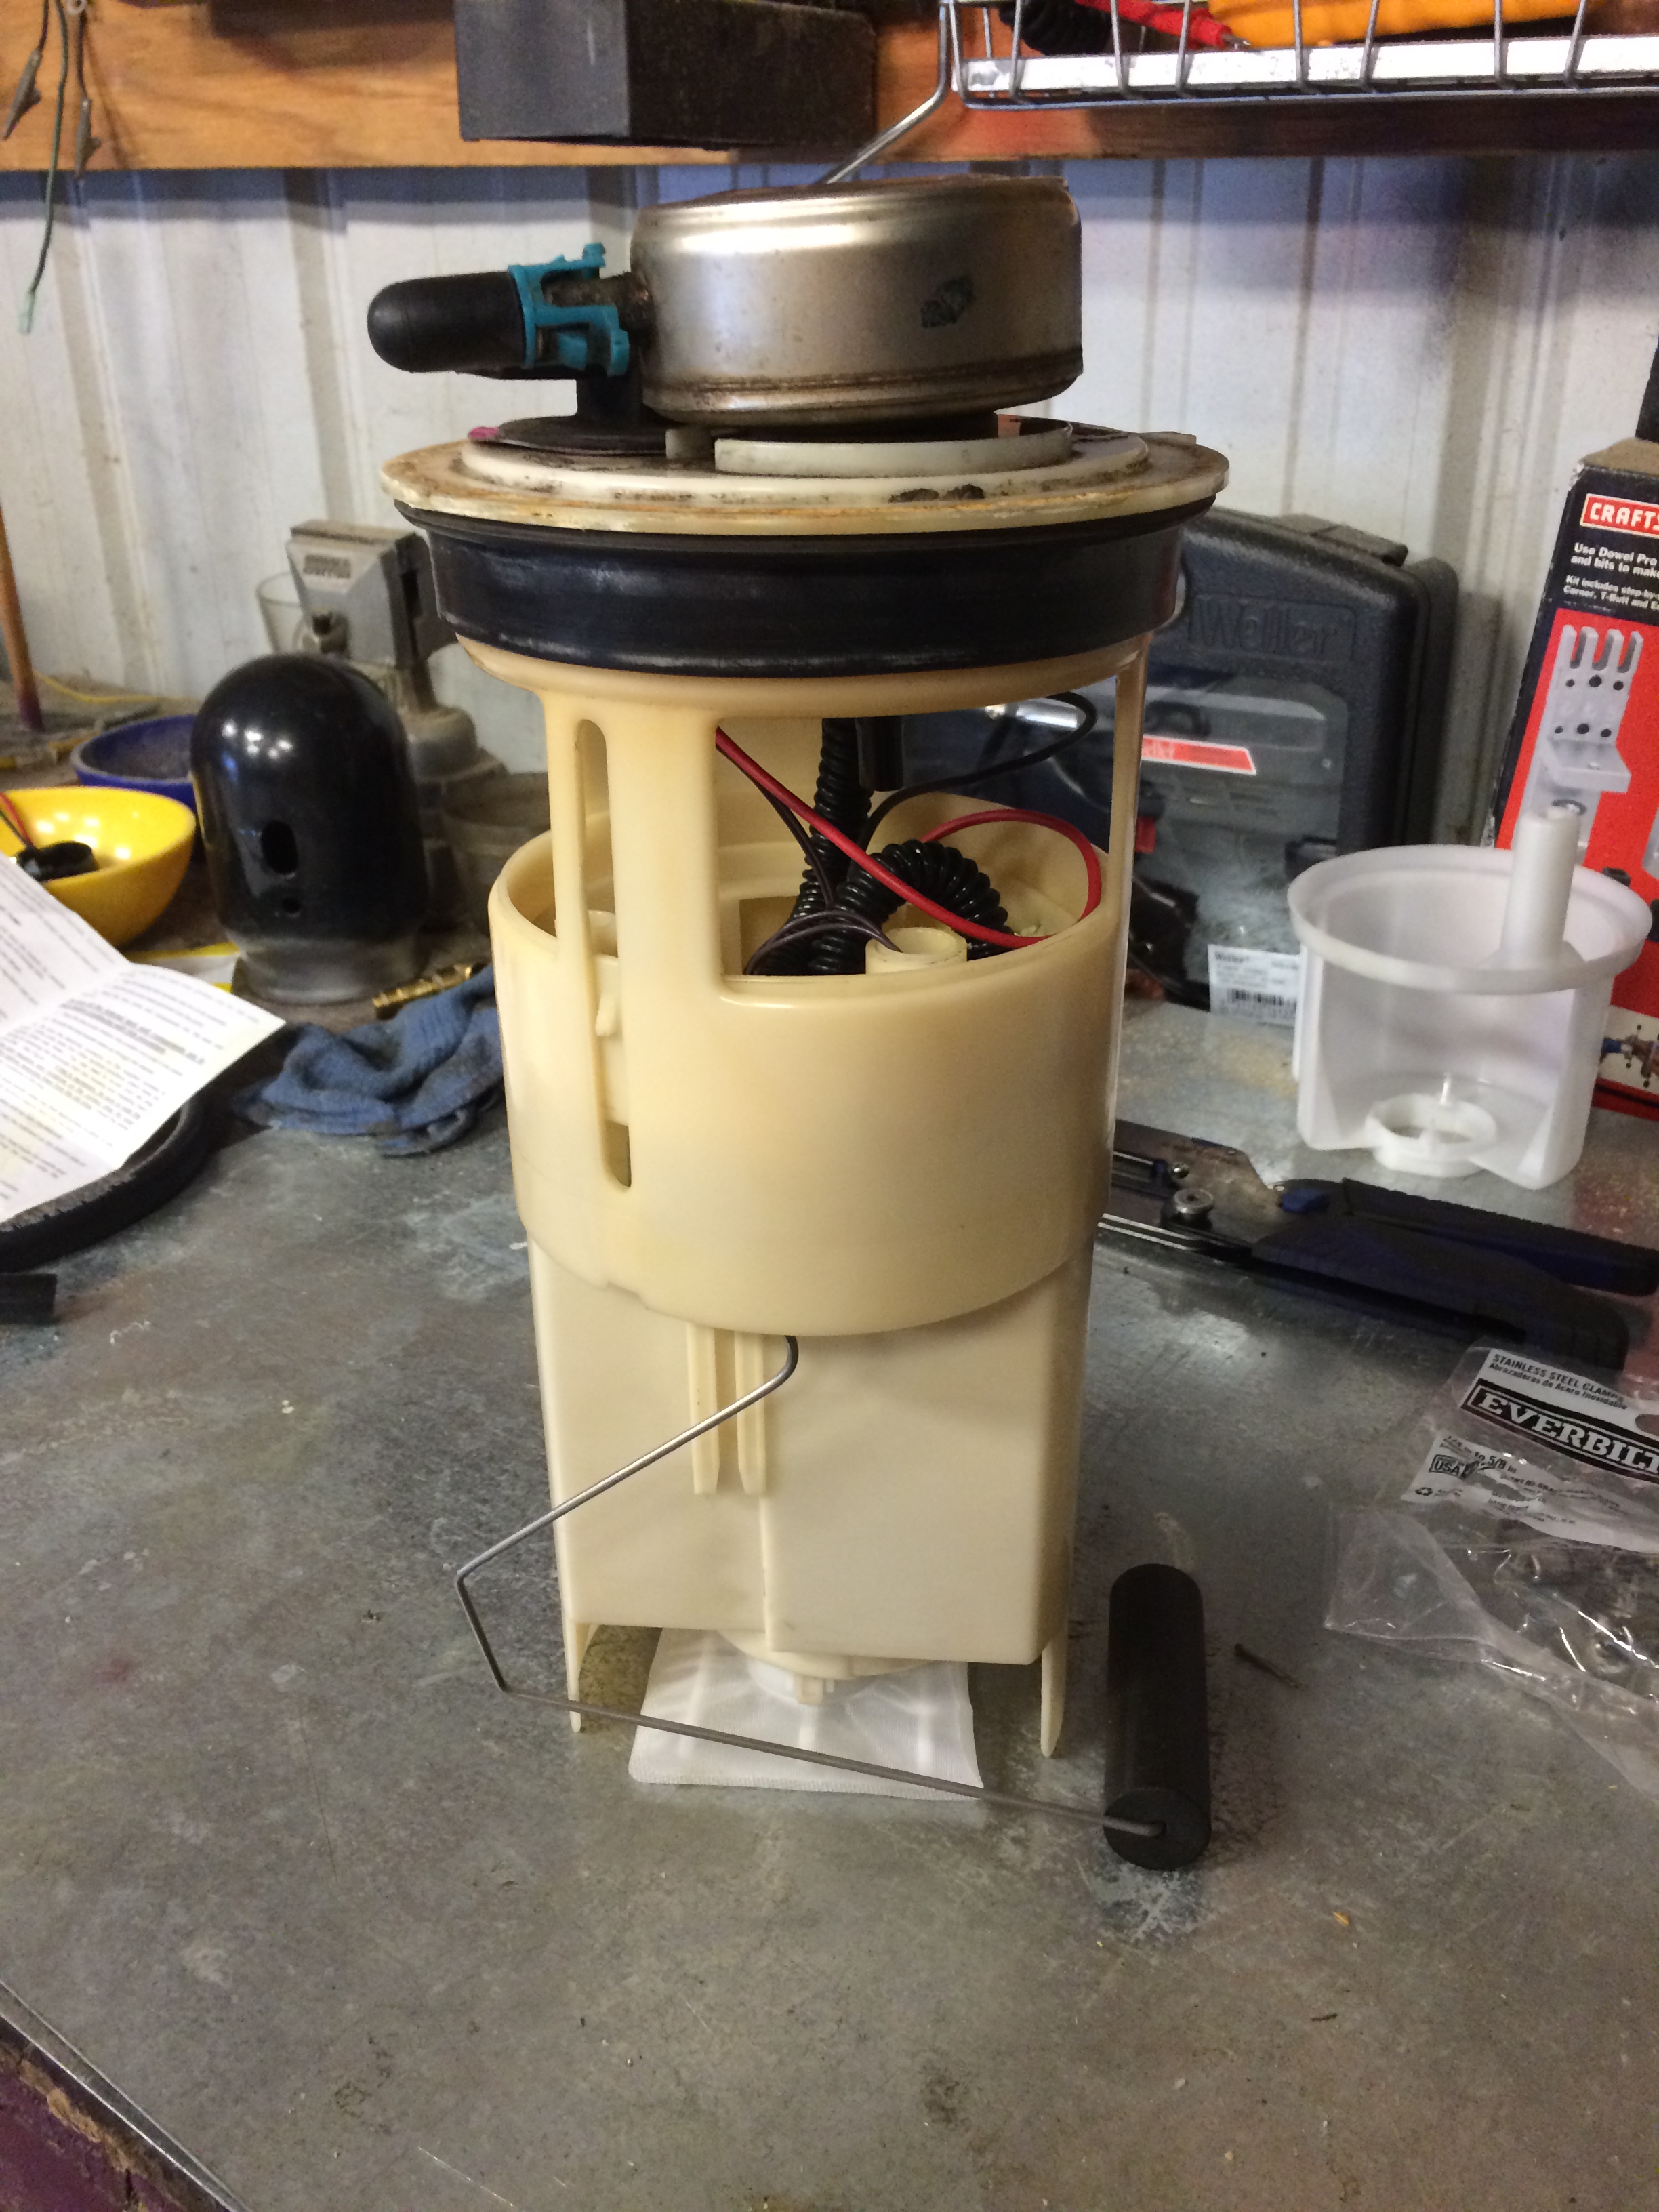


 10-10-2015, 06:39 PM
#5
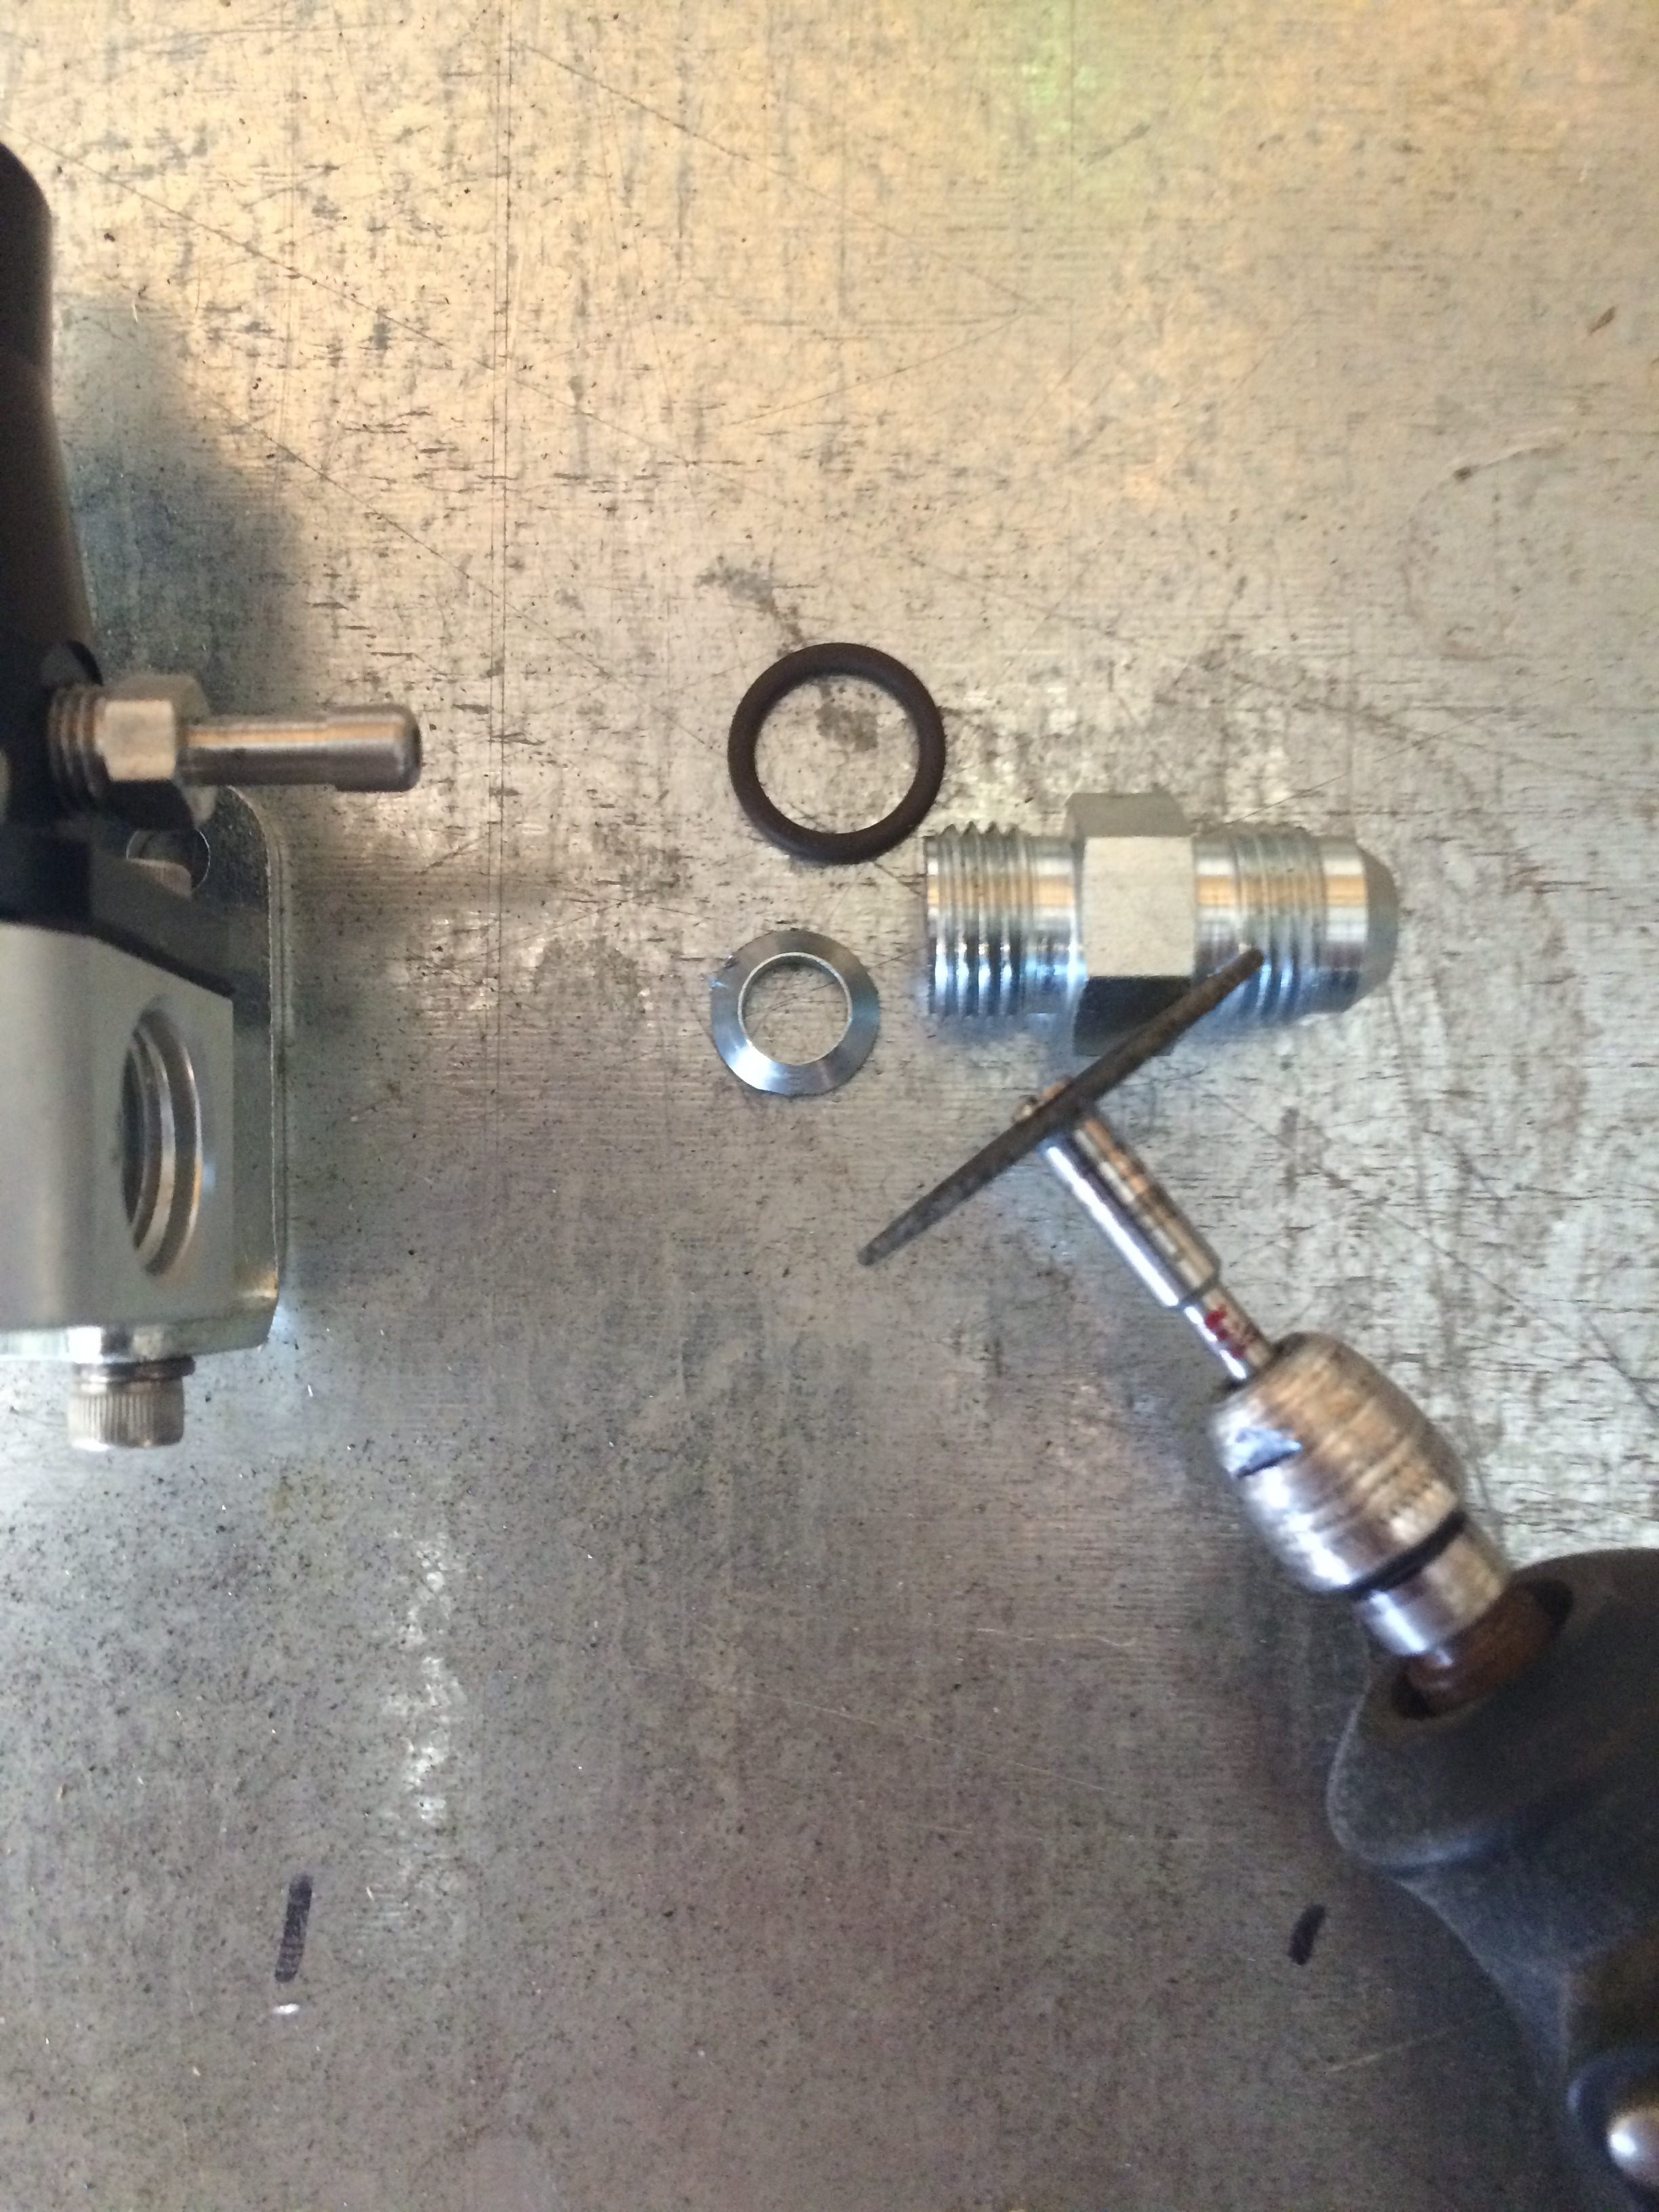
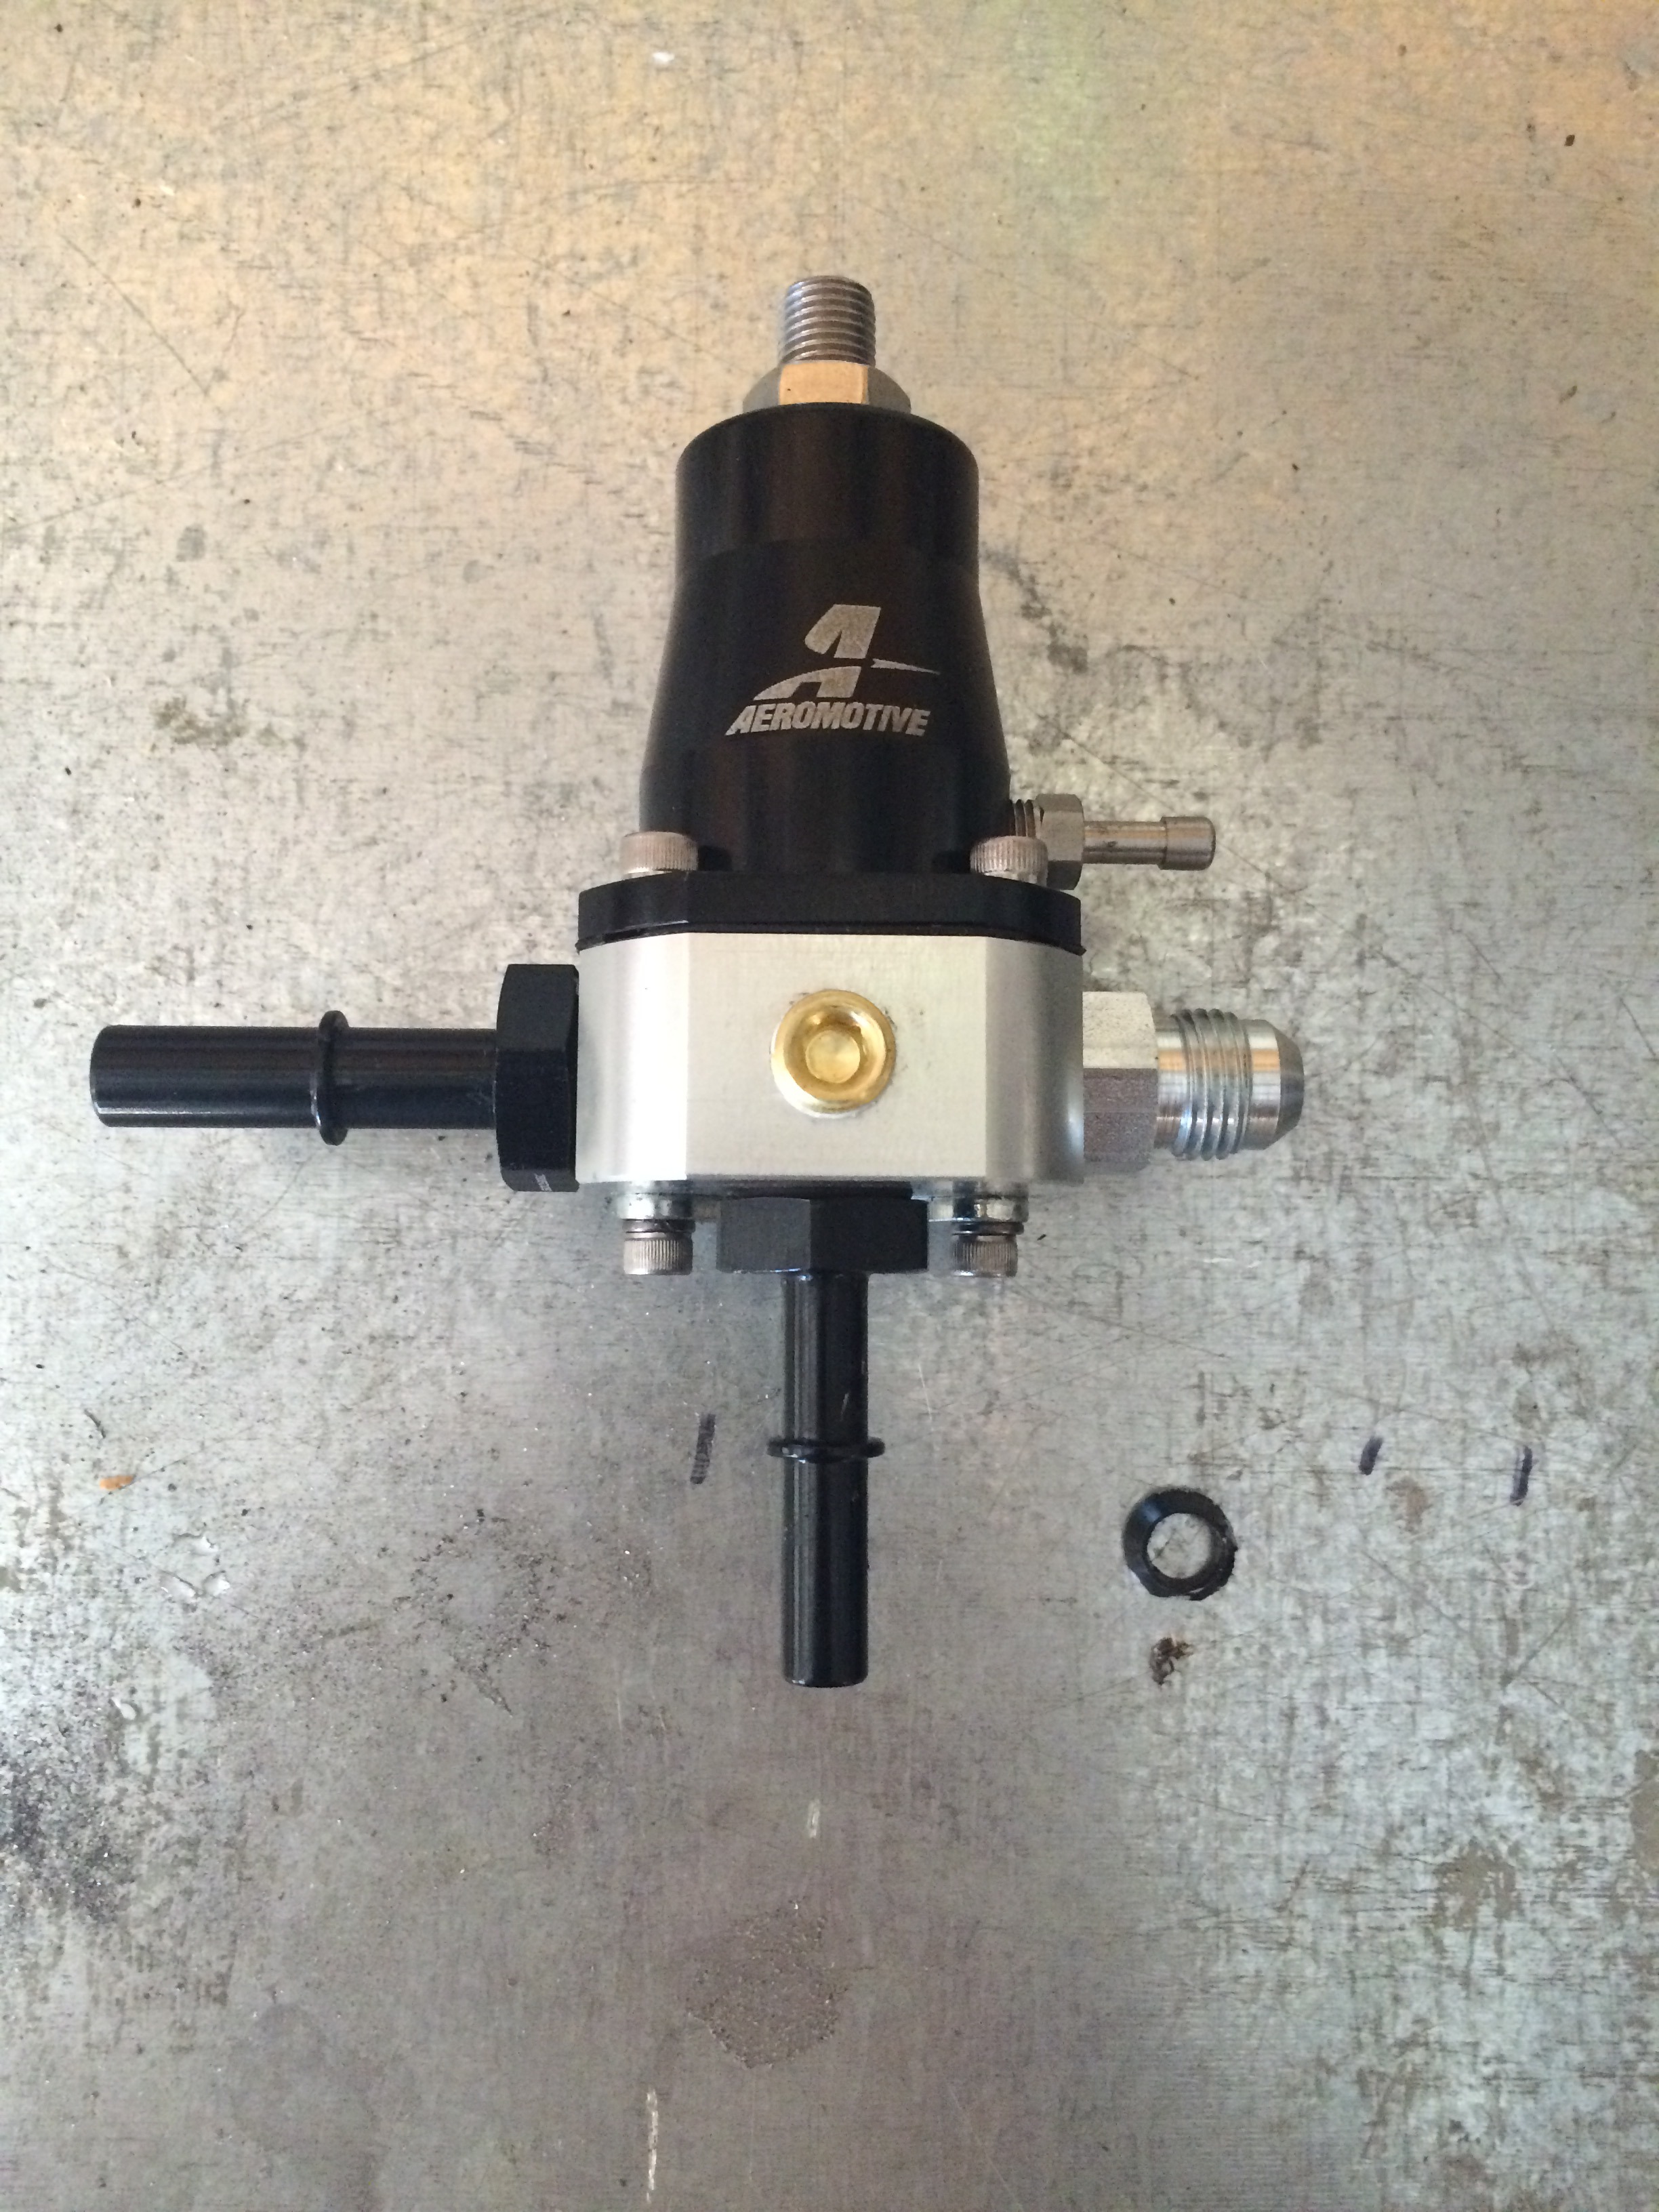
So, moving on with the fuel system. I purchased this aeromotive 13129 fuel pressure regulator, not realizing that the AN-6 openings are for ORB (O-ring boss), or what is called AN port fittings. These are exactly the same as a male flared AN fitting, without the flare. The AN to ORB fittings are about $10-12 each. Ouch. And I don't want to wait to order them.
So, how do I make my own?
Should look like this:
I have this:
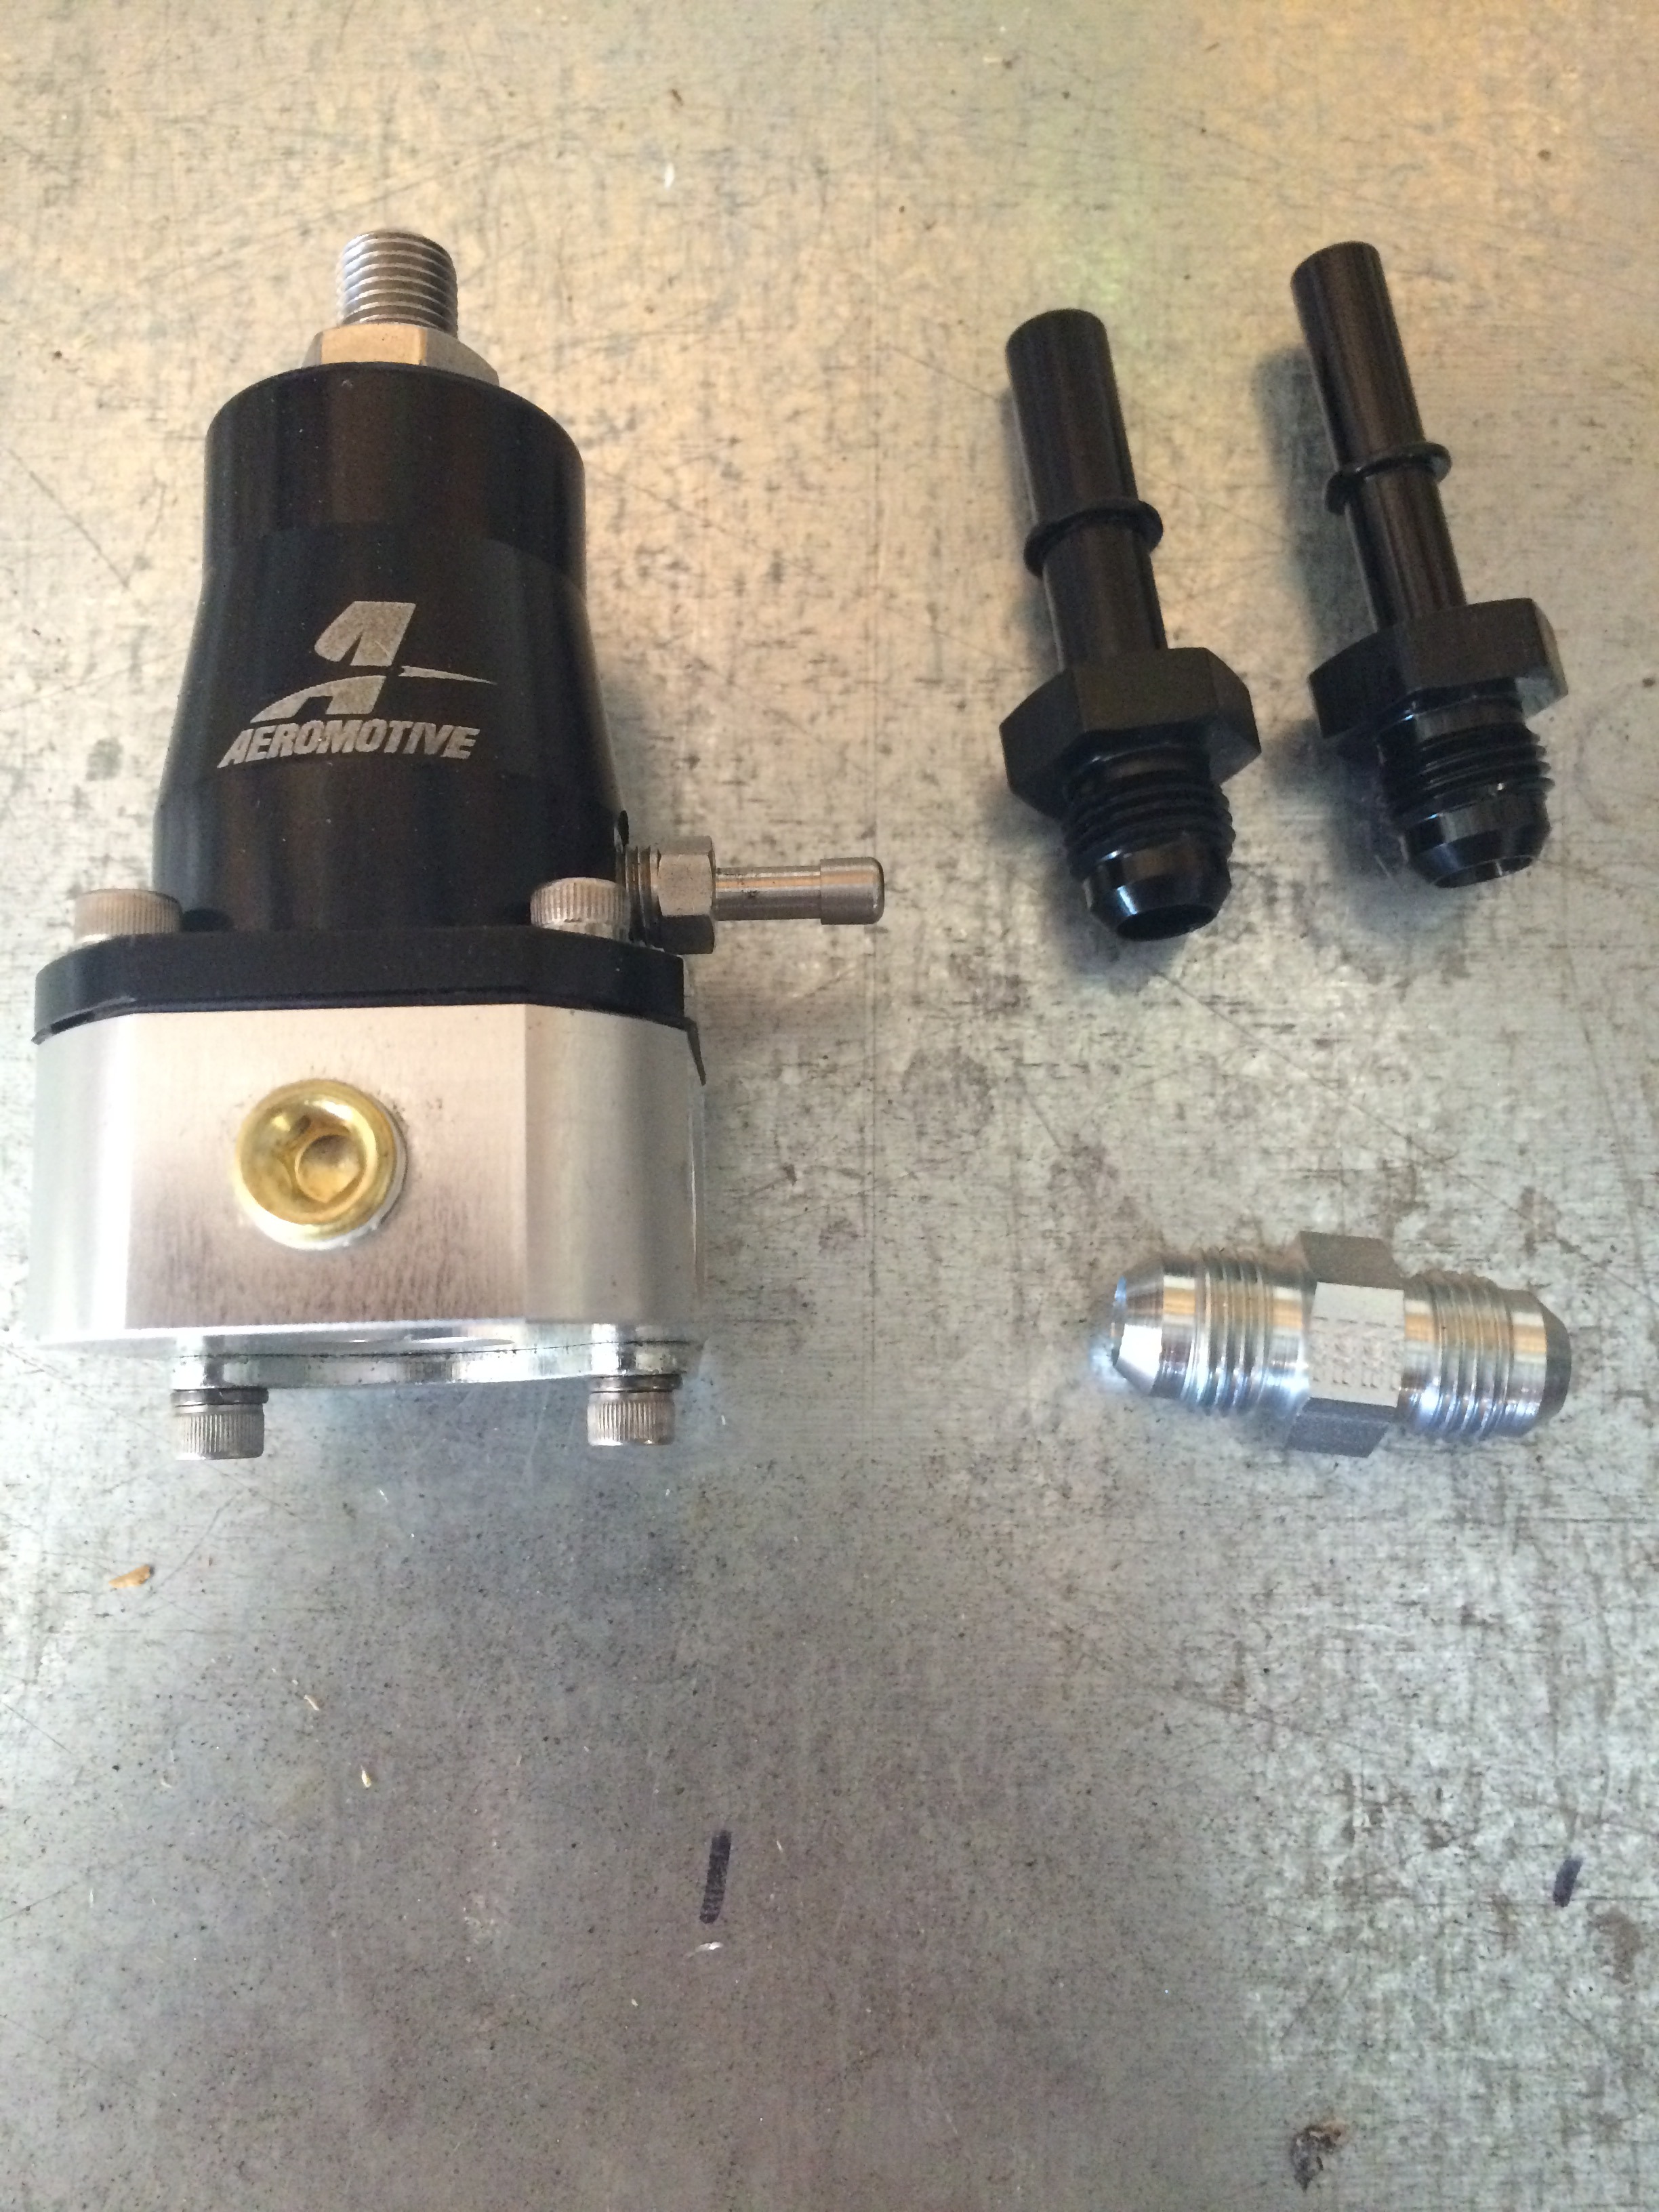
The flared portion bottoms out without sealing the o-ring on the Aeromotive regulator. Other regulators (I think Fuel Labs or Holley), are deep enough to use AN male fittings in them. Not the Aeromotive.
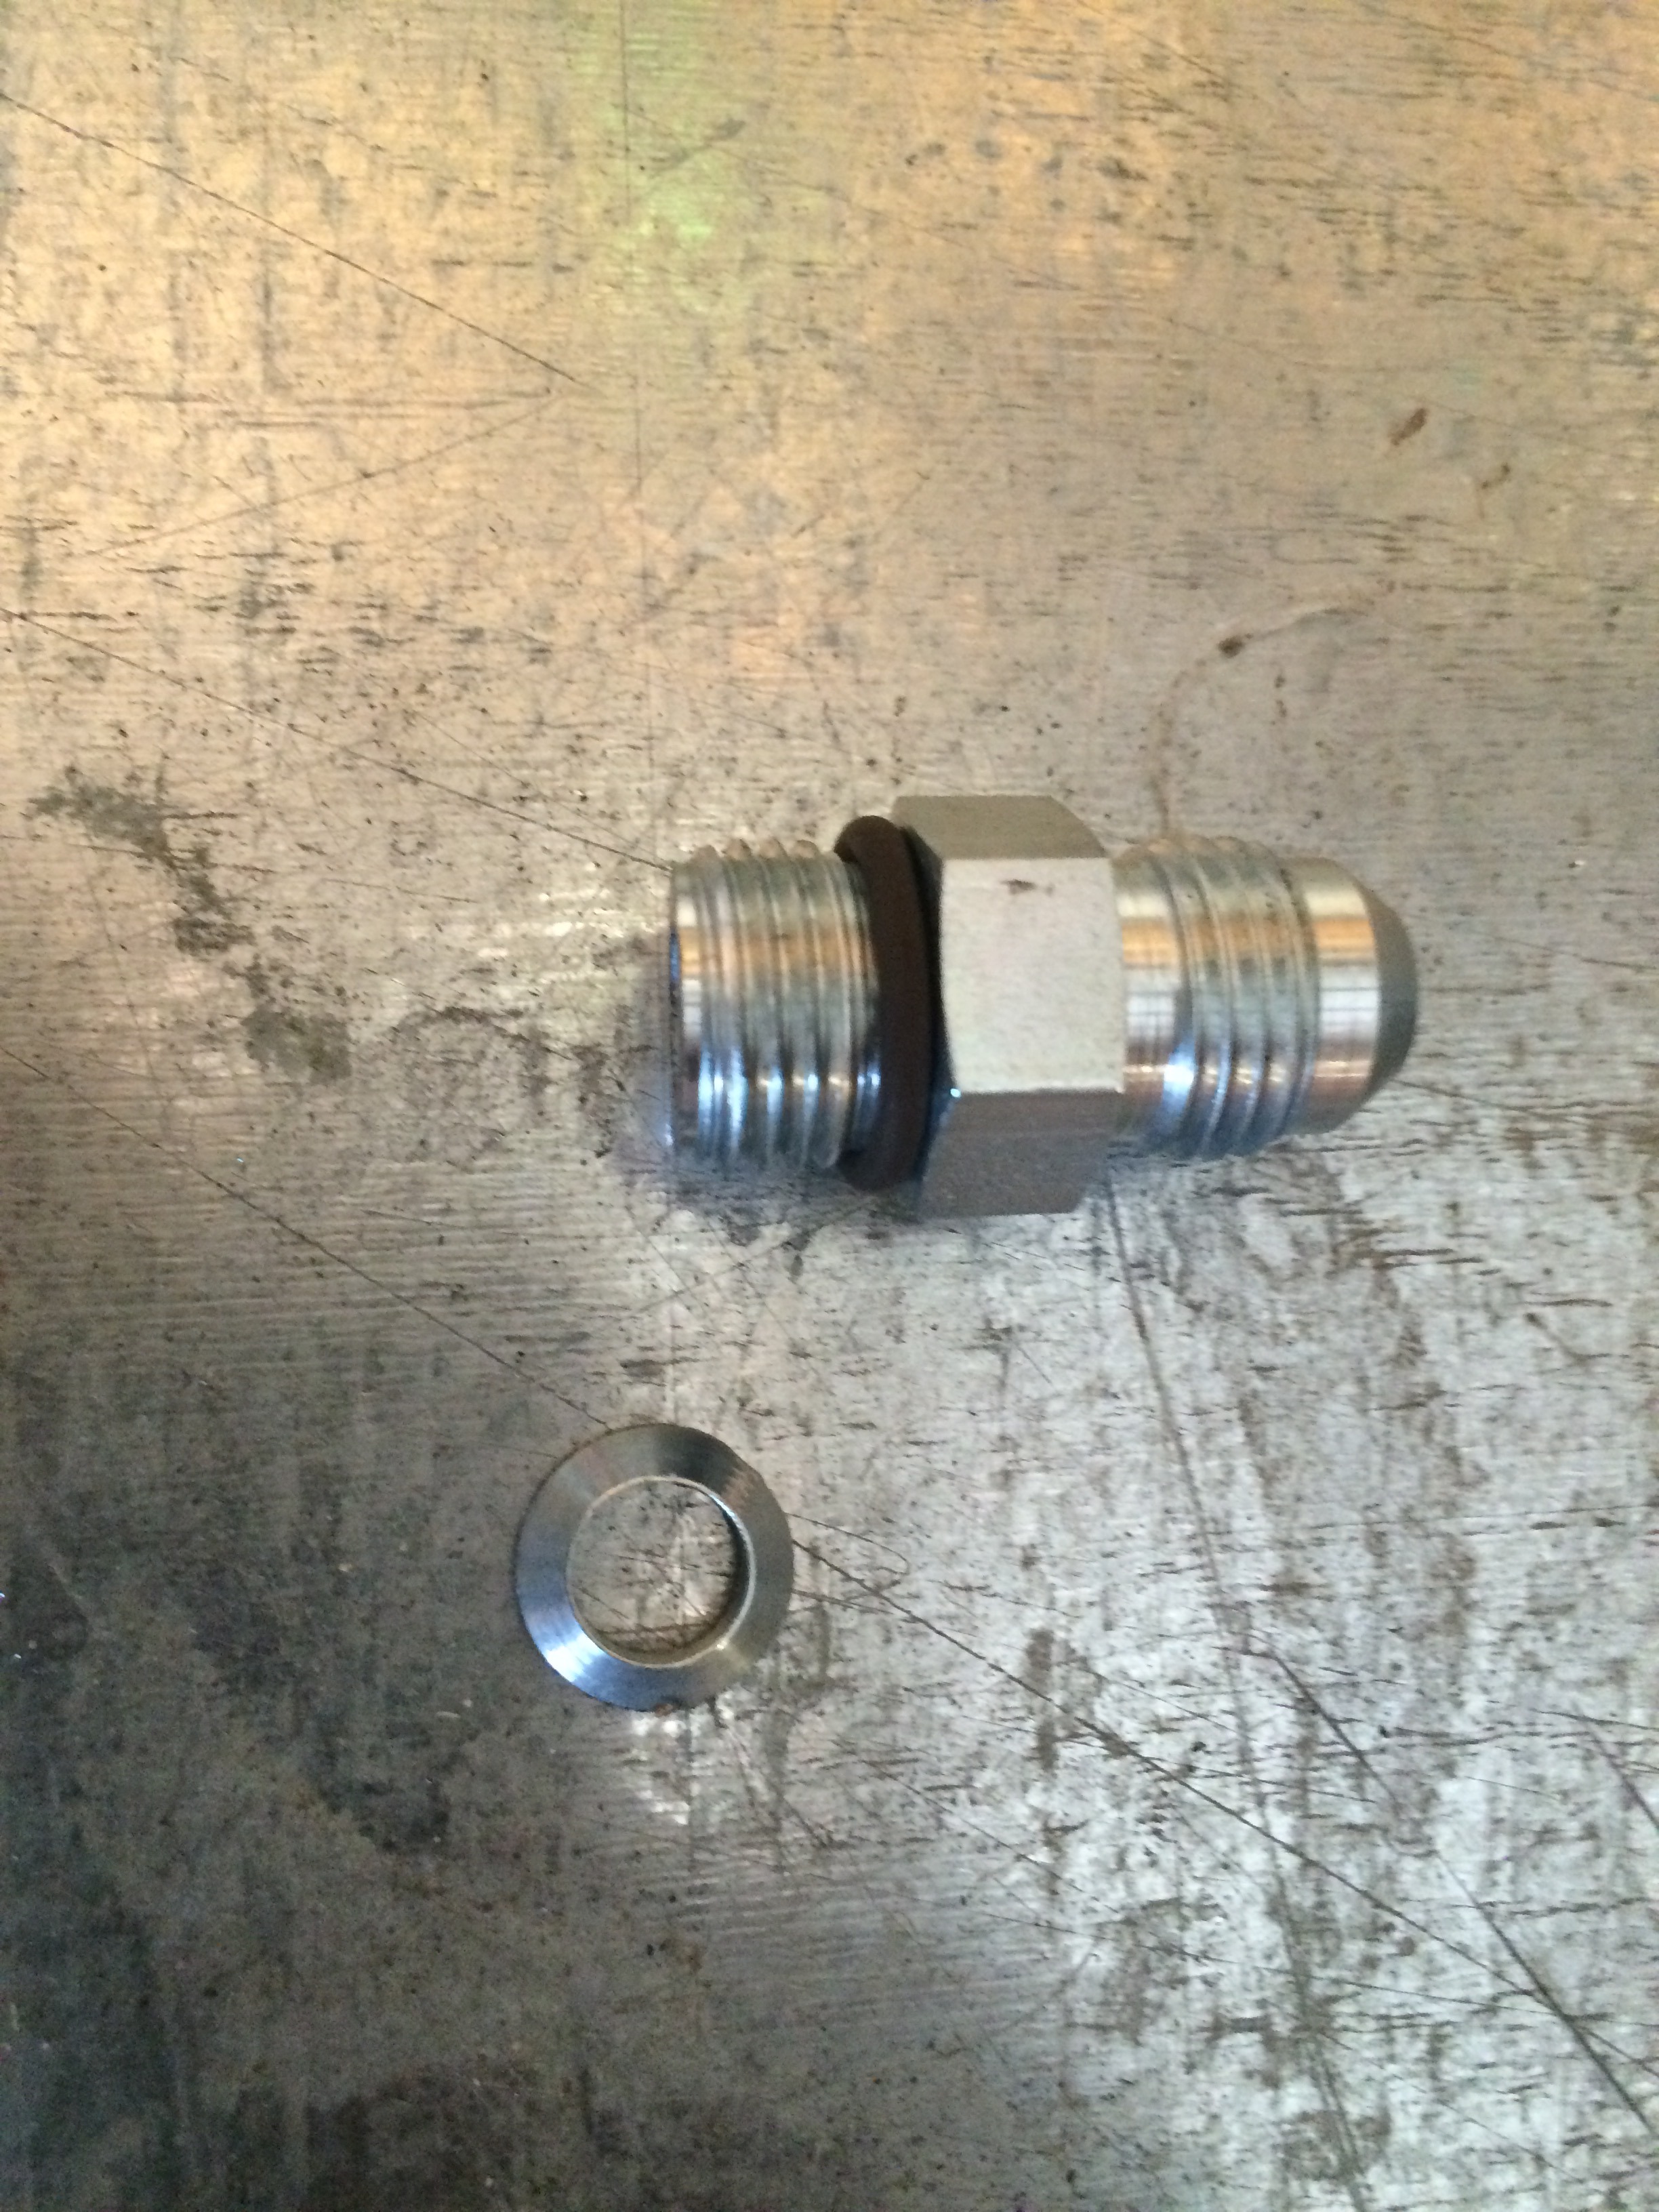
So.....Cut the flare off.
Add an O-ring
The quick disconnect fitting I am going to use don't come AN port to quick-disconnect at all, and AN female to quick disconnect are expensive, and bulky. So cut those also. These are Boostec fittings.
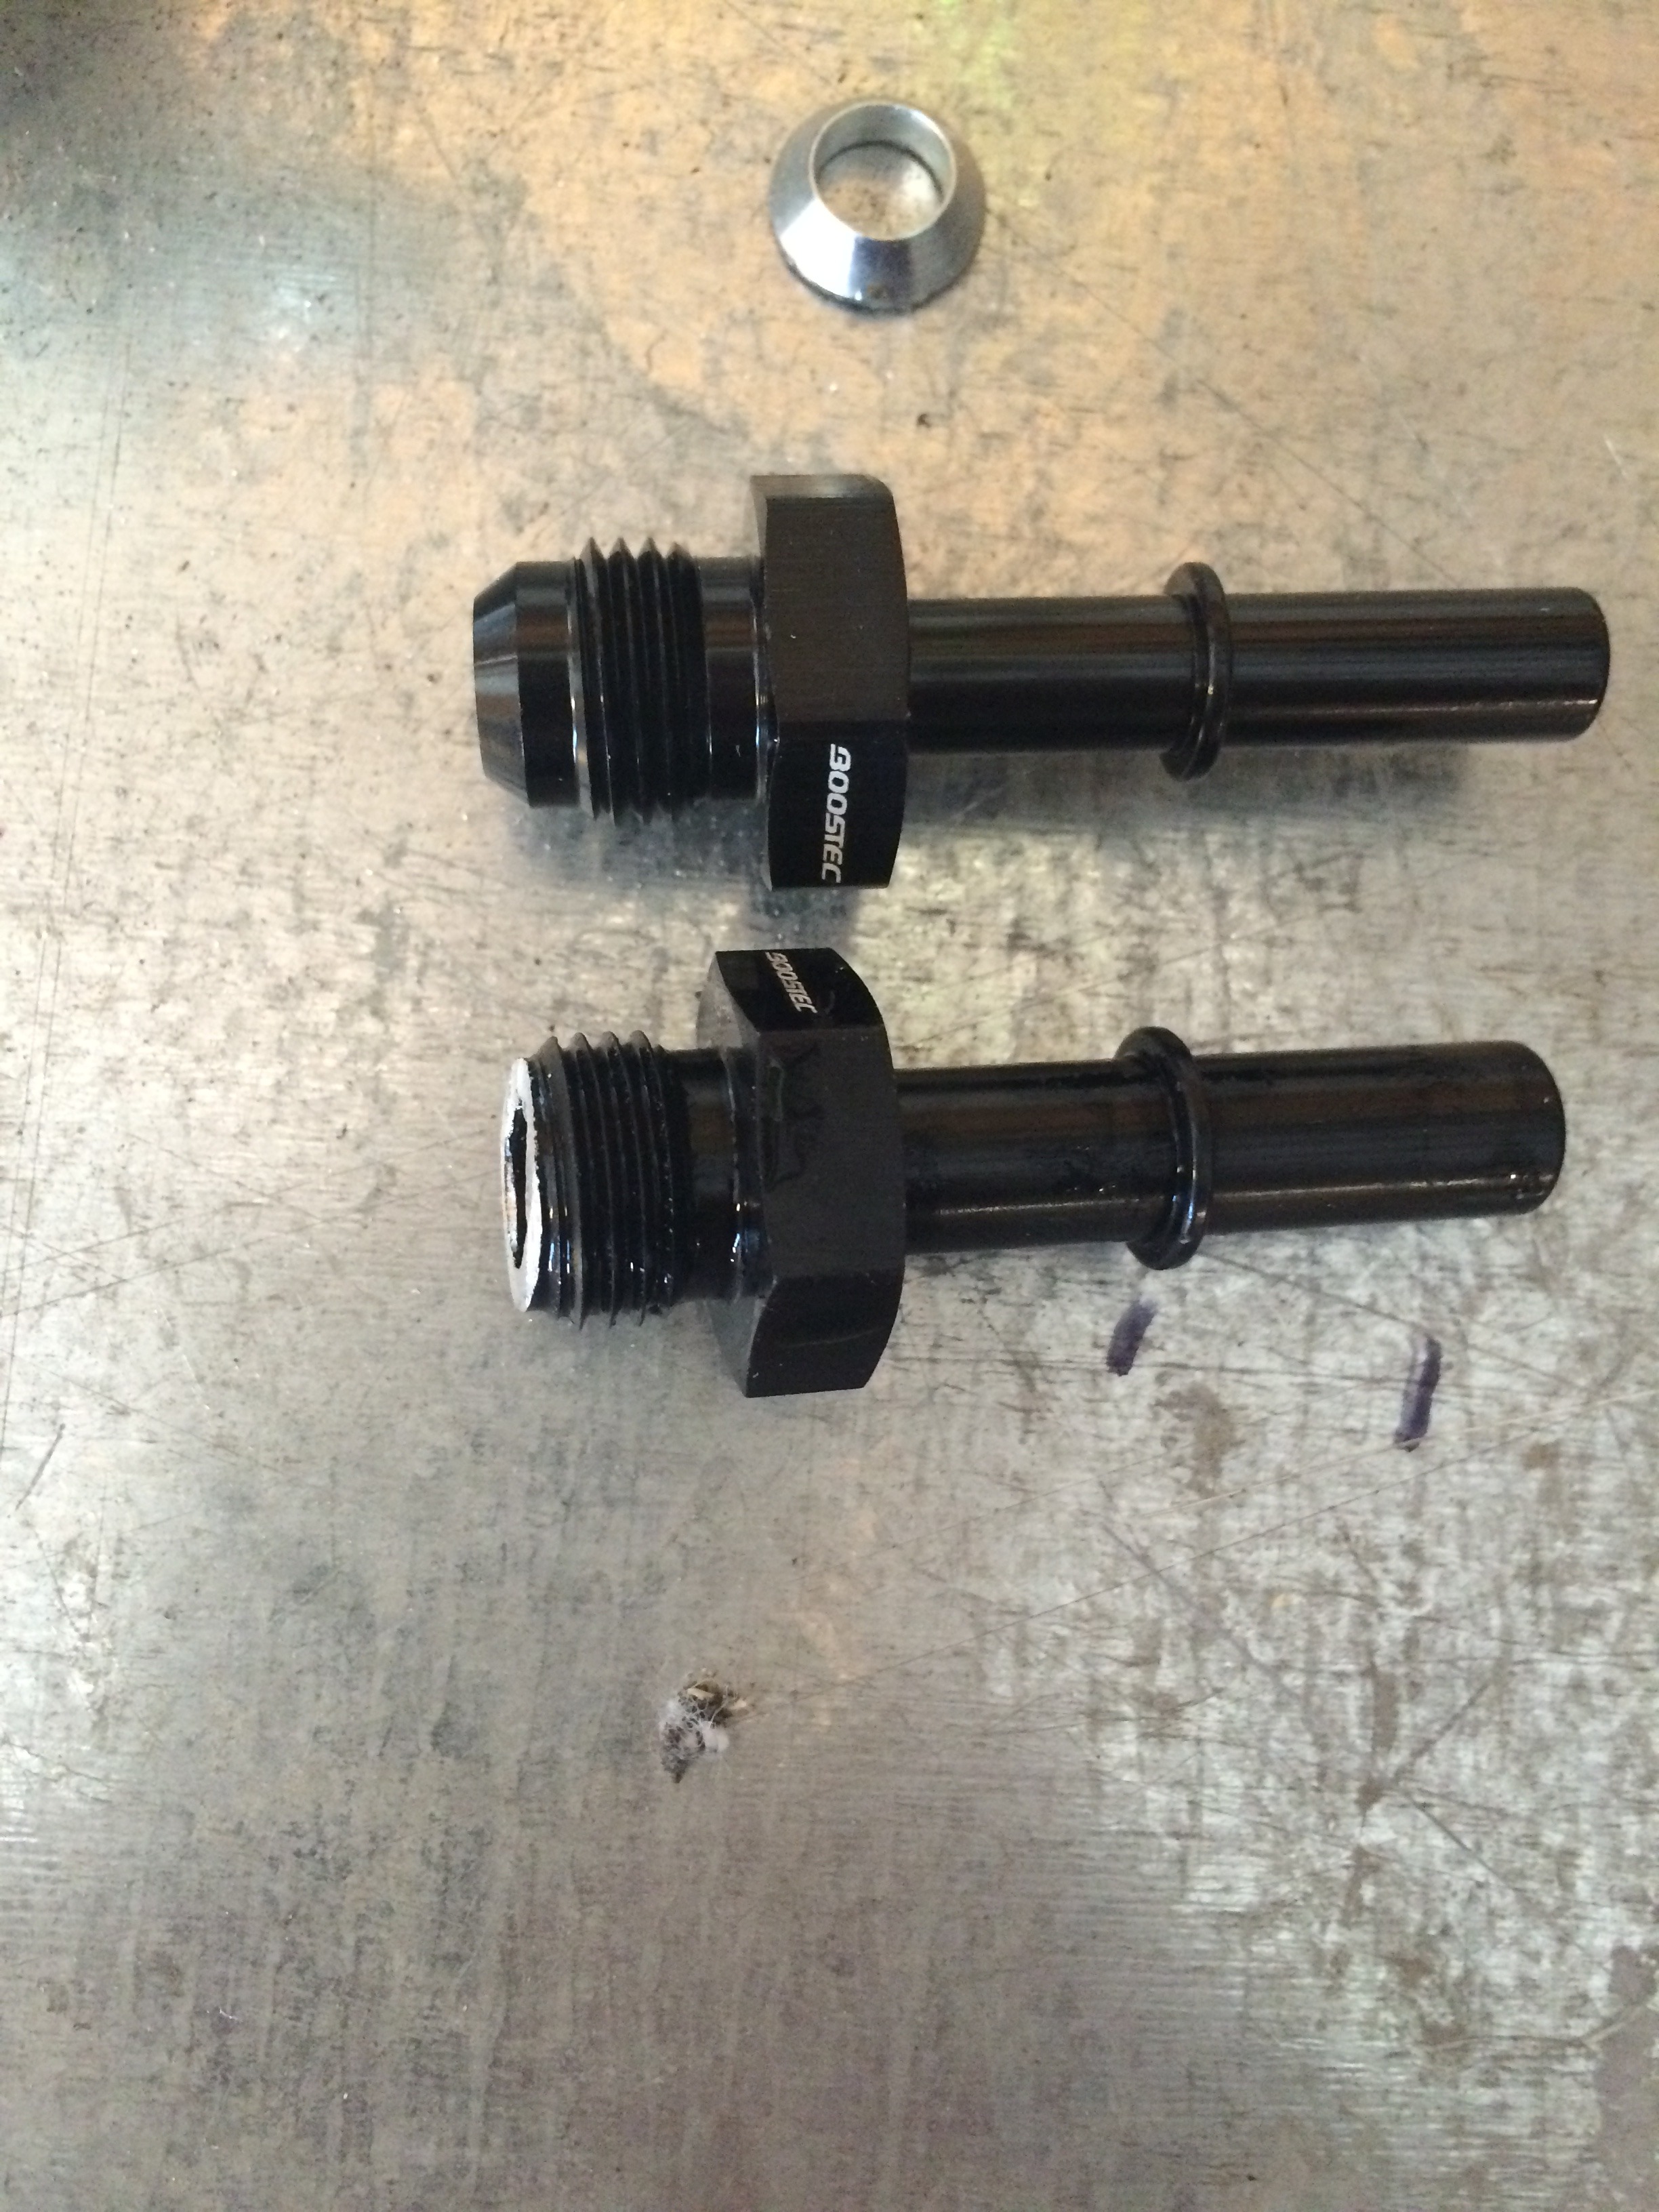
Nice and tidy.
So, how do I make my own?
Should look like this:

I have this:

The flared portion bottoms out without sealing the o-ring on the Aeromotive regulator. Other regulators (I think Fuel Labs or Holley), are deep enough to use AN male fittings in them. Not the Aeromotive.
So.....Cut the flare off.

Add an O-ring

The quick disconnect fitting I am going to use don't come AN port to quick-disconnect at all, and AN female to quick disconnect are expensive, and bulky. So cut those also. These are Boostec fittings.

Nice and tidy.
 10-11-2015, 10:48 AM
#6

cool idea
Trending Topics
10-14-2015, 12:19 PM
#9
Staging Lane
iTrader: (1)

Join Date: Jun 2013
Location: DFW
Posts: 78
Likes: 0
Received 0 Likes
on
0 Posts
Debating either having the 5.9 built or ls swapping it like my LJ.
Last edited by Punisher8738; 10-15-2015 at 03:55 PM.
10-14-2015, 12:49 PM
#10
On The Tree

Join Date: May 2014
Posts: 123
Likes: 0
Received 0 Likes
on
0 Posts
have a tired old 4x4 dak in the driveway thats waiting to be junked or brought back to life, your giving me ideas and i already have too many unfinished projects going on lol. I'm very interested to see your oil pan choice & how that fits as well as what youre going to do for trans and TC. this is pretty far off... but what about gauges? Subbed
 10-18-2015, 06:25 PM
#13
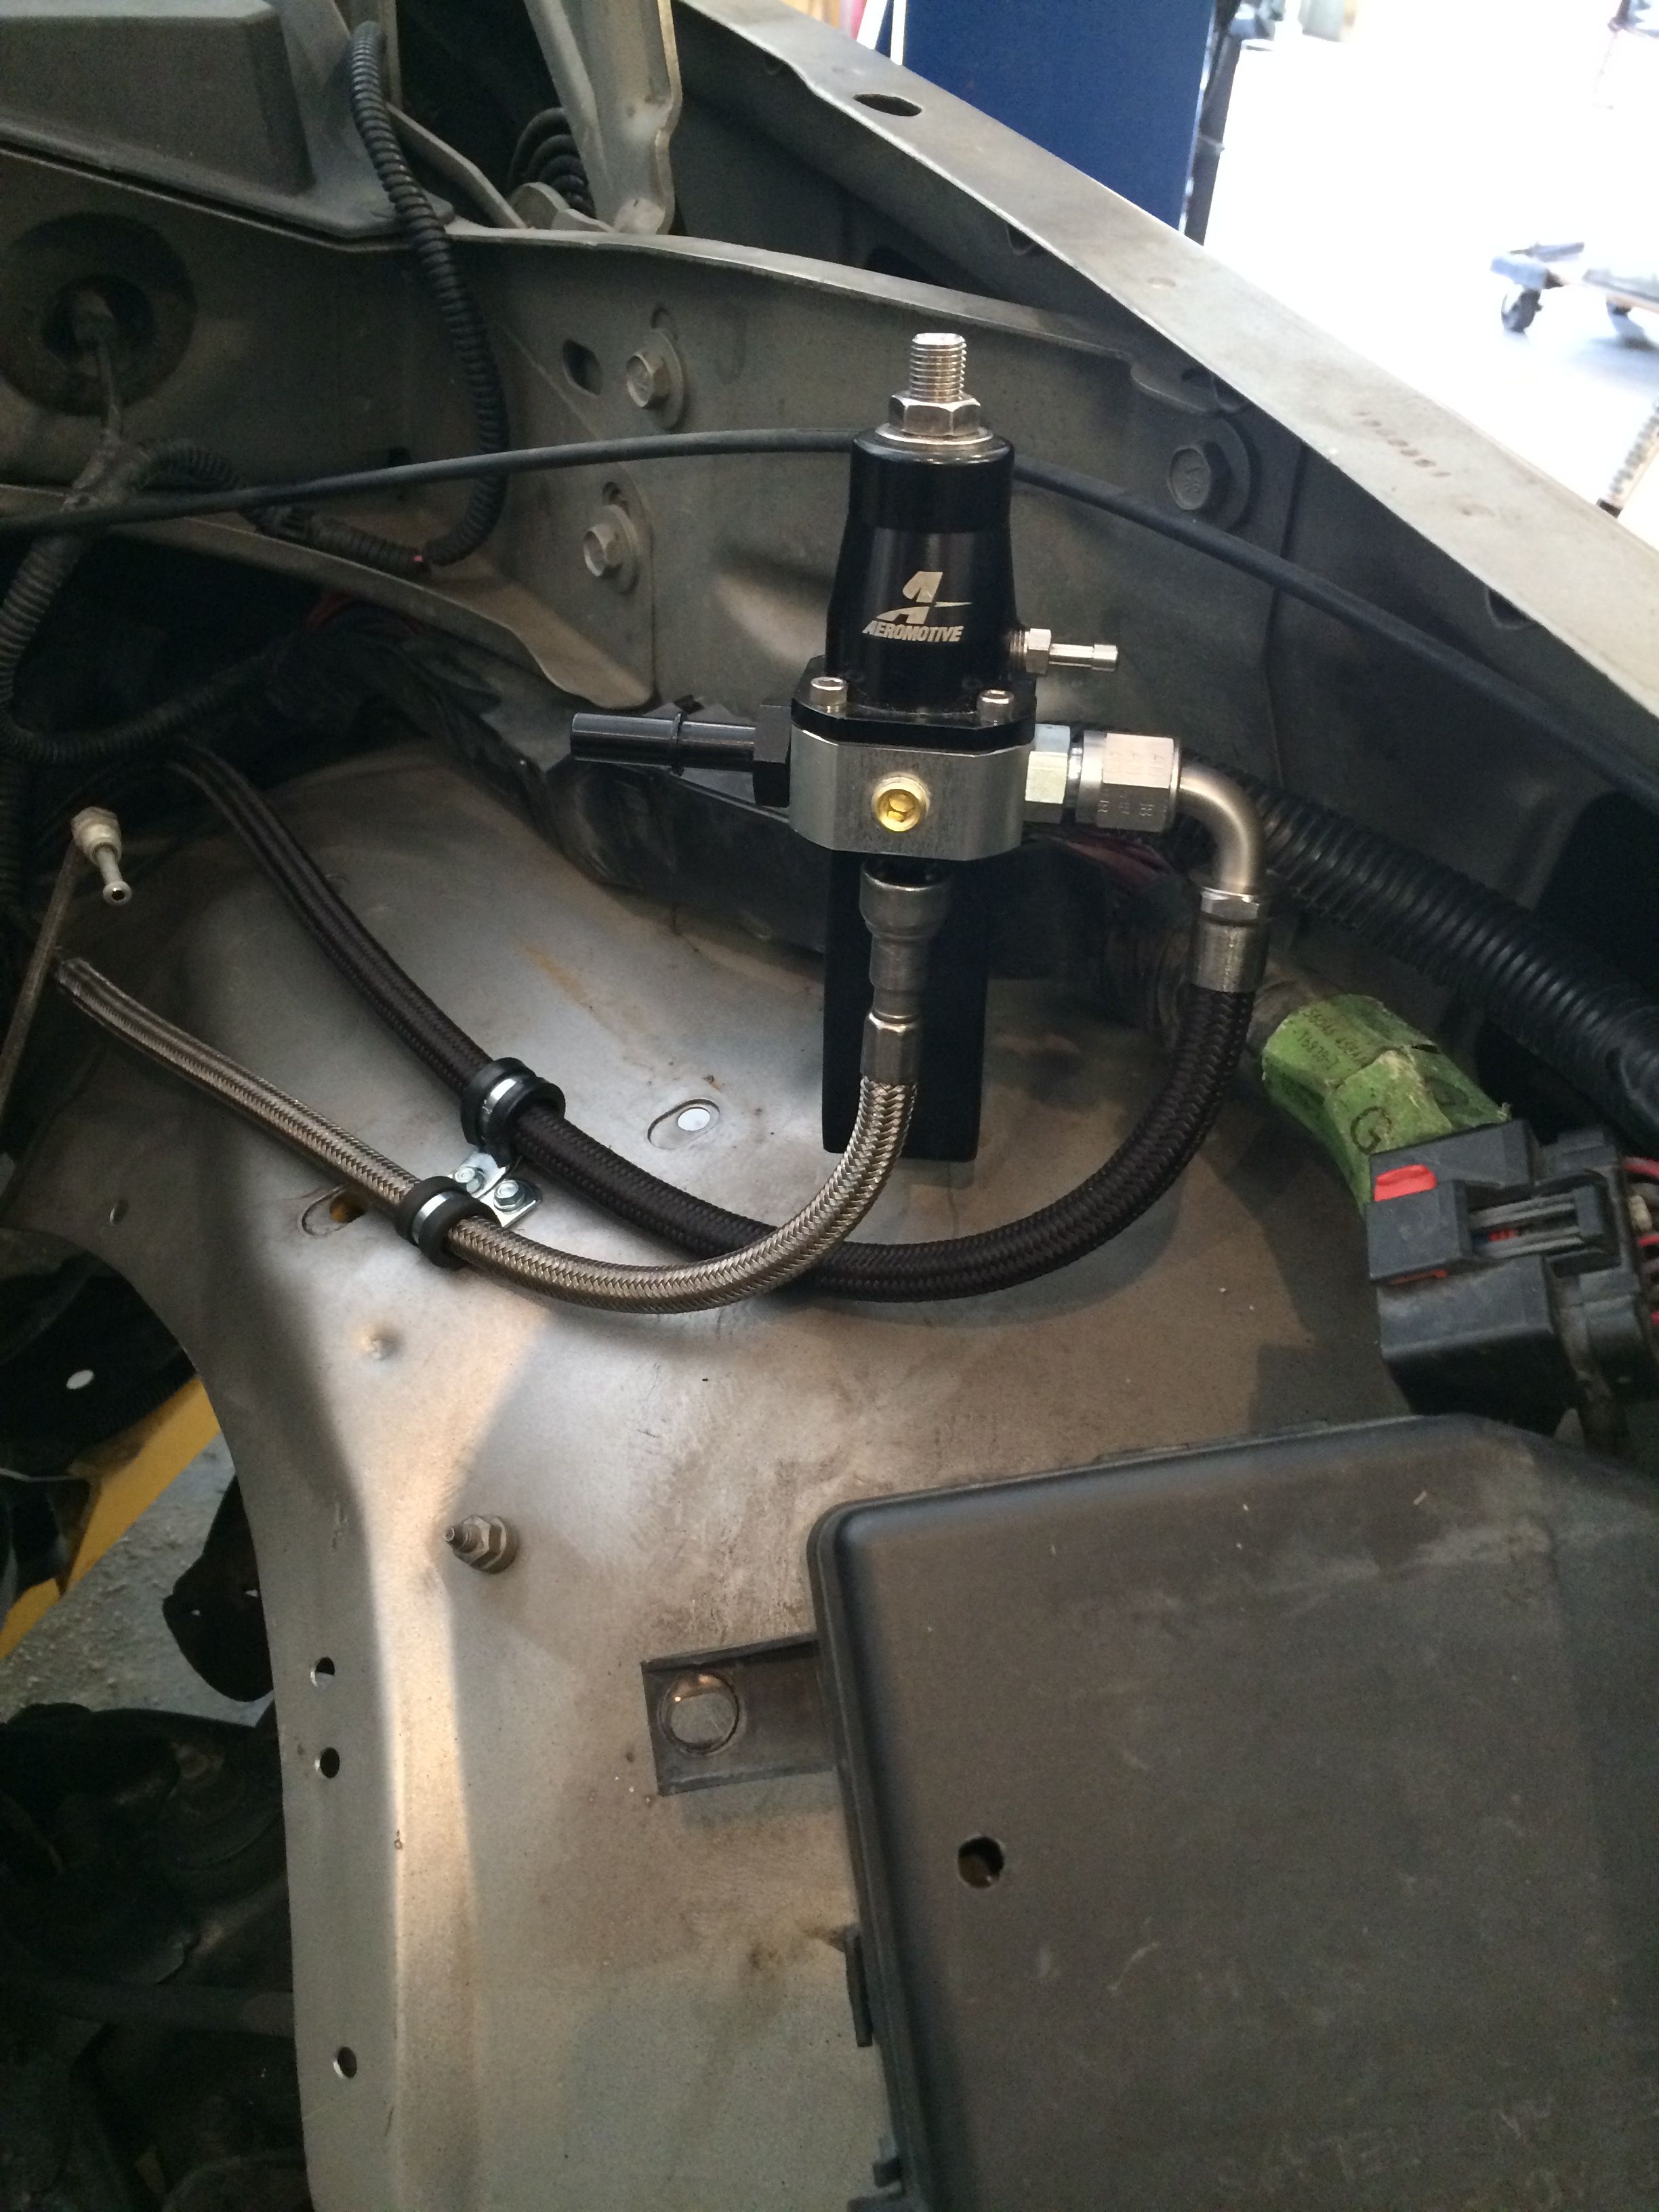
Moving on with the fuel system, I terminated the hard line into a flexible braided stainless line. I used the original 5/16 hard fuel line and flexible fuel line for the return from the adjustable fuel pressure regulator. A few bends on the original line, and it looks just like it came from the factory.

Next, I found an old Ikea curtain bracket, and cut one end off. I found a piece of a table leg left over from a worktable I shortened, and cut this also.
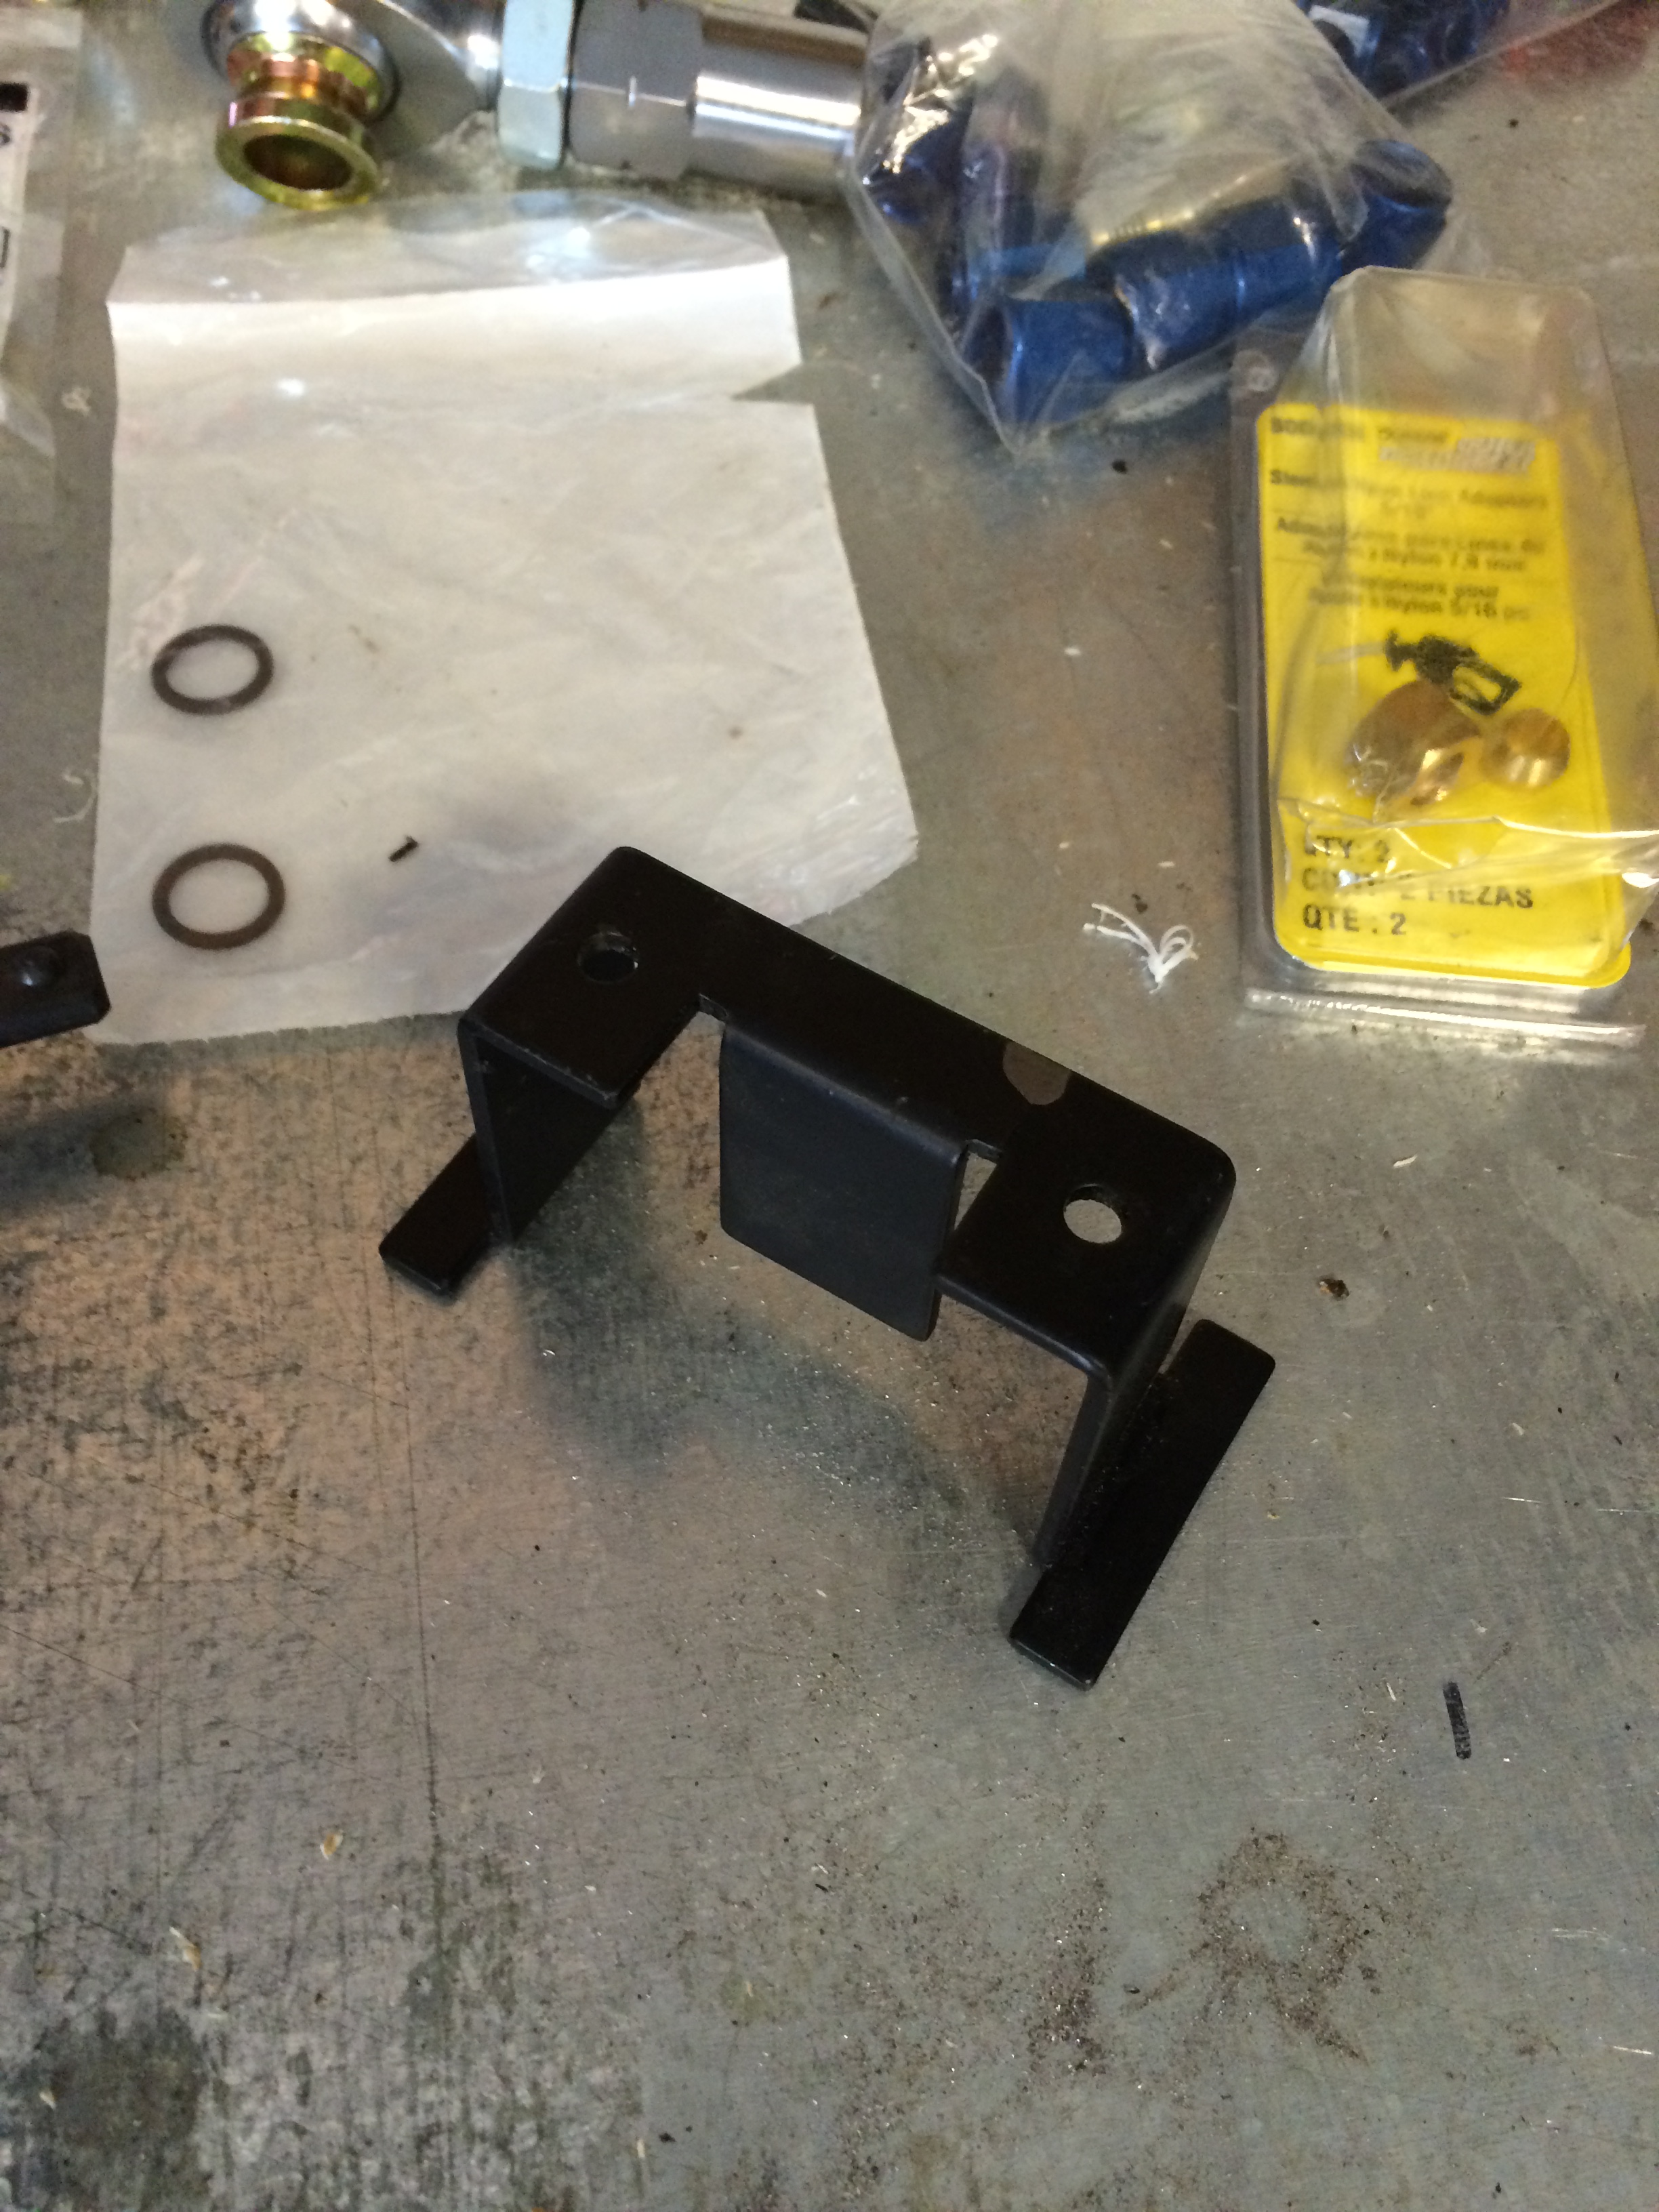
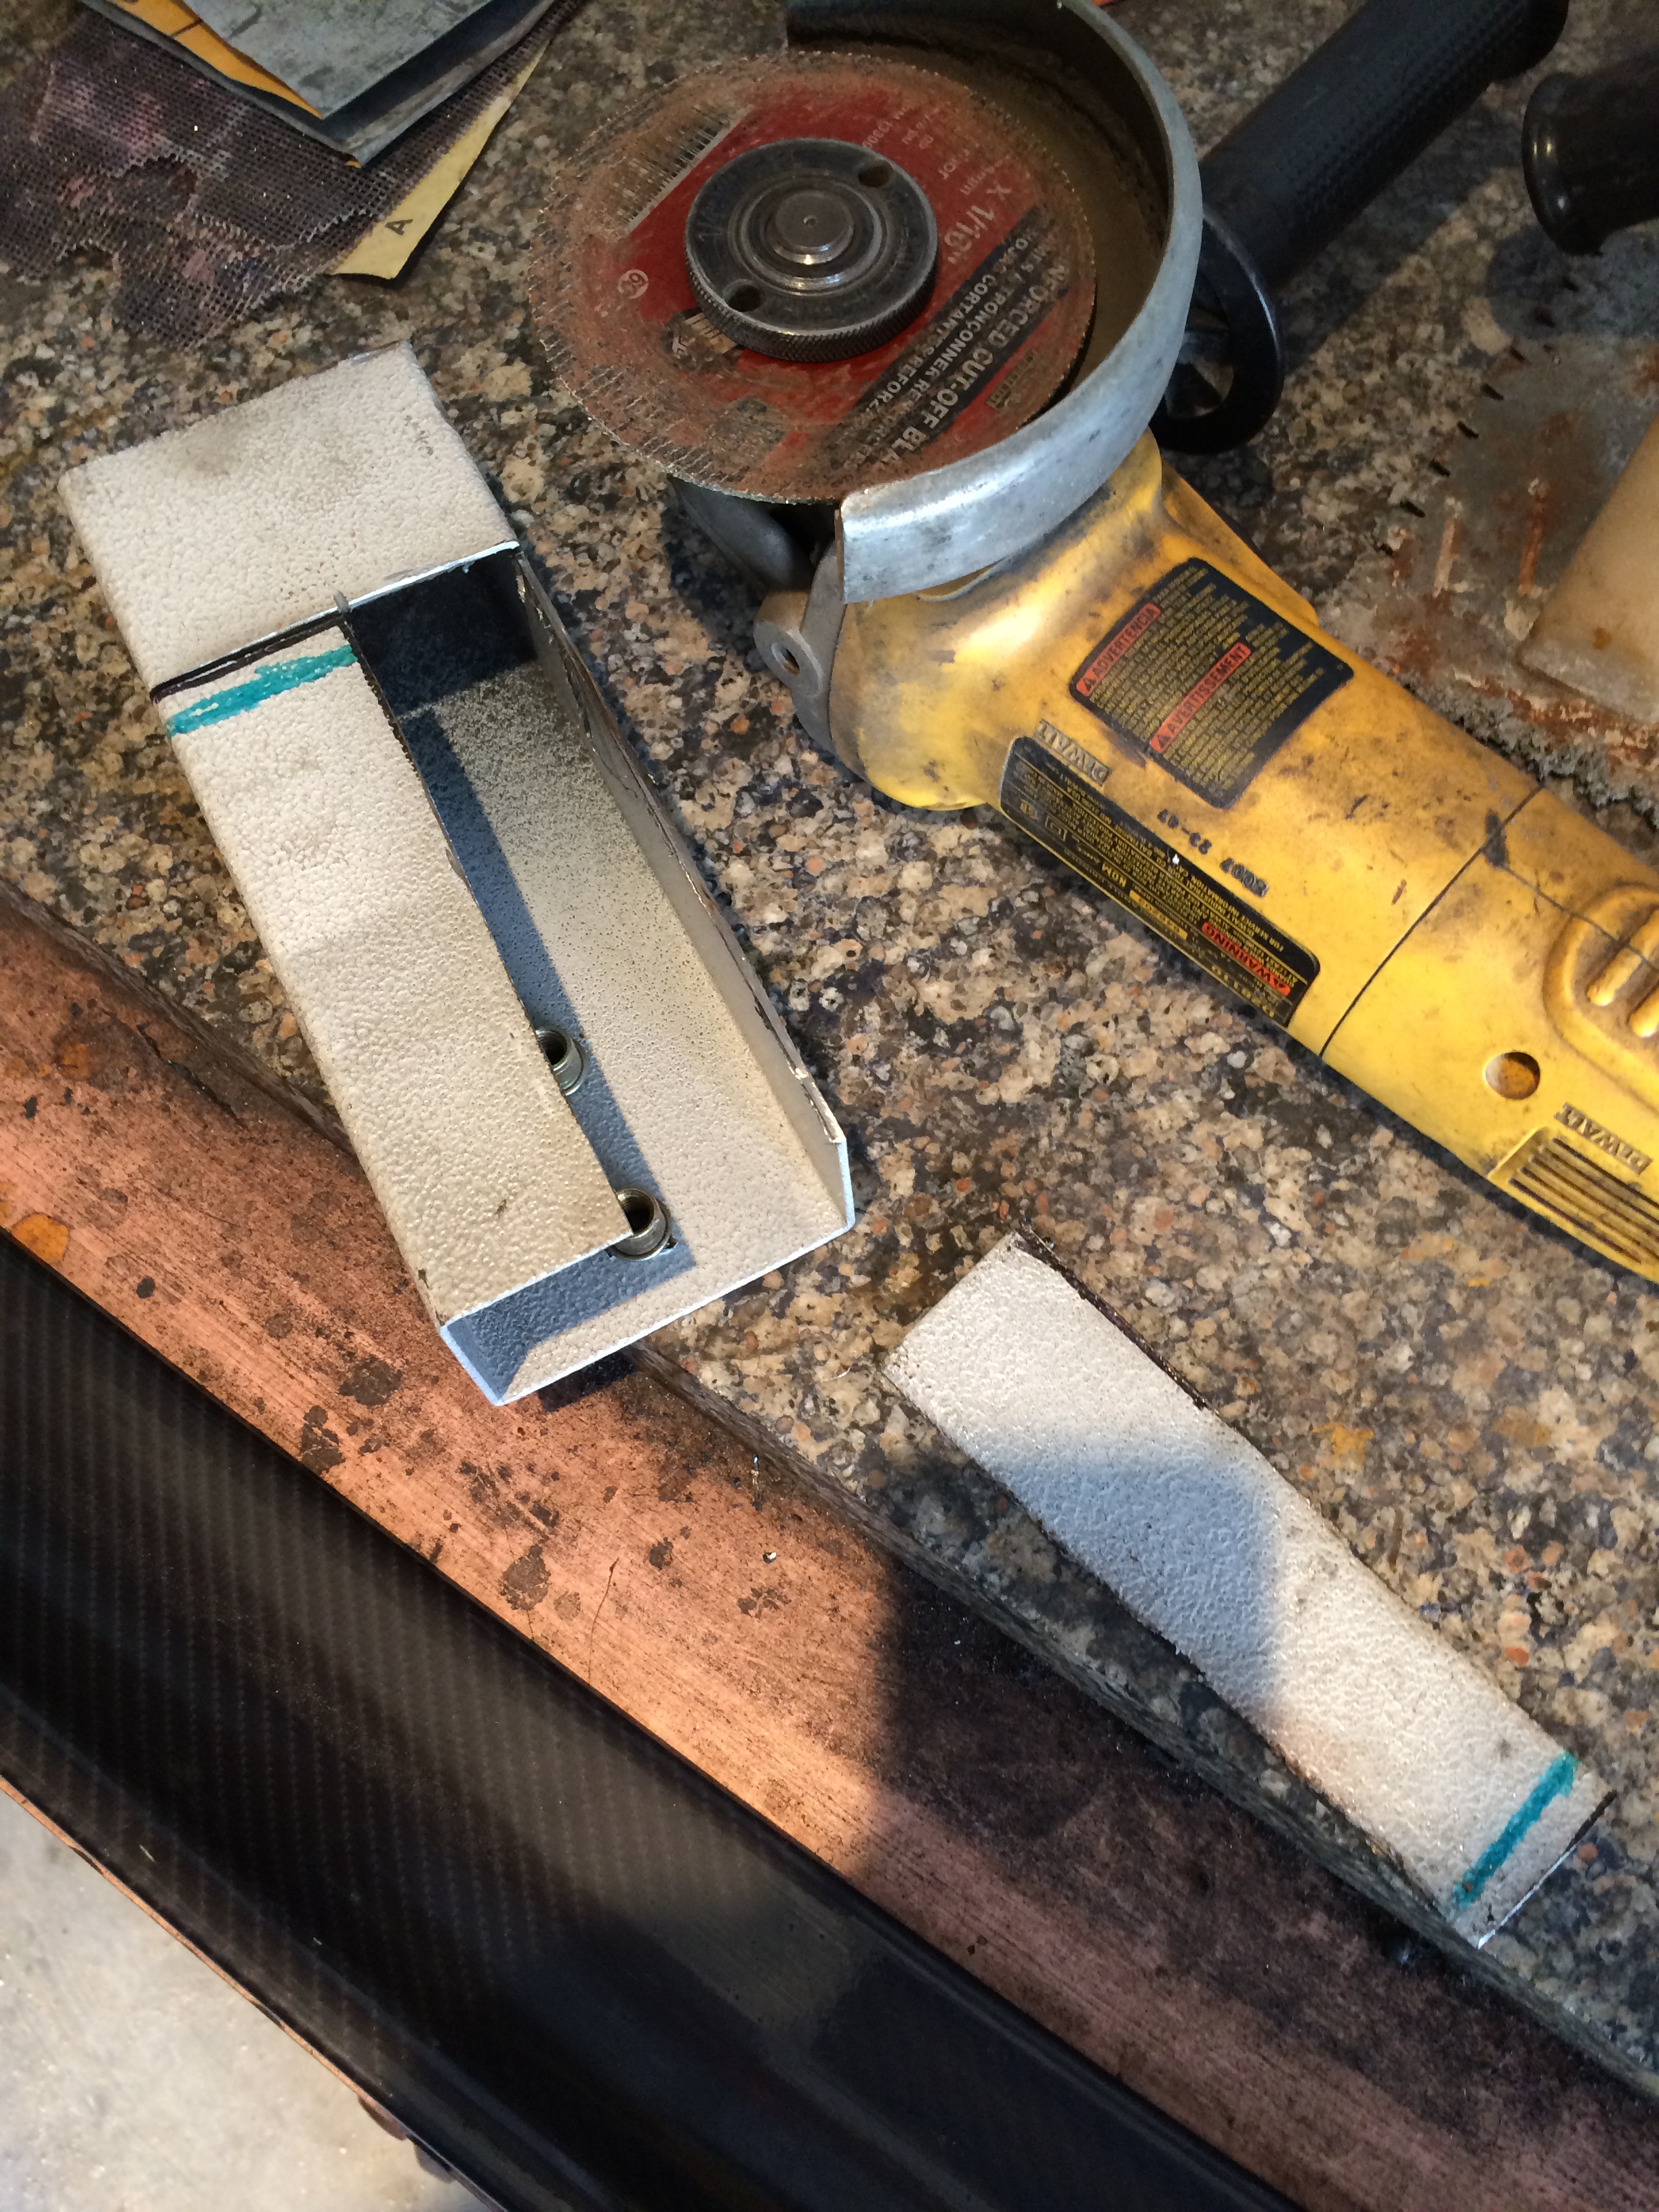
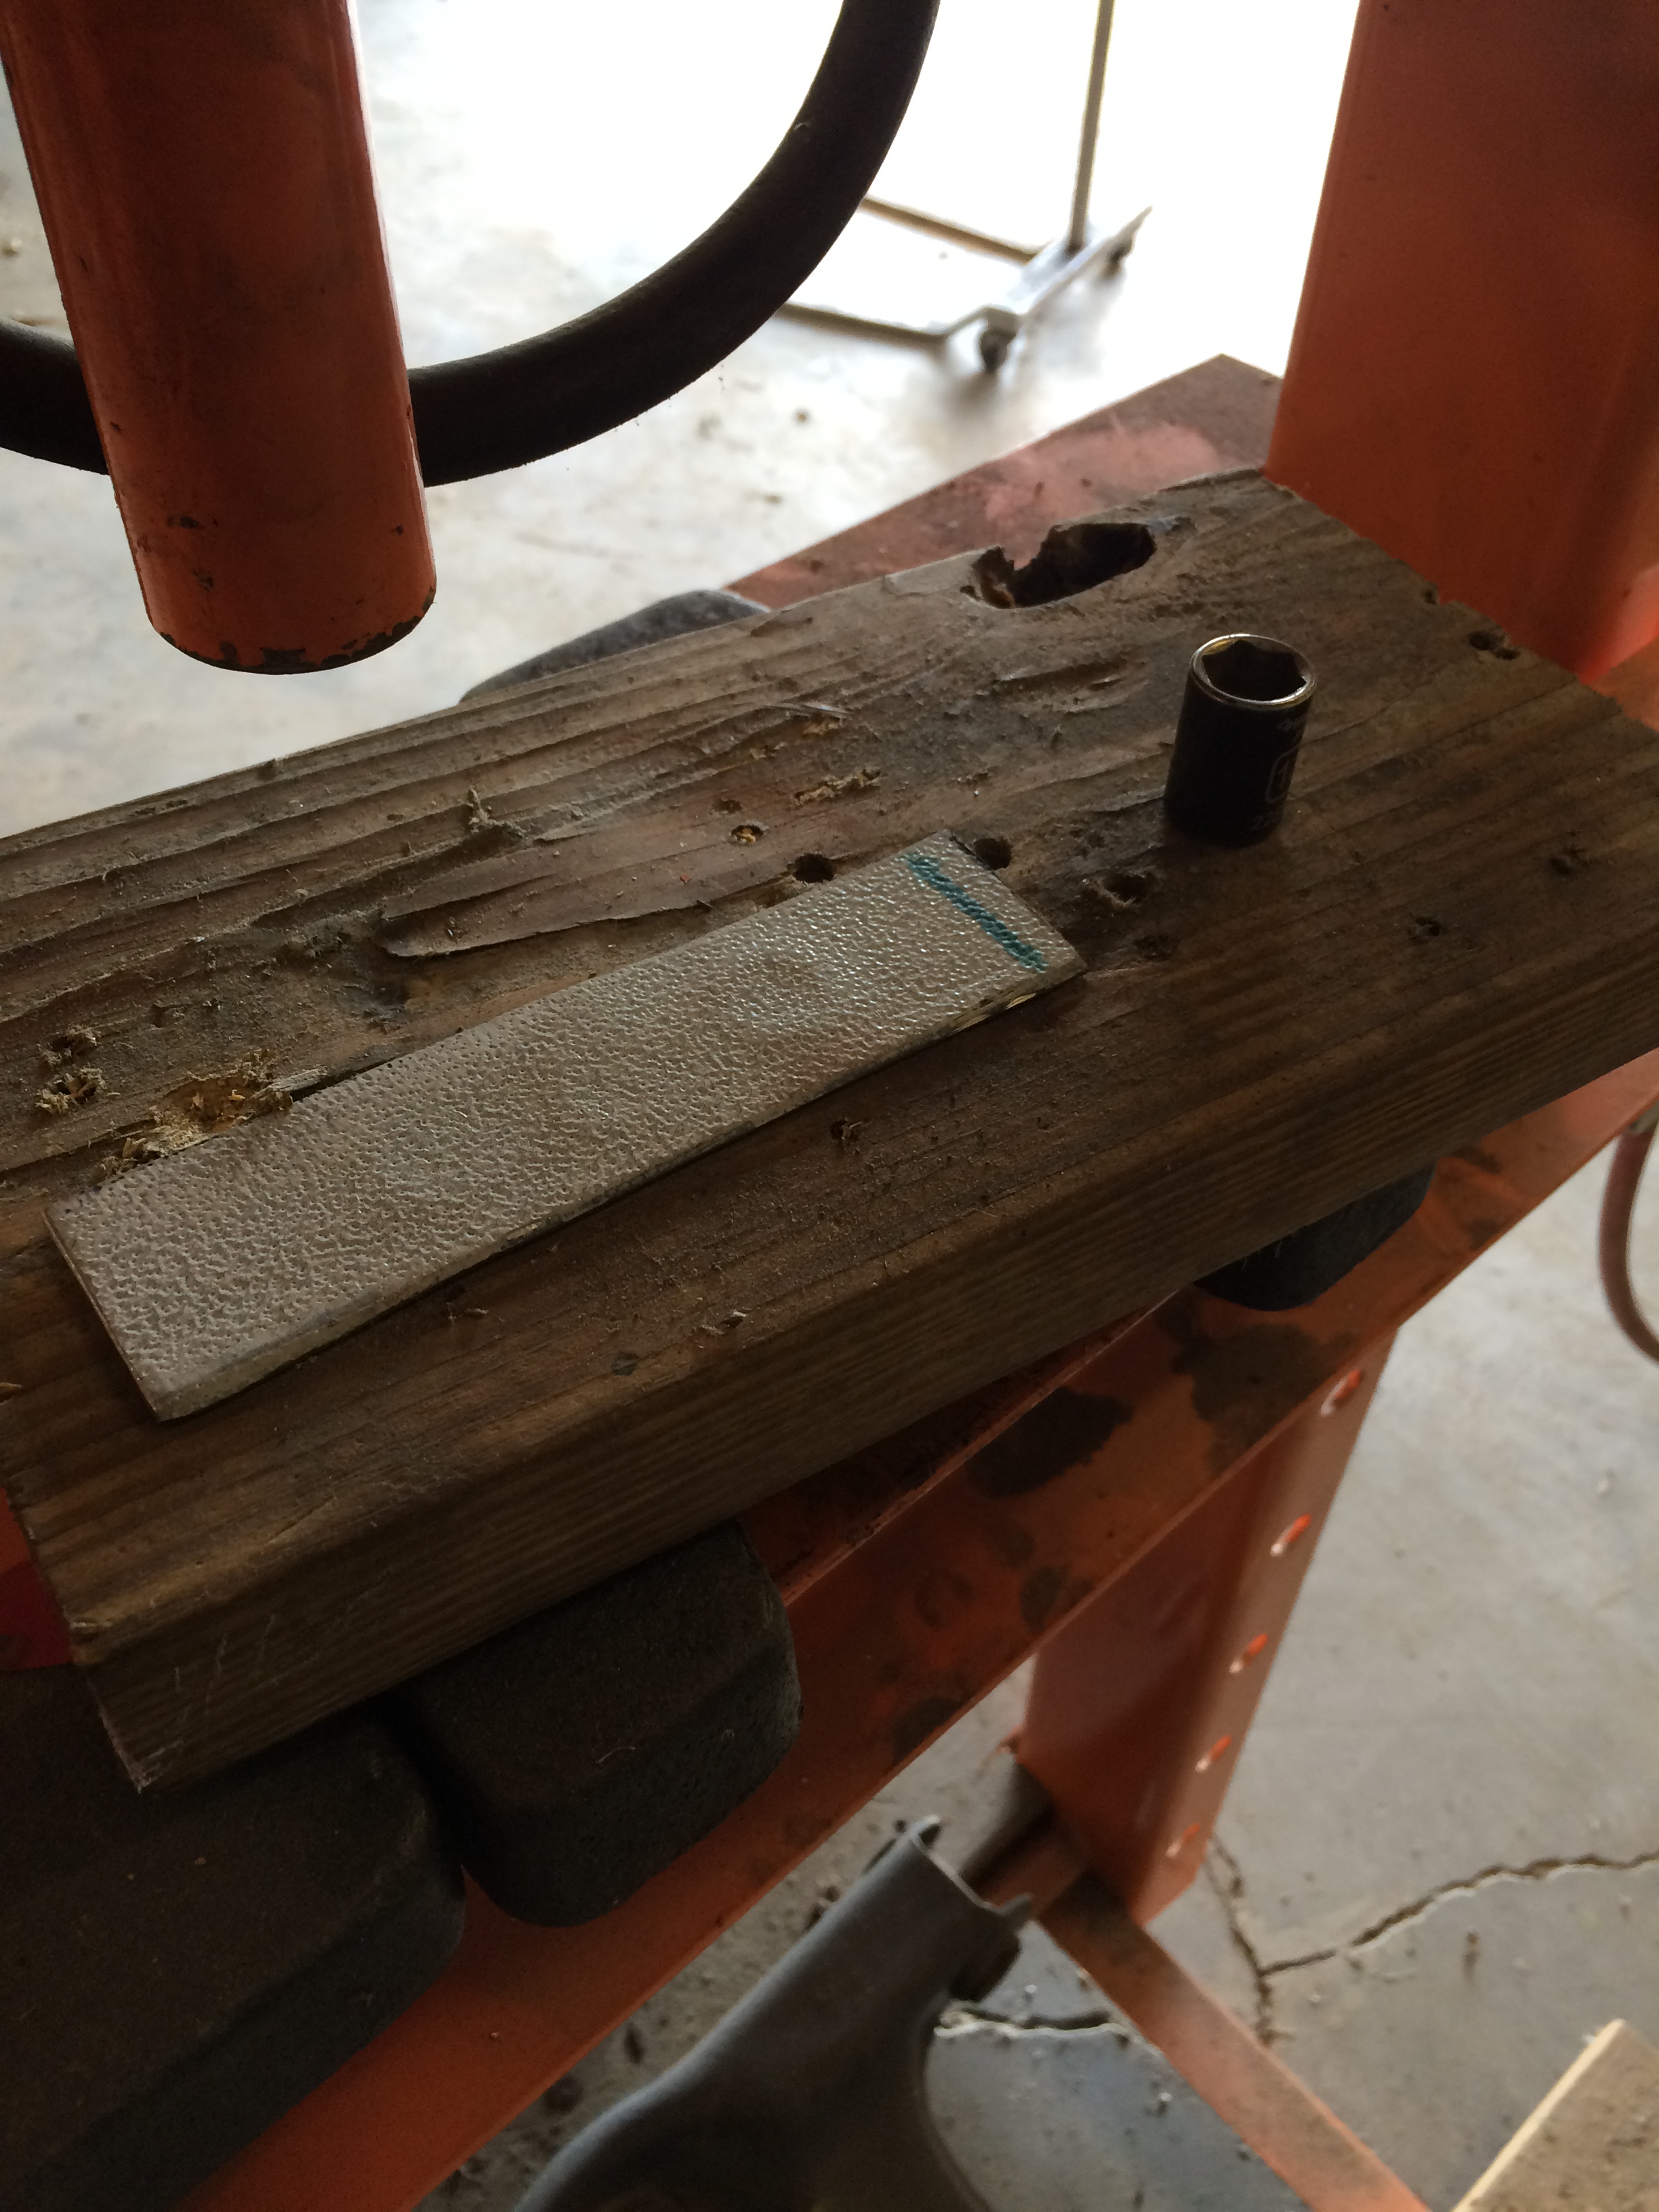
Adding a few dimples with a socket in the shop press makes the flat steel plate a little more rigid.
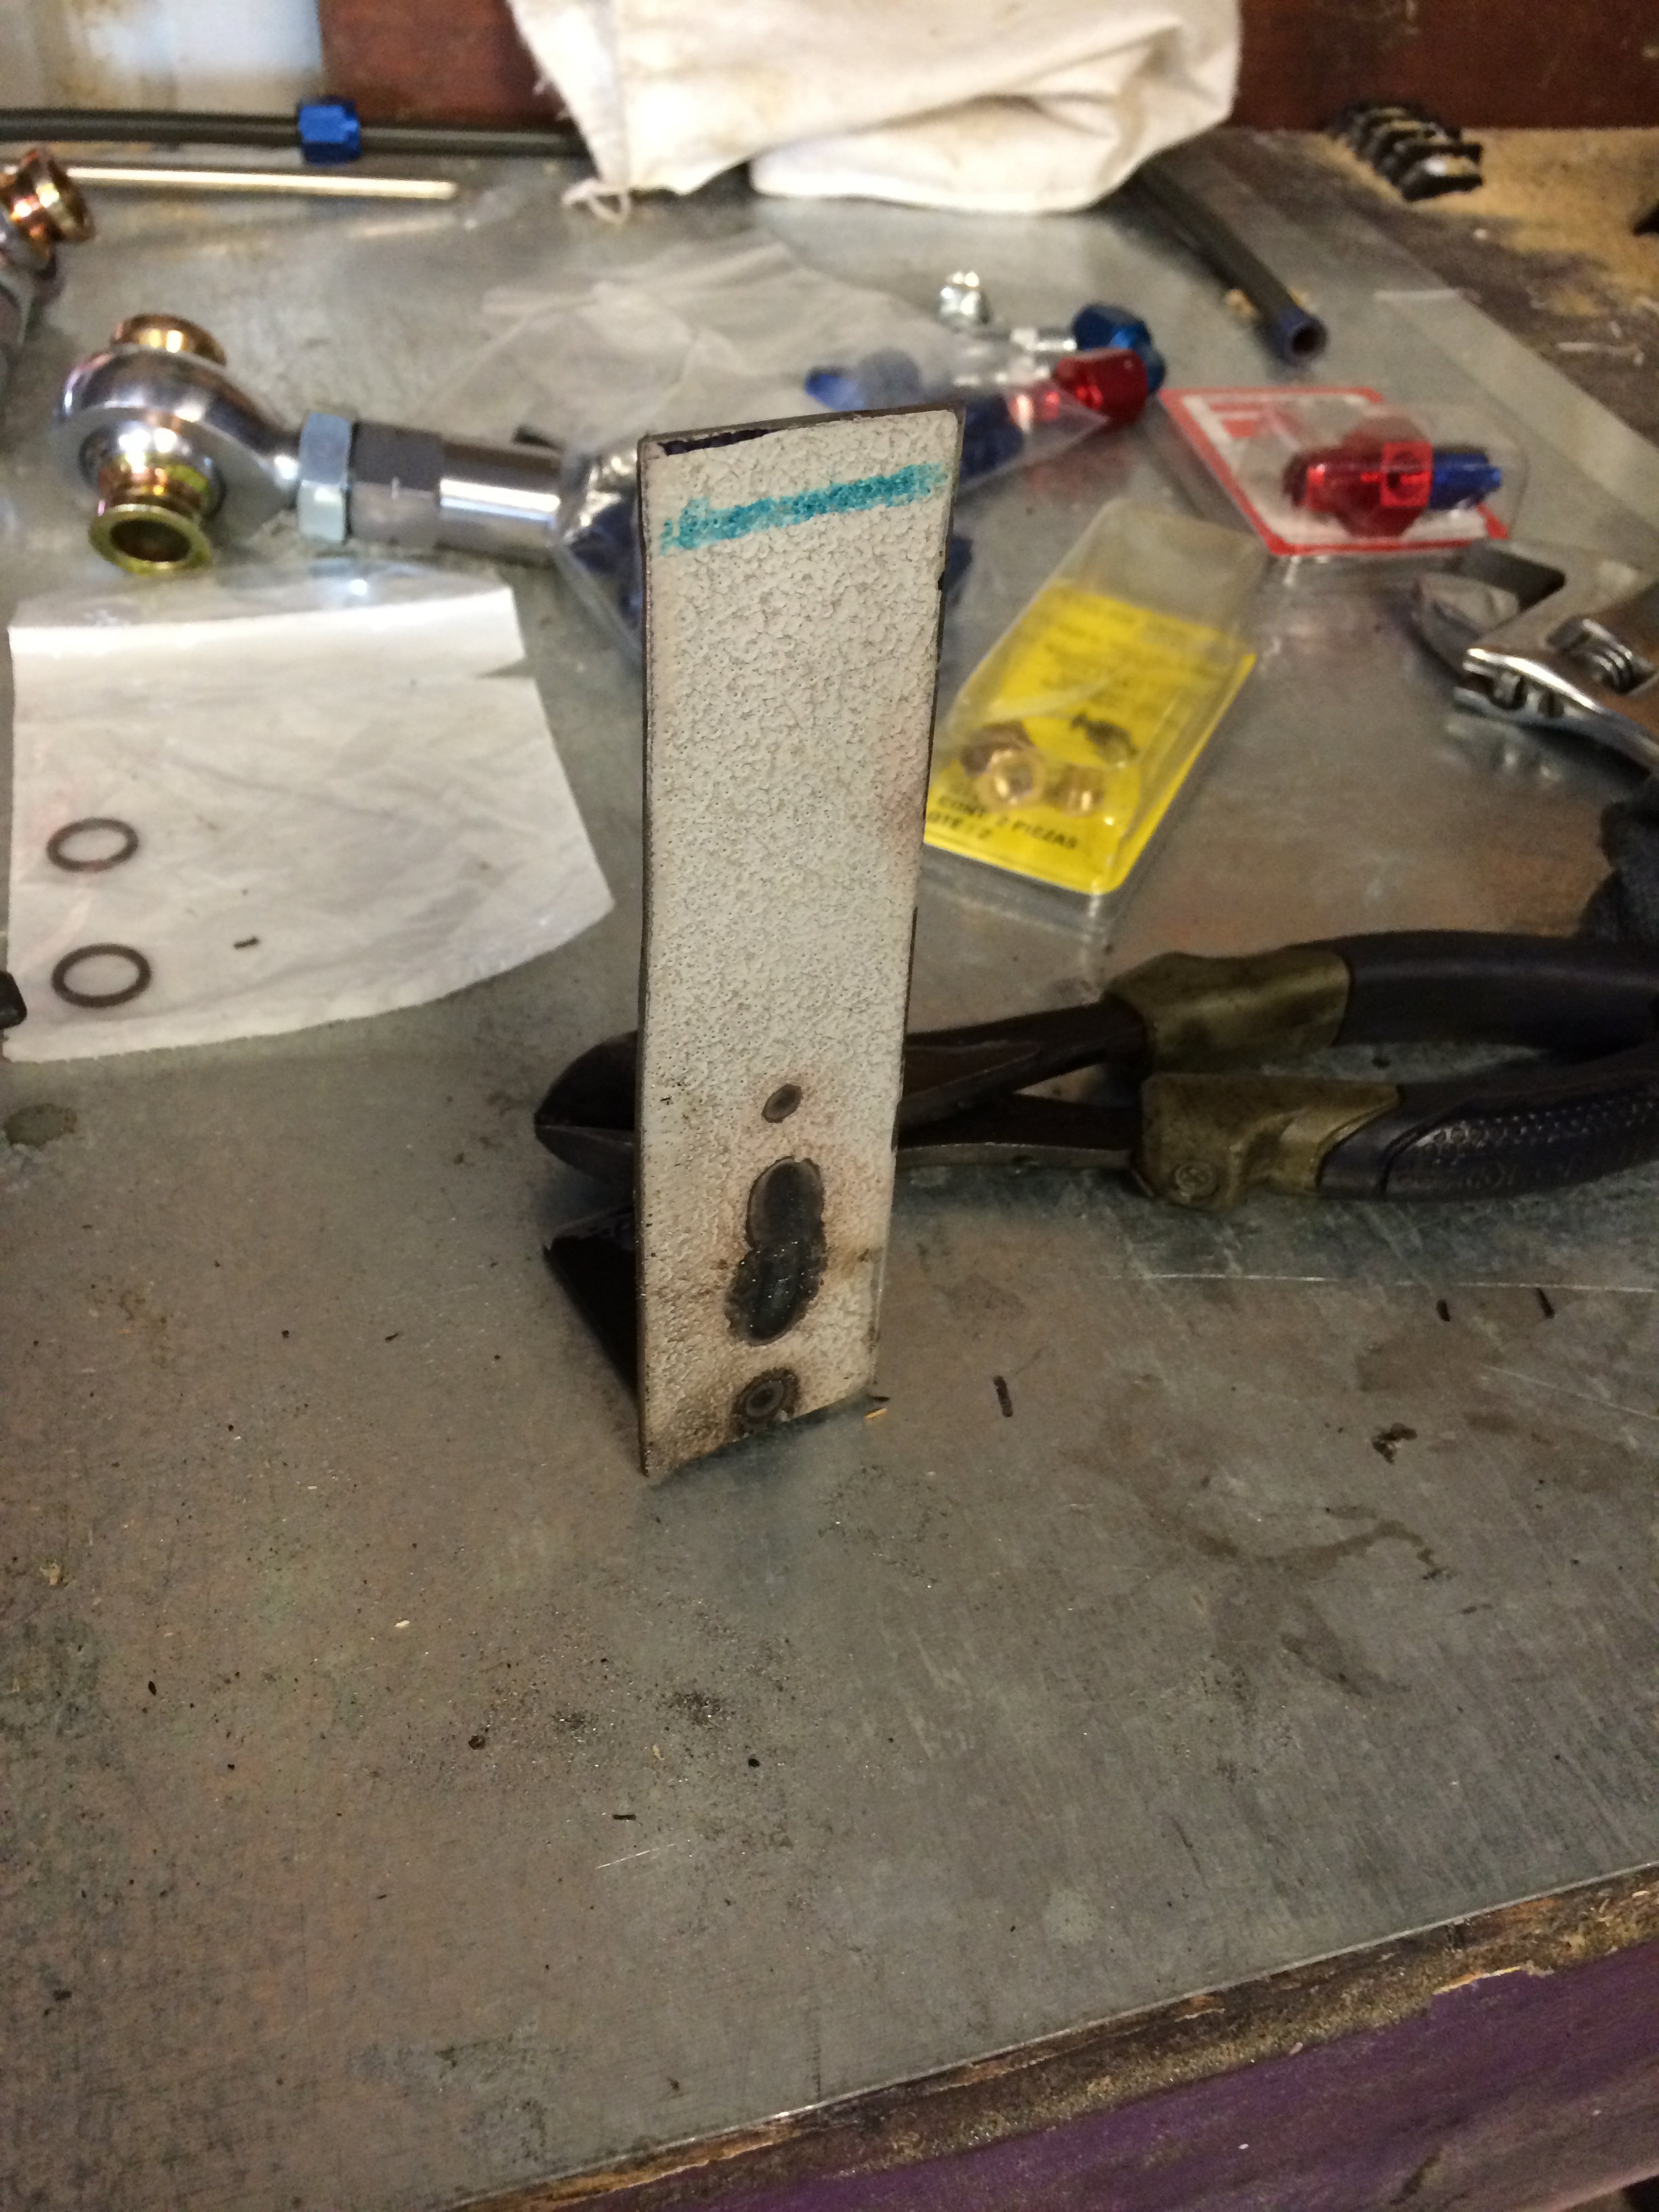
Welded together to make a bracket.
Painted, lines attached, and a couple of cushion clamps to take the tension off.

Next, I found an old Ikea curtain bracket, and cut one end off. I found a piece of a table leg left over from a worktable I shortened, and cut this also.


Adding a few dimples with a socket in the shop press makes the flat steel plate a little more rigid.

Welded together to make a bracket.

Painted, lines attached, and a couple of cushion clamps to take the tension off.
 10-19-2015, 12:25 PM
#14
On The Tree
Join Date: May 2014
Posts: 123
Likes: 0
Received 0 Likes
on
0 Posts
Have you mocked up the motor with an oil pan for front diff clearance yet?
10-19-2015, 09:23 PM
#15
The Dakota is RWD. Former R/T.
But, coincidentally, the same adapter plates locate the motor in the 4x4 as well. I don't see that there will be any trouble using the truck pan, and clearing the front axle. There is more room in the 4x4 than the rwd chassis....at least my eyeball thinks so.
I am using 6.2/6l80/awd out of a 2010 escalade. Should be crated and shipped this week.
10-20-2015, 01:50 PM
#16
On The Tree
Join Date: May 2014
Posts: 123
Likes: 0
Received 0 Likes
on
0 Posts
The Dakota is RWD. Former R/T.
But, coincidentally, the same adapter plates locate the motor in the 4x4 as well. I don't see that there will be any trouble using the truck pan, and clearing the front axle. There is more room in the 4x4 than the rwd chassis....at least my eyeball thinks so.
I am using 6.2/6l80/awd out of a 2010 escalade. Should be crated and shipped this week.
But, coincidentally, the same adapter plates locate the motor in the 4x4 as well. I don't see that there will be any trouble using the truck pan, and clearing the front axle. There is more room in the 4x4 than the rwd chassis....at least my eyeball thinks so.
I am using 6.2/6l80/awd out of a 2010 escalade. Should be crated and shipped this week.
10-20-2015, 07:34 PM
#17
The drivetrain is about $5000 shipped. Seemed like a pretty good price. I needed something specific for this, and I really prefer to use engine/trans and all electronics and accessories from one vehicle. It seems to be easier, and more cost effective than trying to piece stuff together.
10-22-2015, 03:01 PM
#20
On The Tree
Join Date: May 2014
Posts: 123
Likes: 0
Received 0 Likes
on
0 Posts
The drivetrain is about $5000 shipped. Seemed like a pretty good price. I needed something specific for this, and I really prefer to use engine/trans and all electronics and accessories from one vehicle. It seems to be easier, and more cost effective than trying to piece stuff together.