
65 Nova street car, 6.0 LQ4, 4L70E, mini tub, rust repair, Holley Dominator
 12-30-2016, 12:20 AM
#1
Launching!
Thread Starter
iTrader: (6)

Join Date: Jul 2010
Posts: 220
Likes: 0
Received 0 Likes
on
0 Posts
Gents,
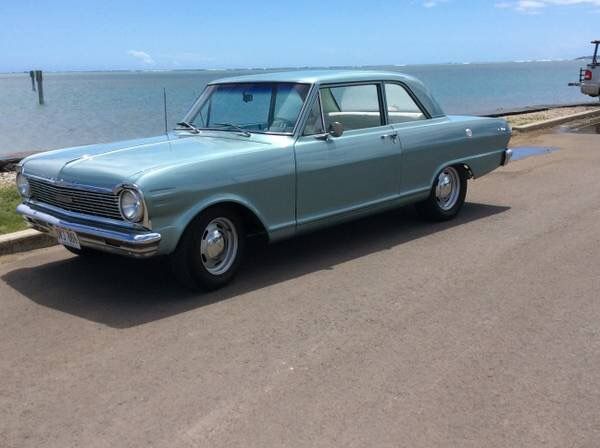
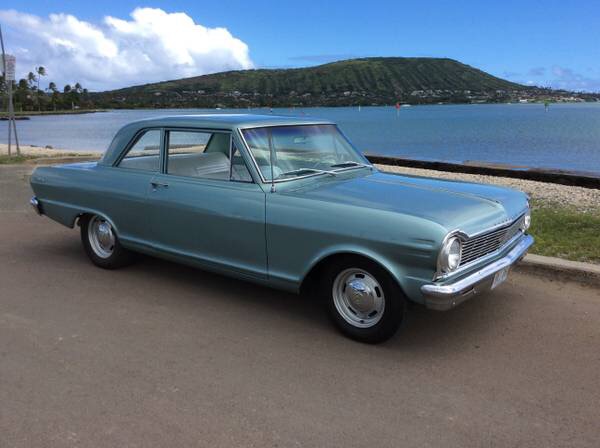
Picked up this sweet 65 Nova a while back and enjoyed cruising around with the family. I did some homework and hatched a game plan for what I wanted out of the car. Will be a fun weekend cruiser that we can enjoy and the wife will be comfortable to run errands in. Although I'm slowly adding parts that she won't be fond of, haha.
It's in decent shape. Car was redone maybe 10-15 years ago. They obviously took some shortcuts but that's ok. Paint is nice, has a few areas that will get touched up. I'm also getting the engine bay painted to match. Some rust in the floor, and a few spots on the drivers rear wheel well. Picked up a patch pan for that
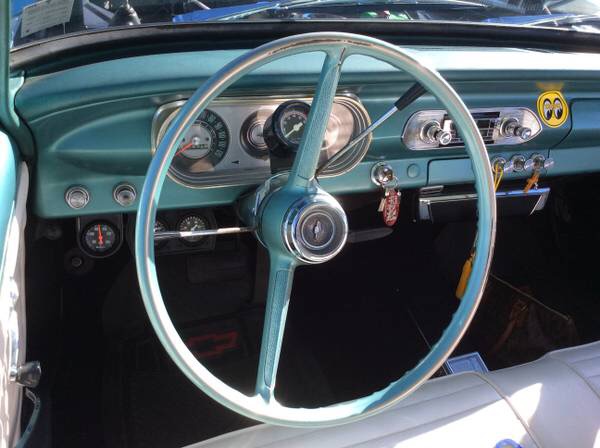
Interior and exterior will remain the same. Only change will be painting the wheels black and keeping the chrome center caps
here's what's getting done over the next few months:
Motor:
Gen III LQ4 6.0
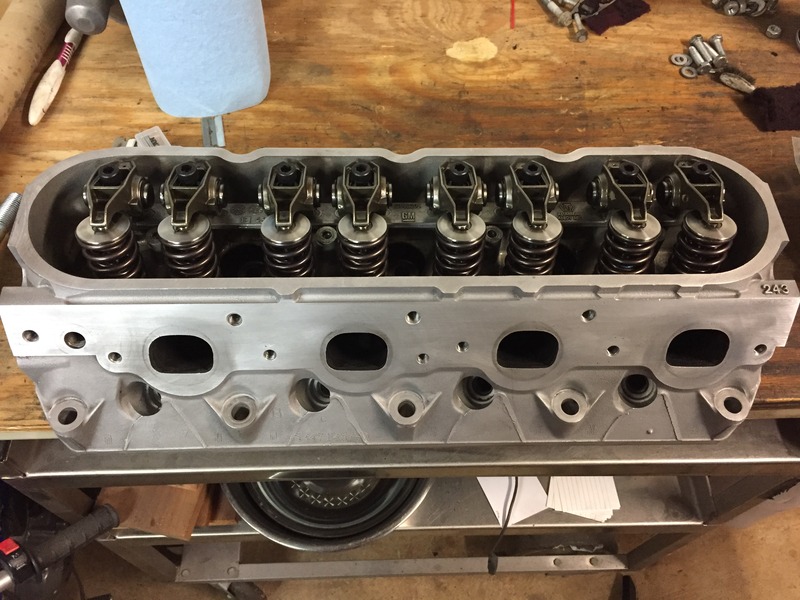
243 heads w/ dual springs
Tick Torquemax v2 cam
Trunion upgrade
HV oil pump
LS2 intake
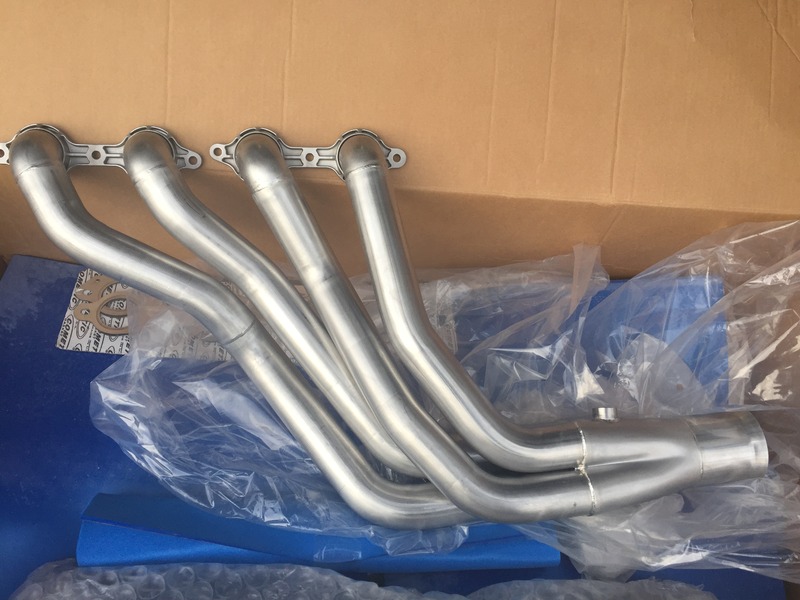
CBR 1 7/8 longtubes
F-body accessories
Vintage air a/c
Trans:
4L70E
HD-2 shift kit
FTI 4,000 stall
shifter undecided (TCI?)
CBR crossmember
Electronics:
Holley Dominator to control motor and trans
Holley 7" digital dash for gauges
Fuel:
Holley retrofit in-tank 450lph returnless pump
PTFE -6 Fragola line
(super simple like this. just the pump and feed line from the stock tank)
Cooling:
Entropy direct fit radiator
Tru cool max trans cooler
Front suspension:
Full CBR rack conversion
Viking coil overs
Tubular upper and lower control arms
CBR sway bar
Right Stuff power disc brakes
Rear:
widen stock tubs by adding a strip to the middle
2" offset rear shackles for 1st gen camaro's (heard they fit)
relocate front leaf spring mount under the frame rail
s10 sway bar
here's how it was when we bought it

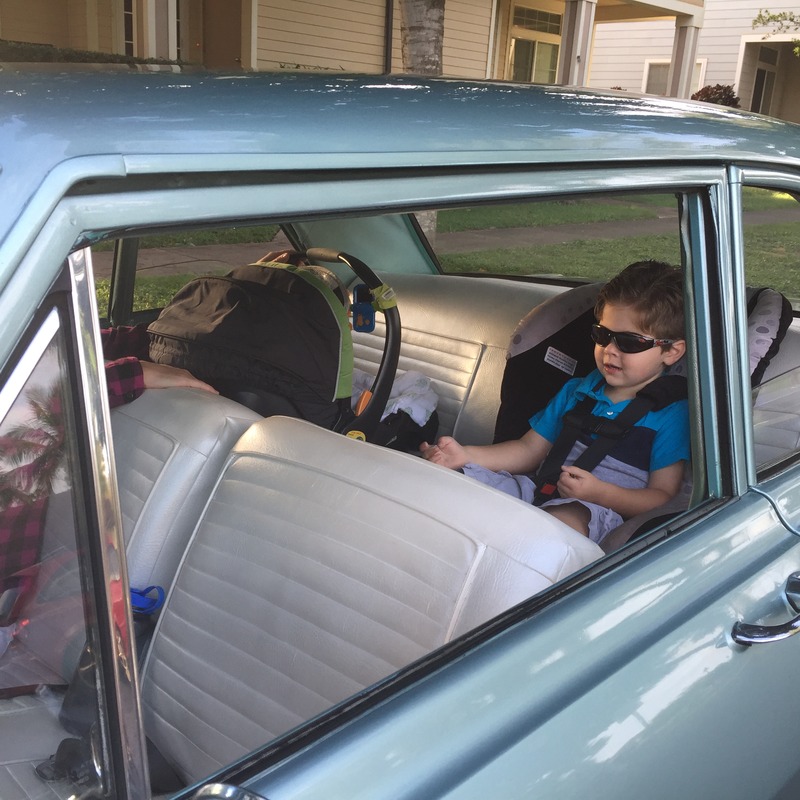
added some brackets to mount the car seats and we were cruising as a family
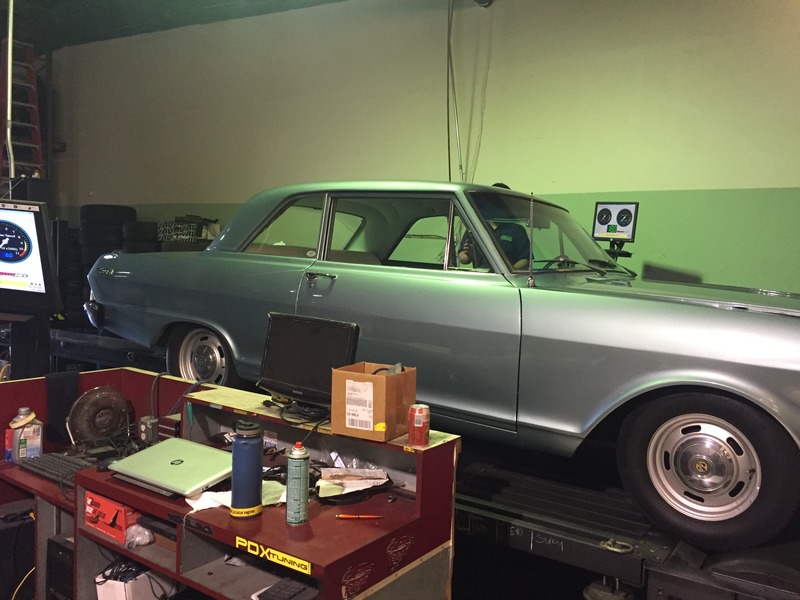
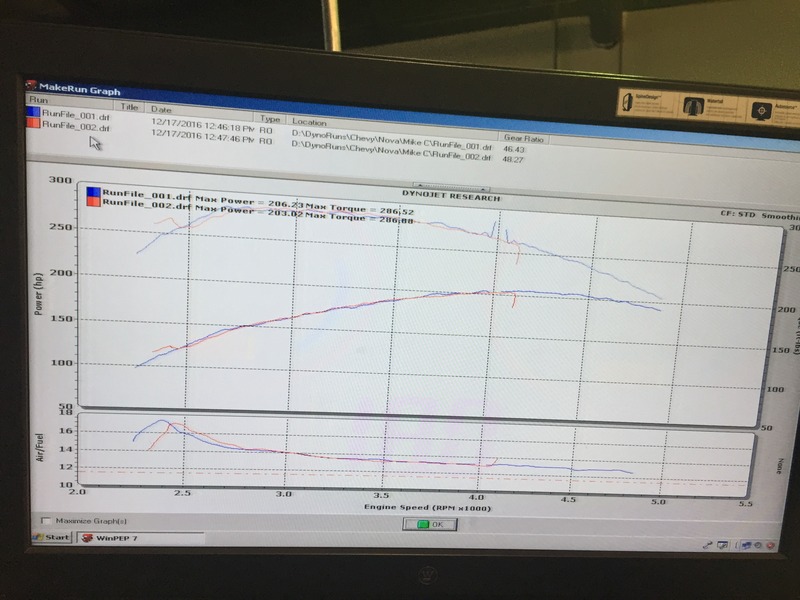
car had a stock 350, power glide setup and I threw it on the dyno for fun one weekend at an event we had setup at a local shop. made 206hp 268tq. Numbers were pleasing for such a basic setup. it was just a good cruiser
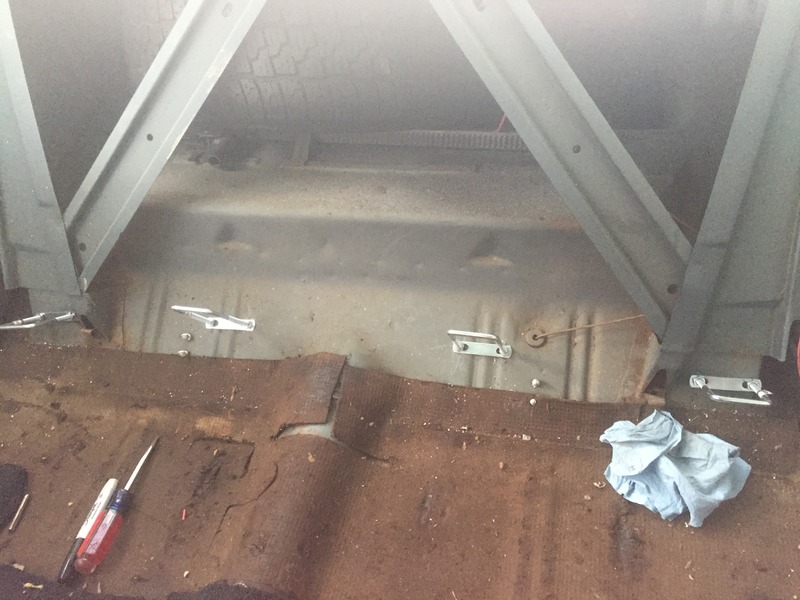
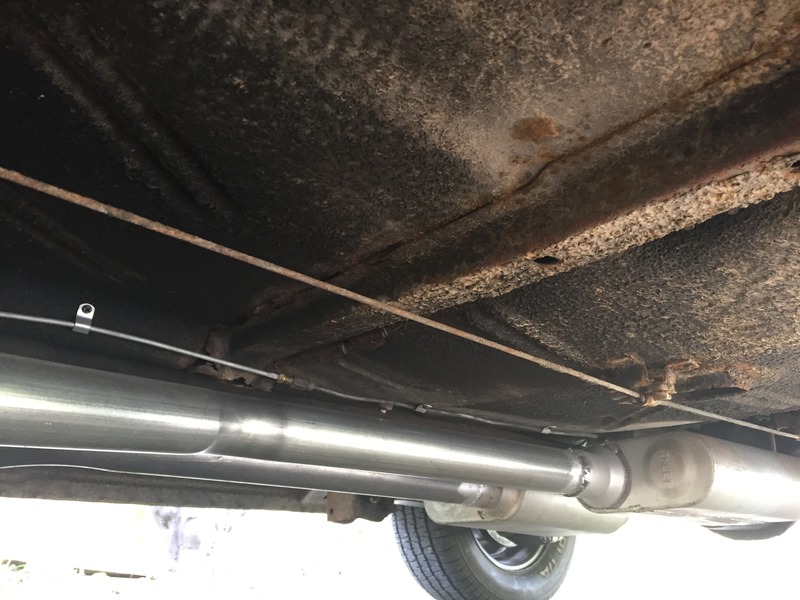
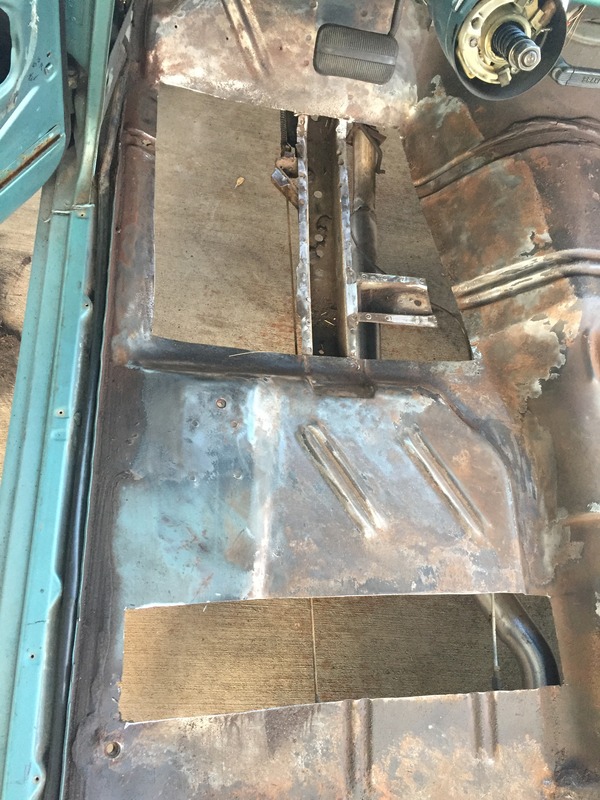
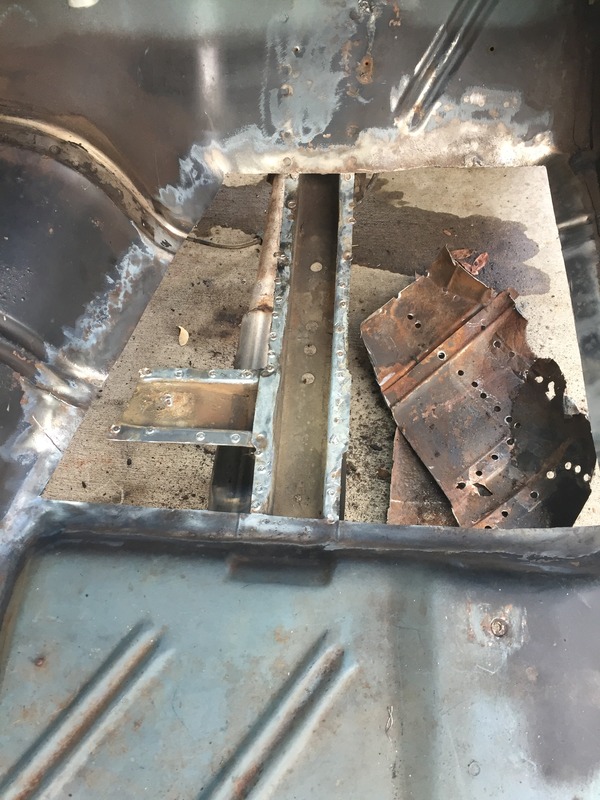
here's the rust areas underneath. not terrible and will strip the whole underside while I'm at it. have a complete drivers side pan and front section for the passenger side. Also got the braces you see that are separating from the floor

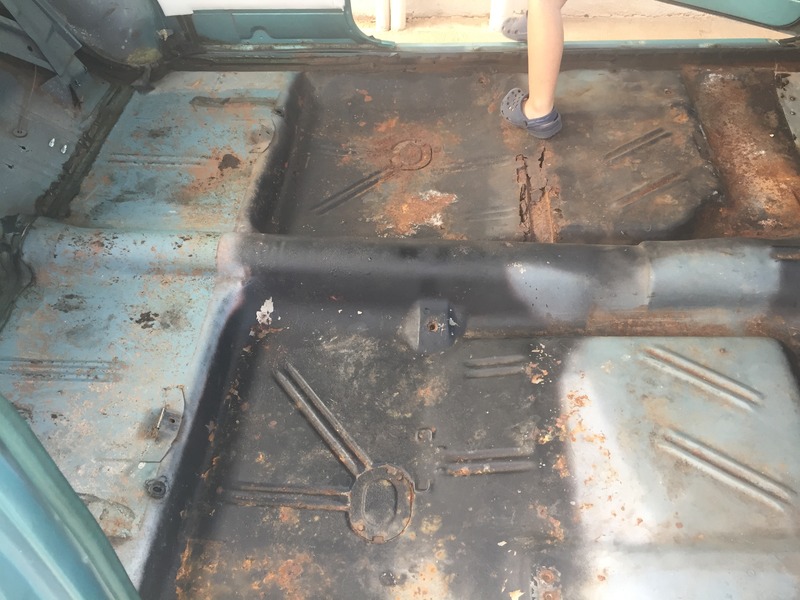
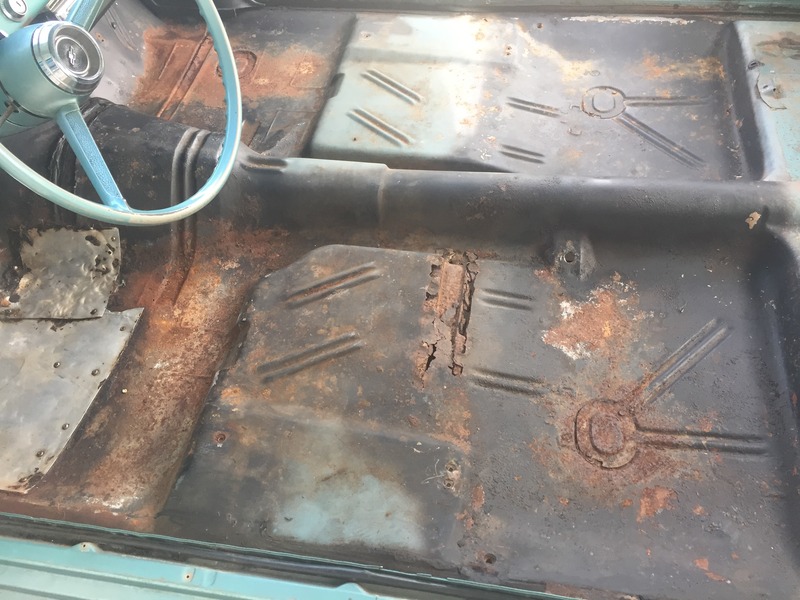
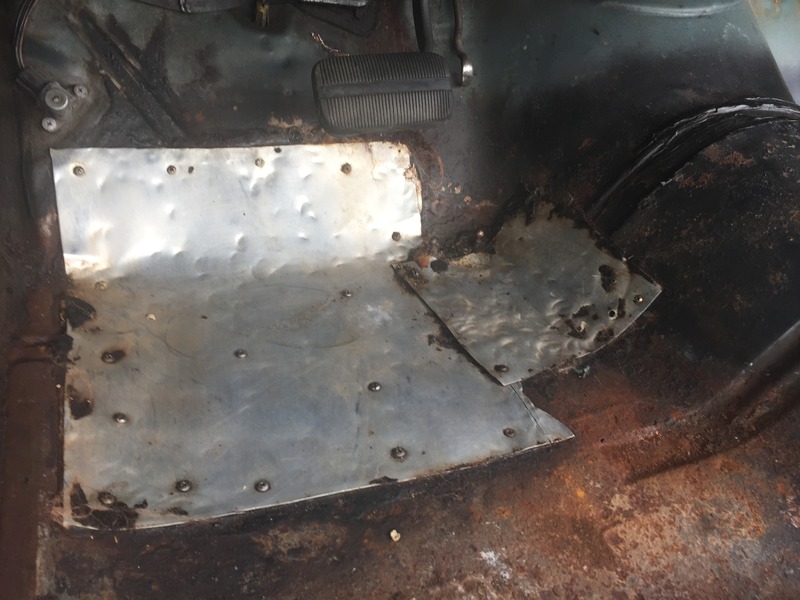
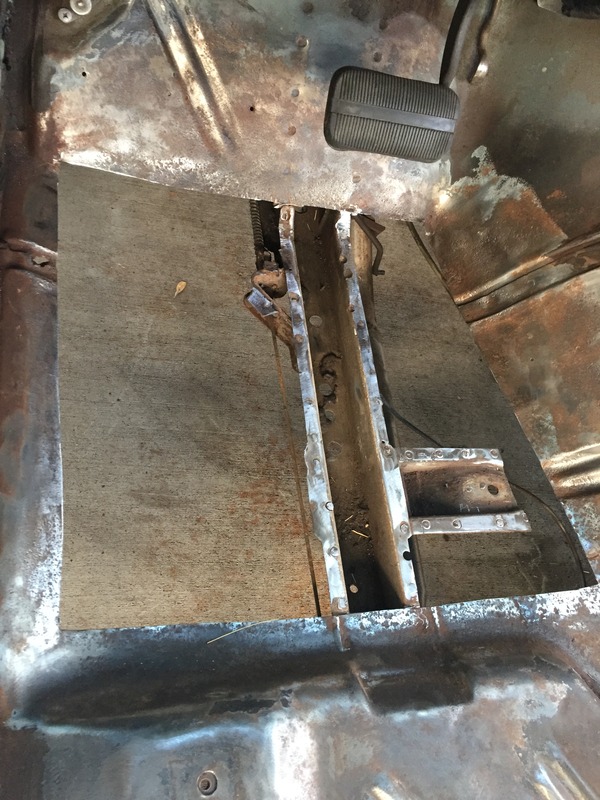
inside view and the awesome patch panel that someone put in at some point, haha...

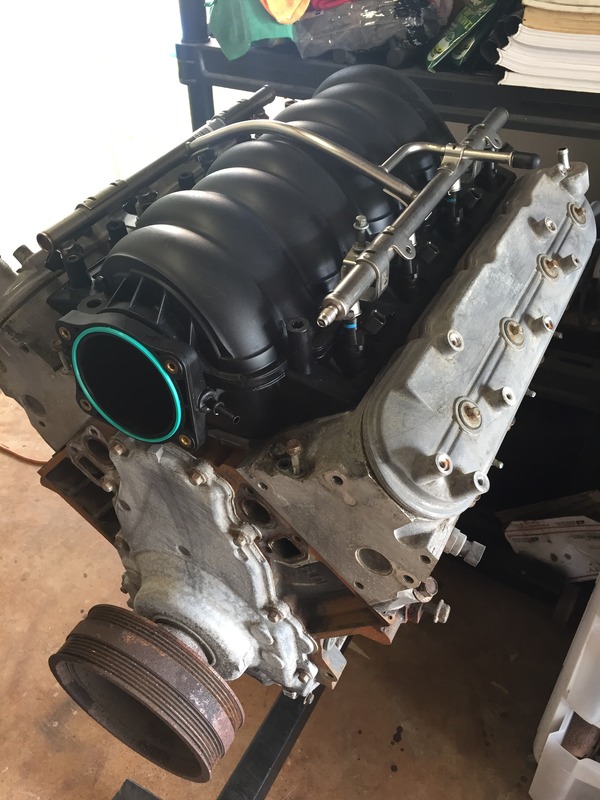
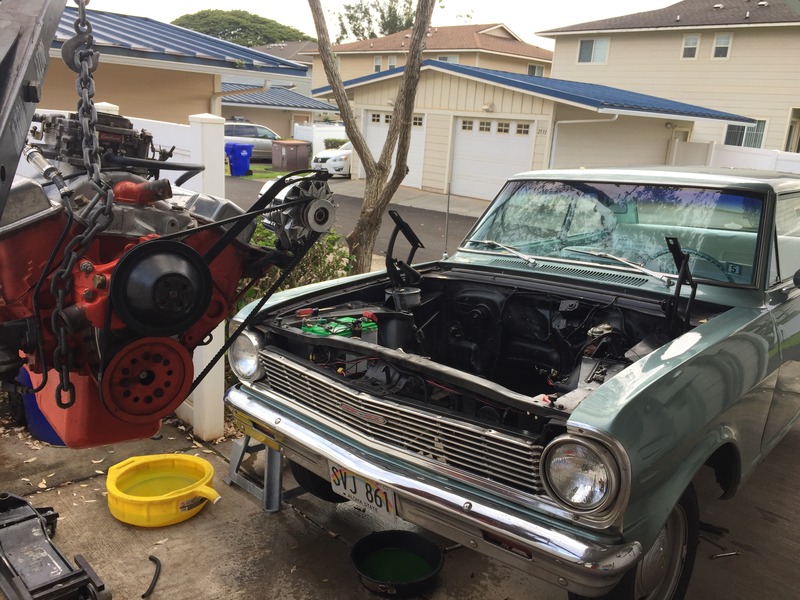
the new 6.0 LQ4. just set the intake on to see how it'd look. Dropping it off at the machine shop tomorrow for new cam bearings. Found the 4L70E trans out of a trailblazer SS with 10k miles on it. They're not the best, but hope it'll live a few years in this lightweight body. I'm not wanting to make a new tunnel and stuff. We are currently stationed in hawaii and I don't have the normal 2 car garage or all of my tools

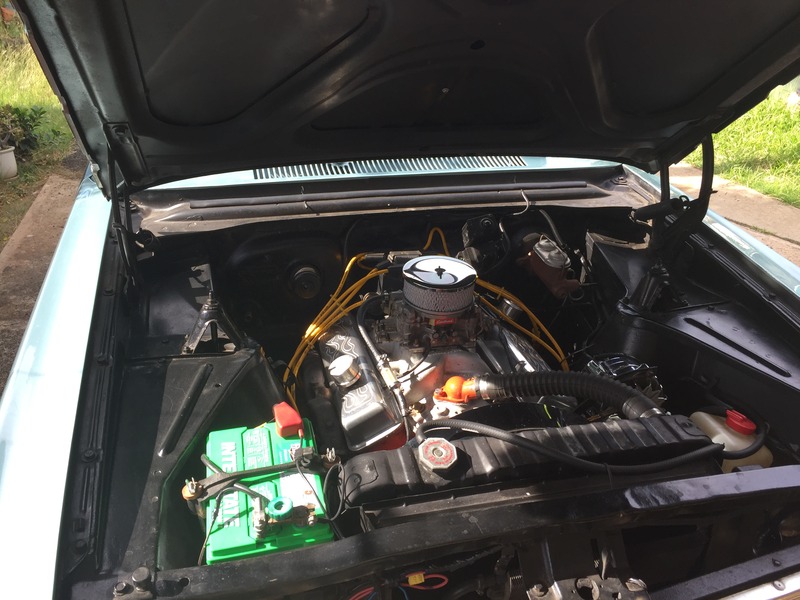
engine bay currently. have to strip it and prep for paint


Picked up this sweet 65 Nova a while back and enjoyed cruising around with the family. I did some homework and hatched a game plan for what I wanted out of the car. Will be a fun weekend cruiser that we can enjoy and the wife will be comfortable to run errands in. Although I'm slowly adding parts that she won't be fond of, haha.
It's in decent shape. Car was redone maybe 10-15 years ago. They obviously took some shortcuts but that's ok. Paint is nice, has a few areas that will get touched up. I'm also getting the engine bay painted to match. Some rust in the floor, and a few spots on the drivers rear wheel well. Picked up a patch pan for that
Interior and exterior will remain the same. Only change will be painting the wheels black and keeping the chrome center caps
here's what's getting done over the next few months:
Motor:
Gen III LQ4 6.0
243 heads w/ dual springs
Tick Torquemax v2 cam
Trunion upgrade
HV oil pump
LS2 intake
CBR 1 7/8 longtubes
F-body accessories
Vintage air a/c
Trans:
4L70E
HD-2 shift kit
FTI 4,000 stall
shifter undecided (TCI?)
CBR crossmember
Electronics:
Holley Dominator to control motor and trans
Holley 7" digital dash for gauges
Fuel:
Holley retrofit in-tank 450lph returnless pump
PTFE -6 Fragola line
(super simple like this. just the pump and feed line from the stock tank)
Cooling:
Entropy direct fit radiator
Tru cool max trans cooler
Front suspension:
Full CBR rack conversion
Viking coil overs
Tubular upper and lower control arms
CBR sway bar
Right Stuff power disc brakes
Rear:
widen stock tubs by adding a strip to the middle
2" offset rear shackles for 1st gen camaro's (heard they fit)
relocate front leaf spring mount under the frame rail
s10 sway bar
here's how it was when we bought it


added some brackets to mount the car seats and we were cruising as a family


car had a stock 350, power glide setup and I threw it on the dyno for fun one weekend at an event we had setup at a local shop. made 206hp 268tq. Numbers were pleasing for such a basic setup. it was just a good cruiser


here's the rust areas underneath. not terrible and will strip the whole underside while I'm at it. have a complete drivers side pan and front section for the passenger side. Also got the braces you see that are separating from the floor


inside view and the awesome patch panel that someone put in at some point, haha...


the new 6.0 LQ4. just set the intake on to see how it'd look. Dropping it off at the machine shop tomorrow for new cam bearings. Found the 4L70E trans out of a trailblazer SS with 10k miles on it. They're not the best, but hope it'll live a few years in this lightweight body. I'm not wanting to make a new tunnel and stuff. We are currently stationed in hawaii and I don't have the normal 2 car garage or all of my tools


engine bay currently. have to strip it and prep for paint


 12-30-2016, 12:20 AM
#2
Launching!
Thread Starter
iTrader: (6)
Join Date: Jul 2010
Posts: 220
Likes: 0
Received 0 Likes
on
0 Posts
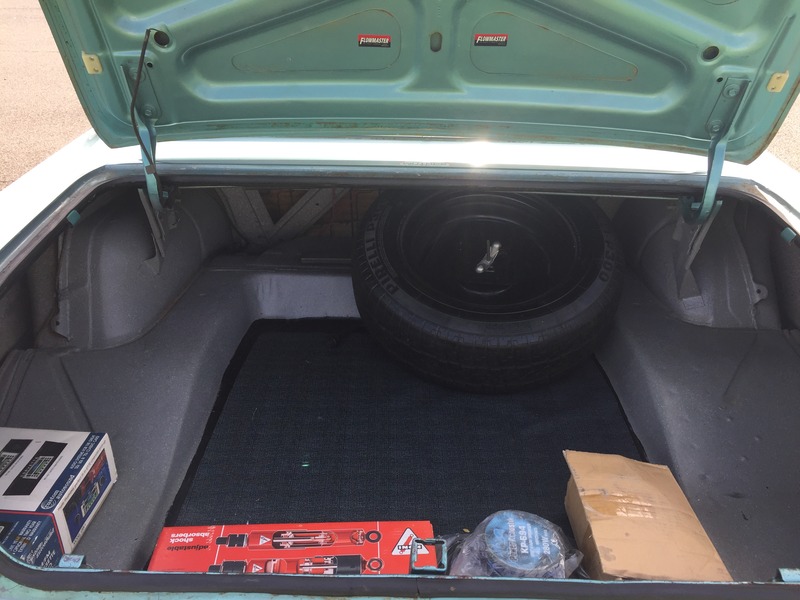
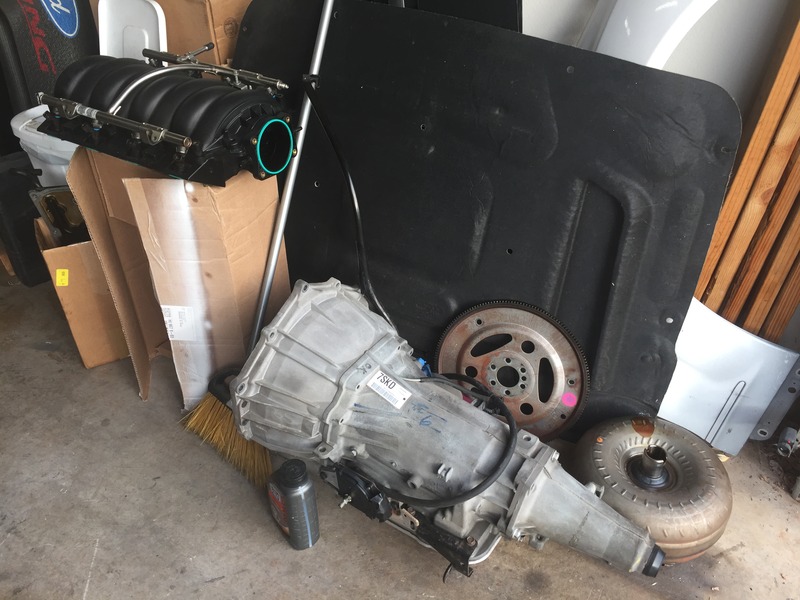
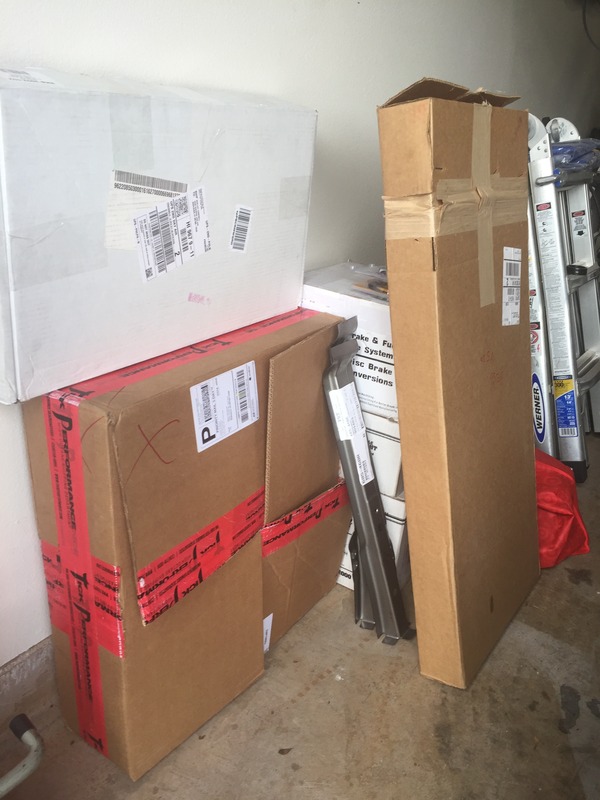
and finally what has been putting a smile on my face for the last few weeks. Tons of boxes showing up. still waiting on a bunch more. but it's coming together
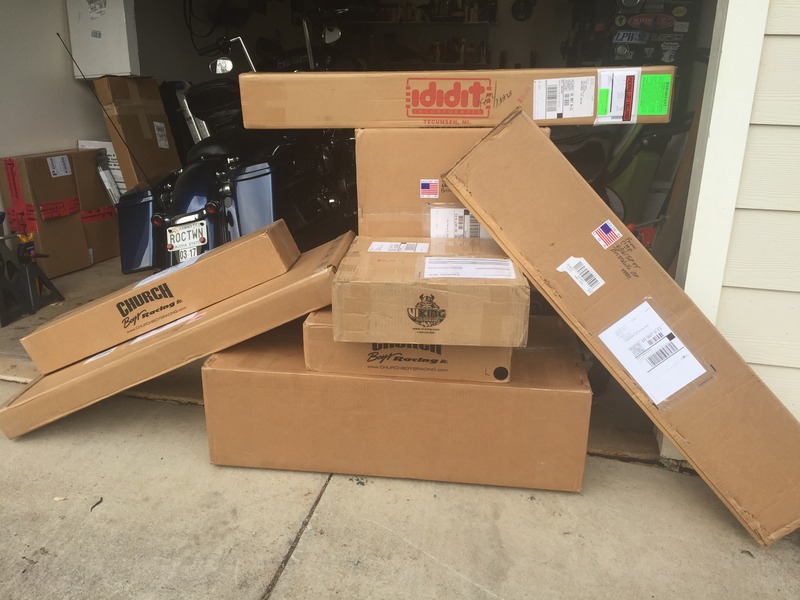
So I have a ton of work ahead of me and will hit plenty of road blocks. Hoping to have it done by this summer and put a bunch of miles on it for years to come
Mike


So I have a ton of work ahead of me and will hit plenty of road blocks. Hoping to have it done by this summer and put a bunch of miles on it for years to come
Mike
12-31-2016, 02:14 PM
#3
TECH Regular

You're going to like the Dominator, it's pretty cool how much it can do.
For a shifter why not use the column shift? I used an ididit column shift on my 55 with a kugel linkage. The dominator will be controlling the trans anyway.
Looks like a fun project.
For a shifter why not use the column shift? I used an ididit column shift on my 55 with a kugel linkage. The dominator will be controlling the trans anyway.
Looks like a fun project.
 12-31-2016, 02:42 PM
#5
TECH Senior Member
iTrader: (7)

Double check the wiring requirements for the 4L70e. A have a friend that used the Dominator with it and he said some pins had to be moved around, but I don't have specifics.
Also, want to sell that LS2 intake, rail, and injectors? I'd consider a partial swap for my Hi-Ram and dual DBW set-up...
You'r Nova would look totally awesome with a bug catching sticking out of the hood!
Andrew
Also, want to sell that LS2 intake, rail, and injectors? I'd consider a partial swap for my Hi-Ram and dual DBW set-up...
You'r Nova would look totally awesome with a bug catching sticking out of the hood!
Andrew
12-31-2016, 09:53 PM
#6
Launching!
Thread Starter
iTrader: (6)
Join Date: Jul 2010
Posts: 220
Likes: 0
Received 0 Likes
on
0 Posts
Thanks guys
I'd prefer a floor shifter. Got a regular column already
This being a 2006 4L70E will work as is. I did read that about the 08+ ones though
Sorry, have to keep this intake for now. Shipping a cowl hood to Hawaii is insane. So it'll stay like this until we move back
Started on the floor this afternoon. Nobody told me how fun replacing a rusted floor pan would be. Must be a pro's secret. What a blast this is, haha. Going fairly smooth I suppose. Got the front section and seat brace area cut out to rough shape. Still waiting for the pan to show up. So I won't cut too much out yet
Mike


Trending Topics
01-02-2017, 01:22 PM
#8
Launching!
Thread Starter
iTrader: (6)
Join Date: Jul 2010
Posts: 220
Likes: 0
Received 0 Likes
on
0 Posts
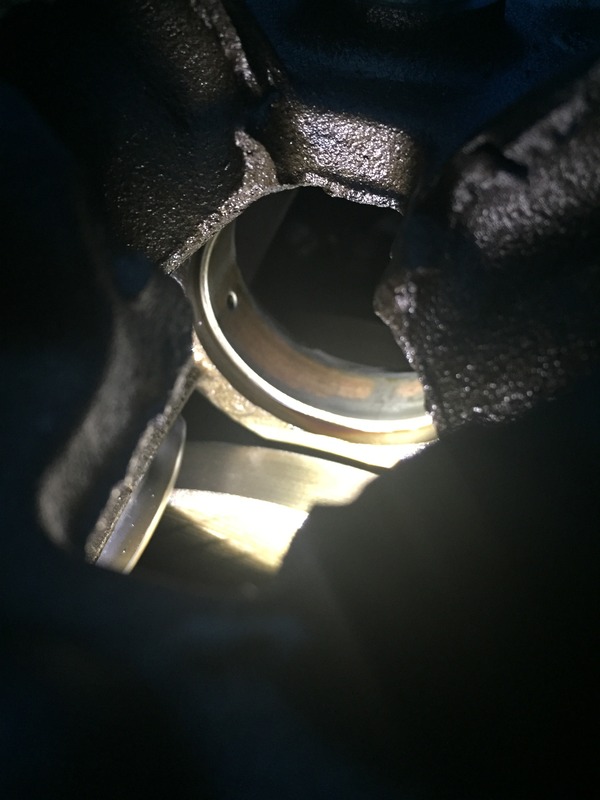
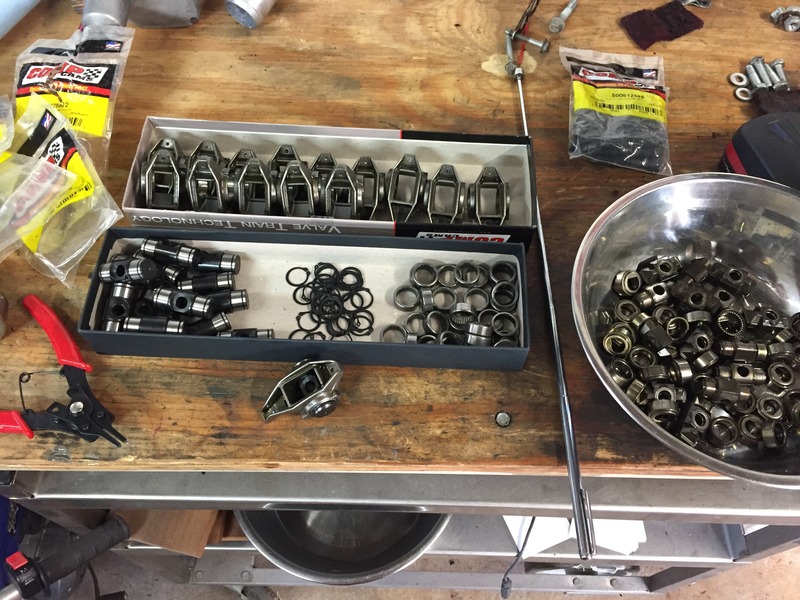
The bearings have the copper showing and were getting chewed up. Don't want any material running around the motor. They're cheap to replace now along with new rod bearings and rings. Motor will be fresh and last a long time
Mike
Mike
01-03-2017, 08:43 AM
#11
Launching!
Thread Starter
iTrader: (6)
Join Date: Jul 2010
Posts: 220
Likes: 0
Received 0 Likes
on
0 Posts
Floor pan is taking a while because of the holidays. Knocked out the trunion upgrade and PAC dual springs. Block should be done next week and then we can assemble the motor
Mike
Mike


 01-04-2017, 07:42 AM
#15
TECH Junkie
iTrader: (18)

Join Date: Aug 2005
Location: Amsterdam Ny, the good part
Posts: 3,389
Likes: 0
Received 63 Likes
on
51 Posts

i cant wait to see this build done .
being as dad and using the latch system for my now two sons, i dont like the looks of that . The latch needs to be thicker material and should be welded and sturdy as **** . Maybe go to a junk yard and cut some latch pieces out and use them .
Cant wait to see more of this ride.
being as dad and using the latch system for my now two sons, i dont like the looks of that . The latch needs to be thicker material and should be welded and sturdy as **** . Maybe go to a junk yard and cut some latch pieces out and use them .
Cant wait to see more of this ride.

 01-07-2017, 09:19 PM
#18
Launching!
Thread Starter
iTrader: (6)
Join Date: Jul 2010
Posts: 220
Likes: 0
Received 0 Likes
on
0 Posts
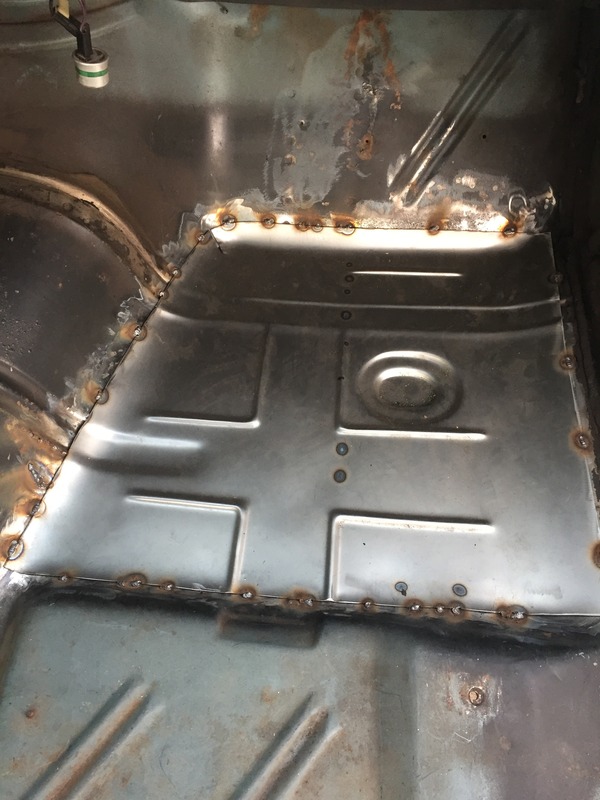
Finished stripping under the dash and small stuff in the engine bay. Also cut out the passenger floor and got the new piece tacked in. Will finish it up next weekend
Mike
Mike

 01-08-2017, 01:18 PM
#19

Looking good. Looks like you took your time trimming the patchpanel. excellent fitup. I'd personally leave the aluminum patch panel in. It wont ever rust LOL