99 Z28 Major Interior Overhaul / Upgrades
 01-11-2017, 09:51 PM
#1


So I purchased a 2017 Chevrolet Camaro 1LT, but who says my 99 Z28 can't be brought up to modern standards? I love the feeling of driving my LS1. Its probably the best sports car I have ever driven. Note I havent tested a 6th Gen Camaro SS yet. Sometimes my 4th gen interior feels like its dated and just a mesh of plastic thrown about in places.. I won't beable to fix "alot" of things, but I can atleast take away the age and make things alittle more prestigious.
The Paint I will be using is KEM (already have it in my garage) and will also be using their adhesion promoter for the painted interior plastics. (No I'm not painting my interior any bright colors) Just basically trying to restore her youth and get alittle more prestige out of her.
So I'll be using this thread to update my progress as I go. I'm also going to be posting questions for help... I may actually post them in the general maintenance forum and link to the post from this thread IF that is permitted. (if its not related to upgrades and just general issues I have related with the car specifically)
Here's my post Christmas List Santa and his elves left for me to do.
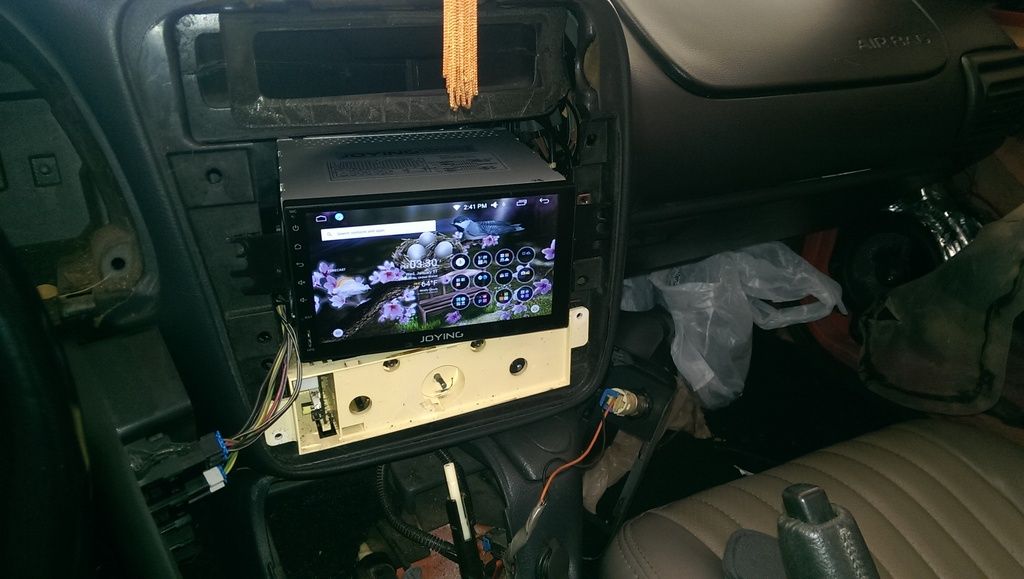
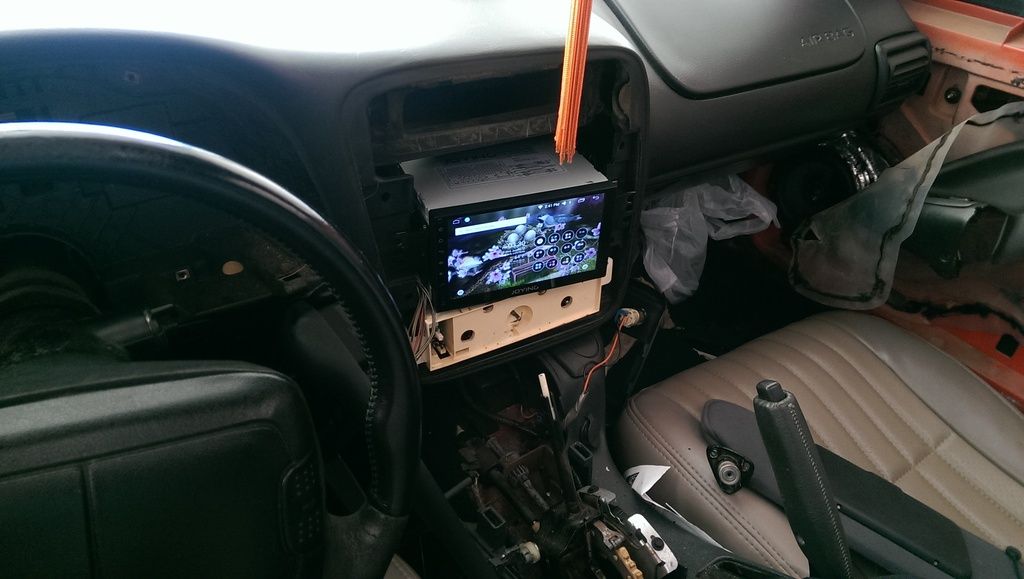
-- Upgraded Intel Android Headunit with Torque / MIC & Bluetooth capabilities
-- Installing 1TB Hard Drive for music & media
-- Installing USB Drive in the Center Console (in place of the catch all cubby hold near the cigaretter lighter)
-- Replacing Steering Wheel with Corvette Steering wheel and hooking up radio controls
-- Repair bright lights switch failure to engage.
-- Attempt to repair security light always on issue.
-- Orange Faced Gauges & Orange Faced HVAC / Headlight / Shifting Column panels
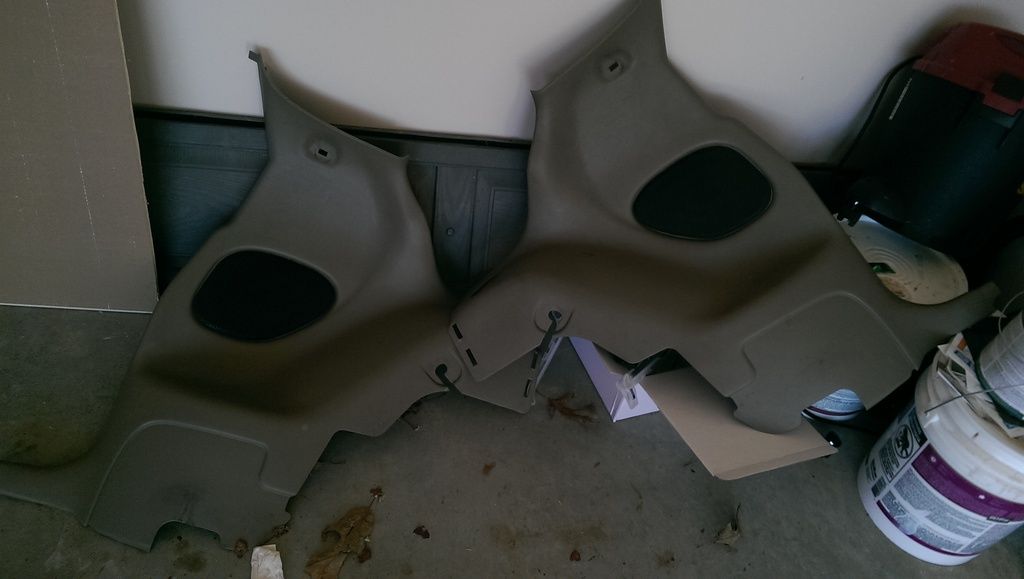
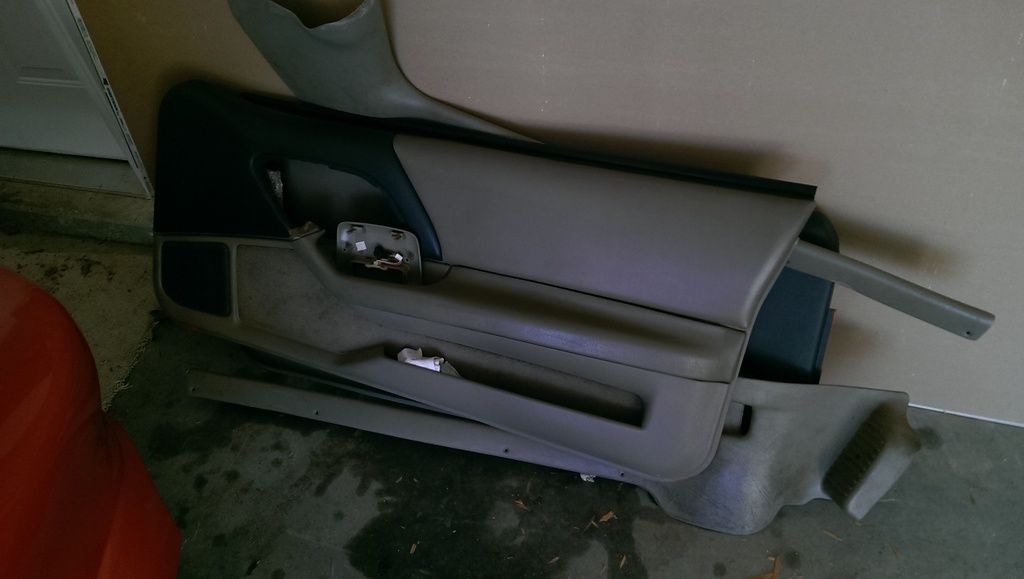
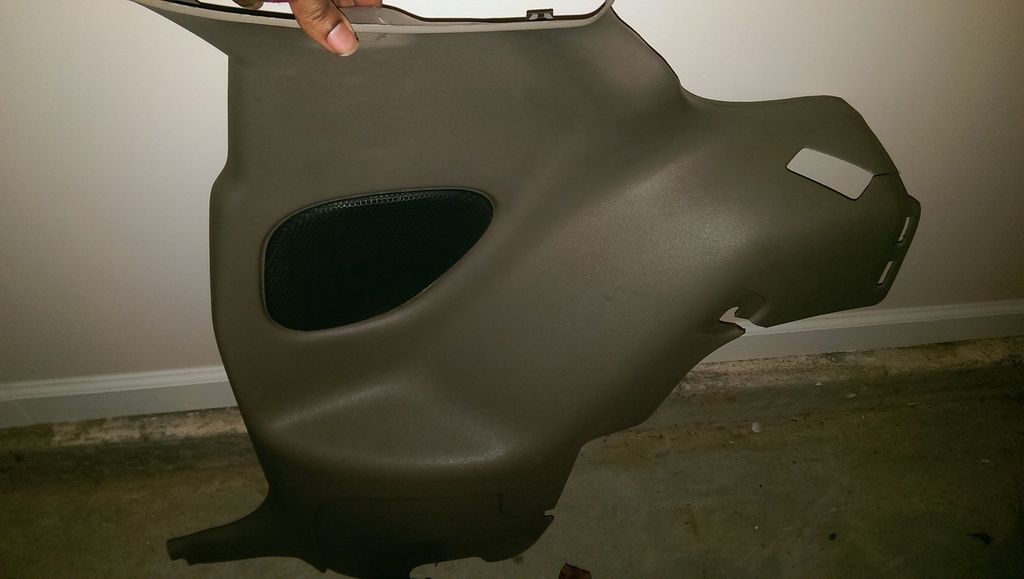
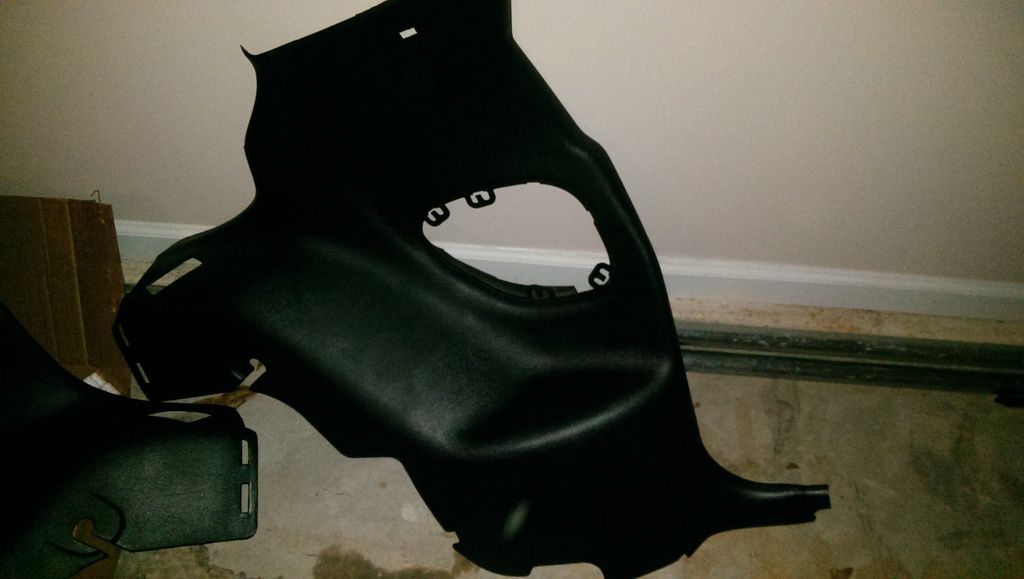
-- Painting Kick Panels, Trunk Interior Panels, Portions of door panels & Upper portions of Sail Panels Charcoal Grey
-- Vinyl Wrapping Grey with Orange Stitching Portions of Door Panel & Lower / Mid Portions of Rear Sail Panel.
-- Replacing & Vinyl Wrapping Upper Dash / Silver Mesh Vent
-- Vinyl Wrapping Center Console Door and Upper Center Console Piece with Orange Stiching.
-- Leather shift boot for automatic.
-- Replacing Parking Break Lever with something alittle more prestigious and leather booting it as well.
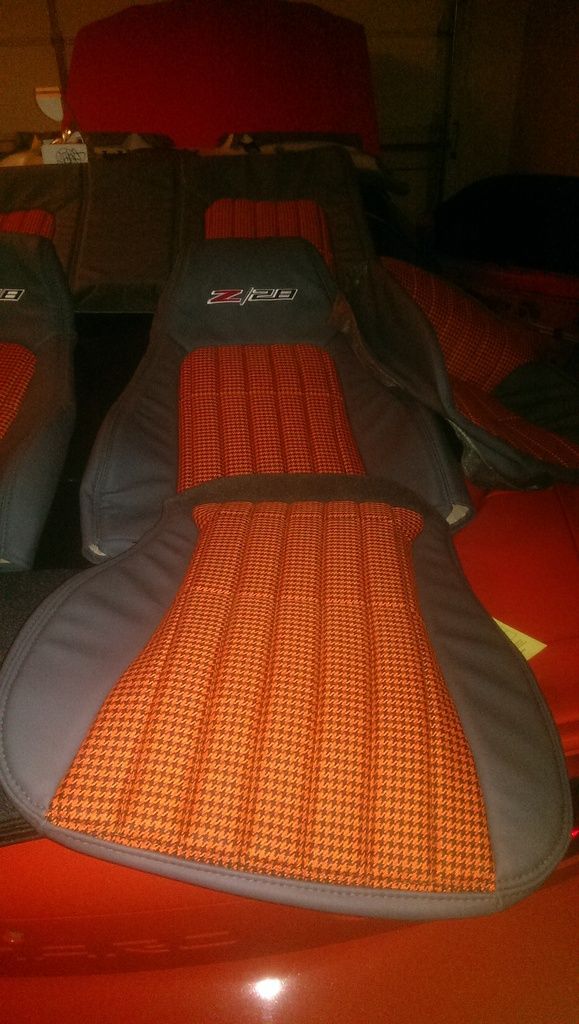
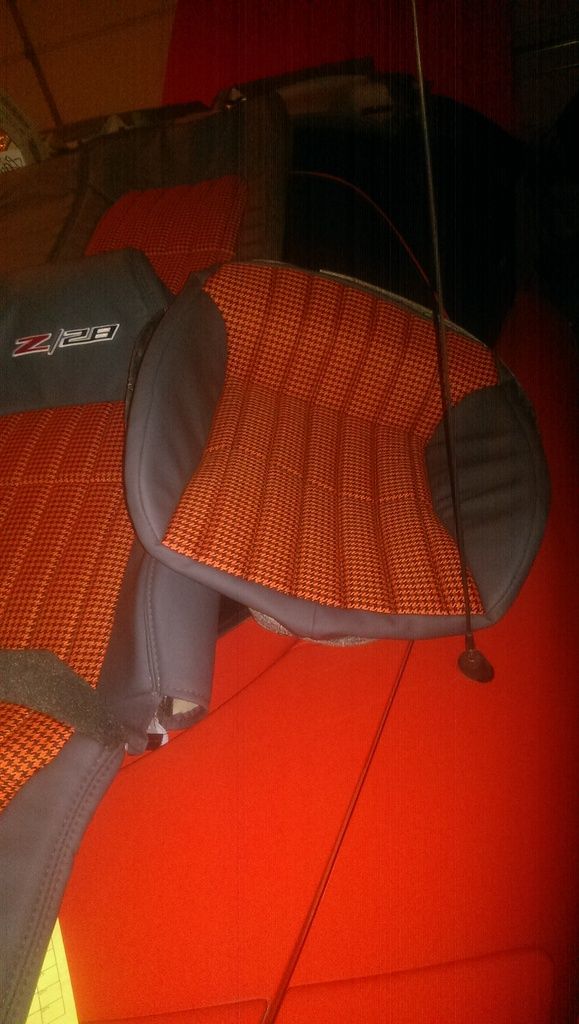
-- Grey & Orange Leather Seat Covers With Z28 Logos on the head rests
-- POSSIBLE Vinyl Wrap the radio fascia bezel - undecided.. may just paint it and call it a day.
-- Replacing all seatbelts with Grey GM replacements.
-- All remaining Tan interior panels will also be painted Grey.
-- Replacing Window Motors & Implementing Aluminum Brace to prevent additional fiberglass damage to the door.
-- Replacing Carpet
-- Replacing Headliner
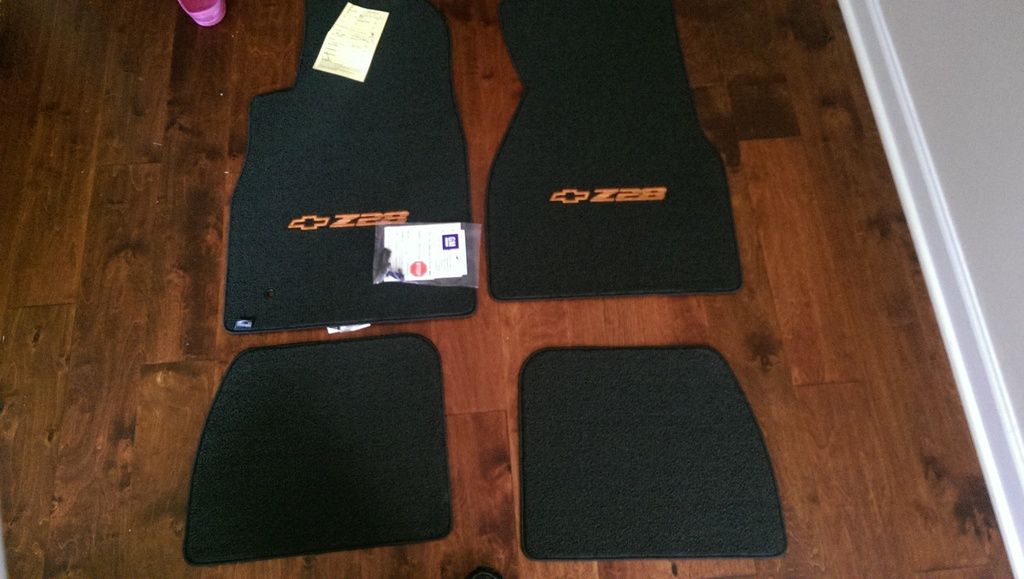
-- Z28 Floormats
-- All interior lights to be replaced with Hyper White LED's
-- Installing orange accent lighting flexible LED bars on lower portions of door panels (just 1 small bar as to not overdo it and rice it out)
-- Adding a $5,000 declaration on my insurance policy
The Paint I will be using is KEM (already have it in my garage) and will also be using their adhesion promoter for the painted interior plastics. (No I'm not painting my interior any bright colors) Just basically trying to restore her youth and get alittle more prestige out of her.
So I'll be using this thread to update my progress as I go. I'm also going to be posting questions for help... I may actually post them in the general maintenance forum and link to the post from this thread IF that is permitted. (if its not related to upgrades and just general issues I have related with the car specifically)
Here's my post Christmas List Santa and his elves left for me to do.
-- Upgraded Intel Android Headunit with Torque / MIC & Bluetooth capabilities
-- Installing 1TB Hard Drive for music & media
-- Installing USB Drive in the Center Console (in place of the catch all cubby hold near the cigaretter lighter)
-- Replacing Steering Wheel with Corvette Steering wheel and hooking up radio controls
-- Repair bright lights switch failure to engage.
-- Attempt to repair security light always on issue.
-- Orange Faced Gauges & Orange Faced HVAC / Headlight / Shifting Column panels
-- Painting Kick Panels, Trunk Interior Panels, Portions of door panels & Upper portions of Sail Panels Charcoal Grey
-- Vinyl Wrapping Grey with Orange Stitching Portions of Door Panel & Lower / Mid Portions of Rear Sail Panel.
-- Replacing & Vinyl Wrapping Upper Dash / Silver Mesh Vent
-- Vinyl Wrapping Center Console Door and Upper Center Console Piece with Orange Stiching.
-- Leather shift boot for automatic.
-- Replacing Parking Break Lever with something alittle more prestigious and leather booting it as well.
-- Grey & Orange Leather Seat Covers With Z28 Logos on the head rests
-- POSSIBLE Vinyl Wrap the radio fascia bezel - undecided.. may just paint it and call it a day.
-- Replacing all seatbelts with Grey GM replacements.
-- All remaining Tan interior panels will also be painted Grey.
-- Replacing Window Motors & Implementing Aluminum Brace to prevent additional fiberglass damage to the door.
-- Replacing Carpet
-- Replacing Headliner
-- Z28 Floormats
-- All interior lights to be replaced with Hyper White LED's
-- Installing orange accent lighting flexible LED bars on lower portions of door panels (just 1 small bar as to not overdo it and rice it out)
-- Adding a $5,000 declaration on my insurance policy
 01-11-2017, 10:14 PM
#2
Progress Post: 1/11/2017 --
It's been in the 10's up to the high of mid 30's from the weekend until Tuesday so that delayed me a bit because Im just not anxious enough to shiver to death while fiddling with this car. It got into the 60's and I got serious from this morning to a few hour before work.
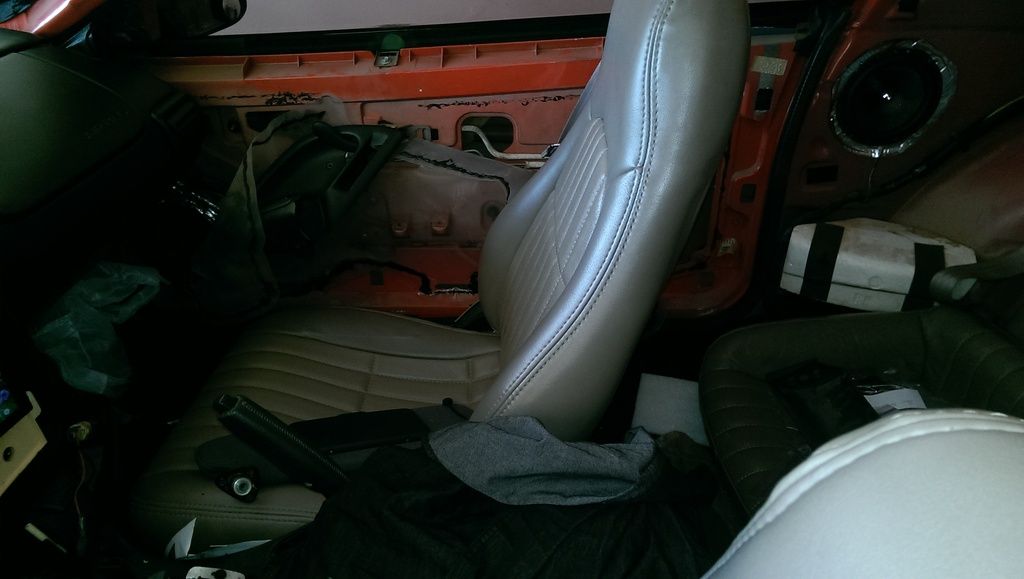
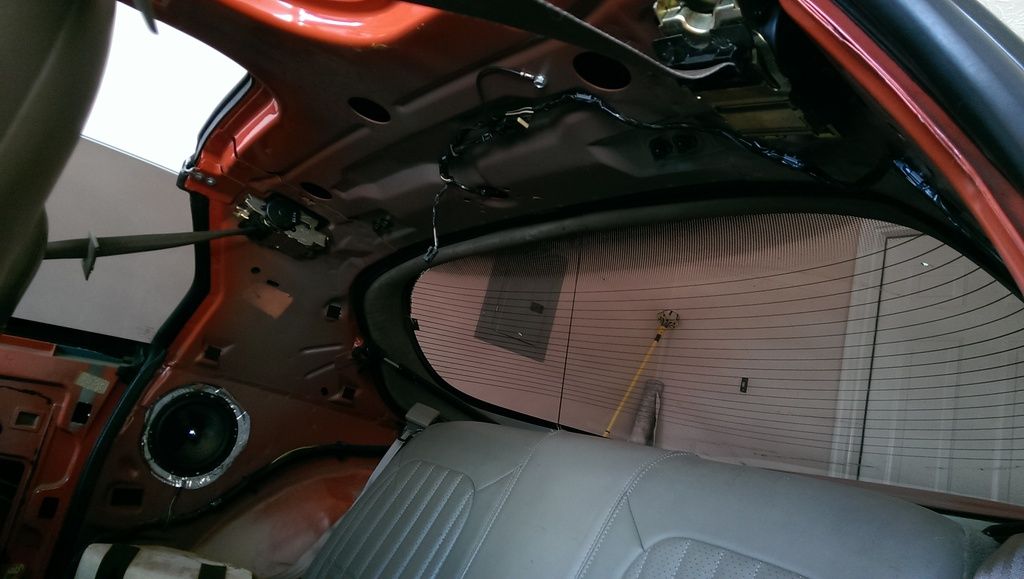
My interior is partially stripped.
-- Received Replacement Headliner
-- Removed Upper Dash
-- Removed A-Pillars
-- Removed Gauge Cluster
-- Removed Upper Center Console
-- Removed Driver Side Door Panel
-- Removed Driver Side Kick Panel
-- Removed Driver Side Rear Sail Panel
-- BAGGED ALL SCREWS IN SEPARATE ZIPLOCK BAGS AND LABELED EACH BAG FOR WHAT EACH SCREW / NUT IS FOR
-- Sent Gauge Cluster & Control Panels to have the logos professionally installed.
.
.
.
-- Installed http://www.ebay.com/itm/232157503276?_trksid=p2057872.m2749.l2649&ssPageName=STRK%3AMEBIDX%3AIT-- Installed Google Maps, Waze, Power Amp, Netflix, Hulu, Crackle, Google Chrome, Open MIC, Weather & Clock Widget, Teamviewer, Windows RDP (I have 1 Gig Upload Speeds at home, I can literally play PC games from this thing as if I were right there at home.), KinoConsole, Torque, Notes, Voice Calendar, and many other apps.
-- Inspected Bolt Holes on Window Motors to assess the damage and necessary means of repair << Link to thread.
.
.
.
PLANNED FOR TOMORROW:
-- Remove Passenger Side Kick Panel, Door Panel and Sail Panel
-- Remove Headliner
-- Remove all seat belts
-- Order replacement upper dash on Friday morning
-- Order replacement seat belts
-- Send door & sail panels to be re-worked
-- Prep Android to operate Windows Applications
It's been in the 10's up to the high of mid 30's from the weekend until Tuesday so that delayed me a bit because Im just not anxious enough to shiver to death while fiddling with this car. It got into the 60's and I got serious from this morning to a few hour before work.
My interior is partially stripped.
-- Received Replacement Headliner
-- Removed Upper Dash
-- Removed A-Pillars
-- Removed Gauge Cluster
-- Removed Upper Center Console
-- Removed Driver Side Door Panel
-- Removed Driver Side Kick Panel
-- Removed Driver Side Rear Sail Panel
-- BAGGED ALL SCREWS IN SEPARATE ZIPLOCK BAGS AND LABELED EACH BAG FOR WHAT EACH SCREW / NUT IS FOR
-- Sent Gauge Cluster & Control Panels to have the logos professionally installed.
.
.
.
-- Installed http://www.ebay.com/itm/232157503276?_trksid=p2057872.m2749.l2649&ssPageName=STRK%3AMEBIDX%3AIT-- Installed Google Maps, Waze, Power Amp, Netflix, Hulu, Crackle, Google Chrome, Open MIC, Weather & Clock Widget, Teamviewer, Windows RDP (I have 1 Gig Upload Speeds at home, I can literally play PC games from this thing as if I were right there at home.), KinoConsole, Torque, Notes, Voice Calendar, and many other apps.
-- Inspected Bolt Holes on Window Motors to assess the damage and necessary means of repair << Link to thread.
.
.
.
PLANNED FOR TOMORROW:
-- Remove Passenger Side Kick Panel, Door Panel and Sail Panel
-- Remove Headliner
-- Remove all seat belts
-- Order replacement upper dash on Friday morning
-- Order replacement seat belts
-- Send door & sail panels to be re-worked
-- Prep Android to operate Windows Applications
Last edited by Need4Camaro; 01-12-2017 at 12:13 AM.
01-12-2017, 09:00 PM
#3
Progress Post 1/12/2017
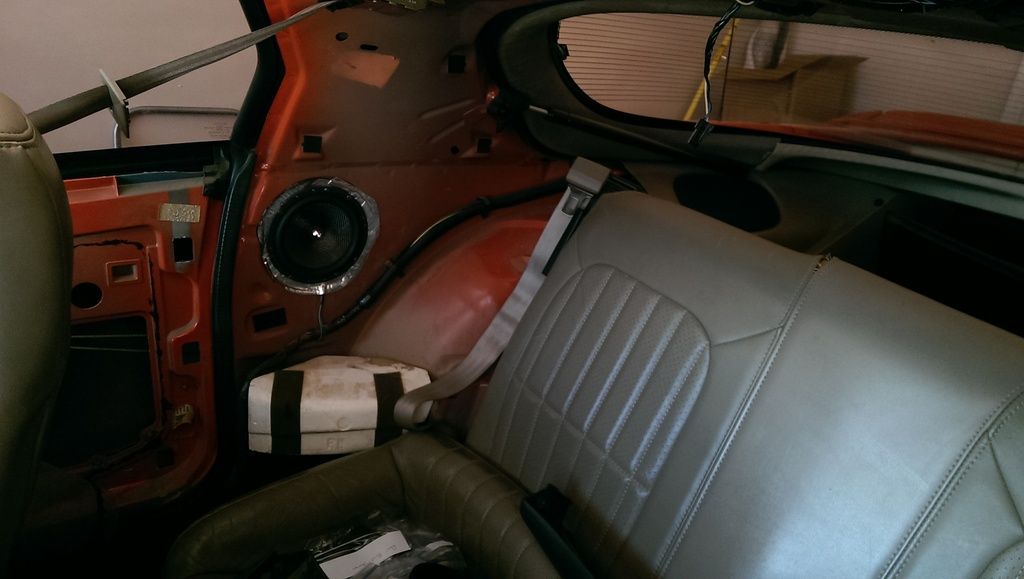
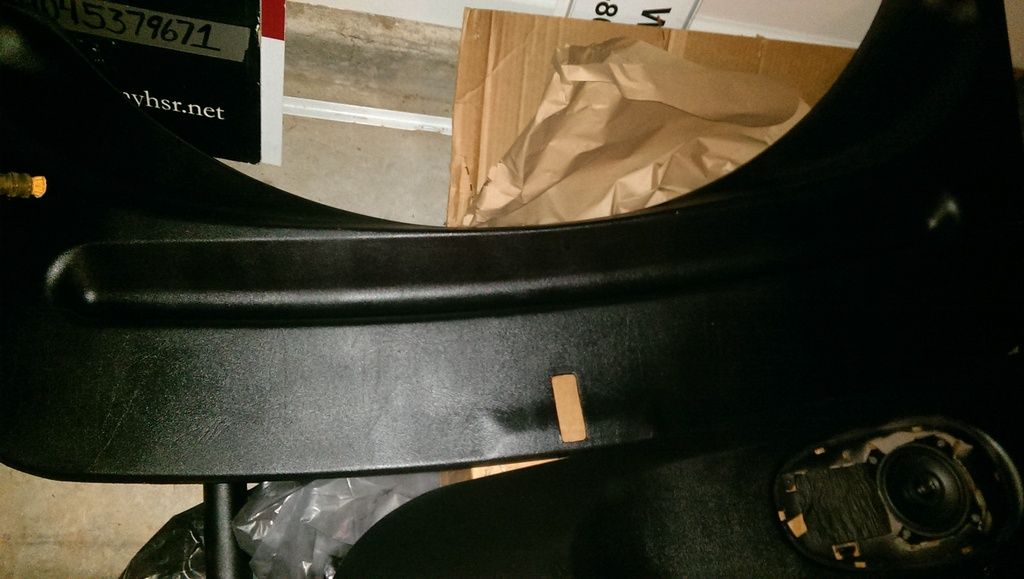
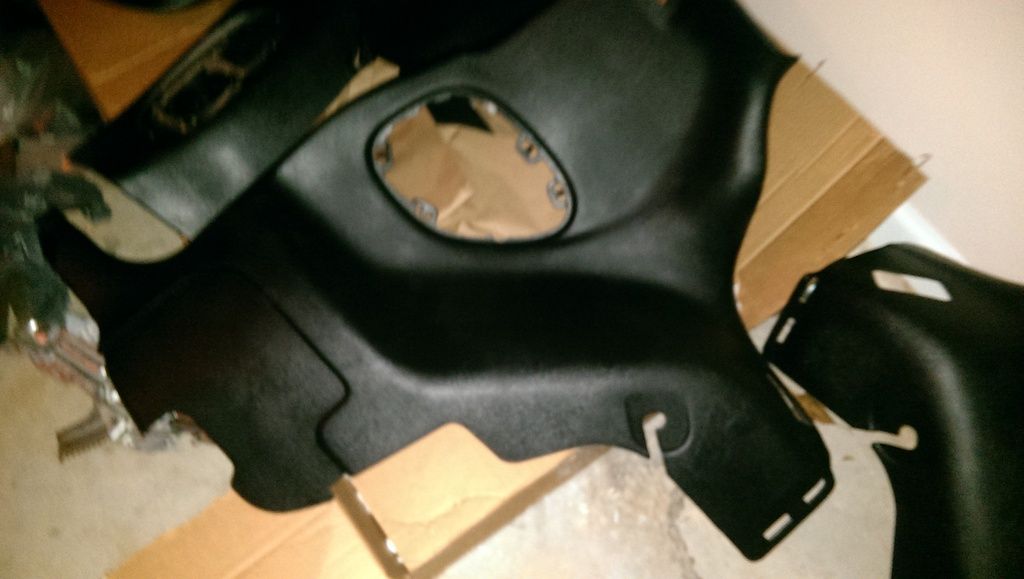
Pretty much gutted all the interior panels and preparing to clean, sand, and paint. That will probably begin tomorrow and last through the weekend.
--Removed Passenger Side Kick Panel
--Removed Passenger Side Door Panel
--Removed Passenger Side Sail Panel
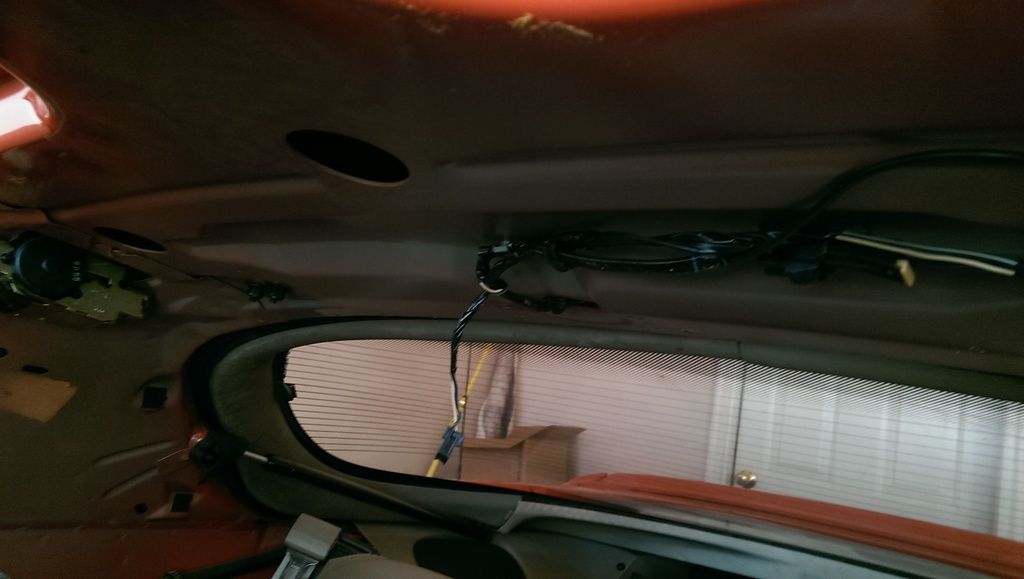
--Removed Headliner & Dome Light
--
-----
-----
-----
-----
-----
-----

-----
-----
-----
--------------------------------------------------------------------------
Window Motors
--------------------------------------------------------------------------
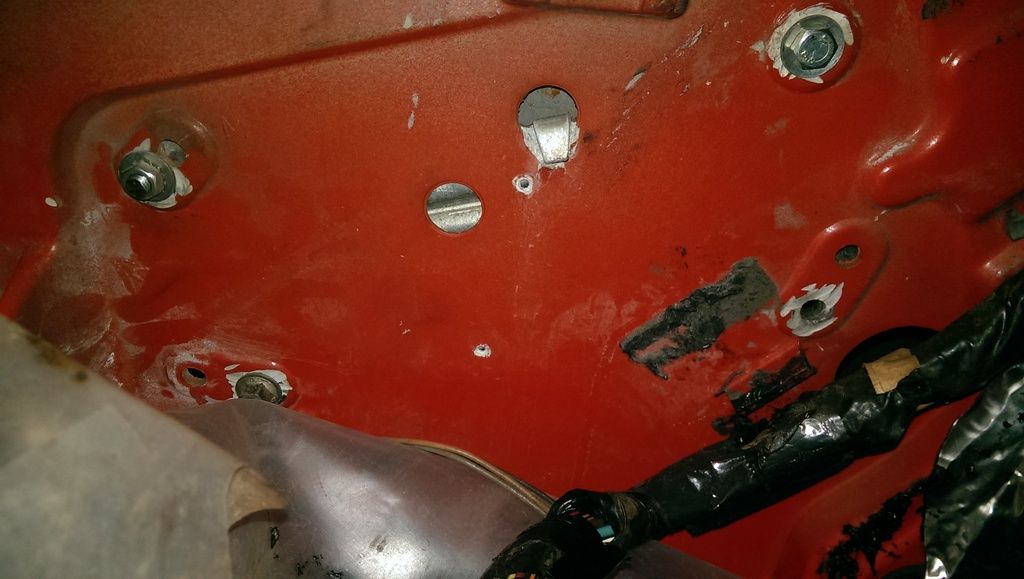
Passenger side window motor is stock, but driver side has been messed with it appears they used three bolts instead of 4. I intend on correcting that. I have been told it doesn't look like I will need a plate or anything so I will just Epoxy in some washers and call it a day.
-----
Pretty much gutted all the interior panels and preparing to clean, sand, and paint. That will probably begin tomorrow and last through the weekend.
--Removed Passenger Side Kick Panel
--Removed Passenger Side Door Panel
--Removed Passenger Side Sail Panel
--Removed Headliner & Dome Light
--

-----

-----

-----

-----

-----

-----

-----

-----

-----

--------------------------------------------------------------------------
Window Motors
--------------------------------------------------------------------------
Passenger side window motor is stock, but driver side has been messed with it appears they used three bolts instead of 4. I intend on correcting that. I have been told it doesn't look like I will need a plate or anything so I will just Epoxy in some washers and call it a day.

-----

Last edited by Need4Camaro; 07-26-2017 at 09:23 PM.
01-13-2017, 06:12 AM
#4
-- Purchased Upper Dashboard off of eBay
-- Purchased Used Grey Seatbelts off of eBay
-- Purchased Lethal Interiors Grey & Orange Leather Seat Covers
-- Purchased Replacement LED Bulbs for interior lighting.
-- Taking door panels to an Upholstery Shop to be re-worked.
-- Purchased Used Grey Seatbelts off of eBay
-- Purchased Lethal Interiors Grey & Orange Leather Seat Covers
-- Purchased Replacement LED Bulbs for interior lighting.
-- Taking door panels to an Upholstery Shop to be re-worked.
01-13-2017, 12:53 PM
#5
TECH Fanatic

I'm curious how the new dash fits and looks.

Trending Topics
01-18-2017, 02:16 PM
#9
I havent had alot of time to test the bluetooth functionality, however according to XDA forums, the newer intel headunits have 100% full bluetooth functionality, meaning it should work just like a phone as far as connectivity of other devices.
The intel units are MUCH MUCH improved.
They are MUCH MUCH MUCH faster than the older Android Headunits (having said I have an older one as well)
They don't use anywhere near as much power and can be run without the ignition on without killing your battery
They now go into sleep/standby mode when you turn the ignition off, so as soon as you turn it back on regardless if its only 15 minutes later or 5 days later... you're back at the same screen you left off on.
It boots up INSTANTLY..there is no wait on waiting for it to come up anymore.
This unit has 2GB RAM, Quad Core Processor, 32 GB storage specwise making it every bit as powerful as a Nexus Tablet.
It is compatible with all apps, the only mild drawback is that it will use the apps that are "x86" compliant if an app is available in that format and some of those apps have less features than the ARM counterpart. I havent run into any app compatability issues and I use ALOT of apps.
Google Maps, Waze, PowerAmp, Netflix, Pandora, iHeart Radio, Hulu, ect all work like they would on your phone and tablet. The device has 32 GB of internal storage, and all of that storage is available to download and use apps. You can also connect a USB hub (I'm doing this) and add additional storage for media such as flash drives, external hard drives, ect. It can use a reverse camera but its not included, you have to buy it separately. Same thing goes for the DVR, and the DVR is propietary only to this specific unit unfortunately meaning you can't use a webcam, ect. Rooting is already available for this specific unit and can be done fairly easily, instructions on XDA forums.
Sound quality is strong. It's no Pioneer..but its no $50 head unit either.
Now for the ugly stuff..
- There is no "Ok Google Everywhere"available for this specific model, although there is another intel model (I can provide link a bit later) that does support it. (saying Ok Google and voice search) - The function does exist in google applications such as google maps and google app. You can kind of help this by downloading "Open Mic", "Commander", and "Tasker" together but you will need to root to get full functionality. There is a member however who has constructed a code that can use the "Source" button on steering wheel controls to activate the prompt for Ok Google.
- The Microphone is fairly weak, this can be remedied with an external microphone and removing the fascia and DISCONNECTING the INTERNAL microphone.
- There is one major issue that will require you to perform a firmware update. Navigation and Music cannot work together. This is fixed in the December firmware, however; you can only use the Navigation app you set as your default navigation app and nothing else without changing it otherwise whichever other navigation app you use will also not work when the radio is playing. There is a work around. Use Poweramp for MP3's and you can use whicever Navigation App you wish.
---------
They're still working on these units everyday and there's a large supporting aftermarket for them..I still believe tablets still have the advantage as far as compatibility to actual android apps, but not so much for compatability to a car...always a trade off..but the trade off on this isn't too too horrible.. and there's work arounds for alot of stuff.
If you decide to get one, wait till the Octocores come out, those will be blazing fast...they should be out by Spring if Im not mistaken.
----------
Edit: I just noticed you are looking to go double din and were still looking, so to add input..If you get one of these.. it will be hard to go back. Even though other radios have better sound quality..its the functionality and abilities that make these head units so awsome.. There is one more drawback though..They are slightly larger than double din as standards in china are different than our own so trimming to the fascia panel on your car will be necessary
01-25-2017, 11:43 AM
#10
Haven't given up on this. I'm being delayed with real life issues plus we just moved to a new house.
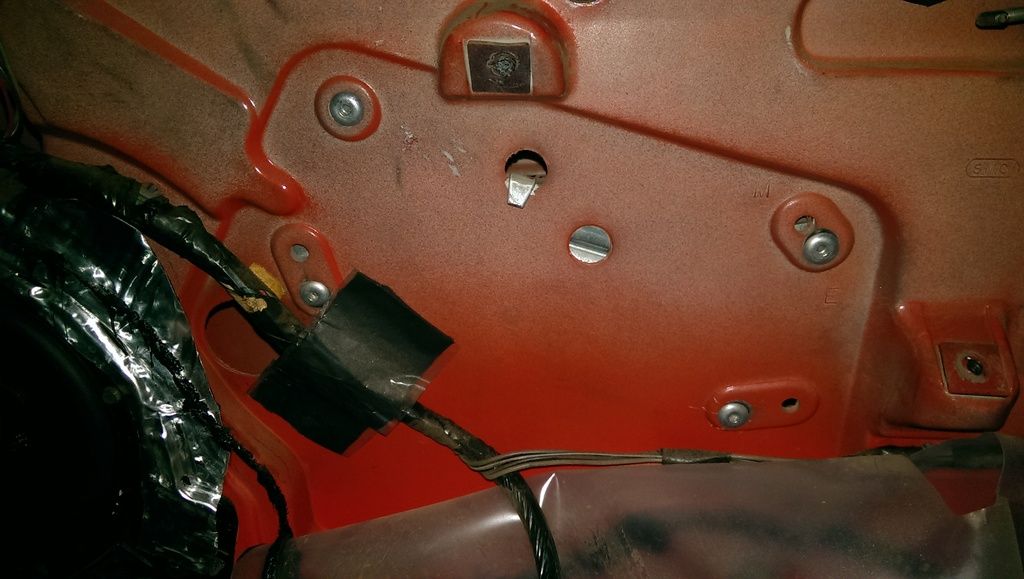
I'm attempting restoring my driver side door to as factory as factory as possible. The previous owner had the regulator removed and several screws were loose, no lock nuts plus 1 bolt wasn't even installed. I'm going to expoxy washers to the fiberglass as the damage doesn't look quite bad enough to make a whole plate for it.
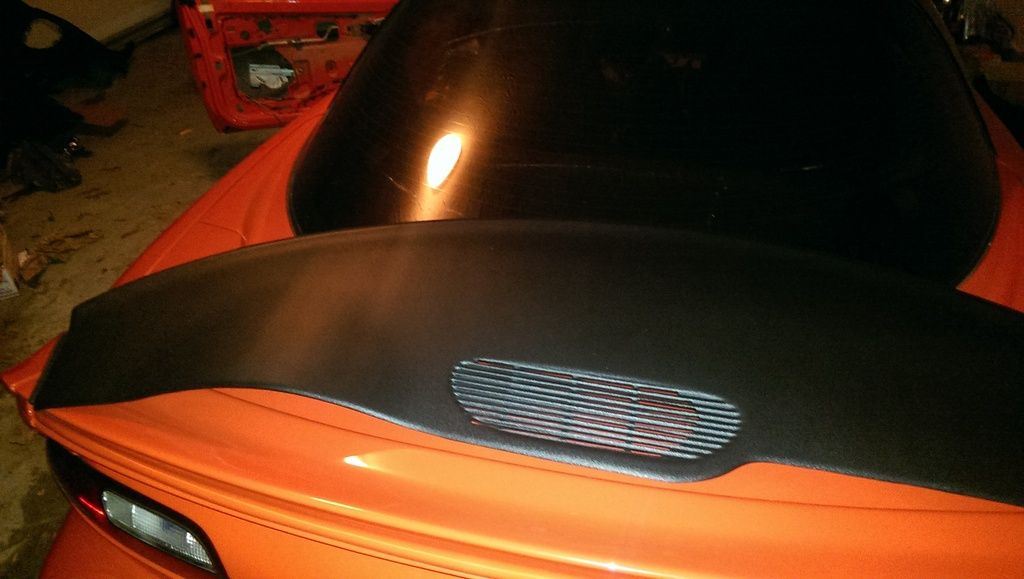
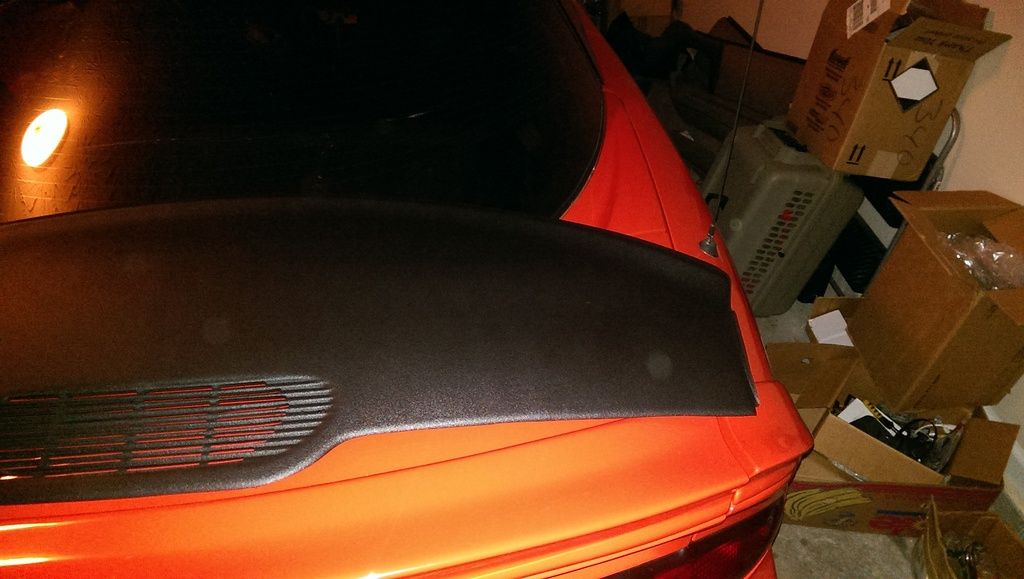
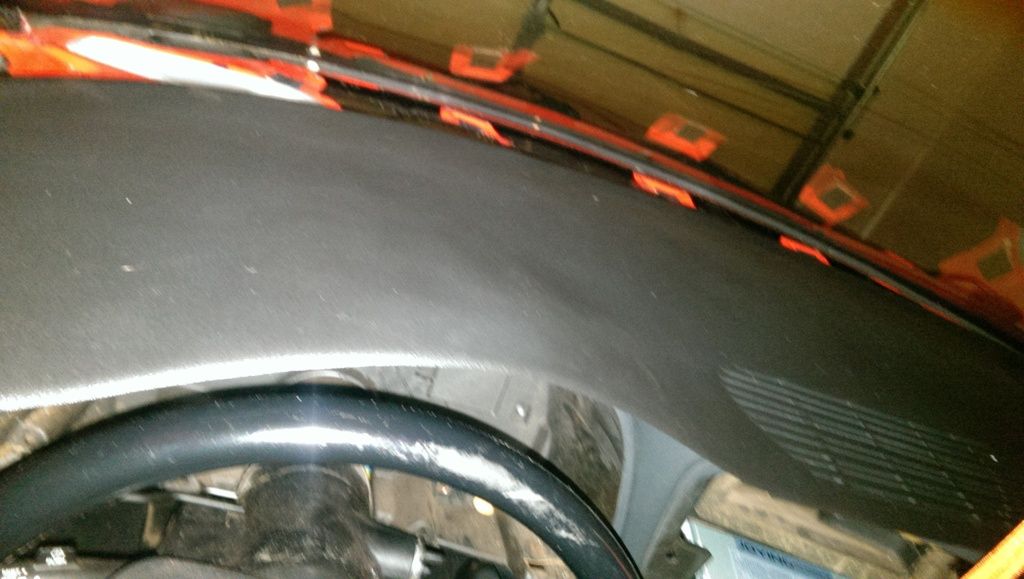
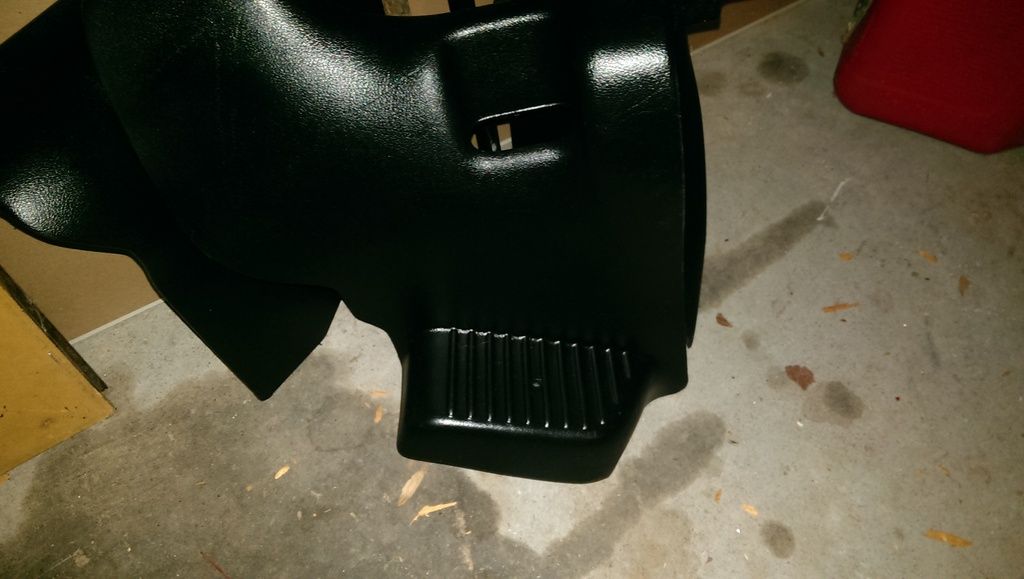
My dashboard has arrived. My leather seat covers probably in a next two weeks. I also repainted all the major interior trim panels with SEM Landue Black. I'm fairly impressed with the outcome. I just hope it holds up to time.
For my door panels... It's going to cost about $2,000 to have them done the way I want them to be done which I think is a bit overpriced and more than what its worth so I may just settle for stock replacements...That or I may take the risk of just doing it myself... but my leather dashboard install (previous attempt) didn't turn out too well.
Next:
Replace Driver side Window Regulator / Window motor and properly install.
Replace Passenger side Window motor.
Install LED bulbs
Install Dashboard
Remove Seats and Carpet
Purchase Carpet
Purchase replacement Seatbelts
Install Seat Covers
I'm attempting restoring my driver side door to as factory as factory as possible. The previous owner had the regulator removed and several screws were loose, no lock nuts plus 1 bolt wasn't even installed. I'm going to expoxy washers to the fiberglass as the damage doesn't look quite bad enough to make a whole plate for it.
My dashboard has arrived. My leather seat covers probably in a next two weeks. I also repainted all the major interior trim panels with SEM Landue Black. I'm fairly impressed with the outcome. I just hope it holds up to time.
For my door panels... It's going to cost about $2,000 to have them done the way I want them to be done which I think is a bit overpriced and more than what its worth so I may just settle for stock replacements...That or I may take the risk of just doing it myself... but my leather dashboard install (previous attempt) didn't turn out too well.
Next:
Replace Driver side Window Regulator / Window motor and properly install.
Replace Passenger side Window motor.
Install LED bulbs
Install Dashboard
Remove Seats and Carpet
Purchase Carpet
Purchase replacement Seatbelts
Install Seat Covers


Last edited by Need4Camaro; 07-26-2017 at 09:28 PM.
02-05-2017, 12:30 AM
#13
Basically what I did was took a Bristillo pad and took it outside with a bucket full of hot water / dish soap and grinded all the grease, armorall, dirt and stains off of them... I let each one dry overnight... then I came back the following day and sanded them down.. I kind of over did it here because they feel alittle rough now. I sanded first with 80 grit and then followed up with 120 grit. If I were to ever do it again, I'd start with 120 Grit then move to 220 Grit.
After sanding, I used SEM's adhesive promotor. I actually did NOT let this completely dry, instead I followed up with one layer of base coat of SEM Landue Black and by 1 layer I mean literally just a mild and quick left to right spray just enough to stain em but not enough to coat them... I let that settle then I went and hit it again with another coat of SEM adhesive promotor in attempt to help the first coat permiate into the panel... and once again followed up with another coat of Landue Black... and finally I repeated that process one more time and after it dried I went ahead and really began to apply Landue Black only coats until the panel was covered.
Hehe my car looks like a hot mess right now. Looks like an angry child went in there and had ripped everything apart... I'm PROBABLY not going to be done until the beginning of Spring because its taking one of my lower financial priorities.. I just bought a new car and have to make sure things are financially sound with it plus Im starting a new job and have to go to Pittsburgh next week.
-----------------------
UPDATE:
So I am currently in process of installing the dashboard from eBay.. The texture is slightly off but its nothing serious..still looks better than a stock cracked dash.. but the issue I'm running into is the tabs dont seem to quite line up..especially on the driver side..they're slightly off..not horribly, but enough to prevent it from going in easy. I "think" I recall some members having this issue and they eventually just cut the tabs off.. I "might" do the same and go with 3M tape but I am just overly zealous about doing things right. If anyone has any suggestions on this I am open ears.
PROGRESS POST:
02/04/2017
-- Purchased and Employed a Battery Charger to keep the battery alive while car is down.
-- Received Driverside Window Regulator
-- Installed Passenger Side Window Motor ** I have a surprise I will post seperately regarding this.
-- Installed various LED's
-- Purchased new Floor Mats with Z28 embroiled on them in Orange.
-- Received confirmation that my seat covers are in production from Princess @ Lethal Interiors
**
FUTURE:
-- Install Driverside Regulator.
-- Purchase new center console
-- Purchase Seatbelts
-- Purchase Ebony Door Panels and Modify them with Orange Stitching
-- Purchase Carpet
-- Purchase Heated Seat Filaments
-- Purchase Remote Start & Anti Theft Gear
-- Purchase DVR for Android Head Unit
-- Purchase External Hard Drive for Android Head Unit and my media.
POSSIBLE:
-- I may.. and just..MAY...attempt to replace my transmission and stock converter since my center console has been removed. Go with a 4L80E and a stall converter... I may be getting alittle too cocky here as I've never replaced a transmission before but it seems like the most opportune time to do it.
02-06-2017, 07:59 PM
#15
------
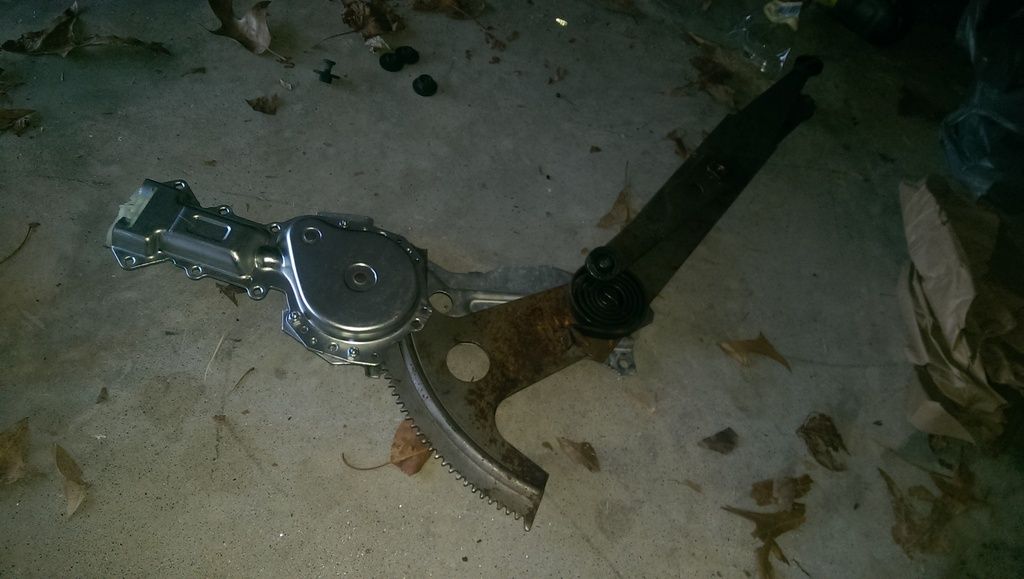
*SURPRISE #1*
*GEN 4 CORVETTE WINDOW MOTORS RETROFIT*
As I stated, my goal is to bring my 4th Gen as close to modern standards as possible without taking too much, 4th Gen away from it... So faster windows are a must for me. I have several other ... surprises ...as well but this will be the first nearing completion...
-- It uses the STOCK regulator.
-- It's about 30 - 40% faster than the Stock Motor.
-- It does not fall prone to the eventual wear of the thermal resistor which is the #1 reason the stock motor goes bad...
Overall it's a better design. The only issue is, your Window Regulator will need to be in pretty close to perfect condition for them to work properly as it is not as forgiving as the stock motor on mating with the half-moon gear.


-- First two photos show the Stock motor on the right and the fabricated motor on the left. Fabricated motor is smaller and the wiring connector is deeper into the motor requiring you to pull the excess wire for the window motor's wiring harness in the door to reach the motor.


-- The next four photos show how the motor's gear meshes with the half moon gear. It's a fairly close fit, if the half moon gear is off by alittle it can slip off. This is what caused for my replacing my window regulator.
I have a video of this setup in action on the passenger side...
Last edited by Need4Camaro; 07-26-2017 at 09:30 PM.
 02-14-2017, 07:30 PM
#19
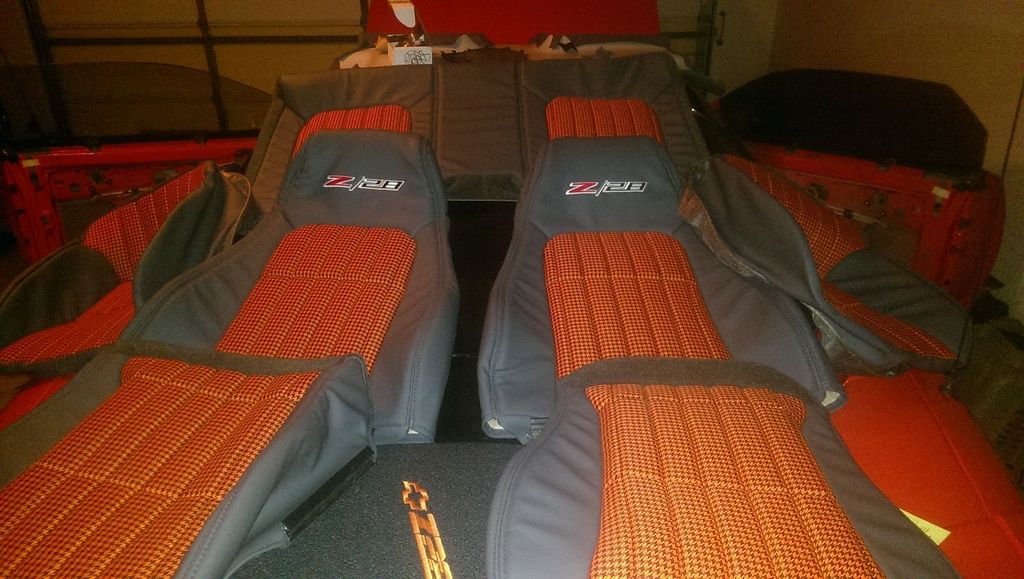
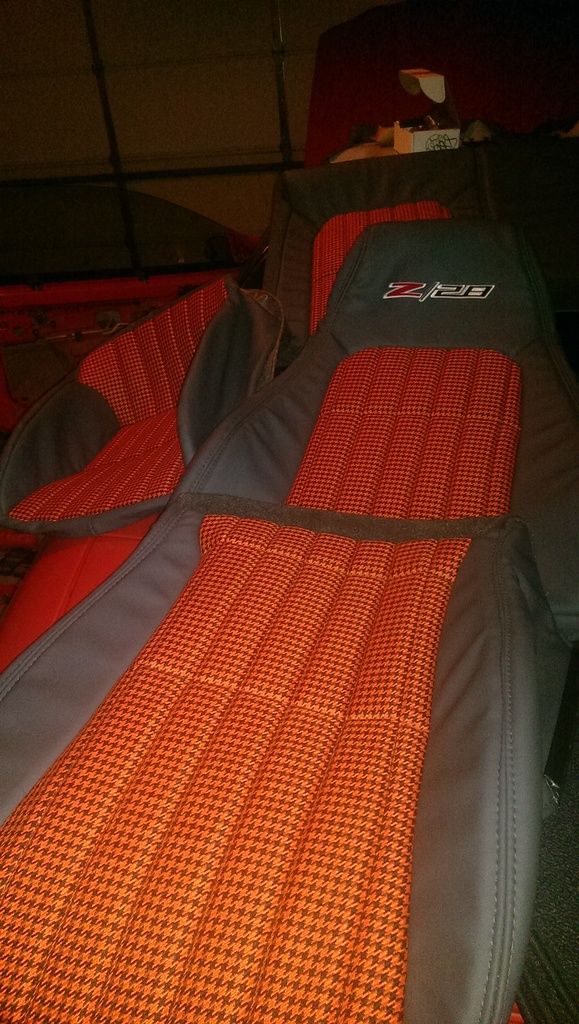
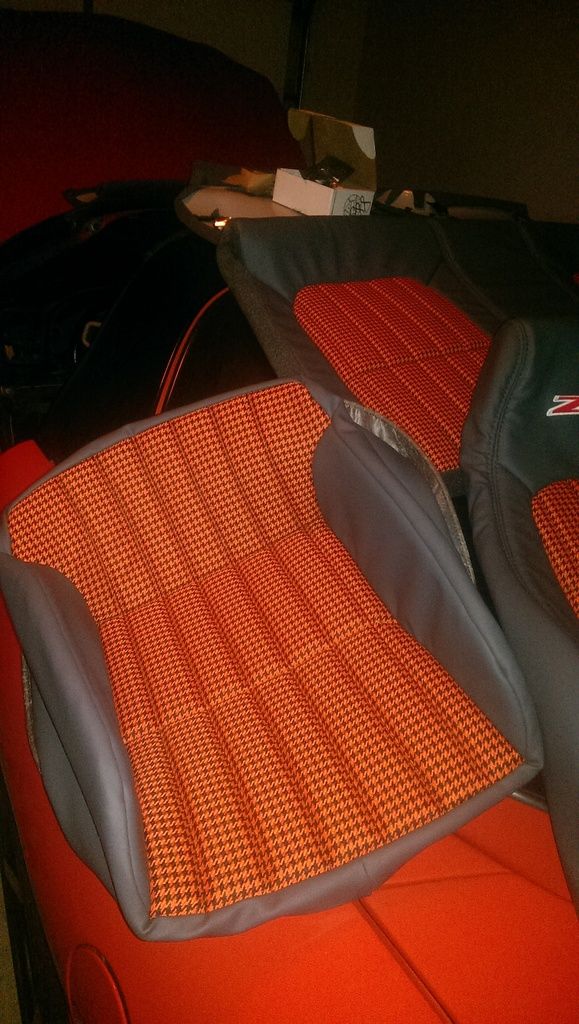
Been really busy lately, had to leave town for a few days, now Im back..with a 1/4th inch rivet gun. I managed to install the driver side Window Regulator, went back in with Rivets too, no fun task but its worth it. I got the Gen 4 Corvette Motors in the new window regulator and it works like a charm. Received my floor mats and seat covers as well. I'm about halfway done at this point... I just need to get the new carpet and, center console replacement and start reinstalling stuff. I have a video at the end regarding the window motors.
So far...
-- Installed Driverside ACDelco Regulator with Gen 4 Corvette Window Motor
-- Received floor mats
-- Received Leather Seat covers from Lethal Interiors
GEN 4 CORVETTE WINDOW MOTOR -- DRIVER SIDE W/ REPLACEMENT REGULATOR INSTALL
So far...
-- Installed Driverside ACDelco Regulator with Gen 4 Corvette Window Motor
-- Received floor mats
-- Received Leather Seat covers from Lethal Interiors


GEN 4 CORVETTE WINDOW MOTOR -- DRIVER SIDE W/ REPLACEMENT REGULATOR INSTALL
Last edited by Need4Camaro; 07-26-2017 at 09:30 PM.
02-14-2017, 09:37 PM
#20
Amazing! So where do I shop my interior pieces for you to make them look that good lol I'm glad you touched on the window motors, mine are starting to slow up and since I'm planning on redoing a lot of things on the car, that I can add to the list! Keep up the great work.

