DIY Ramps how to
 07-22-2012, 03:46 PM
#1
On The Tree
Thread Starter
iTrader: (11)
Join Date: Jan 2011
Location: The forsaken tundra of Minnesota
Posts: 123
Received 0 Likes
on
0 Posts
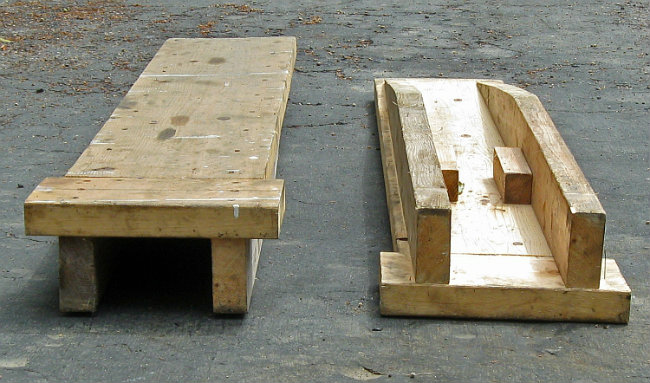
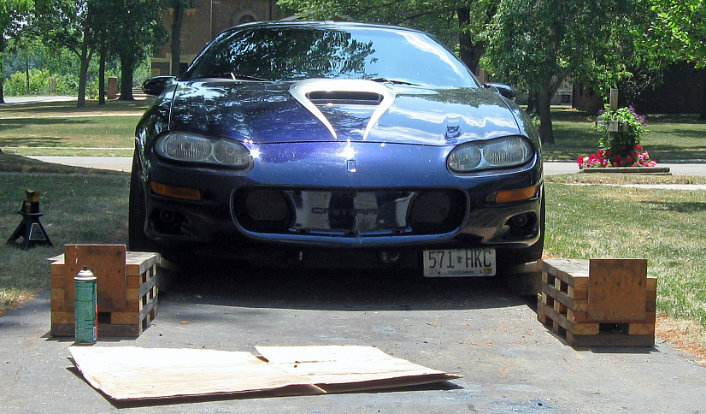
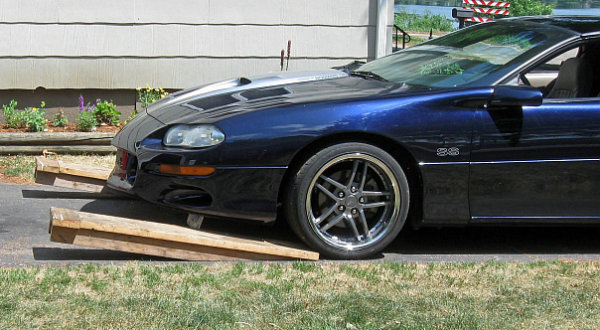
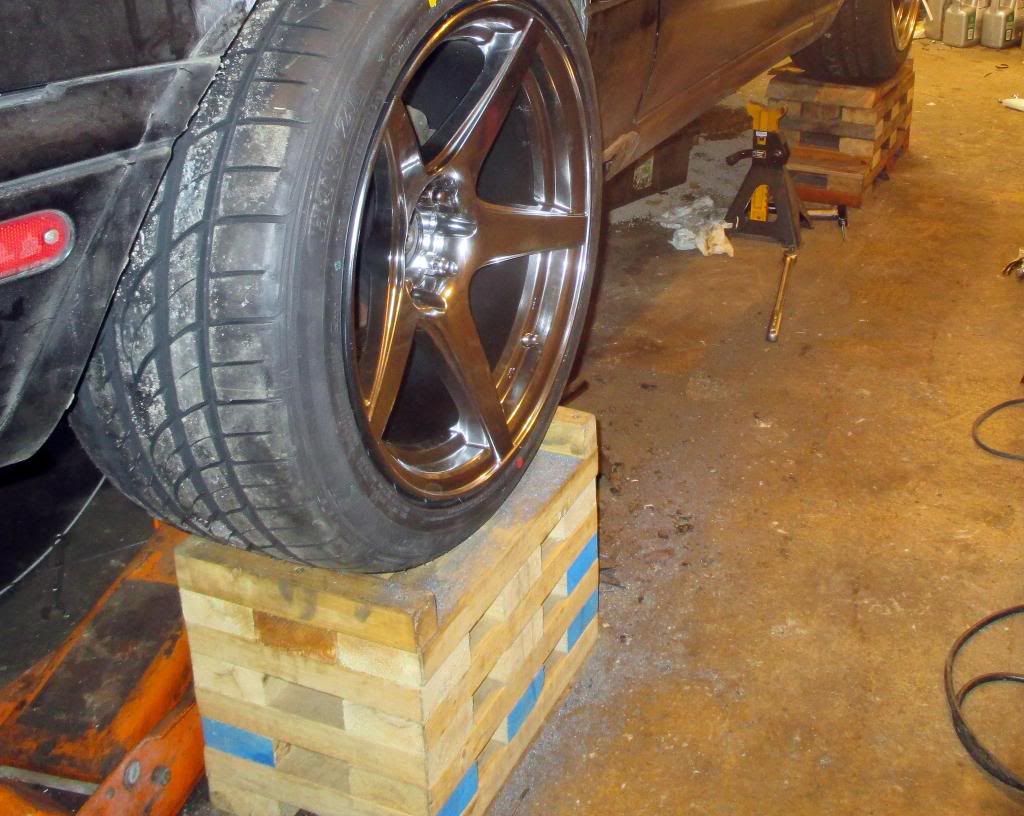
My ramps are awesome DIY ramps and if you have a lowered car with wide tires these are a must have especially to do alignments.

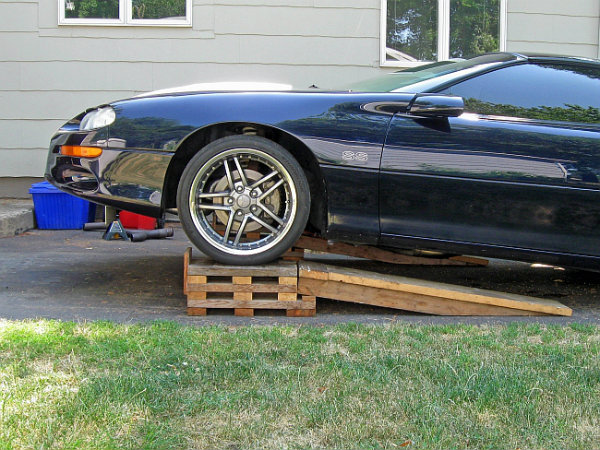
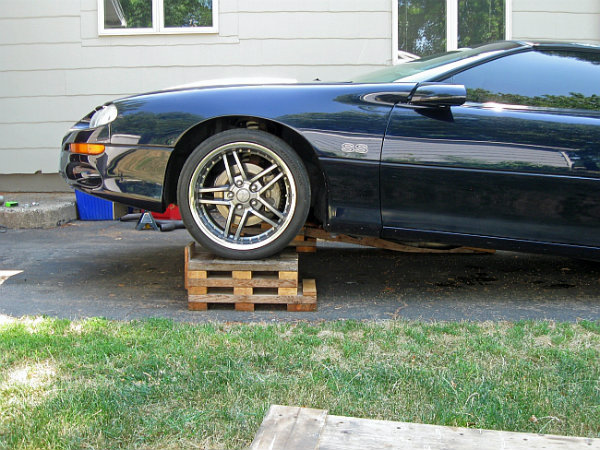
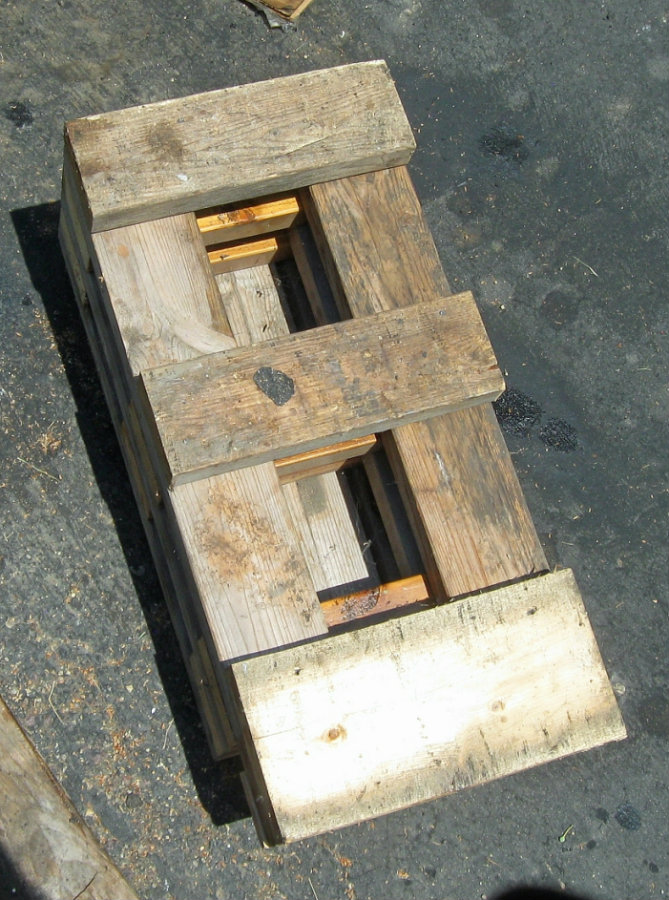
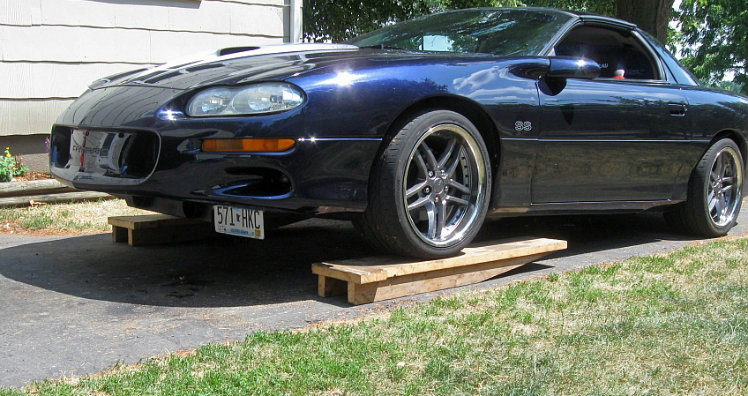
The tops of the bases are 11" wide by 20" long and raise the car 9". The bottom part of them are 11" wide by 24" long. Mine are nearly all wood I had lying around and you can do the math to figure out that is a lot of feet of 2x4s!
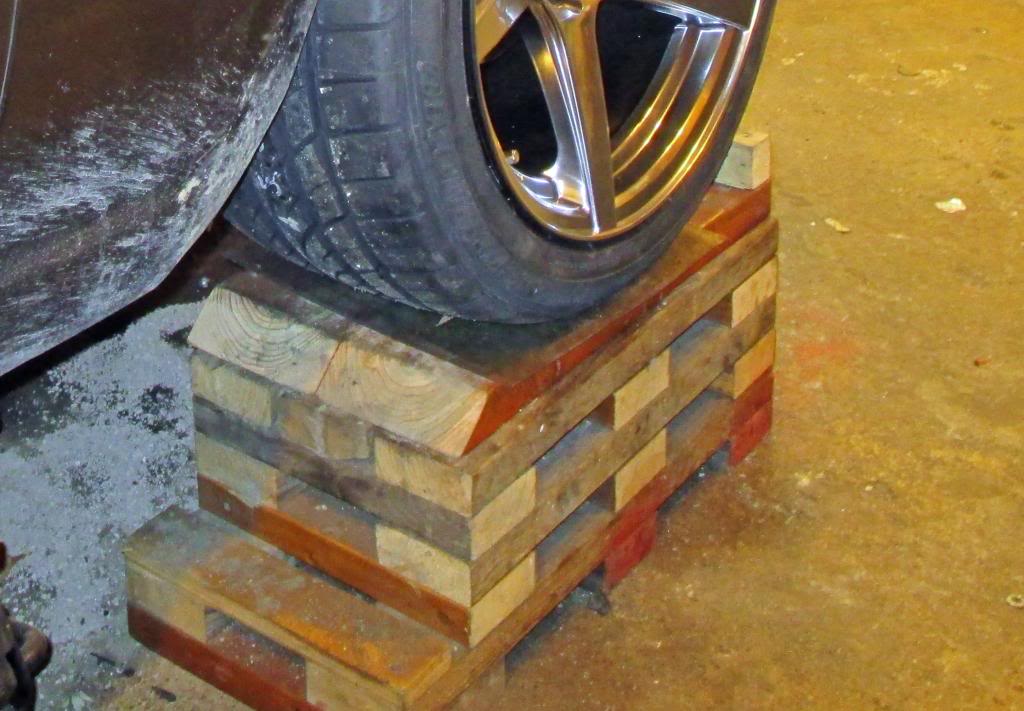
The risers or actual ramp part is 54" long and the tops of them are 2x10s. The reason for the little hunk of 2x6 at the top is because a 10 foot 2x10 was quiet a bit cheaper then a 12" 2x10 so I just added on to it. The boards under the deck are 2x4s laid on their side. Using them alone raises the car 5".
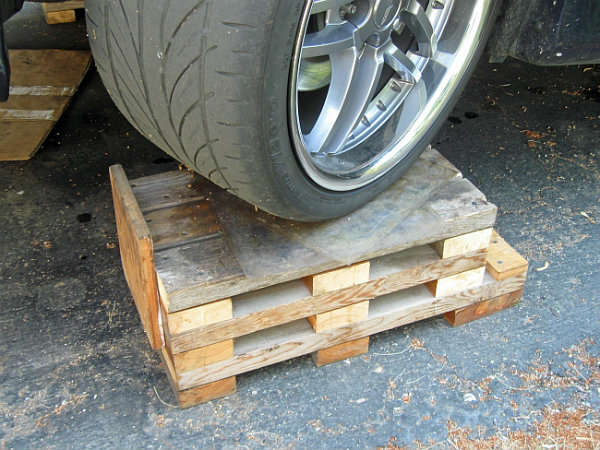
Everything is screwed together with LOTS of 2 1/2" sheet rock screws.
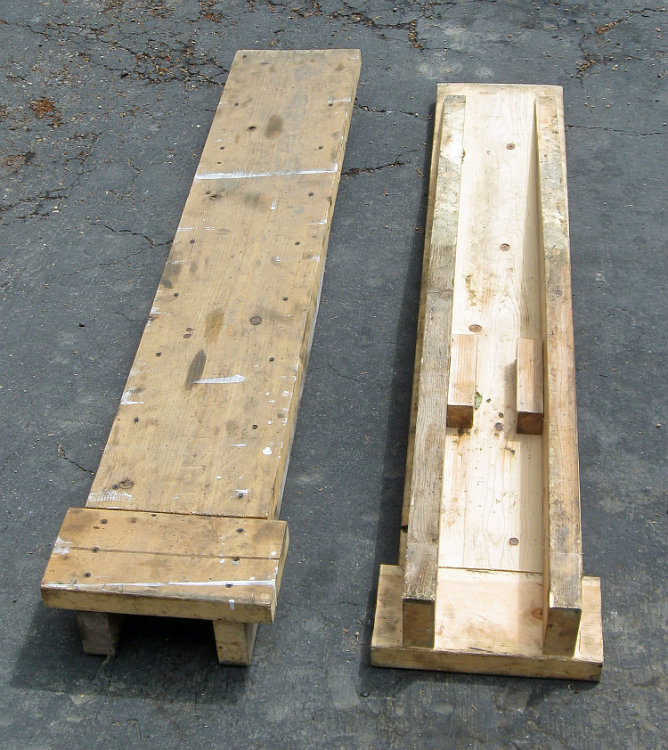
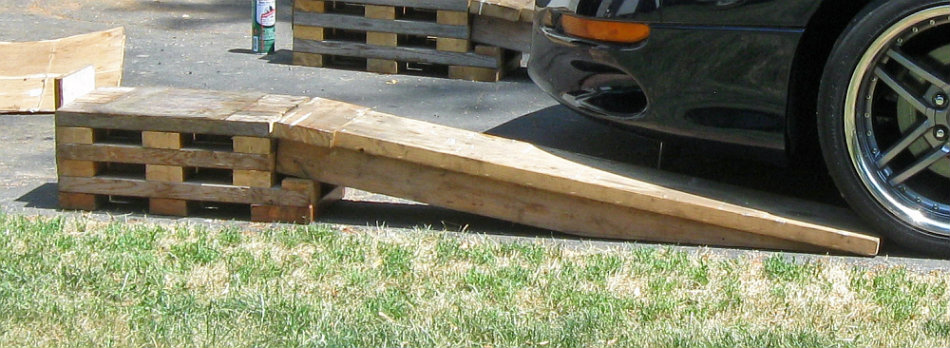
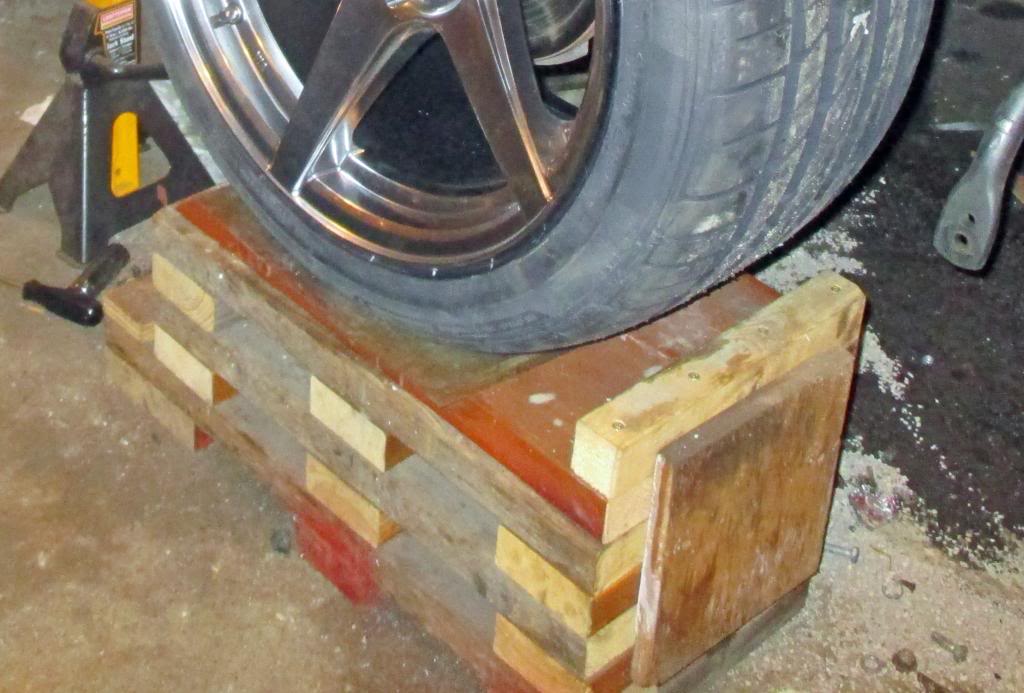
They are very stable and I feel really comfortable under them. If you want to add a safety feature you could put a little tab down on the riser to lock it into the base. Or you could go up from the base into the riser. I was planning on doing that but never did. I've used these for years and never had one move.
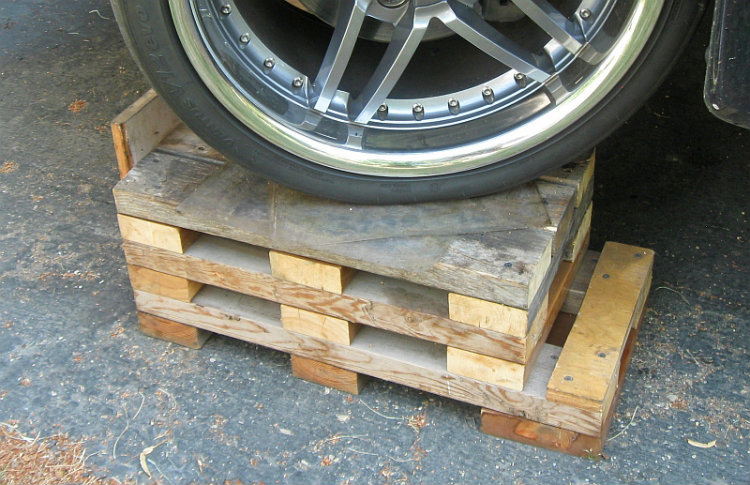
The dents you see in the top of them are from using them as jack stands. Often when I have it up on the ramps and pull a wheel I just kick the ramp under the car and set it on it. It's the perfect height to sit right on the jacking point of the car or under the K member. I should patient these puppies!
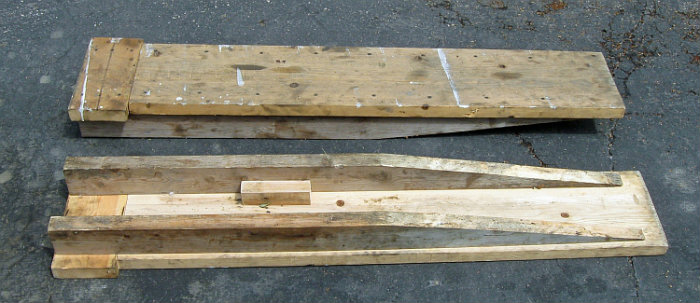
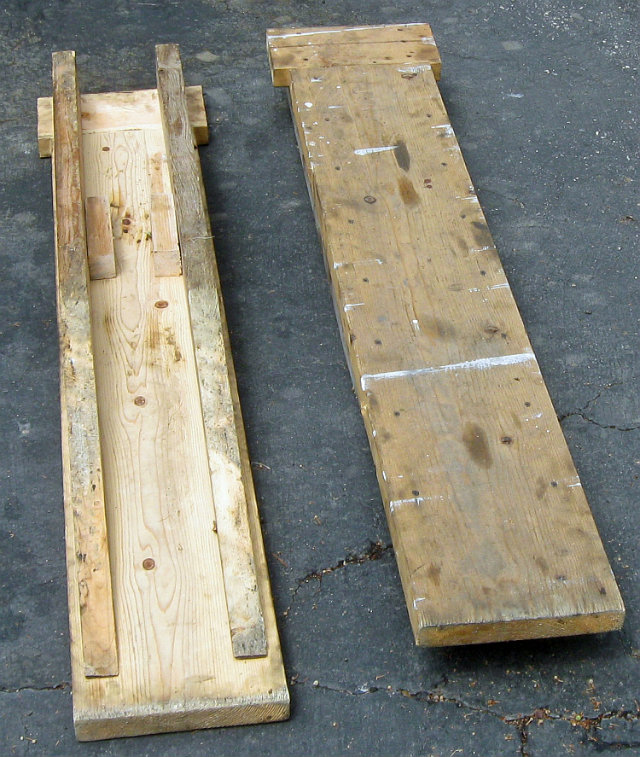
By the way the trick to getting the risers cut exactly right is put the tops up on a 2x4 and scribe a line on your riser boards like so:
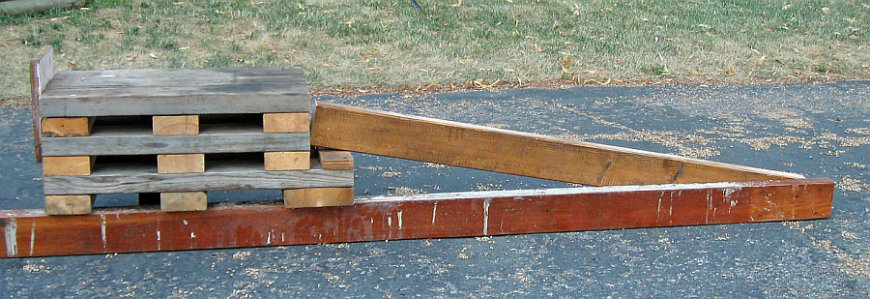
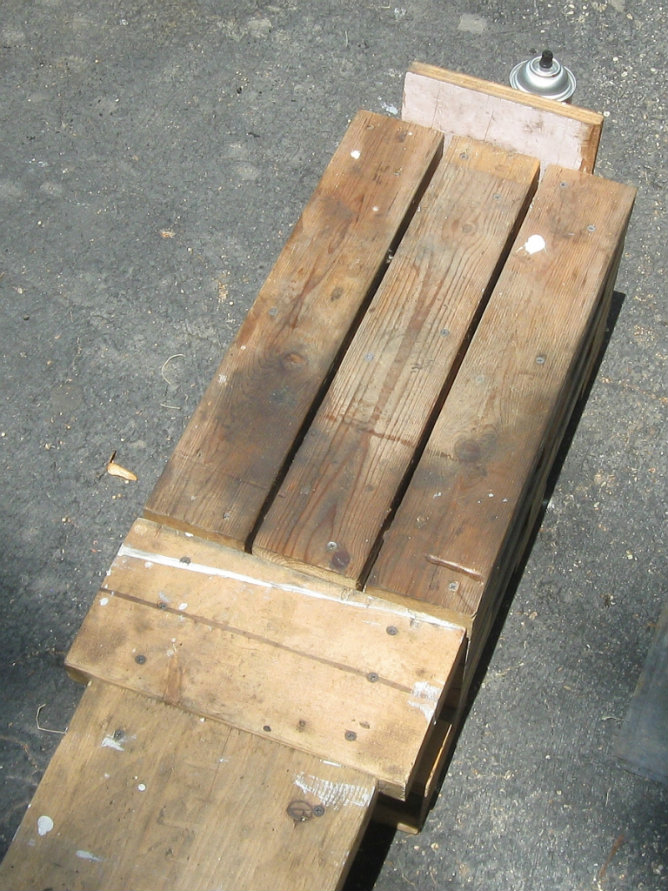
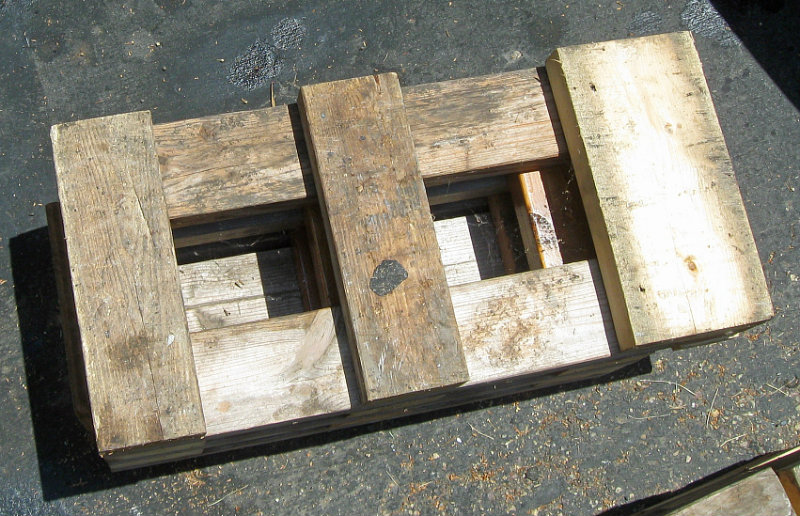

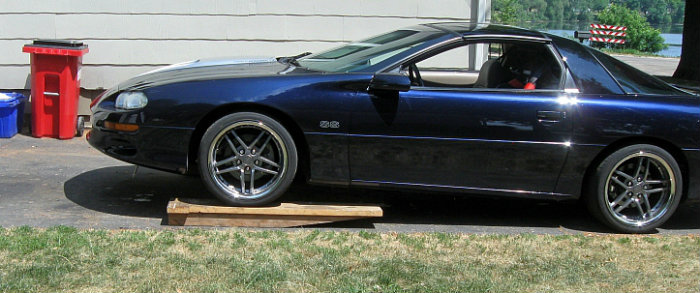
For little stuff or oil changes I use just the riser part which is the main reason I never put the tab in them that would lock them to the deck.
__________________________________________________ __________________________________________________ ___
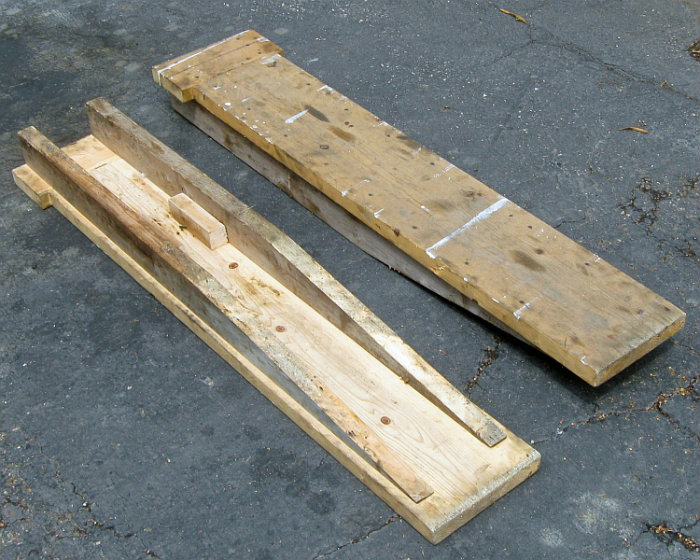
Update 2014
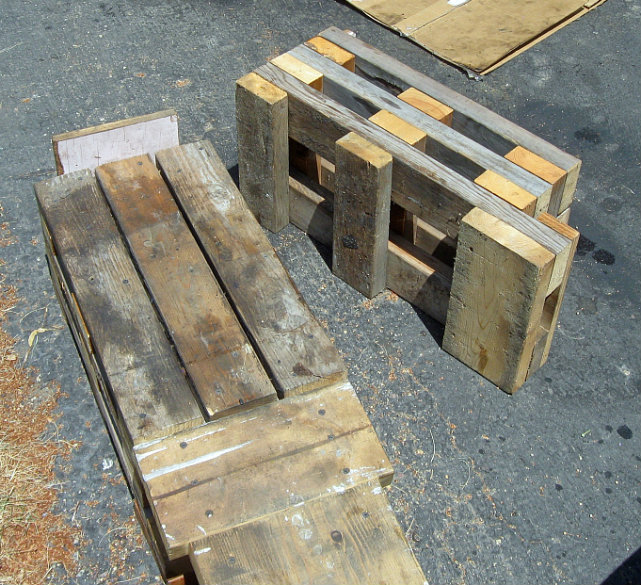
I built a set of rear ramps to deal with the ISD in my Miata.
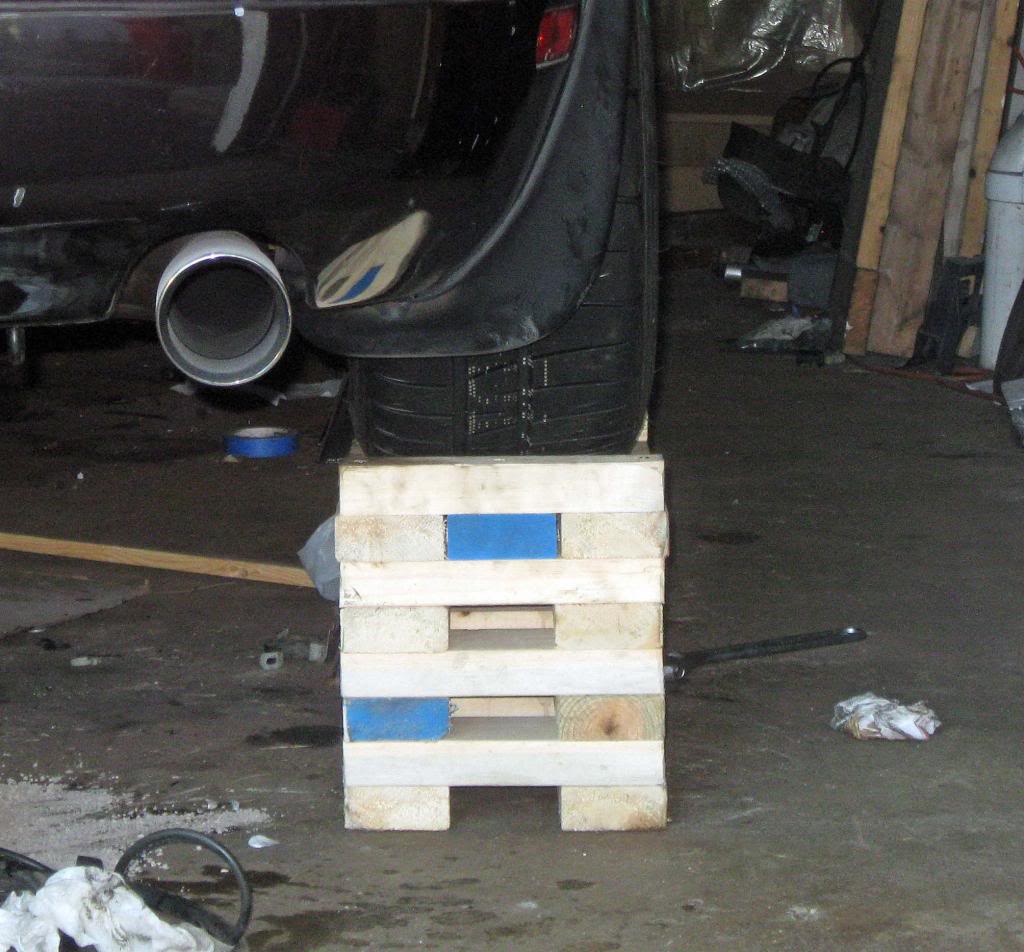
Yeap those are new 2x4s I had to buy them this time!

They are the same 11" wide and 20" long as the tops of the front ramps.
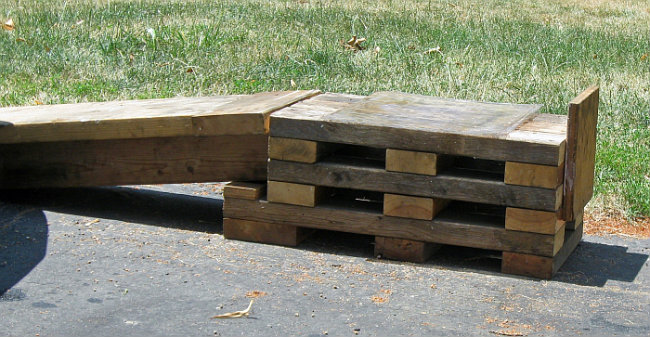
They are one layer higher than the fronts so I made a spacer I set on the fronts when I use them.
That does shorten the tops of the front a little which is not ideal but works. The reason I made the backs one layer higher is I knew I would never drive up on them so I made them as high as my jack would go.
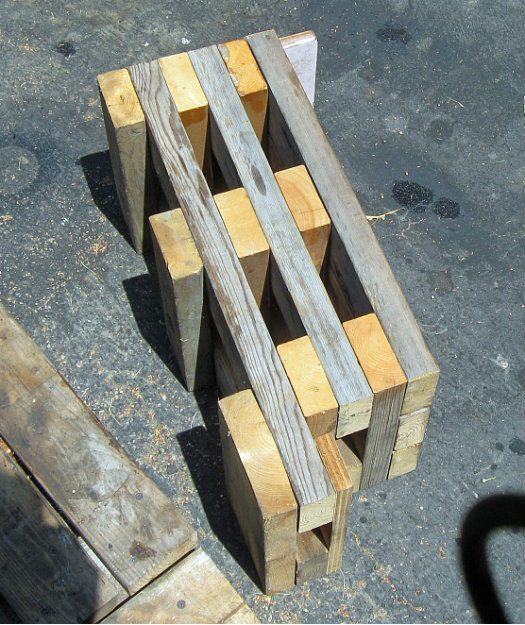
The tops of the bases are 11" wide by 20" long and raise the car 9". The bottom part of them are 11" wide by 24" long. Mine are nearly all wood I had lying around and you can do the math to figure out that is a lot of feet of 2x4s!
The risers or actual ramp part is 54" long and the tops of them are 2x10s. The reason for the little hunk of 2x6 at the top is because a 10 foot 2x10 was quiet a bit cheaper then a 12" 2x10 so I just added on to it. The boards under the deck are 2x4s laid on their side. Using them alone raises the car 5".
Everything is screwed together with LOTS of 2 1/2" sheet rock screws.
They are very stable and I feel really comfortable under them. If you want to add a safety feature you could put a little tab down on the riser to lock it into the base. Or you could go up from the base into the riser. I was planning on doing that but never did. I've used these for years and never had one move.
The dents you see in the top of them are from using them as jack stands. Often when I have it up on the ramps and pull a wheel I just kick the ramp under the car and set it on it. It's the perfect height to sit right on the jacking point of the car or under the K member. I should patient these puppies!
By the way the trick to getting the risers cut exactly right is put the tops up on a 2x4 and scribe a line on your riser boards like so:
For little stuff or oil changes I use just the riser part which is the main reason I never put the tab in them that would lock them to the deck.
__________________________________________________ __________________________________________________ ___
Update 2014
I built a set of rear ramps to deal with the ISD in my Miata.

Yeap those are new 2x4s I had to buy them this time!

They are the same 11" wide and 20" long as the tops of the front ramps.

They are one layer higher than the fronts so I made a spacer I set on the fronts when I use them.


That does shorten the tops of the front a little which is not ideal but works. The reason I made the backs one layer higher is I knew I would never drive up on them so I made them as high as my jack would go.
Last edited by charchri4; 08-05-2014 at 01:18 AM.
 07-22-2012, 06:11 PM
#2
Launching!

Join Date: Sep 2005
Location: dallas
Posts: 218
Likes: 0
Received 0 Likes
on
0 Posts

What are those 2 chunks of wood on the back side of the risers for support? Measurements please? And would you make them longer?
Also whats the measurement of the piece that sits under the risers on the base?
Also whats the measurement of the piece that sits under the risers on the base?
Last edited by 2nasty; 07-22-2012 at 06:22 PM.

 07-26-2012, 04:29 PM
#7
On The Tree
Thread Starter
iTrader: (11)
Join Date: Jan 2011
Location: The forsaken tundra of Minnesota
Posts: 123
Received 0 Likes
on
0 Posts
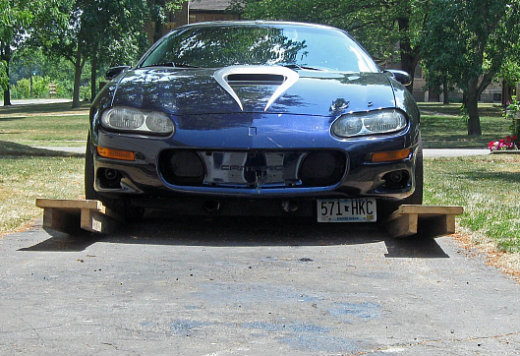
No I wouldn't make them any longer. They are plenty long and a nice gradual incline to put the car up on.
Trending Topics
07-26-2012, 08:12 PM
#8
On The Tree
Thread Starter
iTrader: (11)
Join Date: Jan 2011
Location: The forsaken tundra of Minnesota
Posts: 123
Received 0 Likes
on
0 Posts
Yeah I think you could go up one more level with the same length easy. That would give you 10.5" of lift but I have never thought it necessary except once. When I put my headers in I had the car up on the ramps then jacked it up another 4.5" from there with blocks on the ramps. For the last 3 Camaros and last half dozen years these have worked fine at 9"
07-26-2012, 08:15 PM
#9
On The Tree
Thread Starter
iTrader: (11)
Join Date: Jan 2011
Location: The forsaken tundra of Minnesota
Posts: 123
Received 0 Likes
on
0 Posts
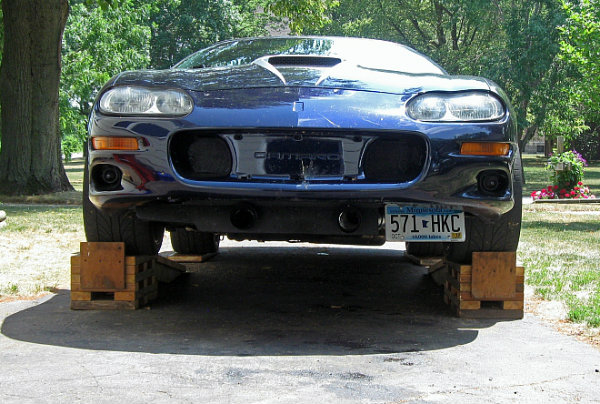
The little lights on the outside are stock. I think they are part of the SS package? If you are talking about the 2 shiny things right in the center by the license plate those are brake duct inlets not lights.
https://ls1tech.com/forums/suspensio...l#post16605601
https://ls1tech.com/forums/suspensio...l#post16605601
Last edited by charchri4; 08-09-2012 at 12:08 PM.
08-03-2012, 12:22 PM
#11

I like this design! Mine are 2x10s sandwiched on top of each other getting shorter and shorter as you go up. Then I also built a stand of all 2x10 to use if I need to go in under the side or get the trans out.
BUT...mine are EXTREMELY heavy. After a day of working, they are a bear to move around or store. Yours not only look lighter, but being two pieces would make them easier to stash too.
I might re-vamp my ramps and go with this idea. Been wanting to make a new set that are more user friendly. Plus I can steal some 2x10s from my ramps, and 2x4s are cheap enough.
Thanks!
J.
08-03-2012, 01:04 PM
#12
I like this design! Mine are 2x10s sandwiched on top of each other getting shorter and shorter as you go up. Then I also built a stand of all 2x10 to use if I need to go in under the side or get the trans out.
BUT...mine are EXTREMELY heavy. After a day of working, they are a bear to move around or store. Yours not only look lighter, but being two pieces would make them easier to stash too.
I might re-vamp my ramps and go with this idea. Been wanting to make a new set that are more user friendly. Plus I can steal some 2x10s from my ramps, and 2x4s are cheap enough.
Thanks!
J.
BUT...mine are EXTREMELY heavy. After a day of working, they are a bear to move around or store. Yours not only look lighter, but being two pieces would make them easier to stash too.
I might re-vamp my ramps and go with this idea. Been wanting to make a new set that are more user friendly. Plus I can steal some 2x10s from my ramps, and 2x4s are cheap enough.
Thanks!
J.
08-08-2012, 04:58 PM
#13
TECH Apprentice
Join Date: Jan 2004
Posts: 392
Likes: 0
Received 0 Likes
on
0 Posts
My Rhino ramps are **** and want something that has a lower angle and is wider. Like what I see here. I might incorporate some of these ideas into my plans. One question I have is what type of wood do you buy from the store? I don't have a saw or anything so I will have to have it cut there and then bring the pieces home to put together.
08-09-2012, 12:30 PM
#15
On The Tree
Thread Starter
iTrader: (11)
Join Date: Jan 2011
Location: The forsaken tundra of Minnesota
Posts: 123
Received 0 Likes
on
0 Posts
My Rhino ramps are **** and want something that has a lower angle and is wider. Like what I see here. I might incorporate some of these ideas into my plans. One question I have is what type of wood do you buy from the store? I don't have a saw or anything so I will have to have it cut there and then bring the pieces home to put together.
If think I was going to start from scratch I would probably use a 2x6 on edge for the center 2 layers rather then so many layers of 2x4s. But to answer your question this is all just basic framing lumber that any lumber yard could cut down for you. Just draw out what you want to do on paper and figure out how many of each length you will need. The lumber yard in my little town (pop. 1200) doesn't charge for cuts but I bet places like home depot does so you better watch that.
The other thing you might do is go talk to your local high school wood shop teacher. If he is like the one in my town he is always looking for easy projects like this and you would might be able to get these made for the cost of the wood.
Good luck!
 Sure I really enjoy piling up the shims to get lower cars on and working around the risers that are totally in the way to do anything like SFCs or a clutch. I wouldn't trade you if mine cost twice that.
 08-23-2012, 03:15 AM
#20
Launching!
Join Date: Feb 2004
Location: NOR-CAL
Posts: 238
Likes: 0
Received 0 Likes
on
0 Posts
I use my lift for big jobs , you out'a try one
I wouldn't trade any tools I own , ever.
Of course i don't go for ghetto solutions.
