Home Made Shop tools.


 02-08-2015, 08:57 AM
#43
11 Second Club
iTrader: (4)
Join Date: Jan 2005
Location: Rowletts,KY
Posts: 1,004
Likes: 0
Received 0 Likes
on
0 Posts

Had to post up. This is a rod heater we made to heat the small end on a rod with press fit pin. we looked at some other gas models and decided we could build one. The fixute in front of it is to hold the piston in place and a stop for the pin
 06-07-2015, 08:40 PM
#45
TECH Addict
iTrader: (14)
Join Date: Feb 2007
Location: Owasso, OK
Posts: 2,342
Likes: 0
Received 0 Likes
on
0 Posts
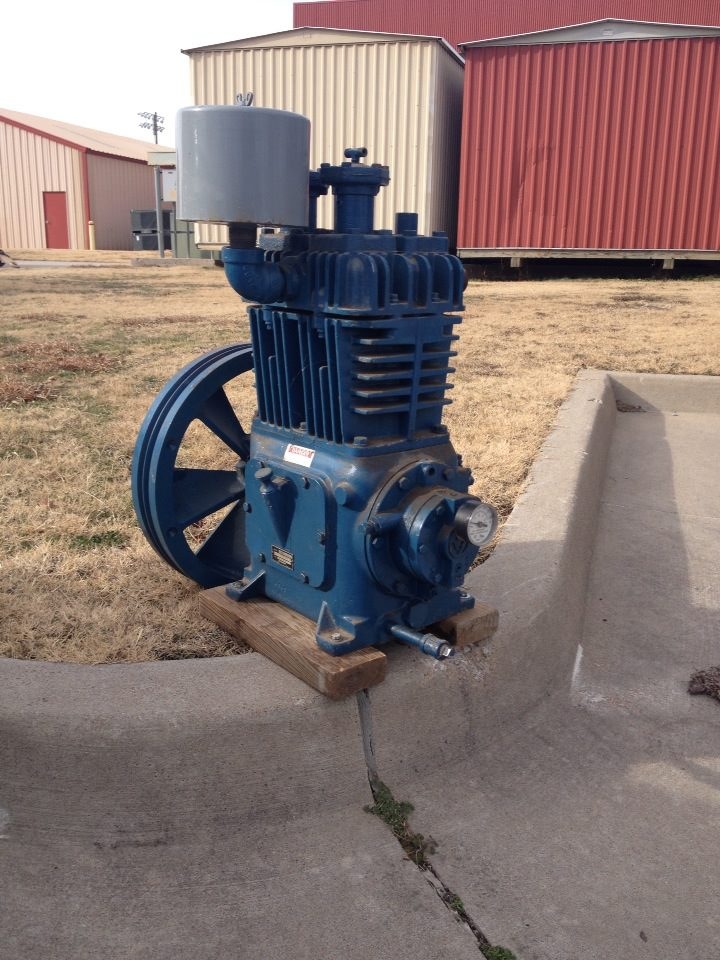
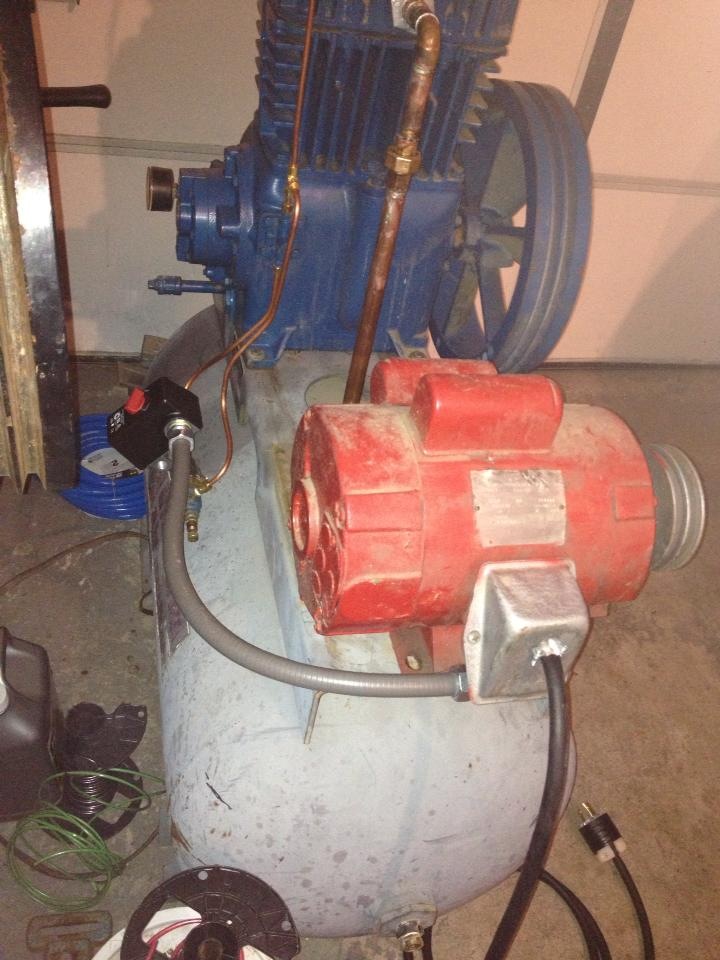
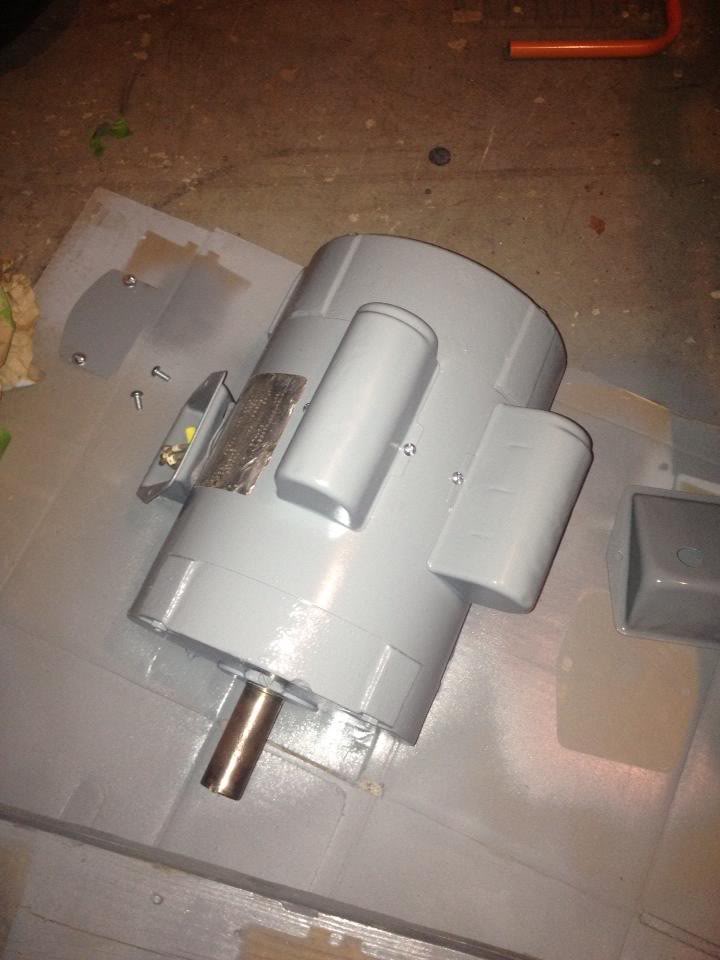
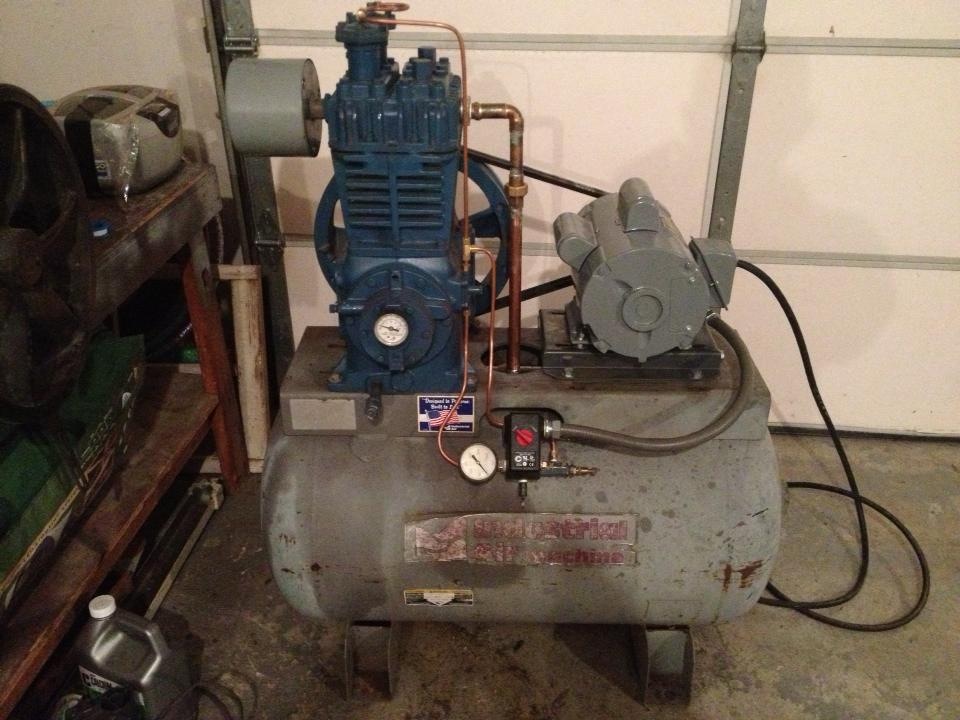
My most recent home made shop tool. Quincy single stage 230 pump, old 3HP oil field motor, 50 gallon tank repurposed from a worn out compressor. All in all I have a about $400-500 in it. Not to bad for a nice Quincy.
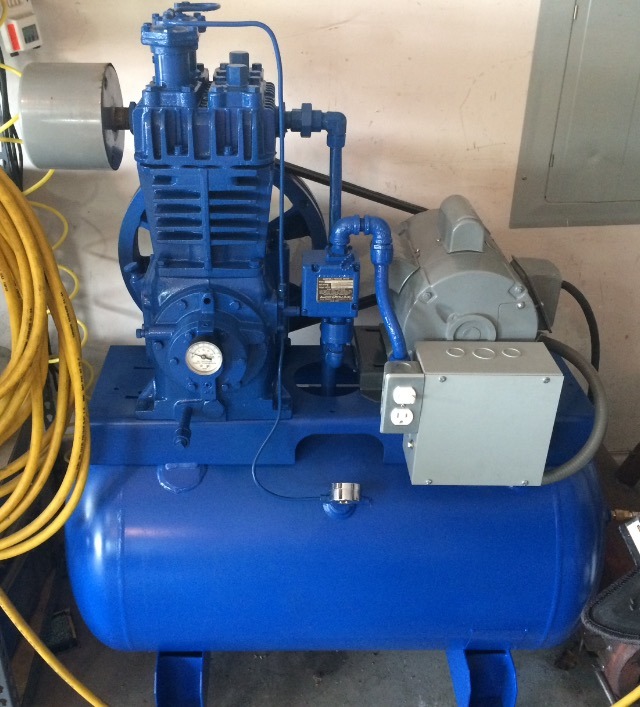
Some build up pics

Some build up pics


Last edited by raven154; 06-12-2015 at 02:50 AM.
 10-21-2015, 09:43 AM
#48

For those asking for a vac/boost leak tester.
So after fighting with misfires and boost leaks on my car I figured it was time to either bite the bullet and but a tester or to get creative and make my own. If the title didn't give it away I decided to make my own using whatever I had laying around the garage. I'm sure if you didn't have these items on hand it could still be made for under $20. This tester was used with a silicone turbo inlet. I'm not sure if it can be used with the stock plastic intake.
Disclaimer: I am not responsible for any injuries or engine damage caused by the use of this tester. Open flames can be dangerous and adult supervision is recommended.
Items needed:
2x male air compressor chucks
1x male barbed fitting
1x jar of peanut butter
1x air compressor
1x gallon paint can
1x electric drill
1x dill bit set
1x hammer
1x tube of silicone
1x 3-6 feet of hose
1x small hose clamp
Step 1:
Once you have acquired all the materials listed above you can begin. First you can take one of the male compressor chucks and get a drill bit roughly the same size. As long as your close to the right size you can use Asian persuasion to screw the fitting into the lid. Then drill the first hole in the lid.
Attachment 58573
Step 2:
This time you need to have your barbed fitting in hand. Find a drill bit the right size and drill the second hole a couple inches away from the second. Make sure this hole is slightly on the small side that way the barbed fitting is a tight fit. The best way is to hammer it in from the bottom for the tightest seal.
Attachment 58574
Step 3:
This step is probably the most important to take your time on. Using jb weld or any of your favorite silicone brands weld around the fittings that way they don't leak. I was impatient and just used silicone. It worked but jb weld would have worked better.
Attachment 58575
Step 4:
You need to acquire a jar of peanut butter or something with a similar sized cap to be used on the intake side.
Attachment 58576
Step 5:
Using your drill again drill a hole in the center or the cap so the second male fitting can be screwed into it. You should probably seal this one too but its not a requirement.
Attachment 58577
Attachment 58578
Attachment 58579
Step 6:
This is where the hose comes in. Slide your desired hose onto the cap side and then slide the other end of the hose onto the barbed fitting.
Attachment 58580
Step 7:
The last step is to light up the fire. I would recommend doing this outside and not in a garage or anywhere near flammable objects. Through some blue towels into the paint can and light them on fire. Let them smoke for about thirty seconds then turn on the compressor to about 5 psi and hammer the lid on. If you have done every right smoke should circulate through the engine and come out through any leaks. If the can builds up to much pressure the cap can blow off quite loudly. This isn't the best tester but it sure beats having someone else work on your car.
Attachment 58581
Attachment 58582
Sent from my XT907 using Tapatalk
10-21-2015, 11:00 AM
#49
Links are coming back invalid. Can you repost the photos in the thread? Thanks.
For those asking for a vac/boost leak tester.
So after fighting with misfires and boost leaks on my car I figured it was time to either bite the bullet and but a tester or to get creative and make my own. If the title didn't give it away I decided to make my own using whatever I had laying around the garage. I'm sure if you didn't have these items on hand it could still be made for under $20. This tester was used with a silicone turbo inlet. I'm not sure if it can be used with the stock plastic intake.
Disclaimer: I am not responsible for any injuries or engine damage caused by the use of this tester. Open flames can be dangerous and adult supervision is recommended.
Items needed:
2x male air compressor chucks
1x male barbed fitting
1x jar of peanut butter
1x air compressor
1x gallon paint can
1x electric drill
1x dill bit set
1x hammer
1x tube of silicone
1x 3-6 feet of hose
1x small hose clamp
Step 1:
Once you have acquired all the materials listed above you can begin. First you can take one of the male compressor chucks and get a drill bit roughly the same size. As long as your close to the right size you can use Asian persuasion to screw the fitting into the lid. Then drill the first hole in the lid.
Attachment 58573
Step 2:
This time you need to have your barbed fitting in hand. Find a drill bit the right size and drill the second hole a couple inches away from the second. Make sure this hole is slightly on the small side that way the barbed fitting is a tight fit. The best way is to hammer it in from the bottom for the tightest seal.
Attachment 58574
Step 3:
This step is probably the most important to take your time on. Using jb weld or any of your favorite silicone brands weld around the fittings that way they don't leak. I was impatient and just used silicone. It worked but jb weld would have worked better.
Attachment 58575
Step 4:
You need to acquire a jar of peanut butter or something with a similar sized cap to be used on the intake side.
Attachment 58576
Step 5:
Using your drill again drill a hole in the center or the cap so the second male fitting can be screwed into it. You should probably seal this one too but its not a requirement.
Attachment 58577
Attachment 58578
Attachment 58579
Step 6:
This is where the hose comes in. Slide your desired hose onto the cap side and then slide the other end of the hose onto the barbed fitting.
Attachment 58580
Step 7:
The last step is to light up the fire. I would recommend doing this outside and not in a garage or anywhere near flammable objects. Through some blue towels into the paint can and light them on fire. Let them smoke for about thirty seconds then turn on the compressor to about 5 psi and hammer the lid on. If you have done every right smoke should circulate through the engine and come out through any leaks. If the can builds up to much pressure the cap can blow off quite loudly. This isn't the best tester but it sure beats having someone else work on your car.
Attachment 58581
Attachment 58582
Sent from my XT907 using Tapatalk
So after fighting with misfires and boost leaks on my car I figured it was time to either bite the bullet and but a tester or to get creative and make my own. If the title didn't give it away I decided to make my own using whatever I had laying around the garage. I'm sure if you didn't have these items on hand it could still be made for under $20. This tester was used with a silicone turbo inlet. I'm not sure if it can be used with the stock plastic intake.
Disclaimer: I am not responsible for any injuries or engine damage caused by the use of this tester. Open flames can be dangerous and adult supervision is recommended.
Items needed:
2x male air compressor chucks
1x male barbed fitting
1x jar of peanut butter
1x air compressor
1x gallon paint can
1x electric drill
1x dill bit set
1x hammer
1x tube of silicone
1x 3-6 feet of hose
1x small hose clamp
Step 1:
Once you have acquired all the materials listed above you can begin. First you can take one of the male compressor chucks and get a drill bit roughly the same size. As long as your close to the right size you can use Asian persuasion to screw the fitting into the lid. Then drill the first hole in the lid.
Attachment 58573
Step 2:
This time you need to have your barbed fitting in hand. Find a drill bit the right size and drill the second hole a couple inches away from the second. Make sure this hole is slightly on the small side that way the barbed fitting is a tight fit. The best way is to hammer it in from the bottom for the tightest seal.
Attachment 58574
Step 3:
This step is probably the most important to take your time on. Using jb weld or any of your favorite silicone brands weld around the fittings that way they don't leak. I was impatient and just used silicone. It worked but jb weld would have worked better.
Attachment 58575
Step 4:
You need to acquire a jar of peanut butter or something with a similar sized cap to be used on the intake side.
Attachment 58576
Step 5:
Using your drill again drill a hole in the center or the cap so the second male fitting can be screwed into it. You should probably seal this one too but its not a requirement.
Attachment 58577
Attachment 58578
Attachment 58579
Step 6:
This is where the hose comes in. Slide your desired hose onto the cap side and then slide the other end of the hose onto the barbed fitting.
Attachment 58580
Step 7:
The last step is to light up the fire. I would recommend doing this outside and not in a garage or anywhere near flammable objects. Through some blue towels into the paint can and light them on fire. Let them smoke for about thirty seconds then turn on the compressor to about 5 psi and hammer the lid on. If you have done every right smoke should circulate through the engine and come out through any leaks. If the can builds up to much pressure the cap can blow off quite loudly. This isn't the best tester but it sure beats having someone else work on your car.
Attachment 58581
Attachment 58582
Sent from my XT907 using Tapatalk
11-10-2015, 04:58 PM
#50

I guess I should just make one, but...Thought I'd ask first if anyone beat me to it.
Something like a u-shaped screwdriver or T- handle would work. None of my screwdrivers would bend that tightly.
Thanks
Jeff
Something like a u-shaped screwdriver or T- handle would work. None of my screwdrivers would bend that tightly.
Thanks
Jeff
01-22-2016, 10:19 PM
#51

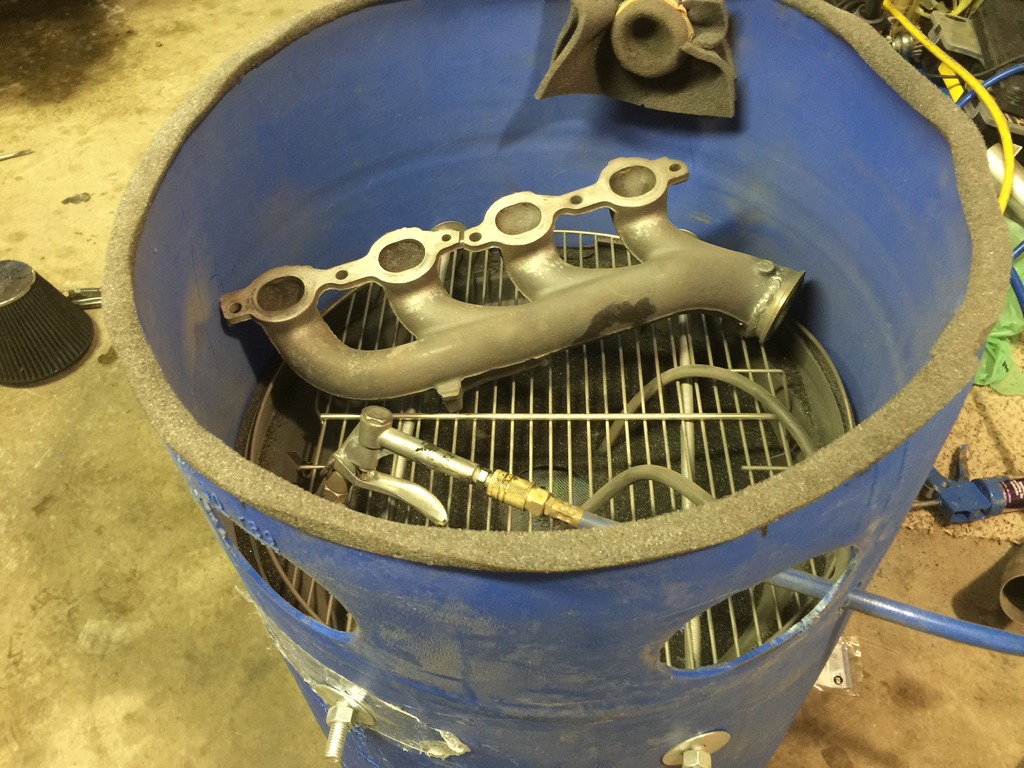
If anyone has wanted a cheap blasting cabinet I did one out of a plastic barrel. I can do a build thread if anyone is interested. So far I have about a $100 into it & it works pretty decent. Good for small parts like manifolds, turbine housings, etc. It has a lexan cover also...
Last edited by gtfoxy; 01-22-2016 at 10:25 PM.
01-23-2016, 01:32 AM
#54
TECH Regular
iTrader: (1)
Join Date: Jan 2016
Location: Ohio
Posts: 401
Likes: 0
Received 0 Likes
on
0 Posts
I love the piston clock and that valve cover coat hanger. Waiting for someone to post their engine block coffee table. I wonder if anyone has made a spinning barstool from a wheel and hub??? Badass no?
01-23-2016, 10:17 AM
#55
Lexan cover. I used it last night before I got latches on it so I just had the lid resting on it & I didn't have an issue. I have trunk latches (draw catch) that I am putting on today.
I have to pick up some sleeves to put your arms in. I made the holes just big enough that I wear a sweater & it seals. I just have to brush my sleeves off before I pull my arms out... No biggie.
I swept up the floor after I used it for a manifold & turbine housing & had maybe 1/4lb of media find its way out. With 50lbs of media in it that isn't very much lost.
I have a 5hp shop vac to suck out the dust (filter to the top of the barrel) but I am going to re-locate it to under the catch so it draws the dust down.
Last edited by gtfoxy; 01-23-2016 at 12:52 PM.
 02-09-2016, 08:38 AM
#59
Teching In

Join Date: Mar 2015
Posts: 25
Likes: 0
Received 0 Likes
on
0 Posts
02-09-2016, 12:58 PM
#60
Thanks man.
The copper cap aids in filling holes while welding. By placing the copper cap the behind the hole and welding over the top. The copper supports the weld while also absorbing heat.The weld doesn't stick to the copper. I built it so I could fill some holes in sheet metal. It helps out when welding holes in the firewall and fender wells. I've seen copper backers used while holes welding in many different types metal.
Bingo
Bingo