Camaro and Firebird: How to Remove Transmission
Dropping your transmission is a challenge in these RWD muscle cars, but if you have the time, you can do it in your own garage.
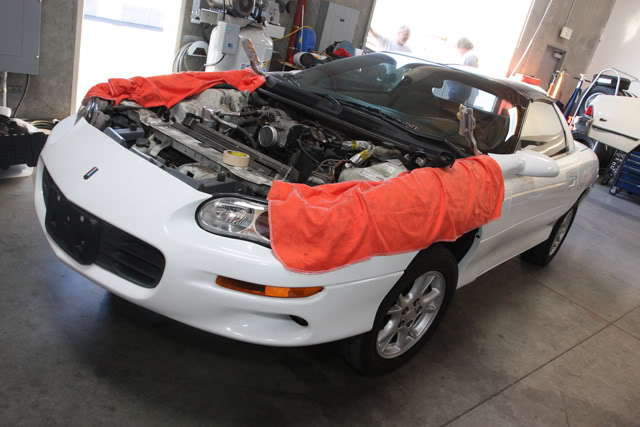
This article applies to the Chevrolet Camaro and Pontiac Firebird (1990-2015).
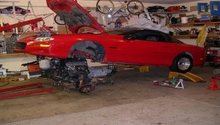
Pulling the transmission in your car can be a real bear. There are several other components that need to be removed before you can budge it even an inch. You will also have to drop the engine and support it somehow. All of this adds up to one long day, but you have to ask yourself if you would rather add up hours or hundred dollar bills? Taking your car to a professional to do this for you is going to cost at least four to five of those hundred dollar bills, and that's just to pull it out of your car. To rebuild it, to change the gear ratios, or add any other modification to it will just stack on more of those Benjamins. If you have the patience, time and a good buddy to work with, you can do this job in your own garage and save yourself a bundle.

Materials Needed
- Ratchet and 11, 13, 15 and 24mm sockets
- Several very long and a short extension
- Swivel joint for ratchet and sockets
- Flat head screwdriver
- Hydraulic floor jack
- Jack stands (4)
- Transmission funnel
- Lots of shop rags
- Transmission jack or converted (modified) jack for the job
- WD-40, PB Blaster or other penetrating spray
Step 1 – Lift your car and place on jack stands
Use the jacking points approved for your car. Raise the car as high as possible and place on jack stands at the highest level available. Make sure that your car is cool before working. Disconnect the negative (black) battery terminal and remove the front tires.
Step 2 – Drain your tranny fluid (optional)
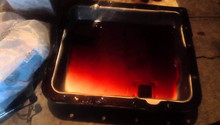
If you are doing any work at all inside your transmission, you may want to take this time when your car is in the air to drain the fluid. Use a huge drain pan and place it under your transmission pan. Use a 13mm socket to remove all the bolts that hold the pan to the bottom of the transmission. This pan is full of fluid and it will get everywhere. Drop the pan, pour the fluid into your catch pan and let all the fluid drain out. Replace the transmission pan. Run a magnet through the old fluid to check the condition of the internals.

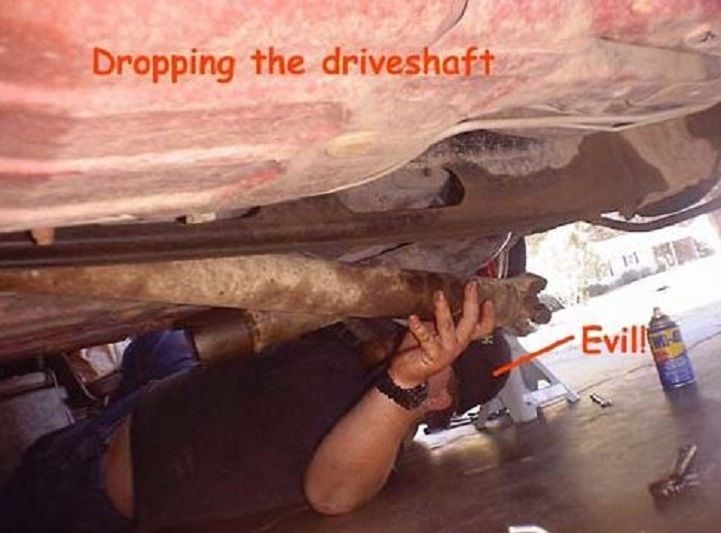
Step 3 – Remove drive shaft
You have to remove the drive shaft from the rear end and out of the transmission first.
- There are four 11mm bolts at the end of the drive shaft that mount it to a U-joint. You'll work with these in a minute, but first, hit them hard with WD-40, PB Blaster or any other penetrating spray.
- Disconnect the shifter cable from the driver's side of the transmission with a flat head screwdriver.
- Once the shifter cable is off, manually pull the lever down two clicks to get it in neutral, so that the drive shaft can spin freely.
- Go back to the U-joint at the rear of the drive shaft and remove those four bolts. It's easiest to turn the shaft to get a bolt in a good position, then remove the bolt, turn the shaft for another bolt and repeat until all four bolts are out.
- Once all the bolts are out, push the shaft toward the tranny, just enough to separate it from the rear end, then tilt it down and pull it all the way out (away from the tranny) and set it aside.
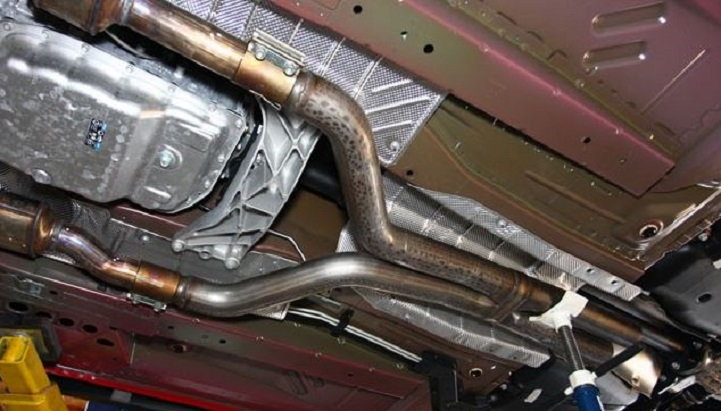
Step 4 – Disconnect your exhaust
If you have the stock exhaust, disconnect the intermediate pipe at the Y. Leave the Y pipe connected to the engine, but remove the mid pipe, as it is in your way and you need a lot of room to tile the motor and tranny down.
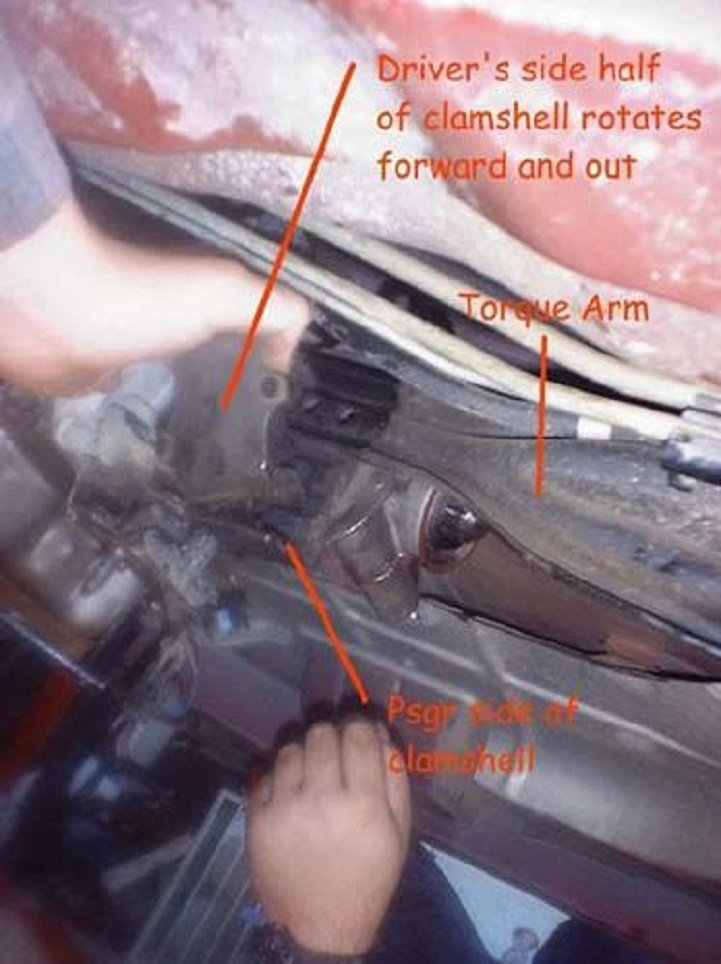
Step 5 – Remove the torque arm from the tranny
The torque arm is connected from the rear end to the transmission via a clamshell shaped bracket. There are three bolts on this bracket: one on either side and one on the top. Remove the side bolts first, then drop the transmission a little to get to the one on top. Once you remove that bolt, it can be completely removed from the transmission, but leave it connected at the rear end.
Step 6 – Remove crossmember and electricals from transmission
The transmission is almost ready to be dropped, but there are several things you must do to get prepared for it.
- Get your transmission jack ready. You may have a special add-on for your regular floor jack to support a transmission/motor, or you can use a thick piece of wood. At any rate, you need something to get under the transmission and motor so you don't literally drop it to the floor.
- Remove the 13mm bolt from the center of the crossmember that goes into the transmission mount bracket.
- Disconnect the O2 sensor that is attached to the crossmember.
- Remove the other two 13mm bolts on either end of the crossmember and set it aside. Now your transmission is being supported only by your jack, so take extra care from here on out.
- Lower the transmission just about an inch or two, but no more. This will allow sufficient room to get to the electrical connections that have to be removed next.
- Disconnect the speed sensor from the tail end on the passenger side.
- Disconnect the large 20 pin wiring harness on the passenger side above the pan.
- Disconnect the O2 socket from the transmission bracket on the driver's side of the transmission.
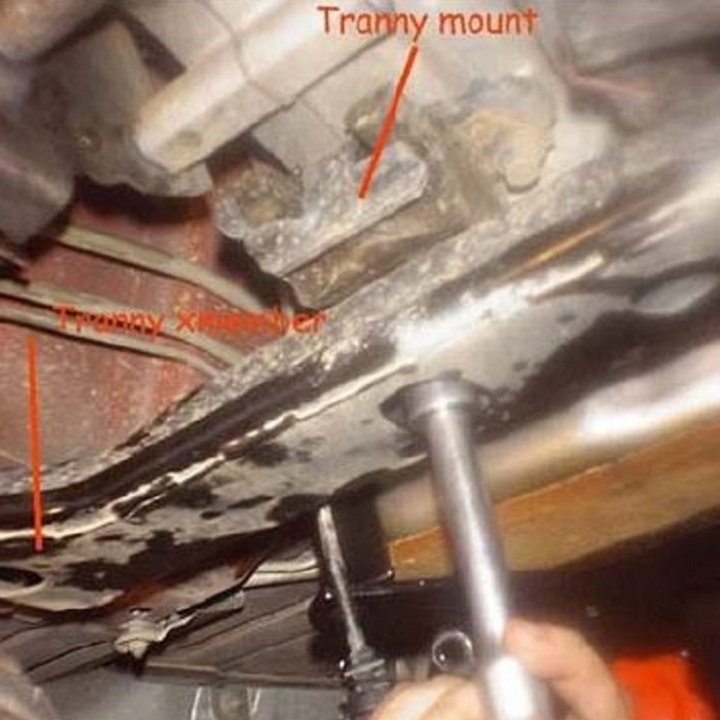
Figure 6. Remove the transmission crossmember. 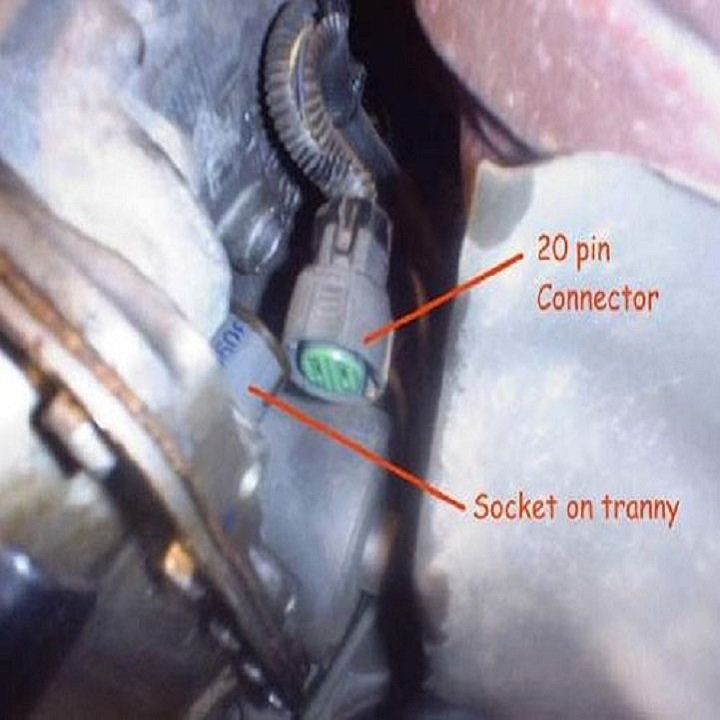
Figure 7. Disconnect the speed sensor and the other electrical connectors.
Step 7 – Remove hard lines, hoses and everything else
These are the last items to disconnect from the transmission before you can completely remove it from under your vehicle.
- Lower the transmission another inch or two, but no more in order to reach the transmission cooler lines.
- There are two cooler lines; one is mounting just above the other. You would do well to mark which one is on top and which is on the bottom, just to be safe.
- They are mounted to the transmission and secured with an odd shaped clip that resembles the letter "E." These must be ordered through the manufacturer, or specialty shop, not something you can run down to your local auto store or hardware store to replace. Take care not to damage or lose them when you remove them.
- There is a plastic cover or boot that covers the cooler line and over these clips. Lift up the skirt or boot to get to the clips and use a small flat head screwdriver to work the clips off. They come off with a combination of pulling and twisting simultaneously.
- Once the clips are off, the cooler lines simply pop right off the transmission.
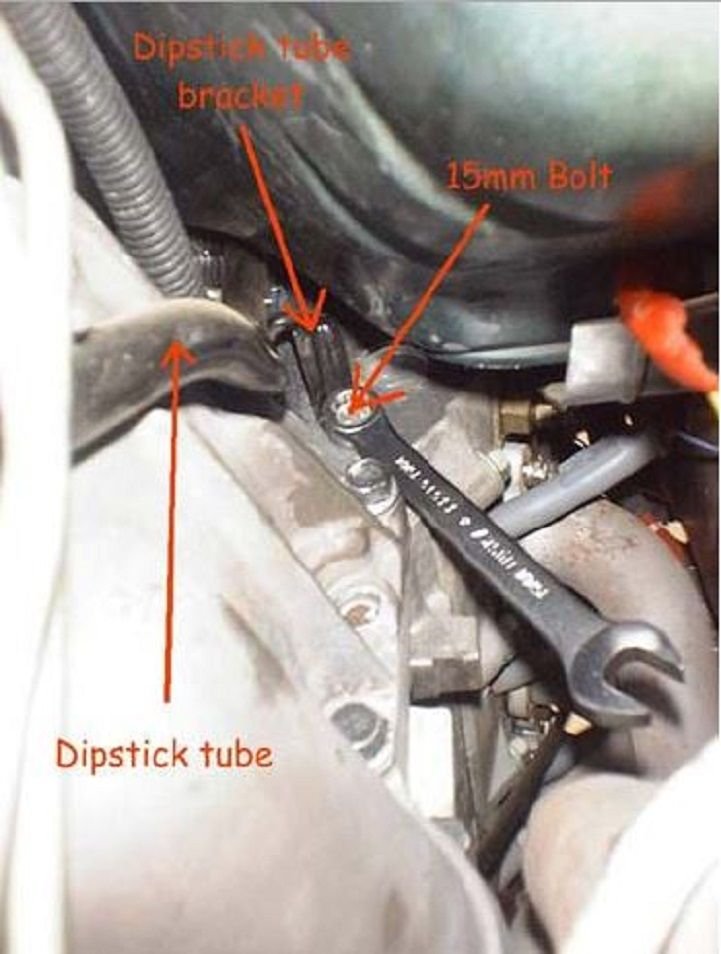
- Pull the vent tube off the top of the bell housing. It just pulls right off. If you have trouble finding it, follow it from the torque arm back to the transmission.
- Remove the dipstick tube by taking off the 15mm bolt that mounts it to the transmission. The bolt will take about 100 to 150 tiny turns, so have patience. Once the bolt is out, someone will need to pull and wiggle the tube from the top while you coax it up from below.
Step 8 – Remove torque converter from flywheel
The torque converter needs to be disconnected from the flywheel. This is the absolute most difficult part of this entire job and a buddy is again needed.
- On the passenger side of the oil pan, you'll find the large, tan oil level sensor hex plug. Remove this plug, which will have wires coming from it, so an old coat hanger from the A-arm will keep this mess out of your way.
- Once that is out of your way, remove the two 13mm (maybe 15mm depending upon model year) bolts that hold the starter in place. Remove the bolts and remove the starter.
- Where the starter was, you'll find a 10mm bolt that holds an inspection cover in place. Remove the cover and you'll have a line of site to the flywheel, as well as all the bolts that you must remove.
- There are three torque converter bolts to remove through this window. Have your buddy turn the motor by way of the crank pulley bolt. Stop when you see the torque converter bolt and remove it. Turn the crank pulley some more until the second bolt is accessible and then repeat.
- Drop the transmission as low as you can get it, and you'll have access to the eight 13 (or 15) mm bolts for the bell housing.
- Remove the eight bolts. The two on top will require almost four feet of ratchet extensions and a swivel nut. It's insane, but you'll get it.
- Jack the transmission back up to level with the motor and then pull the transmission straight away from the motor. There are two dowels, one on either side, that can be pretty tight, so you may need to pry them a bit. The transmission should pull straight away from the motor and it is now finally free!
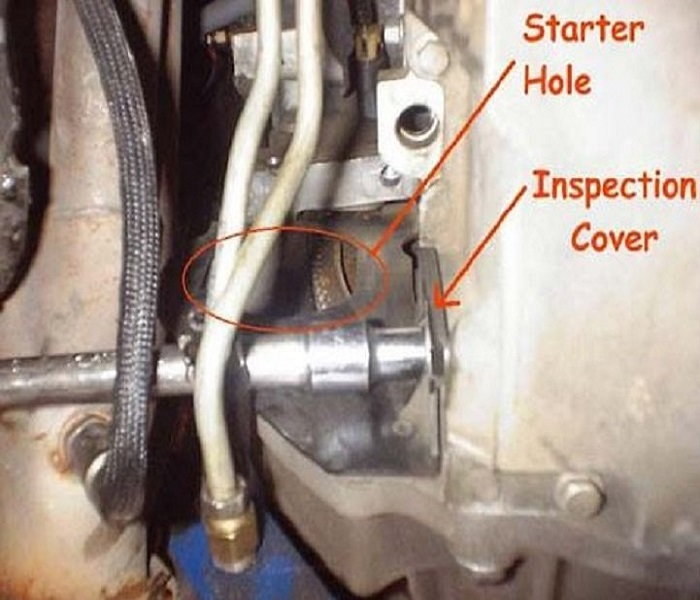
Figure 9. Access the TC bolts through the inspection window behind the starter. 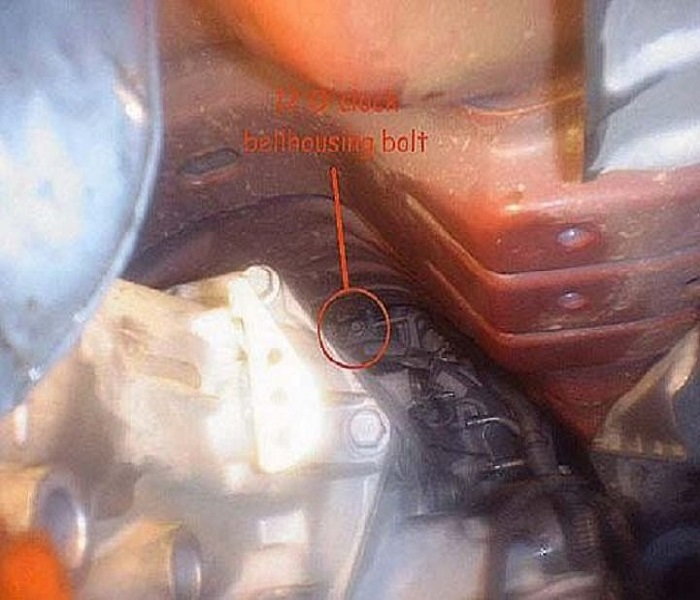
Figure 10. There are very few things more difficult on these cars than getting this bolt out.
Related Discussions
- Removing/Installing Transmission - LS1Tech.com
- Step By Step How to Remove 4L60E Transmission - LS1Tech.com
- Best Way to Remove Tranny? - LS1Tech.com
- Transmission Removal, Need Help! - LS1Tech.com
- 4L60E Remove and Install on 2000 Camaro LS1 - LS1Tech.com