Camaro and Firebird: How to Replace Oil Pressure Sensor
For being a part of the engine which has a proclivity to break, GM sure put it in the worst possible location to replace the oil pressure sensor. Getting to the sensor is half the battle. The other half is getting the new sensor back into place. It doesn't matter if you are a complete newbie mechanic or a seasoned veteran, getting the sensor changed out can be challenging, but keep reading for a how-to on accomplishing it.
This article applies to the Camaro Z28/SS (1998-2002) and Firebird/Trans AM (1998-2002).
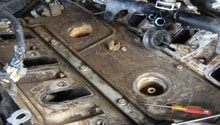
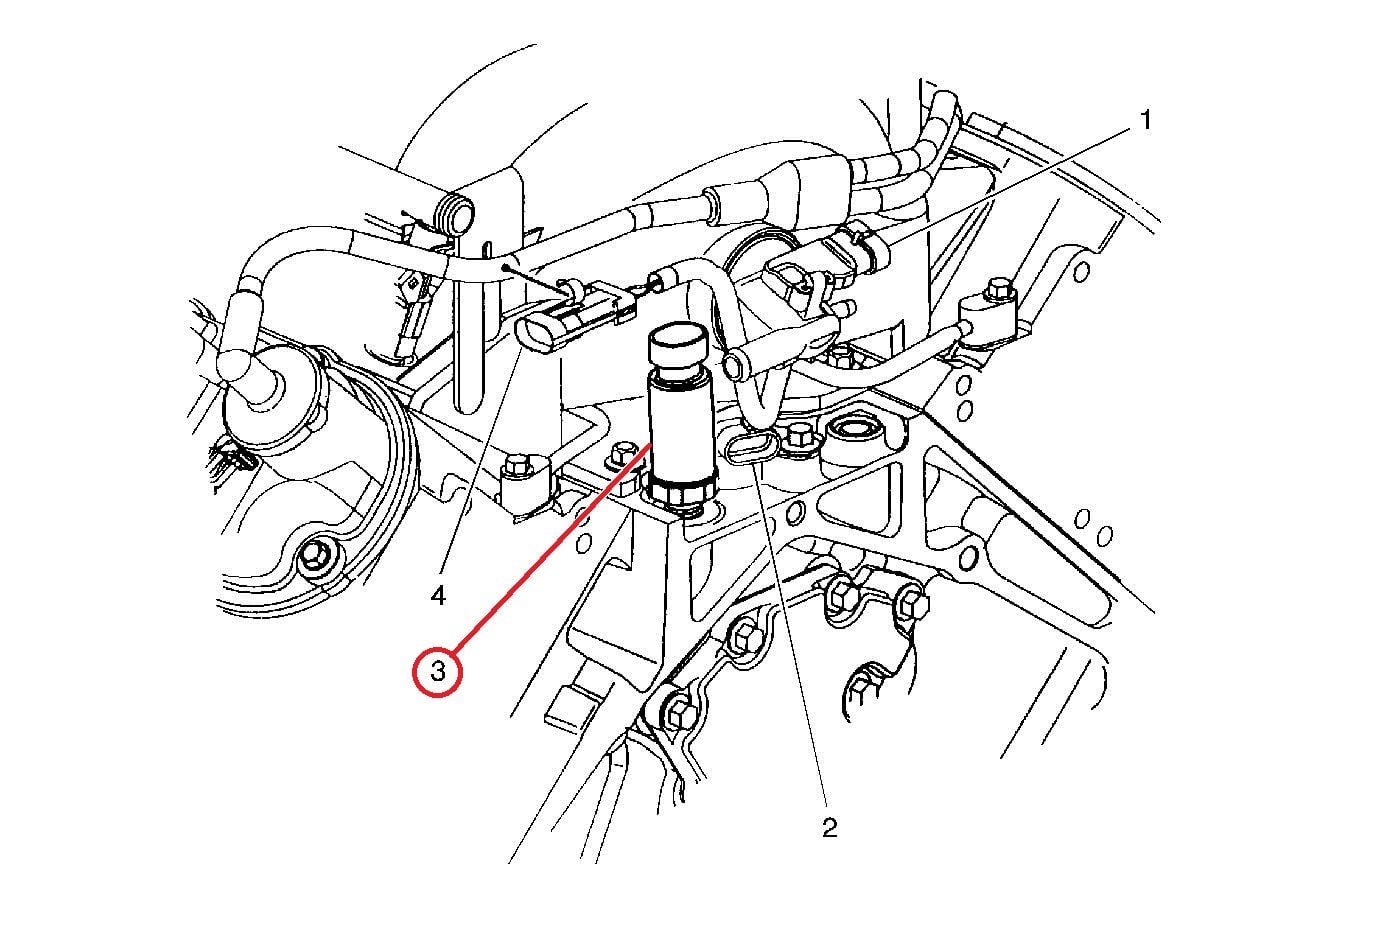
The oil pressure sensor for the LS1 engine sits at the back of the engine behind the intake manifold on the driver's side. If you know anything about the LS1 F-Body, the back half of the engine sits under the cowl. This makes life really interesting when trying to work on that part of the engine, whether changing plugs at the #7 or #8 cylinders or in this case, getting to the oil pressure sensor. When doing this replacement, the best advice for any mechanic is to breathe... deeply. This can be a frustrating job, but don't let it get to you. Loud cussing can sometimes help as well. It doesn't get the sensor out, but it can surely relieve some of the pent up stress.

Materials Needed
- 3/8" drive ratchet
- 4.5" worth of extension
- 10mm deep well socket
- 1-1/16" deep well sensor socket
- 3/8" drive lb-in torque wrench
- Flashlight
- Inspection mirror and/or endoscope
- Stiff wire 15" long (coat hanger)
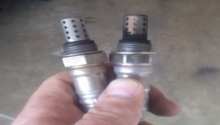
When you go to replace your oil pressure sensor (OPS), please realize the 1998 has a two wire sensor, while the 1999 to 2002 has a single wire sensor. Also, check the OPS for sealant already applied to the threads. If there isn't, you'll need to apply some during installation or utilize Teflon tape to ensure proper sealing. There is no worse feeling than to put the OPS in place, start up your car, and realize it leaks. In this situation, torquing the OPS down more will most likely cause the sensor to break. It only makes sense to do it right in the first place.
Note
The service manual states to remove the intake manifold to replace the OPS. While this procedure makes it easier to get to the sensor, it takes a lot longer to accomplish. The procedure I have laid out in this How-To covers the alternate method of reaching around the intake to get to the sensor. While more uncomfortable, it can be accomplished without having to drain the coolant and the rest of the steps involved in removing the intake.
Step 1 – Unbolt the throttle cable bracket
On top of the manifold, running right to left, are the throttle cables. Remove the bolt in the intake manifold, which holds the bracket for these in place. This will allow you to move the cables around and get your hands between the cowl and the intake manifold easier.
Step 2 – Disconnect the OPS
Shape the piece of wire by bending it into an "L" with a small hook on the end (Figure 2). The leg of the L should be about 4.75" long. Using the L wire, mirror (or endoscope), and light, move the hook into position to grab the latch on the OPS plug. When you are able to grab the latch, pull up just enough to remove the connector. This may take some time, so use both hands and maneuvering in order to accomplish. It's also where patience comes into play.

Step 3 – Remove old OPS
To remove the OPS, you'll need to maneuver the deep well sensor socket down onto the OPS. When in place, put the extension into the socket, then finally the ratchet on top. There will be very little room to work on the OPS, so be ready for pain. You'll need to use both hands, push hoses aside, and generally be in misery, but it is doable. Once you break the sensor free to the point the ratchet will not click anymore, pull the ratchet, then extension, then socket back out. Reach back behind the intake and unscrew the OPS out the rest of the way.
Step 4 – Install the new OPS
Using both hands, start threading the new OPS into the threads. Once started, put the sensor socket onto the sensor, then attach the extension, then finally the ratchet. You may want to use your torque wrench through tightening process, as you DO NOT want to over-tighten it. Tighten the OPS down to 177 lb-in.
Step 5 – Re-seat the OPS connector
Using your mirror and light (or endoscope), find the orientation of the OPS connector socket. Once the orientation is known, work the wiring into position and reconnect. If everything seems correct, get into the car and start it to ensure proper operation of the OPS by viewing the oil gauge. Let the engine run for a couple of minutes, then shut it down. Using your mirror or endoscope, check the sensor to ensure no oil leakage is observed.
Step 6 – Reattach the throttle cable
Reattach the throttle cable to the intake manifold. When complete, shut the hood, put your tools away, and go into the house to nurse your torn up arms.
Pro Tip
To avoid having to go through all the pain of replacing the OPS in the future, there are kits available to relocate the OPS out into the open near your driver's side fuel rail. One such kit also has a manual OPS gauge, which is bolted to the intake. This comes in handy to see what's going on with oil pressure when performing work under the hood. Check the link under Related Discussions at the bottom.
Related Discussions and Site
- Need Tips for Replacing the OPS Unit - LS1Tech.com
- Junkman's OPS Replacement/Relocation for Dummies! - LS1Tech.com
- "Normal" Oil Pressure - LS1Tech.com
- How to Install a Mechanical Oil Pressure Gauge - LS1Tech.com
- Oil Pressure Sender Relocation Kit - DPECorvettes.com