Camaro and Firebird: How to Replace Radiator
Replacement of the radiator doesn't have to be an ordeal. Changing one out can be handled by your average shade tree mechanic. Following these simple steps will help you realize your intention whether the radiator is leaking or not!
This article applies to the Chevrolet Camaro SS/Z28 and Pontiac Formula/Trans Am (1998-2002).
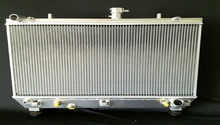
Cooling the LS1 is never an arbitrary thing. With aluminum heads, you always want to maintain a well functioning cooling system. While all parts of the cooling system are important, the radiator is your first line of defense against overheating. Obviously, if your radiator springs a leak due to an accident, mishap, or some other breakage, it'll need to be replaced. There may be another reason to replace your radiator: to upgrade your cooling system. An easy upgrade may actually seem like a downgrade. GM did a curious thing by having a thicker radiator in the LT1 4th Gen than is in the LS1 version. When looking for your replacement radiator, check the width and look for one which is 1-1/4" thick. This will provide you with an extra 30% surface area over the stock LS1 radiator and will keep your motor happy on those hot summer days!

Materials Needed
- 3/8" or 1/2" drive ratchet with matching 10mm socket
- Pliers (can be hose clamp, Vice-Grips, or slip joint)
- Clean drain pan for coolant
- Rags
- Wheel chocks
- Vehicle jack
- Jack stand
Warning
Please dispose of used radiator fluid properly. Do not let the old fluid drain into the street, gutters or your yard. It is a hazard to the environment and deadly to animals. Drain it into an appropriate catch pan and pour into containers to take to a recycling center for proper disposal.
Before you get started, figure out if are going to replace the coolant while changing the radiator, or if you are going to reuse the coolant which is in the system. If you plan on reuse, you'll want to have an extra gallon of 50/50 mix on hand to replace any which might get lost during the procedure. If you have a leak in your radiator and have been topping off with water, consider a complete flush and a refill using fresh coolant. The coolant capacity is ~11 to 12 quarts (depending on model), so purchase three gallons if planning a flush. Also, consider replacing your radiator cap as an old one can leave you guessing at cooling issues which may be hard to diagnose.
Step 1 – Drain coolant
There are two ways you can drain your coolant: through the drain plug (less messy, but slow), or removal of the bottom radiator hose (more messy, but much faster). Regardless of your chosen route, you'll want to place your clean drain pan under the passenger side of the radiator. Next, pop the radiator cap off and set it aside. If using the drain plug, loosen it and allow the radiator to empty. This will take around 10 minutes. If disconnecting the lower radiator hose, use your pliers to loosen the spring clamp, sliding it back further onto the hose. Loosen the hose connection at the radiator and slowly remove the hose, allowing the coolant to flow into your drain pan. You may also want to open the drain plug anyway, as there will still be some coolant in the bottom of the radiator. If not, just be prepared for some residual coolant since it won't drain completely. Wait for coolant flow to abate before moving to the next step.
Pro Tip
When removing a coolant hose from any location, you'll need to break it free first. Twisting the hose at the connection will often work to free it without damage to hose or connection.
Step 2 – Jack car up and suspend on jack stands
Before you jack, ensure you've put your tire chocks in place to the front and rear of at least one rear tire. Set the e-brake and put it in 1st gear, if it's a manual transmission.
Step 3 – Remove the upper radiator panel
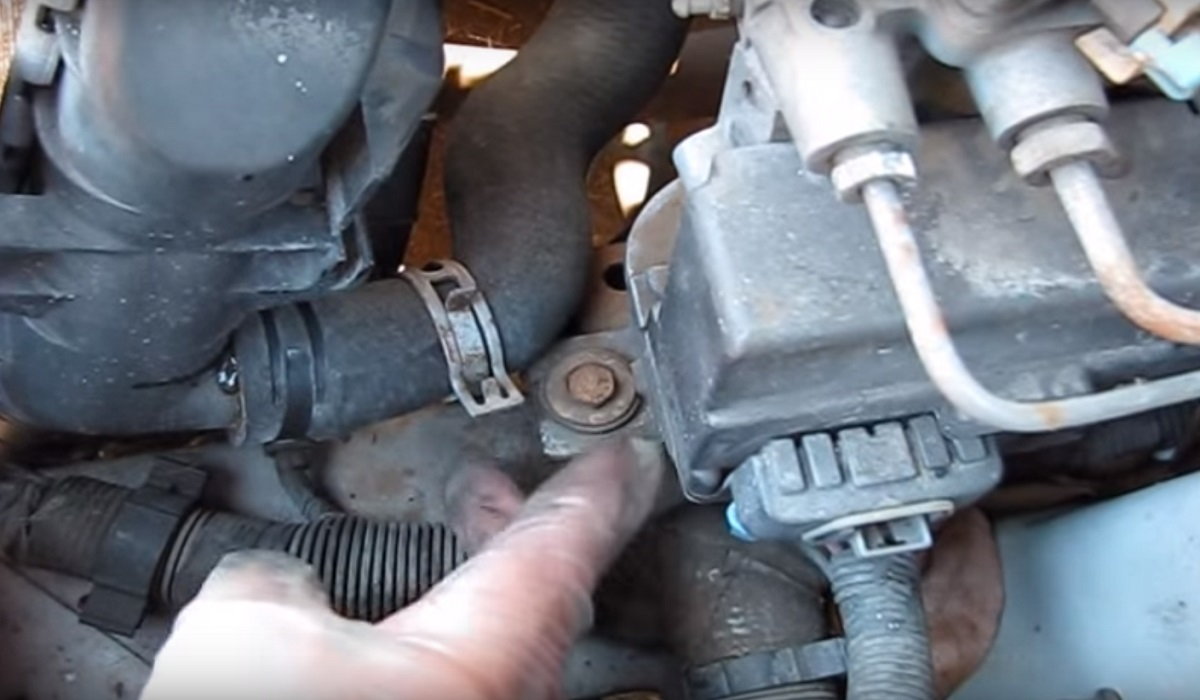
Disconnect the Air Intake Temp (AIT) sensor and Mass Airflow (MAF) connections. Loosen the worm clamp where the intake connects to the throttle body and disconnect. Remove the four 10mm bolts from the upper radiator panel. Remove the panel and air intake ducting. While you're at it, disconnect the upper radiator hose and two smaller hoses which are attached near the filler neck. Bend the rubber hoses back on themselves and stuff them under something convenient. Carefully move your drain pan out from under the car. Loosen and gently pull back the two transmission cooler lines from the passenger side of the radiator without deforming them. Place a rag around each, as a small amount of transmission fluid will leak from these. This will also help prevent dirt or debris from entering the lines and causing transmissions issues down the road. A small amount of tranny fluid will leak from the transmission cooler.
Pro Tip
If at all possible, leaving the hose clamps on their respective hoses makes it really easy to find them when reattaching the hoses.
Step 4 – Remove the fan assembly
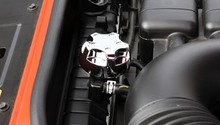
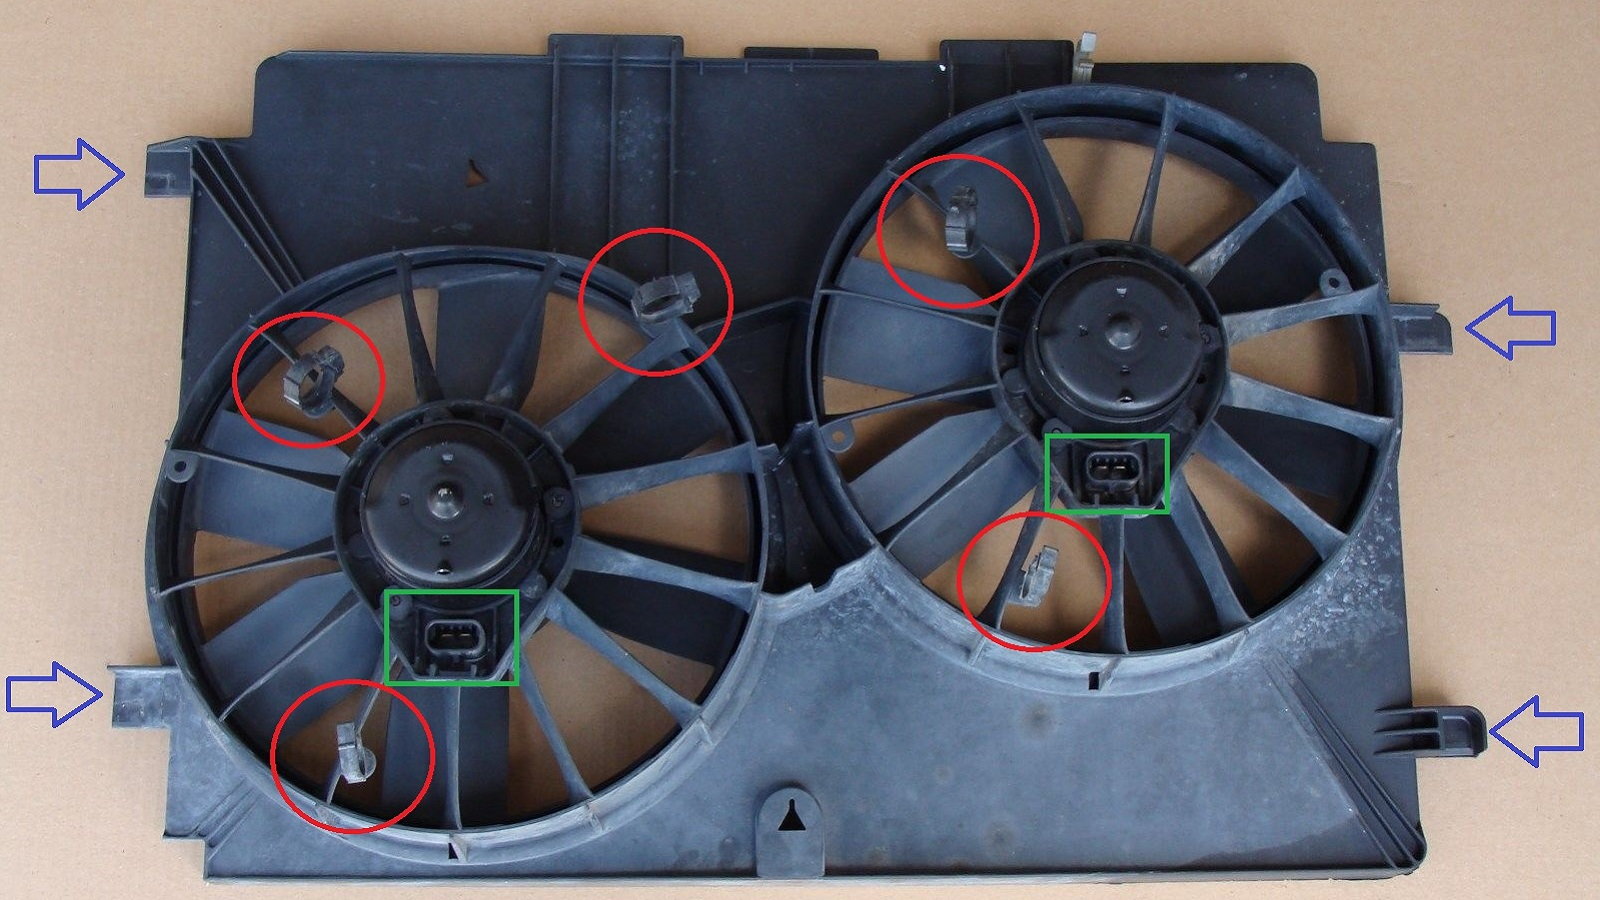
From the bottom, disconnect the two fan power connections (green boxes in Figure 2). Pull the fan wiring harness away from the fan housing. There will be small connectors you'll have to unclip to remove the wires (red circles). The fan assembly is held in place on the radiator by four tabs (blue arrows). Carefully push the fan upwards while holding the radiator until the tabs are clear, then the fan assembly should come straight down and away from the radiator. As Majestic9C1 from the forum states, " ... it's a tight fit, so some rubber mallet persuasion may be necessary." Just be careful not to damage the fan assembly in the process.
Step 5 – Remove the radiator
Carefully pull the radiator up about 2" and move it towards the rear of the car. Be careful as the A/C condenser core will be attached. There should be two 10mm bolts on the bottom tabs to remove, then slide the core up to separate it from the radiator. You'll want to be careful doing this, as the A/C core is fragile and can easily be damaged. It may take a little bit of wiggling to separate the two, but it is completely doable even though the "manuals" all say to evacuate the A/C system first.
Step 6 – Install new radiator
Install the new radiator just as you removed the old one. A couple of notes when doing this:
- Use some grease around the inside of the rubber radiator hoses prior to installing them. This will do three things for you: 1) allow it to slip into place easier, 2) help it to seal, 3) help it not to stick if you ever need to remove the radiator again.
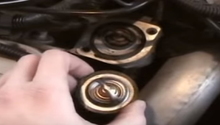
- When installing the clamps back onto the hoses, place the clamps back into the same positions where removed. This will ensure it is in the proper place to prevent leaks. If you are installing new hoses, place the clamp so there is hose sticking out from the end all the way around. Also, insure it is past the ridge of the connection (see Figure 3).

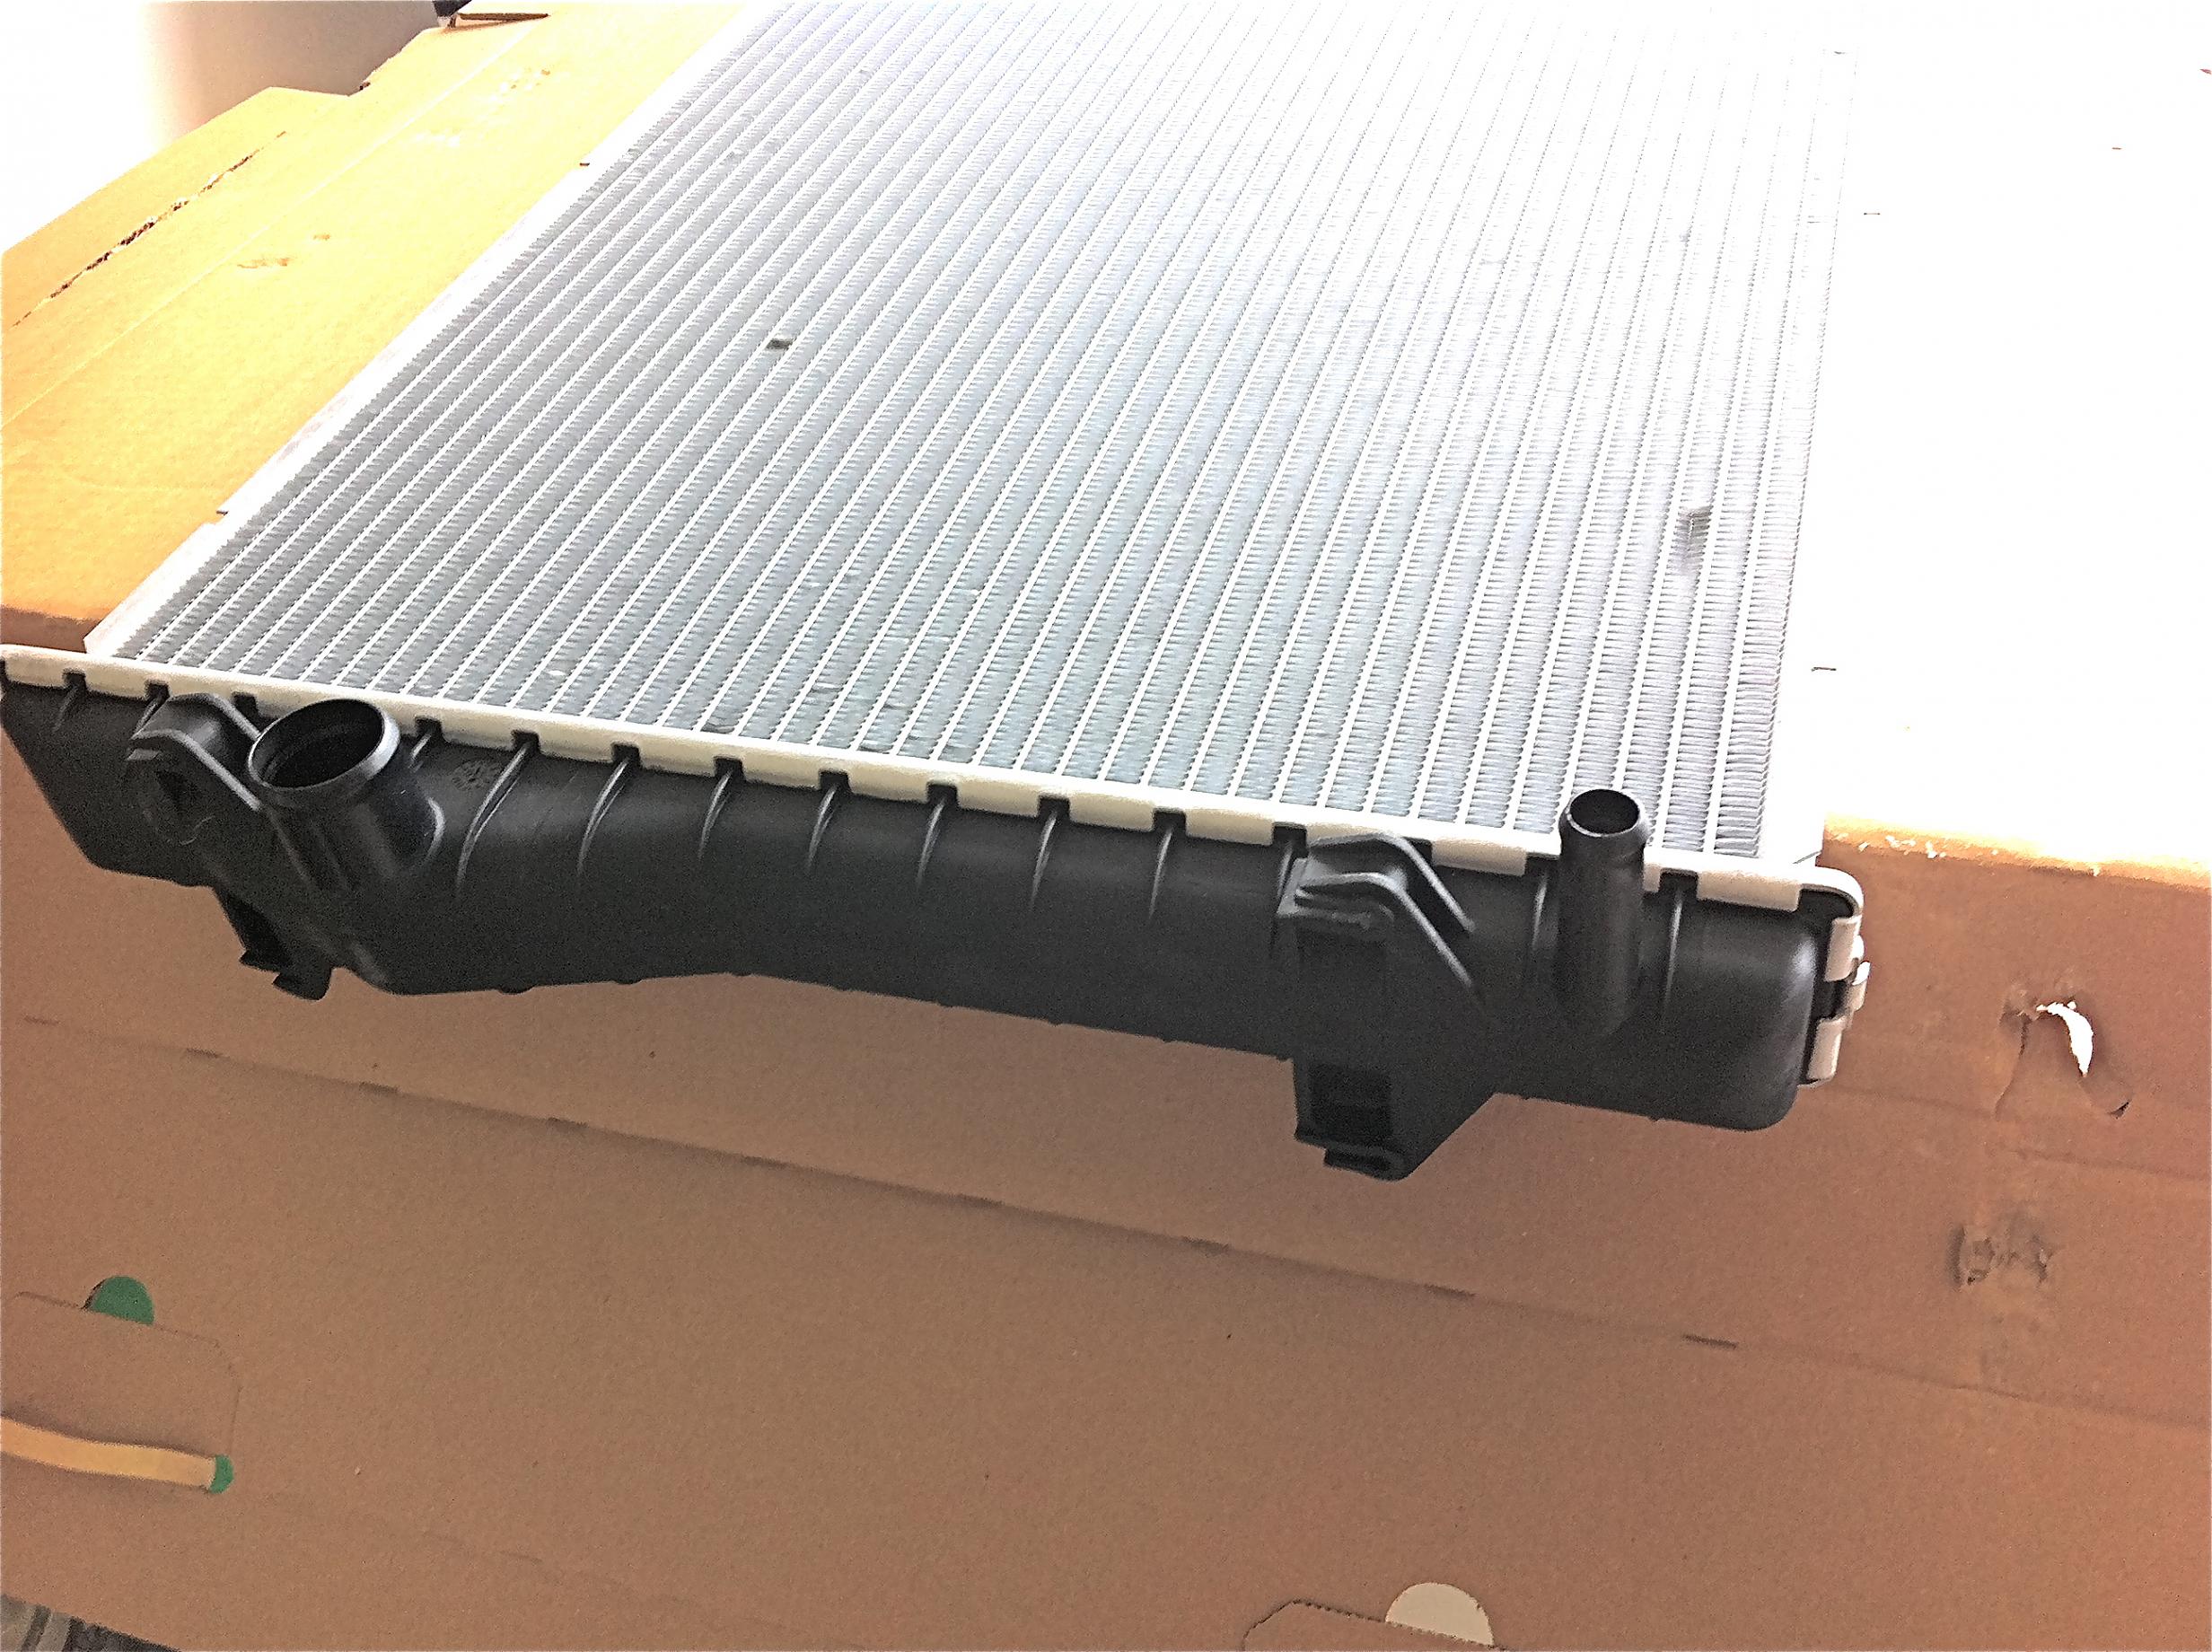
- Most new radiators will be generic between the LS1 and LT1 engines. These will come with an extra coolant connection the LT1 used to keep the throttle body from freezing during cold weather. If your radiator comes this way, you'll need to get a length of 1" radiator hose, two correctly sized hose clamps, and a plug to go in the end. Many owners actually prefer to use this as a drain for their radiator in the future, so this isn't a bad thing. In Figure 4, you can see both the extra coolant connector (bottom right of radiator) and the fan and A/C core slots.
Step 7 – Refill the radiator
When all is back together, you'll need to refill the cooling system. To do this, carefully take your car off of the jack stands. Fill the radiator with coolant until it is up to the neck. While you're waiting for it to settle, check to ensure there aren't any leaks. Stop and fix any if present. Continue to fill the radiator until it stays full. Start the engine and let it run without the radiator cap for about four minutes, checking again to ensure there aren't any leaks. At about the four minute mark the thermostat should open, which will drop the level of the coolant. Refill as necessary until the level stays up to the top. It will probably take about three rounds of refill to get it to stay there. Once it's full, replace the radiator cap and ensure the overflow bottle is up to the hot line. Take the car out for a small run, watching to ensure the temperature doesn't raise above normal. When you get back, check the coolant level in the overflow again to ensure it's where it should be. Over the next few days, recheck the level in the overflow. NOTE: Never open a radiator when hot, as this can cause burns to you or anyone standing by.
Featured Videos: How to Replace Radiator in '96 Camaro
-
Part One
-
Part Two
Related Discussions
- Radiator Removal - LS1Tech.com
- Radiator for Camaro - LS1Tech.com
- Radiator Replacement - LS1Tech.com
- Upgraded to LT1 Radiator - LS1Tech.com
- LT1 Radiator on 4th Gen F-Body - LS1Tech.com