Goodbye Old Engine, Hello Earl’s Performance Vapor Guard!
In part 5 of our LS3 Roadmaster Wagon Project, we yank the old motor, clean up the mess, and install a new Earl’s Performance Vapor Guard fuel system!
Welcome to Part 5 of our LS3 Roadmaster Wagon Project. We started a couple of months ago with a stock 1992 Buick Roadmaster Estate Wagon. Then added wheels and tires and sway bars. New Wilwood brakes. And a full coilover suspension with modern tubular control arms. Here, in part 5, we document pulling out the old drivetrain, a 5.7L TBI engine and 4L60 transmission. And then we do a few odd jobs while we had a little extra room for activities. This includes installing an Earl’s Performance Vapor Guard fuel system.
Watch the above video for the full story, but here’s how it worked out —
Removing the 5.7L TBI
Click HERE to join in on the official LS1Tech.com BUILD THREAD!
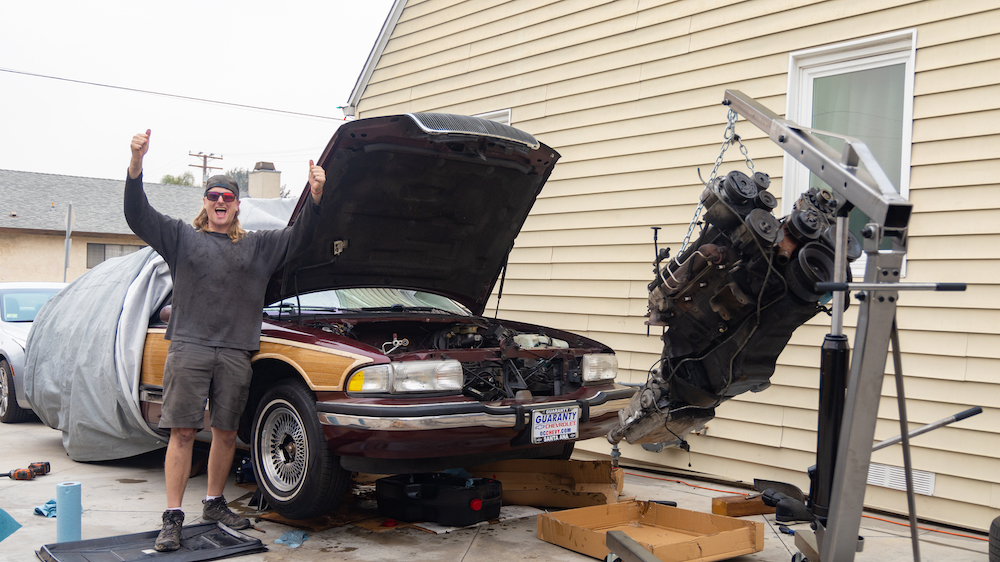
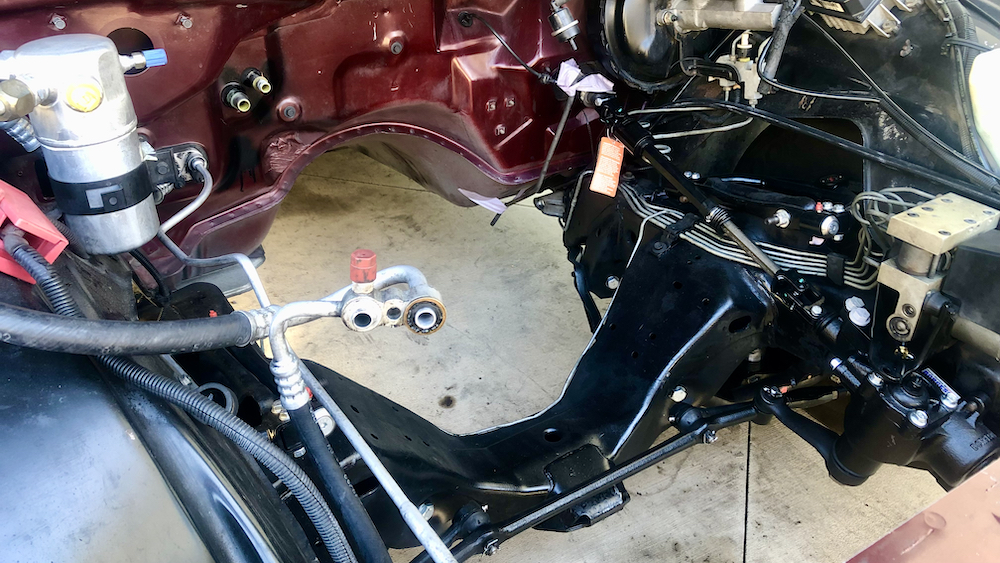
Talk about intimidating for a first-timer. Over the course of about three half-days, we drained as many fluids as possible (oil, transmission, coolant) before pulling out the cooling system and disconnecting everything from the motor and trans. This requires removing the catted downpipe (headers can stay), trans cross member, drift shaft, radiator, a/c condenser, fuel lines, the starter, the entire wiring harness, engine grounds, power steering, heater core hoses, radiator hoses, windshield wiper motor, and anything else you can find in the process. The last thing you do is disconnect the motor mount bolts.
It’s a LOT. And it’s MESSY. But it’s almost all manageable with hand tools. And it helps if you have a rust-free car.
Experienced wrenchers also recommend removing the front clip and/or hood. We ended up leaving the front clip and my brother held the hood open straight up (disconnected from the struts) while my neighbor and I took the engine/trans out of the bay. TIP: once you have the engine and trans tilted up, coolant and trans fluids DUMP out of their respective orifices. Put a couple of pans down and wait an hour or so for everything to drain. THEN pull the engine the rest of the way.
We got too excited and made a mess.
Cleaning & Painting
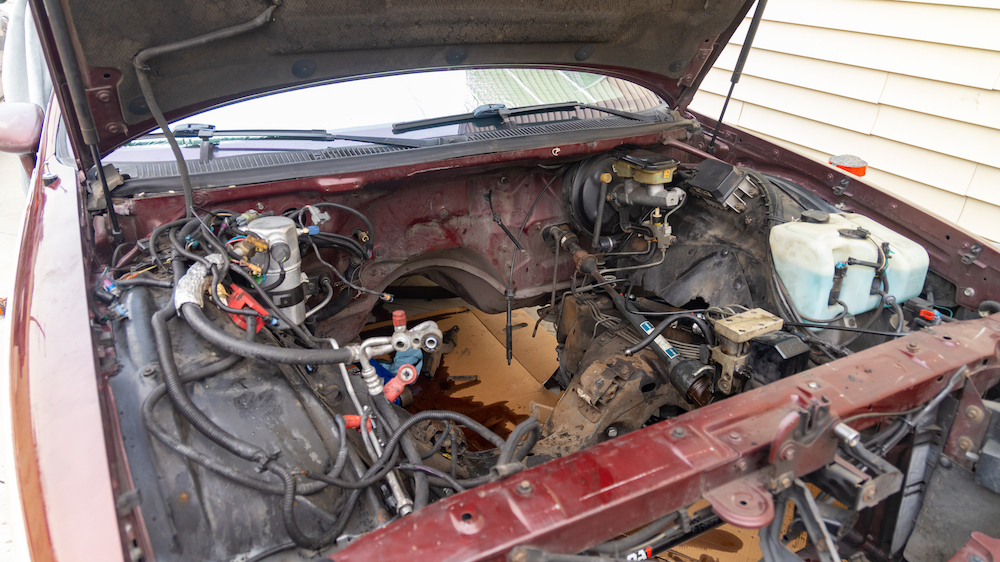
With the engine out and fluids recycled, we snagged ye olde pressure washer and sprayed the engine bay several times with Chemical Guys Orange Degreaser. (Yes, they’re a project partner, but I paid for this because DAMN, this stuff is GOOD.) With everything as clean and dry, we masked off all of the new suspension components and OEM brake lines. Then we rattle canned some VHT Satin Black Chassis paint into place. Not a great job, by any means, the engine bay looks better and is better protected.
(Note: it would have been smarter to pull the motor as the very first step of the build, degrease the entire undercarriage, paint, and only then install new suspension and braking components. But such is life.)
Earl’s Performance Vapor Guard Fuel System
Next, we removed the fuel tank using a guide over on GM Long Roof Forum. Basically, there are two 13mm bolts holding the rear straps, two 15mm bolts holding the front, a wiring harness that connects near the rear bumper, three clamps holding the filler neck assembly, and the fuel/EVAP lines. Disconnect the straps and lower things enough to disconnect the rest, then remove the tank.
Getting access to the OEM fuel pump assembly is easy. Just undo the six 10mm bolts and pull out the assembly. We replaced the factory spec TBI pump with a 225lph Walbro unit (Part # 5CA400HP) that was part of a kit that included everything we needed (sock, hose, adapter cable) to fit into place. This wasn’t hard, but it took a little while to figure out the right hose length.
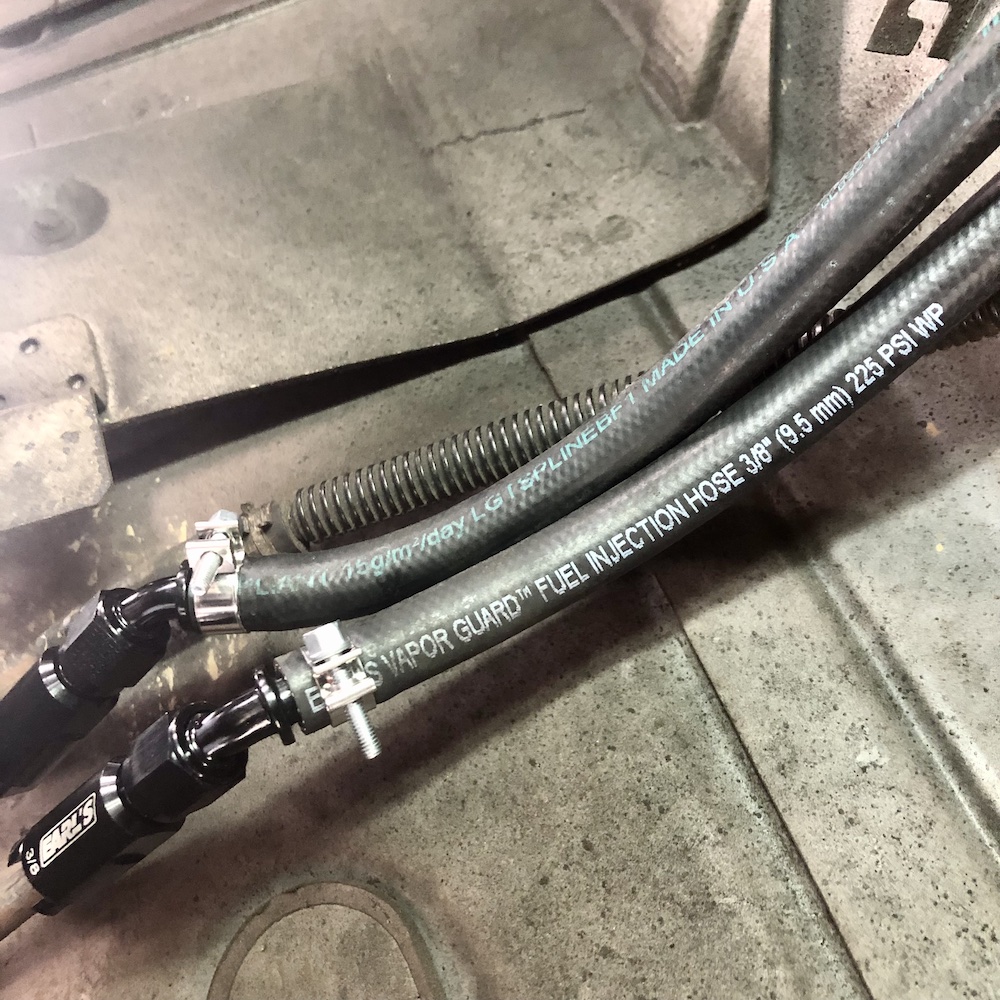
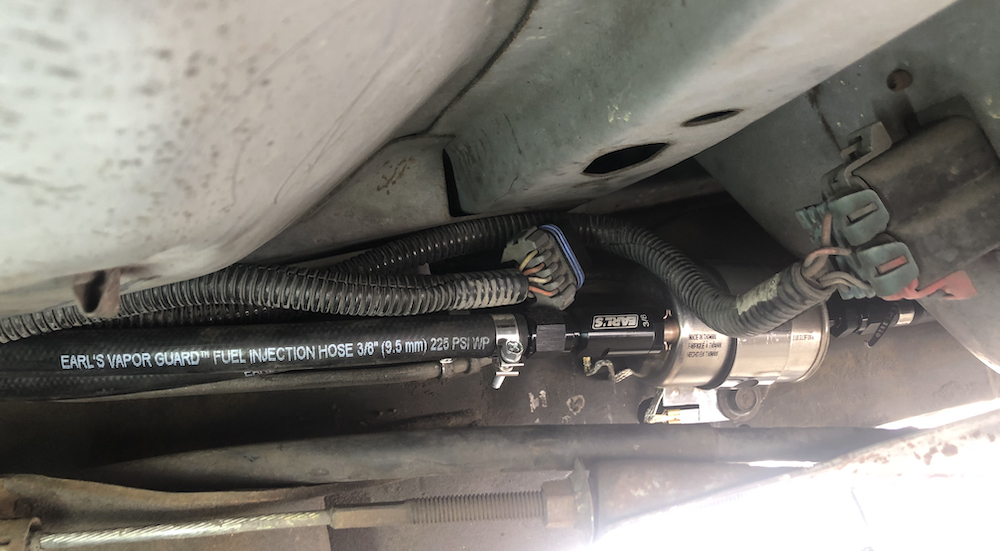
With the tank ready to go back in, we plumbed up the LS3’s new fuel system with Earl’s Performance Vapor Guard hoses, clamps, connections, and 6AN fittings. I know it’s not fancy steel braided line, but Vapor Guard 3/8ths line is rated to 225 PSI (well above our needs) and can handle all types of modern fuels. In a sense, it LOOKS like old-school rubber hoses, but hides modern capabilities within. It’s perfect for most old-school restomods.
As for what you should buy, you’ll need 5/16s fittings for the return line, 3/8s fittings for the sending line, and a C5/C6 Corvette fuel filter regulator. LS3s need 60 PSI constant pressure and the E-ROD instructions recommend avoiding adjustable regulators. So we bought a Wix regulator and it bolted right up to the driver’s side frame rail on the wagon, right where the stock filter would go on a 94-96 B-Body.
Quick Ratio Steering Box & Intermediary Steering Shaft Mod
Last but not least, we installed a Universal 12.7:1 quick ratio steering box from Borgeson that we picked up from Summit Racing. It’s not an exact match for the OEM GM unit (there’s an extra mounting tab and the antilock brake module doesn’t line up perfection), but it bolts right into the Buick’s frame with the original hardware. Borgeson says to check your center by rotating the driveshaft lock to lock — this should be three full turns. Then back up 1.5 turns to reach center. The splines on the lower shaft should now be at 12, 3, 6, and 9 o’clock, and you can reinstall your pitman arm.
Next, following a tip on BangShift.com, we installed a new Doorman intermediary steering shaft from a Jeep Cherokee. After removing the bolt, the bottom joint slides right onto the Borgeson unit. Simply line up the bolt in the notch, and reinstall. For the top joint, you’ll need to remove enough metal to get the bolt onto the upper steering shaft. You can cut a channel or simply flatten the entire side.
The whole mod took about 10 minutes, and we can go back to the OEM rag joint setup if it doesn’t work out.
In Part 6…
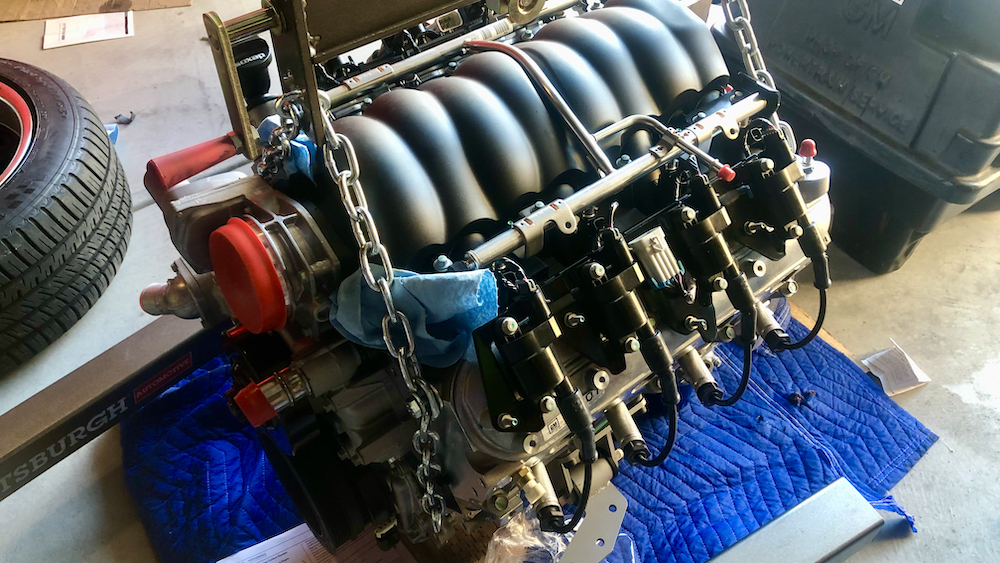
Get excited, folks. We’re already wrenching away on the next part with the goal of bringing the wagon back to life with an all-aluminum hunk of 50-state smog-legal American muscle.
Previous Episodes
Part 1
Parts & Project GoalsPart 2
Michelin Tires, American Racing Wheels, Eaton TrueTrac, & Sway BarsPart 3
Wilwood D52 Disc BrakesPart 4
Coilovers & Control Arms
Click HERE to join in on the official LS1Tech.com BUILD THREAD!
PARTNERS
- Guaranty Chevrolet: https://www.occhevy.com/
- Holley: https://www.holley.com/
- Magnaflow: https://www.magnaflow.com/
- Chemical Guys: https://www.chemicalguys.com/
- Dakota Digital: https://www.dakotadigital.com/
- Michelin: https://www.michelin.com/
- Wilwood Brakes: https://www.wilwood.com/
- Eaton: https://www.eaton.com/
- Sony: https://electronics.sony.com/
DISCOUNTS PROVIDED
- Summit Racing: https://www.summitracing.com/
- Muscle Rods aka BRP HotRods: http://www.brphotrods.com/
- Sikky Manufacturing: https://www.sikky.com/
- American Racing Wheels: https://www.americanracing.com/
- B-Body Parts Specialist Tommy Gosselin: Message HERE on Facebook.